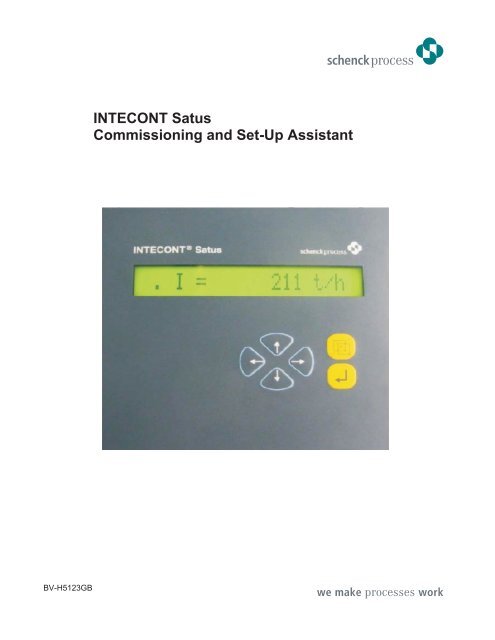
INTECONT Satus Commissioning and Set-Up Assistant - Schenck ...
INTECONT Satus Commissioning and Set-Up Assistant - Schenck ...
INTECONT Satus Commissioning and Set-Up Assistant - Schenck ...

Create successful ePaper yourself
Turn your PDF publications into a flip-book with our unique Google optimized e-Paper software.
BV-H5123GB<br />
<strong>INTECONT</strong> <strong>Satus</strong><br />
<strong>Commissioning</strong> <strong>and</strong> <strong>Set</strong>-<strong>Up</strong> <strong>Assistant</strong>
Service:<br />
Quality <strong>and</strong> reliability form the basis for <strong>Schenck</strong>’s corporate philosophy all over the world.<br />
In House Support (Monday through Friday from at least 8 o’clock to 5 p.m. CST)<br />
Service specialists are available for technical assistance to answer your questions or assist you in<br />
trouble shooting.<br />
Heavy Industry<br />
Phone: 800-558-0184<br />
Fax: 262-473-2489<br />
Light Industry<br />
Phone: 800-558-0184<br />
Fax: 262-473-2489<br />
Spare Parts <strong>and</strong> Components<br />
Phone: 800-558-0184<br />
FAX: 262-473-2489<br />
MKTG@ACCURATEFEEDERS.com - Light Industry<br />
MKTG@<strong>Schenck</strong>americas.com - Heavy Industry<br />
24 hour Emergency Support<br />
You have a malfunction or problem outside of our normal business hours. You can reach our service<br />
technician at any time outside of our office hours for after hour emergency support.<br />
Phone: 800-558-0184 (Please listen closely to menu for after hours support.)<br />
Copyright 2008<br />
SCHENCK AccuRate, USA-PO Box 208, Whitewater, WI, http://www.sarinc.com<br />
a subsidiary of <strong>Schenck</strong> Process GmbH, Pallaswiesenstraße 100, 64293 Darmstadt, Germany<br />
www.schenckprocess.com<br />
All rights reserved. Any reproduction of this documentation, regardless of method, without prior<br />
permission by <strong>Schenck</strong> Process GmbH in writing, even by excerpt, is prohibited.<br />
Subject to change without prior notice.
Table of Contents<br />
1 Introduction . . . . . . . . . . . . . . . . . . . . . . . . . . . . . . . . . . . . . . . . . . . . . . . . . . . . . . . . . . . . . . . . . . . .1<br />
1.1 What is the <strong>INTECONT</strong> <strong>Satus</strong> . . . . . . . . . . . . . . . . . . . . . . . . . . . . . . . . . . . . . . . . . . . . . . . . .1<br />
1.2 Purpose of <strong>Commissioning</strong> <strong>and</strong> <strong>Set</strong>-<strong>Up</strong> <strong>Assistant</strong>. . . . . . . . . . . . . . . . . . . . . . . . . . . . . . . . . .1<br />
1.3 Safety. . . . . . . . . . . . . . . . . . . . . . . . . . . . . . . . . . . . . . . . . . . . . . . . . . . . . . . . . . . . . . . . . . . .1<br />
2 Basic Components of the <strong>INTECONT</strong> <strong>Satus</strong> . . . . . . . . . . . . . . . . . . . . . . . . . . . . . . . . . . . . . . . . . .3<br />
2.1 <strong>INTECONT</strong> <strong>Satus</strong> Operator Interface . . . . . . . . . . . . . . . . . . . . . . . . . . . . . . . . . . . . . . . . . . .3<br />
2.2 Basic Definitions . . . . . . . . . . . . . . . . . . . . . . . . . . . . . . . . . . . . . . . . . . . . . . . . . . . . . . . . . . .54<br />
3 <strong>INTECONT</strong> <strong>Satus</strong> Calibration . . . . . . . . . . . . . . . . . . . . . . . . . . . . . . . . . . . . . . . . . . . . . . . . . . . . . .5<br />
3.1 Verify Mechanical <strong>and</strong> Electrical Installation . . . . . . . . . . . . . . . . . . . . . . . . . . . . . . . . . . . . . .6<br />
3.2 Powering-<strong>Up</strong> <strong>and</strong> Awaiting System Start. . . . . . . . . . . . . . . . . . . . . . . . . . . . . . . . . . . . . . . . .8<br />
3.3 <strong>Set</strong>ting Parameters for Blocks A, B,C . . . . . . . . . . . . . . . . . . . . . . . . . . . . . . . . . . . . . . . . . . .9<br />
3.4 Executive <strong>Set</strong>-<strong>Up</strong> Programs . . . . . . . . . . . . . . . . . . . . . . . . . . . . . . . . . . . . . . . . . . . . . . . . . .11<br />
3.4.1 Impulse/Belt Sequence . . . . . . . . . . . . . . . . . . . . . . . . . . . . . . . . . . . . . . . . . . . . . . . . . . . . . .11<br />
3.4.2 Taring. . . . . . . . . . . . . . . . . . . . . . . . . . . . . . . . . . . . . . . . . . . . . . . . . . . . . . . . . . . . . . . . . . . .12<br />
3.4.3 Weight Check. . . . . . . . . . . . . . . . . . . . . . . . . . . . . . . . . . . . . . . . . . . . . . . . . . . . . . . . . . . . . .13<br />
3.5 <strong>Set</strong>ting Limit Values . . . . . . . . . . . . . . . . . . . . . . . . . . . . . . . . . . . . . . . . . . . . . . . . . . . . . . . . .15<br />
<strong>INTECONT</strong> <strong>Satus</strong> <strong>Commissioning</strong> <strong>and</strong> <strong>Set</strong>-<strong>Up</strong> BV-H5123GB / 0852<br />
SCHENCK AccuRate<br />
i
This page left intentionally blank.<br />
ii BV-H5123GB / 0852 <strong>INTECONT</strong> <strong>Satus</strong> <strong>Commissioning</strong> <strong>and</strong> <strong>Set</strong>-<strong>Up</strong><br />
SCHENCK AccuRate
1.3 Safety<br />
1 Introduction<br />
1.1 What is the <strong>INTECONT</strong> <strong>Satus</strong>?<br />
The <strong>INTECONT</strong> <strong>Satus</strong> is an electronic weigh system for a belt<br />
weigher.<br />
The <strong>INTECONT</strong> <strong>Satus</strong> is supplied with specification sheets including<br />
customer parameters <strong>and</strong> design specifications. Electrical Drawings<br />
are also included for customer specific wiring.<br />
1.2 Purpose of Rapid Start Manual<br />
The purpose of this manual is to provide the information necessary to<br />
make the initial set-up of the <strong>INTECONT</strong> <strong>Satus</strong> as easy as possible.<br />
NOTE: This manual is meant as a quick reference only. For more<br />
detailed information, see your <strong>INTECONT</strong> <strong>Satus</strong> Operating Manual<br />
(BV-H2346GB).<br />
1.3 Safety<br />
Preparation, installation, commissioning, operation, maintenance, <strong>and</strong><br />
servicing of the <strong>INTECONT</strong> <strong>Satus</strong> may be performed by skilled<br />
persons only. All persons working on the <strong>INTECONT</strong> <strong>Satus</strong> are<br />
required to observe the saftey instructions. Refer to your <strong>INTECONT</strong><br />
<strong>Satus</strong> Operating Manual (BV-H2346GB) for further safety instructions.<br />
<strong>INTECONT</strong> <strong>Satus</strong> <strong>Commissioning</strong> <strong>and</strong> <strong>Set</strong>-<strong>Up</strong> BV-H5123GB / 0852 1<br />
SCHENCK AccuRate
1.3 Safety<br />
This page left intentionally blank.<br />
2 BV-H5123GB / 0852 <strong>INTECONT</strong> <strong>Satus</strong> <strong>Commissioning</strong> <strong>and</strong> <strong>Set</strong>-<strong>Up</strong><br />
SCHENCK AccuRate
2.1 <strong>INTECONT</strong> <strong>Satus</strong> Operator Interface<br />
2 Basic Components of the <strong>INTECONT</strong> <strong>Satus</strong><br />
2.1 <strong>INTECONT</strong> <strong>Satus</strong> Operator Interface<br />
The operator interface is used for direct operation of the <strong>INTECONT</strong><br />
<strong>Satus</strong>. Figure 1 below shows the operator interface. The two parts of<br />
the operator interface are the display <strong>and</strong> keypad areas.<br />
Figure 1: Operator Interface<br />
<strong>INTECONT</strong> <strong>Satus</strong> <strong>Commissioning</strong> <strong>and</strong> <strong>Set</strong>-<strong>Up</strong> BV-H5123GB / 0852 3<br />
SCHENCK AccuRate
2.2 Basic Definitions<br />
2.2 Basic Definitions<br />
Letter Coding<br />
I = Feed rate<br />
Material amount discharged from belt per unit of time (kg/h)<br />
V = Speed of conveyor belt (m/s)<br />
Q = Belt load<br />
Material weight on one belt meter (kg/m)<br />
Measuring Principles<br />
Belt load (Q) <strong>and</strong> speed (V) are continuously measured <strong>and</strong> factored<br />
together. The result is feed rate (I) from which the flowrate is<br />
determined.<br />
I = Q x V x 3600<br />
<strong>INTECONT</strong> <strong>Satus</strong> <strong>Commissioning</strong> <strong>and</strong> <strong>Set</strong>-<strong>Up</strong> BV-H5123GB / 0852 4<br />
SCHENCK AccuRate
3 <strong>INTECONT</strong> <strong>Satus</strong> <strong>Commissioning</strong><br />
This section will describe the procedures necessary to commission<br />
the <strong>INTECONT</strong> <strong>Satus</strong>. There are 5 steps for commissioning.<br />
Figure 2: <strong>Commissioning</strong> Steps<br />
NOTE: If you are following along with the BEMP Training Video, go to<br />
Section 3.3, page 9.<br />
<strong>INTECONT</strong> <strong>Satus</strong> <strong>Commissioning</strong> <strong>and</strong> <strong>Set</strong>-<strong>Up</strong> BV-H5123GB / 0852 5<br />
SCHENCK AccuRate
3.1 Verify Mechanical <strong>and</strong> Electrical Installation<br />
3.1 Verify Mechanical <strong>and</strong> Electrical Installation<br />
Mechanical Installation<br />
The first step is to verify the mechanical installation. Refer to the<br />
BEMP mechanical drawings.<br />
Electrical Installation<br />
Refer to your electrical drawings found in the documentation binder for<br />
customer specific wiring.<br />
Below are examples of electrical connections for the <strong>INTECONT</strong><br />
<strong>Satus</strong>.<br />
Load Cell Connections<br />
Figure 3: Load Cell Connections<br />
6 BV-H5123GB / 0852 <strong>INTECONT</strong> <strong>Satus</strong> <strong>Commissioning</strong> <strong>and</strong> <strong>Set</strong>-<strong>Up</strong><br />
SCHENCK AccuRate
3.1 Verify Mechanical <strong>and</strong> Electrical Installation<br />
Speed Input Connections<br />
Speed input is the input from the speed sensor that indicates how fast<br />
the belt is moving.<br />
Figure 4: Speed Input Connections<br />
Digital Input Connections<br />
Digital inputs are inputs that the user will push a button to perform a<br />
specific action on the controller.<br />
Figure 5: Digital Input Connections<br />
Pulse Output Point for Totalizing Counter-Impulse<br />
Pulse output is a digital signal that the <strong>INTECONT</strong> <strong>Satus</strong> is sending to<br />
a PLC or other device indicating the total material passing through the<br />
belt.<br />
Figure 6: Pulse Output Connections<br />
<strong>INTECONT</strong> <strong>Satus</strong> <strong>Commissioning</strong> <strong>and</strong> <strong>Set</strong>-<strong>Up</strong> BV-H5123GB / 0852 7<br />
SCHENCK AccuRate
3.2 Powering-<strong>Up</strong> <strong>and</strong> Awaiting System Start<br />
Relay Output Connections<br />
Figure 7: Relay Output Connections<br />
Overall BEMP System Connections<br />
Figure 8: Overall BEMP System Connections<br />
3.2 Powering-<strong>Up</strong> <strong>and</strong> Awaiting System Start<br />
Once the Mechanical <strong>and</strong> Electrical Installation is complete, power-up<br />
the system.<br />
8 BV-H5123GB / 0852 <strong>INTECONT</strong> <strong>Satus</strong> <strong>Commissioning</strong> <strong>and</strong> <strong>Set</strong>-<strong>Up</strong><br />
SCHENCK AccuRate
3.3 <strong>Set</strong>ting Parameters for Blocks A,B,C<br />
3.3 <strong>Set</strong>ting Parameters for Blocks A,B,C<br />
Customer parameters have been pre-set at SCHENCK AccuRate.<br />
Check the program against your parameter data sheet.<br />
The 14 parameters listed below may require adjustment.<br />
Figure 9: Parameter List<br />
Follow the steps below to set Parameter C 02:<br />
1. With the BEMP turned OFF, use a piece of brown masking tape<br />
<strong>and</strong> pick a spot on the belt where it is easily accessible <strong>and</strong><br />
place the piece of tape on it.<br />
2. Turn the BEMP ON. The belt must be running for the next step.<br />
3. Measure <strong>and</strong> record the time (in seconds) required for one belt<br />
circuit as accurately as possible <strong>and</strong> enter this time for<br />
parameter C 02.<br />
NOTE: Please note that the belt drive is not controlled by the set-up<br />
program <strong>and</strong> the set-up program will be interrupted with a<br />
corresponding message if one of the preconditions are not met.<br />
4. To begin entering data, press the Function key.<br />
5. Using the or keys, select Programming.<br />
6. Press Enter.<br />
7. Using the or keys, select Enter Parameter.<br />
8. Press Enter.<br />
9. Confirm the selection by pressing Enter.<br />
10. The system will prompt for a password. Use the default<br />
password 07734. Use thekeys to move the cursor to the<br />
digit that is to be changed. Use the or keys to increase or<br />
decrease that digit.<br />
<strong>INTECONT</strong> <strong>Satus</strong> <strong>Commissioning</strong> <strong>and</strong> <strong>Set</strong>-<strong>Up</strong> BV-H5123GB / 0852 9<br />
SCHENCK AccuRate
3.3 <strong>Set</strong>ting Parameters for Blocks A,B,C<br />
NOTE: Controller will not prompt for password if you have entered a<br />
password before <strong>and</strong> the duration of the password time has not<br />
expired. This will apply through out the calibration process.<br />
11. Press Enter.<br />
12. Use the or key to select Block C.<br />
13. Press Enter.<br />
14. Use the or key to select C O2.<br />
15. Use the key <strong>and</strong> move the cursor to the value <strong>and</strong> change it to<br />
the value determined in step 3.<br />
16. Once the change is done, confirm it by pressing Enter.<br />
17. Escape to the Main Operation Screen by pressing the Function<br />
key twice.<br />
NOTE: If the <strong>INTECONT</strong> <strong>Satus</strong> is purchased with a BEMP, the<br />
parameters have been set accordingly. However, if the <strong>INTECONT</strong><br />
<strong>Satus</strong> is purchased as a replacement or part, the parameters in the list<br />
below need to be checked <strong>and</strong> modified if necessary.<br />
Figure 10: Parameter List 2<br />
10 BV-H5123GB / 0852 <strong>INTECONT</strong> <strong>Satus</strong> <strong>Commissioning</strong> <strong>and</strong> <strong>Set</strong>-<strong>Up</strong><br />
SCHENCK AccuRate
3.4 Executive <strong>Set</strong>-<strong>Up</strong> Programs<br />
3.4 Executive <strong>Set</strong>-<strong>Up</strong> Programs<br />
3.4.1 Impulse/Belt Sequence<br />
The Executive <strong>Set</strong>-<strong>Up</strong> Programs include the Impulse/Belt Sequence,<br />
Taring, <strong>and</strong> Weight Check.<br />
NOTE: You must perform this calibration program before the tare or<br />
weight check calibration programs.<br />
In this procedure, the amount of impulses given by the speed sensor<br />
for one belt circuit is calculated <strong>and</strong> entered in the <strong>INTECONT</strong> <strong>Satus</strong>.<br />
Perform the impulse/belt sequence for the following reasons:<br />
1. You are at the initial setting.<br />
2. If a new belt is fitted or the belt tension has been altered<br />
significantly.<br />
3. If one of the parameters B 04 (characteristic value vs) or B 05<br />
(nominal speed) have been altered on scales which do or do not<br />
measure velocity.<br />
NOTE: The BEMP must be running. If not, turn it on.<br />
Follow the steps below to begin the Impulse/Belt Sequence:<br />
1. Press the Function key.<br />
2. Using the or keys, select the Calib. Function.<br />
3. Confirm the selection by pressing Enter.<br />
4. The system will prompt for a password. Use the default<br />
password 07734. Use thekeys to move the cursor to the<br />
digit that is to be changed. Use the or keys to increase or<br />
decrease that digit.<br />
NOTE: Controller will not prompt for password if you have entered a<br />
password before <strong>and</strong> the duration of the password time has not<br />
expire. This will apply through out the calibration function.<br />
5. Press Enter.<br />
6. Use the or keys to select the LB: Imp/Belt routine.<br />
7. Press Enter to activate the routine. The display will display LB:<br />
xxx sec (counting down time <strong>and</strong> impulse value will be displayed<br />
alternately).<br />
<strong>INTECONT</strong> <strong>Satus</strong> <strong>Commissioning</strong> <strong>and</strong> <strong>Set</strong>-<strong>Up</strong> BV-H5123GB / 0852 11<br />
SCHENCK AccuRate
3.4 Executive <strong>Set</strong>-<strong>Up</strong> Programs<br />
NOTE: The system will prompt you to “Start!” the belt conveyor if it is<br />
not running. If this occurs, the system will default back to the operation<br />
screen. You will need to start all over again from the beginning of this<br />
routine. This will apply to the rest of the calibration.<br />
8. Once the count down is completed, press Enter to confirm the<br />
values. The system will escape to the Main Operation Screen.<br />
NOTE: This procedure is identical for BEMP belt conveyors without<br />
speed sensors.<br />
3.4.2 Taring<br />
The taring program acquires the zero point error of the BEMP over one<br />
belt circuit <strong>and</strong> the resulting value is used to correct the continuous<br />
measuring results in normal operation.<br />
Preconditions to executing the taring function:<br />
1. Under no circumstances may there be any material on the belt.<br />
2. The mechanical equipment within the scales area must be<br />
cleaned.<br />
3. Belt conveyor must be runnning. If not, turn it on.<br />
Follow the steps below to tare:<br />
1. Press the Function key.<br />
2. Using the or keys, select the Calib. Function.<br />
3. Confirm the selection by pressing Enter.<br />
4. The system prompts for a password. Use the default password<br />
07734. Use thekeys to move the cursor to the digit that is<br />
to be changed. Use the or keys to increase or decrease that<br />
digit.<br />
5. Press Enter.<br />
6. Use the or keys to select the TW: Tare routine.<br />
7. Press Enter to activate the routine. The display will display TW:<br />
xxx % (counting down <strong>and</strong> tare value will be displayed<br />
alternately).<br />
8. Once Tare is completed, press Enter to confirm the Abw. Value.<br />
The tare result is accepted <strong>and</strong> automatically stored in parameter<br />
D 03. The system will escape to the Main Operation Screen.<br />
12 BV-H5123GB / 0852 <strong>INTECONT</strong> <strong>Satus</strong> <strong>Commissioning</strong> <strong>and</strong> <strong>Set</strong>-<strong>Up</strong><br />
SCHENCK AccuRate
3.4 Executive <strong>Set</strong>-<strong>Up</strong> Programs<br />
NOTE: The tare may exceed 100% by using the nominal belt load as<br />
a reference. Additionally, a mechanical error may be at fault if the<br />
deviation ‘Dev.’ is 20% or greater. If this occurs, inspect the weighing<br />
platform for stuck particles of material.<br />
3.4.3 Weight Check<br />
The weight check CW program is used to control the <strong>INTECONT</strong><br />
<strong>Satus</strong> measuring range by loading the weighing platform with a known<br />
calibration weight <strong>and</strong> automatically calculating the average platform<br />
load over one belt circuit. The result is compared to a predetermined<br />
reference value <strong>and</strong> then displayed. No automatic correction is<br />
performed.<br />
Preconditions to executing the Check Weight function:<br />
1. System has been tared.<br />
2. The calibration weight has been entered in parameter C 08. The<br />
calibration weight should be between 30-100% of the nominal<br />
platform load Q0.<br />
a. To enter calibration weight, press the Function key.<br />
b. Using the or keys, select Programming.<br />
c. Press Enter.<br />
d. Using the or keys, select Enter Parameter.<br />
e. Press Enter.<br />
f. Confirm the selection by pressing Enter.<br />
g. The system will prompt for a password. Use the<br />
default password 07734. Use thekeys to<br />
move the cursor to the digit that is to be changed.<br />
Use the or keys to increase or decrease that<br />
digit.<br />
h. Press Enter.<br />
i. Use the or key to select Block C.<br />
j. Press Enter.<br />
k. Use the or key to select C 08.<br />
l. Use the key <strong>and</strong> move the cursor to the value <strong>and</strong><br />
enter the calibration weight.<br />
m. Confirm it by pressing Enter.<br />
n. Escape to the Main Operation Screen by pressing<br />
the Function key twice.<br />
3. The calibration weight has been hung from the test weight hole<br />
on the BEMP. Refer to the BEMP Manual for location.<br />
<strong>INTECONT</strong> <strong>Satus</strong> <strong>Commissioning</strong> <strong>and</strong> <strong>Set</strong>-<strong>Up</strong> BV-H5123GB / 0852 13<br />
SCHENCK AccuRate
3.4 Executive <strong>Set</strong>-<strong>Up</strong> Programs<br />
WARNING: For safety reasons, please turn off the belt prior to<br />
hanging the calibration weight.<br />
4. Belt conveyor should be running. If not, turn it on.<br />
Follow the steps below to run the check weight program:<br />
1. Press the Function key.<br />
2. Using the or keys, select the Calib. Function.<br />
3. Confirm the selection by pressing Enter.<br />
4. The system prompts for a password. Use the default password<br />
07734. Use thekeys to move the cursor to the digit that is<br />
to be changed. Use the or keys to increase or decrease that<br />
digit.<br />
5. Press Enter.<br />
6. Use the or keys to select the CW: Weight Check routine.<br />
7. Press Enter to activate the routine. The display will display CW:<br />
xxx % (CW will be counting down <strong>and</strong> <strong>Set</strong>/Act value will be<br />
displayed alternately).<br />
8. Once the CW is done, the CW: value <strong>and</strong> the KOR value will be<br />
displayed. Record the KOR value on a piece of paper <strong>and</strong> then<br />
enter this value into parameter block D 02.<br />
a. To enter the KOR value, press the Function key.<br />
b. Using the or keys, select Programming.<br />
c. Press Enter.<br />
d. Using the or keys, select Enter Parameter.<br />
e. Press Enter.<br />
f. Confirm the selection by pressing Enter.<br />
g. The system will prompt for a password. Use the<br />
default password 07734. Use thekeys to<br />
move the cursor to the digit that is to be changed.<br />
Use the or keys to increase or decrease that<br />
digit.<br />
h. Press Enter.<br />
i. Use the or key to select Block D.<br />
j. Press Enter.<br />
k. Use the or key to select D 02.<br />
l. Use the key <strong>and</strong> move the cursor to the value <strong>and</strong><br />
enter the KOR value.<br />
m. Confirm it by pressing Enter.<br />
n. Escape to the Main Operation Screen by pressing<br />
the Function key twice.<br />
14 BV-H5123GB / 0852 <strong>INTECONT</strong> <strong>Satus</strong> <strong>Commissioning</strong> <strong>and</strong> <strong>Set</strong>-<strong>Up</strong><br />
SCHENCK AccuRate
3.5 <strong>Set</strong>ting Limit Values<br />
3.5 <strong>Set</strong>ting Limit Values<br />
The following Limit Values should be set.<br />
F 05 Q-MIN Value<br />
F 07 Q-MAX Value<br />
F 09 V-MIN Value<br />
20.0 % Q<br />
120.0 % Q<br />
5.0 % V<br />
Follow the steps below to set the Limit Values:<br />
1. To set the limit values, press the Function key.<br />
2. Using the or keys, select Programming.<br />
3. Press Enter.<br />
4. Using the or keys, select Enter Parameter.<br />
5. Press Enter.<br />
6. Confirm the selection by pressing Enter.<br />
7. The system will prompt for a password. Use the default<br />
password 07734. Use thekeys to move the cursor to the<br />
digit that is to be changed. Use the or keys to increase or<br />
decrease that digit.<br />
8. Press Enter.<br />
9. Use the or key to select Block F.<br />
10. Press Enter.<br />
11. Use the or key to select the desired limit value parameter.<br />
12. Use the key <strong>and</strong> move the cursor to the value <strong>and</strong> enter the<br />
desired limit value.<br />
13. Confirm it by pressing Enter.<br />
14. Escape to the Main Operation Screen by pressing the Function<br />
key twice.<br />
<strong>INTECONT</strong> <strong>Satus</strong> <strong>Commissioning</strong> <strong>and</strong> <strong>Set</strong>-<strong>Up</strong> BV-H5123GB / 0852 15<br />
SCHENCK AccuRate