NORAS Immobilization and Biopsy System MR-BI320-PA ...
NORAS Immobilization and Biopsy System MR-BI320-PA ...
NORAS Immobilization and Biopsy System MR-BI320-PA ...

Create successful ePaper yourself
Turn your PDF publications into a flip-book with our unique Google optimized e-Paper software.
26<br />
5 Start-up<br />
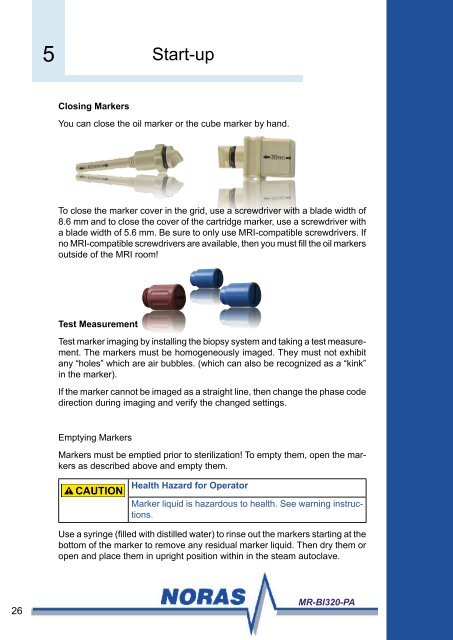
Closing Markers<br />
You can close the oil marker or the cube marker by h<strong>and</strong>.<br />
To close the marker cover in the grid, use a screwdriver with a blade width of<br />
.6 mm <strong>and</strong> to close the cover of the cartridge marker, use a screwdriver with<br />
a blade width of 5.6 mm. Be sure to only use <strong>MR</strong>I-compatible screwdrivers. If<br />
no <strong>MR</strong>I-compatible screwdrivers are available, then you must fill the oil markers<br />
outside of the <strong>MR</strong>I room!<br />
Test Measurement<br />
Test marker imaging by installing the biopsy system <strong>and</strong> taking a test measurement.<br />
The markers must be homogeneously imaged. They must not exhibit<br />
any “holes” which are air bubbles. (which can also be recognized as a “kink”<br />
in the marker).<br />
If the marker cannot be imaged as a straight line, then change the phase code<br />
direction during imaging <strong>and</strong> verify the changed settings.<br />
Emptying Markers<br />
Markers must be emptied prior to sterilization! To empty them, open the markers<br />
as described above <strong>and</strong> empty them.<br />
Health Hazard for Operator<br />
Marker liquid is hazardous to health. See warning instructions.<br />
Use a syringe (filled with distilled water) to rinse out the markers starting at the<br />
bottom of the marker to remove any residual marker liquid. Then dry them or<br />
open <strong>and</strong> place them in upright position within in the steam autoclave.<br />
<strong>MR</strong>-<strong>BI320</strong>-<strong>PA</strong>