Easi-Pit Installation Procedure - FP McCann Ltd
Easi-Pit Installation Procedure - FP McCann Ltd
Easi-Pit Installation Procedure - FP McCann Ltd

Create successful ePaper yourself
Turn your PDF publications into a flip-book with our unique Google optimized e-Paper software.
<strong>FP</strong> <strong>McCann</strong> <strong>Easi</strong>-<strong>Pit</strong> <strong>Installation</strong> <strong>Procedure</strong><br />
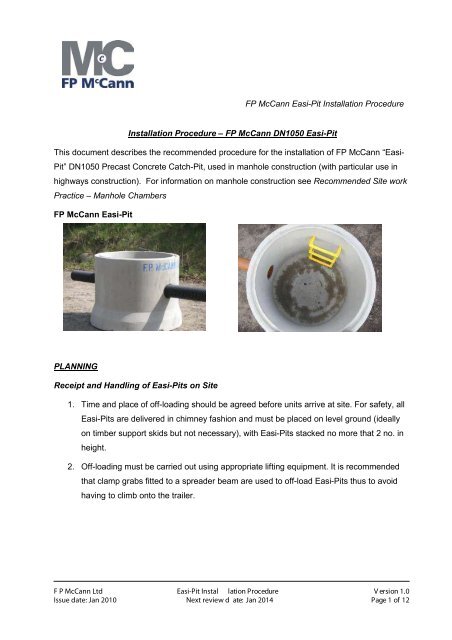
<strong>Installation</strong> <strong>Procedure</strong> – <strong>FP</strong> <strong>McCann</strong> DN1050 <strong>Easi</strong>-<strong>Pit</strong><br />
This document describes the recommended procedure for the installation of <strong>FP</strong> <strong>McCann</strong> “<strong>Easi</strong>-<br />
<strong>Pit</strong>” DN1050 Precast Concrete Catch-<strong>Pit</strong>, used in manhole construction (with particular use in<br />
highways construction). For information on manhole construction see Recommended Site work<br />
Practice – Manhole Chambers<br />
<strong>FP</strong> <strong>McCann</strong> <strong>Easi</strong>-<strong>Pit</strong><br />
PLANNING<br />
Receipt and Handling of <strong>Easi</strong>-<strong>Pit</strong>s on Site<br />
1. Time and place of off-loading should be agreed before units arrive at site. For safety, all<br />
<strong>Easi</strong>-<strong>Pit</strong>s are delivered in chimney fashion and must be placed on level ground (ideally<br />
on timber support skids but not necessary), with <strong>Easi</strong>-<strong>Pit</strong>s stacked no more that 2 no. in<br />
height.<br />
2. Off-loading must be carried out using appropriate lifting equipment. It is recommended<br />
that clamp grabs fitted to a spreader beam are used to off-load <strong>Easi</strong>-<strong>Pit</strong>s thus to avoid<br />
having to climb onto the trailer.<br />
F P <strong>McCann</strong> <strong>Ltd</strong> <strong>Easi</strong>-<strong>Pit</strong> Instal lation <strong>Procedure</strong><br />
Issue date: Jan 2010 Next review d ate: Jan 2014<br />
V ersion 1.0<br />
Page 1 of 12
<strong>FP</strong> <strong>McCann</strong> <strong>Easi</strong>-<strong>Pit</strong> <strong>Installation</strong> <strong>Procedure</strong><br />
Off-loading the <strong>FP</strong> <strong>McCann</strong> <strong>Easi</strong>-<strong>Pit</strong><br />
Spreader Bar<br />
Clamp Grab<br />
3. Off-loading should take the place at the nearest hard road to the point of installation.<br />
The <strong>Easi</strong>-<strong>Pit</strong> must be stored vertically on firm flat ground with the concrete base at the<br />
bottom.<br />
4. Carefully inspect units during off-loading to verify that products are undamaged and<br />
comply with order placed. Two types of check are required:<br />
Visual: Inspect the <strong>Easi</strong>-<strong>Pit</strong> for any sign of damage, including cracked or chipped<br />
concrete, or damage to the inlet / outlet anything that could affect the performance.<br />
Design: Check that the item received is the one ordered. Please note; <strong>Easi</strong>-<strong>Pit</strong>s are<br />
generally ordered in accordance with the Predl Clock system or as specified by the<br />
contractor or engineer. Positions are generally specified in degrees either from 0°to<br />
270°. (A copy of PREDL Clock is included in Appendi x A).<br />
<strong>Easi</strong>-<strong>Pit</strong>s are generally a bespoke product and are labeled with site references, to<br />
include:<br />
• Client / Site Name,<br />
• Site reference (e.g. MH 5),<br />
• Outlet Position<br />
• Production date<br />
F P <strong>McCann</strong> <strong>Ltd</strong> <strong>Easi</strong>-<strong>Pit</strong> <strong>Installation</strong> <strong>Procedure</strong> Version 1.0<br />
Issue date: Jan 2010 Next review date: Jan 2014 Page 2 of 12
<strong>FP</strong> <strong>McCann</strong> <strong>Easi</strong>-<strong>Pit</strong> <strong>Installation</strong> <strong>Procedure</strong><br />
5. Any <strong>Easi</strong>-<strong>Pit</strong>s rejected should be labelled and stored separately with the discrepancies<br />
for each noted on the delivery docket and reported for further action.<br />
CONSTRUCTION<br />
The <strong>Easi</strong>-<strong>Pit</strong> is manufactured to a height of 1000 mm with a grooved joint which faces upward.<br />
Precast concrete manhole chambers using the tongue and groove system are laid directly on<br />
top of the <strong>Easi</strong>-<strong>Pit</strong> unit and constructed as normal. Inlets and outlets within standard units are at<br />
an invert level of 300mm above sump as specified for catch pits in the highways specification<br />
(however other inlet heights are available upon request). A standard drain hole is provided in<br />
line with highways specification.<br />
Catchpits are constructed in accordance to BS EN 1917 and BS 5911-3.<br />
F P <strong>McCann</strong> <strong>Ltd</strong> <strong>Easi</strong>-<strong>Pit</strong> <strong>Installation</strong> <strong>Procedure</strong> Version 1.0<br />
Issue date: Jan 2010 Next review date: Jan 2014 Page 3 of 12
<strong>FP</strong> <strong>McCann</strong> <strong>Easi</strong>-<strong>Pit</strong> <strong>Installation</strong> <strong>Procedure</strong><br />
<strong>FP</strong> <strong>McCann</strong> <strong>Easi</strong>-<strong>Pit</strong> Dimensions<br />
To ensure that the <strong>Easi</strong>-<strong>Pit</strong> and subsequent manhole structure remains vertical, accurate<br />
levelling of the formation and preparation of the manhole foundation is essential.<br />
Bedding and sidefill materials must comply with the requirements of Water Industry Specification<br />
BS EN 13242.<br />
F P <strong>McCann</strong> <strong>Ltd</strong> <strong>Easi</strong>-<strong>Pit</strong> Instal lation <strong>Procedure</strong><br />
Issue date: Jan 2010 Next review d ate: Jan 2014<br />
V ersion 1.0<br />
Page 4 of 12
<strong>FP</strong> <strong>McCann</strong> <strong>Easi</strong>-<strong>Pit</strong> <strong>Installation</strong> <strong>Procedure</strong><br />
Sequence of Operations<br />
1. Excavate to formation level ensuring that sides of excavation are adequately supported.<br />
Trench<br />
Supports<br />
Bedding as per<br />
paragraph 3<br />
2. Trim and compact formation.<br />
3. Place suitable bedding material (in accordance with BS EN 13242, as above) over the<br />
base of the excavation to a thickness of not less than 150mm. The bedding material<br />
should compose of 14 mm – 5 mm graded aggregate; 10 mm nominal single size<br />
aggregate; concrete blinding; or as specified by local undertaker.<br />
4. Level and compact bedding material. The bedding (if aggregate) should be laid in 2<br />
layers with a whacker plate passed over each layer at least twice to compact.<br />
5. Check that the correct DN1050 <strong>Easi</strong>-<strong>Pit</strong> has been brought to the installation point. Cross<br />
reference and check pipe connection orientation with that of the catchpit. The movement<br />
of <strong>Easi</strong>-<strong>Pit</strong> on site must be undertaken in a manner that is safe and will not cause any<br />
damage to the unit in any way – the use of clamp grabs fitted to a spreader beam or<br />
alternatively standard lifting pins is recommended.<br />
6. Place the <strong>Easi</strong>-<strong>Pit</strong> unit onto the bedded surface. The outlet and manhole reference is<br />
clearly marked on each unit. The unit should be lowered into position. It is essential that<br />
the <strong>Easi</strong>-<strong>Pit</strong> with all pre-fabricated orientations is positioned according to the site layout<br />
plan.<br />
F P <strong>McCann</strong> <strong>Ltd</strong> <strong>Easi</strong>-<strong>Pit</strong> <strong>Installation</strong> <strong>Procedure</strong> Version 1.0<br />
Issue date: Jan 2010 Next review date: Jan 2014 Page 5 of 12
<strong>FP</strong> <strong>McCann</strong> <strong>Easi</strong>-<strong>Pit</strong> <strong>Installation</strong> <strong>Procedure</strong><br />
7. When placed check all pipe inlet and outlet levels and ensure that the surface of the<br />
<strong>Easi</strong>-<strong>Pit</strong> is level by checking the rim at the top of the base (using appropriate equipment).<br />
This will ensure the unit has been installed fit for purpose.<br />
Jointing to Pipeline<br />
The <strong>Easi</strong>-<strong>Pit</strong> has rubber seals which connect directly to any form of pipe.<br />
Perform joint as follows:<br />
• Ensure that the rubber seal is in position at the connection port of catchpit and pipe;<br />
• Lubricate the connection port on the manhole and pipe using an approved <strong>FP</strong> <strong>McCann</strong><br />
pipe lubricant;<br />
• Push the pipe into the connection port until fully inserted;<br />
• Check that the seal is water tight and that the gradient and line of the pipe is acceptable.<br />
To allow for any differential settlement between manhole and pipeline, short rocker pipes should<br />
be used, and in the case of uPVC a slip collar is then used to connect the <strong>Easi</strong>-<strong>Pit</strong> to the<br />
pipeline. (Refer to Appendix C for a table of Seal Connectors used with <strong>Easi</strong>-<strong>Pit</strong>).<br />
Jointing to Manhole Chamber Sections<br />
<strong>Easi</strong>-<strong>Pit</strong> sections (as with manhole chambers) are provided with a tongue and groove joint<br />
formed within the wall section (groove facing upward). These are sealed with cement / sand<br />
mortar in accordance with SHW series 2400 or alternatively with proprietary non-shrink mastic<br />
sealant or as specified by local undertaker. As with precast concrete manholes, well jointed<br />
<strong>Easi</strong>-<strong>Pit</strong>s provide an adequate seal under normal conditions.<br />
Pipe connections should be made before installation of manhole chamber ring risers.<br />
Erect the required number of manhole chamber rings (standard components) and seal the joints<br />
as appropriate; all in accordance with the design. Check that subsequent rings remain vertical.<br />
F P <strong>McCann</strong> <strong>Ltd</strong> <strong>Easi</strong>-<strong>Pit</strong> <strong>Installation</strong> <strong>Procedure</strong> Version 1.0<br />
Issue date: Jan 2010 Next review date: Jan 2014 Page 6 of 12
<strong>FP</strong> <strong>McCann</strong> <strong>Easi</strong>-<strong>Pit</strong> <strong>Installation</strong> <strong>Procedure</strong><br />
Place a reinforced concrete manhole cover slab on top. If required place a corbel slab and then<br />
add the appropriate number of adjusting units.<br />
Fit the manhole top for access from the ground.<br />
Adjusting Unit<br />
Manhole Cover<br />
Slab<br />
Bitumen<br />
Sealer<br />
Reinstatement<br />
Sidefill / in-situ concrete surround to be placed in accordance with the specified requirements of<br />
the particular project.<br />
All sidefill material to comply with the requirements of WIS 4-08-02.<br />
Testing<br />
Testing to be carried out in accordance with the specified requirements of the particular project,<br />
or as specified by the local undertaker.<br />
F P <strong>McCann</strong> <strong>Ltd</strong> <strong>Easi</strong>-<strong>Pit</strong> <strong>Installation</strong> <strong>Procedure</strong> Version 1.0<br />
Issue date: Jan 2010 Next review date: Jan 2014 Page 7 of 12
<strong>FP</strong> <strong>McCann</strong> <strong>Easi</strong>-<strong>Pit</strong> <strong>Installation</strong> <strong>Procedure</strong><br />
Appendix A – DN1050 Catchpit Highways Specification<br />
F P <strong>McCann</strong> <strong>Ltd</strong> <strong>Easi</strong>-<strong>Pit</strong> <strong>Installation</strong> <strong>Procedure</strong> Version 1.0<br />
Issue date: Jan 2010 Next review date: Jan 2014 Page 8 of 12
<strong>FP</strong> <strong>McCann</strong> <strong>Easi</strong>-<strong>Pit</strong> <strong>Installation</strong> <strong>Procedure</strong><br />
Appendix B – PREDL Clock<br />
F P <strong>McCann</strong> <strong>Ltd</strong> <strong>Easi</strong>-<strong>Pit</strong> <strong>Installation</strong> <strong>Procedure</strong> Version 1.0<br />
Issue date: Jan 2010 Next review date: Jan 2014 Page 9 of 12
<strong>FP</strong> <strong>McCann</strong> <strong>Easi</strong>-<strong>Pit</strong> <strong>Installation</strong> <strong>Procedure</strong><br />
F910 Seals for Twinwall Pipes<br />
Appendix C - Table of Seal Connectors<br />
Pipe DN Pipe Material Supplier Pipe OD<br />
(mm)<br />
Hole OD<br />
(mm)<br />
Universal<br />
Seals<br />
150 Twinwall<br />
Drainage<br />
Twinwall<br />
Drainage<br />
Wavin 178 198 1213104<br />
202 x 16.0<br />
Polypipe 178 198 1213104<br />
202 x 16.0<br />
Twinwall<br />
Drainage<br />
JFC / MAJO /<br />
CHERRY<br />
180 198 1213104<br />
202x16.0<br />
225 Twinwall<br />
Drainage<br />
Twinwall<br />
Drainage<br />
Wavin 268 294 305 x 20.0<br />
Polypipe 267 294 305 x 20.0<br />
Twinwall<br />
Drainage<br />
JFC / MAJO /<br />
CHERRY<br />
267 294 305 x 20.0<br />
300 Twinwall<br />
Drainage<br />
Twinwall<br />
Drainage<br />
Wavin 355 381 1821902<br />
396 x 20.0<br />
Polypipe 355 381 1821902<br />
396 x 20.0<br />
Twinwall<br />
Drainage<br />
375 Twinwall<br />
Drainage<br />
JFC / MAJO /<br />
CHERRY<br />
Universal<br />
Seal<br />
355 381 1821902<br />
396 x 20.0<br />
426 452 469 x 20.0<br />
F P <strong>McCann</strong> <strong>Ltd</strong> <strong>Easi</strong>-<strong>Pit</strong> <strong>Installation</strong> <strong>Procedure</strong> Version 1.0<br />
Issue date: Jan 2010 Next review date: Jan 2014 Page 10 of 12
<strong>FP</strong> <strong>McCann</strong> <strong>Easi</strong>-<strong>Pit</strong> <strong>Installation</strong> <strong>Procedure</strong><br />
F910 Seals for uPVC Pipes<br />
Pipe DN Pipe Material Supplier Pipe OD<br />
(mm)<br />
Hole OD<br />
(mm)<br />
Seal<br />
110 PVC ALL 110 138 1588606<br />
142 X 21.5<br />
160 PVC ALL 160 198 1662900<br />
202 X 26<br />
200 PVC ALL 200 226 1891706<br />
233 X 20<br />
250 PVC ALL 250 276 1891902<br />
287 X 20<br />
315 PVC ALL 315 341 1892101<br />
351 X 20<br />
F910 Seals for Clay Pipes<br />
Pipe DN Pipe Material Supplier Pipe OD<br />
(mm)<br />
Hole OD<br />
(mm)<br />
Seal<br />
150 Supersleeve Hepworth 178 198 1213104<br />
202 x 16<br />
225 Supersleeve Hepworth 263 289 187101<br />
299 x 20<br />
300 Supersleeve Hepworth 378.5 405 1842800<br />
422 x 20<br />
F P <strong>McCann</strong> <strong>Ltd</strong> <strong>Easi</strong>-<strong>Pit</strong> <strong>Installation</strong> <strong>Procedure</strong> Version 1.0<br />
Issue date: Jan 2010 Next review date: Jan 2014 Page 11 of 12
<strong>FP</strong> <strong>McCann</strong> <strong>Easi</strong>-<strong>Pit</strong> <strong>Installation</strong> <strong>Procedure</strong><br />
F910 Seals for Ductile Iron Pipe<br />
Pipe DN Pipe Material Supplier Pipe OD<br />
(mm)<br />
Hole OD<br />
(mm)<br />
Seal<br />
100 Ductile Iron ALL 118 144 1813704<br />
148 X 20<br />
150 Ductile Iron ALL 170 196 1568201<br />
202 X 20<br />
F P <strong>McCann</strong> <strong>Ltd</strong> <strong>Easi</strong>-<strong>Pit</strong> <strong>Installation</strong> <strong>Procedure</strong> Version 1.0<br />
Issue date: Jan 2010 Next review date: Jan 2014 Page 12 of 12