Zeiss LSM510 Meta Confocal Microscope User Guide
Zeiss LSM510 Meta Confocal Microscope User Guide
Zeiss LSM510 Meta Confocal Microscope User Guide

Create successful ePaper yourself
Turn your PDF publications into a flip-book with our unique Google optimized e-Paper software.
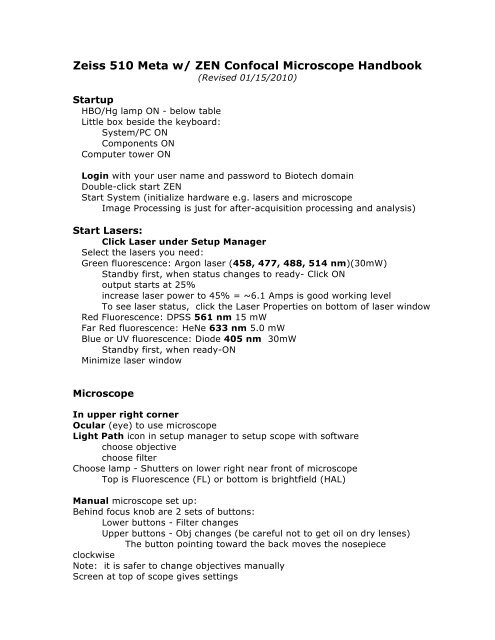
<strong>Zeiss</strong> 510 <strong>Meta</strong> w/ ZEN <strong>Confocal</strong> <strong>Microscope</strong> Handbook<br />
(Revised 01/15/2010)<br />
Startup<br />
HBO/Hg lamp ON - below table<br />
Little box beside the keyboard:<br />
System/PC ON<br />
Components ON<br />
Computer tower ON<br />
Login with your user name and password to Biotech domain<br />
Double-click start ZEN<br />
Start System (initialize hardware e.g. lasers and microscope<br />
Image Processing is just for after-acquisition processing and analysis)<br />
Start Lasers:<br />
Click Laser under Setup Manager<br />
Select the lasers you need:<br />
Green fluorescence: Argon laser (458, 477, 488, 514 nm)(30mW)<br />
Standby first, when status changes to ready- Click ON<br />
output starts at 25%<br />
increase laser power to 45% = ~6.1 Amps is good working level<br />
To see laser status, click the Laser Properties on bottom of laser window<br />
Red Fluorescence: DPSS 561 nm 15 mW<br />
Far Red fluorescence: HeNe 633 nm 5.0 mW<br />
Blue or UV fluorescence: Diode 405 nm 30mW<br />
Standby first, when ready-ON<br />
Minimize laser window<br />
<strong>Microscope</strong><br />
In upper right corner<br />
Ocular (eye) to use microscope<br />
Light Path icon in setup manager to setup scope with software<br />
choose objective<br />
choose filter<br />
Choose lamp - Shutters on lower right near front of microscope<br />
Top is Fluorescence (FL) or bottom is brightfield (HAL)<br />
Manual microscope set up:<br />
Behind focus knob are 2 sets of buttons:<br />
Lower buttons - Filter changes<br />
Upper buttons - Obj changes (be careful not to get oil on dry lenses)<br />
The button pointing toward the back moves the nosepiece<br />
clockwise<br />
Note: it is safer to change objectives manually<br />
Screen at top of scope gives settings
Fluorescence light adjustment<br />
no ND filters<br />
Near the back of the scope on the right are adjusters:<br />
Field stop slide up and down<br />
Aperture stop in back<br />
Focusing<br />
Manual focus as usual<br />
To set the focal plane as Zero<br />
Press Zero button on right of scope<br />
The 2 other buttons are Work (top) and Load (bottom)<br />
When in focus, press and hold Work button to set<br />
Load will then drop nosepiece and Work will return to Work position<br />
Do not change focus in Load position or a new Work is set<br />
If nosepiece won’t move up, you have to delete the Work position<br />
Press top button and hold while manual focusing until in focus, then<br />
release and new Work is set<br />
To avoid confusion, don’t use these 2 buttons, just manually return to the<br />
Zero position using the output on the little screen<br />
Brightfield – Transmitted light<br />
Switch lamps with buttons on right near front of scope<br />
Halogen lamp rheostat in front of scope at bottom<br />
Set Kohler Illumination<br />
Adj condenser aperture for desired contrast<br />
motor on top left of condenser
<strong>Confocal</strong> Mode<br />
LSM icon to switch to confocal scan<br />
Changes lamps, light path<br />
Imaging Setup icon under the setup manager<br />
Single Track for simultaneous acquisition, click the pro button at the<br />
upper right corner of imaging setup window, you can see the single track<br />
configs on the bottom.<br />
Multi Track configs are on the top in Configuration, the button next to<br />
it is "Apply".<br />
You can assign colors to the channels here.<br />
If you want to see the brightfield/DIC channel, check Ch D under<br />
Setup Manger / Light Path / Acquisition<br />
If you want to manually set up the lasers / filters / mirrors / dichriocs,<br />
also go to Setup Manger / Light Path / Acquisition<br />
Mode<br />
Channel Mode for normal scanning<br />
For Transmitted Light must use NONE for filter below stage<br />
After adjusting, Store (button next to apply) with a new name<br />
You can minimize this window<br />
Acquisition Mode icon under Online Acquisition<br />
Frame size in pixels, 512 x 512<br />
Speed, use 6-9<br />
Bits, 8 bits = 256 grey levels, 12 bits = 4096 grey levels<br />
For Scan direction, click pro at the upper right corner<br />
Averaging<br />
Line or Frame (line is not faster)<br />
Mean (averages) or Sum (accumulates)<br />
Scan Area (at the bottom of the Acquisition Mode window)<br />
Zoom – (use crop tool on image window) Must Stop scanning.<br />
Under 1.0x you cannot rotate the scan<br />
Rotation, X- or Y- move<br />
To get rid of the Zoom/Rotation, Reset All<br />
Channels tab<br />
SET BEFORE SCAN for EACH channel every time you switch<br />
objectives:<br />
Pinhole = 1 Airy<br />
make all channels have = section thickness for Z-series or<br />
colocalization<br />
start from the largest section (longest wavelength, or red)<br />
Gain - start at ~500<br />
Offset is OK<br />
Amplifer Gain - keep at 1 unless very low signal<br />
Laser (AOTF) keep optimal low %
<strong>Confocal</strong> Scanning<br />
Find -the system will try to find a preliminary image for you<br />
Fast -to continuous scan at fastest speed and w/o averaging - for focusing<br />
and gain/offset adjustment<br />
Single -to collect one scan - with averaging. Do this before saving.<br />
Continuous -to continuous scan with selected scan speed (with averaging)<br />
Stop<br />
ALWAYS STOP SCANNING<br />
New to open a new image window<br />
Note: While fast scanning has a short dwell time, the repeated scans can<br />
Photobleach as much or more than slow scan!<br />
To focus while scanning, use microscope focus knob or use Focus icon under<br />
Online Acquisition<br />
Note: the nosespiece drifts very badly for first few hours due to temp<br />
changes, move knob towards you to correct (this is down!)<br />
Viewing Images<br />
Image Window (in the middle of ZEN window)<br />
Display<br />
2D-Overlay image<br />
Split-different channels<br />
Range Indicator - click the channels under the image window to switch<br />
between ranger indicator and colored images<br />
Red - saturated pixels<br />
Blue - pixels that are too black (background, or 0s in pixel value)<br />
Adjust gain and laser power to minimize saturation<br />
Adjust offset to minimize black pixels<br />
Crop<br />
Zoom<br />
Overlay – adds icons to window<br />
Scale bar is here. Click on icon and draw on image.<br />
Saving images<br />
Set speed and averaging and use single to collect an image you want to<br />
save<br />
Use save icon to the right of image window or File / Save or Save as to your<br />
folders on the DATA Drive E:<br />
Images is saved in .lsm format (preferred, you can manipulate later<br />
with ZEN LE or ImageJ) or tiff/jpeg format as you want.
Z-Stack<br />
Z-Stack icon under Multidimensional Acquisition<br />
Mark first/last<br />
While Fast scanning use focus knob on scope<br />
Mark first, mark last<br />
Can do this manually or use Stage icon<br />
Z-series ALWAYS collects with nosepiece moving UP. If you set up your Z<br />
series to start deep in your sample and move down to the coverslip, it<br />
won’t. It will go to the end (coverslip) and move up to the start.<br />
Focus values get larger as nosepiece moves down.<br />
Use optimal interval to set up section thickness or number of slices<br />
Change interval / number of slices as desired<br />
Before start, check Z-Stack under Multidimensional Acquisition /<br />
Information On Experiment<br />
Start to start Z-series<br />
Viewing Z-Stack<br />
Image Window<br />
Z Position icon makes scroll bar below image window<br />
Gallery is overlay only, check Show Text under Gallery below image window<br />
shows the depth from first section<br />
3D allows you view the Z-stack in 3D<br />
Auto Brightness Correction<br />
When images get dimmer as you go deeper you can brighten them as you<br />
collect them<br />
Choose first slice, adjust settings, Set A<br />
Choose Last slice: re-adjust settings to match (?), Set B<br />
The settings that you change will adjust linearly through this series<br />
Gain, Offset, Amp Gain, Laser Power<br />
Time Series<br />
Cycles - choose how many cycles you want to acquire<br />
Interval – set time interval between cycles<br />
See Actual scan time and dwell time under the Acquisition Mode<br />
You can set more than one interval and change in the middle of the<br />
series<br />
Start – Manual or choose a clock time based on computer clock<br />
Stop - Manual, set number of time points<br />
Before start, check Time Lapse under Multidimensional Acquisition /<br />
Information On Experiment<br />
Start to start time series<br />
You can save these settings for future use.
Focus, Stage and Tile Scan<br />
Focus - set / change focus (Z) with software<br />
Choose step size<br />
Up arrow moves nosepiece up<br />
Stage - move / change positions on stages in X-Y directions<br />
Finding and marking sites of interest<br />
Move to first position<br />
Zero – defines this position as 0,0<br />
Mark position<br />
Set distance to move<br />
Arrows go in opposite direction from image on screen<br />
Or move to a new location and mark<br />
Go to zero<br />
Goes to each position and scans<br />
To combine with Time, see Multitime series<br />
Tile Scan (aka stitching)<br />
Move to first position - this is center (?)<br />
Choose #X and #Y – will move based on pixel resolution (eg 512 x 512)<br />
Moves up and to the right first (?)<br />
Before start, check Tile Scan under Multidimensional Acquisition /<br />
Information On Experiment<br />
Start to start tile scan<br />
Bleaching (under Multidimensional Acquisition)<br />
Draw ROIs with Regions (under Online Acquisition)<br />
Setup bleaching / FRAP experiment<br />
Before start, check Bleaching under Multidimensional Acquisition /<br />
Information On Experiment<br />
Start to start bleaching<br />
You could combine all or any of the Z-stack, Time series, Bleaching, and Tile Scan.<br />
You could always Reuse your imaging settings by open a previous .lsm file and click<br />
the "reuse" button under the image window. All settings are saved for reuse on a<br />
.lsm file except the objective, please match the objective properly before reuse your<br />
settings.<br />
Shutdown<br />
Lasers OFF<br />
Hg lamp OFF<br />
Copy files to removable disk<br />
File – Exit<br />
Shut down Windows<br />
Wait until fan for argon laser shuts off automatically<br />
then – Components OFF and System OFF
<strong>Zeiss</strong> Axiovert 200 <strong>Microscope</strong> Specs<br />
Filters:<br />
1 blank = LSM???<br />
2 Blue LP FS 02 ex 365/100 (300-400) bs 395 em 420 LP<br />
3 Green FS 10 ex 470/40 (450-490) bs 510 em 540/50 (515-565)<br />
4 Red FS 15 ex 546/12 (534-558) bs 580 em 590 LP<br />
5 DIC<br />
Objectives:<br />
Mag NA Desc coverslip WD (mm)<br />
5x 0.15 C Plan-NEOFLUAR 0.17 13.6<br />
10x 0.3 C Plan-NEOFLUAR 0.17 5.6<br />
20x 0.8 Plan-APOCHROMAT 0.17 0.55<br />
40x 1.3 oil EC Plan-NEOFLUAR 0.17 0.20<br />
63x 1.4 oil Plan-APOCHROMAT 0.17 0.19<br />
40x 1.2 W C-APOCHROMAT c slip adj 0.28<br />
DIC for all except 5x and 10x<br />
Section thickness in um<br />
Wavelength<br />
Obj 488nm 561nm 633mn<br />
5x/0.15 47.2 um 52.7 um 60.1 um<br />
10x/0.3 11.7 13.1 14.9<br />
20x/0.8 1.6 1.7 2.0<br />
40x/1.3 0.9 1.0 1.1<br />
63x/1.4 0.8 0.8 0.9<br />
40x/1.2W 0.9 1.0 1.1<br />
“Optimal” step size is ½ section thickness.
Filter choices<br />
NFT-T<br />
None<br />
DAPI<br />
FITC<br />
RHOD/TEXAS RED<br />
Analyzer module D<br />
Main beam splitter HFT<br />
NT80/20 (for reflected light)<br />
HFT 405/488/561/633/KP725<br />
HFT 405/488/561<br />
HFT 405/514/633<br />
HFT 458/514<br />
HFT 458/561<br />
HFT 458<br />
HFT 488<br />
Beam Splitter NFT-1<br />
None<br />
Mirror<br />
NFT 490<br />
NFT 515<br />
NFT 565<br />
NFT 635 VIS<br />
NFT KP 560<br />
Plate<br />
Beam Splitter NFT-2<br />
Mirror<br />
NFT 490<br />
NFT 515<br />
NFT 565<br />
Em Filter Chan 3<br />
LP 505<br />
LP530<br />
LP 575<br />
LP 560<br />
BP 505-530<br />
BP 505-550<br />
BP 530-600<br />
BP 575-615 IR<br />
Em Filter Chan 2<br />
LP 420<br />
LP 475<br />
LP 505<br />
BP 420-280<br />
BP 470-500<br />
BP 475-525<br />
BP 505-550<br />
Change Pos<br />
Beam Splitter NFT-3<br />
None<br />
Plate<br />
None<br />
Mirror<br />
Em Filter Chan 4<br />
LP 420<br />
LP 475<br />
LP 505<br />
LP 530<br />
LP 575<br />
LP 560<br />
BP 505-550<br />
BP 575-615 IR<br />
Notes<br />
Plate transmits 100%<br />
Mirror deflects 100%<br />
KP = short pass<br />
LP = long pass<br />
BP = band pass<br />
IR = blocks IR light<br />
Suitable for IR excited dyes
Set-up for First-time users of the <strong>Zeiss</strong> <strong>LSM510</strong> software<br />
(System #209385)<br />
Login to Windows with your Domain username and password<br />
Find the New <strong>User</strong> Initialization files (Usually on the D drive)<br />
Initialize_New_<strong>User</strong>_Singletracks<br />
Initialize_New_<strong>User</strong>_Multitracks<br />
Initialize_New_<strong>User</strong>_Macros (if desired)<br />
Initialize<br />
From the LSM 510 software:<br />
Click Options, Settings<br />
Program Start:<br />
Check “don’t show logo”<br />
Save:<br />
Check the third bullet - “At “Create Database” automatically<br />
create a subdirectory with same name as specified database<br />
and create dataset image files in that subdirectory.”<br />
Check “Save prompt at Closing Modified Windows” and “Warning<br />
before overwriting existing recordsets”<br />
Temporary Files:<br />
“Use RAM” is fine, unless you are doing time lapse, then you may<br />
want to set a temporary location, e.g. your server directory<br />
Recording/Reuse:<br />
UNcheck all<br />
Time series: Check “Time Interval”<br />
Image Status Display:<br />
Check all selections under “Status display in image window” and “Image<br />
status bar”<br />
Don’t check “Show status display upon opening of new image display”