ApeosPort/ DocuCentre - III C3300/2200/2201 - Fuji Xerox Malaysia
ApeosPort/ DocuCentre - III C3300/2200/2201 - Fuji Xerox Malaysia
ApeosPort/ DocuCentre - III C3300/2200/2201 - Fuji Xerox Malaysia

Create successful ePaper yourself
Turn your PDF publications into a flip-book with our unique Google optimized e-Paper software.
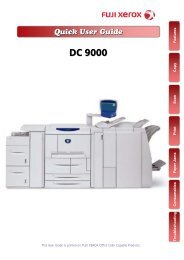
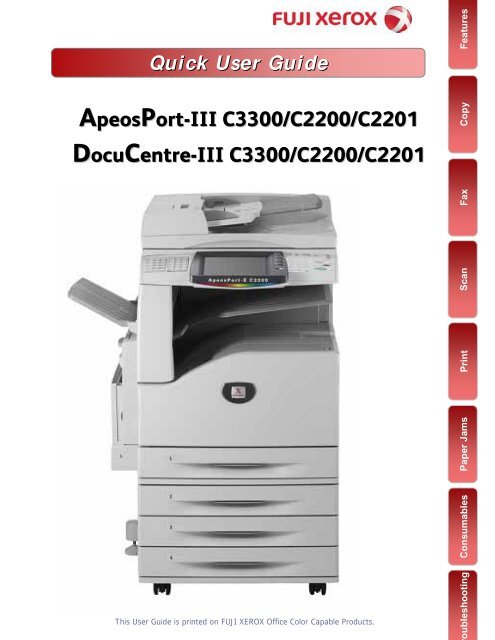
Quick User Guide<br />
<strong>ApeosPort</strong>-<strong>III</strong> <strong>C3300</strong>/C<strong>2200</strong>/C<strong>2201</strong><br />
<strong>DocuCentre</strong>-<strong>III</strong> <strong>C3300</strong>/C<strong>2200</strong>/C<strong>2201</strong><br />
Consumables<br />
Paper Jams<br />
Print<br />
Features<br />
Copy<br />
Scan<br />
Fax<br />
This User Guide is printed on FUJI XEROX Office Color Capable Products.<br />
oubleshooting
01<br />
Features Content<br />
Thank you for selecting the <strong>Fuji</strong> <strong>Xerox</strong> <strong>ApeosPort</strong>-<strong>III</strong> <strong>C3300</strong>/C<strong>2200</strong>/C<strong>2201</strong>,<br />
<strong>DocuCentre</strong>-<strong>III</strong> <strong>C3300</strong>/C<strong>2200</strong>/C<strong>2201</strong>.<br />
This quick user guide provides the fundamental Copy / Fax / Scan / Print operating<br />
procedures for ease use of the machine.<br />
Quick User Guide Organization<br />
♣ Features Content ……………………………………………… Page 01 - 02<br />
Describes the content of this guide and overview of the machine.<br />
♣ Copy ……………………………………………………………. Page 03 - 13<br />
Describes the copy features and operations.<br />
♣ Fax ………….……………………………………………….….. Page 14 - 19<br />
Describes the fax features and operations.<br />
♣ Scan …………………………….………….…………………… Page 20 - 25<br />
Describes the scan features and operations.<br />
♣ Print …………………………….………………………………. Page 26 - 33<br />
Describes the print features and operations from computer.<br />
♣ Paper Jams …………………………….…….….……………… Page 34 - 35<br />
Describes procedures to clear paper jams when error message displays.<br />
♣ Consumables …………………………….…….….…………… Page 36 - 40<br />
Describes procedures to replace consumables & Part No.<br />
(Toners/Drum/Waste Bottle/Staples)<br />
♣ Troubleshooting … … … … .……….…….….……………… Page 41 - 42<br />
Online support Assistance - describes measures to acquire online<br />
help solutions and / or submit a Service & Support Request.<br />
IMPORTANT :<br />
The screen images in this guide solely used for illustration and are based on the standard machine<br />
configurations. Some features mentioned may not be used depending on the machine<br />
configurations. Unsupported features will not be displayed on the screen. Abnormal features will<br />
be grayed out on the screen.<br />
This Quick User Guide may not be copied or modified without the written consent of the author<br />
or publisher.<br />
Parts of this user guide are subject to change without prior notice.<br />
We welcome any comments on ambiguities, errors, omissions or missing pages.<br />
Contact <strong>Fuji</strong> <strong>Xerox</strong> Customer Training Department for more information.
Overview<br />
02<br />
Powering On / Off the machine<br />
Energy Saver<br />
button - Press to<br />
exit power saver<br />
mode.<br />
Log In/Out button<br />
-Press to enter<br />
User ID &<br />
Passcode<br />
Power Switch<br />
Turn ON<br />
Machine<br />
Turn OFF<br />
machine<br />
To Login to User Account, press Log In/Out button & enter user details<br />
as follow. ( Note: Press Log In/Out button again to Logout. )
03<br />
COPY FEATURES<br />
Reduce/Enlarge Page 04<br />
To make a reduced or an enlarge output<br />
size.<br />
2-Sided Copying Page 05<br />
To make copies single or double sided output.<br />
Copy<br />
Book Copying Page 06<br />
To copy bound documents using platen<br />
glass on to 2 separate sheets<br />
Mixed Sized Originals Page 07<br />
To scan different size documents<br />
simultaneously and copies onto matching<br />
paper size.<br />
A<br />
5<br />
A<br />
4<br />
A<br />
3<br />
A<br />
5<br />
A<br />
4<br />
A<br />
3<br />
Multiple-Up Page 08<br />
To copy multiple documents onto a single<br />
sheet of paper<br />
Copy Output / Sorting Page 09<br />
To make copies collated (stapled & punched)<br />
[Collated]<br />
1,2,3…1,2.3…<br />
[Uncollated]<br />
1,1...2,2...3,3...<br />
Edge Erase / Image Shift Page 10<br />
To erase unwanted marks along the edges /<br />
To shift image copy position<br />
[Before] <br />
Booklet Creation Page 11<br />
To copy multiple sheets of documents in<br />
page order to make a booklet<br />
6<br />
5<br />
4<br />
3<br />
2<br />
1<br />
[After] <br />
Repeat Image Page 12<br />
Image to be print repeatedly on one sheet of<br />
paper<br />
ID Card Copying* Page 13<br />
To copy both sides of ID card onto one side<br />
of paper
Making reduced or enlarged copies from the original<br />
04<br />
You can make copies with scaling by selecting desired copy size ratio.<br />
Original A4<br />
Output A3<br />
Copy<br />
1 Select [Copy]<br />
2 Select [Reduce /<br />
Enlarge] for desired<br />
ratio; select [More] for<br />
other presets.<br />
3 Select [Paper Supply] for<br />
tray selection.<br />
4 Enter number of copies<br />
(1 to 999) using numeric<br />
keypad.<br />
5 Press button<br />
Note<br />
User Guide P.65
05<br />
Making copies Single Sided / Double Sided<br />
You can make copies and output as single-sided / double-sided.<br />
Copy<br />
1 Select [Copy]<br />
2 Select [Layout<br />
Adjustment]<br />
Select [2-Sided Copying]<br />
3 Select an option and<br />
select [Save]<br />
1 1 Sided copy 1-sided<br />
document onto 1 side of paper<br />
1 2 Sided copy 1-sided<br />
document onto 2 sides of paper<br />
2 2 Sided copy 2-sided<br />
document onto 2 sides of paper<br />
2 1Sided copy 2-sided<br />
document on 1 side of the paper<br />
4 Enter number of copies<br />
(1 to 999) using numeric<br />
keypad.<br />
5 Press button<br />
Note<br />
Head to Head – both sides of the<br />
paper are at the same orientation.<br />
Head to Toe – one side of the paper<br />
are at rotated orientation<br />
Note<br />
User Guide P.92
Making a copy from a bound document (Book Copying)<br />
06<br />
You can make copies from bound document into separate sheets of<br />
paper using platen glass.<br />
Copy<br />
1 Select [Copy]<br />
2 Select [Layout<br />
Adjustment] tab – Choose<br />
[Book Copying]<br />
3 Select an option and<br />
Select [Save];<br />
Left Page then Right<br />
Right Page then Left<br />
Top Page then Bottom<br />
Select Both Pages (for<br />
scanning left & right page)<br />
4 Press button<br />
Note<br />
Both Pages – to copy both<br />
pages of the book<br />
Left Only/Right Only – copy<br />
selected side of the book<br />
Note<br />
User Guide P.81
07<br />
Making copy of different sized document (Mixed Size)<br />
You can make copy of different sizes documents and copies onto<br />
matching paper size.<br />
A<br />
5<br />
A<br />
4<br />
A<br />
3<br />
A<br />
5<br />
A<br />
4<br />
A<br />
3<br />
Copy<br />
1 Select [Copy]<br />
2 Select [Layout<br />
Adjustment] tab Select<br />
[Mixed Sized Originals]<br />
and Select [ON]<br />
3 Select “Auto%” on<br />
[General Settings] and<br />
Select Paper Size required.<br />
[Auto Paper Tray]<br />
4 Select [Save] and Press<br />
button<br />
Note<br />
User Guide P.85
Making copy of multiple sheets onto 1 sheet paper<br />
08<br />
You can make copies from multiple sheets of documents onto single<br />
sheet of paper using Multiple-Up.<br />
Copy<br />
1 Select [Copy]<br />
2 Select [Output Format]<br />
tab<br />
3 Select [Multiple-Up]<br />
1 Page Up - Multiple Up is<br />
not applied.<br />
2 Pages Up – 2 documents<br />
copied into 1 sheet of paper<br />
4 Pages Up – 4 documents<br />
copied into 1 sheet of paper<br />
8 Pages Up – 8 documents<br />
copied into 1 sheet of paper<br />
4 Select ‘Reading Order’<br />
for document layout and<br />
Press button<br />
Note<br />
[Auto %] is automatically<br />
selected to make copies fit<br />
into paper selection.<br />
Note<br />
User Guide P.100
09<br />
Making multiple copies from the original [sorting]<br />
To make copies output collated. Output can be stapled / hole punched.<br />
[Collated] 1,2,3…1,2.3…<br />
[Uncollated] 1,1...2,2...3,3...<br />
[Finishing]<br />
Stapled / Hole Punch<br />
Copy<br />
1 Select [Copy]<br />
2 Select [Copy Output] on<br />
Copy tab; or select<br />
[Output Format] tab,<br />
select [Copy Output].<br />
3 Select [Collated], and<br />
select Finishing (if<br />
available). Select Staple<br />
/ Punch Positions,<br />
Select [Save]<br />
4 Enter number of sets<br />
using numeric keypad<br />
and press <br />
button<br />
Note<br />
Collated - arranged in page<br />
order per sets.<br />
Uncollated - arranged in total<br />
copies and sort sheets by page<br />
Note<br />
User Guide P.115
Making copies with edge erased / image shifted<br />
10<br />
To make copies with edge erased / image shifted<br />
Copy<br />
1 Select [Copy]<br />
2 Select [Layout<br />
Adjustment] tab; Select<br />
Edge Erase or Image<br />
Shift (where applicable)<br />
3 Edge Erase – set area to<br />
erase using arrow keys at<br />
1mm increments each.<br />
Image Shift –set margin<br />
to shift using arrow keys<br />
at 1mm increments each.<br />
Select [Save]<br />
4 Enter number of sets<br />
using numeric keypad<br />
and Press button<br />
Note<br />
User Guide P.86 & 87
11<br />
Making a copy into a booklet format (Booklet Creation)<br />
You can make copies from multiple sheets of documents onto both<br />
sides of the paper in page order to make a booklet<br />
1<br />
2<br />
3<br />
4<br />
5<br />
Optional feature:<br />
Folding & Staple<br />
Copy<br />
1 Select [Copy]<br />
2 Select [Output Format]<br />
tab<br />
3 Select [Booklet<br />
Creation] and choose<br />
option “Create Left/Top<br />
Bound Booklet” or<br />
“Create Right Bound<br />
Booklet” and Select<br />
[Save]<br />
Optional:<br />
Finishing (Folding + Stapling)<br />
4 Select [Save] and<br />
Press button<br />
Note<br />
Printed Covers The first<br />
page of the document is<br />
copied on the cover<br />
Note<br />
User Guide P.94
Making an image printed repeatedly (Repeat Image)<br />
12<br />
Make copy of a document / image onto 1 sheet of paper repeatedly.<br />
Copy<br />
1 Select [Copy]<br />
2 Select [Output Format]<br />
tab. Select [Repeat<br />
Image]<br />
Off – Image not repeated<br />
Auto Repeat – Auto repeat<br />
according to original<br />
document size, paper size<br />
and copy ratio.<br />
Variable Repeat – User<br />
defined number of times to<br />
repeat copy image<br />
Select [Save]<br />
3 Select [Layout Adjustment]<br />
tab – Select Original Size to<br />
enter width (X) & height (Y) at<br />
1mm increments -<br />
Select [Save]<br />
4 Press button<br />
Note<br />
User Guide P.102 Repeat Image<br />
User Guide P.84 Original Size
13<br />
Making copies of ID Card<br />
To make copy of ID card both sides on the same page of paper<br />
Copy<br />
1 Select [Copy]<br />
2 Select [Output Format] [2]<br />
ID Card Copying. Select<br />
ON – Select [Save]<br />
3 Load ID Card on the top<br />
left of the platen glass.<br />
Close document cover<br />
and press <br />
4 Open document cover<br />
and turn to the 2 nd side.<br />
Place it on the same place<br />
and press <br />
5 The ID Card will then be<br />
printed.<br />
Note<br />
User Guide P.116
FAX FEATURES<br />
14<br />
Numeric Keypads Page 15<br />
To fax document using numeric keypads to a<br />
specific location<br />
On-Hook Dialing Page 15<br />
Use this feature to send or receive fax<br />
manually. Select {Manual Send} to send or<br />
[Exit (Line Cut)] to exit on-hook<br />
Speed Dial/One Touch Page 15<br />
To fax document using Speed Dial/One<br />
Touch Dial<br />
Broadcast Send Page 15<br />
To fax document to multiple locations.<br />
Fax<br />
Address Book/Index Page 16<br />
To fax documents using pre-registered<br />
numbers from the address book<br />
2-Sided Originals Page 17<br />
To enable scan both sides of a document<br />
then transmits automatically<br />
1-Sided: Scans 1-sided documents to<br />
transmit.<br />
2-Sided (H to T): Scans 2-sided (head to<br />
toe) documents to transmit.<br />
2-Sided (H to H): Scans 2-sided (head to<br />
head) documents to transmit.<br />
Transmission Report Page 18<br />
To print a transmission report automatically<br />
after each fax complete successfully /<br />
unsuccessfully<br />
Transmission Report–<br />
Cancel Fax Job<br />
To cancel a fax job, press [Job Status] button.<br />
Select fax job and press [Stop] / [cancel].<br />
ASDFG<br />
EWTEt<br />
dfrewtry<br />
01 78822984 12:45 CP
15<br />
Fax transmission to a single / multiple location(s)<br />
You can select fax feature on [Fax] screen to send document to single<br />
or multiple recipient(s).<br />
1 Select [Fax]<br />
Fax<br />
2 Enter recipient(s) fax<br />
number using numeric<br />
keypad.<br />
3 Select [+Add] button to<br />
enter multiple recipients’<br />
fax number.<br />
4 If Group Entries is<br />
registered, select<br />
[Address Book]>”List all<br />
group entries” & click<br />
“Add” to recipients’ list.<br />
5 Press the button<br />
Note<br />
User Guide P.145
Making a fax transmission using Address Book Entries<br />
16<br />
You can specify fax recipients from pre-registered Address Book<br />
1 Select [Fax]<br />
Fax<br />
2 Select [Address Book]<br />
button to select<br />
recipients from the<br />
registered entries.<br />
3 Select “Retrieve fax<br />
entries using index”<br />
from Address Book<br />
drop down list to search<br />
Recipients by Index<br />
Search.<br />
4 Or select recipients’ fax<br />
number from the One<br />
Touch Dial (001 – 070)<br />
or using Numeric<br />
Keypad<br />
5 Press the button<br />
Note<br />
User Guide P.146
17<br />
Making a 2-sided fax transmission<br />
You can scan a 2 sided document and send in a single operation.<br />
1 Select [Fax]<br />
Fax<br />
2 Select [Address Book]<br />
button to select recipients<br />
or enter Fax number using<br />
Numeric Keypad<br />
3 Or select recipients’ fax<br />
number from the One<br />
Touch Dial (001 – 070).<br />
4 Select 2 Sided Scanning<br />
- 2 Sided (Head to Head) or<br />
- 2 Sided (Head to Toe)<br />
5 Press the button.<br />
Note<br />
Recipients’ fax number will be<br />
displayed on the Address list<br />
Note<br />
User Guide P.152
Making a fax with a transmission report printed<br />
18<br />
Fax transmission results can be printed automatically after each fax<br />
transmission.<br />
Transmission Report–<br />
ASDFG<br />
EWTEt<br />
1 Select [Fax]<br />
Fax<br />
2 Select [Fax Options] tab –<br />
Select Confirmation<br />
Options<br />
3 On the Confirmation<br />
Options Screen, Select<br />
“Print Report”<br />
4 Select [Address Book]<br />
button to select recipients<br />
or enter Fax number using<br />
Numeric Keypad<br />
5 Press the button.<br />
Note<br />
User Guide P.159
19<br />
To register Fax Address and Group Send<br />
To store Fax addresses in the address book [up to 500 entries]<br />
To Register Fax<br />
Address<br />
To Group Pre-<br />
Registered Fax<br />
Address<br />
1 All Services screen<br />
1 All Services screen<br />
Fax<br />
2 Select [Setup] - Select [Add<br />
Address Book Entry]<br />
2 Select [Setup Menu] – Select<br />
[Create Fax Group Recipients]<br />
3 Select an address e.g. 001 (not<br />
in use) - Press [Create/Delete]<br />
3 Select any group no. (e.g #01)<br />
and press [Create/Delete]<br />
4 Address Type: Select [Change<br />
Settings] Select - FAX – Save -<br />
5 Fax Number: Select [Change<br />
Settings] enter recipient fax no.<br />
6 Recipient Name: Select [Change<br />
Settings] Enter Recipient’s<br />
Name / Company Name<br />
7 Index: Select [Change Settings]<br />
Enter 1 alphanumeric character<br />
(e.g. <strong>Fuji</strong> <strong>Xerox</strong> = F)<br />
8 Select [Save] when settings are<br />
completed; Repeat steps 3-7 to<br />
continue or Press [Close] to Exit<br />
Setup Menu.<br />
4 Enter the pre-registered<br />
address no. (3 digits) by using<br />
numeric keypads (e.g. 001) and<br />
select [Add to this group]<br />
5 Repeat step 4 to continue<br />
registering fax no. to the same<br />
group<br />
6 Select [Save] and Close to Exit<br />
[Setup Menu].<br />
Note<br />
Max 50 Groups can be registered<br />
Each group can include up to 20 fax<br />
addresses<br />
Note<br />
Administrator Guide P.221<br />
Note<br />
Administrator Guide P.227
SCAN FEATURES<br />
20<br />
Scan to Mailbox Page 21<br />
To scan documents and save the scanned<br />
data to a mailbox located at the machine.<br />
Importing Mailbox data Page 22<br />
You can import scanned data to your<br />
computer using Mailbox Viewer program.<br />
Mailbox<br />
Mailbox<br />
Scan to Email Page 23<br />
To scan documents and send the scanned<br />
data as an e-mail attachment<br />
Scan to PC [SMB] Page 24<br />
To scan documents and send the data to a<br />
computer on the network.<br />
Scan<br />
Output Color/dpi Page 24<br />
Set scanning color & output resolution for the<br />
documents (up to 600dpi).<br />
Output Format * Page 25<br />
Document can be scanned to the supported<br />
format. [JPEG, TIFF, PDF, DW]<br />
Book Scanning Page 25<br />
The feature scans a bounded documents onto<br />
separate sheets of paper using platen glass.<br />
File Name Page 25<br />
The default file name is "img-xxx-yyy.zzz"<br />
(where xxx is the date and time, yyy is the<br />
page number, and zzz is the extension).
21<br />
To Scan document to Mailbox<br />
You can scan and save the scanned data to a pre-registered mailbox<br />
and import to the computer using Mailbox Viewer application.<br />
Mailbox<br />
1 Select [Scan to Mailbox]<br />
2 Select required mailbox.<br />
* Enter password if any<br />
Scan<br />
3 Select ‘Color Scanning’<br />
Select ‘2 Sided Original’<br />
if necessary.<br />
4 On the [Layout<br />
Adjustment] tab, select<br />
‘Resolution’ if necessary.<br />
5 Press the button.<br />
Documents are scanned<br />
and stored at the selected<br />
mailbox.<br />
Note<br />
User Guide P.210
To Import Mailbox data into personal computer<br />
22<br />
You can import scanned documents / data from mailbox to the<br />
computer using mailbox viewer program.<br />
Mailbox<br />
1 From computer, Select<br />
[Start] > All Programs ><br />
<strong>Fuji</strong> <strong>Xerox</strong> > Network<br />
Scanner Utility3 > Mailbox<br />
Viewer3<br />
2 Select scanner name;<br />
* e.g. <strong>ApeosPort</strong>-<strong>III</strong> <strong>C3300</strong><br />
(192.168.1.1) – Click [Next]<br />
button<br />
Scan<br />
3 Enter Mailbox number<br />
(001-200) and Password -<br />
Click [Confirm] button<br />
4 Select a document from<br />
the list and click [Import].<br />
Default file location at<br />
C:\My Document\<strong>Fuji</strong><br />
<strong>Xerox</strong>\Network Scan\<br />
Note<br />
User Guide P.318
23<br />
To Scan document and transfer via Email<br />
You can scan & send the scanned data to selected recipients as e-mail<br />
attachment(s).<br />
1 Select [Email]<br />
Scan<br />
2 Select [Address Book] or<br />
select [New Receipient] to<br />
enter email address(s)<br />
3 Select ‘Color Scanning’,<br />
select required file format if<br />
necessary.<br />
4 Select [Layout Adjustment]<br />
tab - ‘Resolution’ if<br />
necessary.<br />
5 On the [Email Options] tab,<br />
select ‘File Name’ or ‘Split<br />
Send’ if necessary.<br />
Press the button.<br />
Note<br />
User Guide P.203 & 217
To Scan document and transfer to PC (SMB)<br />
24<br />
You can scan and transfer the scanned documents to a computer<br />
on the network.<br />
1 Select [Scan to PC]<br />
2 Select [Address Book] or<br />
select [Browse] to search<br />
location<br />
Scan<br />
3 Select ‘Color Scanning’, ‘2<br />
Sided Scanning’ and ‘File<br />
Format’ if necessary.<br />
4 Select [Layout Adjustment]<br />
tab - ‘Resolution’ if<br />
necessary.<br />
5 On the [Filing Options] tab,<br />
select ‘File Name’.<br />
Press the button.<br />
Note<br />
User Guide P.213
25<br />
To scan a bound document (Book Scanning)<br />
Book Scanning allows you to scan a book onto separate sheets of paper<br />
in page order and transfer via any scanning method [Mailbox/Email/SMB]<br />
1 Select preferred scan<br />
method e.g. Scan to PC<br />
Scan<br />
2 Select File Format (e.g. PDF)<br />
[Layout Adjustment] tab –<br />
Choose [Book Scanning]<br />
3 Select an option and Select<br />
[Save];<br />
Left Page then Right<br />
Right Page then Left<br />
Top Page then Bottom<br />
Select Both Pages (for scanning<br />
left & right page)<br />
4 Select [Original Size] to<br />
enter document size or<br />
select from the Presets.<br />
5 On the [Filing Options] tab,<br />
select ‘File Name’. Press the<br />
button.<br />
Note<br />
User Guide P.231
PRINTING FEATURES<br />
26<br />
Printing Job Types Page 27<br />
Normal Print – prints as normal print<br />
Secure Print – stores print jobs on the<br />
machine and prints when UserID & password<br />
entered<br />
Sample Set – prints a trial copy<br />
Delayed Print – Temporarily stores print<br />
jobs on the machine to print it at specified<br />
time.<br />
Save to Mailbox – stores print job at<br />
registered mailbox and print upon required.<br />
Fax –PC Faxing.<br />
Paper Tray Selection Page 27<br />
To specify paper tray for printing. Optional:<br />
Finishing Stapled / Hole Punched.<br />
Default Paper Tray - Auto Tray Select<br />
If Tray 5 [Bypass] is selected, paper type<br />
can be specified according to paper loaded<br />
on Tray 5.<br />
Default Finishing Output – Collated<br />
If Finishing is selected, hole punching and<br />
stapling can be applied to the printed copies.<br />
Secure Print Page 28<br />
Temporarily stores print jobs on the machine<br />
and prints when UserID & password entered.<br />
2 Sided Printing Page 29<br />
You can send file and prints on both sides of<br />
paper.<br />
Booklet Printing Page 30<br />
Multiple Up Printing Page 31<br />
To print multi-page file into a booklet format<br />
and double sided.<br />
To print multi-page files onto single sheet of<br />
paper [from 2 Up and up to 32 Up]<br />
Print<br />
Watermarks Page 32<br />
To print files with a pre-fixed text such as<br />
‘Urgent’ or ‘Confidential’ over the printout.<br />
PC Faxing Page 33<br />
To send files and fax directly from computer<br />
without printing out hardcopies.
27<br />
Making a Direct Print from computer<br />
From your application, you can print directly from computer.<br />
1 From application, Select<br />
Printer – [Properties]<br />
2 On the [Paper/Output] tab,<br />
select to<br />
select required paper tray.<br />
Click [OK]<br />
Print<br />
3 Select as<br />
COLOR or BLACK<br />
4 Select [OK] on all open<br />
windows to print.
Making a Secure Printing from computer 28<br />
Allows to set a password to a print job and temporarily stores print<br />
memory on the machine, and print upon entering password.<br />
1 From application, Select<br />
Printer – [Properties]<br />
2 On the [Paper/Output] tab,<br />
select Secure<br />
Print - click to enter<br />
User ID & Passcode. Click<br />
[OK] on all open window.<br />
3 From machine, Press [Job<br />
Status] button - Select<br />
tab.<br />
Select [Secure Print]<br />
Print<br />
4 Select UserID - [Document<br />
List] button. Enter Passcode<br />
and press Confirm.<br />
5 Select file and select [Print]<br />
A message displayed –<br />
Select your preference – the<br />
job will be printed.
29<br />
Making a 2-sided print (optional - Finishing)<br />
Files can be printed into 2 sided format with 2 sided flip on long edge or<br />
flip on short edge.<br />
1 From application, Select<br />
Printer – [Properties]<br />
2 On the [Paper/Output] tab,<br />
select <br />
- 2 Sided Print<br />
- 2 Sided Flip on Short<br />
Edge<br />
Print<br />
3 Select as<br />
COLOR or BLACK<br />
4 *Optional Feature<br />
Select to<br />
enable Stapling / Hole<br />
punch. Set required stapling<br />
and hole punching position.<br />
5 Select [OK] on all open<br />
windows to print.
Making a booklet print from computer<br />
30<br />
Booklet printing enables multi-page files printed 2-sided booklet format<br />
arranged in ascending order, and fold to form a booklet.<br />
1 From application, Select<br />
Printer – [Properties]<br />
2 On the [Layout] tab, select<br />
Select<br />
Booklet Creation<br />
Choose Binding [Left / Right]<br />
* Optional: Fold & Staple<br />
Select [OK]<br />
3 A popup window displays<br />
the changes. Select [OK]<br />
Print<br />
4 Select ‘Fit to New Paper<br />
Size’ – Set any preferred<br />
paper size or select A4<br />
(210mm x 297mm)<br />
5 Select [OK] on all open<br />
windows to print.
31<br />
Prints multi pages in single sheet of paper<br />
You can print a multi-page files into a single print using Multiple-Up<br />
(from 2 Up to 32 Ups)<br />
1 From application, Select<br />
Printer – [Properties]<br />
2 On the [Layout] tab, select<br />
<br />
Choose from 1 Page Up to 32<br />
Pages Up.<br />
Select ‘Image Order’ if required<br />
Select ‘Draw Outlines’ to insert<br />
borders after each page.<br />
Print<br />
3 Select ‘Fit to New Paper<br />
Size’ - Set any preferred<br />
paper size or select A4<br />
(210mm x 297mm)<br />
4 Select [OK] on all open<br />
windows to print.
Making a printout with Watermarks<br />
32<br />
From your application, you can insert watermark.<br />
1 From application, Select<br />
Printer – [Properties]<br />
2 Select as<br />
COLOR or BLACK<br />
3 On the [Watermarks] tab,<br />
select watermark (e.g.<br />
Confidential, Urgent, etc.) or<br />
Select [New Text] to create<br />
Select [Edit Watermark] to<br />
edit any watermark.<br />
Print<br />
4 Select [Print on Page 1<br />
Only] to print watermark<br />
on first page, if necessary.<br />
5 Select [OK] on all open<br />
windows to print.
33<br />
Making direct fax from computer<br />
You can perform PC Faxing from your application.<br />
1 From application, Select<br />
Printer – [Properties]<br />
2 On the [Paper/Output] tab,<br />
select [Job Type List] –<br />
Select ‘FAX’ and Click<br />
‘OK’ on all open windows.<br />
Print<br />
3 The ‘Fax Recipient’<br />
window displayed. Enter<br />
recipient name and fax<br />
number on the text box<br />
and click [To>>] button.<br />
(Repeat step to add more than<br />
one recipient)<br />
4 Select [OK] on all open<br />
windows to proceed.<br />
Note<br />
To cancel Fax, go to [Job Status]<br />
on the machine panel, select the<br />
fax job – Press [Cancel]
MAINTENANCE<br />
Clearing Paper Jams<br />
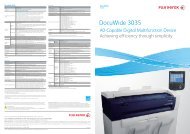
34<br />
Paper Jams in the Document Feeder<br />
1 2<br />
3 4<br />
1: Lift up the front edge of the Duplex<br />
Automatic Document Feeder<br />
2: Open the belt area by pulling up on<br />
the small green lever located at the<br />
bottom, left corner inside the DADF.<br />
Remove the jammed original.<br />
3: If the page is hard to remove, use<br />
the green wheel to wind the page<br />
out.<br />
4: Sometimes it may be necessary to<br />
remove the original from<br />
underneath the DADF, pull the<br />
page gentle with the lid open.<br />
Paper Jam in Door A<br />
1 2<br />
3<br />
4<br />
1: Lower the bypass tray.<br />
2: Raise the release lever to open<br />
cover A.<br />
3: Open green fuser cover labeled A1.<br />
4: Pull the jammed paper gently from<br />
the Fuser Unit. Check that there<br />
are no paper scraps left in the<br />
Fuser. Close the green fuser cover<br />
labeled A1. Press the center of the<br />
Fuser cover (Door A) to close it.<br />
CAUTION! Fuser Cartridge may<br />
be very hot, Handle with care.<br />
Paper Jams<br />
Paper Jams in Door C<br />
1 2<br />
3<br />
1: Open the side cover at the bottom of the machine (Door C).<br />
2: Open the door wide enough to allow access to the whole side of the tray feed area.<br />
3: Pull the jammed sheet gently from the side. Close the side cover.
35<br />
Clearing Paper Jams<br />
Paper Jam in Fuser Area<br />
1 2<br />
1: Open top left cover & Pull both edge<br />
of the jammed paper to remove. Gently<br />
close the cover.<br />
2: If paper jammed inside fuser area,<br />
lift green lever to remove paper.<br />
Reposition green lever once done.<br />
Gently close the cover.<br />
CAUTION! Fuser Cartridge may be very hot, Handle with care.<br />
Paper Jam in Paper Tray 1, 2, 3, 4 or Tray 5 (Bypass<br />
1<br />
1: Gently pull out paper tray and remove<br />
any jammed paper. If paper torn, try to<br />
remove any torn pieces inside the<br />
machine.<br />
Gently push in the tray.<br />
1 2<br />
1: Inspect the paper feed<br />
entrance in Tray 5 (Bypass Tray)<br />
2: Remove any jammed paper.<br />
NOTE: When two or more sheets<br />
of paper are loaded in the tray,<br />
remove all of the sheets.<br />
Paper Jams<br />
Paper Jam in Finisher Unit<br />
* Optional Feature<br />
Gently open the finisher door.<br />
Remove any jammed paper at<br />
selected area displayed on the<br />
screen.<br />
If paper torn, try to remove any torn<br />
pieces inside the machine.<br />
If the edge of the jammed paper<br />
can be reached, pull the jammed<br />
paper to remove the jammed paper.<br />
Gently close the cover.<br />
Note<br />
If paper is torn, make sure to<br />
remove any torn pieces of paper<br />
inside the machine.
Replacing Consumables<br />
36<br />
Replacing Toner Cartridge<br />
1 2 3<br />
1-2: Open the front cover. Carefully pull the required toner cartridge out from the<br />
machine.<br />
Info: Prepare a new toner cartridge by rocking it gently up and down, left and right<br />
several times. The cartridge must be the same color as the one removed.<br />
3: With the label of the toner cartridge facing upwards, insert it firmly into the machine.<br />
Press the toner cartridge in so it sits securely in place. Close the front cover.<br />
Replacing Waste Toner Bottle<br />
1 2<br />
1-2: Open the Front Cover of the machine. Grasp the front of the cartridge and gently<br />
pull the cartridge straight out.<br />
Note: Place a few sheets of paper on the floor before removing the cartridge. This<br />
will allow any excess Toner to fall on the paper.<br />
3 4<br />
Paper Jams<br />
3-4: Remove the new Waste Toner Cartridge from its packaging. Install the cartridge<br />
with the label facing upwards, (arrow in the 12 o'clock position,) and push the<br />
cartridge into the machine until it clicks into place.<br />
Close the Front Cover. If the cover will not close completely, make sure the<br />
cartridge is fully installed.
37<br />
Replacing Consumables<br />
Replacing Drum Cartridge<br />
1 2<br />
Info: Ensure machine is idle before opening the Front Cover.<br />
1: Open the Front Cover. Grasp the tan handle marked R9 and unlock by rotating it to<br />
the left.<br />
2: Pull down the handle to open the Drum Cartridge Cover and access the four<br />
cartridges.<br />
NOTE: There is resistance from the cover in its final stages of travel. It will be harder to<br />
push down, this is normal. The release mechanism requires this tension.<br />
3 4 5<br />
Paper Jams<br />
3: Gently pull out the Drum Cartridge (R1=Black, R2=Cyan, R3=Magenta,R4=Yellow),<br />
indicated on the Touch Screen, by lifting and pulling the cartridge handle<br />
Place the used Drum Cartridge into the polythene bag supplied in the package and<br />
put it in the box that the new cartridge came in.<br />
NOTE: The Drum Cartridge is recyclable.<br />
4: Grasp the new Drum Cartridge, with the protective cover still on the handle, and<br />
insert the end of the cartridge into the machine up to the arrow mark.<br />
5: Remove the seal from the top side of the Drum Cartridge. Push the Drum Cartridge<br />
into the machine by sliding the colored tab on top of the cartridge away from you.<br />
Put the protective cover into the box.<br />
Lift up the Drum Cartridge Cover to lock the Drum Cartridge. Rotate the tan handle<br />
marked R9 to the right to the to lock the cover in place.<br />
Close the Front Cover.<br />
NOTE: If the Front Cover is not completely closed a message will be displayed and<br />
the machine will not operate. Ensure handle R9 is in the locked position.
Replacing Consumables<br />
38<br />
Replacing B1 Finisher Booklet Maker Staple Cartridge<br />
1<br />
3<br />
4<br />
2<br />
1: Make sure that the machine<br />
has stopped copying / printing,<br />
then open the top of the<br />
Finisher, facing the scanner.<br />
2: Grasp the tabs on the side of<br />
the cartridge and then lift the<br />
cartridge to remove it from the<br />
stapler.<br />
3-4: Repeat the process to<br />
remove the second cartridge.<br />
Grasp the tabs on the new<br />
cartridge and install it into the<br />
stapler. Push down gently on<br />
the cartridge until it clicks into<br />
place. Close the Finisher top<br />
cover.<br />
Replacing C Finisher Staple Cartridge<br />
1 2 3<br />
1: Open the Finisher Front Door.<br />
2-3: Rotate Stapling Unit to the right and pull out on the Staple Cartridge handle and<br />
remove the used cartridge.<br />
4 5 6<br />
4-5: Unpack and install the new cartridge. The cartridge will click into place when it is<br />
installed correctly.<br />
6: Insert the cartridge into the machine. Close the Finisher Front Door.<br />
Consumables
39<br />
Checking Billing Meter / Supplies Status (Consumables)<br />
BILLING METER<br />
On the Machine Panel, press button.<br />
Select [Billing Information] tab - Select Billing Information<br />
METER 1 : Number of full color (Copies + Prints)<br />
METER 2 : Number of B/W (Copies + Prints + Faxes)<br />
METER 3 : Number of large-size full color (Copies + Prints)<br />
METER 4 : Total of Meter 1 + Meter 2<br />
This Billing<br />
Information is<br />
different from<br />
the ‘Usage<br />
Counters’ in<br />
CWIS properties.<br />
User should<br />
submit meter<br />
readings based<br />
on the Billing<br />
Meter from<br />
machine UI /<br />
Touch Screen.<br />
SUPPLIES / CONSUMABLES<br />
On the Machine Panel, press button.<br />
Select [Supplies] tab<br />
The status of consumables is shown as:<br />
“OK”, “Replace Soon (Order Now)”, or “Replace Now”<br />
For toner, the amount is shown in percentage (0 to 100%).<br />
Replace only<br />
when the Alert<br />
Message displays<br />
“Replace Now”<br />
Consumables
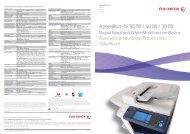
Consumables Part No.<br />
40<br />
+ OR OR<br />
+ OR OR<br />
Customer Replaceable Units Part Number Qty per box<br />
Toner Cartridge<br />
- Black [B] CT201213 1 unit<br />
- Cyan [C] CT201214 1 unit<br />
- Magenta [M] CT201215 1 unit<br />
- Yellow [Y] CT201216 1 unit<br />
Drum Cartridge<br />
- Black CT350748 1 unit<br />
- Color (C,M,Y) CT350595 1 unit<br />
Waste Toner Container CWAA0751 1 unit<br />
For Finisher A1/B1/C1:<br />
Staple Cartridge (XE) CWAA0540 3pcs (5000 staples)<br />
(50 sheets capacity)<br />
For Finisher B1: CWAA0728 4pcs (2000 staples)<br />
Booklet Staples (XG)<br />
(15 sheets capacity)<br />
Consumables<br />
For Finisher C1:<br />
Booklet Staples (XC) CWAA0501 4pcs (5000 staples)<br />
(15 sheets capacity)
41 Checking Job Status<br />
On the Machine Panel, press the button.<br />
oubleshooting<br />
To find out more on<br />
the Error Codes Cause<br />
and Remedy, please refer<br />
to “Problem Solving”<br />
section in Administrator<br />
Guide
For Quick Self-Help Solution and faster machine uptime,<br />
Please Logon to: www.fujixerox.com.my<br />
Click on any of the following link to start !<br />
> [Download] to download latest Driver or User Guide<br />
> [Support] for FAQs or submit Service Request online!
This Quick User Guide is printed on FUJI XEROX Office Color Products.<br />
Copyright Reserved © 2010 by Customer Training, <strong>Fuji</strong> <strong>Xerox</strong> <strong>Malaysia</strong><br />
Printed in <strong>Malaysia</strong><br />
For Service & Supplies Enquiries (Nationwide)<br />
Toll Free : 1-300-88-1163<br />
Online support: http://onlinesupport.fujixerox.com<br />
The contents described herein are correct as of August, 2010.<br />
Edition 2.4 Wakasa User Guide