Design Debugging Using In-System Sources and Probes ... - Altera
Design Debugging Using In-System Sources and Probes ... - Altera
Design Debugging Using In-System Sources and Probes ... - Altera

Create successful ePaper yourself
Turn your PDF publications into a flip-book with our unique Google optimized e-Paper software.
June 2012<br />
QII53021-12.0.0<br />
QII53021-12.0.0<br />
Overview<br />
© 2012 <strong>Altera</strong> Corporation. All rights reserved. ALTERA, ARRIA, CYCLONE, HARDCOPY, MAX, MEGACORE, NIOS, QUARTUS <strong>and</strong> STRATIX words <strong>and</strong> logos<br />
are trademarks of <strong>Altera</strong> Corporation <strong>and</strong> registered in the U.S. Patent <strong>and</strong> Trademark Office <strong>and</strong> in other countries. All other words <strong>and</strong> logos identified as<br />
trademarks or service marks are the property of their respective holders as described at www.altera.com/common/legal.html. <strong>Altera</strong> warrants performance of its<br />
semiconductor products to current specifications in accordance with <strong>Altera</strong>'s st<strong>and</strong>ard warranty, but reserves the right to make changes to any products <strong>and</strong><br />
services at any time without notice. <strong>Altera</strong> assumes no responsibility or liability arising out of the application or use of any information, product, or service<br />
described herein except as expressly agreed to in writing by <strong>Altera</strong>. <strong>Altera</strong> customers are advised to obtain the latest version of device specifications before relying<br />
on any published information <strong>and</strong> before placing orders for products or services.<br />
Quartus II H<strong>and</strong>book Version 12.0<br />
Volume 3: Verification<br />
June 2012<br />
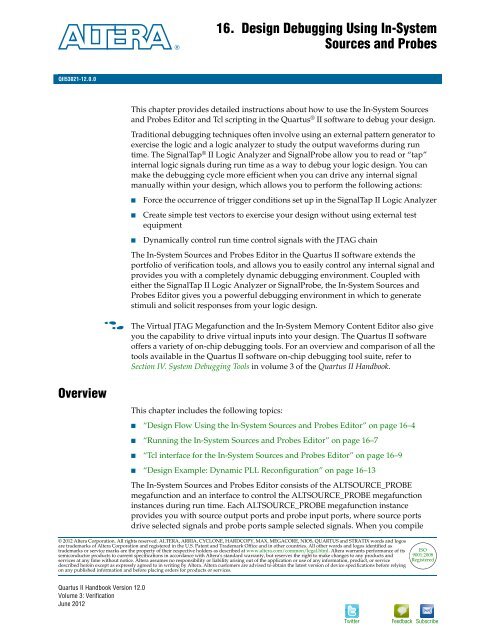
16. <strong>Design</strong> <strong>Debugging</strong> <strong>Using</strong> <strong>In</strong>-<strong>System</strong><br />
<strong>Sources</strong> <strong>and</strong> <strong>Probes</strong><br />
This chapter provides detailed instructions about how to use the <strong>In</strong>-<strong>System</strong> <strong>Sources</strong><br />
<strong>and</strong> <strong>Probes</strong> Editor <strong>and</strong> Tcl scripting in the Quartus ® II software to debug your design.<br />
Traditional debugging techniques often involve using an external pattern generator to<br />
exercise the logic <strong>and</strong> a logic analyzer to study the output waveforms during run<br />
time. The SignalTap ® II Logic Analyzer <strong>and</strong> SignalProbe allow you to read or “tap”<br />
internal logic signals during run time as a way to debug your logic design. You can<br />
make the debugging cycle more efficient when you can drive any internal signal<br />
manually within your design, which allows you to perform the following actions:<br />
■ Force the occurrence of trigger conditions set up in the SignalTap II Logic Analyzer<br />
■ Create simple test vectors to exercise your design without using external test<br />
equipment<br />
■ Dynamically control run time control signals with the JTAG chain<br />
The <strong>In</strong>-<strong>System</strong> <strong>Sources</strong> <strong>and</strong> <strong>Probes</strong> Editor in the Quartus II software extends the<br />
portfolio of verification tools, <strong>and</strong> allows you to easily control any internal signal <strong>and</strong><br />
provides you with a completely dynamic debugging environment. Coupled with<br />
either the SignalTap II Logic Analyzer or SignalProbe, the <strong>In</strong>-<strong>System</strong> <strong>Sources</strong> <strong>and</strong><br />
<strong>Probes</strong> Editor gives you a powerful debugging environment in which to generate<br />
stimuli <strong>and</strong> solicit responses from your logic design.<br />
f The Virtual JTAG Megafunction <strong>and</strong> the <strong>In</strong>-<strong>System</strong> Memory Content Editor also give<br />
you the capability to drive virtual inputs into your design. The Quartus II software<br />
offers a variety of on-chip debugging tools. For an overview <strong>and</strong> comparison of all the<br />
tools available in the Quartus II software on-chip debugging tool suite, refer to<br />
Section IV. <strong>System</strong> <strong>Debugging</strong> Tools in volume 3 of the Quartus II H<strong>and</strong>book.<br />
This chapter includes the following topics:<br />
■ “<strong>Design</strong> Flow <strong>Using</strong> the <strong>In</strong>-<strong>System</strong> <strong>Sources</strong> <strong>and</strong> <strong>Probes</strong> Editor” on page 16–4<br />
■ “Running the <strong>In</strong>-<strong>System</strong> <strong>Sources</strong> <strong>and</strong> <strong>Probes</strong> Editor” on page 16–7<br />
■ “Tcl interface for the <strong>In</strong>-<strong>System</strong> <strong>Sources</strong> <strong>and</strong> <strong>Probes</strong> Editor” on page 16–9<br />
■ “<strong>Design</strong> Example: Dynamic PLL Reconfiguration” on page 16–13<br />
The <strong>In</strong>-<strong>System</strong> <strong>Sources</strong> <strong>and</strong> <strong>Probes</strong> Editor consists of the ALTSOURCE_PROBE<br />
megafunction <strong>and</strong> an interface to control the ALTSOURCE_PROBE megafunction<br />
instances during run time. Each ALTSOURCE_PROBE megafunction instance<br />
provides you with source output ports <strong>and</strong> probe input ports, where source ports<br />
drive selected signals <strong>and</strong> probe ports sample selected signals. When you compile<br />
Twitter<br />
ISO<br />
9001:2008<br />
Registered<br />
Feedback Subscribe
16–2 Chapter 16: <strong>Design</strong> <strong>Debugging</strong> <strong>Using</strong> <strong>In</strong>-<strong>System</strong> <strong>Sources</strong> <strong>and</strong> <strong>Probes</strong><br />
Overview<br />
your design, the ALTSOURCE_PROBE megafunction sets up a register chain to either<br />
drive or sample the selected nodes in your logic design. During run time, the<br />
<strong>In</strong>-<strong>System</strong> <strong>Sources</strong> <strong>and</strong> <strong>Probes</strong> Editor uses a JTAG connection to shift data to <strong>and</strong> from<br />
the ALTSOURCE_PROBE megafunction instances. Figure 16–1 shows a block<br />
diagram of the components that make up the <strong>In</strong>-<strong>System</strong> <strong>Sources</strong> <strong>and</strong> <strong>Probes</strong> Editor.<br />
Figure 16–1. <strong>In</strong>-<strong>System</strong> <strong>Sources</strong> <strong>and</strong> <strong>Probes</strong> Editor Block Diagram<br />
<strong>Design</strong> Logic<br />
<strong>Probes</strong> <strong>Sources</strong><br />
altsource_probe<br />
Megafunction<br />
D Q<br />
D Q<br />
D Q<br />
D Q<br />
The ALTSOURCE_PROBE megafunction hides the detailed transactions between the<br />
JTAG controller <strong>and</strong> the registers instrumented in your design to give you a basic<br />
building block for stimulating <strong>and</strong> probing your design. Additionally, the <strong>In</strong>-<strong>System</strong><br />
<strong>Sources</strong> <strong>and</strong> <strong>Probes</strong> Editor provides single-cycle samples <strong>and</strong> single-cycle writes to<br />
selected logic nodes. You can use this feature to input simple virtual stimuli <strong>and</strong> to<br />
capture the current value on instrumented nodes. Because the <strong>In</strong>-<strong>System</strong> <strong>Sources</strong> <strong>and</strong><br />
<strong>Probes</strong> Editor gives you access to logic nodes in your design, you can toggle the<br />
inputs of low-level components during the debugging process. If used in conjunction<br />
with the SignalTap II Logic Analyzer, you can force trigger conditions to help isolate<br />
your problem <strong>and</strong> shorten your debugging process.<br />
The <strong>In</strong>-<strong>System</strong> <strong>Sources</strong> <strong>and</strong> <strong>Probes</strong> Editor allows you to easily implement control<br />
signals in your design as virtual stimuli. This feature can be especially helpful for<br />
prototyping your design, such as in the following operations:<br />
■ Creating virtual push buttons<br />
■ Creating a virtual front panel to interface with your design<br />
■ Emulating external sensor data<br />
FPGA<br />
JTAG<br />
Controller<br />
<strong>Altera</strong><br />
Programming<br />
Hardware<br />
■ Monitoring <strong>and</strong> changing run time constants on the fly<br />
Quartus II<br />
Software<br />
Quartus II H<strong>and</strong>book Version 12.0 June 2012 <strong>Altera</strong> Corporation<br />
Volume 3: Verification
Chapter 16: <strong>Design</strong> <strong>Debugging</strong> <strong>Using</strong> <strong>In</strong>-<strong>System</strong> <strong>Sources</strong> <strong>and</strong> <strong>Probes</strong> 16–3<br />
Overview<br />
The <strong>In</strong>-<strong>System</strong> <strong>Sources</strong> <strong>and</strong> <strong>Probes</strong> Editor supports Tcl comm<strong>and</strong>s that interface with<br />
all your ALTSOURCE_PROBE megafunction instances to increase the level of<br />
automation.<br />
Hardware <strong>and</strong> Software Requirements<br />
The following components are required to use the <strong>In</strong>-<strong>System</strong> <strong>Sources</strong> <strong>and</strong> <strong>Probes</strong><br />
Editor:<br />
■ Quartus II software<br />
or<br />
■ Quartus II Web Edition (with the TalkBack feature turned on)<br />
■ Download Cable (USB-Blaster TM download cable or ByteBlaster TM cable)<br />
■ <strong>Altera</strong> ® development kit or user design board with a JTAG connection to device<br />
under test<br />
The <strong>In</strong>-<strong>System</strong> <strong>Sources</strong> <strong>and</strong> <strong>Probes</strong> Editor supports the following device families:<br />
■ Arria ® GX<br />
■ Stratix ® series<br />
■ HardCopy ® II<br />
■ Cyclone ® series<br />
■ MAX ® II<br />
June 2012 <strong>Altera</strong> Corporation Quartus II H<strong>and</strong>book Version 12.0<br />
Volume 3: Verification
16–4 Chapter 16: <strong>Design</strong> <strong>Debugging</strong> <strong>Using</strong> <strong>In</strong>-<strong>System</strong> <strong>Sources</strong> <strong>and</strong> <strong>Probes</strong><br />
<strong>Design</strong> Flow <strong>Using</strong> the <strong>In</strong>-<strong>System</strong> <strong>Sources</strong> <strong>and</strong> <strong>Probes</strong> Editor<br />
<strong>Design</strong> Flow <strong>Using</strong> the <strong>In</strong>-<strong>System</strong> <strong>Sources</strong> <strong>and</strong> <strong>Probes</strong> Editor<br />
The <strong>In</strong>-<strong>System</strong> <strong>Sources</strong> <strong>and</strong> <strong>Probes</strong> Editor supports an RTL flow. Signals that you want<br />
to view in the <strong>In</strong>-<strong>System</strong> <strong>Sources</strong> <strong>and</strong> <strong>Probes</strong> editor are connected to an instance of the<br />
ALTSOURCE_PROBE megafunction. After you compile the design, you can control<br />
each ALTSOURCE_PROBE instance via the <strong>In</strong>-<strong>System</strong> <strong>Sources</strong> <strong>and</strong> <strong>Probes</strong> Editor<br />
pane or via a Tcl interface. The complete design flow is shown in Figure 16–2.<br />
Figure 16–2. FPGA <strong>Design</strong> Flow <strong>Using</strong> the <strong>In</strong>-<strong>System</strong> <strong>Sources</strong> <strong>and</strong> <strong>Probes</strong> Editor<br />
Configuring the ALTSOURCE_PROBE Megafunction<br />
Start<br />
Create a New Project<br />
or Open an Existing<br />
Project<br />
Configure<br />
altsource_probe<br />
Megafunction<br />
<strong>In</strong>strument selected logic<br />
nodes by <strong>In</strong>stantiating the<br />
altsource_probe<br />
Megafunction variation file<br />
into the HDL <strong>Design</strong><br />
Compile the design<br />
Program Target<br />
Device(s)<br />
Control Source <strong>and</strong><br />
Probe <strong>In</strong>stance(s)<br />
Functionality<br />
Satisfied?<br />
End<br />
Yes<br />
To use the <strong>In</strong>-<strong>System</strong> <strong>Sources</strong> <strong>and</strong> <strong>Probes</strong> Editor in your design, you must first<br />
instantiate the ALTSOURCE_PROBE megafunction variation file. You can configure<br />
the ALTSOURCE_PROBE megafunction with the MegaWizard Plug-<strong>In</strong> Manager.<br />
Each source or probe port can be up to 256 bits. You can have up to 128 instances of<br />
the ALTSOURCE_PROBE megafunction in your design.<br />
Quartus II H<strong>and</strong>book Version 12.0 June 2012 <strong>Altera</strong> Corporation<br />
Volume 3: Verification<br />
No<br />
Debug/Modify HDL
Chapter 16: <strong>Design</strong> <strong>Debugging</strong> <strong>Using</strong> <strong>In</strong>-<strong>System</strong> <strong>Sources</strong> <strong>and</strong> <strong>Probes</strong> 16–5<br />
<strong>Design</strong> Flow <strong>Using</strong> the <strong>In</strong>-<strong>System</strong> <strong>Sources</strong> <strong>and</strong> <strong>Probes</strong> Editor<br />
To configure the ALTSOURCE_PROBE megafunction, performing the following<br />
steps:<br />
1. On the Tools menu, click MegaWizard Plug-<strong>In</strong> Manager.<br />
2. Select Create a new custom megafunction variation.<br />
3. Click Next.<br />
4. On page 2a of the MegaWizard Plug-<strong>In</strong> Manager, make the following selections:<br />
a. <strong>In</strong> the <strong>In</strong>stalled Plug-<strong>In</strong>s list, exp<strong>and</strong> the JTAG-accessible Extensions folder<br />
<strong>and</strong> select <strong>In</strong>-<strong>System</strong> <strong>Sources</strong> <strong>and</strong> <strong>Probes</strong>.<br />
1 Verify that the currently selected device family matches the device you are<br />
targeting.<br />
b. Select an output file type <strong>and</strong> enter the name of the ALTSOURCE_PROBE<br />
megafunction. You can choose AHDL (.tdf), VHDL (.vhd), or Verilog HDL (.v)<br />
as the output file type.<br />
5. Click Next.<br />
6. On page 3 of the MegaWizard Plug-<strong>In</strong> Manager, make the following selections:<br />
a. Under Do you want to specify an <strong>In</strong>stance <strong>In</strong>dex?, turn on Yes.<br />
b. Specify the ‘<strong>In</strong>stance ID’ of this instance.<br />
c. Specify the width of the probe port. The width can be from 0 bit to 256 bits.<br />
d. Specify the width of the source port. The width can be from 0 bit to 256 bits.<br />
7. On page 3 of the MegaWizard Plug-<strong>In</strong> Manager, you can click Advanced Options<br />
<strong>and</strong> specify other options, including the following:<br />
■ What is the initial value of the source port, in hexadecimal?—Allows you to<br />
specify the initial value driven on the source port at run time.<br />
■ Write data to the source port synchronously to the source clock—Allows you<br />
to synchronize your source port write transactions with the clock domain of<br />
your choice.<br />
■ Create an enable signal for the registered source port—When turned on,<br />
creates a clock enable input for the synchronization registers. You can turn on<br />
this option only when the Write data to the source port synchronously to the<br />
source clock option is turned on.<br />
1 The <strong>In</strong>-<strong>System</strong> <strong>Sources</strong> <strong>and</strong> <strong>Probes</strong> Editor does not support simulation. You must<br />
remove the ALTSOURCE_PROBE megafunction instantiation before you create a<br />
simulation netlist.<br />
June 2012 <strong>Altera</strong> Corporation Quartus II H<strong>and</strong>book Version 12.0<br />
Volume 3: Verification
16–6 Chapter 16: <strong>Design</strong> <strong>Debugging</strong> <strong>Using</strong> <strong>In</strong>-<strong>System</strong> <strong>Sources</strong> <strong>and</strong> <strong>Probes</strong><br />
<strong>Design</strong> Flow <strong>Using</strong> the <strong>In</strong>-<strong>System</strong> <strong>Sources</strong> <strong>and</strong> <strong>Probes</strong> Editor<br />
<strong>In</strong>stantiating the ALTSOURCE_PROBE Megafunction<br />
The MegaWizard Plug-<strong>In</strong> Manager produces the necessary variation file <strong>and</strong> the<br />
instantiation template based on your inputs to the MegaWizard. Use the template to<br />
instantiate the ALTSOURCE_PROBE megafunction variation file in your design. The<br />
port information is shown in Table 16–1.<br />
Table 16–1. ALTSOURCE_PROBE Megafunction Port <strong>In</strong>formation<br />
Port Name Required? Direction Comments<br />
probe[] No <strong>In</strong>put The outputs from your design.<br />
source_clk No <strong>In</strong>put<br />
source_ena No <strong>In</strong>put<br />
You can include up to 128 instances of the ALTSOURCE_PROBE megafunction in<br />
your design, if your device has available resources. Each instance of the<br />
ALTSOURCE_PROBE megafunction uses a pair of registers per signal for the width of<br />
the widest port in the megafunction. Additionally, there is some fixed overhead logic<br />
to accommodate communication between the ALTSOURCE_PROBE instances <strong>and</strong> the<br />
JTAG controller. You can also specify an additional pair of registers per source port for<br />
synchronization.<br />
Compiling the <strong>Design</strong><br />
Source Data is written synchronously to this clock. This input is<br />
required if you turn on Source Clock in the Advanced Options box in<br />
the MegaWizard Plug-<strong>In</strong> Manager.<br />
Clock enable signal for source_clk. This input is required if specified<br />
in the Advanced Options box in the MegaWizard Plug-<strong>In</strong> Manager.<br />
source[] No Output Used to drive inputs to user design.<br />
When you compile your design with the <strong>In</strong>-<strong>System</strong> <strong>Sources</strong> <strong>and</strong> <strong>Probes</strong> megafunction<br />
instantiated, an instance of the ALTSOURCE_PROBE <strong>and</strong> SLD_HUB instances are<br />
added to your compilation hierarchy automatically. These instances provide<br />
communication between the JTAG controller <strong>and</strong> your instrumented logic.<br />
You can modify the number of connections to your design by editing the<br />
ALTSOURCE_PROBE megafunction. To open the design instance you want to modify<br />
in the MegaWizard Plug-<strong>In</strong> Manager, double-click the instance in the Project<br />
Navigator. You can then modify the connections in the HDL source file. You must<br />
recompile your design after you make changes.<br />
You can use the Quartus II incremental compilation feature to reduce compilation<br />
time. <strong>In</strong>cremental compilation allows you to organize your design into logical<br />
partitions. During recompilation of a design, incremental compilation preserves the<br />
compilation results <strong>and</strong> performance of unchanged partitions <strong>and</strong> reduces design<br />
iteration time by compiling only modified design partitions.<br />
f For more information about the Quartus II incremental compilation feature, refer to<br />
the Quartus II <strong>In</strong>cremental Compilation for Hierarchical <strong>and</strong> Team-Based <strong>Design</strong> chapter in<br />
volume 1 of the Quartus II H<strong>and</strong>book.<br />
Quartus II H<strong>and</strong>book Version 12.0 June 2012 <strong>Altera</strong> Corporation<br />
Volume 3: Verification
Chapter 16: <strong>Design</strong> <strong>Debugging</strong> <strong>Using</strong> <strong>In</strong>-<strong>System</strong> <strong>Sources</strong> <strong>and</strong> <strong>Probes</strong> 16–7<br />
Running the <strong>In</strong>-<strong>System</strong> <strong>Sources</strong> <strong>and</strong> <strong>Probes</strong> Editor<br />
Running the <strong>In</strong>-<strong>System</strong> <strong>Sources</strong> <strong>and</strong> <strong>Probes</strong> Editor<br />
The <strong>In</strong>-<strong>System</strong> <strong>Sources</strong> <strong>and</strong> <strong>Probes</strong> Editor gives you control over all<br />
ALTSOURCE_PROBE megafunction instances within your design. The editor allows<br />
you to view all available run time controllable instances of the ALTSOURCE_PROBE<br />
megafunction in your design, provides a push-button interface to drive all your<br />
source nodes, <strong>and</strong> provides a logging feature to store your probe <strong>and</strong> source data.<br />
To run the <strong>In</strong>-<strong>System</strong> <strong>Sources</strong> <strong>and</strong> <strong>Probes</strong> Editor, on the Tools menu, click <strong>In</strong>-<strong>System</strong><br />
<strong>Sources</strong> <strong>and</strong> <strong>Probes</strong> Editor.<br />
The <strong>In</strong>-<strong>System</strong> <strong>Sources</strong> <strong>and</strong> <strong>Probes</strong> Editor contains three panes:<br />
■ JTAG Chain Configuration—Allows you to specify programming hardware,<br />
device, <strong>and</strong> file settings that the <strong>In</strong>-<strong>System</strong> <strong>Sources</strong> <strong>and</strong> <strong>Probes</strong> Editor uses to<br />
program <strong>and</strong> acquire data from a device.<br />
■ <strong>In</strong>stance Manager—Displays information about the instances generated when<br />
you compile a design, <strong>and</strong> allows you to control data that the <strong>In</strong>-<strong>System</strong> <strong>Sources</strong><br />
<strong>and</strong> <strong>Probes</strong> Editor acquires.<br />
■ <strong>In</strong>-<strong>System</strong> <strong>Sources</strong> <strong>and</strong> <strong>Probes</strong> Editor—Logs all data read from the selected<br />
instance <strong>and</strong> allows you to modify source data that is written to your device.<br />
When you use the <strong>In</strong>-<strong>System</strong> <strong>Sources</strong> <strong>and</strong> <strong>Probes</strong> Editor, you do not need to open a<br />
Quartus II software project. The <strong>In</strong>-<strong>System</strong> <strong>Sources</strong> <strong>and</strong> <strong>Probes</strong> Editor retrieves all<br />
instances of the ALTSOURCE_PROBE megafunction by scanning the JTAG chain <strong>and</strong><br />
sending a query to the device selected in the JTAG Chain Configuration pane. You<br />
can also use a previously saved configuration to run the <strong>In</strong>-<strong>System</strong> <strong>Sources</strong> <strong>and</strong><br />
<strong>Probes</strong> Editor.<br />
Each <strong>In</strong>-<strong>System</strong> <strong>Sources</strong> <strong>and</strong> <strong>Probes</strong> Editor pane can access the<br />
ALTSOURCE_PROBE megafunction instances in a single device. If you have more<br />
than one device containing megafunction instances in a JTAG chain, you can launch<br />
multiple <strong>In</strong>-<strong>System</strong> <strong>Sources</strong> <strong>and</strong> <strong>Probes</strong> Editor panes to access the megafunction<br />
instances in each device.<br />
Programming Your Device With JTAG Chain Configuration<br />
After you compile your project, you must configure your FPGA before you use the<br />
<strong>In</strong>-<strong>System</strong> <strong>Sources</strong> <strong>and</strong> <strong>Probes</strong> Editor. To configure a device to use with the <strong>In</strong>-<strong>System</strong><br />
<strong>Sources</strong> <strong>and</strong> <strong>Probes</strong> Editor, perform the following steps:<br />
1. Open the <strong>In</strong>-<strong>System</strong> <strong>Sources</strong> <strong>and</strong> <strong>Probes</strong> Editor.<br />
2. <strong>In</strong> the JTAG Chain Configuration pane, point to Hardware, <strong>and</strong> then select the<br />
hardware communications device. You may be prompted to configure your<br />
hardware; in this case, click Setup.<br />
3. From the Device list, select the FPGA device to which you want to download the<br />
design (the device may be automatically detected). You may need to click Scan<br />
Chain to detect your target device.<br />
4. <strong>In</strong> the JTAG Chain Configuration pane, click to browse for the SRAM Object File<br />
(.sof) that includes the <strong>In</strong>-<strong>System</strong> <strong>Sources</strong> <strong>and</strong> <strong>Probes</strong> instance or instances. (The<br />
.sof may be automatically detected).<br />
5. Click Program Device to program the target device.<br />
June 2012 <strong>Altera</strong> Corporation Quartus II H<strong>and</strong>book Version 12.0<br />
Volume 3: Verification
16–8 Chapter 16: <strong>Design</strong> <strong>Debugging</strong> <strong>Using</strong> <strong>In</strong>-<strong>System</strong> <strong>Sources</strong> <strong>and</strong> <strong>Probes</strong><br />
Running the <strong>In</strong>-<strong>System</strong> <strong>Sources</strong> <strong>and</strong> <strong>Probes</strong> Editor<br />
<strong>In</strong>stance Manager<br />
The <strong>In</strong>stance Manager pane provides a list of all ALTSOURCE_PROBE instances in<br />
the design <strong>and</strong> allows you to configure how data is acquired from or written to those<br />
instances.<br />
The following buttons <strong>and</strong> sub-panes are provided in the <strong>In</strong>stance Manager pane:<br />
■ Read Probe Data—Samples the probe data in the selected instance <strong>and</strong> displays<br />
the probe data in the <strong>In</strong>-<strong>System</strong> <strong>Sources</strong> <strong>and</strong> <strong>Probes</strong> Editor pane.<br />
■ Continuously Read Probe Data—Continuously samples the probe data of the<br />
selected instance <strong>and</strong> displays the probe data in the <strong>In</strong>-<strong>System</strong> <strong>Sources</strong> <strong>and</strong><br />
<strong>Probes</strong> Editor pane; you can modify the sample rate via the Probe read interval<br />
setting.<br />
■ Stop Continuously Reading Probe Data—Cancels continuous sampling of the<br />
probe of the selected instance.<br />
■ Write Source Data—Writes data to all source nodes of the selected instance.<br />
■ Probe Read <strong>In</strong>terval—Displays the sample interval of all the <strong>In</strong>-<strong>System</strong> <strong>Sources</strong><br />
<strong>and</strong> Probe instances in your design; you can modify the sample interval by<br />
clicking Manual.<br />
■ Event Log—Controls the event log in the <strong>In</strong>-<strong>System</strong> <strong>Sources</strong> <strong>and</strong> <strong>Probes</strong> Editor<br />
pane.<br />
■ Write Source Data—Allows you to manually or continuously write data to the<br />
system.<br />
The status of each instance is also displayed beside each entry in the <strong>In</strong>stance<br />
Manager pane. The status indicates if the instance is Not running Offloading data,<br />
Updating data, or if an Unexpected JTAG communication error occurs. This status<br />
indicator provides information about the sources <strong>and</strong> probes instances in your design.<br />
<strong>In</strong>-<strong>System</strong> <strong>Sources</strong> <strong>and</strong> <strong>Probes</strong> Editor Pane<br />
The <strong>In</strong>-<strong>System</strong> <strong>Sources</strong> <strong>and</strong> <strong>Probes</strong> Editor pane allows you to view data from all<br />
sources <strong>and</strong> probes in your design. The data is organized according to the index<br />
number of the instance. The editor provides an easy way to manage your signals, <strong>and</strong><br />
allows you to rename signals or group them into buses. All data collected from<br />
in-system source <strong>and</strong> probe nodes is recorded in the event log <strong>and</strong> you can view the<br />
data as a timing diagram.<br />
Reading Probe Data<br />
You can read data by selecting the ALTSOURCE_PROBE instance in the <strong>In</strong>stance<br />
Manager pane <strong>and</strong> clicking Read Probe Data. This action produces a single sample of<br />
the probe data <strong>and</strong> updates the data column of the selected index in the <strong>In</strong>-<strong>System</strong><br />
<strong>Sources</strong> <strong>and</strong> <strong>Probes</strong> Editor pane. You can save the data to an event log by turning on<br />
the Save data to event log option in the <strong>In</strong>stance Manager pane.<br />
If you want to sample data from your probe instance continuously, in the <strong>In</strong>stance<br />
Manager pane, click the instance you want to read, <strong>and</strong> then click Continuously read<br />
probe data. While reading, the status of the active instance shows Unloading. You can<br />
read continuously from multiple instances.<br />
Quartus II H<strong>and</strong>book Version 12.0 June 2012 <strong>Altera</strong> Corporation<br />
Volume 3: Verification
Chapter 16: <strong>Design</strong> <strong>Debugging</strong> <strong>Using</strong> <strong>In</strong>-<strong>System</strong> <strong>Sources</strong> <strong>and</strong> <strong>Probes</strong> 16–9<br />
Tcl interface for the <strong>In</strong>-<strong>System</strong> <strong>Sources</strong> <strong>and</strong> <strong>Probes</strong> Editor<br />
You can access read data with the shortcut menus in the <strong>In</strong>stance Manager pane.<br />
To adjust the probe read interval, in the <strong>In</strong>stance Manager pane, turn on the Manual<br />
option in the Probe read interval sub-pane, <strong>and</strong> specify the sample rate in the text<br />
field next to the Manual option. The maximum sample rate depends on your<br />
computer setup. The actual sample rate is shown in the Current interval box. You can<br />
adjust the event log window buffer size in the Maximum Size box.<br />
Writing Data<br />
To modify the source data you want to write into the ALTSOURCE_PROBE instance,<br />
click the name field of the signal you want to change. For buses of signals, you can<br />
double-click the data field <strong>and</strong> type the value you want to drive out to the<br />
ALTSOURCE_PROBE instance. The <strong>In</strong>-<strong>System</strong> <strong>Sources</strong> <strong>and</strong> <strong>Probes</strong> Editor stores the<br />
modified source data values in a temporary buffer. Modified values that are not<br />
written out to the ALTSOURCE_PROBE instances appear in red. To update the<br />
ALTSOURCE_PROBE instance, highlight the instance in the <strong>In</strong>stance Manager pane<br />
<strong>and</strong> click Write source data. The Write source data function is also available via the<br />
shortcut menus in the <strong>In</strong>stance Manager pane.<br />
The <strong>In</strong>-<strong>System</strong> <strong>Sources</strong> <strong>and</strong> <strong>Probes</strong> Editor provides the option to continuously update<br />
each ALTSOURCE_PROBE instance. Continuous updating allows any modifications<br />
you make to the source data buffer to also write immediately to the<br />
ALTSOURCE_PROBE instances. To continuously update the ALTSOURCE_PROBE<br />
instances, change the Write source data field from Manually to Continuously.<br />
Organizing Data<br />
The <strong>In</strong>-<strong>System</strong> <strong>Sources</strong> <strong>and</strong> <strong>Probes</strong> Editor pane allows you to group signals into<br />
buses, <strong>and</strong> also allows you to modify the display options of the data buffer.<br />
To create a group of signals, select the node names you want to group, right-click <strong>and</strong><br />
select Group. You can modify the display format in the Bus Display Format <strong>and</strong> the<br />
Bus Bit order shortcut menus.<br />
The <strong>In</strong>-<strong>System</strong> <strong>Sources</strong> <strong>and</strong> <strong>Probes</strong> Editor pane allows you to rename any signal. To<br />
rename a signal, double-click the name of the signal <strong>and</strong> type the new name.<br />
The event log contains a record of the most recent samples. The buffer size is<br />
adjustable up to 128k samples. The time stamp for each sample is logged <strong>and</strong> is<br />
displayed above the event log of the active instance as you move your pointer over<br />
the data samples.<br />
You can save the changes that you make <strong>and</strong> the recorded data to a <strong>Sources</strong> <strong>and</strong><br />
<strong>Probes</strong> File (.spf). To save changes, on the File menu, click Save. The file contains all<br />
the modifications you made to the signal groups, as well as the current data event log.<br />
Tcl interface for the <strong>In</strong>-<strong>System</strong> <strong>Sources</strong> <strong>and</strong> <strong>Probes</strong> Editor<br />
To support automation, the <strong>In</strong>-<strong>System</strong> <strong>Sources</strong> <strong>and</strong> <strong>Probes</strong> Editor supports the<br />
procedures described in this chapter in the form of Tcl comm<strong>and</strong>s. The Tcl package for<br />
the <strong>In</strong>-<strong>System</strong> <strong>Sources</strong> <strong>and</strong> <strong>Probes</strong> Editor is included by default when you run<br />
quartus_stp.<br />
June 2012 <strong>Altera</strong> Corporation Quartus II H<strong>and</strong>book Version 12.0<br />
Volume 3: Verification
16–10 Chapter 16: <strong>Design</strong> <strong>Debugging</strong> <strong>Using</strong> <strong>In</strong>-<strong>System</strong> <strong>Sources</strong> <strong>and</strong> <strong>Probes</strong><br />
Tcl interface for the <strong>In</strong>-<strong>System</strong> <strong>Sources</strong> <strong>and</strong> <strong>Probes</strong> Editor<br />
The Tcl interface for the <strong>In</strong>-<strong>System</strong> <strong>Sources</strong> <strong>and</strong> <strong>Probes</strong> Editor provides a powerful<br />
platform to help you debug your design. The Tcl interface is especially helpful for<br />
debugging designs that require toggling multiple sets of control inputs. You can<br />
combine multiple comm<strong>and</strong>s with a Tcl script to define a custom comm<strong>and</strong> set.<br />
f For more information about Tcl scripting, refer to the Tcl Scripting chapter in volume 2<br />
of the Quartus II H<strong>and</strong>book. For more information about settings <strong>and</strong> constraints in the<br />
Quartus II software, refer to the Quartus II Settings File Manual. For more information<br />
about comm<strong>and</strong>-line scripting, refer to the Comm<strong>and</strong>-Line Scripting chapter in<br />
volume 2 of the Quartus II H<strong>and</strong>book.<br />
Table 16–2 shows the Tcl comm<strong>and</strong>s you can use instead of the <strong>In</strong>-<strong>System</strong> <strong>Sources</strong> <strong>and</strong><br />
<strong>Probes</strong> Editor.<br />
Table 16–2. <strong>In</strong>-<strong>System</strong> <strong>Sources</strong> <strong>and</strong> <strong>Probes</strong> Tcl Comm<strong>and</strong>s<br />
Comm<strong>and</strong> Argument Description<br />
start_insystem_source_pro<br />
be<br />
get_insystem_source_<br />
probe_instance_info<br />
read_probe_data<br />
read_source_data<br />
write_source_data<br />
end_interactive_probe None<br />
-device_name <br />
-hardware_name <br />
-device_name <br />
-hardware_name <br />
-instance_index<br />
<br />
-value_in_hex (optional)<br />
-instance_index<br />
<br />
-value_in_hex (optional)<br />
-instance_index<br />
<br />
-value <br />
-value_in_hex (optional)<br />
Opens a h<strong>and</strong>le to a device with the<br />
specified hardware.<br />
Call this comm<strong>and</strong> before starting any<br />
transactions.<br />
Returns a list of all ALTSOURCE_PROBE<br />
instances in your design. Each record<br />
returned is in the following format:<br />
{, , , }<br />
Retrieves the current value of the probe.<br />
A string is returned that specifies the status<br />
of each probe, with the MSB as the<br />
left-most bit.<br />
Retrieves the current value of the sources.<br />
A string is returned that specifies the status<br />
of each source, with the MSB as the<br />
left-most bit.<br />
Sets the value of the sources.<br />
A binary string is sent to the source ports,<br />
with the MSB as the left-most bit.<br />
Releases the JTAG chain.<br />
Issue this comm<strong>and</strong> when all transactions<br />
are finished.<br />
Example 16–1 shows an excerpt from a Tcl script with procedures that control the<br />
ALTSOURCE_PROBE instances of the design as shown in Figure 16–3. The example<br />
design contains a DCFIFO with ALTSOURCE_PROBE instances to read from <strong>and</strong><br />
write to the DCFIFO. A set of control muxes are added to the design to control the<br />
flow of data to the DCFIFO between the input pins <strong>and</strong> the ALTSOURCE_PROBE<br />
instances. A pulse generator is added to the read request <strong>and</strong> write request control<br />
lines to guarantee a single sample read or write. The ALTSOURCE_PROBE instances,<br />
Quartus II H<strong>and</strong>book Version 12.0 June 2012 <strong>Altera</strong> Corporation<br />
Volume 3: Verification
Chapter 16: <strong>Design</strong> <strong>Debugging</strong> <strong>Using</strong> <strong>In</strong>-<strong>System</strong> <strong>Sources</strong> <strong>and</strong> <strong>Probes</strong> 16–11<br />
Tcl interface for the <strong>In</strong>-<strong>System</strong> <strong>Sources</strong> <strong>and</strong> <strong>Probes</strong> Editor<br />
when used with the script in Example 16–1, provide visibility into the contents of the<br />
FIFO by performing single sample write <strong>and</strong> read operations <strong>and</strong> reporting the state<br />
of the full <strong>and</strong> empty status flags.<br />
Use the Tcl script in debugging situations to either empty or preload the FIFO in your<br />
design. For example, you can use this feature to preload the FIFO to match a trigger<br />
condition you have set up within the SignalTap II Logic Analyzer.<br />
Figure 16–3. A DCFIFO Example <strong>Design</strong> Controlled by the Tcl Script in Example 16–1<br />
altsource_probe<br />
(instance 0)<br />
Write_clock<br />
Wr_req_in<br />
Data_in[7..0]<br />
Rd_req_in<br />
altsource_probe<br />
(instance 1)<br />
Read_clock<br />
S_write_req<br />
S_data[7..0]<br />
S_read_req<br />
Source_write_sel<br />
D Q<br />
D Q<br />
Source_read_sel<br />
Write_req<br />
Data[7..0]<br />
Write_clock<br />
Read_req<br />
Read_clock<br />
June 2012 <strong>Altera</strong> Corporation Quartus II H<strong>and</strong>book Version 12.0<br />
Volume 3: Verification<br />
Wr_full<br />
Q[7..0]<br />
Rd_empty<br />
Data_out
16–12 Chapter 16: <strong>Design</strong> <strong>Debugging</strong> <strong>Using</strong> <strong>In</strong>-<strong>System</strong> <strong>Sources</strong> <strong>and</strong> <strong>Probes</strong><br />
Tcl interface for the <strong>In</strong>-<strong>System</strong> <strong>Sources</strong> <strong>and</strong> <strong>Probes</strong> Editor<br />
Example 16–1. Tcl Script Procedures for Reading <strong>and</strong> Writing to the DCFIFO in Figure 16–3 (Part 1 of 2)<br />
## Setup USB hardware - assumes only USB Blaster is installed <strong>and</strong><br />
## an FPGA is the only device in the JTAG chain<br />
set usb [lindex [get_hardware_names] 0]<br />
set device_name [lindex [get_device_names -hardware_name $usb] 0]<br />
## write procedure : argument value is integer<br />
proc write {value} {<br />
global device_name usb<br />
variable full<br />
start_insystem_source_probe -device_name $device_name -hardware_name $usb<br />
#read full flag<br />
set full [read_probe_data -instance_index 0]<br />
if {$full == 1} {end_insystem_source_probe<br />
return "Write Buffer Full"<br />
}<br />
Quartus II H<strong>and</strong>book Version 12.0 June 2012 <strong>Altera</strong> Corporation<br />
Volume 3: Verification
Chapter 16: <strong>Design</strong> <strong>Debugging</strong> <strong>Using</strong> <strong>In</strong>-<strong>System</strong> <strong>Sources</strong> <strong>and</strong> <strong>Probes</strong> 16–13<br />
<strong>Design</strong> Example: Dynamic PLL Reconfiguration<br />
Example 16–1. Tcl Script Procedures for Reading <strong>and</strong> Writing to the DCFIFO in Figure 16–3 (Part 2 of 2)<br />
}<br />
##toggle select line, drive value onto port, toggle enable<br />
##bits 7:0 of instance 0 is S_data[7:0]; bit 8 = S_write_req;<br />
##bit 9 = Source_write_sel<br />
##int2bits is custom procedure that returns a bitstring from an integer<br />
## argument<br />
write_source_data -instance_index 0 -value /[int2bits [expr 0x200 | $value]]<br />
write_source_data -instance_index 0 -value [int2bits [expr 0x300 | $value]]<br />
##clear transaction<br />
write_source_data -instance_index 0 -value 0<br />
end_insystem_source_probe<br />
proc read {} {<br />
}<br />
global device_name usb<br />
variable empty<br />
start_insystem_source_probe -device_name $device_name -hardware_name $usb<br />
##read empty flag : probe port[7:0] reads FIFO output; bit 8 reads empty_flag<br />
set empty [read_probe_data -instance_index 1]<br />
if {[regexp {1........} $empty]} { end_insystem_source_probe<br />
return "FIFO empty" }<br />
## toggle select line for read transaction<br />
## Source_read_sel = bit 0; s_read_reg = bit 1<br />
## pulse read enable on DC FIFO<br />
write_source_data -instance_index 1 -value 0x1 -value_in_hex<br />
write_source_data -instance_index 1 -value 0x3 -value_in_hex<br />
set x [read_probe_data -instance_index 1 ]<br />
end_insystem_source_probe<br />
return $x<br />
<strong>Design</strong> Example: Dynamic PLL Reconfiguration<br />
The <strong>In</strong>-<strong>System</strong> <strong>Sources</strong> <strong>and</strong> <strong>Probes</strong> Editor can help you create a virtual front panel<br />
during the prototyping phase of your design. You can create relatively simple, high<br />
functioning designs of in a short amount of time. The following PLL reconfiguration<br />
example demonstrates how to use the <strong>In</strong>-<strong>System</strong> <strong>Sources</strong> <strong>and</strong> <strong>Probes</strong> Editor to provide<br />
a GUI to dynamically reconfigure a Stratix PLL.<br />
Stratix PLLs allow you to dynamically update PLL coefficients during run time. Each<br />
enhanced PLL within the Stratix device contains a register chain that allows you to<br />
modify the pre-scale counters (m <strong>and</strong> n values), output divide counters, <strong>and</strong> delay<br />
counters. <strong>In</strong> addition, the ALTPLL_RECONFIG megafunction provides an easy<br />
interface to access the register chain counters. The ALTPLL_RECONFIG<br />
June 2012 <strong>Altera</strong> Corporation Quartus II H<strong>and</strong>book Version 12.0<br />
Volume 3: Verification
16–14 Chapter 16: <strong>Design</strong> <strong>Debugging</strong> <strong>Using</strong> <strong>In</strong>-<strong>System</strong> <strong>Sources</strong> <strong>and</strong> <strong>Probes</strong><br />
<strong>Design</strong> Example: Dynamic PLL Reconfiguration<br />
megafunction provides a cache that contains all modifiable PLL parameters. After you<br />
update all the PLL parameters in the cache, the ALTPLL_RECONFIG megafunction<br />
drives the PLL register chain to update the PLL with the updated parameters.<br />
Figure 16–4 shows a Stratix-enhanced PLL with reconfigurable coefficients.<br />
1 Stratix II <strong>and</strong> Stratix III devices also allow you to dynamically reconfigure PLL<br />
parameters. For more information about these families, refer to the appropriate data<br />
sheet. For more information about dynamic PLL reconfiguration, refer to AN 282:<br />
Implementing PLL Reconfiguration in Stratix & Stratix GX Devices or AN 367:<br />
Implementing PLL Reconfiguration in Stratix II Devices.<br />
Figure 16–4. Stratix-Enhanced PLL with Reconfigurable Coefficients<br />
f REF<br />
sc<strong>and</strong>ata<br />
scanclk<br />
scanaclr<br />
Counters <strong>and</strong> Clock<br />
Delay Settings are<br />
Programmable<br />
÷n Δtn<br />
LSB MSB<br />
(1) (2)<br />
Charge Loop<br />
PFD VCO<br />
Pump Filter<br />
÷m<br />
The following design example uses an ALTSOURCE_PROBE instance to update the<br />
PLL parameters in the ALTPLL_RECONFIG megafunction cache. The<br />
ALTPLL_RECONFIG megafunction connects to an enhanced PLL in a Stratix FPGA to<br />
drive the register chain containing the PLL reconfigurable coefficients. This design<br />
example uses a Tcl/Tk script to generate a GUI where you can enter in new m <strong>and</strong> n<br />
values for the enhanced PLL. The Tcl script extracts the m <strong>and</strong> n values from the GUI,<br />
shifts the values out to the ALTSOURCE_PROBE instances to update the values in the<br />
Quartus II H<strong>and</strong>book Version 12.0 June 2012 <strong>Altera</strong> Corporation<br />
Volume 3: Verification<br />
Δtm<br />
LSB MSB<br />
All Output Counters <strong>and</strong><br />
Clock Delay Settings can<br />
be Programmed Dynamically<br />
÷g0 Δtg0<br />
LSB MSB<br />
÷g3 Δtg3<br />
LSB MSB<br />
LSB<br />
÷e3 Δte3<br />
MSB
Chapter 16: <strong>Design</strong> <strong>Debugging</strong> <strong>Using</strong> <strong>In</strong>-<strong>System</strong> <strong>Sources</strong> <strong>and</strong> <strong>Probes</strong> 16–15<br />
<strong>Design</strong> Example: Dynamic PLL Reconfiguration<br />
ALTPLL_RECONFIG megafunction cache, <strong>and</strong> asserts the reconfiguration signal on<br />
the ALTPLL_RECONFIG megafunction. The reconfiguration signal on the<br />
ALTPLL_RECONFIG megafunction starts the register chain transaction to update all<br />
PLL reconfigurable coefficients. A block diagram of a design example is shown in<br />
Figure 16–5. The Tk GUI is shown in Figure 16–6.<br />
Figure 16–5. Block Diagram of Dynamic PLL Reconfiguration <strong>Design</strong> Example<br />
50 MHz<br />
<strong>In</strong>-<strong>System</strong> <strong>Sources</strong><br />
<strong>and</strong> <strong>Probes</strong><br />
Tcl <strong>In</strong>terface<br />
JTAG<br />
<strong>In</strong>terface<br />
<strong>In</strong>-<strong>System</strong><br />
<strong>Sources</strong> <strong>and</strong> <strong>Probes</strong><br />
Counter<br />
Parameters<br />
Stratix FPGA<br />
alt_pll_reconfig<br />
Megafunction<br />
PLL_sc<strong>and</strong>ata<br />
PLL_sc<strong>and</strong>lk<br />
PLL_scanaclr<br />
Figure 16–6. <strong>In</strong>teractive PLL Reconfiguration GUI Created with Tk <strong>and</strong> <strong>In</strong>-<strong>System</strong> <strong>Sources</strong> <strong>and</strong> <strong>Probes</strong> Tcl Package<br />
This design example was created using a Nios ® II Development Kit, Stratix Edition.<br />
The file sourceprobe_DE_dynamic_pll.zip contains all the necessary files for running<br />
this design example, including the following:<br />
■ Readme.txt—A text file that describes the files contained in the design example<br />
<strong>and</strong> provides instructions about running the Tk GUI shown in Figure 16–6.<br />
■ <strong>In</strong>teractive_Reconfig.qar—The archived Quartus II project for this design<br />
example.<br />
f Download the sourceprobe_DE_dynamic_pll.zip file from the Literature: Quartus II<br />
H<strong>and</strong>book page of the <strong>Altera</strong> website.<br />
June 2012 <strong>Altera</strong> Corporation Quartus II H<strong>and</strong>book Version 12.0<br />
Volume 3: Verification<br />
f ref<br />
Stratix-Enhanced<br />
PLL<br />
E 0<br />
C 0<br />
C 1
16–16 Chapter 16: <strong>Design</strong> <strong>Debugging</strong> <strong>Using</strong> <strong>In</strong>-<strong>System</strong> <strong>Sources</strong> <strong>and</strong> <strong>Probes</strong><br />
Conclusion<br />
Conclusion<br />
The <strong>In</strong>-<strong>System</strong> <strong>Sources</strong> <strong>and</strong> <strong>Probes</strong> Editor provides stimuli <strong>and</strong> receives responses<br />
from the target design during run time. With the simple <strong>and</strong> intuitive interface, you<br />
can add virtual inputs to your design during run time without using external<br />
equipment. When used in conjunction with the SignalTap II Logic Analyzer, you can<br />
use the <strong>In</strong>-<strong>System</strong> <strong>Sources</strong> <strong>and</strong> <strong>Probes</strong> Editor to obtain greater control of the signals in<br />
your design, <strong>and</strong> thus help shorten the verification cycle.<br />
Document Revision History<br />
Table 16–3. Document Revision History<br />
Table 16–3 shows the revision history for this chapter.<br />
Date Version Changes<br />
June 2010 12.0.0 Removed survey link.<br />
November 2011 10.1.1 Template update.<br />
December 2010 10.1.0 Minor corrections. Changed to new document template.<br />
July 2010 10.0.0 Minor corrections.<br />
November 2009 9.1.0<br />
■<br />
■<br />
Removed references to obsolete devices.<br />
Style changes.<br />
March 2009 9.0.0 No change to content.<br />
November 2008 8.1.0 Changed to 8-1/2 x 11 page size. No change to content.<br />
May 2008 8.0.0<br />
■ Documented that this feature does not support simulation on page 17–5<br />
■ Updated Figure 17–8 for <strong>In</strong>teractive PLL reconfiguration manager<br />
■ Added hyperlinks to referenced documents throughout the chapter<br />
■ Minor editorial updates<br />
f For previous versions of the Quartus II H<strong>and</strong>book, refer to the Quartus II H<strong>and</strong>book<br />
Archive.<br />
Quartus II H<strong>and</strong>book Version 12.0 June 2012 <strong>Altera</strong> Corporation<br />
Volume 3: Verification