Bios Integrator 110 User Manual - Mesa Labs
Bios Integrator 110 User Manual - Mesa Labs
Bios Integrator 110 User Manual - Mesa Labs

You also want an ePaper? Increase the reach of your titles
YUMPU automatically turns print PDFs into web optimized ePapers that Google loves.
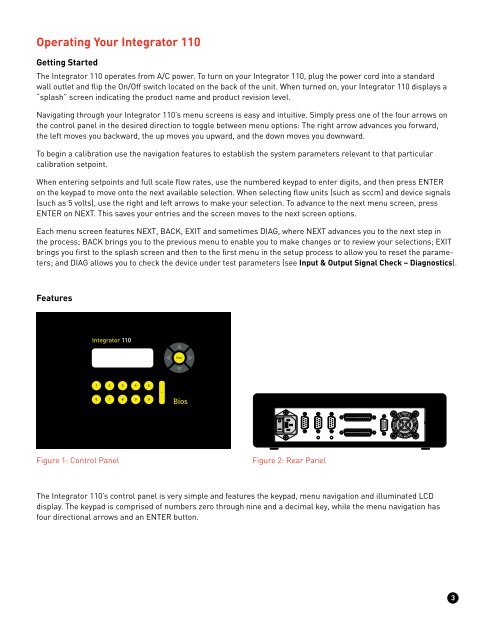
Operating Your <strong>Integrator</strong> <strong>110</strong>Getting StartedThe <strong>Integrator</strong> <strong>110</strong> operates from A/C power. To turn on your <strong>Integrator</strong> <strong>110</strong>, plug the power cord into a standardwall outlet and flip the On/Off switch located on the back of the unit. When turned on, your <strong>Integrator</strong> <strong>110</strong> displays a“splash” screen indicating the product name and product revision level.Navigating through your <strong>Integrator</strong> <strong>110</strong>’s menu screens is easy and intuitive. Simply press one of the four arrows onthe control panel in the desired direction to toggle between menu options: The right arrow advances you forward,the left moves you backward, the up moves you upward, and the down moves you downward.To begin a calibration use the navigation features to establish the system parameters relevant to that particularcalibration setpoint.When entering setpoints and full scale flow rates, use the numbered keypad to enter digits, and then press ENTERon the keypad to move onto the next available selection. When selecting flow units (such as sccm) and device signals(such as 5 volts), use the right and left arrows to make your selection. To advance to the next menu screen, pressENTER on NEXT. This saves your entries and the screen moves to the next screen options.Each menu screen features NEXT, BACK, EXIT and sometimes DIAG, where NEXT advances you to the next step inthe process; BACK brings you to the previous menu to enable you to make changes or to review your selections; EXITbrings you first to the splash screen and then to the first menu in the setup process to allow you to reset the parameters;and DIAG allows you to check the device under test parameters (see Input & Output Signal Check – Diagnostics).FeaturesFigure 1: Control PanelFigure 2: Rear PanelThe <strong>Integrator</strong> <strong>110</strong>’s control panel is very simple and features the keypad, menu navigation and illuminated LCDdisplay. The keypad is comprised of numbers zero through nine and a decimal key, while the menu navigation hasfour directional arrows and an ENTER button.3