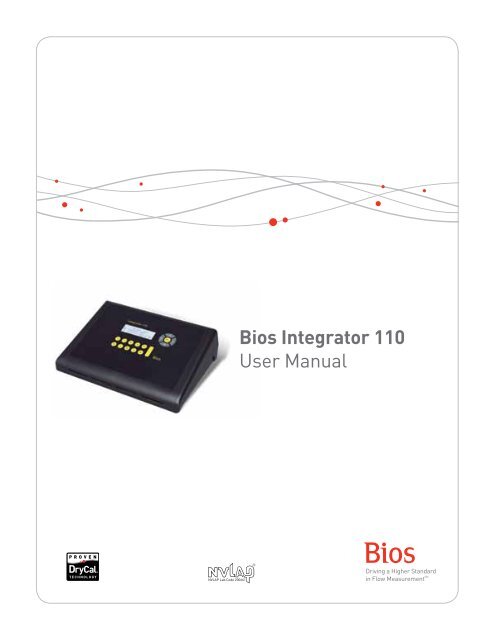
Bios Integrator 110 User Manual - Mesa Labs
Bios Integrator 110 User Manual - Mesa Labs
Bios Integrator 110 User Manual - Mesa Labs

Create successful ePaper yourself
Turn your PDF publications into a flip-book with our unique Google optimized e-Paper software.
<strong>Bios</strong> <strong>Integrator</strong> <strong>110</strong><strong>User</strong> <strong>Manual</strong>
Table of ContentsIntroduction................................................................................................................................................................ 2About Your <strong>Integrator</strong> <strong>110</strong>.......................................................................................................................................... 2Operating Your <strong>Integrator</strong> <strong>110</strong>.................................................................................................................................... 3Getting Started........................................................................................................................................................................................... 3Features..................................................................................................................................................................................................... 3Using Your <strong>Integrator</strong> <strong>110</strong>........................................................................................................................................... 4Connectivity Diagram................................................................................................................................................................................ 4The Main Menu: Three Modes of Operation.............................................................................................................................................. 5Input & Output Signal Check – Diagnostics.............................................................................................................................................. 5MFC Control: Operation One..................................................................................................................................................................... 5Compare MFC and ML: Operation Two...................................................................................................................................................... 6Compare MFM and ML: Operation Three.................................................................................................................................................. 7Maintenance and Troubleshooting.............................................................................................................................. 9Annual Calibration..................................................................................................................................................................................... 9Sending Your <strong>Integrator</strong> <strong>110</strong> to <strong>Bios</strong>.......................................................................................................................................................... 9Troubleshooting........................................................................................................................................................................................10Shipping....................................................................................................................................................................................................10Pin Configuration (25-pin D-Sub).............................................................................................................................. 11Make MFC/MFM Cable.............................................................................................................................................. 12DB25 Pin Designation...............................................................................................................................................................................13<strong>Integrator</strong> <strong>110</strong> Specifications.................................................................................................................................... 13Limited Warranty...................................................................................................................................................... 14AccuracyReliabilityConvenience1
IntroductionCongratulations! You’ve chosen the <strong>Bios</strong> <strong>Integrator</strong> <strong>110</strong> command, control and readout device. This powerful toolintegrates Proven DryCal ® Technology and a range of systems to make it easier than ever to perform in-houseverifications and multi-setpoint calibrations of your analog mass flow devices.Before you get started, we recommend taking a few moments to review this manual and familiarize yourselfwith your <strong>Integrator</strong> <strong>110</strong>. If at any time you have questions regarding its operation, please contact <strong>Bios</strong> throughour Web site (www.biosint.com), or call us at 973.492.8400 to speak with one of our knowledgeable customersupport representatives.About Your <strong>Integrator</strong> <strong>110</strong>The <strong>Integrator</strong> <strong>110</strong> is a microprocessor-based, two-channel device that powers, controls and integrates analog massflow controllers (MFC) and mass flow meters (MFM), enabling them to be verified and calibrated by the <strong>Bios</strong> Met Lab ®and Definer ® Series of primary piston provers, which feature Proven DryCal ® Technology. Please note that theseproducts are referred to within your <strong>Integrator</strong>’s menu screens as “DryCal”.One of the <strong>Integrator</strong>’s channels controls and monitors the gas flow through an MFC, the other channel monitorsthe flow through an MFM.Your <strong>Integrator</strong> <strong>110</strong> comes with the following:• Power Cord• PC Serial Cable• Calibration Certificate (voltage and current)• <strong>Manual</strong>2
Operating Your <strong>Integrator</strong> <strong>110</strong>Getting StartedThe <strong>Integrator</strong> <strong>110</strong> operates from A/C power. To turn on your <strong>Integrator</strong> <strong>110</strong>, plug the power cord into a standardwall outlet and flip the On/Off switch located on the back of the unit. When turned on, your <strong>Integrator</strong> <strong>110</strong> displays a“splash” screen indicating the product name and product revision level.Navigating through your <strong>Integrator</strong> <strong>110</strong>’s menu screens is easy and intuitive. Simply press one of the four arrows onthe control panel in the desired direction to toggle between menu options: The right arrow advances you forward,the left moves you backward, the up moves you upward, and the down moves you downward.To begin a calibration use the navigation features to establish the system parameters relevant to that particularcalibration setpoint.When entering setpoints and full scale flow rates, use the numbered keypad to enter digits, and then press ENTERon the keypad to move onto the next available selection. When selecting flow units (such as sccm) and device signals(such as 5 volts), use the right and left arrows to make your selection. To advance to the next menu screen, pressENTER on NEXT. This saves your entries and the screen moves to the next screen options.Each menu screen features NEXT, BACK, EXIT and sometimes DIAG, where NEXT advances you to the next step inthe process; BACK brings you to the previous menu to enable you to make changes or to review your selections; EXITbrings you first to the splash screen and then to the first menu in the setup process to allow you to reset the parameters;and DIAG allows you to check the device under test parameters (see Input & Output Signal Check – Diagnostics).FeaturesFigure 1: Control PanelFigure 2: Rear PanelThe <strong>Integrator</strong> <strong>110</strong>’s control panel is very simple and features the keypad, menu navigation and illuminated LCDdisplay. The keypad is comprised of numbers zero through nine and a decimal key, while the menu navigation hasfour directional arrows and an ENTER button.3
The rear panel is more complex. It features the following ports and switches for integrating various components(from left to right):POWER INPUT. An IEC-320 power connector for A/C power operation with an integral On/Off power switch.PC. A 9-pin female D-sub connector. Connects your <strong>Integrator</strong> <strong>110</strong> to your PC.DRYCAL. A 9-pin female D-sub connector. Connects your <strong>Integrator</strong> <strong>110</strong> to your <strong>Bios</strong> Met Lab ® Series primarypiston prover.AUX. An extra port that’s currently not used, but may serve as an expansion port in the future.MFM/EXPANSION PORT. A multi-function port. It’s a 25-pin D-sub connector for attaching MFM cables (cables varyby MFM manufacturer; <strong>Bios</strong> offers various cable types for your convenience). It may also be used to “warm up” amass flow device while you’re simultaneously calibrating another device via the MFC port. If and when <strong>Bios</strong> enablesthe manipulation of additional devices, it will also serve as an expansion port.MFC PORT. A 25-pin D-sub connector for attaching MFC cables (cables vary by MFC manufacturer; <strong>Bios</strong> offers variouscable types for your convenience).VALVE. An extra port that’s currently not used, but may serve as an expansion port in the future.FAN. A 25mm x 8mm cooling fan (exhaust) with a finger guard for your protection.RESET SWITCH. A “hard” reset that returns your <strong>Integrator</strong> <strong>110</strong> to the main menu. Your settings for the currentcalibration process will be lost.PROGRAM LOAD SWITCH. Allows you to “flash” upgrade your <strong>Integrator</strong> <strong>110</strong>’s firmware in order to take advantage ofavailable upgrades.Using Your <strong>Integrator</strong> <strong>110</strong>Connectivity DiagramUse Figure 3 to familiarize yourself with your <strong>Integrator</strong> <strong>110</strong>’s connectivity options.Your <strong>Integrator</strong> <strong>110</strong> is equipped with three serial ports (RS-232). The PC port connects to your PC, the DryCal port toyour <strong>Bios</strong> Met Lab and Definer Series primary piston prover, and the AUX port is an expansion port for future use asavailable. Two D-25 (D-Sub) ports are available for use with MFCs and MFMs. The program load switch enables you toflash upgrade your <strong>Integrator</strong> <strong>110</strong>.Figure 3 – Connectivity DiagramPC DryCal AUX MFMVentilation FanPower InletResetProgramLoadMFCValve4
The Main Menu: Three Modes of OperationYour <strong>Integrator</strong> <strong>110</strong>’s main menu offers three modes of operation:Control MFC. Allows you to create an MFC setpoint and read the MFC’s output signal.Compare MFC and DryCal. With the MFC as the device under test, you can create an MFC setpoint, read the MFC’soutput signal and then compare the output signal to your DryCal’s flow measurements. A deviation percentage isdisplayed on your <strong>Integrator</strong> <strong>110</strong>’s screen.Compare MFM and DryCal. With the MFC as the flow source and the MFM as the device under test, you can createan MFC setpoint to generate a specific flow rate, read your MFM’s output signal and then compare the output signalto your DryCal’s flow measurements. A deviation percentage is displayed on your <strong>Integrator</strong> <strong>110</strong>’s screen.Input & Output Signal Check – DiagnosticsAs a quality assurance measure, your <strong>Integrator</strong> <strong>110</strong> has a diagnostics function that enables you to review the setpointand/or output signals from your mass flow device. Within certain menu screens (such as MFC Output), Diagnosticsmay be accessed during any of the three modes of operation by navigating to the “Diag” option, located in thebottom-right corner of the screen.The signal levels reflect the MFC’s setpoint and output flow rates, or MFM’s output flow rate.Control MFC: Operation OneMFC Control describes the mode of operation for controlling an MFC using your <strong>Integrator</strong> <strong>110</strong>.Gas SupplyMFC1. Attach the appropriate MFC cable into the MFC and your <strong>Integrator</strong> <strong>110</strong>.2. Connect your gas supply to the MFC.3. Turn on your <strong>Integrator</strong> <strong>110</strong>.4. Once the splash screen ends, select “Control MFC” and press ENTER.5. At “Input to MFC” select the analog signal, then navigate to “Next” and press ENTER.6. At “Output from MFC” select the analog signal, then navigate to “Next” and press ENTER.7. At “Connect MFC” select “Next” and press ENTER to begin “Checking Setup.” Your <strong>Integrator</strong> <strong>110</strong> willcheck the MFC’s connection.8. Upon successful setup, input the “MFC Full Scale Flow” value (the rated flow of the MFC) using the keypad,and press ENTER. Then, arrow down to select the flow units using the right and left arrows, then navigate to“Next” and press ENTER.9. Input the “MFC Setpoint” (within the rated specification of the MFC) using the keypad, and press ENTER.Then, navigate to “Next” and press ENTER.10. When the display begins flashing, your <strong>Integrator</strong> <strong>110</strong> is updating the MFC’s output reading against theMFC’s setpoint value.11. To change the MFC’s flow, navigate to BACK and press ENTER. Input the new “MFC Setpoint”and follow Steps 9 through 10 as prompted.5
Compare MFC and DryCal: Operation TwoCompare MFC and DryCal describes the mode of operation for comparing an MFC to your Met Lab primarypiston prover using your <strong>Integrator</strong> <strong>110</strong>.Gas Supply MFC DryCal1. Attach the appropriate MFC cable into the MFC and your <strong>Integrator</strong> <strong>110</strong>.2. Attach the 9-pin cable into your DryCal and your <strong>Integrator</strong> <strong>110</strong>.3. Connect your gas supply to the MFC, connect the outlet of the MFC to the inlet of the DryCal.4. Turn on your <strong>Integrator</strong> <strong>110</strong> and your DryCal. Make sure that your DryCal is set to read insccm and the temperature correction matches that of the MFC under test.5. Once the splash screen ends, select “Compare MFC and DryCal” and press ENTER.6. At “Input to MFC” select the analog signal, then navigate to “Next” and press ENTER.7. At “Output from MFC” select the analog signal, then navigate to “Next” and press ENTER.8. At “Connect MFC and DryCal” select “Next” and press ENTER to begin “Checking Setup.” Your <strong>Integrator</strong> <strong>110</strong>will check the communication among all systems.9. Upon successful setup, at “% Deviation” select the deviation type, then navigate to “Next” and press ENTER.10. At “MFC Full Scale Flow” (the rated flow of the MFC) input the value using the keypad, and press ENTER.Then, arrow down to select the flow units using the right and left arrows, then navigate to “Next” andpress ENTER.11. Input the “MFC Setpoint” (within the rated specification of the MFC) using the keypad, and press ENTER.Then, navigate to “Next” and press ENTER.12. When the display begins flashing, your <strong>Integrator</strong> <strong>110</strong> is updating the MFC’s output reading against theMFC’s setpoint value, and the DryCal’s flow measurement is recorded and updated. The deviation percentagebetween MFC and the DryCal is displayed.13. To change the MFC’s flow, navigate to BACK and press ENTER. Input the new “MFC Setpoint” andfollow Steps 11 through 12 as prompted.6
Compare MFM and DryCal: Operation ThreeCompare MFM and DryCal describes the mode of operation for controlling flow through an MFM via an MFC or viaan external device (i.e., needle valve, sonic nozzle) using your <strong>Integrator</strong> <strong>110</strong>.Via an MFCGas Supply MFC MFM DryCal1. Attach the appropriate MFC cable into the MFC and your <strong>Integrator</strong> <strong>110</strong>.2. Attach the appropriate MFM cable into the MFM and your <strong>Integrator</strong> <strong>110</strong>.3. Attach the 9-pin cable into your DryCal and your <strong>Integrator</strong> <strong>110</strong>.4. Connect your gas supply to the MFC, connect the outlet of the MFC to the inlet of the MFM,connect the outlet of the MFM to the inlet of the DryCal.5. Turn on your <strong>Integrator</strong> <strong>110</strong> and your DryCal. Make sure that your DryCal is set to read in sccmand the temperature correction matches that of the MFC under test.6. Once the splash screen ends, select “Compare MFM and DryCal” and press ENTER.7. At “MFM Output Signal” select the analog signal, then navigate to “Next” and press ENTER.8. At “MFM Flow Source” select “MFC” and press ENTER.9. At “Input to MFC” select the analog signal, then navigate to “Next” and press ENTER.10. At “Output from MFC” select the analog signal, then navigate to “Next” and press ENTER.11. At “Connect MFC and MFM and DryCal” select “Next” and press ENTER to begin “Checking Setup.”Your <strong>Integrator</strong> <strong>110</strong> will check the communication among all systems.12. Upon successful setup, at “% Deviation” select the deviation type, then navigate to “Next” and press ENTER.13. At “MFM Full Scale Flow” (the rated flow of the MFM) input the value using the keypad, and press ENTER.Then, arrow down to select the flow units using the right and left arrows, then navigate to “Next” andpress ENTER.14. At “MFC Full Scale Flow” (the rated flow of the MFC) input the value using the keypad, and press ENTER.Then, arrow down to select the flow units using the right and left arrows, then navigate to “Next” andpress ENTER.15. Input the “MFC Setpoint” (within the rated specification of the MFC) using the keypad, and press ENTER.Then, navigate to “Next” and press ENTER.16. When the display begins flashing, your <strong>Integrator</strong> <strong>110</strong> is updating the MFM’s output reading against theMFC’s setpoint, and the DryCal’s flow measurement is recorded and updated. The deviation percentagebetween MFM and the DryCal is displayed.17. Press ‘back’ to change the flow to the MFM and repeat Steps 15 through 16 as prompted.7
Via an External DeviceGas Supply Ext. Mech MFM DryCal1. Attach the appropriate MFM cable into the MFM and your <strong>Integrator</strong> <strong>110</strong>.2. Attach the 9-pin cable into your DryCal and your <strong>Integrator</strong> <strong>110</strong>.3. Connect your gas supply to the external mechanical device, connect the outlet of the external mechanicaldevice to the inlet of the MFM, connect the outlet of the MFM to the inlet of the DryCal.4. Turn on your <strong>Integrator</strong> <strong>110</strong> and your DryCal. Make sure that your DryCal is set to read in sccm and thetemperature correction matches that of the MFC under test.5. Once the splash screen ends, select “Compare MFM and ML” and press ENTER.6. At “MFM Output Signal” select the analog signal, then navigate to “Next” and press ENTER.7. At “MFM Flow Source” select “EXT Mechanical” and press ENTER.8. At “Connect MFM and DryCal” select “Next” and press ENTER to begin “Checking Setup.” Your <strong>Integrator</strong> <strong>110</strong>will check the communication among all systems.9. Upon successful setup, at “% Deviation” select the deviation type, then navigate to “Next” and press ENTER.10. At “MFM Full Scale Flow” (the rated flow of the MFM) input the value using the keypad, and press ENTER.Then, arrow down to select the flow units using the right and left arrows, then navigate to “Next” andpress ENTER.11. The flow indicated by <strong>Bios</strong> is recorded and updated in this step with a percentage deviation betweenMFM and DryCal readings.8
Maintenance and TroubleshootingAnnual CalibrationYour <strong>Integrator</strong> <strong>110</strong> is a high precision voltage and current measuring device that is used to provide set points andread voltage and current signals from mass flow devices. As such, your <strong>Integrator</strong> <strong>110</strong>’s voltage and current settingsshould be calibrated at least annually by an ISO 17025 accredited calibration laboratory, such as <strong>Bios</strong> International.Please note that while any ISO 17025–accredited gas flow measurement laboratory may be capable of calibrating your<strong>Integrator</strong> <strong>110</strong>, <strong>Bios</strong> is the only authorized service center for <strong>Bios</strong> products. All <strong>Integrator</strong> <strong>110</strong> service and calibrationis performed in our ISO 17025–accredited laboratory in New Jersey by experienced <strong>Bios</strong> personnel.Turnaround time within <strong>Bios</strong>’ facility is generally two weeks. For an expedite fee and as available, we will place your<strong>Integrator</strong> <strong>110</strong> “next on bench” for 48-hour turnaround. This means that an <strong>Integrator</strong> <strong>110</strong> received on Monday will bereturn-shipped on Wednesday and a <strong>Integrator</strong> <strong>110</strong> received on Friday will be return-shipped on Tuesday. Although wecannot guarantee successful expedited turnaround, we will make every effort to accommodate your request.For a detailed explanation of our service process, expedite option and to obtain current calibration pricing, pleasecontact <strong>Bios</strong> at 973.492.8400 or visit our web site at www.biosint.com.Sending Your <strong>Integrator</strong> <strong>110</strong> to <strong>Bios</strong>Please contact <strong>Bios</strong> for an RMA (return merchandise authorization) number before sending your <strong>Integrator</strong> <strong>110</strong> to ourfactory for annual calibration or other service. You can get an RMA number through our automated web-based systemat http://www.biosint.com/ContactUs/rmaform.aspx, by email to service@biosint.com, or by telephone at 973.492.8400.Our web address is www.biosint.com.Sending your <strong>Integrator</strong> <strong>110</strong> to <strong>Bios</strong> without an RMA number may result in return of the instrument without inspectionor a substantial delay in service turnaround time.When requesting your RMA number, provide your <strong>Integrator</strong> <strong>110</strong> serial number and revision level, as well as yourfull contact information. Also, please describe any product issues you may be experiencing. Please keep in mind that<strong>Bios</strong> will not begin evaluation and service of your <strong>Integrator</strong> <strong>110</strong> until you have accepted and approved, in writing, ourformal RMA quote for service. This protects both you and <strong>Bios</strong> during this process and ensures a fair and efficientservice experience.If sending your <strong>Integrator</strong> <strong>110</strong> for warranty evaluation or repair, please contact <strong>Bios</strong> for troubleshooting assistanceprior to shipment to our facility (see Troubleshooting).9
TroubleshootingIf you should encounter any problems with your <strong>Integrator</strong> <strong>110</strong>, please contact <strong>Bios</strong> Customer Service and provide adetailed description of your situation, including your <strong>Integrator</strong> <strong>110</strong> serial number, information about the flow source,the current calibration setup, environmental conditions during the test, the flow point or points that you’re checkingand an explanation of the issue you’re experiencing.With your help, our technical support team will attempt to resolve the situation over the phone and/or via email.If we’re unable to do so, we’ll issue you an RMA number for the prompt return of your <strong>Integrator</strong> <strong>110</strong> for evaluation.Before contacting <strong>Bios</strong> with any problems, please verify the following:• Is your <strong>Integrator</strong> <strong>110</strong> plugged into the appropriate power source and turned on?• Are all of the appropriate cables plugged into the devices under test?• Are all of the appropriate cables plugged into your <strong>Integrator</strong> <strong>110</strong>?• Are you using the correct setups (voltage and/or current) for devices you’re operating?• Is your <strong>Bios</strong> DryCal Series primary piston prover powered on?• Are your DryCal settings correct? For example, standardized flow, standardizing temperature,Sensor Factors, etc.• Is your gas supply on?• Are all the pneumatic connections correct and tight?<strong>Bios</strong> will make every attempt to verify your issue, as we want you to get the most out of your <strong>Integrator</strong> <strong>110</strong>.However, if you’ve shipped your <strong>Integrator</strong> <strong>110</strong> to <strong>Bios</strong> for an issue that we’re unable to verify – or, if we determinethat the issue is application-related rather than product-related – we reserve the right to charge an evaluation feeat prevailing labor rates.ShippingWhen shipping your <strong>Integrator</strong> <strong>110</strong>, please ensure that the packaging is adequate to protect the instrument.Whenever possible, your <strong>Integrator</strong> <strong>110</strong> should be shipped in its original packaging or within a hard case, such asa Pelican carrying case (available for purchase from <strong>Bios</strong>). We highly recommend using a standard freight carrier(e.g., FedEx, UPS) that supplies tracking numbers and insuring the product against damage in transit.<strong>Bios</strong> is generally not responsible for freight cost associated with shipments to and from <strong>Bios</strong>, except in certaininstances; please contact <strong>Bios</strong> for information before initiating a shipment.<strong>Bios</strong> is not responsible for damage that occurs during shipment.10
Pin Configuration (25-pin D-Sub)Below is a table for the pin assignments for the MFC and MFM.(Connector is on the back of the <strong>Integrator</strong>. Customers my use this to fabricate cables to connect to their MFC/MFMsor may purchase cables from <strong>Bios</strong> International)Pin No. Description1 Power Ground2 N/C3 Signal Ground4 + 15V_1.7A, MFC /MFM Power5 GND26 N/C7 N/C8 N/C9 N/C10 N/C11 N/C12 Signal Voltage in MFC/MFM13 N/C14 N/C15 Signal Voltage out MFC16 N/C17 N/C18 Signal Current out MFC19 N/C20 N/C21 N/C22 Signal Current in MFC/MFM23 -15V_1.7A, MFC/MFM Power24 N/C25 N/CN/C = no connectionMFC/MFM Power ConnectionsA. + 15 VDC Supply Voltage• Positive, pin 4• Negative, pin 1B. – 15 VDC Supply Voltage• Negative, pin 23• Positive, pin 1 (jumper pin 1 to pin 5)C. 30 VDC Supply Voltage• Positive, Pin 5 (jumper pin 4 to pin 23)• Negative, pin 1Drawing of MFC/MFM Connector on backof <strong>Integrator</strong>25- pin D-Sub(Female on <strong>Integrator</strong> <strong>110</strong>)132511411
Make a MFC/MFM CableTwo MFC/MFM cables are supplied to a user with an <strong>Integrator</strong> <strong>110</strong>.The <strong>Integrator</strong> <strong>110</strong> side of the cable is connected to a fixed female DB25 pin.The MFC/MFM side of the cable is left open-ended for the users to configure and connect to their MFC/MFMconnector. This side can be connected to a DB15, DB9, DB25 etc based on the type of MFC/MFM pin connector.There are a total of nine terminals brought out for the users to configure their own cable.Figure 4 – MFC/MFM CableDB-25 Pin, connectsto the <strong>Integrator</strong>Open ended MFC/MFMside, connects to MFC/MFM12
DB25 Pin DesignationConfigure your MFC/MFM cable as the connection table below.Pin No. Description Wire Color1 Power Ground Black2 N/C3 Signal Ground White4 + 15V_1.7A, MFC /MFM Power Red5 GND2 Brown6 N/C7 N/C8 N/C9 N/C10 N/C11 N/C12 Signal Voltage from MFC/MFM Yellow13 N/C14 N/C15 Signal Voltage to MFC Orange16 N/C17 N/C18 Signal Current to MFC Green19 N/C20 N/C21 N/C22 Signal Current from MFC/MFM Blue23 -15V_1.7A, MFC/MFM Power Purple24 N/C25 N/CN/C = no connectionSpecial Notes:A. + 15 VDC Supply Voltage• Positive/+15 V, pin 4• Negative/ Power ground, pin 1B. – 15 VDC Supply Voltage• Negative/-15 V,pin 23• Positive/ Power ground, pin 1(jumper pin 1 to pin 5)C. 30 VDC Supply Voltage• Positive/30 V, Pin 5 (jumper pin 4 to pin 23)• Negative, pin 1The jumpers for – 15 V/ 30 V are not connectedat the <strong>Integrator</strong> side. Make connection at theMFC/MFM sideD. Signal Voltage from MFC/MFM and SignalVoltage to MFC are 0-5VDC or 1-5 VDCE. Signal Current from MFC/MFM and SignalCurrent to MFC are 0 – 20 miliAmp DCor 4-20 miliAmp DCF. Signal ground and power ground areconnected at the <strong>Integrator</strong> side.G. N/C implies No Connection<strong>Integrator</strong> <strong>110</strong> SpecificationsInputPower:90-264 VAC, 47-53 Hz.Operating Temperature: 0-50°CStorage Temperature: -20 - 85°CCommunication Ports: 9-pin D-Sub (RS232)MFC Electrical Connection: 25-pin D-SubMFM Electrical Connection: 25-pin D-SubOptional ValveElectrical Connection:9-pin D-SubMFC/MFM:4-20 ma, 0-20 ma,1-5 V or 0-5 VOutputPower Supply:Current:Resolution:Uncertainty:Voltage:Resolution:Uncertainty:+/- 15 VDC or 30 VDC4-20 ma, 0-20 ma0.4 micro-amp.015% Full Scale1-5 V, 0-5 V0.1 mVDC.015% FS13
Limited WarrantyThe <strong>Bios</strong> <strong>Integrator</strong> <strong>110</strong> is warranted to the original end user to be free from defects in materials and workmanship under normal use and servicefor a period of one year from the date of purchase as shown on the purchaser’s receipt. If your <strong>Integrator</strong> <strong>110</strong> was purchased from an authorizedreseller, a copy of an invoice or packing slip showing the date of purchase may be required to obtain warranty service.The obligation of <strong>Bios</strong> International Corporation under this warranty shall be limited to repair or replacement (at our option), during the warrantyperiod, of any part that proves defective in material or workmanship under normal use and service, provided the product is returned to <strong>Bios</strong>International Corporation, transportation charges prepaid.Notwithstanding the foregoing, <strong>Bios</strong> International Corporation shall have no liability to repair or replace any <strong>Bios</strong> International Corporation product:1. That has been damaged following sale, including but not limited to damage resulting from improper electrical voltages or currents,defacement, misuse, abuse, neglect, accident, fire, flood, terrorism, act of God or use in violation of the instructions furnished by <strong>Bios</strong>International Corporation;2. When the serial number has been altered or removed; or,3. That has been repaired, altered or maintained by any person or party other than <strong>Bios</strong> International Corporation’s own service facility ora <strong>Bios</strong> authorized service center, should one be established.This warranty is in lieu of all other warranties, and all other obligations or liabilities arising as a result of any defect or deficiency of the product,whether in contract or in tort or otherwise. All other warranties, expressed or implied, including any implied warranties of merchantability andfitness for a particular purpose, are specifically excluded.In no event shall <strong>Bios</strong> be liable for any special, incidental or consequential damages for breach of this or any other warranty,express or implied, whatsoever.<strong>Bios</strong> International Corporation10 Park PlaceButler, NJ, USA 07405Phone: 973.492.8400Toll Free: 800.663.4977Fax: 973.492.8270Email: sales@biosint.comweb: www.biosint.com© 2011 <strong>Bios</strong> International Corporation MK01-107 Rev E14