Operating Instructions - Operating Manuals for Panasonic Products ...
Operating Instructions - Operating Manuals for Panasonic Products ...
Operating Instructions - Operating Manuals for Panasonic Products ...

You also want an ePaper? Increase the reach of your titles
YUMPU automatically turns print PDFs into web optimized ePapers that Google loves.
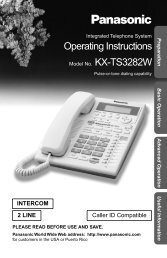
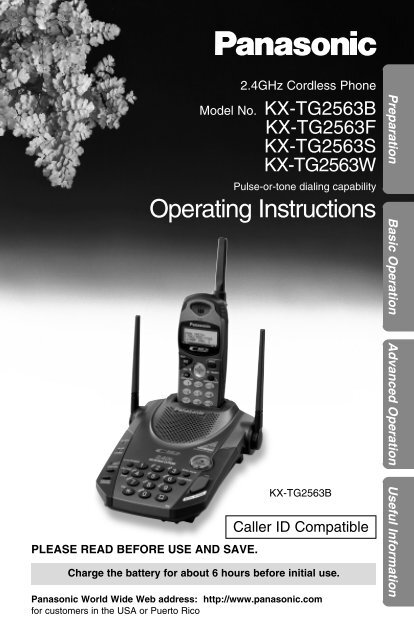
PLEASE READ BEFORE USE AND SAVE.2.4GHz Cordless PhoneModel No. KX-TG2563BKX-TG2563FKX-TG2563SKX-TG2563WPulse-or-tone dialing capability<strong>Operating</strong> <strong>Instructions</strong>KX-TG2563BCaller ID CompatibleCharge the battery <strong>for</strong> about 6 hours be<strong>for</strong>e initial use.<strong>Panasonic</strong> World Wide Web address: http://www.panasonic.com<strong>for</strong> customers in the USA or Puerto RicoPreparation Basic Operation Advanced Operation Useful In<strong>for</strong>mation
Be<strong>for</strong>e Initial UsePlease read IMPORTANT SAFETYINSTRUCTIONS on page 63 be<strong>for</strong>e use.Read and understand all instructions.Thank you <strong>for</strong> purchasing your new <strong>Panasonic</strong> cordlesstelephone.Caller ID and Call Waiting Service, where available, are telephonecompany services. After subscribing to Caller ID, this phone will display acaller’s name and phone number. Call Waiting Caller ID, which displays asecond caller’s name and phone number while the user is on anothercall, requires a subscription to both Caller ID and Call Waiting.Attach your purchase receipt here.For your future referenceSerial No.(found on the bottom of the unit)Date of purchaseName and address of dealerAccessories (included) For extra orders, call 1-800-332-5368.AC Adaptor (p. 12)Order No. PQLV10ZWall Mounting Adaptor (p. 54)Order No.PQKL10038Z3(Black, Blue, Silver)PQKL10038Z1 (White)oneTelephone Line Cord(p. 12)oneBelt Clip (p. 56)Order No.PQKE10127Z1(Black, Blue, Silver)PQKE10127Z2 (White)2oneone
For Best Per<strong>for</strong>manceBattery ChargeA rechargeable Ni-Cd battery powers thehandset. Charge the battery <strong>for</strong> about6 hours be<strong>for</strong>e initial use (p. 13).The batteryis beneaththis cover.Base Unit Location/NoiseCalls are transmitted between the base unit and the handset usingwireless radio waves. For maximum distance and noise-freeoperation, the recommended base unit location is:Away from electrical appliancessuch as a TV, personal computeror another cordless phone.In a HIGH and CENTRAL locationwith no obstructions such as walls.Raisethe antennas.Note:While using the handset:•If you are near a microwave oven which is being used, noise may be heard fromthe receiver. Move away from the microwave oven and closer to the base unit.•If more than one cordless phone is being used and your handset is near anothercordless phone’s base unit, noise may be heard. Move away from the othercordless phone’s base unit and closer to your base unit.3
ContentsPreparationLocation of Controls . . . . . . . . . . . . . . . . . . . . . . . . . . . . . . . . . 6Display . . . . . . . . . . . . . . . . . . . . . . . . . . . . . . . . . . . . . . . . . . . . 9Settings. . . . . . . . . . . . . . . . . . . . . . . . . . . . . . . . . . . . . . . . . . . . 12Connections . . . . . . . . . . . . . . . . . . . . . . . . . . . . . . . . . . . . . . . 12Battery Charge . . . . . . . . . . . . . . . . . . . . . . . . . . . . . . . . . . . . . 13Selecting the Dialing Mode . . . . . . . . . . . . . . . . . . . . . . . . . . . . 15Selecting the Line Mode . . . . . . . . . . . . . . . . . . . . . . . . . . . . . . 16Programmable Functions . . . . . . . . . . . . . . . . . . . . . . . . . . . . . 17Setting the Auto Talk Feature . . . . . . . . . . . . . . . . . . . . . . . . . . 18Selecting the Ringer Volume . . . . . . . . . . . . . . . . . . . . . . . . . . . 19Basic OperationMaking Calls . . . . . . . . . . . . . . . . . . . . . . . . . . . . . . . . . . . . . . . . 20With the Handset . . . . . . . . . . . . . . . . . . . . . . . . . . . . . . . . . . . 20With the Base Unit (Digital Duplex Speakerphone) . . . . . . . . . . 22Simultaneous Keypad Dialing . . . . . . . . . . . . . . . . . . . . . . . . . . 24Answering Calls . . . . . . . . . . . . . . . . . . . . . . . . . . . . . . . . . . . . . 25With the Handset . . . . . . . . . . . . . . . . . . . . . . . . . . . . . . . . . . . 25With the Base Unit (Digital Duplex Speakerphone) . . . . . . . . . . 25Caller ID Service. . . . . . . . . . . . . . . . . . . . . . . . . . . . . . . . . . . . . 26Using the Caller List. . . . . . . . . . . . . . . . . . . . . . . . . . . . . . . . . . 28Viewing the Caller List. . . . . . . . . . . . . . . . . . . . . . . . . . . . . . . . 28Calling Back from the Caller List . . . . . . . . . . . . . . . . . . . . . . . . 30Editing the Caller’s Phone Number . . . . . . . . . . . . . . . . . . . . . . 31Storing Caller List In<strong>for</strong>mation in the Directory. . . . . . . . . . . . . . 32Erasing Caller List In<strong>for</strong>mation . . . . . . . . . . . . . . . . . . . . . . . . . 33Advanced OperationOne-Touch Dialer . . . . . . . . . . . . . . . . . . . . . . . . . . . . . . . . . . . . 34Storing a Phone Number in the DIRECT Button . . . . . . . . . . . . 34Dialing the Stored Number in the DIRECT Button . . . . . . . . . . . 35Speed Dialer . . . . . . . . . . . . . . . . . . . . . . . . . . . . . . . . . . . . . . . . 36Storing Phone Numbers in Memory. . . . . . . . . . . . . . . . . . . . . . 36Dialing a Stored Number . . . . . . . . . . . . . . . . . . . . . . . . . . . . . . 374
Using the Directory . . . . . . . . . . . . . . . . . . . . . . . . . . . . . . . . . . 38Storing Names and Numbers in the Directory . . . . . . . . . . . . . . 38Selecting Characters to Enter Names . . . . . . . . . . . . . . . . . . . . 40Finding Items in the Directory . . . . . . . . . . . . . . . . . . . . . . . . . . 42Dialing from the Directory . . . . . . . . . . . . . . . . . . . . . . . . . . . . . 43Editing an Item in the Directory . . . . . . . . . . . . . . . . . . . . . . . . 44Erasing an Item from the Directory . . . . . . . . . . . . . . . . . . . . . . 45Voice Mail Service . . . . . . . . . . . . . . . . . . . . . . . . . . . . . . . . . . . 46Storing a Voice Mail Access Number . . . . . . . . . . . . . . . . . . . . 46Setting the Voice Mail Tone . . . . . . . . . . . . . . . . . . . . . . . . . . . 47Listening to Voice Mail Messages . . . . . . . . . . . . . . . . . . . . . . . 48Intercom . . . . . . . . . . . . . . . . . . . . . . . . . . . . . . . . . . . . . . . . . . . 49Transferring a Call Using the Intercom . . . . . . . . . . . . . . . . . . . 50Special Features. . . . . . . . . . . . . . . . . . . . . . . . . . . . . . . . . . . . . 51Automatic Security Code Setting . . . . . . . . . . . . . . . . . . . . . . . . 51For Call Waiting Service Users . . . . . . . . . . . . . . . . . . . . . . . . . 52How to Use the PAUSE Button(For Analog PBX Line/Long Distance Service Users). . . . . . . 52Temporary Tone Dialing(For Rotary or Pulse Service Users) . . . . . . . . . . . . . . . . . . . 52FLASH Button. . . . . . . . . . . . . . . . . . . . . . . . . . . . . . . . . . . . . . 53Useful In<strong>for</strong>mationWall Mounting. . . . . . . . . . . . . . . . . . . . . . . . . . . . . . . . . . . . . . . 54Using the Belt Clip . . . . . . . . . . . . . . . . . . . . . . . . . . . . . . . . . . . 56Using an Optional Headset . . . . . . . . . . . . . . . . . . . . . . . . . . . . 56Battery Replacement . . . . . . . . . . . . . . . . . . . . . . . . . . . . . . . . . 57Adding Another Phone . . . . . . . . . . . . . . . . . . . . . . . . . . . . . . . 58Be<strong>for</strong>e Requesting Help. . . . . . . . . . . . . . . . . . . . . . . . . . . . . . . 59Important Safety <strong>Instructions</strong> . . . . . . . . . . . . . . . . . . . . . . . . . . 63FCC and Other In<strong>for</strong>mation . . . . . . . . . . . . . . . . . . . . . . . . . . . . 65Preparation Basic Operation Advanced Operation Useful In<strong>for</strong>mation5
Location of ControlsBase unitAntennas (p. 3, 12)CALLER IDIndicator (p. 25, 26, 27)Charge Contacts(p. 14)IN USE/CHARGEIndicator (p. 13)(CALL!WAIT/FLASH)Button (p. 52, 53)MIC (Microphone) (p. 22, 49)(DIGITAL!SP-PHONE)(Speakerphone)Button and Indicator (p. 22)(REDIAL/PAUSE)Button (p. 23, 52)(HOLD/RINGER)Button (p. 19, 23)6
Back SidePreparationCradle Lock Switch(p. 54)VOICE MAILIndicator (p. 46)(VOICEÒMAIL)Button (p. 46, 48)(LOCATOR/INTERCOM)Button (p. 49)LOUD ,Key (p. 23)(TONE) Button (p. 52)(AUTO/PROGRAM)Button (p. 36)7
HandsetLocation of ControlsAntennaDisplay (p. 9)Headset Jack (p. 56)(TALK) Button (p. 20, 25)(FUNCTION/EXIT/CH)(Channel) Button(p. 17, 20, 28)(TONE) Button (p. 52)Charge Contact (p. 14)TALKBACKBACKFWDEDITEDITCH CHFUNCTION EXIT EXIT INTTONE TONEONOFF47 8 9CALL L WAITREDIALPAUSEFLASHSH REDIALVOICE MAILLOUDSEARCH0DIRECTINTERCOMCLEAR CLEAR1 2 35 6(DIRECT) Button(p. 34, 35)Navigator Key( , , , )(p. 17, 21, 28, 39, 40)(INTERCOM/CLEAR)Button (p. 21, 33, 49)Charge Contact (p. 14)(REDIAL/PAUSE)Button (p. 20, 21, 52)(FLASH/CALL!WAIT/VOICE!MAIL)Button (p. 46, 48, 52, 53)8
DisplayThe handset shows you instructions and in<strong>for</strong>mation on the display.These display prompts are shown below.No items storedRecharge batteryThe Caller List is empty or there are no storeditems in the directory.The battery needs to be charged. Place thehandset on the base unit to charge the battery(p. 14).Preparation12 new callsThe display shows the number of new calls andthe battery strength while the handset is on thebase unit.12 new callsGF H=DirectoryVoicemailThis display shows the number of new callswhen Ö or Ñ is pressed while the handset isoff the base unit.To search from the most recent call, press Ö.To search from the oldest call, press Ñ (p. 28).To go to the directory list, press FWD/EDIT á(Directory key).The display shows the voice mail message(s)is/are recorded (p. 46).Ringer offTINA ROBINSON1-000-222-3333When the handset ringer volume is set to OFF(p. 19), “Ringer off” will flash <strong>for</strong> about 45seconds be<strong>for</strong>e the handset returns to thestandby mode (p. 14).When a call is received, the display shows thecaller’s name and number after the first ring.9
DisplayTalk01-06-35No link to base.Place on cradleand try again.JACK SMITH1-222-333-444411:20A JAN.10 ✕3Ann1234567890During a conversation, the display shows thelength of the call (ex. 1 hour, 6 minutes and 35seconds). The battery strength is also displayed(p. 13).The handset has lost communication with thebase unit. Place the handset on the base unitand try again.This is a name from the Caller List.The display shows:— the caller’s name,— the caller’s number,— the time and date of the last call(ex. Jan. 10, 11:20 AM), and— the number of times called (ex. 3 times).This is a name from the directory. The storedname and phone number are displayed.PagingThe base unit is paging the handset (p. 49).Press INTERCOMIntercomThe handset and the base unit are in theintercom mode (p. 49).00-00-07Intercom hold00-01-12An outside call has been put on hold by thehandset user in the intercom mode. To releasethe hold, press (TALK) or (DIGITAL!SP-PHONE)(p. 50).10
NANCY BROWN1-000-222-3333----Waiting-----Please lift upand try againA second call is received during a conversation(p. 52).Ö, Ñ, BACK Ü or FWD/EDIT á was pressedwith the handset while the handset was on thebase unit. Lift the handset and press the buttonagain.PreparationNot availableDirectory fullWhile the base unit was not in the standby mode,Ö or Ñ was pressed to search the CallerList/directory list, FWD/EDIT á was pressed toselect an option or (INTERCOM/CLEAR) waspressed.When trying to store an item or Caller Listin<strong>for</strong>mation in the directory, the directorymemory is full (p. 32, 39).Save errorWhile storing items in the directory, the handsethas lost communication with the base unit.Move closer to the base unit and try again.11
SettingsConnectionsFasten the cords to prevent themfrom being disconnected.HooksHooksTelephone LineCordSingle-LineTelephone Jack(RJ11C)AC AdaptorPower Outlet(AC 120 V, 60 Hz)Raise theantennas.•USE ONLY WITH <strong>Panasonic</strong> AC ADAPTOR PQLV10 (Order No. PQLV10Z).•The AC adaptor must remain connected at all times. (It is normal <strong>for</strong> the adaptorto feel warm during use.)•To connect a standard telephone on the same line, see page 58.•If your unit is connected to a PBX which does not support Caller ID and voicemail services, you cannot access those services.12
Battery ChargePlace the handset on the base unitand charge <strong>for</strong> about 6 hours be<strong>for</strong>einitial use.•The IN USE/CHARGE indicator lights anda beep sounds.PreparationIN USE/CHARGEIndicatorBattery strengthYou can check the battery strength on the handset display while thehandset is on the base unit, while it is in use (making/answering a calletc.), or after viewing the Caller List or directory items, programming etc.The battery strength will remain <strong>for</strong> 5 seconds after using the handset,then the display will return to the standby mode (p. 14).The battery strength is as shown in the chart below.Display prompt(flashing)Battery strengthFully chargedMediumLowNeeds to be recharged.13
SettingsRechargeRecharge the battery when:Recharge battery—“Recharge battery” is displayed onthe handset,—“ ” flashes on the display, or—the handset beeps intermittently while it is in use.•If you DO NOT recharge the handset battery <strong>for</strong> more than 15 minutes, thedisplay will keep indicating “Recharge battery” and/or “ ” will continueto flash.Battery in<strong>for</strong>mationAfter your <strong>Panasonic</strong> battery is fully charged (p. 13):While in use(TALK)Operationnear the base unit*away from the base unitWhile not in use (Standby)Approx. battery lifeUp to 4.5 hoursUp to 3.5 hoursUp to 11 days*Within about 10 feet (3 m)•Battery life may be shortened depending on usage conditions, such as viewingthe Caller ID Caller List or directory list, and ambient temperature.•Clean the handset and the base unit charge contacts with a soft, dry clothonce a month. Clean more often if the unit is subject to grease, dust orhigh humidity. Otherwise the battery may not charge properly.•If the battery is fully charged, you do not have to place the handset on the baseunit until “Recharge battery” is displayed and/or “ ” flashes. This willmaximize the battery life.•The battery cannot be overcharged.Standby mode (The handset is off the base unit.)The handset goes into the standby mode after you finish using thehandset (making/answering a call, viewing the Caller List or directoryitems etc.). The display is blank, but the handset can receive calls.The battery life is conserved in this mode.14
Selecting the Dialing ModeYou can program the dialing mode using the handset near the baseunit.If you have touch tone service, set to “Tone”. If rotary or pulse service isused, set to “Pulse”. Your phone comes from the factory set to “Tone”.Make sure the unit is in the standby mode initially.1Press2Press3Press4Press5Press6Press7Press(FUNCTION/EXIT/CH).Ö or Ñ repeatedly until the arrowpoints to “Program”.FWD/EDIT á (Yes key).Ö or Ñ repeatedly until the arrowpoints to “Set dial mode”.FWD/EDIT á (Yes key).Ö or Ñ to select “Pulse” or“Tone”.FWD/EDIT á (Save key).•A beep sounds.•To return to the standby mode, press(FUNCTION/EXIT/CH).HSave directoryRinger volumeGFH=YesHProgramGFH=YesHSave DIRECT#Set flash timeGFH=YesSet line modeHSet dial modeGFH=YesDial mode:ToneGFH=SaveDial mode:PulseGFH=SaveDial mode:PulsePreparation•You can exit the programming mode any time by pressing (FUNCTION/EXIT/CH).•If the handset has lost communication with the base unit, 3 beeps sound and “Nolink to base. Place on cradle and try again.” is displayed.15
Selecting the Line ModeIf the line is connected to a low voltage system such as a PBX, set to “B”.Otherwise the Call Waiting Caller ID Feature may not be used (p. 52).Your phone comes from the factory set to “A”.Use the handset near the base unit.Make sure the unit is in the standby mode initially.1Press2Press3Press4Press5Press6Press7PressSettings(FUNCTION/EXIT/CH).Ö or Ñ repeatedly until the arrowpoints to “Program”.FWD/EDIT á (Yes key).Ö or Ñ repeatedly until the arrowpoints to “Set line mode”.FWD/EDIT á (Yes key).Ö or Ñ to select “B” or “A”.FWD/EDIT á (Save key).•A beep sounds.•To return to the standby mode, press(FUNCTION/EXIT/CH).HSave directoryRinger volumeGFH=YesHProgramGFHSet line modeSet dial modeGFH=YesLine mode:AGFH=SaveLine modeH=YesHSave DIRECT#Set flash timeGFH=YesLine mode:BGFH=Save:B•You can exit the programming mode any time by pressing (FUNCTION/EXIT/CH).•If the handset has lost communication with the base unit, 3 beeps sound and “Nolink to base. Place on cradle and try again.” is displayed.16
Programmable FunctionsYou can program the following function items using the handset nearthe base unit. The display shows the programming instructions. See thecorresponding pages <strong>for</strong> function details.Make sure the unit is in the standby mode initially.Press (FUNCTION/EXIT/CH).Preparation*HSave directoryRinger volumeProgramTo store an item in the directory (p. 39).To select the ringer volume (p. 19).Press FWD/EDIT á.*HSave DIRECT#Set flash timeSave mailbox#Voicemail toneSet line modeSet dial modeTalk switchingTo store a phone number in the DIRECT button(p. 34).To select the flash time (p. 53).To store a voice mail access number (p. 46).To set the voice mail tone (p. 47).To select the line mode (p. 16).To select the dial mode (p. 15).To set the auto talk feature (p. 18).During programming:*To select a desired function item, press Ö or Ñ repeatedly until thearrow points to the item. Then press FWD/EDIT á to go to the next step.•You can exit the programming mode any time by pressing (FUNCTION/EXIT/CH).•If you do not press any buttons <strong>for</strong> 60 seconds, the unit will return to the standbymode.•If the handset has lost communication with the base unit, 3 beeps sound and “Nolink to base. Place on cradle and try again.” is displayed.17
Programmable FunctionsSetting the Auto Talk FeatureThe Auto Talk feature allows you to answer a call by lifting the handset offthe base unit without pressing (TALK). If you want to use this feature, turnthe feature ON by programming. Your phone comes from the factory setto OFF.Make sure the unit is in the standby mode initially.1Press (FUNCTION/EXIT/CH).2Press Ö or Ñ repeatedly until the arrow HProgrampoints to “Program”.GFH=Yes3Press FWD/EDIT á (Yes key).4Press5Press6Press7PressÖ or Ñ repeatedly until the arrowpoints to “Talk switching”.FWD/EDIT á (Yes key).Ö or Ñ to select “On” or “Off”.FWD/EDIT á (Save key).•A beep sounds.•To return to the standby mode, press(FUNCTION/EXIT/CH).HTalk switchingGFAuto talkH=YesAuto talk:OffGFH=SaveAuto talk:OnGFH=Save:On•You can exit the programming mode any time by pressing (FUNCTION/EXIT/CH).•In order to view Caller ID in<strong>for</strong>mation be<strong>for</strong>e answering a call, leave the Auto Talkfeature OFF.18
Selecting the Ringer VolumeYou can set the handset and base unit ringer volumes to HIGH, LOW orOFF. If set to OFF, the handset/base unit will not ring. Your phone comesfrom the factory set to HIGH.Handset ringer volumeMake sure the unit is in the standby mode initially.1Press (FUNCTION/EXIT/CH).Save directory2Press3PressÖ or Ñ repeatedly until thearrow points to “Ringer volume”,and press FWD/EDIT á (Yes key).Ö or Ñ to select thedesired volume.•The selected volume is displayed and rings.•To turn the ringer OFF, press andhold Ö until 2 beeps sound.To turn the ringer ON, press Ñ or Öin step 3.•The ringer will sound at the LOW level.HIGHLOWOFFHRinger volumeGFH=YesRingerLow ❚❚❚❚❚❚ HighGFRingerLow ❚❚❚❚❚❚ HighGF•You can also select the ringer volume while acall is being received. Press Ö or Ñ while the unit is ringing.•When set to OFF, “Ringer off” will flash <strong>for</strong> about 45 seconds be<strong>for</strong>e thehandset returns to the standby mode.•When you replace the battery, the selected ringer volume setting will return to thefactory set (HIGH). Reprogram if necessary.ÖÖÑÑRinger offPreparationBase unit ringer volumeMake sure the unit is in the standby modeinitially. (You can also select the ringervolume while a call is being received.)•To select HIGH or LOW, press(HOLD/RINGER). Each time you press thebutton, the ringer volume will change andthe selected volume will ring.•To turn the ringer OFF, press and hold(HOLD/RINGER) until 2 beeps sound.•To turn the ringer ON,press (HOLD/RINGER).The ringer will sound at the HIGH level.(HOLD/RINGER)19
Making CallsWith the Handset(TALK)(FUNCTION/EXIT/CH)(INTERCOM/CLEAR)(REDIAL/PAUSE)1Press(TALK).Talk2Dial3Toa phone number.•The dialed number is displayed.•After a few seconds, the display will show thelength of the call and the battery strength.hang up, press (TALK) or place thehandset on the base unit.Talk1112222Talk00-00-00Off00-01-08•If the handset has lost communication with the base unit, 3 beeps sound and “Nolink to base. Place on cradle and try again.” is displayed.If noise interferes with the conversationPress (FUNCTION/EXIT/CH) to select a clearer channel or move closer tothe base unit.To redial the last number dialed on the handsetPress (TALK) and press (REDIAL/PAUSE).20
To dial after confirming the entered number1Dial a phone number.2Press•If you misdial, press (INTERCOM/CLEAR) anddial again.(TALK).•After a few seconds, the display will show thelength of the call and the battery strength.3334444Talk3334444Talk3Tohang up, press (TALK) or place thehandset on the base unit.To redial after confirming the last number dialedPress (REDIAL/PAUSE) and press (TALK).To adjust the receiver volume while talkingTo increase, press Ñ.To decrease press Ö.•Each time you press Ö or Ñ, thevolume level will change.•The display will return to the length ofthe call.Lighted handset keypadHIGHMEDIUMLOW00-00-00Off00-01-08LoudLow ❚❚❚❚❚❚ HighÑLoudLow ❚❚❚❚ÑLoudLow ❚❚HighHighThe handset dialing buttons will light when you press a button or lift thehandset off the base unit, and flash when a call is received. The lights willgo out a few seconds after pressing a button, lifting the handset oranswering a call.ÖÖBasic OperationBacklit LCD displayThe lighted handset display will stay on <strong>for</strong> a few seconds after pressing ahandset button or lifting the handset off the base unit.21
Making CallsWith the Base Unit (Digital Duplex Speakerphone)LOUDMIC(DIGITAL!SP-PHONE)and Indicator(REDIAL/PAUSE)(HOLD/RINGER)1Press2Dial3When4To(DIGITAL!SP-PHONE).•The DIGITAL SP-PHONE indicator lights.a phone number.the other party answers, talk into the MIC (microphone).hang up, press (DIGITAL!SP-PHONE).•The indicator light goes out.•To switch to the handset while using the base unit speakerphone:—If the handset is off the base unit, press (TALK).—If on the base unit, just lift up.•During a call using the handset, the call can be switched to the speakerphone bypressing (DIGITAL!SP-PHONE).22
Hands-free Digital Duplex SpeakerphoneFor best per<strong>for</strong>mance, please note the following:•Talk alternately with the caller in a quiet room.•If the other party has difficulty hearing you, press LOUD Ö to decrease thespeaker volume.•If the other party’s voice from the speaker cuts in/out during a conversation,press LOUD Ö to decrease the speaker volume.To adjust the speaker volume (8 levels) while talkingTo increase, press LOUD Ñ. To decrease, press LOUD Ö.To redial the last number dialed on the base unitPress (DIGITAL!SP-PHONE) and press (REDIAL/PAUSE).To put a call on holdPress (HOLD/RINGER).•The DIGITAL SP-PHONE indicator flashes.Basic OperationTo release the holdFrom the base unit, press (DIGITAL!SP-PHONE).From the handset, press (TALK) or lift the handset off the base unit.•If another phone is connected on the same line (p. 58), you can also release thehold by lifting its handset.23
Making CallsSimultaneous Keypad DialingYou can use the base unit like a standard telephone. After pressing(TALK) to make a call with the handset near the base unit, you can alsodial using the base unit keypad.1 Handset:Press (TALK).2Base unit:Dial a telephone number whilehearing a dial tone on thehandset.•When the other party answers, talkusing the handset.(TALK)3 Handset:To hang up, press (TALK) orplace the handset on the baseunit.Simultaneous Keypad Dialing is only possible after pressing (TALK).Useful in<strong>for</strong>mationYou can enter numbers using the base unit keypad during a call with thehandset. For example, to access an answering service, electronic bankingservice, etc.1. Handset:Press (TALK).2. Handset:Dial a telephone number.•You can also dial with the base unit keypad.3. Base unit:Enter the required numbers while listening to the pre-recordedinstructions.4. Handset:To hang up, press (TALK) or place the handset on the base unit.24
Answering CallsWhen a call is received, the unit rings, “Incoming call” is displayedand the CALLER ID indicator flashes quickly.If you subscribe to a Caller ID service, the calling party in<strong>for</strong>mation will bedisplayed after the first ring (p. 26). In order to view the Caller IDin<strong>for</strong>mation, please wait until the second ring to answer a call.With the HandsetIf the handset is off the base unit,press (TALK).•You can also answer a call by pressing any dialingbutton (0) to (9), (*) or (#) (—Any Key Talk).Auto TalkIf you set the Auto Talk feature to ON(p. 18), you can answer a call by liftingthe handset off the base unit withoutpressing (TALK).(TALK)Basic OperationWith the Base Unit (Digital Duplex Speakerphone)1Press2Talk3To(DIGITAL!SP-PHONE).into the MIC.hang up, press(DIGITAL!SP-PHONE).CALLER ID IndicatorMIC(DIGITAL!SP-PHONE)25
Caller ID ServiceThis unit is compatible with a Caller ID service offered by your telephonecompany. If you subscribe to a Caller ID service, the calling party’sin<strong>for</strong>mation will be displayed after the first ring.The unit can record in<strong>for</strong>mation of up to 50 different callers in the CallerList. The Caller List in<strong>for</strong>mation is sorted by the most recent to the oldestcall. When the 51st call is received, the first call is deleted.Using the list, you can automatically call back a caller. You can store thecallers’ names and numbers from the Caller List into the directory.If you subscribe to both Caller ID and Call Waiting services, when asecond call is received while talking, the new caller’s name and phonenumber will be displayed (p. 52).How caller in<strong>for</strong>mation is displayed when a call isreceivedThe display shows the caller’s nameand number after the first ring.After you answer the call, the displaywill show the length of the call andthe battery strength.TINA ROBINSON1-000-222-3333Talk01-06-35The CALLER ID indicatorlight will flash quickly whena call is being received.26•Caller in<strong>for</strong>mation cannot be displayed in the following cases:•—If the caller dialed from an area which does not provide a Caller ID service, thedisplay will show “Out of area”.•—If the caller has requested not to display his/her in<strong>for</strong>mation, the display willshow “Private caller”.
•If your unit is connected to a PBX which does not support Caller ID services, youcannot access those services.•The name display service may not be available in some areas. For furtherin<strong>for</strong>mation, please contact your telephone company.To check the number of new callsWhen new calls have been received, the CALLER ID indicator flashesslowly on the base unit.While the handset is on the base unit:If you have received 10 new calls,the display will show the following:10 new callsBasic OperationCALLER ID IndicatorWhile the handset is off the base unit:Press Ö or Ñ to turn the display on.If you have received 10 new calls,the display will show the following:10 new callsGF H=Directory,•If “No items stored” is displayed, the Caller List is empty.27
Using the Caller ListViewing the Caller ListYou can view the caller list with the handset. Caller List in<strong>for</strong>mationincludes the caller’s name and phone number, the time and date the callwas received, and the number of times that caller called.Make sure the unit is in the standby mode initially.1Press Ö or Ñ to enter the CallerList.•The display will show, <strong>for</strong> example,the following.2 new callsGF H=Directory2To3To•You can go to the directory list bypressing FWD/EDIT á (p. 42).search from the most recentcall, press Ö.To search from the oldest call,press Ñ.•To scroll between callers,press Ö or Ñ.exit the list, press(FUNCTION/EXIT/CH).•The handset will return to thestandby mode.,(FUNCTION/EXIT/CH)•Once new calls have been checked, “√” will be added.•If “No items stored” is displayed, the Caller List is empty.•If more than one call is received from the same caller, the date and time of thelast call will be recorded. If the same caller calls again, the call entry with “√” willbe deleted.28
Ex. When you search from the most recent call:Press Ö or Ñ to enter the Caller List.2 new callsGF H=DirectoryPress Ö.JACK SMITH1-222-333-44443:10P JUN.10Press Ö.NANCY BROWN222-33331:54P JUN. 9 ✕3Press Ö.CINDY TURNER1-234-456-789010:38A JUN. 9 √•If there is no name in<strong>for</strong>mation <strong>for</strong> acaller, the display will only show thephone number.To return to the previous caller,press Ñ.To exit the Caller List,press (FUNCTION/EXIT/CH).•The handset will return to the standbymode.Basic OperationPress Ö.0 new callsGF H=DirectoryPress Ö.Display meaning:√: You have checked this caller in<strong>for</strong>mation, answered the callor called back the caller.✕2-✕9 : The number of times the same caller called (up to 9).After checking, “✕2” – “✕9” will be replaced with “√”.29
Using the Caller ListCalling Back from the Caller List(TALK),1Press2PressÖ or Ñ to enter the Caller List.Ö or Ñ repeatedly to find thedesired caller.3 new callsGF H=DirectoryCINDY TURNER1-234-456-789011:20A JAN.12 ✕33Press(TALK).•The displayed phone number is dialedautomatically.Talk12344567890Talk01-06-35•In some cases, you may have to edit the number be<strong>for</strong>e dialing (p. 31).(Ex. You may have to delete “1” and the area code.)•If a phone number is not displayed in the caller in<strong>for</strong>mation, you cannot call backthat caller.30
Editing the Caller’s Phone NumberYou can edit a phone number into one of 4 patterns.Make sure the unit is in the standby mode initially.1Press Ö or Ñ to enter the Caller List.5 new callsGF H=Directory2Press3While4Press5AfterÖ or Ñ repeatedly to find thedesired caller, and pressFWD/EDIT á.the arrow points to “Edit”,press FWD/EDIT á (Yes key).FWD/EDIT á (Edit key) toselect a pattern.•Each time you press FWD/EDIT á, thenumber is rearranged into one of4 different patterns.abPhone no.Area code – Phone no.c 1 – Phone no.d 1 – Area code – Phone no.•The order in which patterns a–d aredisplayed depends on how the telephonenumber is displayed in step 2.editing the number, you can continue with calling back orstoring procedures. To call back, press (TALK) (p. 30).To store the number in the directory,press Ö (Next key), and pressFWD/EDIT á (Save key). (If the callerhas no name in<strong>for</strong>mation, see page 32,from step 3.)aFRED PARKER1-234-321-555511:20A JAN.12 √HEditSave directoryGFH=YesFRED PARKER1-234-321-5555G=Next H=Edit321-5555G=NextH=Editb 234-321-5555G=Next H=Editc 1-321-5555G=Next H=Editd 1-234-321-5555G=Next H=EditFRED PARKER321-5555F=Edit H=SaveBasic Operation•The number edited in step 4 will not be maintained in the Caller List.31
Using the Caller ListStoring Caller List In<strong>for</strong>mation in the DirectoryYou can store names and phone numbers that are in the Caller List intothe directory.Make sure the unit is in the standby mode initially.1Press2Press3PressÖ or Ñ to enter the Caller List.Ö or Ñ repeatedly to find thecaller you want to store in the directory,and press FWD/EDIT á (Yes key).•If the number requires editing, see page 31.Ö or Ñ to select “Savedirectory”, and press FWD/EDIT á(Yes key).10 new callsGF H=DirectoryCINDY TURNER1-234-456-789011:20A JAN.12 ✕3HEditSave directoryGFH=YesEditHSave directoryGFH=YesIf there is no name in<strong>for</strong>mation <strong>for</strong> thecaller, “Enter name” will bedisplayed.a) If a name is not required, press Ö(Next key) and press FWD/EDIT á(Save key).b) If a name is required, enter the name(p. 40). When finished, press Ö(Next key) and press FWD/EDIT á(Save key).•A beep sounds.•To continue storing other items, repeat fromstep 2.•To return to the standby mode, press(FUNCTION/EXIT/CH).Enter nameIHG=NextEnter nameCINDY TURNERIHG=NextCINDY TURNER1234456789032•You can exit the programming mode any time by pressing (FUNCTION/EXIT/CH).•If the display shows “Directory full” in step 3, press (FUNCTION/EXIT/CH)to exit the list. To erase other stored items from the directory, see page 45.•After the maximum of 50 items has been stored, “Directory full” is also displayed.•You cannot store caller in<strong>for</strong>mation in the directory if a phone number is notdisplayed.•If 3 beeps sound and the display shows “Save error”, move closer to the baseunit and start again from step 1.
Erasing Caller List In<strong>for</strong>mationAfter checking the Caller List, you can erase some or all of the entries.Make sure the unit is in the standby mode initially.To erase a specific caller from the Caller List1Press Ö or Ñ to enter the Caller List.10 new callsGF H=Directory2Press3PressÖ or Ñ repeatedly to find thecaller you want to erase from the CallerList.(INTERCOM/CLEAR).•A beep sounds and the in<strong>for</strong>mation is erased.•To erase other items, repeat from step 2.•To return to the standby mode, press(FUNCTION/EXIT/CH).TOM REAGAN1-888-777-666612:20A JAN.12 √ClearBasic OperationTo erase all entries in the Caller ListBe<strong>for</strong>e erasing all entries, make sure that “0 new call” is displayed.1Press Ö or Ñ to enter the Caller List.0 new callGF H=Directory2Press3Press4Press(INTERCOM/CLEAR).Ö or Ñ to select “All clear”.FWD/EDIT á (Yes key) or(INTERCOM/CLEAR).•A beep sounds and all entries are erased.HExitAll clearGFExitHAll clearGFAll clearH=YesH=Yes33
One-Touch DialerYou can store a phone number in the (DIRECT) button of the handset. Thestored number is dialed with a one-touch operation.Storing a Phone Number in the DIRECT ButtonMake sure the unit is in the standby mode initially.1Press (FUNCTION/EXIT/CH).2Press Ö or Ñ repeatedly until the arrow HProgrampoints to “Program”.GFH=Yes3Press FWD/EDIT á (Yes key).HSave DIRECT#Set flash timeGFH=Yes4While the arrow points to “SaveDIRECT#”, press FWD/EDIT á (Yes key).IHG=Next5Enter6Pressa phone number, up to 22 digits.•Each time you press (INTERCOM/CLEAR) thedigit to the left of the cursor is erased. To eraseall digits, press and hold (INTERCOM/CLEAR).•To move the cursor, press BACK Ü orFWD/EDIT á.Ö (Next key).•If you want to edit the entered number, pressÑ (Edit key) and return to step 5.1234567890123456789012IHG=Next1234567890123456789012F=Edit H=Save7PressFWD/EDIT á (Save key).•A beep sounds.•To return to the standby mode, press(FUNCTION/EXIT/CH).1234567890123456789012Save DIRECT#•You can exit the programming mode any time by pressing (FUNCTION/EXIT/CH).•If a pause is required <strong>for</strong> dialing, (REDIAL/PAUSE) can be stored in a phonenumber in step 5. This counts as one digit (p. 52).34
Dialing the Stored Number in the DIRECTButton1Press(DIRECT).•The stored number is displayed.12345678901234567890122Press(TALK).•The number is dialed.Talk1234567890123456789012•You can also dial the stored number by pressing (TALK) then pressing (DIRECT).(If your line has rotary or pulse service, any access numbers stored afterpressing (TONE) will not be dialed.)Advanced Operation35
Speed DialerStoring Phone Numbers in MemoryYou can store up to 10 phone numbers in the base unit. The dialingbuttons ((0) to (9)) function as memory stations.Make sure the unit is in the standby mode initially.1Press2Enter3Press4Press(AUTO/PROGRAM).•The IN USE/CHARGEindicator flashes.(AUTO/PROGRAM)a phone number,up to 22 digits.•If you misdial, press(AUTO/PROGRAM)twice to end storing,and start again from step 1.(AUTO/PROGRAM).a memory stationnumber ((0) to (9)).•A beep sounds.•To store other numbers, repeatsteps 1 through 4.Memory Station NumbersIN USE/CHARGEIndicator(REDIAL/PAUSE)•If a pause is required <strong>for</strong> dialing, press (REDIAL/PAUSE) where needed.Pressing (REDIAL/PAUSE) counts as one digit (p. 52).To erase a stored numberPress (AUTO/PROGRAM) twice and press the memory station number((0) to (9)) <strong>for</strong> the phone number to be erased.36
Dialing a Stored Number1Press2Press3Press(DIGITAL!SP-PHONE).(AUTO/PROGRAM).the memory stationnumber ((0) to (9)).•The stored number is dialed.(AUTO/PROGRAM)(DIGITAL!SP-PHONE)and IndicatorMemory Station Numbers•Numbers stored in the base unit can only be dialed from the base unit.•If your line has rotary or pulse service, any access numbers stored after pressing(TONE) will not be dialed.Advanced Operation37
Using the DirectoryYou can store up to 50 names and phone numbers in the directory. Alldirectory items are sorted by the first word in alphabetical order. Using thedirectory, you can make a call by selecting a name on the handsetdisplay.Storing Names and Numbers in theDirectoryMake sure the unit is in the standby mode initially.(FUNCTION/EXIT/CH), , BACK ,FWD/EDITThe dialing buttons canbe used to enter lettersand symbols.(INTERCOM/CLEAR)(REDIAL/PAUSE)38
1Press2While3Enter4Press(FUNCTION/EXIT/CH).the arrow points to “Savedirectory”, press FWD/EDIT á (Yes key).•The display shows the number of stored itemsin the directory.a name, up to 15 characters usingthe dialing buttons (p. 40).•To move the cursor, press BACK Ü orFWD/EDIT á.•If a name is not required, press Ö (Next key)and go to step 5.Ö (Next key).HSave directoryRinger volumeGFH=YesDirectory=20 itemsEnter nameIHG=NextEnter nameTom JonesIHG=NextEnter phone no.5Enter6Press7Pressa phone number, up to 22 digits.•If you misdial, press (INTERCOM/CLEAR).Digits are erased from the right. To erase alldigits, press and hold (INTERCOM/CLEAR).Ö (Next key).•If you want to change the storing name ornumber, press Ñ (Edit key) repeatedly toreach the desired display and change it.FWD/EDIT á (Save key).•A beep sounds.•To continue storing other items, repeat from step 2.•To return to the standby mode, press(FUNCTION/EXIT/CH).0987654321IHTom Jones0987654321F=Edit H=SaveTom Jones0987654321G=NextAdvanced Operation•If a pause is required <strong>for</strong> dialing, (REDIAL/PAUSE) can be stored in a phonenumber in step 5. This counts as one digit (p. 52).•You can exit the programming mode any time by pressing (FUNCTION/EXIT/CH).•If the display shows “Directory full” in step 2, press (FUNCTION/EXIT/CH).To erase other stored items from the directory, see page 45.•After the maximum of 50 items has been stored, “Directory full” is also displayed.•If 3 beeps sound and the display shows “Save error”, move closer to the baseunit and start again from step 1.39
Using the DirectorySelecting Characters to Enter NamesThe handset dialing buttons ((0) to (9)), BACK Üand FWD/EDIT á can be used to enter lettersand symbols. The letters are printed on thedialing buttons.Pressing each button selects a character asshown below.TALKBACKCHFUNCTION EXITTONEONOFFLOUDSEARCH1 2DIRECTFWD EDITINTERCOMCLEAR34 5 67 809Number of times key is pressedFLASH CALL WAITVOICE MAILREDIALPAUSEKeys(1)(2)(3)(4)(5)(6)(7)(8)(9)(0)BACKÜFWD/EDITá1 2 3 4 5 6 7 8 9 10 11# & ’ ( ) , – . / 1A B C a b c 2D E F d e f 3G H I g h i 4J K L j k l 5M N O m n o 6P Q R S p q r s 7T U V t u v 8W X Y Z w x y z 90 BlankTo move the cursor to the leftTo move the cursor to the right•To enter another character using the same dialing button, press FWD/EDIT áto move the cursor to the next space.If you make a mistake while entering a nameUse BACK Ü or FWD/EDIT á to move the cursor to the incorrectcharacter, press (INTERCOM/CLEAR) to delete and enter the correctcharacter. Each time you press (INTERCOM/CLEAR), a character is erasedfrom the right. To erase all characters, press and hold(INTERCOM/CLEAR).40
For example, to enter “Tom Jones”:1Press (FUNCTION/EXIT/CH).2Whilethe arrow points to “Savedirectory”, press FWD/EDIT á(Yes key).HSave directoryRinger volumeGFH=YesDirectory=20 itemsEnter name3Press4Press5Press6Press7Press8Press9Press101112(8).(6) six times, then press FWD/EDITá to move the cursor to the right.(6) four times.FWD/EDIT á twice to enter a blank.(5).(6) six times, then press FWD/EDITá to move the cursor to the right.(6) five times.Press (3) five times.Press (7) eight times.When finished, press Ö (Next key).•To enter a phone number and continuestoring, see page 39, from step 5.IHTToTomTomTom JTom JoTom JonTom JoneG=NextEnter nameTom JonesIHG=NextEnter phone no.Advanced Operation41
Using the DirectoryFinding Items in the DirectoryMake sure the unit is in the standby mode initially.1Press BACK Ü or FWD/EDIT á toenter the directory list.2Press3Press.Directory listGFH=Caller’s listÖ or Ñ.•The first item is displayed.Ann1234567890Ö or Ñ repeatedly until thedesired item is displayed.•All directory items are stored in theorder shown on the right.To search <strong>for</strong> a name by initial# Press the dialing button <strong>for</strong> thefirst letter of the desired nameuntil any name with the sameinitial is displayed (see theIndex table on page 43).Ex. To find “Frank”, press (3)repeatedly until the first itemunder “F” is displayed.$ Press Ö repeatedly until thename is displayed., , BACK ,FWD/EDIT(FUNCTION/EXIT/CH)Press Ö. Press Ñ.Alphabet letterSymbolNumberTelephone number(If no name is stored)•You can leave the directory list any time by pressing (FUNCTION/EXIT/CH).•If “No items stored” is displayed in step 2, the directory is empty.•In step 1, you can go to the Caller List by pressing FWD/EDIT á (p. 28).42
Index tableKeysIndex(1) Other symbols, 1(2) A, B, C, 2(3) D, E, F, 3(4) G, H, I, 4(5) J, K, L, 5Keys(6)(7)(8)(9)(0)IndexM, N, O, 6P, Q, R, S, 7T, U, V, 8W, X, Y, Z, 90Dialing from the DirectoryMake sure the unit is in the standby mode initially.1Press BACK Ü or FWD/EDIT á to enter Directory listthe directory list.GFH=Caller’s list2Press Ö or Ñ.•The first item is displayed.3Press Ö or Ñ repeatedly to find the Frankdirectory item that you want to dial.4567890•To search <strong>for</strong> the item by initial, see page 42.•To exit the directory, press(FUNCTION/EXIT/CH).4Press5To(TALK).•The number is dialed automatically.hang up, press (TALK) or place thehandset on the base unit.Talk4567890Advanced Operation43
Using the DirectoryEditing an Item in the DirectoryMake sure the unit is in the standby mode initially.1Press BACK Ü or FWD/EDIT á to enterthe directory list.2Press Ö or Ñ.•The first item is displayed.3Press Ö or Ñ repeatedly to find thedirectory item you want to change, andpress FWD/EDIT á.4Edit5Press6Add7Press8Press•To search <strong>for</strong> the item by initial, see page 42.•If you do not need to change the name, go tostep 5.the name using the dialing buttons,BACK Ü or FWD/EDIT á (p. 40), up to 15characters.Ö (Next key).•If you do not need to change the number, go tostep 7.a number to the current number.•Pressing (INTERCOM/CLEAR) erases the digitto the left of the cursor. To erase all digits,press and hold (INTERCOM/CLEAR).Ö (Next key).•If you want to change the storing name ornumber, press Ñ (Edit key) repeatedly toreach the desired display and change it.FWD/EDIT á (Save key).•A beep sounds.•To continue editing other items, repeat fromstep 3.•To return to the standby mode, press(FUNCTION/EXIT/CH).Directory listGFH=Caller’s listJane1234567Enter nameJaneIHG=NextEnter nameJane WalkerIHG=Next1234567Jane Walker0981234567F=Edit H=SaveJane Walker0981234567•You can exit the programming mode any time by pressing (FUNCTION/EXIT/CH).IH0981234567IHG=NextG=Next44
Erasing an Item from the DirectoryMake sure the unit is in the standby mode initially.1Press BACK Ü or FWD/EDIT á to enter Directory listthe directory list.GFH=Caller’s list2Press Ö or Ñ.•The first item is displayed.3Press Ö or Ñ repeatedly to find the Helendirectory item you want to erase.1234567890•To search <strong>for</strong> the item by initial, see page 42.4Press5Press(INTERCOM/CLEAR).•To stop erasing, press BACK Ü (No key).FWD/EDIT á (Yes key) or(INTERCOM/CLEAR).•A beep sounds and the item is erased.•To erase other items, repeat from step 3.•To return to the standby mode, press(FUNCTION/EXIT/CH).Clear?I=NoClearH=Yes•You can exit the programming mode any time by pressing (FUNCTION/EXIT/CH).Advanced Operation45
46Voice Mail ServiceVoice mail service is an electronic on-line answering system offered byyour telephone company. After subscribing, the voice mail system cananswer calls automatically when your line is busy or if calls are notanswered. Callers can leave messages by following the pre-recordedinstructions. When voice mail messages are recorded, “Voicemail” and“ ” will be displayed and the VOICE MAIL indicator on the base unit willflash.To use this feature, you must first store your access number.Storing a Voice Mail Access NumberMake sure the unit is in the standby mode initially.1Press (FUNCTION/EXIT/CH).2Press Ö or Ñ repeatedly until the arrowpoints to “Program”, and press FWD/EDITá (Yes key).HProgramGFH=Yes3Press Ö or Ñ repeatedly until the arrow HSave mailbox#points to “Save mailbox#”, and press Voicemail toneFWD/EDIT á (Yes key).GFH=Yes4Enter5Press6Pressyour access number, up to 32 digits.•You may enter pauses*.•If you enter a wrong number, press(INTERCOM/CLEAR). Digits are erased fromthe right. To erase all digits, press and hold(INTERCOM/CLEAR).Ö (Next key).•If you want to edit the entered number, pressÑ (Edit key) and return to step 4.FWD/EDIT á (Save key).•A beep sounds.•To return to the standby mode, press(FUNCTION/EXIT/CH).1234567PPP890IH1234567PPP890F=Edit1234567PPP890Save mailbox#G=NextH=Save*For quick access to your voice mail box by using (FLASH/CALL!WAIT/VOICE!MAIL)or (VOICE!MAIL), you may add pauses between your voice mail box access numberand your mail box password in step 4.EX. 1-222-333-4444 PPPP 8888Your voice mail box access numberYour mail box passwordPausesPressing (REDIAL/PAUSE) once creates a 3.5 seconds delay and counts asone digit. The delay time depends on a telephone company.
To erase a stored numberPress and hold (INTERCOM/CLEAR) in step 4 on page 46.•You can exit the programming mode any time by pressing (FUNCTION/EXIT/CH).Setting the Voice Mail ToneIf your voice mail service sends a voice mail tone after a new message hasbeen recorded, set to “On”. “Voicemail” and “ ” will be displayed andthe VOICE MAIL indicator on the base unit will flash when a message hasbeen recorded in your mailbox. You will hear a series of voice mail tonesfollowed by a dial tone after pressing (TALK) or (DIGITAL!SP-PHONE).(Contact your service provider <strong>for</strong> details about your service.)Set to “Off” if:—you do not subscribe to a voice mail service,—your voice mail service does not send a voice mail tone, or—the unit is connected to a PBX.Your phone comes from the factory set to “On”.Make sure the unit is in the standby mode initially.1Press (FUNCTION/EXIT/CH).2Press Ö or Ñ repeatedly until the arrow HProgrampoints to “Program”.GFH=Yes3Press4Press5Press6PressFWD/EDIT á (Yes key).Ö or Ñ repeatedly until the arrowpoints to “Voicemail tone”.FWD/EDIT á (Yes key).Ö or Ñ to select “Off” or “On”.Press FWD/EDIT á (Save key).•A beep sounds.•To return to the standby mode, press(FUNCTION/EXIT/CH).Save mailbox#HVoicemail toneGFH=YesVoicemail tone:OnGFH=SaveVoicemail tone:OffAdvanced Operation•You can exit the programming mode any time by pressing (FUNCTION/EXIT/CH).47
Voice Mail ServiceListening to Voice Mail MessagesAfter receiving a voice mail message, “Voicemail” and “ ”will bedisplayed and the VOICE MAIL indicator on the base unit will flash. Youcan listen to your voice mail message(s) using the handset or the baseunit.With the handset1 Press(FLASH/CALL!WAIT/VOICE!MAIL),and press (TALK).2Follow3WhenWith the base unitPress (VOICE!MAIL).1 •The unit is connected to thetelephone line and automatically•The unit is connected to thedials the access number (p. 46).telephone line and dials the2access number (p. 46).Follow the pre-recordedinstructions.the pre-recordedinstructions.3When finished, press(DIGITAL!SP-PHONE).finished, press (TALK).•If “Voicemail” and “ ” still remain on the display and the VOICE MAILindicator on the base unit still flashes even if you have listened to your voice mailmessage(s), press (FUNCTION/EXIT/CH), and press and hold(INTERCOM/CLEAR) on the handset until the unit beeps. “Voicemail” and“ ” will disappear and the indicator will go off.•If your voice mail service uses a voice mail tone and the recorded message isover 3 minutes long, “Voicemail” and “ ” may not be displayed and theVOICE MAIL indicator may not flash.•If your voice mail service uses a voice mail tone, the tone will be heard from anyparallel connected phone. If you use another phone to retrieve messages, youhave to dial your access number manually.48
IntercomA 2-way intercom is possible between the handset and the base unit.Paging the base unit from the handset1 Handset:Press (INTERCOM/CLEAR). Talkto the paged party after thebeeps.2Base•“Intercom” is displayed.unit:When the other party’s voice isheard, answer using the MIC.3 Handset:To end the intercom, press(INTERCOM/CLEAR).(INTERCOM/CLEAR)MICPaging the handset from the base unit (Handset locator)Using this feature, you can locate a misplaced handset.1Base unit:Press (LOCATOR/INTERCOM).•The handset beeps <strong>for</strong> 1 minuteand “Paging PressINTERCOM” is displayed.•To stop paging, press(LOCATOR/INTERCOM) again.2 Handset:Press (INTERCOM/CLEAR) toanswer.•“Intercom” is displayed.MIC3Baseunit:Talk into the MIC.4 Handset:To end the intercom, press(INTERCOM/CLEAR).(LOCATOR/INTERCOM)(INTERCOM/CLEAR)Advanced Operation49
IntercomDuring an intercom call:•Intercom calls can only be ended with the handset.•If the handset user has difficulty hearing the base unit user, decrease thebase unit speaker volume by pressing LOUD Ö on the base unit.•If an incoming call is received, the intercom call stops and the unit starts toring. To answer, press (TALK) or (DIGITAL!SP-PHONE).Transferring a Call Using the IntercomThe intercom can be used during a call. This feature enables you totransfer a call between the handset and the base unit.From the handset to thebase unit1 Handset:During a call, press(INTERCOM/CLEAR). Talk tothe paged party after thebeeps.2Base3Base•The call is put on hold and“Intercom hold” is displayed.•If the base unit user does notanswer, press (TALK).unit:When the paging party’svoice is heard, answer usingthe MIC.unit:To answer the call, press(DIGITAL!SP-PHONE).•The transfer is complete.From the base unit to thehandset1Base unit:During a call, press(LOCATOR/INTERCOM).•The call is put on hold.•If the handset user does notanswer, press(DIGITAL!SP-PHONE).2 Handset:Press (INTERCOM/CLEAR) toanswer the page.•“Intercom hold” is displayed.3 Handset:To answer the call, press(TALK).•The transfer is complete.50
Special Features, , FWD/EDIT(FUNCTION/EXIT/CH)(TONE)(REDIAL/PAUSE)(FLASH/CALL!WAIT/VOICEÒMAIL)(CALL!WAIT/FLASH)Advanced Operation(TONE)(REDIAL/PAUSE)Automatic Security Code SettingEach time you place the handset on the base unit, the unit automaticallyselects one of more than a million security codes. These codes helpprevent the unauthorized use of your telephone line by another cordlesstelephone user.51
Special FeaturesFor Call Waiting Service UsersPress (FLASH/CALL!WAIT/VOICE!MAIL) or (CALL!WAIT/FLASH) if you heara call-waiting tone while talking.•The first call is put on hold and you can answer the second call.•To return to the first caller, press (FLASH/CALL!WAIT/VOICE!MAIL) or(CALL!WAIT/FLASH) again.•The call waiting service cannot be used when a parallel connected telephone isin use.•If this function does not operate properly, consult your telephone company <strong>for</strong>details.Call Waiting Caller ID FeatureCall Waiting Caller ID Feature allows your unitto display the second caller’s in<strong>for</strong>mation. Afteryou hear a call-waiting tone while talking, theunit will display the caller’s name with the phonenumber and “----Waiting-----”.•Please contact your telephone company <strong>for</strong> details and availability in your area.How to Use the PAUSE Button(For Analog PBX Line/Long Distance Service Users)We recommend you press (REDIAL/PAUSE) if a pause is required <strong>for</strong>dialing with a PBX or to access a long distance service.Ex. Line access number (9) (PBX)(9) \ (REDIAL/PAUSE) \ Phone number•Pressing (REDIAL/PAUSE) once creates a 3.5 second pause. This preventsmisdialing when you redial or dial a stored number.•Pressing (REDIAL/PAUSE) more than once increases the length of the pausebetween numbers.Temporary Tone Dialing(For Rotary or Pulse Service Users)NANCY BROWN1-000-222-3333----Waiting-----Press (TONE) be<strong>for</strong>e entering access numbers which require tone dialing.•The dialing mode changes to tone. You can enter numbers to access ananswering service, electronic banking service, etc. When you hang up, the modewill return to pulse.•Access numbers entered after pressing (TONE) will not be included whenredialing.52
FLASH ButtonPressing (FLASH/CALL!WAIT/VOICE!MAIL) or (CALL!WAIT/FLASH) allowsyou to use special features of your host PBX such as transferring anextension call or accessing special telephone services (optional) such ascall waiting.Selecting the flash timeThe flash time depends on your telephone exchange or host PBX.You can select the following flash times: “700, 600, 400, 300, 250, 110,100 or 90 ms (milliseconds)”. Your phone comes from the factory set to“700 ms”.Make sure the unit is in the standby mode initially.1Press (FUNCTION/EXIT/CH).2Press Ö or Ñ repeatedly until the arrow HProgrampoints to “Program”.GFH=Yes3Press FWD/EDIT á (Yes key).4Press5Press6Press7PressÖ or Ñ repeatedly until the arrowpoints to “Set flash time”.FWD/EDIT á (Yes key).Ö or Ñ repeatedly until thedesired time is displayed.FWD/EDIT á (Save key).•A beep sounds.•To return to the standby mode, press (FUNCTION/EXIT/CH).Save DIRECT#HSet flash timeGFH=YesFlash time:700msGFH=SaveAdvanced Operation•You can exit the programming mode any time by pressing(FUNCTION/EXIT/CH).•If you are connected via a PBX, a longer flash time may be necessary to usePBX functions (transferring a call etc.). Consult your PBX supplier <strong>for</strong> the correctsetting.53
Wall MountingThis unit can be mounted on a wall phone plate.1Adjust the angle of the cradle:#Slide the lock switch 2 1to “RELEASE”.$Rotate the cradle 90°until it faces straightup.%Slide the lock switchto “LOCK” with the3cradle facing straightup.Back SideBack Side2Connectthe AC adaptor.To PowerOutlet3#Tuckthe telephone linecord inside the wallmounting adaptor.$Connect the telephoneline cord to the unit.%Install the adaptor bypushing it in the directionof the arrow.•The word “UP” should faceupward.12354
4Connectthe telephone linecord. Mount the unit, thenslide down.•Raise the antennas.5Tocharge the handset battery:Place the handset in the cradle asshown.•The IN USE/CHARGE indicator lights.IN USE/CHARGEIndicatorUseful In<strong>for</strong>mation55
Using the Belt ClipYou can hang the handset on your belt or pocket using the belt clip.To attach the belt clipTo remove the belt clipUsing an Optional HeadsetPlugging an optional headset into the handset allows a hands-free phoneconversation. Please use only the <strong>Panasonic</strong> KX-TCA88 headset. To ordercall the accessories telephone number on page 2.Connecting the headset to the handsetOpen the headset jack cover, and connect the headset to the headsetjack as shown below.HHeadset Jack56When the optional headset is connected to the handset, make sure to use theheadset to talk with the caller. If you want to have a normal cordless phoneconversation, disconnect the headset.
Battery ReplacementIf “Recharge battery” is displayed and/or “ ” flashes after beingfully charged, replace the battery with a new <strong>Panasonic</strong> P-P510(N4HKGMB00001) battery. To order, call the accessories telephonenumber on page 2.1Carefully insert a flat metalobject in the slot, and push<strong>for</strong>ward to release the lock.Remove the handset cover.Push<strong>for</strong>ward.2Replacethe battery. Thenplace the battery leadsinside the groove, otherwisethe leads may be damagedwhen closing the cover.3Closethe cover.124Makesure you charge the new battery <strong>for</strong> about 6 hours in order todisplay the battery strength prompt correctly (p. 13).Attention:The product you have purchased is powered by a nickelcadmium battery which is recyclable. At the end of itsuseful life, under various state and local laws, it is illegalto dispose of this battery into your municipal wastestream. Please call 1-800-8-BATTERY <strong>for</strong> in<strong>for</strong>mation onhow to recycle this battery.Useful In<strong>for</strong>mation57
Adding Another PhoneThis unit will not function during a power failure. To connect a standardtelephone on the same line, use the <strong>Panasonic</strong> T-adaptor KX-J66.To order, call the accessories telephone number on page 2.Standard TelephoneSingle-LineTelephone JackTelephoneLine CordT-Adaptor (KX-J66)58
Be<strong>for</strong>e Requesting HelpProblem“No link to base.Place on cradle andtry again.” is displayedand an alarm tone sounds.The unit does not work.Static, sound cuts in/out,fades. Interference fromother electrical units.The handset and/or the baseunit do not ring.The handset display isblank.The handset display is stillblank after pressing Ö, Ñ,BACK Ü or FWD/EDIT á.Remedy•You are too far from the base unit. Movecloser and try again.•Place the handset on the base unit andtry again.•Plug in the AC adaptor.•Raise the base unit antennas.•Check the settings (p. 12–16).•Charge the battery fully (p. 13).•Clean the charge contacts and chargeagain (p. 14).•Install the battery properly (p. 57).•Place the handset on the base unit andunplug the AC adaptor to reset. Plug in,and try again.•Re-install the battery and place thehandset on the base unit (p. 57).Try again.•Locate the handset and the base unitaway from other electrical appliances(p. 3).•Move closer to the base unit.•Raise the base unit antennas.•Press (FUNCTION/EXIT/CH) to select aclearer channel.•The ringer volume is set to OFF. Set toHIGH or LOW (p. 19).•The handset is in the standby mode(p. 14). Press Ö, Ñ, BACK Ü orFWD/EDIT á to turn the display on.•Charge the battery fully (p. 13).Useful In<strong>for</strong>mation59
Be<strong>for</strong>e Requesting HelpProblemYou cannot program items,such as the dialing mode.Previously programmedin<strong>for</strong>mation is erased.You cannot store a nameand phone number in thedirectory.While programming orsearching, the unit starts toring and stops the program/search.The unit does not display thecaller’s name and/or phonenumber.The display goes to thestandby mode while viewingthe Caller List.When a second call isreceived during aconversation, the unit doesnot display the new caller’sname and/or phone number.Remedy•Programming is not possible while the unitis in the talk or speakerphone mode orwhen viewing the Caller List/directory list.•Do not pause <strong>for</strong> over 60 seconds whileprogramming.•Move closer to the base unit.•Make sure that the unit is in the standbymode.•If a power failure occurs, programmedin<strong>for</strong>mation may be erased. Reprogramif necessary.•You cannot store an item in the directorywhile the unit is in the talk,speakerphone or intercom mode.•Do not pause <strong>for</strong> over 60 seconds whilestoring.•To answer the call, press (TALK) or(DIGITAL!SP-PHONE). Start again fromthe beginning after hanging up.•You need to subscribe to a Caller IDservice from a telephone company.•Other telephone equipment may beinterfering with your phone. Disconnectit and try again.•Other electrical appliances connected tothe same outlet may be interfering withthe Caller ID in<strong>for</strong>mation.•Telephone line noise may be affectingthe Caller ID in<strong>for</strong>mation.•Do not pause <strong>for</strong> over 60 seconds whilesearching.•(DIGITAL!SP-PHONE) was pressed.•The line mode selection is incorrect. Seepage 16.60
ProblemYou cannot redial bypressing (REDIAL/PAUSE).“Recharge battery” isdisplayed on the handset,“ ” flashes or the unitbeeps intermittently.You charged the batteryfully, but “Rechargebattery” is still displayedand/or “ ” continues toflash.The IN USE/CHARGEindicator light does not goout while charging.You cannot have aconversation using thehandset.You cannot have aconversation using theheadset.Remedy•If the last number dialed was more than32 digits long, the number will not beredialed correctly.•Access numbers entered after pressing(TONE) will not be included whenredialing.•The button has a double function aseither redial or pause. It will redial thelast number dialed if pressed at theoutset of a call (p. 20, 23). If anothernumber has been dialed first, it willoperate as a pause button (p. 52).•Charge the battery fully (p. 13).•Clean the charge contacts and chargeagain (p. 14).•Install a new battery (p. 57).•This is normal.•When the headset is connected (p. 56),you must use the headset to talk withthe caller. To have a normal cordlessphone conversation, disconnect theheadset.•Make sure that the headset is connectedproperly (p. 56).Useful In<strong>for</strong>mation61
Be<strong>for</strong>e Requesting HelpProblemIf you cannot solve yourproblem.Remedy•Call our customer call center at1-800-211-PANA(7262).•<strong>Panasonic</strong>’s e-mail address <strong>for</strong> customerinquiries:consumerproducts@panasonic.com<strong>for</strong> customers in the USA or Puerto RicoONLY62
Important Safety <strong>Instructions</strong>When using this unit, basic safety precautions should always be followedto reduce the risk of fire, electric shock, or personal injury.11. Read and understand all instructions.12. Follow all warnings and instructions marked on this unit.13. Unplug this unit from AC outlets be<strong>for</strong>e cleaning. Do not use liquid oraerosol cleaners. Use a damp cloth <strong>for</strong> cleaning.14. Do not use this unit near water, <strong>for</strong> example, near a bathtub,washbowl, kitchen sink, or the like.15. Place this unit securely on a stable surface. Serious damage and/orinjury may result if the unit falls.16. Do not cover slots and openings on the unit. They are provided <strong>for</strong>ventilation and protection against overheating. Never place the unitnear radiators, or in a place where proper ventilation is not provided.17. Use only the power source marked on the unit. If you are not sure ofthe type of power supplied to your home, consult your dealer or localpower company.18. Do not place objects on the power cord. Install the unit where no onecan step or trip on the cord.19. Do not overload wall outlets and extension cords. This can result inthe risk of fire or electric shock.10. Never push any objects through slots in this unit. This may result inthe risk of fire or electric shock. Never spill any liquid on the unit.11. To reduce the risk of electric shock, do not disassemble this unit.Take the unit to an authorized servicenter when service is required.Opening or removing covers may expose you to dangerous voltagesor other risks. Incorrect reassembly can cause electric shock whenthe unit is subsequently used.12. Unplug this unit from the wall outlet and refer servicing to anauthorized servicenter when the following conditions occur:A. When the power supply cord or plug is damaged or frayed.B. If liquid has been spilled into the unit.C. If the unit has been exposed to rain or water.D. If the unit does not work normally by following the operatinginstructions. Adjust only controls covered by the operatinginstructions. Improper adjustment may require extensive work byan authorized servicenter.E. If the unit has been dropped or physically damaged.F. If the unit exhibits a distinct change in per<strong>for</strong>mance.13. During thunderstorms, avoid using telephones except cordless types.There may be a remote risk of an electric shock from lightning.14. Do not use this unit to report a gas leak, when in the vicinity of theleak.SAVE THESE INSTRUCTIONS63Useful In<strong>for</strong>mation
Important Safety <strong>Instructions</strong>CAUTION:To reduce the risk of fire or injury to persons, read and follow theseinstructions.1. Use only the battery(ies) specified.2. Do not dispose of the battery(ies) in a fire. They may explode. Checkwith local waste management codes <strong>for</strong> special disposal instructions.3. Do not open or mutilate the battery(ies). Released electrolyte iscorrosive and may cause burns or injury to the eyes or skin. Theelectrolyte may be toxic if swallowed.4. Exercise care in handling batteries in order not to short the battery toconductive materials such as rings, bracelets, and keys. The batteryand/or conductor may overheat and cause burns.5. Charge the battery(ies) provided with or identified <strong>for</strong> use with thisproduct only in accordance with the instructions and limitationsspecified in this manual.WARNING:TO PREVENT FIRE OR SHOCK HAZARD, DO NOT EXPOSE THEBASE UNIT TO RAIN OR ANY TYPE OF MOISTURE. ONLY THEHANDSET IS SHOCK AND SPLASH RESISTANT.• The AC adaptor is used as the main disconnect device, ensure that theAC outlet is located/installed near the unit and is easily accessible.64Splash-Resistant (HANDSET ONLY)The handset is designed to be splash resistant.You can use the handset with wet hands.CAUTION:• Do not immerse in water or leave under running water.• Keep the handset away from salt water.• Avoid exposure to prolonged high humidity.• Since water in headset jack may cause damage, close the headset jackcover when the optional headset is not in use. When the optionalheadset is connected, do not use the handset with wet hands.• If the handset is wet, wipe with a soft dry cloth.• The base unit is not designed to be splash resistant. Do not place thewet handset on the base unit.Shock-Resistant (HANDSET ONLY)Although the handset is designed to be shock resistant, do not throw orstep on the handset.
FCC and Other In<strong>for</strong>mationIf requested by the telephone company, in<strong>for</strong>m them as follows:FCC Registration No. . . . . . . . . . . . . . . . . . . . . . (found on the bottom of the unit)Ringer Equivalence . . . . . . . . . . . . . . . . . . . . . . . . . . . . . . . . . . . . . . . . . . . . 0.1BThe particular telephone line to which the equipment is connected.This unit must not be connected to a coin operated line.If you are on a party line, check with your local telephone company.Ringer Equivalence No. (REN):The REN is useful in determining the quantity of devices you may connect to yourtelephone line and still have all of those devices ring when your telephone numberis called. In most, but not all areas, the sum of the REN’s of all devices connectedto one line should not exceed five (5.0). To be certain of the number of devicesyou may connect to your line, as determined by the REN, you should contact yourlocal telephone company to determine the maximum REN <strong>for</strong> your calling area.In the event terminal equipment causes harm to the telephone network, thetelephone company should notify the customer, if possible, that service may bestopped.However, where prior notice is impractical, the company may temporarily ceaseservice providing that they:(a) Promptly notify the customer.(b) Give the customer an opportunity to correct the problem with their equipment.(c) In<strong>for</strong>m the customer of the right to bring a complaint to the FederalCommunication Commission pursuant to procedures set out in FCC Rules andRegulations Subpart E of Part 68.The Telephone Company may make changes in its communications facilities,equipment, operations or procedures, where such action is reasonably required inthe operation of its business and is not inconsistent with the rules and regulationsin FCC Part 68.If such changes can be reasonably expected to render any customer terminalequipment incompatible with telephone company communications facilities, orrequire modification or alteration of such terminal equipment, or otherwisematerially affect its use or per<strong>for</strong>mance, the customer shall be given adequatenotice in writing, to allow the customer an opportunity to maintain uninterruptedservice.When programming emergency numbers and/or making test calls to emergencynumbers:1. Remain on the line and briefly explain to the dispatcher the reason <strong>for</strong> the callbe<strong>for</strong>e hanging up.2. Per<strong>for</strong>m such activities in the off-peak hours, such as early morning hours orlate evenings.This device complies with Part 15 of the FCC Rules. Operation is subject to thefollowing two conditions: (1) This device may not cause harmful interference, and(2) this device must accept any interference received, including interference thatmay cause undesired operation.65Useful In<strong>for</strong>mation
FCC and Other In<strong>for</strong>mation66Privacy of communications may not be ensured when using this phone.CAUTION:Any changes or modifications not expressly approved by the party responsible <strong>for</strong>compliance could void the user’s authority to operate this device.Note:This equipment has been tested and found to comply with the limits <strong>for</strong> a Class Bdigital device, pursuant to Part 15 of the FCC Rules. These limits are designed toprovide reasonable protection against harmful interference in a residentialinstallation. This equipment generates, uses, and can radiate radio frequencyenergy and, if not installed and used in accordance with the instructions, maycause harmful interference to radio communications. However, there is noguarantee that interference will not occur in a particular installation. If thisequipment does cause harmful interference to radio or television reception, whichcan be determined by turning the equipment off and on, the user is encouraged totry to correct the interference by one or more of the following measures:—Reorient or relocate the receiving antenna.—Increase the separation between the equipment and receiver.—Connect the equipment into an outlet on a circuit different from that to which thereceiver is connected.—Consult the dealer or an experienced radio/TV technician <strong>for</strong> help.Some cordless telephones operate at frequencies that may cause interference tonearby TVs and VCRs. To minimize or prevent such interference, the base of thecordless telephone should not be placed near or on top of a TV or VCR. Ifinterference is experienced, move the cordless telephone further away from theTV or VCR. This will often reduce, or eliminate, interference.<strong>Operating</strong> near 2.4GHz electrical appliances may cause interference. Move awayfrom the electrical appliances and/or press the CH (Channel) button.CAUTION:To comply with FCC RF exposure requirements, the base unit should be installedwith its antenna located at 20 cm or more from persons and handset should becarried with the specific belt-clip provided <strong>for</strong> the handset to ensure compliance.Other non-tested belt-clips or similar body-worn accessories may not comply,there<strong>for</strong>e, should be avoided.• Environment — do not place the unit in a room where the temperature is lessthan 5°C (41°F) or greater than 40°C (104°F). Allow 10 cm (4") clearancearound the unit <strong>for</strong> proper ventilation. Avoid excessive smoke, dust, mechanicalvibration, shock, or direct sunlight.• Medical — consult the manufacturer of any personal medical devices, such aspacemakers, to determine if they are adequately shielded from external RF(radio frequency) energy. (The unit operates in the frequency range of 2401MHzto 2472MHz, and the power output level can range from 0.001 watts to 0.20watts.) Do not use the unit in health care facilities if any regulations posted in thearea instruct you not to do so. Hospitals or health care facilities may be usingequipment that could be sensitive to external RF (radio frequency) energy.• Routine care — wipe the unit with a soft cloth. Do not use benzine, thinner, orany abrasive powder. When you leave the unit unused <strong>for</strong> a long period of time,unplug the AC adaptor from the outlet.• If there is any trouble — disconnect the unit from the telephone line and connecta known working phone. If the known working phone operates properly, have yourunit repaired by one of the authorized <strong>Panasonic</strong> Factory Service Centers. If theknown working phone does not operate properly, consult your telephone company.
For product service•<strong>Panasonic</strong> Servicenters are listed in the servicenter directory.•Call 1-800-211-PANA(7262) <strong>for</strong> the location of an authorized servicenter.•<strong>Panasonic</strong>’s e-mail address <strong>for</strong> customer inquiries:consumerproducts@panasonic.com<strong>for</strong> customers in the USA or Puerto Rico ONLYWhen you ship the product•Carefully pack your unit, preferably in the original carton.•Attach a letter, detailing the symptom, to the outside of the carton.Symptom•Send the unit to an authorized servicenter, prepaid and adequatelyinsured.•Do not send your unit to the <strong>Panasonic</strong> Consumer Electronics Companylisted on the back cover or to executive or regional sales offices. Theselocations do not repair consumer products.67
<strong>Panasonic</strong> Consumer Electronics Company,Division of Matsushita Electric Corporation of AmericaOne <strong>Panasonic</strong> Way, Secaucus, New Jersey 07094<strong>Panasonic</strong> Sales Company,Division of Matsushita Electric of Puerto Rico, Inc.Ave. 65 de Infantería, Km. 9.5, San Gabriel Industrial ParkCarolina, Puerto Rico 00985Printed in Malaysia PQQX12946ZB-BM SS0101HT1021