FinePix F401 Owner's Manual - Fujifilm Canada
FinePix F401 Owner's Manual - Fujifilm Canada
FinePix F401 Owner's Manual - Fujifilm Canada

You also want an ePaper? Increase the reach of your titles
YUMPU automatically turns print PDFs into web optimized ePapers that Google loves.
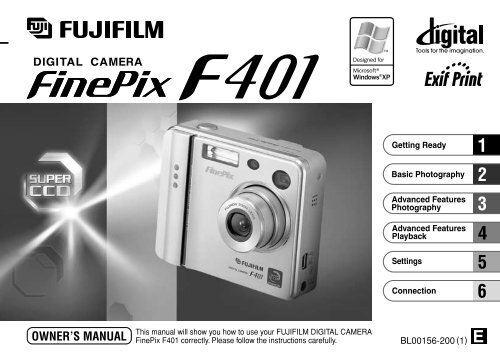
This manual will show you how to use your FUJIFILM DIGITAL CAMERA<strong>FinePix</strong> <strong>F401</strong> correctly. Please follow the instructions carefully. BL00156-200 (1)
WarningTo prevent fire or shock hazard, do not expose the unit to rain or moisture.CAUTION— Consult the dealer or an experienced radio/TVtechnician for help.This symbol is intended to alert the user toThis equipment has been tested and found toYou are cautioned that any changes orthe presence of uninsulated “dangerouscomply with the limits for a Class B digital device,modifications not expressly approved in thisvoltage” within the product’s enclosurepursuant to Part 15 of the FCC Rules. These limitsmanual could void the user’s authority to operatethat may be of sufficient magnitude toare designed to provide reasonable protectionthe equipment.constitute a risk of electric shock toagainst harmful interference in a residentialpersons.installation. This equipment generates, uses, and Notes on the Grant:can radiate radio frequency energy and, if not To comply with Part 15 of the FCC rules, thisCAUTION: TO REDUCE THE RISK OF ELECTRIC SHOCK.This symbol is intended to alert the userDO NOT REMOVE COVER (OR BACK).installed and used in accordance with the product must be used with a <strong>Fujifilm</strong>-specifiedto the presence of important operatingNO USER-SERVICEABLE PARTS INSIDE.instructions, may cause harmful interference to ferrite-core USB cable and DC supply cord.and maintenance (servicing) instructionsREFER SERVICING TO QUALIFIED SERVICE PERSONNEL.radio communications. However, there is noin the literature accompanying theguarantee that interference will not occur in a For customers in <strong>Canada</strong>The graphical symbols are located on the bottomappliance.particular installation. If this equipment does causeof the case.harmful interference to radio or television CAUTIONFor customers in the U.S.A.reception, which can be determined by turning the This Class B digital apparatus complies withequipment off and on, the user is encouraged to Canadian ICES-003.FCC Statementtry to correct the interference by one or more ofThis device complies with part 15 of the FCCthe following measures:Rules. Operation is subject to the following two—conditions: (1)Reorient or relocate the receiving antenna.This device may not cause—harmful interference, and (2)Increase the separation between thethis device mustequipment and receiver.accept any interference received, including— Connect the equipment into an outlet on ainterference that may cause undesiredPlease read the Safety Notes (➡P.108)circuit different from that to which the receiver isoperation.and make sure you understand themconnected.before using the camera.2 3
ContentsWarning ................................................................. 2Preface .................................................................. 6Camera Features and Accessories ....................... 7Nomenclature/Attaching the strap ........................... 81 Getting ReadyLOADING THE BATTERY AND SmartMedia ....... 11CHARGING THE BATTERY .................................... 14Using the AC Power Adapter ............................... 14SWITCHING ON AND OFF •SETTING THE DATE AND TIME ............................. 15Changing the date and time ................................. 172 Basic PhotographyBASIC OPERATION GUIDE .................................... 18q MODETAKING PICTURES (| AUTO MODE) ............. 21■ Viewfinder Lamp Display .............................. 25Number of Available Frames ........................... 26USING AF/AE LOCK ............................................ 27FRAMING GUIDELINE FUNCTION ..................... 29z FLASH ............................................................. 32Auto Flash Mode (no icon) ............................... 32nRed-Eye Reduction ..................................... 33z Forced Flash ................................................ 33bSuppressed Flash ........................................ 34vSlow Synchro ............................................... 34w MODEVIEWING YOUR IMAGES (PLAYBACK) ............. 35Fast Forwarding Images .................................. 35MULTI-FRAME PLAYBACK ................................. 36PLAYBACK ZOOM ............................................... 37Saving Trimmed Images .................................. 38ERASING SINGLE FRAME ................................. 393 Advanced Features Photographyq MODESELECTING | AUTO OR W MANUAL ........... 41PHOTOGRAPHY MENU OPERATION/PHOTOGRAPHY MENU OPTIONS ......................... 42PHOTOGRAPHY MENUySETTING QUALITY MODE (NO. OF RECORDEDPIXELS FOR STILL IMAGES) ........................... 44=SELF-TIMER PHOTOGRAPHY ....................... 45tCONTINUOUS SHOOTING ............................. 47tTop 4-frame Continuous Shooting ............... 48fSENSITIVITY ................................................... 49dEV (EXPOSURE COMPENSATION) ............... 50aWHITE BALANCE(SELECTING THE LIGHT SOURCE) .............. 51u MODE IN CONNECTION ..................................................... 81TMOVIE (VIDEO) ............................................... 52 CONNECTING AT DSC MODE ............................... 82Resolution settings for movies ......................... 55 CONNECTING AT PC CAMERA MODE .................. 844 Advanced Features Playbackw MODEPLAYING BACK MOVIES (VIDEO) ..................... 56PLAYBACK MENUp ERASING SINGLE • ALL FRAMES/FORMATTING ................................................. 58kPROTECTING IMAGES FRAME/ALL ............. 62iHOW TO SPECIFY PRINT OPTIONS (DPOF) ... 66iDPOF SET FRAME ......................................... 67rRECORDING VOICE MEMOS ........................ 71PLAYING BACK VOICE MEMOS ........................ 74q/u MODEUSING THE ZOOM .............................................. 30gADJUSTING THE MONITOR BRIGHTNESS ...... 76gADJUSTING THE VOLUME ................................. 774q MODEgUSING SET–UP ................................................... 78eMACRO (CLOSE-UP) PHOTOGRAPHY ......... 31}Final 4-frame Continuous Shooting ............. 48■ SET–UP Menu Options (Date/time setting, etc.) ... 79EC Declaration of Conformity ............................ 1115w MODE5 SettingsSET–UPgPOWER SAVE ................................................. 806 ConnectionDISCONNECTING FROM THE PC(Important — always use this procedure.) ................ 86System Expansion Options ................................. 88Accessories Guide .............................................. 89Notes on Using Your Camera Correctly .............. 91Notes on the Power Supply ................................. 92Notes on Using the Battery (NP-60) ................ 92AC Power Adapter .......................................... 94Notes on the SmartMedia ................................ 95Warning Displays ................................................ 97Troubleshooting ................................................. 100Explanation of Terms ........................................ 103Specifications .................................................... 105Safety Notes ...................................................... 108123456
PrefaceCamera Features and Accessories■ Test Shots Prior to PhotographyFor particularly important photographs (such as weddings andoverseas trips), always take a test photograph and view theimage to make sure that the camera is functioning normally.h Fuji Photo Film Co., Ltd. cannot accept liability for anyincidental losses (such as the costs of photography or theloss of income from photography) incurred as a result offaults with this product.■ Notes on CopyrightImages recorded using your digital camera system cannot beused in ways that infringe copyright laws without the consentof the owner, unless intended only for personal use. Note thatsome restrictions apply to the photographing of stageperformances, entertainments and exhibits, even whenintended purely for personal use. Users are also asked to notethat the transfer of memory cards containing images or dataprotected under copyright laws is only permissible within therestrictions imposed by those copyright laws.■ Liquid CrystalIf the LCD monitor or display panel is damaged, take particularcare with the liquid crystal in the monitor or panel. If any of thefollowing situations arise, take the urgent action indicated.h If liquid crystal comes in contact with your skinWipe the area with a cloth and then wash thoroughly withrunning water and soap.h If liquid crystal gets into your eyeFlush the affected eye with clean water for at least15 minutes and then seek medical assistance.h If liquid crystal is swallowedquantities of water and induce vomiting. Then seekmedical assistance.■ Notes on Electrical InterferenceIf the camera is to be used in hospitals or aircrafts, pleasenote that this camera may cause interference to otherequipment in the hospital or aircraft. For details, pleasecheck with the applicable regulations.■ Handling Your Digital CameraThis camera contains precision electronic components. Toensure that images are recorded correctly, do not subject thecamera to impact or shock while an image is being recorded.■ Trademark Informationh IBM PC/AT is a registered trademark of InternationalBusiness Machines Corp. of the U.S.A.h iMac and Macintosh are registered trademarks of AppleComputer, Inc.h Microsoft, Windows, and the Windows logo aretrademarks, or registered trademarks of MicrosoftCorporation in the United States and/or other countries.Windows is an abbreviated term referring to the MicrosoftWindows Operating System.✽ The “Designed for Microsoft Windows XP” logo refers tothe camera and the driver only.h SmartMedia is a trademark of Toshiba Corporation.h Other company or product names are trademarks orregistered trademarks of the respective companies.■ Exif Print (Exif ver. 2.2)Exif Print Format is a newly revised digital camera fileformat that contains a variety of shooting information forCamera Featuresh 2.1 million effective pixelsh 1/2.7-inch Super CCD provides high quality images with2304 × 1728 (4.0 million) recorded pixelsh High-performance 3× optical zoomh Compact and lightweight aluminum-magnesium alloy bodyh Quick, responsive operation with a 2.5-second startupand 1.3 seconds between shots.h Auto focus with macro functionh <strong>Manual</strong> photography mode lets you set your ownphotography settings.h High-sensitivity photography (1 mode only)h Image checking function automatically plays back theimage for about 2 seconds after you take a picture.h Maximum 3.6× seamless digital zoomh Playback zoom function (up to 14.4×)h Continuous shooting functionh Movie shooting function (with sound)h Voice Memo function for easy photography informationrecordingh 1.5-inches 114,000-pixels low-temperature polysiliconTFT LCD monitorh Recharge or connect to your PC simply by placing the<strong>FinePix</strong> <strong>F401</strong> in its cradle (sold separately)h Easy high-speed image file transfer via the USB connectionh Conforms to “Design for Camera File system” standardand Exif ver 2.2 for digital cameras✽ “Design for Camera File system” standard and Exifformat are formulated by the Japanese Electronic andAccessorieshSmartMedia (16MB, 3.3V) (1)Supplied with:• Anti-static case (1)• Index label (1)hNP-60 Rechargeable Battery (1)Soft case includedhStrap (1)hAC-5VS/AC-5VHSAC Power Adapter (1)Approx. 2 m (6.6 ft.)connection cordhUSB Interface Set (1)• CD-ROM: Software for <strong>FinePix</strong> EX (1)• <strong>FinePix</strong> <strong>F401</strong> Special USB cable with NoiseSuppression core (1)• Software Quick Start Guide (1)6 Flush your mouth thoroughly with water. Drink large optimal printing.Information Association (JEITA)hOwner’s <strong>Manual</strong> (this manual) (1)7
Nomenclature✽ Refer to the pages in parentheses for information on using the camera features.Shutter buttonFlash (P.32)Self-timer lamp (P.46)POWER switch (P.15)Flash control sensorMicrophoneViewfinder windowSpeaker (P.77)Lens/Lens coverMode switchStill photography mode (P.21)Playback mode (P.35)Movie (video) mode(P.52)Viewfinder (P.23)Viewfinder lamp (P.25)d/Macro button (P.31)(a)(b)/Zoom button (P.19)c/Flash button (P.32)Attaching the strap1 2(USB) socketCradle connectionsocket (P.8284)DC IN 5V (power input)socket (P.14)LCD monitorTripod mountBattery cover(P.12, 13)MENU/OK button (P.18)BACK button (P.18)DISP button (P.18, 29, 36)Strap mountBattery compartment (P.12)Battery release catch (P.12)SmartMedia eject button (P.13)8 SmartMedia slot (P.13) 9
Nomenclature (Sample display)1 Getting Ready LOADING THE BATTERY AND SmartMedia 10Example of LCD Monitor Text Display: Still photography modeFlashSensitivity (Only displayedfor 800 or 1600)Photography modeContinuous shootingEV (Exposurecompensation)White balanceZoom barDateExample of LCD Monitor Text Display: Playback modePlayback modeProtectionDPOFVoice memoZoom barDateMacroSelf-TimerNumber of recorded pixelsNumber of remaining shotsBattery level warningAF warningCamera shake warningAF framePlayback frame numberBattery level warningCompatible BatteriesUse only the special Rechargeable Battery NP-60.The use of other brands of rechargeable batterycould cause faults or damage to the camera.NP-60 Rechargeable Battery (1)TerminalsNP-60Indicator●! The battery is not fully charged at shipment andmust be charged up before being used.●! Do not stick labels onto the battery as this couldcause the battery to become jammed inside thecamera.●! See P.92-93 for note on the battery.SmartMedia (sold separately)■ Only use 3.3V SmartMediaMG-4S ( 4MB), MG-16SW ( 16MB, ID)MG-8S ( 8MB), MG-32SW ( 32MB, ID)MG-16S (16MB), MG-64SW ( 64MB, ID)MG-32S (32MB), MG-128SW (128MB, ID)MG-64S (64MB)●! Image files cannot be recorded or erased if a writeprotectsticker is affixed to the SmartMedia.●! Operation of this camera is only guaranteed when itis used with FUJIFILM SmartMedia.●! Some 3.3V SmartMedia are labelled as “3V” or ID”cards.●! See P.95-96 for note on SmartMedia.111
LOADING THE BATTERY AND SmartMedia01IndicatorGoldmarking03◆ To remove the SmartMedia ◆01 02IndicatorNP-6002041Battery release catch03 04121 Slide the battery cover out to open it.2 Hold the battery so that the arrow markingsare aligned, use your finger to pull the batteryrelease catch in the direction shown andinsert the battery. Check that the battery islocked in place.●! Do not apply excessive force to the battery cover.Never open the battery cover while the camerais still switched on. This could damage theSmartMedia or corrupt the image files on theSmartMedia.◆ To remove the battery ◆Open the battery cover and pull the batteryrelease catch in the direction indicated torelease the battery.●! Always switch the camera off when removingthe battery.3 Align the contact area (the gold-colored section)on the SmartMedia with the gold marking on theSmartMedia slot and firmly push theSmartMedia all the way into the slot.4 Close the battery cover.●! If you open the battery cover while the camera isswitched on, the camera automatically switches off toprotect the data on the SmartMedia.●! The SmartMedia will not slide fully into the slot if it isinserted facing the wrong way. Be careful not toapply undue force to the SmartMedia.●! To protect the SmartMedia, always store it in the specialanti-static case.Open the battery cover, pull the SmartMediaeject button up 1 and push it down 2. Thenfold the SmartMedia eject button back down toits original position 3.Grip the SmartMedia and pull it out 4.13
14CHARGING THE BATTERYDC IN 5V socketCheck that the camera is switched off. Plug theAC power adapter connector into the DC IN 5Vsocket on the camera and then plug the adapteritself into the main power outlet.The self timer lamp lights (blue) and batterycharging begins. When charging is completed,the self-timer lamp switches off.A fully discharged battery takes roughly 3 hoursto fully recharge (at an ambient temperature of+21°C to +25°C (+70°F to +77°F)).Using the AC Power AdapterUse the AC power adapter to avoid losing powerat inconvenient times, such as when you aredownloading photographed images to yourcomputer. Using the AC power adapter alsoallows you to take pictures and play back imageswithout worrying about depleting the battery.hCompatible AC power adaptersAC-5VS/AC-5VHS/AC-5VH●! Use only the FUJIFILM products listed above.●! See P.94 for notes on using the AC power adapter.●! Only connect or disconnect the AC power adapter whenthe camera is switched off.Connecting or disconnecting the AC power adapter whilethe camera is switched on temporarily interrupts thepower supply to the camera, so that images or moviesbeing shot at the time are not recorded. Failing to switchthe camera off first can also result in damage to theSmartMedia or malfunctions during PC connection.●! Charging times increase at low temperatures.●! If the self-timer lamp flashes during charging, a chargingerror has occurred and the battery cannot be charged. Ifthis occurs, see P.100.●! Switching the camera on during charging interrupts thecharging.●! You can charge the battery more quickly by using theBC-60 Battery Charger (sold separately) (➡P.89).●! The shape of the plug and socket-outlet depends on thecountry of use.SWITCHING ON AND OFF • SETTING THE DATE AND TIME1 2ONOFFSlide the POWER switch to turn the camera on andoff. When you switch the camera on, the viewfinderlamp lights (green).If the “q/T” mode is selected, the lens cover opensand the lens slides out. Avoid pressing on the lensso as not to damage precision components.Obstructing the lens will cause a malfunction or faultand the “ß” or “´” messagewill appear. Take care also not to get fingerprints onthe camera lens as this will result in impaired imagequality in your shots.✽ See P.78-79 for informationon selecting the language.When you first switch the camera on, the date iscleared. Press the “MENU/OK” button to set thedate and time.●! To set the date and time later, press the “BACK” button.●! If you do not set the date and time, this confirmationscreen will appear each time you switch the camera on.●! When you switch the camera on, the self timer lamplights for about 5 seconds.●! If you load the battery while the camera’s POWERswitch is set to ON, the viewfinder lamp/self timer lamplights briefly. This is normal and does not indicate a fault.151
SWITCHING ON AND OFF • SETTING THE DATE AND TIME163 401 021 Use “d” and “c” to select Year, Month, Day,Hour or Minute.2 Press “P(a)” or “{(b)” to set the number.●! If you hold down “a(P)” or “b({)”, the numberschange continuously.●! When the time displayed passes “12:00”, the AM/PMsetting automatically switches.Once you have set the date and time, press the“MENU/OK” button. Pressing the “MENU/OK”button switches the camera to Photography orPlayback mode.●! To set the time, press the “MENU/OK” button when the timeis at zero seconds.●! If at least 2 hours have passed since the AC poweradapter was connected or the battery inserted and thedate and time set, then those settings will be maintainedfor roughly 5 hours even when the camera has no powersupply (when the AC power adapter is disconnected andthe battery is removed).Changing the date and time0103 0204To change the date and time:1 Press the “MENU/OK” button.2 Use “d” or “c” to select “g” OPTION and thenuse “P(a)” or “{(b)” to select “SET–UP”.3 Press the “MENU/OK” button.4 Select “DATE/TIME” and press “c”.See P.16 for information on setting the date andtime.◆ Checking the remaining battery charge ◆Switch the camera on and check that no batterylevel warning (Z, X or C) is displayed onthe LCD monitor. If no icon is displayed, there isample charge left in the battery.i Z Lit white:The battery is approximately half charged.i X Lit red:Battery charge low. Replace or recharge thebattery as it will run out shortly.i C Blinking red:The battery is exhausted. The display will shortlygo blank and the camera will stop working.Replace or recharge the battery.●! The above estimates are for the photography modes.In Playback mode, the transition from “Z” to “C”may take less time.◆ Power Save Function ◆If the camera is not used in any way for approx. 30seconds when the camera functions are enabled, thisfunction temporarily switches features such as the LCDmonitor off to reduce power consumption (➡P.80). Ifthe camera is then left unused for a further period (2minutes or 5 minutes), the Power Save functionautomatically switches the camera off. To switch thecamera back on, slide the Power switch to the side toturn the camera off briefly and then turn it back on.171
2 BasicPhotographyBASIC OPERATION GUIDEThis section describes the camera’s functions.hMain actions performed by“ (a)”, “ (b)”, “d” and “c”When the Mode switch is set to “ ”:h Switching between stillphotography, playback andmoviesSlide the Mode switch to selectthe mode.hMenu display and confirmationDisplays the menu screen when youare shooting or playing back images.You also press this button to confirma menu selection.ZoomSwitches Macro ( )on and off.Sets the flash ( ).218Still image: Still photography.Playback: Photographed imageplayback andrecording sound.Movie: Movie photography.hBACKPress this button to stop a proceduremidway through.hDisplay selectorYou can use this button to selectthe LCD monitor display.When shooting:Switches the LCD monitor on andoff or displays the framing guides.During playback:Switches text display on and off orselects multi-frame playback.When the Mode switch is set to “ ”:Playback zoom,start/stop movie orsound playback.Change frame or (in amovie) frame advance.When the Mode switch is set to “ ”:Zoom19
BASIC OPERATION GUIDEq MODETAKING PICTURES (| AUTO MODE)hUsing the Menus2Select a menu option.Press the “d” or “c”button.1Display the menu.Press the “MENU/OK” button.3Select a setting.Press the buttonupward(a) ordownward(b) .You’ve read the chapter on getting ready and thecamera is now set up and ready to take pictures.The Basic Photography section explains the threebasic steps of “taking pictures”, “viewing pictures”and “erasing pictures”. Master the basic steps byactually trying them out on the camera as you go.12204Confirm your selection.Press the “MENU/OK” button.Press this button tostop a proceduremidway through.In the <strong>Owner's</strong> <strong>Manual</strong>, blacktriangles are used to indicate up,down (a, b) and left, right (d, c)respectively. Displaying the On-screen Help Instructions for the next step in the procedureare displayed at the bottom of the LCD monitor.Press the button indicated. Press the “DISP” buttonto use the zoom or the“MENU/OK” button totrim the image.Set the Mode switch to “q”.When you are taking shots using the viewfinder,you can make the battery last longer by pressingthe “DISP” button to switch the LCD monitor off.(Note that you cannot switch the LCD monitor offin Macro mode.)hPhotography range: Approx. 60 cm (2 ft.) to infinity●! If a “∂”, “ƒ”, “å” or“˙” message appears, see P.97, 98.Brace your elbows against your sides and holdthe camera with both hands. Position the thumbof your right hand so that it is handy for usingthe zoom.●! For subjects closer than 60 cm (2 ft.), use Macrophotography (➡P.31).●! Use the viewfinder to take pictures (switch the LCDmonitor off) to make the battery last longer.●! The image will be blurred if the camera moves whentaking the picture (camera shake). Use a tripod to avoidcamera shake, particularly for shots in dark locationswhen the flash is set to Suppressed Flash mode.212
q MODETAKING PICTURES (| AUTO MODE)3 4 5 6AF frameLCD monitorTake care to hold the camera so that yourfingers or the strap do not cover the lens, flashor flash control sensor. If the lens, flash or flashcontrol sensor is obscured by your fingers or thecamera strap, you may not be able to obtain thecorrect brightness (exposure) for your shot.●! There may be some unevenness in the brightness atthe lower edge of the LCD monitor. This is normaland does not indicate a fault. This does not affectthe photographed image.●! Check that the lens is clean. If it is dirty, clean thelens as described on P.91.●! If you use the flash in very dusty conditions or whenit is snowing, white dots may appear in the imagedue to the flash reflecting off the dust particles orsnowflakes. Try taking the shot with the flashswitched off.Zoom barAF frameWhen you are using the viewfinder to take apicture at a distance of 0.6 m to 1.5 m (2.0 ft. to4.9 ft.), only the shaded area in the figure isphotographed.222To zoom in on the subject, press “a” (PTELE).To zoom out, press “b” ({WIDE). A “zoombar” appears on the LCD monitor when youzoom in or out.h Optical zoom focal length(35mm camera equivalent)Approx. 38 mm-114 mm (1.5 in. to 4.5 in.)Maximum zoom scale: 3×●! Zooming stops briefly when the camera switchesbetween optical zoom and digital zoom (➡P.30). Pressthe same zoom button again to switch zoom modes.ViewfinderUsing the viewfinder or LCD monitor, frame yourshot so that the subject fills the entire AF (AutoFocus) frame.●! If your subject is not in the center of the picture, useAF/AE lock to take the picture (➡P.27).●! To center the photographed area accurately, youshould use the LCD monitor to take the shot.●! In some conditions it may be difficult to see yoursubject clearly on the LCD monitor (such as in sunnyweather outdoors or when you are shooting dimly litscenes). In such situations, use the viewfinder totake the shot.●! The image shown on the LCD monitor before youtake the shot may differ in its brightness, color, etc.from the image actually recorded. If necessary, playback the recorded image to check it (➡P.35).23
q MODETAKING PICTURES (| AUTO MODE)247 Bebeep8ClickWhen you press the shutter button down halfway, thecamera emits a short double-beep and focuses on yoursubject (the viewfinder lamp (green) changes fromblinking to steady). At that point, the AF frame on theLCD monitor becomes smaller and the camera sets theshutter speed and aperture.●! If the camera does not emit a short double-beep and “V”appears on the LCD monitor, the camera cannot focus.●! When you press the shutter button down halfway, the imageon the screen freezes temporarily. However, this image is notthe recorded image.●! If “V” is displayed on the screen (e.g. the shot is too darkfor the camera to focus), try standing about 2 m (6.6 ft.) fromyour subject to take the picture.If you press the shutter button down fully withoutreleasing it, the camera makes a clicking noiseand takes the picture. The camera then recordsthe photographed image.●! You can adjust the volume of the camera operationnoises (“bebeep” and “click”) or switch them offaltogether in the SET–UP menu (➡P.78, 79).●! There is a slight delay between the shutter buttonbeing pressed and the shot being taken. If necessary,play back the shot to check the image.●! If you press the shutter button down fully in one motion,the shot is taken without the AF frame changing.●! When you take a picture, the viewfinder lamp lightsorange (camera not ready) before switching back togreen to indicate that the camera is again ready forshooting.●! The viewfinder lamp flashes orange while the flash ischarging. If the LCD monitor is switched on, thescreen may go dark for a moment. This is normaland does not indicate a fault.●! See P.97-99 for information on the warning displays.■ Viewfinder Lamp DisplayDisplayStatusLit greenReady to shoot.Blinking greenAF/AE operating or camera shake/AF warning (ready to shoot).Blinking green and orange Recording data to the SmartMedia (ready to shoot).alternatelyLit orangeRecording data to the SmartMedia (not ready to shoot).Blinking orangeCharging the flash (flash will not fire).Blinking rediSmartMedia-related warning.The SmartMedia is not loaded, is not formatted, is incorrectly formatted or has awrite-protect sticker attached. SmartMedia full. SmartMedia fault.iLens operation error.✽ Detailed warning messages are displayed on the LCD monitor (➡P.97-99).◆ Subjects Not Suitable for Autofocus ◆Though the <strong>FinePix</strong> <strong>F401</strong> uses an accurate autofocus mechanism, it may have difficulty focusing or not be ableto focus at all on the types of subject and situation listed below. In such cases, the image may be out of focus.h Very shiny subjects such as a mirror or car body. h Subjects moving at high speed.h Subjects photographed through glass.h When something other than your subject is close toh Subjects that do not reflect well, such as hair or fur. the AF frame, has contrasting areas of light andh Subjects with no substance, such as smoke or flames. dark and is either closer or further away than yourh When the subject is dark.subject (as when you photograph someone againsth When there is very little contrast between the subject a background with strongly contrasting elements).and the background (such as white walls or subjectsdressed in the same color as the background).For subjects of this type, use AF/AE lock (➡P.27).252
q MODETAKING PICTURES (| AUTO MODE)q MODEUSING AF/AE LOCKNumber of Available FramesThe number of available shots is displayed onthe LCD monitor.1 2 ●! See P.44 for information on changing the resolution.●! The default resolution “y” set at shipment is 1.■ Standard number of shots per SmartMediaBecause the amount of data recorded varies depending on the subject, the number of available shots may notdecrease when recording ends, or may decrease by 2 frames. The discrepancy between the standard number ofavailable shots and the actual number of available shots increases in proportion to the capacity of the SmartMedia.In a shot with this type of composition, thesubjects (two people in this case) are not in theAF frame. If the shot is taken at this point, thesubjects will not be in focus.Move the camera slightly so that one of thesubjects in the AF frame.2Quality3 4M • F 3 4M • N2 2M 1 1M ! 0.3MNo. of recorded pixels 2304 × 1728 1600 × 1200 1280 × 960 640 × 480Image Data SizeApprox. 1.6MBApprox. 790KBApprox. 390KB Approx. 320KB Approx. 130KB26MG-4S (4MB)MG-8S (8MB)MG-16S/SW (16MB)MG-32S/SW (32MB)MG-64S/SW (64MB)MG-128SW (128MB)249204081491939791599193979159319122549991983983061122247497997✽ Number of available shots displayed on the camera for a new SmartMedia formatted in the camera.Continued on next page...◆ AF (Autofocus)/AE (Auto exposure) Lock ◆On the <strong>FinePix</strong> <strong>F401</strong>, when you press the shutter button down half way, the focus and exposure settingsare fixed (AF/AE lock). If you want to focus on a subject that is off to one side of the image or if you wantto set the exposure before you compose the final shot, lock the AF and AE settings and then composeand shoot your picture to get the best results.27
q MODEUSING AF/AE LOCKq MODEFRAMING GUIDELINE FUNCTION3Bebeep4ClickLCD monitor ONSceneUse this frame when you want to position yourmain subject in the center of the frame or whenyou want to align your shot with the horizon.This feature provides a clear guide to thesubject size and the overall balance of the shotso that you get exactly the shot you want.Framing Guidelinedisplayed2LCD monitor OFF28Without moving the camera, press the shutterbutton down halfway (AF/AE lock). Check thatthe AF frame on the LCD monitor has shrunkand the green viewfinder lamp has stoppedflashing and is now lit.Continue to hold the shutter button downhalfway. Move the camera back to the originalimage and then fully press down on the shutterbutton.●! You can reapply the AF/AE lock as many times asyou like before releasing the shutter.●! The AF/AE lock operates in all photography modesand can be used to ensure excellent results.You can select the Framing Guideline function inthe “q” still photography mode. The LCD monitordisplay changes each time you press the “DISP”button. Press the “DISP” button until “FramingGuideline” appears.●! The framing guideline is not recorded on the image.●! The lines in the scene frame roughly divide therecorded pixels into three equal parts horizontally andvertically. When the image is printed, the resultingprint may be shifted slightly from the scene frame.◆ Important ◆Always use the AF/AE lock to compose yourpicture.Failing to use the AF/AE lock may result in theimage being out of focus.29
q/T MODEUSING THE ZOOMq MODEe MACRO (CLOSE-UP) PHOTOGRAPHYYou can operate the optical zoom using the zoombuttons. You can also use the digital zoom whenthe resolution setting is “2”, “1”, “!” or “MOVIE”(# or $). However, this only applies when youare using the LCD monitor to take pictures.hDigital zoom focal distance (35mm camera equivalent)2: Approx. 114 mm to 164 mmMaximum zoom scale: 1.44×1: Approx. 114 mm to 205 mmMaximum zoom scale: 1.8×!: Approx. 114 mm to 410 mmMaximum zoom scale: 3.6×#: Approx. 38 mm to 137 mmMaximum zoom scale: 3.6×$: Approx. 38 mm to 274 mmMaximum zoom scale: 7.2×●! You cannot use the digital zoom for resolutions of “3”.●! The digital zoom cannot be used in high-sensitivityphotography (f800, 1600).●! See P.44, 55 for information on changing the file size30 setting.DigitalzoomOpticalzoomZoom bar displayThe position of the “■” on the zoom bar indicatesthe current zoom setting.hIf the “ ■ ” is above the dividing line, the digitalzoom is being used. If it is below the line, theoptical zoom is being used,hPress “P(a)” or “{(b)” to move the “ ■ ”.hWhen you switch between digital zoom andoptical zoom, the “ ■ ” stops moving. Press thebutton for the same direction again to start the“ ■ ” moving again.●! If the image goes out of focus when you use thezoom, press the shutter button down halfway torefocus.●! The optical zoom is equivalent to approximately38 mm-114 mm on a 35 mm camera.Selecting Macro mode allows you to take closeupshots.●Effective Photography Range:Approx. 10 cm to 80 cm (3.9 in to 31.5 in.).●! Macro photography is automatically cancelled in thefollowing situations:• When you have switched photography modes.• When the camera is switched off.●! When you set the mode, the “e” icon is brieflydisplayed larger.●! To fire the flash, press “c” and select “z” ForcedFlash or “v” Slow Synchro (➡P.33, 34). However, insome cases the correct brightness (exposure) maynot be obtained.●! If you are shooting in a dark location (when the “\”camera shake warning icon is displayed), use a tripodto prevent camera shake.If you use the viewfinder to take a picture in Macromode, the field visible through the viewfinder doesnot match the field actually photographed becausethe viewfinder and lens are in different positions.Accordingly, you should use the LCD monitor totake pictures in Macro mode.01 021 Set the Mode switch to “q”.2 Press the “e” Macro button (d). The “e” iconappears on the LCD monitor indicating that youcan take close-up shots.To cancel Macro mode, press the “e” Macrobutton (d) again.●! The LCD monitor automatically switches on.●! You cannot switch the LCD monitor off.●! When you cancel Macro mode, the LCD monitorremains on.312
q MODEI FLASH01 0232No iconYou can choose from 5 flash modes accordingto the type of shot.1 Set the Mode switch to “q”.2 The flash setting changes each time youpress the “z” Flash button (c). The last flashmode displayed is selected.hEffective flash range (for | AUTO)Wide-angle: Approx. 0.4 m to 3.5 m (1.3 ft. to 11.5 ft.)Telephoto : Approx. 0.4 m to 2 m (1.3 ft. to 6.6 ft.)●! The selected flash icon is briefly displayed larger.●! If you use the flash in very dusty conditions or when itis snowing, white dots may appear in the image due tothe flash reflecting off the dust particles or snowflakes.Try taking the shot with the flash switched off.Auto Flash Mode (no icon)Use this mode for ordinary photography. Theflash fires automatically as required by theshooting conditions.●! The flash charging time may increase if the chargeremaining in the battery is low.●! When you take a shot using the flash, you may seethe video image disappear and the screen go darkas the flash charges. The viewfinder lamp flashesorange while the flash is charging.n Red-Eye ReductionUse this mode to ensure that the subject’s eyesappear natural when photographing people inlow-light conditions.The flash fires a pre-flash just before the pictureis taken and then fires again to take the actualpicture.I Forced FlashUse this mode to photograph backlit scenes,such as a subject against a window or in theshade of a tree, or to obtain the correct colorswhen you are shooting under lighting such asfluorescent tubes. In this mode, the flash fires inbright as well as dark conditions.◆ Red-Eye Effect ◆When you use the flash to photograph people in low-light conditions, their eyes sometimes appear red inthe picture. This is caused by the light of the flash reflecting off the inside of the eye. Use Red-EyeReduction flash to effectively minimize the likelihood of the red-eye effect.Take the following measures to make Red-Eye Reduction more effective:h Get the subjects to look at the camera.h Get as close as possible to the subjects.332
q MODEI FLASHw MODEVIEWING YOUR IMAGES (PLAYBACK)Fast Forwarding Images34b Suppressed FlashUse this mode for photography using indoorlighting, for shots taken through glass, and forphotography in venues such as theaters or atindoor sporting events where the distance is toogreat for the flash to be effective. When you useSuppressed Flash, the Automatic White Balancefunction (➡P.104) operates so that natural colorsare captured along with the ambience of theavailable light.●! If you are shooting in Suppressed Flash mode in darkconditions, use a tripod to prevent camera shake.●! See P.25, 97 for information on the camera shakewarning.v Slow SynchroThis is a flash mode that uses a slow shutterspeed (slowest shutter speed: 1/4 sec.). Thisallows you to take pictures of people at nightthat clearly show both your subjects and thenight time backdrop.●! The image may be overexposed when you shootbright scenes.●! Because a slow shutter speed is used, a tripodshould be used to prevent camera shake.Set the Mode switch to “Q”.You can “d” and “c” button to move forwardand backward respectively through your images.●! When you set the Mode switch to “Q”, the lastimage shot is displayed.●! If the lens is extended during playback, the cameraretracts the lens as a protective measure if thecamera is not used for approximately 6 seconds.◆ Images That Can be Viewed on the <strong>FinePix</strong> <strong>F401</strong> ◆You can fast forward through the frames byholding down “d” or “c” button for about 1second during playback.●! A progress bar is displayed to show the approximateplayback position on the SmartMedia.You can use this camera to view (excluding some uncompressed data) images recorded on a <strong>FinePix</strong> <strong>F401</strong> orimages recorded onto a 3.3V SmartMedia using a FUJIFILM <strong>FinePix</strong> series, MX series and DX series digital camera.352
w MODEMULTI-FRAME PLAYBACKw MODEPLAYBACK ZOOM1 2 01 02Text displayed1 2010302No text displayedMulti-frame playbackIn playback mode, the display shown on theLCD monitor switches each time you press the“DISP” button. Press the “DISP” button until themulti-frame playback screen (9 frames) appears.Zoom bar236●! The LCD monitor text display disappears afterapproximately 3 seconds.●! Playback zoom cannot be used with multi-frameplayback.1 Select a frame by using “d”, “c”, “P(a)” and“ { (b )” button to move the cursor (theorange box) to the desired frame. Press the“P(a)” or “{(b)” button several times toswitch to the previous page or the next page.2 You can enlarge the selected image bypressing the “DISP” button again.Pressing the “P(a)” or “{(b)” button during singleframeplayback zooms in (enlarges) or out on a stillimage. When you use this function, a zoom bar isdisplayed. On-screen help is also displayed at thebottom of the screen.hZoom scales:3 2304 × 1728 pixel images: Max. 14.4×2 1600 × 1200 pixel images: Max. 10×1 1280 × 960 pixel images: Max. 8×! 640 × 480 pixel images: Max. 4×●! Pressing the “d” or “c” button during zooming cancelszooming and moves to the next image.After you have zoomed in on your image,1 Press the “DISP” button.2 Use “P(a) {(b)” and “g” to zoom in ondifferent parts of the image.3 Press the “DISP” button again to revert tozoomed display.●! Press the “BACK” button to return to normal unscaleddisplay.Continued on next page...37
w MODEPLAYBACK ZOOMw MODEERASING SINGLE FRAMESaving Trimmed Images121 01 02 2 238After using playback zoom, press the “MENU/OK”button to trim the image.The size of the saved image varies depending onthe zoom scale. In 0.3M mode, “ ”is displayed in yellow. At recorded pixels below0.3M, “” is no longer displayed.Check the size of the image being saved and thenpress the “MENU/OK” button. The trimmed imageis added as a separate file in the last frame.■Image Sizes2 Best for prints1 Good for prints“ ” is displayed in yellow! since the quality is too low for printing.✽ Lower than !: “” is no longer displayedand images cannot be saved trimmed asthe quality is not suitable for printing.1 Set the Mode switch to “w”.2 Press the “MENU/OK” button to display theMenu screen on the LCD monitor.●! To revert to image playback without erasing theimage, select “BACK” and press the “MENU/OK”button.Select “FRAME” in the “pERASE” menu andpress the “MENU/OK” button.See P.58 for more information on “ALL FRAMES”and “FORMAT”.39
w MODEERASING SINGLE FRAME3Advanced FeaturesPhotographyq MODESELECTING | AUTO OR W MANUAL3412 01 030240Press “d” or “c” to view the frame (individualfile) you want to erase.●! Press the “BACK” button to cancel frame erasing.Note that mistakenly erased images cannot berecovered. You should copy important files thatyou do not want to be erased to your computeror another media.Pressing the “MENU/OK” button erases theframe (individual file) displayed. When erasing iscomplete, the next image appears and the“§” message is displayed.To erase another frame, repeat steps 3 and 4 .Set the Mode switch to “q”.●! See P.52 for information on shooting movies.| AUTOThis is the easiest mode for taking pictures andcan be used in a wide range of conditions.W MANUALThis mode allows you to specify your ownbrightness, white balance and sensitivitysettings.1Press the “MENU/OK” button to display themenu.2Use “d” or “c” to select “g” OPTION and thenuse “P(a)” or “{(b)” to select “qAUTO” or“qMANUAL”.3Press the “MENU/OK” button to confirm theselection.413
PHOTOGRAPHY MENU OPERATION/PHOTOGRAPHY MENU OPTIONSPhotography Menu Operation1 0103 021Press the “MENU/OK” button to display themenu.2Use “d” and “c” to select the menu item and“P(a)” and “{(b)” to change the setting.3Press the “MENU/OK” button to confirm theselection.2When you enable the setting, an icon appears inthe top-left corner of the LCD monitor.●! The settings available in the menu screen differdepending on the still image mode.Photography Menu Optionsa White balanced EVf Sensitivityy Quality= Self-timer photographyt Continuous shootingg Option342Default setting: AUTOSee P.51 for details.Available modesWDefault setting: 0See P.50 for details.Default setting: 200See P.49 for details.In “W” (<strong>Manual</strong>) mode:Pressing “d” or “c” oncemore in the resolution andsensitivity settings jumps tothe previous page or the nextpage.Available modes|, W, uDefault setting: 1 (q), # (u)See P.44, 55 for details.Available modes|, WDefault setting: OFFSee P.45 for details.Available modes|, WDefault setting: OFFSee P.47 for details.Available modes|, W, u—See P.78 for details.43
PHOTOGRAPHY MENU✽ Displaying the menus (➡P.42)y SETTING QUALITY MODE (NO. OF RECORDED PIXELS FOR STILL IMAGES)PHOTOGRAPHY MENU= SELF-TIMER PHOTOGRAPHY✽ Displaying the menus (➡P.42)UsePrintingInternetQuality Mode3 4M • F (2304 × 1728)3 4M • N (2304 × 1728)2 2M (1600 × 1200)1 1M (1280 × 960)! 0.3M ( 640 × 480)12 0144This mode can be selected in the “|”, “W” stillimage modes.You can choose from 5 settings. Use the table onthe right as a guide for selecting the best settingfor the shot you want to take.●! The numbers to the right of each setting show thenumber of available shots.●! When you change the resolution, the number ofavailable shots also changes.hTo print at A5 size or larger→ 34M • F or 34M • N✽ Select “F” (FINE) for better image quality and“N” (NORMAL) to increase the number of availableshots.In most cases, the “N” (NORMAL) setting providesmore than adequate image quality.hTo print at A6 (postcard) to A5 size → 22MhTo print at A7 (half postcard) to A6 size → 11MhFor an image attached to E-mail or used on awebsite → !0.3M●! See P.55 for information on the resolution setting forMovie mode.This mode can be selected in the “|”, “W” stillimage modes.When you set the self-timer to “ON”, “=” appearson the LCD monitor.In this mode, a timer runs for roughly 10 secondsbefore the shutter is released. Use this mode forshots such as photographs of yourself.●! The self timer is automatically switched off in thefollowing situations:• When shooting ends• When you switch to “|” or “W” mode• When you change the Mode switch setting• When the camera is switched off.●! You can also use the AF/AE lock (➡P.27).●! Be careful not to stand in front of the camera whenyou press the shutter button as this can causefocusing or exposure metering errors.Bebeep02 Beep 031 Position the AF frame over your subject.2 Press the shutter button down half way to setthe focus.3 Without releasing the shutter button, press itdown fully. The self-timer then starts running.Continued on next page...453
PHOTOGRAPHY MENU= SELF-TIMER PHOTOGRAPHYPHOTOGRAPHY MENUt CONTINUOUS SHOOTING✽ Displaying the menus (➡P.42)341246The self timer lamp lights for 5 seconds and thenstarts flashing. 5 seconds later the cameramakes a clicking noise and takes the picture.●! To stop the self-timer once it has started running,press the “BACK” button.Until the picture is taken, a countdown appearson the LCD monitor.Self-timer mode is automatically cancelled aftereach shot.This mode can be selected in the “|”, “W” stillimage modes.Select the continuous shooting mode you wantto use.See P.48 for more information on continuousshooting modes.●! “¨” appears on the LCD monitor duringshooting.●! You cannot use the flash in this mode.●! The speed of continuous shooting remains the sameregardless of the resolution setting.●! The shots should be taken using the viewfinder.●! The results of the shot are displayed even when“POSTVIEW” is set to OFF (➡P.79).●! The time required to record a file is approximately8 seconds in “1” mode (for TOP or FINAL 4-framecontinuous shooting).When Top 4-frame continuous shooting is set toON, the “t” icon appears on the LCD monitor.When Final 4-frame continuous shooting is setto ON, “}” appears on the LCD monitor.Continuous shooting continues while the shutterbutton is pressed down fully.●! The focus and exposure are determined for the firstframe and cannot be changed during shooting.●! If there is insufficient available space on theSmartMedia to take the maximum number ofcontinuous shots, the number of shots that can berecorded is taken.Continued on next page...473
PHOTOGRAPHY MENUt CONTINUOUS SHOOTINGPHOTOGRAPHY MENUf SENSITIVITY✽ Selecting |/W (➡P.41)✽ Displaying the menus (➡P.42)t Top 4-frame Continuous Shooting} Final 4-frame Continuous ShootingPress shutterbuttonMax. 25 shotsRelease shutterbuttonHigh-sensitivity photography (800 or 1600) 4 frames48In this mode, you can shoot up to 4 frames atintervals as short as 0.3 seconds. When youtake the shots, the photographed images aredisplayed and automatically recorded.This mode allows you to release the shutter up to25 times (at intervals as short as 0.3 seconds)and record the last 4 frames. If you take yourfinger off the shutter button before 25 shots havebeen taken, the camera records the final 4 framesshot before you released the shutter button.If there is insufficient capacity on the SmartMedia,the number of shots that could be recorded justbefore the shutter button was released is taken.This mode can be selected in the “W” photography mode.Use this setting when you want to take bright picturesindoors without using a flash or when you want to usea fast shutter speed (to prevent camera shake, etc.).hSettings: 200 (standard), 400, 800, 1600●! While selecting a higher sensitivity setting will allow youto take pictures in darker locations, it will also increasethe amount of speckling in your images.Streaking may also be visible in shots of scenes such asthe night sky.Choose the sensitivity setting that best suits the conditions.●! When you specify a high sensitivity, the amount of noise(interference) in the image shown on the LCD monitorbefore the shot is taken increases. However, this isnormal and does not indicate a fault.●! The digital zoom cannot be used in high-sensitivity photography.If you select a photography mode other than “W” when ahigh sensitivity setting is selected, the resolution revertsto the setting specified just before the sensitivity was set.When a high sensitivity (800 or 1600) is set, “&”or “*” appears on the LCD monitor and theresolution is automatically set to “1”. If you try toselect a resolution other than “1” when a highsensitivity setting is selected, “&” or “*”flashes and the resolution remains unchanged.493
PHOTOGRAPHY MENU✽ Selecting |/W (➡P.41)d EV (EXPOSURE COMPENSATION) ✽ Displaying the menus (➡P.42)PHOTOGRAPHY MENUa WHITE BALANCE (SELECTING THE LIGHT SOURCE)✽ Selecting |/W (➡P.41)✽ Displaying the menus (➡P.42)50This mode can be selected in the “W” photographymode.Use the Brightness setting to obtain the optimumimage brightness (exposure) when the subject ismuch brighter or darker than the background.hCorrection range: 13 steps(–2.1 EV to +1.5 EV in 0.3 EV increments)See P.103 for more information on EV.●! The Brightness setting is disabled in the followingsituations:• When the flash is used in Auto or Red-EyeReduction mode.• When dark scenes are shot in Forced Flash mode.◆ Subjects for Which ExposureAdjustment is Particularly Effective ◆Guide to using + (positive) compensationhCopying of printed text (black characterson white paper) (+1.5 EV)hBacklit portraits (+0.6 EV to +1.5 EV)hVery bright scenes (such as snowfields)and highly reflective subjects (+0.9 EV)hShots made up predominantly of sky.(+0.9 EV)Guide to using – (negative) compensationhSpotlit subjects, particularly against darkbackgrounds (–0.6 EV)hCopying of printed text (white characterson black paper) (–0.6 EV)hScenes with low reflectivity, such as shotsof pine trees or dark foliage (–0.6 EV)This mode can be selected in the “W” photographymode.Change the white balance setting when youwant to take a picture with the white balancefixed for the surroundings and lighting when thepicture is taken.In AUTO mode, the correct white balance maynot be obtained for subjects such as close-upsof people’s faces and shots taken under aspecial light source. In such situations, selectthe correct white balance for the light source.See P.104 for information on the white balance.AUTO: Automatic adjustment(Shooting to show the ambience of thelight source)6 : Shooting outdoors in fine weather7 : Shooting in shade9 : Shooting under “Daylight” fluorescentlamps0 : Shooting under “Warm White” fluorescentlamps- : Shooting under “Cool White” fluorescentlamps8 : Shooting in incandescent light✽ When the flash fires, the white balance set for theflash is used. To achieve a particular desired effect,set the flash mode to Suppressed Flash (➡P.34).513
T MODET MOVIE (VIDEO)12 3452Set the Mode switch to “T”.This mode allows you to shoot movies up to 120seconds (at the # setting) or 480 seconds (at the$ setting) with sound. (See P.55 for informationon resolution settings.)hMovie format: Motion JPEG (➡P.103)# (320 × 240 pixels)$ (160 × 120 pixels)selectable10 frames per secondWith monaural sound●! Because the audio is recorded as you shoot, take carenot to cover the microphone with your finger (➡P.8).●! Depending on the available space on the SmartMedia,the available shooting time per movie may be shorter.●! You cannot switch the LCD monitor off in this mode.It may not be possible to play back your movieon other cameras.The available shooting time and the “œ”message are shown on the LCD monitor.■ SmartMedia standard shooting timeSmartMediaQualityCapacity#$MG-4S (4MB) Approx. 24 sec. Approx. 83 sec.MG-8S (8MB) Approx. 49 sec. Approx. 169 sec.MG-16S/SW (16MB) Approx. 98 sec. Approx. 5.6 min.MG-32S/SW (32MB) Approx. 199 sec. Approx. 11.3 min.MG-64S/SW (64MB) Approx. 6.7 min. Approx. 22.8 min.MG-128SW (128MB) Approx. 13.4 min. Approx. 45.6 min.✽ The available shooting time displayed on the camerafor a new SmartMedia formatted in the camera.Zoom barIn Movie (video) mode, the lens is fixed at thewide-angle setting and only the digital zoom canbe used. You can use the “P(a)” and “{(b)”zoom buttons to zoom in and out. A “zoom bar”appears on the LCD monitor.hDigital zoom focal distance (35mm camera equivalent)#: Approx. 38 mm to 137 mmMaximum zoom scale: 3.6×$: Approx. 38 mm to 274 mmMaximum zoom scale: 7.2×Press the shutter button down fully to startshooting the movie.●! If the brightness of the subject changes while youare shooting a movie, the sound of the apertureoperating may be recorded in the movie.●! Camera operation noises may be recorded duringmovie shooting.●! You do not need to hold down the shutter button.●! The focus is fixed at 2 m (6.6 ft.) to infinity.●! The focus and white balance are fixed duringshooting, but the exposure varies automatically tosuit the scene being shot.●! The image shown on the LCD monitor before you takethe shot may differ in its brightness, color, etc. from theimage shown on the monitor during movie recording.The white balance is set automatically when youpress the shutter button down fully.Continued on next page...533
T MODET MOVIE (VIDEO)561Resolution settings for movies012During shooting, a timer in the top-right corner ofthe LCD monitor counts down the remainingtime.02 0301023If you press the shutter button once more duringshooting, shooting ends and the movie isrecorded onto the SmartMedia.1 Set the Mode switch to “T”.2 Press the “MENU/OK” button to display themenu screen.3 Press “d” or “c” to select “y” Quality.You can select 2 levels of quality. For betterimage quality, select “# ”, and for longerphotography time, select “$”.1 Use “P(a)” and “{(b)” to change the qualitysetting.2 Press “MENU/OK” button to confirm yourselection.54●! Once the remaining time runs out, movie recordingautomatically stops and the movie is stored on theSmartMedia.●! The time required to record a 120 second movie(roughly 20 MB) is approximately 14 seconds.●! If you end shooting immediately after you startshooting, only 1 second of movie is shot.Movie Size# 320 × 240$ 160 × 120Maximum shooting time120 sec.480 sec.55
4 AdvancedFeatures Playbackw MODEPLAYING BACK MOVIES (VIDEO)101 02 201■ Controlling Movie PlaybackControlDescriptionPlaybackThe movie automatically stops when playback ends.02Pause/ResumePauses the movie during playback.Press this button again to resume playback.StopStops playback.✽ Press “d” or “c” while movie playback is stopped to go backto the previous file or advance to the next file respectively.561Set the Mode switch to “Q”.2Press “d” or “c” to select a movie file.●! Movies cannot be played back using multi-frameplayback. Use the “DISP” button to select normalplayback.Indicated by the “u” icon.1 Press “b({)” to play the movie.2 The LCD monitor shows the playback timeand a playback progress bar.●! Take care not to block the speaker.●! If the sound is difficult to hear, adjust the volume(➡P.77).●! If the subject of the movie is very bright, whitestreaks may appear on the image during playback.This is normal and is not a fault.Fast forward/RewindSkip playbackRewindWhen pausedFast forwardPress these during playback to skip forwards or backwardsthrough the movie.i Each time you press “d” or “c” when the movie is paused,the movie advances or goes back one frame.i Hold down the button to move through the frames quickly.✽ Refer to the Software Quick Start Guide (provided) for information on playing back movies on your PC.◆ Compatible movie files ◆You can use the <strong>FinePix</strong> <strong>F401</strong> to play back movie files recorded on a <strong>FinePix</strong> <strong>F401</strong> or movie files (10 fps)up to 120 seconds long shot at 320 × 240 pixels on a FUJIFILM digital camera and then recorded on a 3.3Volt SmartMedia. Movies recorded using a <strong>FinePix</strong> F601/S602 cannot be played back on this camera.574
PLAYBACK MENUp ERASING SINGLE • ALL FRAMES/FORMATTING1 01 02 23FORMATFormatting erases all the files.The SmartMedia is initialized for usein the camera.You should copy important files thatyou do not want to be erased to yourcomputer or another media.1Set the Mode switch to “Q”.2Press the “MENU/OK” button to view themenu screen.Use “g” to select “p” ERASE.01 021Use “P(a)” or “{(b)” to select “FRAME”, “ALLFRAMES” or “FORMAT”.2Press “MENU/OK” button to confirm yourselection.ALL FRAMESErases all unprotected files.You should copy important files thatyou do not want to be erased to yourcomputer or another media.FRAMEErase only the selected file.BACK4Returns to playback without erasingany files.58Continued on next page...59
PLAYBACK MENUp ERASING SINGLE • ALL FRAMES/FORMATTINGFRAMEALL FRAMESFORMAT01 024601Use “d” and “c” to select the file to be erased.2Press the “MENU/OK” button to erase thecurrently displayed file.To erase another image, repeat steps 1 and 2.When you have finished erasing images, pressthe “BACK” button.●! The file for which “ˆ” was displayedcannot be erased. Remove the protection.Pressing the “MENU/OK” button erases all theunprotected files.If the “©”“ø” message appears,press the “MENU/OK” button once more to erasethe image.Pressing the “MENU/OK” button erases all thefiles and initializes the SmartMedia. Formattingerases protected files also.●! If the “∂”, “ƒ”, “å” or“˙” message appears, refer to P.97,98 before formatting the SmartMedia and take theappropriate measures.61
PLAYBACK MENUk PROTECTING IMAGES FRAME/ALL1 01 0223UNPROTECT ALLRemoves the protection from all thefiles.PROTECT ALLProtects all the files.1Set the Mode switch to “Q”.2Press the “MENU/OK” button to view themenu screen.FRAME SET/RESET01 02Protects or unprotects only theselected file.Use “d” or “c” to select “k” PROTECT.1Press “P(a)” or “{(b)” to select “UNPROTECTALL”, “PROTECT ALL” or “FRAME SET/RESET”.2Press “MENU/OK” button to confirm yourselection.462Protection is a setting that prevents images frombeing accidentally erased. However, “FORMAT”erases all images, regardless of a “PROTECTALL” setting (➡P.61).Continued on next page...63
PLAYBACK MENUk PROTECTING IMAGES FRAME/ALLFRAME SET/RESET1 2PROTECT ALLUNPROTECT ALL01 024641 Press “d” or “c” to select the file to beprotected.2 Press the “MENU/OK” button to protect thefile currently displayed.To protect another file, repeat steps 1 and 2.To finish protecting files, press the “BACK”button.To remove the protection, press the “MENU/OK”button again.Press the “MENU/OK” button to protect all thefiles.Press the “MENU/OK” button to unprotect all thefiles.65
PLAYBACK MENUi HOW TO SPECIFY PRINT OPTIONS (DPOF)PLAYBACK MENUi DPOF SET FRAMEDPOF stands for Digital Print Order Format and refers to a format that is used forrecording printing specifications for images shot using a digital camera on media such asSmartMedia. The recorded specifications include information on which frames are to beprinted.This section gives a detailed description of how to order your prints with the <strong>FinePix</strong> <strong>F401</strong>.On the <strong>FinePix</strong> <strong>F401</strong>, you can specify only one print per image in the DPOF settings.✽ Note that some printers do not support date and time imprinting or specification of thenumber of prints.✽ Note that the warnings shown below may be displayed while you are specifying theprints.1 01 022©ø (➡P.60)When you erase the image, the DPOF setting for that image is deleted at the same time.¥ (➡P.70)If you load a SmartMedia that contains frames specified for printing on another camera,those print specifications are all reset and replaced by the new print specifications. (➡P.99)Up to 999 frames can be specified on the same SmartMedia.1Set the Mode switch to “Q”.2Press the “MENU/OK” button to display themenu screen.Use “g” to select “i” DPOF.466Continued on next page...67
PLAYBACK MENUi DPOF SET FRAME343501 02601 0201 02681Press “P(a)” or “{(b)” to select “DDATE”.2Use “d” and “c” to select “DATE ON” or“DATE OFF”.The selected setting is then valid for all frameswith DPOF settings.1Press “P(a)” to select “OK”.2Press the “MENU/OK” button.1 Use “d” or “c” to display the frame for whichyou want to specify DPOF settings.2 Press “P(a)” or “{(b)” to set “YES” for theframe to be printed and then press the“MENU/OK” button or “c”.To specify more DPOF settings, repeat steps 1and 2.●! DPOF settings cannot be specified for movies.●! “TOTAL” shows the total number of frames for whichprints have been ordered.When you have finished the settings, alwaysselect “FINISH” and press the “MENU/OK”button.If you press the “BACK” button, no DPOF settingsare specified.●! You can only specify one print per frame in the DPOFsettings. Note also that you can specify prints for upto 999 frames on the same SmartMedia.Continued on next page...694
PLAYBACK MENUi DPOF SET FRAMEPLAYBACK MENUr RECORDING VOICE MEMOS7◆ DPOF settings cannot be changed. ◆101 02201 0302Pressing the “MENU/OK” button confirms theDPOF settings.Pressing the “BACK” button returns you to thesettings screen 5 .If you select a frame for which DPOF settings havealready been specified, the “¥ ”message appears.Pressing the “MENU/OK” button erases all ofthe DPOF settings already specified for eachframe. You must then specify the DPOF settingfor each frame again.1Set the Mode switch to “Q”.2Use “d” and “c” to select the image (stillimage) to which you want to add a voicememo.1Press the “MENU/OK” button to display themenu screen.2Use “g” to select “r” VOICE MEMO.3Press the “MENU/OK” button.470Pressing the “MENU/OK” button confirms all thesettings.●! Press the “BACK” button to leave the previoussettings unchanged.●! During playback, check that the “i” icon isdisplayed for the previous settings.●! You can also add voice memos to images (stillimages) shot on other cameras, provided they canbe played back on this camera.●! Voice memos cannot be added to movies.Continued on next page...71
PLAYBACK MENUr RECORDING VOICE MEMOS345◆ When the image already hasa voice memo ◆If you select an image that already has a voicememo, a screen appears in which you canselect whether or not to rerecord the caption.72The “®” message appears on theLCD monitor. Recording begins when you pressthe “MENU/OK” button.MicrophoneFace the microphone asyou record the voicememo. Hold the cameraroughly 20 cm (7.9 in.)away for the bestresults.During recording, the remaining time is shownon the LCD monitor and the self-timer lampflashes.When the time remaining reaches 5 seconds,the self-timer lamp starts flashing quickly.●! To end your comment during recording, press the“MENU/OK” button.When you have recorded 30 seconds ofcomment, the “∑” message appears onthe LCD monitor.To finish: Press the “MENU/OK” button.To re-record your comment: Press the “BACK”button.734
w MODEPLAYING BACK VOICE MEMOS1 01 02 201■ Playing back voice memosControlDescriptionPlaybackThe voice memo automatically stops when playback ends.02Pause/ResumePauses the voice memo during playback.Press this button again to resume playback.1Set the Mode switch to “Q”.2Use “d” or “c” to select an image file thathas a voice memo.1 Press “b({)” to play the voice memo.2 The LCD monitor shows the playback timeand a playback progress bar.StopFast forward/RewindRewindFast forwardStops playback.✽ Press “d” or “c” while voice memo playback is stopped togo back to the previous file or advance to the next filerespectively.Press these during playback to skip forwards or backwardsthrough the voice memo.✽ These buttons do not function while playback is paused.✽ Refer to the Software Quick Start Guide (provided) for information on playing back voice memos on your PC.474●! You cannot play back voice memos using multiframeplayback. Use the “DISP” button to revert tonormal playback.The “r” icon is displayed.●! Take care not to block the speaker.●! If the sound is difficult to hear, adjust the volume(➡P.77).◆ Compatible voice memo files ◆The <strong>FinePix</strong> <strong>F401</strong> can play voice memo files recorded on a <strong>FinePix</strong> <strong>F401</strong> and voice memo files up to30 seconds long that were recorded on a FUJIFILM digital camera and stored on a 3.3V SmartMedia.75
5 Settings g ADJUSTING THE MONITOR BRIGHTNESS g ADJUSTING THE VOLUME101 03 022The volume can only be adjusted in w mode.1 01 03 02 201 0201 02You can set the monitor brightness in any mode.1Press the “MENU/OK” button to display themenu screen.2Press “d” or “c” to select “g” OPTION and thenpress “P(a)” or “{(b)” to select “LCDBRIGHTNESS”.3Press the “MENU/OK” button.76 ●! The screen shown is for still photography.1 Use “d” or “c” to adjust the LCD monitorbrightness.2 Press the “MENU/OK” button.●! To exit this procedure without changing the settings,press the “BACK” button.Use the procedure below to adjust the volumefor movies and voice memos.1Press the “MENU/OK” button to display themenu screen.2Press “d” or “c” to select “g” OPTION andthen press “P (a )” or “{ (b )” to select“VOLUME”.3Press the “MENU/OK” button.1Press “d” or “c” to adjust the speaker volume.2Press the “MENU/OK” button.●! To exit this procedure without changing the settings,press the “BACK” button.775
g USING SET–UP1 01 030220102■ SET–UP Menu Options (Date/time setting, etc.)POSTVIEWUSB MODEFactorySettings DisplaydefaultExplanationPOWER SAVEON/OFF2MIN/5MIN/OFFDSC/PC CAMON2MINDSCThis option specifies whether or not an image checking screen(photography results) is displayed after you take a shot.The photography results are displayed for about 2 seconds andthen automatically recorded.In continuous shooting, the photography results are displayedfor a set time before being automatically recorded even if thisoption is set to “OFF”.Use this option to specify whether the camera’s powerconsumption is reduced and the camera is subsequently switchedoff automatically when it is not being used. See P.80 for details.See P.81 for details.DATE/TIMESET—Use this option to correct the date or time. See P.16 for details.You can set in any mode.1Press the “MENU/OK” button to display themenu screen.2Press “d” or “c” to select “g” OPTION andthen press “P (a )” or “{ (b )” to select“SET–UP”.3Press the “MENU/OK” button.78 ●! The screen shown is for still photography.1Press “P(a)” or “{(b)” to select a menuoption and then press “d” or “c” to changethe setting.2Press the “MENU/OK” button.●! Press “c” for “DATE/TIME” or “RESET ALL”.q LCDSOUNDLANGUAGERESET ALLON/OFFLOW/HIGH/OFFENGLISH/FRANCAIS/DEUTSCHOKONLOWENGLISH—Use this option to specify whether the LCD monitor is automaticallyswitched ON or OFF when the Mode switch is set to “q”.This option allows you to set the volume of the beep emittedwhen the camera controls are used.Select English, French or German as the language used forscreen display.This resets all camera settings (including the photography andplayback menu settings) other than the date and time to thefactory default values set at shipment. When you press “c”, aconfirmation screen appears. To proceed, press the“MENU/OK” button again.795
SET–UPg POWER SAVE6 ConnectionIN CONNECTION80Once you enable this function, the monitor istemporarily switched off to reduce powerconsumption (Sleep mode) if the camera is notused for about 30 seconds. If the camera is thenleft unused for a further time (2 minutes or 5minutes), it is automatically switched off. Usethis function when you want to get the maximumpossible running time from the battery.●! Power Save is disabled when the camera is connectedto a USB port.The Sleep function does not operate when theLCD monitor is switched off or when the camerais in Setup or Playback mode. However, if thecamera controls are not used for some time (2minutes or 5 minutes), the camera automaticallyswitches off.When the camera is in sleep mode, pressing theshutter button down halfway brings the cameraback to full operational mode. This is a usefulfeature as it allows you to take pictures morequickly than switching the camera off and thenon again. You can also take a picture by pressingthe shutter button all the way down.◆ To restore power to the camera ◆21Use the power switch toturn the camera off briefly1 and then on again 2.●! Operation can also be restored by pressing buttonsother than the shutter button.The “Connection” section explains how to connect the camera to your computer using the special USBcable and describes the functions you can use once the camera and computer are connected. Referalso to the Software Quick Start Guide booklet.If the power cuts out during data transmission, the data cannot be transmitted correctly. Always use theAC power adapter when connecting the camera to a computer.The first time you connect the camera to your computerYou must install all the software beforeconnecting the camera to your computer.Refer also to the Software Quick Start Guidebooklet.CD-ROM(Software for <strong>FinePix</strong> EX)Software Quick Start GuideDSC (Mass storage device) ModeThis mode provides a simple way to readimages from a SmartMedia and store images onto a SmartMedia (➡P.82).PC CAM (camera) ModeThis function allows you to conductvideoconferencing sessions between PCsconnected to the Internet. This function can alsobe used to record video on a PC (➡P.84).●! Videoconferencing (“PictureHello”) is notsupported on Macintosh computers.●! The PC Camera function cannot be used on Mac OSX (including the Classic environment). Use a MacOS version between 8.6 and 9.2.816
CONNECTING AT DSC MODE1 01 02 04 2(USB)socketCamera OperationPC Operationi <strong>FinePix</strong>Viewer automatically starts up.ONOFF82031 Load a SmartMedia containing photographedimages into your camera. Plug the AC poweradapter connector into the DC IN 5V socketon the camera and then plug the adapteritself into the main power outlet.2 Slide the POWER switch to the side to turnthe camera on.3 Set the “USB MODE” setting in the SET–UPmenu to “DSC” (➡P.78, 79).4 Slide the POWER switch to the side to turnthe camera off.DC IN Camera5V socketUSBsocket1 Switch your PC on.2 Use the special <strong>FinePix</strong> <strong>F401</strong> USB cable toconnect the camera to your computer.3 Switch the camera on.If you are using a Windows PC, the driver settingsare specified automatically when installation iscompleted. No further action is required.✽ If your PC fails to recognize the camera, refer tothe Software Quick Start Guide.Always use the prescribed procedure whendisconnecting or switching off the camera (➡P.86).●! On Windows XP and Mac OS X, you must specify theautomatic launch settings the first time you connect thecamera to your computer (➡Software Quick Start Guidebooklet).●! Take care to ensure that the special <strong>FinePix</strong> <strong>F401</strong> USBcable is connected the correct way around and that theplugs are pushed fully into the connection sockets.PCi When the camera and computer are exchangingdata, the self timer lamp flashes and theviewfinder lamp flashes alternately green andorange.i “DSC” appears on the LCD monitor.i Power Save is disabled when the camera isconnected to a USB port.●! Before replacing the SmartMedia, always disconnectthe camera from the PC using the procedure onP.86.●! Do not disconnect the USB cable when the camerais communicating with the PC. See P.86 forinformation on the disconnection procedure.✽ Screen for Windows 98 SEi A removable disk icon appears and you canuse your PC to transfer files to and from thecamera.WindowsMacintoshIf the above operations do not occur, you do nothave the required software programs or driversinstalled on your PC. Refer to the SoftwareQuick Start Guide booklet and complete therequired PC setup procedures. Then reconnectthe camera to your PC.836
CONNECTING AT PC CAMERA MODE(USB)1 01 03 2socketON OFFCamera OperationPC Operationi <strong>FinePix</strong>Viewer automatically starts up and thePictureHello window opens (Windows only).8402Plug the AC power adapter connector into theDC IN 5V socket on the camera and then plugthe adapter itself into the main power outlet.1 Slide the POWER switch to the side to turnthe camera on.2 Set the “USB MODE” setting in the SET–UPmenu to “PC CAM” (➡P.78, 79).3 Slide the POWER switch to the side to turnthe camera off.DC IN Camera5V socketUSBsocket1Switch your PC on.2Use the special <strong>FinePix</strong> <strong>F401</strong> USB cable toconnect the camera to your computer.3Switch the camera on.If you are using a Windows PC, the driversettings are automatically specified wheninstallation ends. Just wait a few moments.✽ If your PC fails to recognize the camera, referto the Software Quick Start Guide.Always use the prescribed procedure whendisconnecting or switching off the camera(➡P.86).●! Take care to ensure that the special <strong>FinePix</strong> <strong>F401</strong> USBcable is connected the correct way around and that theplugs are pushed fully into the connection sockets.PCi When the camera and computer areexchanging data, the self timer lamp flashesand the viewfinder lamp flashes alternatelygreen and orange.i The lens is fixed at the wide-angle zoom setting.i “PC CAMERA” appears on the LCD monitor.i Power Save is disabled when the camera isconnected to a USB port.●! If you switch the power on with the “PC Camera”USB setting selected, the color tones shown on theLCD monitor may differ.●! Do not disconnect the USB cable when the camerais communicating with the PC. See P.86 forinformation on the disconnection procedure.✽ Screen for Windows 98 SEi You can useVideoImpression toview live images.✽ Screen for MacintoshIf the above operations do not occur, you donot have the required software programs ordrivers installed on your PC. Refer to theSoftware Quick Start Guide booklet andcomplete the required PC setup procedures.Then reconnect the camera to your PC.856
DISCONNECTING FROM THE PC (Important — always use this procedure.)12Perform the steps shown below before youswitch the camera off. This procedurediffers depending on the operating systemsoftware (or PC) you are using.3 The menu option shown below appears. Clickon this option.3 01(USB)02socketWindows 98 or 98 SE✽ Screen for Windows Me1 Quit all applications (<strong>FinePix</strong>Viewer,VideoImpression, etc.) that are using thecamera.2 Check that the viewfinder lamp is lit green orthat the self timer lamp is off (no data is beingexchanged with the computer).No PC operation is needed.Windows Me/2000 Professional/XP1 Right-click the removabledisk icon in the “MyComputer” window andselect Eject. This step isonly required in WindowsMe.4 The “Eject hardware” dialog box appears.Click the [OK] button or the close button.MacintoshDrag the “Removable drive” icon on the desktopto the Trash.CameraDC IN5V socket1 Switch the camera off.2 Unplug the special <strong>FinePix</strong> <strong>F401</strong> USB cablefrom the camera.86For a DSC connection, proceed to step 2 .For a PC CAMERA connection, proceed to step 3 .●! Even when “Copying” is no longer displayed on thecomputer, the camera and the computer may still beexchanging data. Always check that the viewfinderlamp is lit green or that the self timer lamp is off.2 Left-click the Eject icon in the taskbar andeject “USB Disk”.✽ Screen for Windows Me●! When you drag the icon to the Trash, “≠”appears on the camera’s LCD monitor.876
88System Expansion Optionse By using the <strong>FinePix</strong> <strong>F401</strong> together with other optional FUJIFILM products, your system can beexpanded to fill a wide range of uses.SmartMediaPC CARDADAPTERFloppy Disk Adapter(FlashPath)PC Card AdapterImage MemoryCard ReaderImage MemoryCard ReaderCradle<strong>FinePix</strong> <strong>F401</strong>Digital Camera(Floppy disk drive)(PC card slot)(USB)(IEEE1394)Digital Photo Printer(USB)Personal Computer(commercially available)(USB)TV monitor(commercially available)Accessories Guidee The optional accessories (sold separately) can make taking pictures with the <strong>FinePix</strong> <strong>F401</strong> even easier. Forinformation on how to attach and use the accessories, refer to the instructions provided with the accessory used.Visit the FUJIFILM web site for the latest information on camera accessories. http://home.fujifilm.com/products/digital/index.htmlh SmartMediaThese are SmartMedia cards sold separately. Use the 9 types listed below.h MG-4S : 4MB, 3.3V h MG-8S : 8MB, 3.3V h MG-16S : 16MB, 3.3Vh MG-32S : 32MB, 3.3V h MG-64S : 64MB, 3.3V✽ Some 3.3V SmartMedia are labelled as “3V” cards.h MG-16SW : 16MB, 3.3V, ID h MG-32SW : 32MB, 3.3V, IDh MG-64SW : 64MB, 3.3V, ID h MG-128SW : 128MB, 3.3V, ID✽ SmartMedia with ID are labelled as “ID” cards.h BC-60 Battery ChargerQuickly charges the rechargeable battery. The BC-60 reduces charging time toapproximately 2 hours (for the NP-60).h NP-60 Rechargeable BatteryLithium-ion slimline rechargeable battery.h AC-5VH/AC-5VHS AC Power AdapterUse the AC-5VH/AC-5VHS when you want to take pictures or play back images for longperiods or when the <strong>FinePix</strong> <strong>F401</strong> is connected to a personal computer.✽ The shape of the AC power adapter, the plug and socket outlet depend on the country.h PictureCradle CP-FX401If you connect the AC power adapter and USB cable to this cradle, you can charge thecamera battery or connect the camera to your computer just by placing the camera inthe cradle.h SC-FX401This is designed to protect the camera against dirt, dust and light knocks while you arecarrying it.89
Accessories GuideNotes on Using Your Camera Correctly90h FD-A2 Floppy Disk Adapter (FlashPath)This adapter is the same size and shape as a 3.5-inch floppy disk. You can copythe images on a SmartMedia to your PC simply by loading the SmartMedia into thefloppy disk adapter and then inserting the adapter into your floppy disk drive.FD-A2Compatible OSWindows 95/98/98 SE/Me/NT4.0Mac OS 7.6.1 to 9.1Compatible SmartMedia5V/3.3V, 2MB to 128MBh SM-R2 Image Memory Card ReaderThe SM-R2 allows images to very easily be read and written from an imagememory card (SmartMedia) to a personal computer. Its USB interface provideshigh-speed data transmission.h Compatible with Windows 98/98 SE, Windows Me, Windows 2000 Professionalor iMac and models that support USB as standard.h DM-R1 Image Memory Card ReaderThis device provides a simple way to transfer image data in either directionbetween your PC and an image memory card (SmartMedia or CompactFlashType II (Microdrive-compatible)).The IEEE 1394 interface provides high-speed data transfer.h Compatible with Windows 98 SE, Windows 2000 Professional (read-only), iMac DVand Power Macintosh PCs with FireWire as a standard feature. Mac OS 8.5.1 to 9.1h PC-AD3 PC Card AdapterThe PC Card Adapter allows the SmartMedia to be used as a PC Card StandardATA-compliant (PCMCIA 2.1) PC card (Type II).h Compatible with SmartMedia of 5V/3.3V, 2MB to 128MB.PC CARDADAPTEReBe sure to read this information in conjunction with “Safety Notes” (➡P.108), to ensure that you useyour camera correctly.■ Places to AvoidDo not store or use the camera in the following types oflocations:h In the rain or in very humid, dirty or dusty places.h In direct sunlight or in places subject to extremetemperature rises, such as in a closed car in summer.h Extremely cold places.h Places subject to strong vibration.h Places affected by smoke or steam.h Places subject to strong magnetic fields (such as nearmotors, transformers or magnets).h In contact with chemicals such as pesticides or next torubber or vinyl products for long periods of time.■ Notes on Immersion in Water or SandThe <strong>FinePix</strong> <strong>F401</strong> is particularly adversely affected bywater and sand. When you are at the beach or close towater, ensure that the camera is not exposed to water orsand. Take care also not to place the camera on a wetsurface. Water or sand inside the camera can cause faultsthat may be irreparable.■ Notes on CondensationIf the camera is carried suddenly from a cold location into awarm place, water droplets (condensation) may form onthe inside of the camera or on the lens. When this occurs,switch the camera off and wait an hour before using thecamera. Condensation may also form on the SmartMediacard. In this event, remove the SmartMedia and wait ashort time before using it again.■ When the Camera is Unused for Long PeriodsIf you do not intend to use the camera for a long period oftime, remove the battery and the SmartMedia card beforestoring the camera.■ Cleaning Your Camerah Use a blower brush to remove dust from the lens, LCDmonitor screen or viewfinder as these surfaces, and thenwipe lightly with a soft, dry cloth. If any soiling remains,apply a small amount of lens cleaning liquid to a piece ofFUJIFILM lens cleaning paper and wipe gently.h Do not scratch hard objects against the lens, LCDmonitor screen or viewfinder as these surfaces are easilydamaged.h Clean the body of the camera with a soft, dry cloth. Donot use volatile substances such as thinners, benzine orinsecticide, as these may react with camera body andcause deformation or remove the coating.■ Using the Camera OverseasWhen travelling overseas, do not place your camera in thecheck-in baggage. Baggage handling at airports maysubject baggage to violent shocks, and the camera may bedamaged internally even when no external damage isvisible.91
Notes on the Power Supply92Notes on Using the Battery (NP-60)This camera uses the Rechargeable Lithium-ion BatteryPack NP-60. Note the points below when using therechargeable battery. Take particular care to read theSafety Notes to ensure that you use the battery correctly.✽When shipped, the NP-60 is not fully charged. Alwayscharge the NP-60 before using it.h When carrying the NP-60, install it in a digitalcamera or keep it in thesoft case.h When storing the NP-60,place it inside the specialsoft case provided.Soft caseBattery(NP-60)■ Battery Featuresh The NP-60 gradually loses its charge even when notused. Use a NP-60 that has been charged recently (inthe last day or two) to take pictures.h To maximize the life of the NP-60, switch the cameraoff as quickly as possible when it is not being used.h The number of available shots will be lower in coldlocations or at low temperatures. Take along a sparefully charged NP-60.You can also increase the amount of power producedby putting the NP-60 in your pocket or another warmplace to heat it and then loading it into the camerajust before you take a picture.If you are using a heating pad, take care not to place theNP-60 directly against the pad. The camera may notoperate if you use a depleted NP-60 in cold conditions.■ Charging the Batteryh You can charge the NP-60 using the AC PowerAdapter AC-5VS/AC-5VHS.• The NP-60 can be charged at ambient temperaturesbetween 0°C and +40°C (+32°F and +104°F). At anambient temperature of +23°C (+73°F), it takesapproximately 3 hours to charge a fully depletedNP-60 battery.• You should charge the NP-60 at an ambienttemperature between +10°C and +35°C (+50°F and+95°F). If you charge the NP-60 at a temperatureoutside this range, charging takes longer becausethe performance of the NP-60 is impaired.• You cannot charge the NP-60 at temperatures of0°C (+32°F) or below.h You can also use the optional BC-60 Battery Chargerto charge the NP-60.• The NP-60 can be charged using the BC-60 BatteryCharger at ambient temperatures between 0°C and+40°C (+32°F and +104°F). At an ambienttemperature of +23°C (+73°F), it takes approximately2 hours to charge a fully depleted NP-60 battery.• You should charge the NP-60 at an ambienttemperature between +10°C and +35°C (+50°F and+95°F). If you charge the NP-60 at a temperatureoutside this range, charging takes longer becausethe performance of the NP-60 is impaired.h The NP-60 does not need to be fully discharged orexhausted flat before being charged.h The NP-60 may feel warm after it has been charged orimmediately after being used. This is perfectly normal.h Do not recharge a fully charged NP-60.■ Battery LifeAt normal temperatures, the NP-60 can be used atleast 300 times.If the time for which the NP-60 provides power shortensmarkedly, this indicates that the NP-60 has reached theend of its effective life and should be replaced.Notes on storageLithium-ion Battery Pack NP-60 is both compact andcapable of storing large quantities of power. However, ifIt is stored for long periods while charged, theperformance of the battery can be impaired.h If the battery will not be used for some time, run thebattery flat before storing it.h Always remove the battery from the camera or batterycharger when it is not being used.h Place the battery pack inside the soft case and storein a cool place.✽The battery should be stored in a dry location with anambient temperature between +15°C and +25°C(+59°F and +77°F).✽Do not leave the battery in hot or extremely cold places.■ Handling the BatteryTo avoid injury or damage, observe the following:h Do not allow the metal portions of the battery to touchother metal objects.h Do not bring the battery close to a flame or throw itinto a fire.h Do not attempt to disassemble or modify the battery.h Do not recharge the battery with chargers other thosespecified.h Dispose of used batteries promptly.To avoid damaging the battery or shortening itslife, observe the following:h Do not drop the battery or otherwise subject it tostrong impacts.h Do not immerse the battery in water.To ensure that you obtain optimum batteryperformance, observe the following:h Always keep the battery terminals clean.h Store the battery in a cool, dry place. Storing thebattery for long periods in a hot location can shortenthe battery life.If you use the battery for a long period, the camerabody and the battery itself will become warm. This isnormal and is not a malfunction. Use the AC poweradapter supplied with the camera if you are takingpictures or viewing images for a long period of time.■ Specifications of the Enclosed NP-60Nominal voltage DC 3.7VNominal capacity 1035mAhOperating temperature 0°C to +40°C (+32°F to +104°F)Dimensions 35.2 mm × 53 mm × 7.0 mm(1.39 in. × 2.1 in. × 0.28 in.)(W × H × D)Mass (Weight) Approx. 30g (1.05 oz.)✽ These specifications are subject to change without notice. 93
Notes on the Power SupplyNotes on the SmartMedia 94AC Power AdapterUse only the AC-5VS/AC-5VHS AC Power Adapterwith your <strong>FinePix</strong> <strong>F401</strong> Digital Camera. The use ofother AC power adapters may result in damage to yourcamera.h The AC Power Adapter is only intended for indooruse.h Push the connection cord plug firmly into the DC inputsocket.h When unplugging the connector cord, switch thecamera off and pull out the plug by grasping the plugitself. (Do not pull on the cord.)h Do not use the AC power adapter with any deviceexcept the specified device.h During use, the AC power adapter will become hot totouch, but this is normal.h Do not disassemble the AC power adapter. Doing socould be dangerous.h Do not use the AC power adapter in a place with hightemperature and high humidity.h Do not drop or subject the AC power adapter tostrong shocks.h The AC power adapter may emit a humming noise,but this is normal.h If used near a radio, the AC power adapter maycause static, so play the radio in a distant place.✽Very occasionally, DC output will be prevented by theoperation of the internal protection circuit. In thisevent, unplug the AC-5VS/AC-5VHS AC poweradapter from the power socket for a few momentsand then plug it in again. This will restore DC output.■ Specifications (AC-5VS/AC-5VHS)Power Supply AC 100V to 240V, 50/60HzRated Input Capacity 12W (U.S.A. and <strong>Canada</strong>)0.15A to 0.24A (other countries)Rated Output DC 5.0V 1.5A (U.S.A. and <strong>Canada</strong>)DC 5.0V 2.0A (other countries)Temperature During Use 0°C to +40°C (+32°F to +104°F)(U.S.A. and <strong>Canada</strong>)0°C to +45°C (other countries)Storage Temperature -10°C to +70°C (+14°F to +158°F)Dimensions (MAX.) 47 mm × 20 mm × 72 mm(1.9 in. × 0.8 in. × 2.8 in.)(W × H × D) (U.S.A. and <strong>Canada</strong>)49 mm × 40 mm × 65 mm(W × H × D) (U.K.)49 mm × 31 mm × 65 mm(W × H × D) (other countries)Mass (Weight) Approx. 120 g (4.2 oz.)(U.S.A. and <strong>Canada</strong>)Approx. 200 g (7.0 oz.) (U.K.)Approx. 180 g (6.4 oz.)(other countries)Connection Cord Length Approx. 2 m (6.6 ft.)✽ Please note that specifications and characteristics aresubject to change without notice.■SmartMediaThe SmartMedia card supplied with your <strong>FinePix</strong> <strong>F401</strong>camera is a new image recording medium developedespecially for use in digital cameras. Each SmartMediacard contains a built-in semiconductor memory chip(NAND flash memory) which is used for storing digitalimage data.Because the data is stored electronically, the stored imagedata can be erased from the card and new data recorded.■SmartMedia with IDsThe SmartMedia ID is a SmartMedia that has anindividually assigned identification number. SmartMediaID cards can be used with devices that use ID numbersfor copyright protection or other purposes. This cameraaccepts SmartMedia ID cards in the same way asconventional SmartMedia cards.■Storing DataIn the situations listed below, recorded data may beerased (destroyed). Please note that Fuji Photo FilmCo., Ltd. accepts no responsibility whatsoever for theloss (destruction) of recorded data.✽When the SmartMedia is used incorrectly by theowner or a third party✽When the SmartMedia is exposed to static electricityor electrical noise✽When the battery cover is opened or the SmartMediaremoved and the camera is then switched off duringdata recording, during data erasing (SmartMediaformatting) or during frame advance when images arebeing played back.You should always back up important files ontoanother media (MO disk, CD-R, CD-RW, harddisk, etc.).■Notes on Handling SmartMediah Take care to hold the SmartMedia straight when youload it into your camera.h Never remove the SmartMedia or switch the cameraoff during data recording, during data erasing(SmartMedia formatting) or during frame advancewhen images are being played back. These actionscould result in damage to the SmartMedia.h Use only the SmartMedia specified for use with the<strong>FinePix</strong> <strong>F401</strong>. The use of other SmartMedia coulddamage the camera.h SmartMedia are precision electronic devices. Do notbend, drop, or subject SmartMedia to excessiveshocks.h Do not use or store SmartMedia in environmentslikely to be affected by strong static electricity orelectrical noise.h Do not use or store SmartMedia in very hot, humid orcorrosive environments.h Take care not to touch the SmartMedia’s contact areaor allow the area to become soiled. Use a dry lint-freecloth to wipe away any soiling that does occur.h To avoid damage caused by static electricity, alwaysuse the special static-free case provided duringtransportation or storage, or keep the SmartMedia ina storage case if available.95
Notes on the SmartMediaWarning Displayse The table below lists the warnings that are displayed on the LCD monitor96h Do not carry SmartMedia in locations such as atrouser pocket. This could subject the SmartMedia toexcessive force when you sit down, therebydamaging the SmartMedia.h The SmartMedia may feel warm when it is removedfrom the camera after extended periods of picturetaking or image viewing. This is normal and does notindicate a fault.h Inserting a SmartMedia that is charged with staticelectricity into your camera may result in a cameramalfunction. If this occurs, switch the camera off andthen on again.h Affix the label onto the designated area of the card.Do not use third-party labels as this can lead toproblems when the card is inserted or removed.h When you attach the label, take care that it does notcover any of the write-protect area.■Notes on Using SmartMedia with a PCh If you intend to take photos using a SmartMedia thathas been used on a PC, format the SmartMedia onyour camera.h When you format a SmartMedia in the camera andthen shoot and record images, a directory (folder) isautomatically created. Image data is then recorded inthis directory.h Do not change or delete the directory (folder) namesor file names on the SmartMedia from your PC as thiswill make it impossible to use the SmartMedia in yourcamera.h Always use the camera to erase image data on aSmartMedia.h To edit image data, copy the image data to the PC’shard disk and then edit the copied data.h Do not copy files other than those that will be used by thecamera.Be sure to use your PC’s disk eject function(right-click the removable disk icon in the “MyComputer” window and then click “Eject”) whenyou eject a SmartMedia from the PC card readeror PC card adapter.When you are using a USB connection, youshould also select and left-click the eject buttonfor “USB disc/mass storage” in the taskbar.If you do not use the correct eject procedure,the SmartMedia may be damaged due to writebehindcashing.■SpecificationsTypeImage memory card for digital cameras(SmartMedia)Operating voltage 3.3VConditions for use Temperature:0°C to +40°C (+32°F to +104°F)Humidity:80% or less (no condensation)Dimensions 37 mm × 45 mm × 0.76 mm(1.45 in. × 1.77 in. × 0.03 in.) (W × H × D)Warning Displayed Explanation Remedy(Lit red)(Blinking red)\The battery in the camera is fully depleted orvery low on charge.There is a strong likelihood of camera shakebecause the shutter speed is slow.Outside the AE continuous range.The AF (auto focus) cannot work effectively.There is no SmartMedia loaded or a 5 VSmartMedia is loaded the wrong way round.i The SmartMedia is not formatted.i The SmartMedia contact area is soiled.i Camera fault.i The SmartMedia contact area is soiled.i The SmartMedia is damaged.i The SmartMedia format is incorrect.i Camera fault.The SmartMedia is fully recorded.Replace the battery or have new battery ready.Use flash photography. However, a tripodshould be used for some scenes and modes.The shot can be taken, but the exposure will notbe correct.i If the image is too dark, take the picture at adistance of around 2 m (6.6 ft.) from the subject.i Use AF lock to take the picture.Load the SmartMedia (3.3V) in the correctdirection.i Format the SmartMedia.i Wipe the contact area on the SmartMedia witha soft dry cloth. It may be necessary to formatthe SmartMedia. If the error message is stilldisplayed, replace the SmartMedia.i Contact your FUJIFILM dealer.i Wipe the contact area on the SmartMedia witha soft dry cloth. It may be necessary to formatthe SmartMedia. If the error message is stilldisplayed, replace the SmartMedia.i Contact your FUJIFILM dealer.Erase some images or use a SmartMedia thathas ample free space.97
Warning DisplaysWarning Displayed Explanation RemedyThe SmartMedia is write-protected.i The file played back was not recorded correctly.i The SmartMedia contact area is soiled.i Camera fault.i You attempted to play a movie that was notrecorded on this camera.The frame number has reached 999–9999.Use a SmartMedia that is not write-protected.i Images cannot be played back.i Wipe the contact area on the SmartMedia witha soft dry cloth. It may be necessary to formatthe SmartMedia. If the error message is stilldisplayed, replace the SmartMedia.i Contact your FUJIFILM dealer.i Movies cannot be played back.Take the shot using a formatted SmartMedia.Warning Displayed Explanation RemedyPrints were specified for more than 1000 framesin the DPOF frame settings.Camera malfunction or fault.The lens cover is faulty.The maximum number of frames for which printscan be specified on the same SmartMedia is 999.Copy the images for which you want to orderprints onto another SmartMedia and thenspecify the DPOF settings.i Switch the camera on again, taking care not totouch the lens.i Switch the camera off and on again.i Switch the camera on again, taking care not totouch the lens.i Switch the camera off and on again.i The data could not be recorded due to aSmartMedia error or a connection errorbetween the SmartMedia and camera.i The photographed image cannot be recordedas it is too large to fit in the available space onthe SmartMedia.i Re-insert the SmartMedia or switch thecamera off and then on again.i Use a new SmartMedia.i The voice memo file is faulty.i Camera fault.A protected file was erased.i The voice memo cannot be played back.i Contact your FUJIFILM dealer.Protected files cannot be erased. Remove theprotection.9899
Troubleshootinge If you think the camera is faulty, check the following once more100Troubleshooting Possible causes SolutionsI tried to charge thebattery but the self-timerlamp does not light.The self-timer lamp flashesduring charging and I can’tcharge the battery.No power.Power cuts out duringoperation.Battery runs out quickly.No photograph is takenwhen the shutter button ispressed.i There is no battery in the camera.i The camera and AC power adapter are notconnected correctly.i The battery terminals are dirty.i The battery is faulty or flat.i The battery is exhausted.i The AC power adapter plug has come out ofthe power outlet.i The battery is loaded the wrong way round.The battery is exhausted.i Camera is being used in extremely coldconditions.i The terminals are soiled.i The battery is flat.i No SmartMedia is loaded.i The SmartMedia is fully recorded.i The SmartMedia is write-protected.i The SmartMedia is not formatted.i The SmartMedia contact area is soiled.i Load the battery.i Connect the camera and AC power adaptercorrectly.i Take the battery out briefly and then reload it.i Wipe the battery terminals with a clean, dry cloth.i Load a new battery.i Load a new fully charged battery.i Plug the adapter back in.i Load the battery in the correct direction.Load a new fully charged battery.i Put the battery in your pocket or anotherwarm place to heat it and then load it into thecamera just before you take a picture.i Wipe the battery terminals with a clean, drycloth.i Load a new fully charged battery.i Load a SmartMedia.i Insert a new SmartMedia or erase someunwanted frames.i Remove the write-protection.i Format the SmartMedia.i Wipe the SmartMedia contact area with aclean dry cloth.Troubleshooting Possible causes SolutionsNo photograph is takenwhen the shutter button ispressed.I can’t use the flash totake pictures.I can only select “SuppressedFlash” flash mode.I can only select the “1”resolution setting.The photographed imageis dark even though I usedthe flash.The image is blurred.i The SmartMedia is damaged.i The Power Save function has switched thecamera off.i The battery is exhausted.i The shutter button was pressed while theflash was charging.i The battery is exhausted.i The Suppressed Flash mode is selected.Continuous shooting is selected.The sensitivity is set to 800 or 1600 (highsensitivityphotography) in the Photography menu.i The subject is too far away.i Your finger was covering the flash/flashcontrol sensor.i The lens is dirty.i You photographed scenery with Macro modeselected.i You took a close-up shot without selectingMacro mode.i You are shooting a subject that is not suitedto autofocusing.i Load a new SmartMedia.i Switch the camera on.i Load a new fully charged battery.i Wait until charging is completed beforepressing the shutter button.i Load a new fully charged battery.i Set the flash mode to Auto, Red-eyeReduction or Forced Flash (The flash cannotbe used in some modes).Set continuous shooting to OFF.In the Photography menu, set the sensitivityto 400 or less.i Move to within the effective flash rangebefore taking the shot.i Hold the camera correctly.i Clean the lens.i Cancel Macro mode.i Select Macro mode.i Use AF/AE lock to take the shot.101
Troubleshootinge If you think the camera is faulty, check the following once moreExplanation of Terms102Troubleshooting Possible causes SolutionsThere is speckling on theimage.The camera does not emitany sound.Frame erase does noterase the frame.The ERASE ALL functiondoes not erase all the frames.I can’t format theSmartMedia.When the camera is connectedto a personal computer (PC),the shot image appears on thecamera’s LCD monitor.Nothing happens when Iuse the camera switches.The camera no longerworks correctly.The shot was taken with a slow shutter speed (longexposure) in a high-temperature environment.i The camera volume is set too low.i The microphone was blocked duringshooting/recording.i There is something covering the speakerduring playback.i DPOF settings are specified for someframes.i Some frames may be protected.The SmartMedia is write-protected.i The special <strong>FinePix</strong> <strong>F401</strong> USB cable is notproperly connected to the computer orcamera.i The PC is not switched on.i Camera malfunction.i The battery is exhausted.The camera has suffered an unforeseenproblem.This is a characteristic of CCDs and does notindicate a camera fault.i Adjust the volume.i Take care not to block the microphoneduring shooting/recording.i Ensure that the speaker is uncovered.i Cancel the DPOF settings and try again(➡P.67).i Remove the protection.Remove the write-protection.(Peel off the write-protect sticker.)i Set up the camera and the special <strong>FinePix</strong><strong>F401</strong> USB cable correctly.i Switch the PC on.i Briefly remove the battery or disconnect the ACpower adapter. Then reload the battery orreconnect the AC power adapter and try again.i Load a new fully charged battery.Briefly remove the battery or disconnect theAC power adapter. Then reload the battery orreconnect the AC power adapter and try again.DPOF:Digital Print Order FormatDPOF is a format used for recording information ona storage media (image memory card, etc.) thatallows you to specify which of the frames shot usinga digital camera are printed and how many printsare made of each image.EV:A number that denotes Exposure Value. The EV isdetermined by the brightness of the subject andsensitivity (speed) of the film or CCD. The numberis larger for bright subjects and smaller for darksubjects. As the brightness of the subject changes,a digital camera maintains the amount of lighthitting the CCD at a constant level by adjusting theaperture and shutter speed.When the amount of light striking the CCD doubles,the EV increases by 1. Likewise, when the light ishalved, the EV decreases by 1.JPEG:Joint Photographics Experts GroupA file format used for compressing and saving colorimages. The compression ratio can be selected, butthe higher the compression ratio, the poorer thequality of the expanded image.Motion JPEG:A type of AVI (Audio Video Interleave) file formatthat handles images and sound as a single file.Images in the file are recorded in JPEG format.Motion JPEG can be played back by QuickTime 3.0or later.PC Card:A generic term for cards that meet the PC CardStandard.PC Card Standard:A standard for PC cards determined by thePCMCIA.PCMCIA:Personal Computer Memory Card InternationalAssociation (US).103
Explanation of TermsSpecifications104WAVE:A standard format used on Windows systems forsaving audio data. WAVE files have the “.WAV” fileextension and the data can be saved in eithercompressed or uncompressed format. Uncompressedrecording is used on this camera.WAVE files can be played back on a personalcomputer using the following software:Windows : MediaPlayerMacintosh: QuickTime Player✽ QuickTime 3.0 or laterWhite Balance:Whatever the kind of the light, the human eyeadapts to it so that a white object still looks white.On the other hand, devices such as digital camerassee a white subject as white by first adjusting thecolor balance to suit the color of the ambient lightaround the subject. This adjustment is calledmatching the white balance. A function thatautomatically matches the white balance is calledan Automatic White Balance function.Systemh Model: Digital camera <strong>FinePix</strong> <strong>F401</strong>h Number of effective pixels: 2.1million pixelsh CCD sensor1/2.7-inch Super CCD in an interwoven patternNumber of total pixels 2.11 million pixelsh Number of recorded pixels2304 × 1728 pixels (4.0 million pixels)/1600 × 1200 pixels/1280 × 960 pixels/640 × 480 pixelsh File formatStill image: JPEG (Exif ver. 2.2)✽ Design rule for Camera File System compliant, DPOFcompatibleMovie: AVI format, Motion JPEGAudio: WAV formath Storage media: SmartMedia (3.3V)■ Standard number of available shots/recording time per SmartMedia TMQuality3 4M • F 3 4M • N 2 2M 1 1M ! 0.3M # $No. of recorded pixels 2304 × 1728 1600 × 1200 1280 × 960 640 × 480 MovieImage Data SizeMG-4S (4MB)MG-8S (8MB)MG-16S/SW (16MB)MG-32S/SW (32MB)MG-64S/SW (64MB)MG-128SW (128MB)Approx. 1.6MB Approx. 790KB Approx. 390KB Approx. 320KB Approx. 130KB249204081491939791599193979159319h Viewfinder: Real image optical Approx. 80% coverageh Lens: Super EBC Fujinon optical 3× zoom lensh Aperture: F2.8-F4.8/F7-F11.6 (automatically selected)h Focus: TTL contrast-type, Auto focush Focus distance: f = 5.7 mm-17.1 mm(Equivalent to 38 mm-114 mm on a 35 mm camera)h Exposure controlTTL 64-zones metering, Program AE, exposurecompensation available in <strong>Manual</strong> photography modeh Sensitivity: Equivalent to ISO 200/400/800/1600h White balanceAuto (In <strong>Manual</strong> modes, 7 positions can be selected.)h Focal rangeNormal: Approx. 60 cm (2.0 ft.) to infinityMacro : Approx. 10 cm (0.3 ft.) to 80 cm (2.6 ft.)122549991983983061122247497997—Approx. 24 sec.Approx. 49 sec.Approx. 98 sec.Approx. 199 sec.Approx. 6.7 min.Approx. 13.4 min.—Approx. 83 sec.Approx. 169 sec.Approx. 5.6 min.Approx. 11.3 min.Approx. 22.8 min.Approx. 45.6 min.105
Specifications106h Shutter: Variable-speed, 1/4 sec. to 1/2000 sec. (dependon Exposure mode)h Flash: Auto flash using flash control sensorEffective range: Wide-angle Approx. 0.4 m-3.5 m(15.7 in.-11.5 ft.)Telephoto Approx. 0.4 m-2 m(15.7 in.-6.6 ft.)Flash modes: Auto, Red-Eye Reduction, Forced Flash,Suppressed Flash, Slow Synchroh Erase modes: ERASE FRAME, ERASE ALL FRAMES,FORMAT (initialize)h LCD monitor1.5-inches, low-temperature polysilicon TFT 114,000 pixelsh Self-Timer: 10 sec. timer clockInput/Output Terminalsh DC Input: To connect the AC power Adapter AC-5VS/AC-5VHSh (USB) socketFor file transfer to a computer and connection to theoptional cradlePower Supply and Othersh Power supplyUse one of the following• Rechargeable Battery NP-60 or AC Power AdapterAC-5VS/AC-5VHS■ Available shots using the battery (When fully charged)NP-60Battery TypeNo. of ShotsLCD monitor ON Approx. 200LCD monitor OFF Approx. 450The number of shots shown here is an approximate guideto the number of consecutive shots that can be taken basedon 50% flash usage at normal temperatures. However, theactual number of available shots will vary depending on theambient temperature when the camera is used and theamount of charge in the battery. The number of availableshots will be lower in cold conditions.h Conditions for useTemperature: 0°C to +40°C (+32°F to +104°F)80% humidity or less (no condensation)h Camera dimensions (W/H/D)85.0 mm × 69.4 mm × 27.5 mm/3.3 in. × 2.7 in. × 1.1 in.(not including accessories and attachments)h Camera mass (weight): 185 g/6.5 oz.(not including accessories, batteries or SmartMedia)h Weight for photography: Approx. 215 g/7.6 oz.(including battery and SmartMedia)h Accessories: See P.7h Optional Accessories: See P.89-90■ Self timer lamp displayCamera operationDuring chargingSwitched onSelf-timerphotographyRecording VoiceMemosConnected to acomputerDisplayLitOffBrinkingLitLitBrinkingBrinkingFlashing rapidlyBrinkingOffCharging in progressCharging completeCharging errorStatusPOWER switch set to ON (goes off after several seconds)From 10 seconds to 5 seconds before the shot is takenFor 5 seconds or less before the shot is takenRecording in progressFor 5 seconds or less before recording endsDuring communication with a computerReady for disconnection✽ These specifications are subject to change without notice.✽ The LCD monitor on your digital camera is manufactured using advanced high-precision technology. Even so, small brightpoints and anomalous colors (particularly around text) may appear on the monitor. These are normal display characteristicsand do not indicate a fault with the monitor. This phenomenon will not appear on the recorded image.✽ The operation error may be caused in a digital camera by the strong radio interference (i. e. electric fields, staticelectricity, line noise, etc.).✽ Due to the nature of the lens, the edges of photographed images may appear distorted. This is normal and does notindicate a fault.107
Safety Notes108h To ensure that you use your <strong>FinePix</strong> <strong>F401</strong> cameracorrectly, read these Safety Notes and your Owner’s<strong>Manual</strong> carefully beforehand.h After reading these Safety Notes, store them in a safeplace.About the IconsThe icons shown below are used in this document toindicate the severity of the injury or damage that canresult if the information indicated by the icon is ignoredand the product is used incorrectly as a result.This icon indicates that death orWARNING serious injury can result if theinformation is ignored.This icon indicates that personalCAUTION injury or material damage canresult if the information is ignored.The icons shown below are used to indicate the natureof the information which is to be observed.Triangular icons notify the user of informationrequiring attention (“Important”).Circular icons with a diagonal bar notify theuser that the action indicated is prohibited(“Prohibited”).Filled circles with an exclamation mark notifythe user of an action that must be performed(“Required”).WARNINGIf a problem arises, switch the cameraoff, remove the battery, disconnectand unplug the AC power adapter.Continued use of the camera when it isemitting smoke, is emitting any unusualodor, or is in any other abnormal statecan cause a fire or electric shock.h Contact your FUJIFILM dealer.Do not allow water or foreign objectsto enter the camera.If water or foreign objects get inside thecamera, switch the camera off, removethe battery and disconnect and unplugthe AC power adapter.Continued use of the camera can causea fire or electric shock.h Contact your FUJIFILM dealer.Do not place the camera on anunstable surface.This can cause the camera to fall or tipover and cause injury.Never attempt to modify or disassemblethe camera. (Never open the casing.)Do not use the camera when it has beendropped or the casing is damaged.This can cause a fire or electric shock.h Contact your FUJIFILM dealer.Unplug frompower socket.Do notdisassemble.WARNINGDo not use the camera in the bathroom orshower.This can cause a fire or electric shock.Never attempt to take pictures while inmotion.Do not use the camera while you are walkingor operating a moving car or other vehicle.This can result in you falling down or beinginvolved in a traffic accident.Do not touch any metal parts of thecamera during a thunderstorm.This can cause an electric shock due toinduced current from the lightning discharge.Do not use the batteries except asspecified.Load the batteries with the poles positionedas indicated by the > and < marks.Do not heat, modify or attempt todisassemble the batteries.Do not drop or subject the batteries toimpacts.Do not attempt to recharge lithium oralkaline batteries.Do not store the batteries with metallicproducts.Any of these actions can cause the batteries toburst or leak and cause fire or injury as a result.Do not use in thebathroom or shower.WARNINGUse only the batteries or AC poweradapter specified for use with this camera.Do not use voltages other than thepower supply voltage shown.The use of other power sources can causea fire.If the battery leaks and fluid gets intoyour eyes or comes into contact withyour skin or clothing, this can causeinjury or loss of eyesight. Immediatelyflush the affected area thoroughly withclean water and seek medical treatment.When discarding or storing batteries,cover the battery terminals withinsulation tape.h Contact with other metallic objects orbatteries could cause the batteries toignite or burst.Do not use the charger to chargebatteries other than those specified here.The charger is designed for <strong>Fujifilm</strong> HR-AANiMH batteries. Using the charger tocharge conventional batteries or othertypes of rechargeable batteries can causethe batteries to leak fluid, overheat or burst.109
Safety NotesEC Declaration of Conformity110CAUTIONWhen charging ends, unplug thecharger from the power socket.Leaving the charger plugged into thepower socket can cause a fire.Do not use this camera in locationsseverely affected by oil fumes, steam,humidity or dust.This can cause a fire or electric shock.Do not leave this camera in placessubject to extremely high temperatures.Do not leave the camera in locations suchas a sealed vehicle or in direct sunlight.This can cause a fire.Keep out of the reach of small children.This product could cause injury in thehands of a child.Do not place heavy objects on thecamera.This can cause the heavy object to tipover or fall and cause injury.Do not move the camera while the ACpower adapter is still connected.Do not pull on the connection cord todisconnect the AC power adapter.This can damage the power cord orcables and cause a fire or electric shock.CAUTIONDo not cover or wrap the camera or theAC power adapter in a cloth or quilt.This can cause heat to build up anddistort the casing or cause a fire.When you are cleaning the camera oryou do not plan to use the camera foran extended period, remove thebattery and disconnect and unplugthe AC power adapter.Failure to do so can cause a fire orelectric shock.Using a flash too close to a person’seyes may temporarily affect theeyesight.Take particular care when photographinginfants and young children.Request regular internal testing andcleaning for your camera.Build-up of dust in your camera cancause a fire or electric shock.h Contact your FUJIFILM dealer torequest internal cleaning every 2 years.WeName :Fuji Photo Film (Europe) G.m.b.H.Address : Heesenstrasse 3140549 Dusseldorf, Germanydeclare that the productProduct Name :Manufacture’s Name :Manufacture’s Address :FUJIFILM DIGITAL CAMERA <strong>FinePix</strong> <strong>F401</strong>Fuji Photo Film Co., Ltd.26-30, Nishiazabu 2-chome, Minato-ku,Tokyo 106-8620, Japanis in conformity with the following StandardsSafety : EN60950EMC : EN55022 : 1998 Classe BEN55024 : 1998EN61000-3-2 : 1995 + A1:1998 + A2:1998following the provision of the EMC Directive (89/336/EEC, 92/31/EEC and93/68/EEC) and Low Voltage Directive (73/23/EEC).Dusseldorf, Germany August 1, 2002Place Date Signature/Managing DirectorBij dit produkt zijn batterijen geleverd. Wanneer deze leeg zijn, moet u ze nietweggooien maar inleveren als KCA111
26-30, Nishiazabu 2-chome, Minato-ku, Tokyo 106-8620, JapanPrinted in JapanPrinted on recycled paper.FGS-204105-FG