FinePix 3800 Owner's Manual - Fujifilm Canada
FinePix 3800 Owner's Manual - Fujifilm Canada
FinePix 3800 Owner's Manual - Fujifilm Canada
- No tags were found...

Create successful ePaper yourself
Turn your PDF publications into a flip-book with our unique Google optimized e-Paper software.
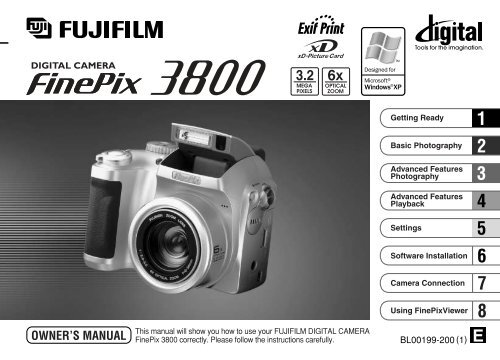
3.2Getting ReadyBasic PhotographyAdvanced FeaturesPhotographyAdvanced FeaturesPlaybackSettingsSoftware InstallationCamera ConnectionUsing <strong>FinePix</strong>ViewerThis manual will show you how to use your FUJIFILM DIGITAL CAMERA<strong>FinePix</strong> <strong>3800</strong> correctly. Please follow the instructions carefully. BL00199-200 (1)78
CAUTIONThis equipment has been tested and found tocomply with the limits for a Class B digital device,pursuant to Part 15 of the FCC Rules. These limitsare designed to provide reasonable protectionagainst harmful interference in a residentialinstallation. This equipment generates, uses, andcan radiate radio frequency energy and, if notinstalled and used in accordance with theinstructions, may cause harmful interference toradio communications. However, there is noguarantee that interference will not occur in aparticular installation. If this equipment does causeharmful interference to radio or televisionreception, which can be determined by turning theequipment off and on, the user is encouraged totry to correct the interference by one or more ofthe following measures:— Reorient or relocate the receiving antenna.— Increase the separation between theequipment and receiver.— Connect the equipment into an outlet on acircuit different from that to which the receiver isconnected.— Consult the dealer or an experienced radio/TVtechnician for help.You are cautioned that any changes ormodifications not expressly approved in thismanual could void the user’s authority to operatethe equipment.Notes on the Grant:To comply with Part 15 of the FCC rules, thisproduct must be used with a <strong>Fujifilm</strong>-specifiedferrite-core USB cable and DC supply cord.For customers in <strong>Canada</strong>CAUTIONThis Class B digital apparatus complies withCanadian ICES-003.Please read the Safety Notes (➡P.131)and make sure you understand thembefore using the camera.3
4 Advanced Features PlaybackPLAYING BACK MOVIES (VIDEO) ................................ 59w PLAYBACK MENUp ERASING SINGLE • ALL FRAMES/FORMAT ....... 61kPROTECTING IMAGES FRAME/ALL ................... 65iHOW TO SPECIFY PRINT OPTIONS (DPOF) ......... 69iDPOF SET FRAME ............................................... 70rRECORDING VOICE MEMOS .............................. 74PLAYING BACK VOICE MEMOS ............................... 775 Settingsg LCD BRIGHTNESS/VOLUME .................................... 79g USING SET–UP ......................................................... 80■ List of settings ......................................................... 81■ SET–UP Menu Options (Date/time setting, etc.) ......... 81SET–UPPOWER SAVE ............................................................ 826 Software Installation6.1 The Software Components ........................................ 836.2 Installation on a Windows PC .................................... 846.2.1 Load the CD-ROM into your PC ....................... 846.2.2 From <strong>FinePix</strong>Viewer installation to restart ........ 856.3 Installation on a Mac OS 8.6 to 9.2 ........................... 896.3.1 Check the system software settings ................. 896.3.2 From <strong>FinePix</strong>Viewer installation to restart ........ 896.4 Installation on a Mac OS X ........................................ 926.4.1 From <strong>FinePix</strong>Viewer installation to restart ........ 927 Camera Connection7.1 Using the optional AC Power adapter ....................... 957.2 Use at DSC mode ..................................................... 967.3 Use at PC-CAM mode ............................................... 997.4 Disconnecting the Camera ...................................... 1028 Using <strong>FinePix</strong>Viewer8.1 Saving Images on Your Computer .......................... 1048.2 Making a <strong>FinePix</strong> CD Album ................................... 1058.3 Using the <strong>FinePix</strong> Internet Service .......................... 1068.4 User Registration ..................................................... 1068.5 Mastering <strong>FinePix</strong>Viewer ......................................... 1108.6 Uninstalling the Software ......................................... 111System Expansion Options ...................................... 113Accessories Guide ................................................... 114Notes on Using Your Camera Correctly .................. 116Notes on the Power Supply ..................................... 117Applicable Batteries ............................................ 117Notes on the Batteries ......................................... 117Notes on Using the AC Power Adapter ............... 119Notes on the xD-Picture Card .................................. 120Warning Displays ..................................................... 122Troubleshooting ....................................................... 125Specifications ........................................................... 128Explanation of Terms ............................................... 130Safety Notes ............................................................ 131EC Declaration of Conformity .................................. 134512345678
Preface6■ Test Shots Prior to PhotographyFor particularly important photographs (such as weddings andoverseas trips), always take a test photograph and view theimage to make sure that the camera is functioning normally.h Fuji Photo Film Co., Ltd. cannot accept liability for anyincidental losses (such as the costs of photography or theloss of income from photography) incurred as a result offaults with this product.■ Notes on CopyrightImages recorded using your digital camera system cannot beused in ways that infringe copyright laws without the consentof the owner, unless intended only for personal use. Note thatsome restrictions apply to the photographing of stageperformances, entertainments and exhibits, even whenintended purely for personal use. Users are also asked to notethat the transfer of memory cards containing images or dataprotected under copyright laws is only permissible within therestrictions imposed by those copyright laws.■ Liquid CrystalIf the LCD monitor or viewfinder (EVF) is damaged, takeparticular care with the liquid crystal in the monitor orviewfinder. If any of the following situations arise, take theurgent action indicated.h If liquid crystal comes in contact with your skinWipe the area with a cloth and then wash thoroughly withrunning water and soap.h If liquid crystal gets into your eyeFlush the affected eye with clean water for at least15 minutes and then seek medical assistance.h If liquid crystal is swallowedFlush your mouth thoroughly with water. Drink large quantitiesof water and induce vomiting. Then seek medical assistance.■ Notes on Electrical InterferenceIf the camera is to be used in hospitals or aircrafts, pleasenote that this camera may cause interference to otherequipment in the hospital or aircraft. For details, pleasecheck with the applicable regulations.■ Handling Your Digital CameraThis camera contains precision electronic components. Toensure that images are recorded correctly, do not subject thecamera to impact or shock while an image is being recorded.■ Trademark Informationh IBM PC/AT is a registered trademark of InternationalBusiness Machines Corp. of the U.S.h iMac and Macintosh are registered trademarks of AppleComputer, Inc.h QuickTime and the QuickTime logo are trademarks usedunder license. The QuickTime logo is registered in theU.S. and other countries.h Adobe Acrobat ® Reader is a trademark of Adobe SystemsIncorporated of the U.S.h Microsoft, Windows, the Windows logo and DirectX areeither trademarks, or registered trademarks of MicrosoftCorporation in the United States and/or other countries.Windows is an abbreviated term referring to the MicrosoftWindows Operating System.✽ The “Designed for Microsoft Windows XP” logo refers tothe camera and the driver only.h xD-Picture Card and other company or product names aretrademarks or registered trademarks of the respectivecompanies.■ Exif Print (Exif ver. 2.2)Exif Print Format is a newly revised digital camera file format thatcontains a variety of shooting information for optimal printing.
Camera Features and AccessoriesFeaturesh Superb image quality provided by the high-resolutionFujinon 6× zoom lens and 3.2 million effective pixelsh Maximum number of recorded pixels: 2048 × 1536pixels (3.15 million pixels)h Compact and lightweight bodyh Wide range of photography applications (includes Macrofunction)h Intelligent Auto White Balance and AE functions built-inh Built-in automatic flash with precise wide-range flashcontrolh 3.2× digital zoom photography (5× for movie shooting)and up to 12.8× zoom playback functionsh <strong>Manual</strong> and Scene Position modes that provide anexpanded range of photography optionsh 1.8 inches 62,000 pixels amorphous silicon TFT LCDmonitor and 0.33 inches electronic viewfinder (EVF)h Voice Caption function records up to 30 seconds ofsound.h Movie shooting function (320 × 240/160 × 120 pixelswith sound)h Easy high-speed image file transfer via the USBconnection (using the Interface Set provided with sound)h Accepts tele and wide conversion lenses. (Flash cannotbe used when a conversion lens is mounted.)h Conforms to the new standard for digital camera filesystem ✽✽ Design rule for Camera File systemAccessoriesh LR6 AA-size alkaline batteries (4)h 16MB, xD-Picture Card (1)Supplied with: Anti-static case (1)h Adapter Ring (1) h Lens Cap (1)h Strap (1)h Interface Set (1)• CD-ROM: Software for <strong>FinePix</strong> SX (1)• Special USB cable with Noise Suppression core (1)h Owner’s <strong>Manual</strong> (this manual) (1)7
Nomenclature✽ Refer to the pages in parentheses for information on using the camera features.Power switchPhotography mode(P.22)Playback mode(P.38)Power-OFF(P.17)Mode dial<strong>Manual</strong>(P.44)Scene Position(P.45)AUTO (P.22)MOVIE(Video)(P.47)Shutter buttonSelf-timer lampFlash(P.33)Flash controlsensorLensMicrophoneOPEN(Flash pop-up)buttonStrap mountSlot coverxD-Picture Card slotDigital(USB)socket(P.96,99)8SpeakerDC IN 5V(Power input)socket(P.95)
d( Macro)button(P.37)Viewfinder(EVF)(P.23)a( Tele zoom)buttonc( Flash)button(P.33)EVF/LCD(monitor selector)button(P.23)Indicator lamp(P.27)LCD monitor(P.23)b( Wide zoom)buttonStrap mountMENU/OK buttonBACK buttonDISP button(P.31,39)Tripod mountBattery cover(P.15)9
Nomenclature (Sample display)Example of Screen Text Display: Still photography modeMacroFlashPhotography modeWhite balanceZoom barExample of Screen Text Display: Playback modePlayback modeVoice captioningSelf-TimerEV(Exposure compensation)Number of remaining shotsQuality mode(Number of recordedpixels for images)Battery low warningAF warningCamera shake warningAF frameProtectionDPOFPlayback frame numberBattery low warning10Date
1 Getting Ready PREFACEAttach the lens cap, strap and adapter ring121Pull the lens cap cord through the strap mount.●! Attach the lens cap cord to avoid losing the lens cap.Attach the strap to the strap mounts on thecamera. Once you have attached both ends ofthe strap, check carefully to ensure that thestrap is firmly secured.●! Failure to attach the strap correctly can result in thecamera being dropped.11
PREFACEAttaching the Lens Cap31Screw the adapter ring in the direction of thearrow to mount it on the camera.To prevent the lens cap from appearing in theshot when you take pictures, attach the lens capto the strap.212Mounting the adapter ring on the cameraprotects the lens and allows you to attach theoptional conversion lens. The adapter ringshould be mounted on the camera at all times toprotect the lens.Fit and remove the lens cap by squeezing theleft and right sides of the cap.
◆ Conversion Lens Guide ◆Wide Conversion Lens WL-FX9Changes the focal length by a factor of 0.79×(wide-angle: equivalent to 30 mm) without alteringthe F-stop value of the lens.hWide conversion lens specificationsMagnification : 0.79×Lens configuration : 3 lenses in 3 groupsShooting range : Approx. 10 cm to infinityDimensions : 32 mm (1.26 in.) × 70 mm(2.76 in.) dia.Mass (Weight)Accessories: Approx. 185 g (6.5 oz.): Adapter Ring AR-FX9 (seebelow for specifications),Lens caps (front and rear),Lens pouch●! The enclosed adapter ring (for <strong>FinePix</strong> 4800/6900/S602) cannot be used.●! Only use the wide conversion lens at the wideanglezoom setting.●! The flash cannot be used when the wideconversion lens is mounted.Teleconversion Lens TL-FX9Changes the focal length by a factor of 1.5x(telephoto: equivalent to 340 mm) without alteringthe F-stop value of the lens.hTeleconversion lens specificationsMagnification : 1.5×Lens configuration : 3 lenses in 3 groupsShooting range : Approx. 2.4 m to infinityDimensions : 55 mm (2.17 in.) × 65 mm(2.56 in.) dia.Mass (Weight)Accessories: Approx. 100 g (3.5 oz.): Adapter Ring AR-FX9 (seebelow for specifications),Lens caps (front and rear),Lens pouch●! Only use the tele conversion lens at the telephotozoom setting.●! The flash cannot beused when theteleconversion lensis mounted.1Conversionlens●! Commercially available filters can be mounted on the lens when the adapter ring is attached, but no more thanone filter should be mounted at a time.13
LOADING THE BATTERY AND xD-Picture Card14Compatible batteriesUse four AA-size alkaline batteries or four AAsizenickel-metal hydride (Ni-MH) batteries.◆ Notes on Handling Batteries ◆h It is recommended that you use same brand ofalkaline batteries as those supplied with the camera.h Never use a battery when theouter casing is split or peeling asthis could result in a short-circuitand cause major problems dueto battery fluid leakage oroverheating.Outer casingh Do not use different types of batteries or old and newbatteries together.h You cannot use lithium, manganese or nickelcadmium(Ni-Cd) batteries.h The operating lives of alkaline batteries vary betweenbrands and the life of batteries you purchase may beshorter than the alkaline batteries provided with thecamera. Note also that due to the nature of alkalinebatteries, the time for which they can be used isshorter in cold locations (at temperatures of +10°C(+50°F) or below). Consequently, Ni-MH batteries arerecommended.h Soiling (fingerprints, etc) on the terminals of batteriescan greatly reduce the time for which the batteriesprovide power.h You will need the optional charger (➡P.114) to rechargeNi-MH batteries.h See P.117, 118 for notes on using batteries.xD-Picture Card (sold separately)DPC-16 (16MB)DPC-64 (64MB)FrontDPC-32 (32MB)DPC-128 (128MB)Back●! Operation of this camera is only guaranteed when itis used with FUJIFILM xD-Picture Card.●! Because xD-Picture Cards are small, they can beaccidentally swallowed by small children. Be sure tostore xD-Picture Cards out of the reach of smallchildren. If a child accidentally swallows an xD-Picture Card, seek medical advice immediately.●! See P.120-121 for more information on xD-PictureCard.
LOADING THE BATTERY AND xD-Picture Card0103021Open the slot cover.2Firmly push the xD-Picture Card fully into thexD-Picture Card slot.3Close the slot cover.●! If you open the battery cover while the camera is stillswitched on, the camera is automatically switchedoff to protect the xD-Picture Card.●! The xD-Picture Card will not slide fully into the slot ifit is inserted facing the wrong way. Be careful not toapply excessive force to the xD-Picture Card.●! When storing the xD-Picture Card, always use the16 special anti-static case provided.◆ Replacing the xD-Picture Card ◆When you push the xD-PictureCard into the slot and thenslowly remove your finger, thelock is released and the xD-Picture Card is pushed out.You can then pull the xD-Picture Card the rest of theway out.●! Take care not to remove your finger too quicklyafter the lock is released, as the card may springcompletely out of the slot.
SWITCHING ON AND OFF1 21Turn the Power switch to turn the camera onand off.q : Photography modew : Playback modeOFF: Power-OFFWhen you switch the camera on, the indicatorlamp lights (green).When you first switch the camera on, the date iscleared. Press the “MENU/OK” button to set thedate and time.●! To set the date and time later, press the “BACK”button.●! If you do not set the date and time, this confirmationmessage will appear each time you switch thecamera on.17
SETTING THE DATE AND TIME34 01 021 Use “d” and “c” to select Year, Month, Day,Hour or Minute.2 Press “a” or “b” to set the number. Press “d” when “YEAR” is selected, or press“c” when “MIN” is selected and select the dateformat.●! If you hold down “a” or “b”, the numbers changecontinuously.●! When the time displayed passes “12:00”, the AM/PM18 setting automatically switches.
56 1Press “a” or “b” to switch between “YYYY.MM.DD” (year.month.day) and “MM/DD/YYYY”(month/day/year).Once you have set the date and time, press the“MENU/OK” button. Pressing the “MENU/OK”button switches the camera to Photography orPlayback mode.●! To set the time more precisely, press the “MENU/OK”button when the time on your reference clock reacheszero seconds.●! If at least 2 hours have passed since the AC poweradapter was connected or the batteries inserted and thedate and time set, then those settings will be maintainedfor roughly 6 hours even when the camera has no powersupply (when the AC power adapter is disconnected andthe batteries are removed).19
SETTING THE DATE AND TIMEChanging the date and time 0103 02041 Press the “MENU/OK” button.2 Use “d” or “c” to select “gOPTION” andthen use “a” or “b” to select “SET–UP”.3 Press the “MENU/OK” button.4 Select “DATE/TIME” and press “c”.See P.18 for information on setting the date andtime.20◆ Checking the remaining batteries charge ◆Switch the camera on and check that no batterylevel warning (Z or X) is displayed on theLCD monitor. If no icon is displayed, there isample charge left in the batteries.i X Lit red:Batteries charge low. Replace or recharge thebatteries as they will run out shortly.i C Blinking red:The batteries are exhausted. The display willshortly go blank and the camera will stopworking. Replace or recharge the batteries.●! Do not reuse batteries that have no remainingcharge (C blinking red) as this can result in faultssuch as the camera switching off without retractingthe lens.●! The above estimates are for the Still image modes.In Playback mode, the transition from “X” to “C”may take less time.◆ Power Save Function ◆If the camera is not used for 2 minutes, thisfunction automatically switches it off.When this function is enabled, the screenswitches off to conserve battery power if thecamera is not used in any way for 30 seconds(See P.82 for details). To switch the cameraback on, turn the Power switch to “OFF” brieflyand then back to “q”.
SELECTING THE LANGUAGE12 10103 020102031Press the “MENU/OK” button.2Press “d” or “c” to select “gOPTION” andthen press “a” or “b” to select “SET–UP”.3Press the “MENU/OK” button.1Press “a” or “b” to select “LANGUAGE”.2Press “d” or “c” to select “ENGLISH”.3Press the “MENU/OK” button.21
2 BasicPhotographyYou’ve read the chapter on getting ready andthe camera is now set up and ready to takepictures.The Basic Photography section explains thethree basic steps of “taking pictures”, “viewingpictures” and “erasing pictures”. Master thebasic steps by actually trying them out on thecamera as you go.TAKING PICTURES (AUTO MODE)1 ●➀ ●➁➀ Set the Power switch to “q” ➁ and set theMode dial to “R”.●Effective Photography RangeApprox. 80 cm (2.6 ft.) to infinity22●! If the subject is closer than approximately 80 cm (2.6ft.), set the camera to Macro mode (➡P.37).●! Check that the lens is clean. If it is dirty, clean thelens as described on P.116.●! If a “∂”, “ƒ”, “å” or“˙” message appears, see P.122,123.
223Press the “z OPEN” button to make the flashpop up.Immediately after you select Photography mode,the viewfinder (EVF) switches on. You canchoose whether to use the viewfinder (EVF) orthe LCD monitor to take pictures by pressing the“EVF/LCD” button to switch between the two.2●! If the photography mode is “R”, use the AutoFlash mode.●! When the flash is popped up or you are using theflash to take pictures, you may see the imagedisappear and the screen go dark as the flashcharges. The indicator lamp blinks orange while theflash is charging.●! If you use the flash in very dusty environments orwhen it is snowing, the flash may reflect offsnowflakes or floating dust particles so that theyappear as glowing white dots on your image.●! You can specify individually whether the viewfinder(EVF) or the LCD monitor is used in the Photographyand Playback modes.Mode Default setting After switchingqPhotography mode EVF LCD monitorwPlay back mode LCD monitor EVF✽ The selection reverts to the default setting when youswitch the camera off.23
TAKING PICTURES (AUTO MODE)4 54Zoom bar24Loop the strap over your wrist, brace yourelbows firmly against your body and hold thecamera with both hands.Be careful to ensure that the lens, microphoneand flash control sensor are not obscured byyour hands or the camera strap.●! You may be unable to take pictures correctly if yourfinger or the camera strap is obscuring the lens, etc.To zoom in on the subject, press “a” (T TELEZoom). To zoom out, press “b” (W WIDE Zoom).A “zoom bar” appears on the screen when youzoom in or out.hOptical zoom focal length (35mm cameraequivalent)Approx. 38 mm-228 mm (1.5 in. to 9.0 in.)Maximum zoom scale: 6×●! Zooming stops briefly when the camera switchesbetween optical zoom and digital zoom (➡P.32).
TAKING PICTURES (AUTO MODE)8ClickTo take the picture, press the shutter buttondown fully without lifting your finger off it. Thecamera makes a soft clicking sound, and thedata is then recorded.●! If you press the shutter button down fully in onemotion, the shot is taken without the AF framechanging.●! When you take a picture, the indicator lamp lightsorange (not ready to shoot) before switching back togreen to indicate that the camera is again ready forshooting.●! The indicator lamp flashes orange during charging.The screen may go dark briefly. This is normal anddoes not indicate a fault.26 ●! See P.122-124 for information on the warning displays.◆ Warnings displayed when the shutterbutton is pressed down halfway ◆Shot not focused.VSolutioni Move at least 2 m (6.6 ft.) away from thesubject before taking the shot.i Use AF/AE lock to take the shot (➡P.29).\Solutioni Use the flash.i Use a tripod.Strong likelihood of camera shakedue to the slow shutter speed.
■ Indicator Lamp DisplayDisplayLit greenBlinking greenBlinking green and orangealternatelyLit orangeBlinking orangeBlinking red◆ Subjects not suitable for autofocus ◆Though the <strong>FinePix</strong> <strong>3800</strong> uses an accurate autofocus mechanism, it may have difficulty focusing or not be ableto focus at all for the types of subject and situation listed below. In such cases, the image may be out of focus.h Very shiny subjects such as a mirror or car body.h Subjects photographed through glass.h Subjects that do not reflect well, such as hair or fur.h Subjects with no substance, such as smoke orflames.h When the subject is dark.h When there is very little contrast between the subjectand the background (such as white walls or subjectsdressed in the same color as the background).StatusReady to shoot.AF/AE operating or camera shake/AF warning (ready to shoot)Recording data to the xD-Picture Card (ready to shoot).Recording data to the xD-Picture Card (not ready to shoot)Charging the flash (flash will not fire)i xD-Picture Card-related warningThe xD-Picture Card is not loaded, is not formatted, is incorrectly formatted or is fullyrecorded. xD-Picture Card fault.i Lens operation error.h Subjects moving at high speed.h When something other than your subject is close tothe AF frame, has contrasting areas of light anddark and is either closer or further away than yoursubject (as when you photograph someone againsta background with strongly contrasting elements).For subjects of this type, use AF/AE lock (➡P.29).272
USING AF/AE LOCK3Bebeep4ClickKeep holding the shutter button down halfway(AF/AE lock) and check that the AF frame on thescreen shrinks and that the indicator lamp(green) stops flashing and stays lit.Continue to hold the shutter button down halfway(AF/AE lock). Move the camera back to theoriginal image and then fully press down on theshutter button.30●! You can reapply the AF/AE lock as many times asyou like before releasing the shutter.●! The AF/AE lock operates in all photography modesand can be used to ensure excellent results.
FRAMING GUIDELINE FUNCTIONText displayedFraming GuidelinedisplayedNo text displayedSceneUse this frame when you want to position yourmain subject in the center of the frame or whenyou want to align your shot with the horizon.This feature provides a clear guide to thesubject size and the overall balance of the shotso that you get exactly the shot you want.2You can use the framing guidelines to takepictures in the “R, E, W” mode. The screendisplay changes each time you press the “DISP”button. Press the “DISP” button until “FramingGuideline” appears.●! The framing guideline is not recorded on the image.●! The lines in the scene frame roughly divide therecorded pixels into three equal parts horizontally andvertically. When the image is printed, the resultingprint may be shifted slightly from the scene frame.◆ Important ◆Always use the AF/AE lock to compose yourpicture.Failing to use the AF/AE lock may result in theimage being out of focus.31
DIGITAL ZOOMDigital zoomZoom bar displayOptical zoom32Press “a” to zoom in on your subject and “b” tozoom out. When the limit of optical zooming isreached, the digital zoom can then be used tozoom still further.3M2M1M0.3MDigital zoom focal distance(35 mm camera equivalent)–Equivalent to approx. 228 mm-291 mmEquivalent to approx. 228 mm-364 mmEquivalent to approx. 228 mm-729 mmMax. ZoomScale1.28×1.6×3.2×●! See P.51 for information on changing the qualitysetting.The position of the “■” on the zoom bar indicatesthe current zoom setting.hIf the “■” is above the dividing line, the digitalzoom is being used. If it is below the line, theoptical zoom is being used.hPress “a” or “b” to move the “■” up and down.hWhen you switch between digital zoom andoptical zoom, the “■” stops moving briefly.Press the button for the same direction againto start the “■” moving and switch the zoomsetting.●! If the image goes out of focus when you use thezoom, press the shutter button down halfway torefocus.●! The optical zoom is equivalent to approximately38 mm-228 mm on a 35 mm camera.
I FLASH12To change the flash setting, pop the flash unit up.The flash mode setting does not change whenyou close the flash.hEffective flash range (in “R” mode)Wide-angle: Approx. 0.3 m to 3.5 m(1 ft. to 11.5 ft.)Telephoto : Approx. 0.8 m to 3.5 m(2.6 ft. to 11.5 ft.)●! If the photography mode is “R”, use the AutoFlash mode.●! When you pop the flash up, the image shown on thescreen may disappear and the screen may go darkbecause the flash is charging. In this event, theindicator lamp blinks orange.●! If you use the flash in very dusty environments orwhen it is snowing, the flash may reflect offsnowflakes or floating dust particles so that theyappear as glowing white dots on your image.Press the “I” Flash button (c) to select the flashmode to be used.●! The flash charging time may increase if the chargeremaining in the battery is low.332
I FLASHc Auto Flash ModeUse this mode for ordinary photography. Theflash fires automatically as required by theshooting conditions.n Red-Eye ReductionUse this mode to ensure that the subject’s eyesappear natural when photographing people inlow-light conditions.The flash fires a pre-flash just before the pictureis taken and then fires again to take the actualpicture.34◆ Red-Eye Effect ◆When you use the flash to photograph people in low-light conditions, their eyes sometimes appear red inthe picture. This is caused by the light of the flash reflecting off the inside of the eye. Use Red-EyeReduction flash to effectively minimize the likelihood of the red-eye effect.Take the following measures also to make Red-Eye Reduction more effective:h Get the subjects to look at the camera.h Get as close as possible to the subjects.
z Forced FlashUse this flash mode to photograph backlitscenes, such as a subject against a window orin the shade of a tree, or to obtain the correctcolors when you are shooting under lightingsuch as fluorescent tubes. In this mode, theflash fires in bright as well as dark conditions.v Slow SynchroThis is a flash mode that uses a slow shutterspeed. This allows you to take pictures of peopleat night that clearly show both your subjects andthe night-time backdrop.? Red-Eye Reduction + Slow SynchroUse this mode for slow synchro shots with redeyereduction.●! The image may be overexposed when you shootbright scenes.●! Because a slow shutter speed is used, a tripodshould be used to prevent camera shake.2To take a picture of a main subject at night with thebackground brightly lit, please use the “E” mode“/” (Night Scene) settings (➡P.45).35
I FLASH◆ When you cannot change theflash settings ◆h Check that the flash is popped up.Suppressed FlashPressing the flash down switches the camera toSuppressed Flash mode.Use this mode for photography using indoorlighting, for shots taken through glass, and forphotography in venues such as theaters or atindoor sporting events where the distance is toogreat for the flash to be effective. When you useSuppressed Flash, the Auto White Balancefunction (➡P.130) operates so that natural colorsare captured along with the ambience of theavailable light.●! If you are shooting in Suppressed Flash mode in darkconditions, use a tripod to prevent camera shake.●! See P.26, 122 for information on the camera shake36 warning.h When “,” (Landscape) or “t” (ContinuousShooting) is selected in “E” (Scene Position)mode, the flash mode is set to “SuppressedFlash” even when the flash is popped up.
e MACRO (CLOSE-UP) PHOTOGRAPHYSelecting Macro mode allows you to take closeupshots.●Effective Photography Range:Approx. 10 cm to 80 cm (3.9 in. to 2.6 ft.)●! Macro photography is automatically cancelled in thefollowing situations:• When you have switched photography modes• When the camera is switched off●! When you set the mode, the “e” icon is brieflydisplayed larger.●! If you are shooting in a dark location (when the “\”camera shake warning icon is displayed), use a tripodto prevent camera shake.◆ When you are using the flash ◆When you use the flash in Macro mode, removethe lens adapter ring.If the adapter ring is not removed, a shadowmay appear in the bottom center of your shot.h Effective shootingrange:Approx. 30 to 80 cm(1 ft. to 2.6 ft.)Press the “e ” Macro button (d ). The “e ”appears on the screen indicating that you cantake close-up shots.To cancel Macro mode, press the “e” Macrobutton (d) again.2●! In “E” photography mode, you can only select theMacro setting for “t” mode (Continuous shooting).37
wPLAYBACKVIEWING YOUR IMAGES (PLAYBACK)01 02Fast Forwarding Images1Set the Power switch to “w”.2Use the “d” and “c” button to move forwardand backward respectively through yourimages.Playback frame number●! When you set the Power switch to “q”, the lastimage shot is displayed.●! You can use this camera to play back still imagesrecorded on an <strong>FinePix</strong> <strong>3800</strong> or still images (excludingsome uncompressed images) recorded on anyFUJIFILM digital camera that supports xD-Picture38 Cards.During playback, you can skip backwards orforwards through the images (the frame numberincreases or decreases) by holding down “d” or“c” for approximately 1 second.The displayed image does not change, but aprogress bar indicates the approximate playbacklocation on the xD-Picture Card.
wPLAYBACKMULTI-FRAME PLAYBACK1 2 01 02Text displayedNo text displayedMulti-frame playbackIn playback mode, the display shown on thescreen switches each time you press the “DISP”button. Press the “DISP” button until the multiframeplayback screen (9 frames) appears.2●! The screen text display disappears after approximately3 seconds.●! Playback zoom cannot be used with multi-frameplayback.1 Select a frame by using “d”, “c”, “a” and “b”button to move the cursor (the orange box) tothe desired frame. Press “a” or “b” severaltimes to switch to the previous page or thenext page.2 You can enlarge the selected image bypressing the “DISP” button again.39
wPLAYBACKPLAYBACK ZOOMThis function is useful for things such as checking the focus of shots you have taken. Pressing “a”during single-frame playback switches you to the zoom screen.Single-frame Playback Zoom Panning Switch to zoomView another frameadcChange zoom scaleView another frameRevert to singleframeplaybackabdcBACKView a different areaRevert to singleframeplaybackabdcBACKQuality3M • F/N (2048 × 1536)2M (1600 × 1200)1M (1280 × 960)0.3M (640 × 480)Maximum Zoom Scale12.8×10.0×8.0×4.0×●! It may not be possible to play back shots taken on other camera models.40 ●! Playback zoom cannot be used during multi-frame playback.
wPLAYBACKERASING SINGLE FRAME1 01 02 221 Set the Power switch to “w”.2 Press the “MENU/OK” button to display theMenu on the screen.●! To revert to image playback without erasing the image,select “BACK” and press the “MENU/OK” button.Note that mistakenly erased images cannot berecovered. You should copy important files thatyou do not want to be erased to your computeror another media.Press “a ” or “b ” to select “FRAME” in the“pERASE” menu and press the “MENU/OK”button.See P.61 for more information on “ALL FRAMES”and “FORMAT”.41
w PLAYBACKERASING SINGLE FRAME34Pressing the “MENU/OK” button erases theframe (selected file) displayed. When erasing iscomplete, the next image appears and the“§” message is displayed.Press “d” or “c” to view the frame (selected file)you want to erase.42●! Press the “BACK” button to cancel erasing singleframe .To erase another frame, repeat steps 3 and 4 .
3Advanced FeaturesPhotographyADVANCED FEATURES PHOTOGRAPHYThe Advanced Features Photography section introduces a range of camera functions that you canaccess by setting the Power switch to “q”.■ Photography Mode SpecificationscdMenuz FLASH (c/n/z/v/?)e MACRO (ON/OFF)y Quality (Still image: 0.3M/1M/2M/3M • N/3M • F)(Movie: $/#)= SELF-TIMER (ON/OFF)E SCENE POSITION (m/,/.///A)d EV (Exposure compensation –2.1 to +1.5)a WHITE BALANCE (8/-/0/9/7/6/R)N A.PRIORITY (AUTO/F2.8/F4.8/F8.2)KSHARPNESS (HARD/NORMAL/SOFT)x FLASH (Flash brightness adjustment –0.6 to +0.6)g OPTION (SET–UP/LCD BRIGHTNESS)R (AUTO)OKOKOKOK——————OKE (SCENEPOSITION)OK ✽1— ✽2OKOKOK ✽1—————OKW (MANUAL)OKOKOKOK—OKOKOKOKOKOKT (MOVIE)✽1 Restrictions apply to the available flash modes depending on the “E” Scene Position menu setting in “E” mode(➡P.45).✽2 In “E” photography mode, you can only select the Macro setting for “t” mode (Continuous shooting).——OK———————OK433
q STILL IMAGER/W MANUALR Auto modeW <strong>Manual</strong> modeThis is the simplest photography mode to useand is suitable for the widest range of shots.<strong>Manual</strong> mode lets you specify a range ofdifferent menu settings for taking pictures.hMenu options only available in <strong>Manual</strong> modeBrightness (exposure compensation), whitebalance, aperture priority, sharpness, flash(flash brightness adjustment)44■ Available menu optionsy QUALITY= SELF-TIMERg OPTION■ Available menu optionsy QUALITY = SELF-TIMERd EVa WHITE BALANCENA.PRIORITY KSHARPNESSz FLASH g OPTION
q STILL IMAGEE SCENE POSITION01 03 02The “E” Scene Position setting allows you toselect any of 5 modes to suit the scene you areshooting. See P.46 for details.3■ Available menu optionsy QUALITY= SELF-TIMERE SCENE POSITIONg OPTION1Press the “MENU/OK” button to display themenu.2Press “d” or “c” to select “E” Scene Positionand then press “a” or “b” to change thesetting.3Press the “MENU/OK” button to confirm theselection.45
q STILL IMAGEE SCENE POSITIONm PortraitUse this mode for shots of people. Portrait modeprovides soft-tone images with natural skin colors.hWhen using the flashAuto Flash, Red-Eye Reduction, Forced Flash,Slow Synchro, Red-Eye Reduction + SlowSynchro, SceneUse this mode for daytime shots of scenery.Landscape mode provides crisp, clear shots ofbuildings, mountains and other scenery.hWhen using the flashThe Flash mode is automatically set toSuppressed Flash. This setting cannot bechanged.. SportsUse this mode for moving objects.hShutterTakes pictures using fast shutter speeds.hWhen using the flash46 Auto Flash or Forced Flash only/ Night SceneUse this mode for shots taken in the evening orat night.hShutterSlow shutter speed mode with speeds as slowas 3 secondshWhen using the flashSlow Synchro, Red-Eye Reduction+SlowSynchro onlyA Cont.Use this mode for continuous shooting withoutlimiting the photographic scenes.hNumber of continuous shots: 2hFocusing Exposure, White Balance:Set when the first frame is shot.hFlash: The flash is automatically set toSuppressed Flash mode.
q MOVIET MOVIE (VIDEO)12“T” Movie mode allows you to shoot videos withsound. Depending on the “yQuality” number ofrecorded pixels setting (➡P.51), the maximumrecording time for a single movie is either 200seconds “$” or 60 seconds “#”.hMovie format: Motion JPEG (➡P.130)# (320 × 240 pixels) or$ (160 × 120 pixels)selectable10 frames per secondWith sound●! Because the audio is recorded as you shoot, take carenot to cover the microphone with your finger (➡P.8).●! Depending on the available space on the xD-PictureCard, the available shooting time per movie may beshorter.●! It may not be possible to play back your movie onother cameras.The available shooting time and the “œ”message are shown on the screen.■ xD-Picture Card standard shooting timexD-Picture CardCapacityDPC-16 (16MB)DPC-32 (32MB)DPC-64 (64MB)DPC-128 (128MB)Available shooting time#$Approx. 94 sec. Approx. 5 min.Approx. 191 sec. Approx. 10.1 min.Approx. 6.4 min. Approx. 20.2 min.Approx. 12.9 min. Approx. 40.6 min.✽ The available shooting time when the xD-Picture Card isformatted in the camera.473
q MOVIET MOVIE (VIDEO)3448Zoom barIn Movie mode, the lens is locked at the wideanglesetting and only the digital zoom can beused. You can use “a” (T TELE Zoom) and “b”(W WIDE Zoom) to zoom in and out. A “zoombar” is displayed on the screen.Quality#$Digital zoom focus distance(35 mm camera equivalent)Approx. 38 mm-95 mmApprox. 38 mm-190 mmMax. ZoomScale2.5×5×Shooting begins when you fully depress theshutter button.●! When the camera is used to shoot a movie, you canget brighter images by using a light source such as afluorescent lamp to illuminate the subject.●! You do not need to hold down the shutter button.●! The focus is fixed at 80 cm (2.6 ft.) to infinity.●! The focus and white balance remain fixed duringshooting, but the exposure automatically changes tosuit the scene.●! The image shown on the screen before you take theshot may differ in its brightness, color, etc. from theimage shown on the monitor during movie recording.The white balance is automatically set when youfully depress the shutter button.
5 6 During shooting, a timer in the top-right corner ofthe screen counts down the remaining time.Press the shutter button again during shooting toend the movie.3●! Once the remaining time runs out, movie recordingautomatically stops and the movie is stored on thexD-Picture Card.●! If you end shooting immediately after you startshooting, only 1 second of movie is shot.49
PHOTOGRAPHY MENU OPERATION1 01 030221Press the “MENU/OK” button to display themenu.2Use “d” and “c” to select the menu item and“a” and “b” to change the setting.3Press the “MENU/OK” button to confirm theselection.When you validate the settings, the respectiveicons appear at the top of the screen (Exampleshowing the camera in AUTO mode with the selftimer set.).50●! The accessible menu settings differ depending onthe photography mode.
PHOTOGRAPHY MENU✽ Displaying the menus (➡P.50)y SETTING QUALITY MODE (NUMBER OF RECORDED PIXELS FOR IMAGES)Quality (pixels)3M · F (2048 × 1536)UsageFor Printing Use the “y” QUALITY setting to specify thenumber of recorded pixels.Still image(R · E ·W)Movie(u)3M · N (2048 × 1536)2M (1600 × 1200)1M (1280 × 960)0.3M ( 640 × 480)# ( 320 × 240)$ ( 160 × 120)Forthe Internet—3Continued on next page...51
PHOTOGRAPHY MENU✽ Displaying the menus (➡P.50)y SETTING QUALITY MODE (NUMBER OF RECORDED PIXELS FOR IMAGES)Still image (R · E · W)Movie (u)Any of 5 settings can be selected.Choose the setting that best suits your needs.i To print at A4-size → 3M • F or 3M • N✽ Select 3M • F for better quality and 3M • N for moreshots.Normally the 3M • N setting provides sufficientlyhigh quality for printing.i To print at A5 size → 2Mi To print at A6 (postcard) size → 1Mi To use the image as an e-mail attachment→ 0.3MYou can select 2 levels of quality. For betterimage quality, select “# ”, and for longerphotography time, select “$”.52
PHOTOGRAPHY MENU= SELF-TIMER PHOTOGRAPHY✽ Displaying the menus (➡P.50)12 01The self timer can be set in the “R”, “E” and“W” modes.When you set the self-timer to “ON”, “=” appearson the screen.In this mode, a timer runs for roughly 10 secondsbefore the shutter is released. Use this mode forshots such as photographs of yourself.●! The self timer is automatically switched off in thefollowing situations:• When shooting ends• When the Mode dial setting is changed• When the mode is switched between photographyand playback• When the camera is switched off●! You can also use the AF/AE lock (➡P.29).●! Be careful not to stand in front of the camera whenyou press the shutter button as this can causefocusing or exposure metering errors.Bebeep02 031 Position the AF frame over your subject.2 Press the shutter button down half way to setthe focus.3 Without releasing the shutter button, press itdown fully. The self-timer then starts running.Continued on next page...533
PHOTOGRAPHY MENU= SELF-TIMER PHOTOGRAPHY34The self timer lamp lights for 5 seconds and thenstarts blinking. 5 seconds later the cameramakes a clicking noise and takes the picture.Until the picture is taken, a countdown appearson the screen.Self-timer mode is automatically cancelled aftereach shot.54●! To stop the self-timer once it has started running,press the “BACK” button.
PHOTOGRAPHY MENUd EV (EXPOSURE COMPENSATION)✽ Displaying the menus (➡P.50)This mode can be selected in the “W” photographymode.Use the Exposure compensation setting toobtain the optimum image brightness (exposure)when the subject is much brighter or darker thanthe background.hCorrection range:–2.1 EV to +1.5 EV (13 steps: 0.3 EV increments)See P.130 for more information on EV.●! The Exposure compensation setting is disabled in thefollowing situations:• When the flash is used in Auto or Red-EyeReduction mode.• When dark scenes are shot in Forced Flash mode.◆ Subjects for Which ExposureAdjustment is Particularly Effective ◆Guide to using + (positive) compensationhCopying of printed text (black characterson white paper) (+1.5 EV)hBacklit portraits (+0.6 EV to +1.5 EV)hLocations with very bright backgroundsor strong reflections, such as ski resorts:(+0.9 EV)hShots made up predominantly of sky.(+0.9 EV)Guide to using – (negative) compensationhSpotlit subjects, particularly against darkbackgrounds (–0.6 EV)hCopying of printed text (white characterson black paper) (–0.6 EV)hScenes with low reflectivity, such as shotsof pine trees or dark foliage (–0.6 EV)553
PHOTOGRAPHY MENUa WHITE BALANCE (SELECTING THE LIGHT SOURCE)✽ Displaying the menus (➡P.50)This mode can be selected in the “W” photographymode.Change the white balance setting when youwant to take a picture with the white balancefixed for the surroundings and lighting when thepicture is taken.In AUTO mode, the correct white balance maynot be obtained for subjects such as close-upsof people’s faces and shots taken under aspecial light source. In such situations, selectthe correct white balance for the light source.See P.130 for information on the white balance.AUTO: Automatic adjustment(Shooting to show the ambience of thelight source)6 : Shooting outdoors in fine weather7 : Shooting in shade9 : Shooting under “Daylight” fluorescentlamps0 : Shooting under “Warm White” fluorescentlamps- : Shooting under “Cool White” fluorescentlamps8 : Shooting in incandescent light✽ When the flash fires, the white balance set for theflash is used. To achieve a particular desired effect,set the flash mode to Suppressed Flash (➡P.36).56
PHOTOGRAPHY MENUx FLASH (FLASH BRIGHTNESS ADJUSTMENT)PHOTOGRAPHY MENUK SHARPNESSThis mode can be selected in the “W ”photography mode.Flash brightness adjustment allows you tochange only the amount of light emitted by theflash to suit the photography conditions or toachieve a desired effect.hAdjustment range:–0.6 to +0.6 EV (5steps: 0.3 EV increments)See P.130 for more information on EV.●! Depending on the subject and the shooting distance,adjusting the flash brightness may have little or noeffect.This mode can be selected in the “W ”photography mode.Use this setting to soften or emphasize outlinesor to adjust the image quality.h3 levels of sharpness are availableHARD: Emphasizes the outlines.Best for shots of subjects such asbuildings or text where you wantsharp images.NORMAL : Best for ordinary photography.Provides edge sharpness that isideal for ordinary shots.SOFT : Softens the outlines.Best for shots of subjects such aspeople, where a softer image isdesirable.573
PHOTOGRAPHY MENUN APERTURE-PRIORITY AUTODisplayed in redThis mode can be selected in the “W” photographymode.This is an automatic mode that allows you to setthe aperture. You can use this mode to takeshots with a blurred background (wide aperture)or with both foreground and background in sharpfocus (narrow aperture).hAperture settings: F2.8/F4.8/F8.2Shutter speed (auto): 1/2 to 1/1500 sec.If the shutter speed is displayed in red when theshutter button is pressed down halfway, the shotis overexposed or underexposed. Change theaperture setting until the correct exposure isobtained.58●! c (Auto) flash mode cannot be used in Aperture-Priority mode.
4 AdvancedFeatures PlaybackPLAYING BACK MOVIES (VIDEO)1 01 022010241Set the Power switch to “Q”.2Use “d” or “c” to select the movie file.1Press “b” to play the movie.2The screen shows the playback time and aplayback progress bar.●! Movies cannot be played back using multi-frameplayback. Use the “DISP” button to revert to normalplayback.Indicated by the “u” icon.●! Take care not to block the speaker.●! If the sound is difficult to hear, adjust the volume(➡P.79).●! If the subject of the movie is very bright, whitestreaks may appear on the image during playback.This is normal and is not a fault.59
PLAYING BACK MOVIES (VIDEO)■ Playing back moviesControlDescriptionPlaybackThe movie automatically stops when playback ends.Pause/ResumeStopPauses the movie during playback.Press this button again to resume playback.Stops playback.✽ Press “d” or “c” while movie playback is stopped to go backto the previous file or advance to the next file respectively.Fast forward/RewindRewindFast forwardPress these during playback to skip forwards or backwardsthrough the movie.Skip playbackWhen pausedi Each time you press “d” or “c” when the movie is paused,the movie advances or goes back one frame.i Hold down the button to move through the frames quickly.60◆ Playing back movie files ◆i This camera may not be able to play back movie files (10 fps) that were recorded on a camera other than <strong>FinePix</strong> <strong>3800</strong>.i To play back movie files on a computer, save the movie file on the xD-Picture Card to the compute’s hard disk and thenplay back the saved file.i Video files contain large amounts of data. Depending on the performance of the computer, movies may not run smoothlyif the computer cannot process the images quickly enough.
w PLAYBACK MENUp ERASING SINGLE • ALL FRAMES/FORMAT1 01 02 21Set the Power switch to “Q”.2Press the “MENU/OK” button to view themenu screen.4Use “g” to select “p” ERASE.Note that mistakenly erased images cannot berecovered. You should copy important files thatyou do not want to be erased to your computeror another media.61
w PLAYBACK MENUp ERASING SINGLE • ALL FRAMES/FORMAT3FormatErases all the files. Because formattingalso erases protected files, checkcarefully before formatting a card andcopy any files that you want to keeponto another media, such as your harddisk.01 021Use “a ” or “b ” to select “FRAME”, “ALLFRAMES” or “FORMAT”.2Press “MENU/OK” button to confirm yourselection.All framesErases all unprotected files.You should copy important files thatyou do not want to be erased to yourcomputer or another media.FrameErase only the selected file.BackReturns to playback without erasingany files.62
FrameAll frames01 0241Use “d” and “c” to select the file to be erased.2Press the “MENU/OK” button to erase thecurrently displayed file.To erase another image, repeat steps 1 and 2.When you have finished erasing images, pressthe “BACK” button.●! The file for which “ˆ” was displayedcannot be erased. Remove the protection.Pressing the “MENU/OK” button erases all theunprotected files.If the “©”“ø” message appears, pressthe “MENU/OK” button once more to erase the image.63
w PLAYBACK MENUFormatp ERASING SINGLE • ALL FRAMES/FORMATPressing the “MENU/OK” button erases all thefiles and initializes the xD-Picture Card.Formatting erases protected files also.64●! If the “∂”, “ƒ”, “å” or“˙” message appears, refer to P.122,123 before formatting the xD-Picture Card and take theappropriate measures.
w PLAYBACK MENUk PROTECTING IMAGES FRAME/ALL1 01 0221Set the Power switch to “Q”.2Press the “MENU/OK” button to view themenu screen.4Use “d” or “c” to select “k” PROTECT.Protection is a setting that prevents images frombeing accidentally erased. However, “FORMAT”erases all images, regardless of a “PROTECTALL” setting (➡P.64).65
w PLAYBACK MENUk PROTECTING IMAGES FRAME/ALL3Unprotect allRemoves the protection from all thefiles.Protect allProtects all the files.Frame set/Reset01 02Protects or unprotects only theselected file.1Press “a” or “b” to select “UNPROTECT ALL”,“PROTECT ALL” or “FRAME SET/RESET”.2Press “MENU/OK” button to confirm yourselection.66
Frame set/Reset1 201 0241 Press “d” or “c” to select the file to beprotected.2 Press the “MENU/OK” button to protect thefile currently displayed.To protect another file, repeat steps 1 and 2.To finish protecting files, press the “BACK”button.To remove the protection, press the “MENU/OK”button again.67
w PLAYBACK MENUProtect allk PROTECTING IMAGES FRAME/ALLUnprotect allPress the “MENU/OK” button to protect all thefiles.Press the “MENU/OK” button to unprotect all thefiles.68●! To interrupt the procedure before it is completed,press the “BACK” button.●! To interrupt the procedure before it is completed,press the “BACK” button.
w PLAYBACK MENUi HOW TO SPECIFY PRINT OPTIONS (DPOF)DPOF stands for Digital Print Order Format and refers to a format that is used forrecording printing specifications for images shot using a digital camera on media such asxD-Picture Card. The recorded specifications include information on which frames are tobe printed.This section gives a detailed description of how to order your prints with the <strong>FinePix</strong> <strong>3800</strong>.On the <strong>FinePix</strong> <strong>3800</strong>, you can specify only one print per image in the DPOF settings.✽ Note that some printers do not support date and time imprinting or specification of thenumber of prints.✽ Note that the warnings shown below may be displayed while you are specifying theprints.©ø (➡P.63)When you erase the image, the DPOF setting for that image is deleted at the same time.¥ (➡P.73)If you load an xD-Picture Card that contains frames specified for printing on anothercamera, those print specifications are all reset and replaced by the new printspecifications. (➡P.124)Up to 999 frames can be specified on the same xD-Picture Card.694
w PLAYBACK MENUi DPOF SET FRAME1 01 02 21Set the Power switch to “Q”.2Press the “MENU/OK” button to display themenu screen.Use “d” or “c” to select “i” DPOF.70
3401 0201 0241Press “a” or “b” to select “DDATE”.2Use “d” and “c” to select “DATE ON” or“DATE OFF”.The selected setting is then valid for all frameswith DPOF settings.1Press “a” to select “OK”.2Press the “MENU/OK” button.71
w PLAYBACK MENUi DPOF SET FRAME3501 02 61 Use “d” or “c” to display the frame for whichyou want to specify DPOF settings.2 Press “a” or “b” to set “YES” for the frame tobe printed and then press the “MENU/OK”button or “c”.To specify more DPOF settings, repeat steps 1and 2.●! DPOF settings cannot be specified for movies.●! “TOTAL” shows the total number of frames for which72 prints have been ordered.When you have finished the settings, alwaysselect “FINISH” and press the “MENU/OK”button.If you press the “BACK” button, no DPOF settingsare specified.●! You can only specify one print per frame in the DPOFsettings. Note also that you can specify prints for upto 999 frames on the same xD-Picture Card.
7◆ Individual DPOF settings cannot bechanged. ◆Pressing the “MENU/OK” button confirms theDPOF settings.Pressing the “BACK” button returns you to thesettings screen 5 .If you select a frame for which DPOF settings havealready been specified, the “¥ ”message appears.Pressing the “MENU/OK” button erases all ofthe DPOF settings already specified for eachframe. You must then specify the DPOF settingfor each frame again.4Pressing the “MENU/OK” button confirms all thesettings.●! Press the “BACK” button to leave the previoussettings unchanged.●! During playback, check that the “i” icon isdisplayed for the previous settings.73
w PLAYBACK MENUr RECORDING VOICE MEMOS101 02201 03021Set the Power switch to “Q”.2Use “d” and “c” to select the image (stillimage) to which you want to add a voicememo.1Press the “MENU/OK” button to display themenu.2Use “d” or “c” to select “r” VOICE MEMO.3Press the “MENU/OK” button.●! You can also add voice memos to images (stillimages) shot on other cameras, provided they canbe played back on this camera.74 ●! Voice memos cannot be added to movies.
344The “®” message appears on thescreen. Recording begins when you press the“MENU/OK” button.MicrophoneFace the microphone asyou record the voicememo. Hold the cameraroughly 20 cm (7.9 in.)away for the bestresults.During recording, the remaining time is shownon the screen and the self-timer lamp blinks.When the time remaining reaches 5 seconds,the self-timer lamp starts blinking quickly.●! To end your comment during recording, press the“MENU/OK” button.75
w PLAYBACK MENUr RECORDING VOICE MEMOS5◆ When the image already hasa voice memo ◆If you select an image that already has a voicememo, a screen appears in which you canselect whether or not to rerecord the caption.When you have recorded 30 seconds ofcomment, the “∑” message appears onthe screen.To finish: Press the “MENU/OK” button.To re-record your comment: Press the “BACK”button.76
w PLAYBACK MENUPLAYING BACK VOICE MEMOS101 022010241Set the Power switch to “Q”.2Use “d” or “c” to select an image file thathas a voice memo.1 Press “b” to play the voice memo.2 The screen shows the playback time and aplayback progress bar.●! You cannot play back voice memos using multiframeplayback. Use the “DISP” button to revert tonormal playback.The “r” icon is displayed.●! Take care not to block the speaker.●! If the sound is difficult to hear, adjust the volume(➡P.79).77
w PLAYBACK MENUPLAYING BACK VOICE MEMOS■ Playing back voice memosControlDescriptionPlaybackThe voice memo automatically stops when playback ends.Pause/ResumePauses the voice memo during playback.Press this button again to resume playback.StopStops playback.✽ Press “d” or “c” while voice memo playback is stopped togo back to the previous file or advance to the next filerespectively.Fast forward/RewindRewindFast forwardPress these during playback to skip forwards or backwardsthrough the voice memo.✽ These buttons do not function while playback is paused.78
5 Settingsg LCD BRIGHTNESS/VOLUME1 2 01 021Use “d ” and “c ” to adjust the screenbrightness or speaker volume.2Press the “MENU/OK” button to confirm thenew setting.5When you select the “BRIGHTNESS” or“VOLUME” menu option, an adjustment barappears on the LCD monitor or viewfinder (EVF).●! To exit this procedure without changing the settings,press the “BACK” button.79
g USING SET–UP1 01 03022Still PhotographyScreen 0102You can use “SET–UP” in any mode.1Press the “MENU/OK” button to display themenu screen.2Press “d” or “c” to select “g” OPTION andthen press “a” or “b” to select “SET–UP”.3Press the “MENU/OK” button.1Press “a” or “b” to select a menu option andthen press “d” or “c” to change the setting.2Press the “MENU/OK” button.80●! Press “c” for “DATE/TIME” or “RESET ALL”.
■ List of settingsq Still Image mode—BRIGHTNESS (➡P.79)SET–UPT Movie mode—BRIGHTNESS (➡P.79)SET–UPw Playback modeVOLUME (➡P.79)BRIGHTNESS (➡P.79)SET–UP■ SET–UP Menu Options (Date/time setting, etc.)FactorySettings DisplaydefaultExplanationPOSTVIEWPOWER SAVEUSB MODEDATE/TIMESOUNDLANGUAGERESET ALLON/OFFON/OFFDSC/PC CAMSETLOW/HIGH/OFFENGLISH/FRANCAIS/DEUTSCHOKONOFFDSC—LOWENGLISH—This option specifies whether or not an image checking screen (photographyresults) is displayed after you take a shot.The photography results are displayed for about 2 seconds and thenautomatically recorded.In continuous shooting, the photography results are displayed for a set timebefore being automatically recorded even if this option is set to “OFF”.This function temporarily switches the screen off if the camera is not used forapproximately 30 seconds. See P.82 for details.See P.96 for details.Use this option to correct the date or time. See P.20 for details.This option allows you to set the volume of the beep emitted when the cameracontrols are used.Select English, French or German as the language used for screen display.Except for the DATE/TIME and LANGUAGE settings, this function resets all thecamera settings (including the photography and playback menu settings) to thefactory default values set at shipment. When you press “c”, a confirmationscreen appears. To proceed, press the “MENU/OK” button again.815
SET–UPPOWER SAVEBebeep hPower saving “OFF” (default setting)The camera does not use measures such as“sleep” to reduce power consumption. However, ifthe camera is not used for approximately 2 minutes,this function automatically switches the camera off.hPower saving “ON”Power consumption is kept to a minimum toprevent battery depletion.i If the camera is not used for approximately 30seconds, the screen switches off temporarilyto reduce power consumption (Sleep mode).i Once the camera is in Sleep mode, if it is leftunused for a further 90 seconds, it isautomatically switched off.i The charging time for the flash increasesslightly because the flash charging power is82 reduced.When the camera is in sleep mode, pressing theshutter button down halfway brings the cameraback to full operational mode. This is a usefulfeature as it allows you to take pictures morequickly than switching the camera off and thenon again. You can also take a picture by pressingthe shutter button all the way down.●! Operation can also be restored by pressing buttonsother than the shutter button.◆ To restore power to the camera ◆Turn the Power switch to“OFF” briefly and thenback to “q”.
6 Software Installation6.1 The Software ComponentsConnect the camerawith “DSC” selected asthe USB setting(➡P.96).USB Mass StorageDriverAllows a digital camera to be usedas USB Mass Storage (removabledisk drive, card reader).Exif Launcher<strong>FinePix</strong>ViewerAllows you to display thumbnail lists of theimages stored on your PC or in the camera,print the images individually or as an index,display the images at full size and performsome basic image processing.PictureHelloUsed for videoconferencing (Windows only)Connect the camerawith “PC CAM”selected as the USBsetting (➡P.99).Launches the <strong>FinePix</strong>Viewersoftware when a camera isconnected.USB PC CameraDriverAllows a digital camera to beused as a PC Camera.RAcrobat ReaderImageMixer VCDfor <strong>FinePix</strong>Creates a <strong>FinePix</strong> CD Album.Software used to read PDF-format documents on apersonal computer. This software is needed to read theUser’s Guides for <strong>FinePix</strong>Viewer.QuickTimeSoftware needed for playing back movies, etc.6✽ Note that the software configuration differs slightly depending on your operating system.83
6.2 Installation on a Windows PC6.2.1 Load the CD-ROM into your PCDo not connect the camera to your PC untilthe software installation is completed.4. The Setup screen appears. Click the[Installing <strong>FinePix</strong>Viewer] button.✽ For more information on what is installed, click the[Read Me First] button and [Using <strong>FinePix</strong>Viewer]button.1. Switch on your PC and start up Windows.✽ If you have already switched on your PC, restartyour PC at this point.NOTEUsers of Windows 2000 or Windows XP should log inusing a system administrator account (e.g.“Administrator”).2. Quit all other active applications until noapplications are shown in the taskbar.NOTEIf a “----.dll file not found.” message appears duringinstallation, there is another application running in thebackground. Forcibly shut down the application. Referto your Windows manuals for information on how toforcibly shut down an application.3. Load the enclosed CD-ROM into the CD-ROMdrive. The installer starts up automatically.84
Launching the Installer <strong>Manual</strong>ly1. Double-click the “My Computer” icon.✽ Windows XP users should click “MyComputer” in the “Start” menu.2. Right-click “FINEPIX” (CD-ROM drive) inthe “My Computer” window and select“Open”.3. Double-click “SETUP” or “SETUP.exe”in the CD-ROM window.6.2.2 From <strong>FinePix</strong>Viewer installation to restart1. Pre-installation checking begins. If anywarning messages appear, follow theinstructions given on the screen.✽ The way file names are displayed differs asdescribed below depending on your computersettings.• File extensions (3-letter suffixes indicatingthe file type) may be shown or hidden. (e.g.Setup.exe or Setup)• Text may be shown normally or all inuppercase (e.g. Setup or SETUP).✽ The “Add New Hardware Wizard” may be hiddenbehind the “Note” message. Check the taskbar,move the message window and then click the[Cancel] button.685
2. A confirmation message appears askingwhether you want to continue with theinstallation. Click the [OK] button.3. The software version is checked. If thewindow shown below appears, click the[OK] button to uninstall the software.3 Check the installation destination folder and thenclick the [Next >] button.4 “Confirmation” screen shown may appear. Tocontinue with the settings, click the [Yes] button.4. The USB drivers are installed.5. Install <strong>FinePix</strong>Viewer.1 <strong>FinePix</strong>Viewer installation begins and notes andwarnings are displayed. When you haveconfirmed these, click the [Next >] button.2 The User License Agreement for this software isdisplayed. Read the agreement carefully andthen, if you agree to the terms of the Agreement,click the [Yes] button. If you click the [No] button,86 the software is not installed.
6. Install QuickTime as directed by the onscreeninstructions.✽ If you have already installed QuickTime version5.0.2 or later, this installation is not performed.Click [Agree] button in the “Software LicenseAgreement” window.7. Install NetMeeting as directed by the onscreeninstructions.✽ If NetMeeting 3.01 or later is already installed onyour PC, this installation is not performed.8. Install ImageMixer VCD for <strong>FinePix</strong> asdirected by the on-screen instructions.9. Close the “Readme” window.10. Install WINASPI as directed by the on-screeninstructions.11. Install Windows Media Player as directedby the on-screen instructions and thenrestart your PC.✽ If the latest version of the software is already installedon your PC, this installation is not performed. Whennext screen appears, click the [Restart] button.6If the “Connection speed” window appears, set thecorrect speed for your environment of connection andthen click the [Next] button.✽ If you do not know your connection speed, simplyclick the [Next] button.In Windows Media Component Setup window, tickthe “I have read the Privacy Statement” checkboxand then click the [Next >] button.When you click the [Finish] button, your PC isrestarted.87
12. After you restart your PC, install DirectX asdirected by the on-screen instructions andthen restart your PC again. If the latestversion of DirectX is already installed onyour PC, this installation is not performed.13. After you restart your PC, the “<strong>FinePix</strong>Viewerinstallation completed” message appears.Click “Using <strong>FinePix</strong>Viewer” to view thebasic <strong>FinePix</strong>Viewer functions.15. Proceed with the installation as directedby the on-screen instructions.■ To install Acrobat Reader later...1. Open the “My Computer” window, right-clickthe CD-ROM icon and select “Open” to viewthe contents of the CD-ROM.8814. To install Acrobat Reader, click “InstallAcrobat Reader”. ✽✽ You should install Adobe Systems’ AcrobatReader software to read the <strong>FinePix</strong>Viewer User’sGuide (PDF).If you already have the latest version installed,this step is not required.2. Double-click “ACROREAD” → “ENGLISH”folder.3. Double-click “ar505enu.exe”.4. Proceed with the installation as directed bythe on-screen instructions.
6.3 Installation on a Mac OS 8.6 to 9.26.3.1 Check the system software settings■ Enable File ExchangeCheck whether File Exchange is active.To use an xD-Picture Card that is supported by thecamera, the File Exchange utility supplied with MacOS must be running.1. Switch on your Macintosh and start upMac OS 8.6 to 9.2.NOTEDo not connect the camera to your Macintosh until thesoftware installation is completed.2. Select the Extension Manager in the ControlPanel and check that the File Exchangecheck box is ticked. If not, click in the boxso that an appears and then restart yourMacintosh.6.3.2 From <strong>FinePix</strong>Viewer installation to restart1. When you load the enclosed CD-ROM intothe CD-ROM drive, the “<strong>FinePix</strong>” windowautomatically opens.NOTEIf the “<strong>FinePix</strong>” window does not open automatically,double-click the CD-ROM icon.2. Double-click “Installer for MacOS8.6-9.x”to launch the Installer.3. The Installer setup screen appears. Clickthe [Installing <strong>FinePix</strong>Viewer] button.✽ For more information on what is installed, click the[Read Me First] button and [Using <strong>FinePix</strong>Viewer]button.4. A confirmation message appears askingwhether you want to continue with theinstallation. Click the [OK] button.5. The User License Agreement for thissoftware is displayed. Read the agreementcarefully and then, if you agree to theterms of the Agreement, click the [Yes]button. If you click the [No] button, thesoftware is not installed.896
6. Select the installation destination for<strong>FinePix</strong>Viewer and ImageMixer VCD for<strong>FinePix</strong>.1 Click the [Open] button to open the installationdestination folder.7. Install QuickTime as directed by the onscreeninstructions and then restart yourMacintosh.✽ If you have already installed QuickTime version5.0.2 or later, this installation is not performed.2 Click the [Save] button.Click [Agree] button in the “License” window.90If the “Connection Speed” window appears after you restart yourMacintosh, set the correct speed for your environment ofconnection and then click the [Next] button.✽ If you do not know your connection speed, simply click the[Next] button.
8. After you restart your Macintosh, the“<strong>FinePix</strong>Viewer installation completed”message appears. Click “Using<strong>FinePix</strong>Viewer” to view the basic<strong>FinePix</strong>Viewer functions.■ To install Acrobat Reader later...1. Double-click the “<strong>FinePix</strong>” CD-ROM toopen the CD-ROM window.2. Double-click “<strong>FinePix</strong>Viewer for Mac OS8.6-9.x” → “Acrobat Reader” → “English”folder.3. Double-click “English Reader Installer”.4. Proceed with the installation as directed bythe on-screen instructions.9. To install Acrobat Reader, click “InstallAcrobat Reader”. ✽✽ You should install Adobe Systems’ AcrobatReader software to read the <strong>FinePix</strong>Viewer User’sGuide (PDF).If you already have the latest version installed,this step is not required.10. Proceed with the installation as directedby the on-screen instructions.691
6.4 Installation on a Mac OS X6.4.1 From <strong>FinePix</strong>Viewer installation to restartOnly <strong>FinePix</strong>Viewer is installed on Mac OS X.NOTEAVI movies cannot be played back on version 10.0.4.1. Switch your Macintosh on and start up MacOS X. Do not launch any other applications.2. Load the enclosed CD-ROM into the CD-ROM drive. The “<strong>FinePix</strong>” window opens.NOTEIf the “<strong>FinePix</strong>” window does not open automatically,double-click the CD-ROM icon.4. Click the “ ” icon.5. Enter the administrator name and password.Then click the [OK] button.923. Double-click “Installer for MacOS X”.6. Click the [Continue] button.7. Quit any other programs that are runningand then click the [Continue] button.8. Click [Cntinue] button in the “SoftwareLicense Agreement” window.
9. Select the Mac OS X startup disk as theinstallation destination and click the[Continue] button.10. Click the [Install (upgrade)] button.11. When you have completed the installation,click the [Restart] button.693
7 Camera ConnectionThe “Camera Connection” section explains howto connect the camera to your computer usingthe special USB cable and describes thefunctions you can use once the camera andcomputer are connected.If the power cuts out during data transmission,the data will not be transmitted correctly. Alwaysuse the AC power adapter when connecting thecamera to a computer.The first time you connect the camerato your computer by referring Section 6You must install all thesoftware beforeconnecting the camerato your computer.■ PC CAM (PC Camera) ModeThis function allows you to conductvideoconferencing sessions between PCsconnected to the Internet (➡P.99).✽Videoconferencing (“PictureHello”) is notsupported on Macintosh computers.✽Connection is only possible with a FUJIFILM cameraequipped with a “PC Camera” function.For more information on using the software,refer to “How to use <strong>FinePix</strong>Viewer” in the HELPmenu which was installed from the CD-ROM.CD-ROM(Software for <strong>FinePix</strong> SX)■ DSC (Mass storage device) ModeThis mode provides a simple way to read imagesfrom an xD-Picture Card and store images on toan xD-Picture Card (➡P.96).94
7.1 Using the optional AC Power adapterAlways use a FUJIFILM AC Power Adapter AC-5V(➡P.114).Use the AC power adapter in situations when aloss of power will cause problems, such asduring file downloading (via the USB connection).Using the AC power adapter also allows you totake pictures and play back images withoutworrying about depleting the batteries.hCompatible AC power adapters(Sold separately)AC-5VS/AC-5VHS/AC-5VH✽ See P.119 for notes on using the AC power adapter.✽Only connect or disconnect the AC power adapterwhen the camera is switched off.Connecting or disconnecting the AC power adapterwhile the camera is switched on temporarily interruptsthe power supply to the camera, so that images ormovies being shot at the time are not recorded.Failing to switch the camera off first can also result indamage to the xD-Picture Card or malfunctions duringPC connection.DC IN 5V SocketCheck that the camera is switched off. Plug theAC power adapter connector into the “DC IN 5V”socket and then plug the AC power adapter intothe power outlet.✽The socket-outlet shall be installed near the equipmentand shall be easily accessible.✽The shape of the plug and socket-outlet depends onthe country of use.Connecting the AC power adapter does notallow you to charge the Ni-MH batteries. Use theoptional charger (➡P.114) to charge the Ni-MHbatteries.795
7.2 Use at DSC modeDC IN 5VsocketCameraDigital(USB) socket(USB)socketPC 5. Switch your PC on.6. Use the special USB cable to connect thecamera to your computer.7. Switch the camera on.If you are using a Windows PC, the driver settingsare specified automatically when installation iscompleted. No further action is required.1. Load an xD-Picture Card containingphotographed images into your camera.2. Slide the Power switch to the side to turnthe camera on.3. Set the “USB MODE” setting in the “SET–UP” menu to “DSC” (➡P.80, 81).4. Slide the Power switch to the side to turnthe camera off.✽You should use the AC power adapter (soldseparately) the camera is connected to your PC(➡P.95). Loss of power during data transmission can96 prevent successful data downloading.Always use the prescribed procedure whendisconnecting or switching off the camera(➡P.102).✽On Windows XP and Mac OS X, you must specify theautomatic launch settings the first time you connectthe camera to your computer.✽Take care to ensure that the special USB cable isconnected the correct way around and that the plugsare pushed fully into the connection sockets.
■ Camera Operation■ PC OperationWindows 98/98 SE/Me/2000 Professional✽ The Windows CD-ROM may also be requiredduring installation. In this event, switch CD-ROMsas directed by the on-screen instructions.i <strong>FinePix</strong>Viewer automatically starts up.i When the camera and computer are exchangingdata, the self timer lamp blinks and the indicatorlamp blinks alternately green and orange.i “DSC” appears on the screen.i Power Save is disabled when the camera isconnected to a USB port.✽Before replacing the xD-Picture Card, always disconnectthe camera from the PC using the procedure on P.102.✽Do not disconnect the USB cable when the camera iscommunicating with the PC. See P.102 for informationon the disconnection procedure.✽ Screen forWindows 98 SEi A removable disk icon appears and you canuse your PC to transfer files to and from thecamera.WindowsMacintoshIf the above operations do not occur, you do nothave the required software programs or driversinstalled on your PC. Complete the required PCsetup procedures. Then reconnect the camerato your PC.977
Windows XP1. The “Found New Hardware” help messageappears in the bottom-right corner of yourscreen. This message will close when thesettings are completed. No action is required.✽ This step is not required for subsequent connections.2. Specify the settings in the “AutoPlay” dialogbox.■ When <strong>FinePix</strong>Viewer is included inthe list of actions to performSelect “Viewing images using <strong>FinePix</strong>Viewer”and then select the “Always do the selectedaction” checkbox. (This checkbox may not beshown in some cases.)Click the [OK] button to launch <strong>FinePix</strong>Viewer.■ When <strong>FinePix</strong>Viewer is not includedin the list of actions to performSelect “Take no action” and then select the “Alwaysdo the selected action” checkbox. (This checkboxmay not be shown in some cases.)Click the [OK] button and launch <strong>FinePix</strong>Viewermanually.3. A new removable disk icon appears in the“My Computer” window.TIPThe next time you connect the camera, the removabledisk drive icon and name change to the “<strong>FinePix</strong>” iconand name.Proceed to “Using <strong>FinePix</strong>Viewer” onpage 104.98
7.3 Use at PC-CAM modeDC IN 5VsocketCameraDigital(USB) socket(USB)socketPC 4. Switch your PC on.5. Use the special USB cable to connect thecamera to your computer.6. Switch the camera on.If you are using a Windows PC, the driversettings are automatically specified wheninstallation ends. Just wait a few moments.1. Slide the Power switch to the side to turnthe camera on.2. Set the “USB MODE” setting in the“SET–UP” menu to “PC CAM” (➡P.80, 81).3. Slide the Power switch to the side to turnthe camera off.✽You should use the AC power adapter (sold separately)when the camera is connected to your PC (➡P.95).Loss of power during data transmission can preventsuccessful data downloading.Always use the prescribed procedure whendisconnecting or switching off the camera(➡P.102).✽Take care to ensure that the special USB cable isconnected the correct way around and that the plugsare pushed fully into the connection sockets.997
■ Camera Operation■ PC Operation1. <strong>FinePix</strong>Viewer automatically starts up andthe PictureHello window opens (Windowsonly).100i When the camera and computer areexchanging data, the self timer lamp blinksand the indicator lamp blinks alternately greenand orange.i The lens is fixed at the wide-angle zoom setting.i “PC CAM” appears on the screen.i Power Save is disabled when the camera isconnected to a USB port.✽Do not disconnect the USB cable when the camera iscommunicating with the PC. See P.102 for informationon the disconnection procedure.✽If the camera is used as a PC camera, a light sourcesuch as fluorescent tube stand can be used toilluminate the subject and get a brighter image.✽When the camera is connected to a computer as a PCcamera, the color tones on the screen may changebriefly.✽ Screen for Windows 98 SEIf the above operations do not occur, you do nothave the required software programs or driversinstalled on your PC. Complete the required PCsetup procedures. Then reconnect the camerato your PC.
2. Check PC operation. The installationprocedure differs depending on theoperating system running on your PC.✽ This step is not required for subsequentconnections.Windows 2000 ProfessionalIf the “Digital Signature Not Found” dialog boxappears, click the [Yes] button.Windows 98/98 SE/MeThe “New Hardware Found” wizard appears. Thewizard will close when the settings are completed.No action is required.✽ The Windows CD-ROM may also be requiredduring installation. In this event, switch CD-ROMsas directed by the on-screen instructions.Windows XPThe USB PC Camera Driver is installed automatically.When the following screen appears, click the[Continue] button.3. <strong>FinePix</strong>Viewer starts up automatically andthe live image is displayed.NOTEIf the live image does not appear, refer to“Troubleshooting” in <strong>FinePix</strong>Viewer User’s Guide (PDF).TIPThe Exif Launcher installed with the <strong>FinePix</strong>Viewerautomatically launches <strong>FinePix</strong>Viewer when youconnect the camera to your PC.1017
7.4 Disconnecting the Camera11. Quit all applications (<strong>FinePix</strong>Viewer etc.)that are using the camera.2. Check that the indicator lamp is lit greenor that the self timer lamp is off (no data isbeing exchanged with the computer).For a DSC connection, proceed to step 2 .For a PC CAM connection, proceed to step 3 .✽Even when “Copying” is no longer displayed on thecomputer, the camera and the computer may still beexchanging data. Always check that the indicatorlamp is lit green or that the self timer lamp is off.2Perform the steps shown below before youswitch the camera off. This procedurediffers depending on the operating systemsoftware (or PC) you are using.Windows 98 or 98 SENo PC operation is needed.Windows Me/2000 Professional/XP1. Right-click theremovable disk icon inthe “My Computer”window and selectEject. This step is onlyrequired in WindowsMe.2. Left-click the Eject icon in the taskbar andeject “USB Disk”.102✽ Screen for Windows Me
3. The menu option shown below appears.Click on this option.3CameraDC IN 5Vsocket✽ Screen for Windows Me4. The “Eject hardware” dialog box appears.Click the [OK] button or the close button.MacintoshDrag the “Removable drive” icon on the desktopto the Trash.Digital(USB) socket1. Switch the camera off.2. Unplug the special USB cable from thecamera.✽When you drag the icon to the Trash, “≠”appears on the camera’s screen.7103
8 Using <strong>FinePix</strong>Viewer8.1 Saving Images on Your ComputerThis section gives a brief overview of how to use<strong>FinePix</strong>Viewer. Refer to these instructions while youare using <strong>FinePix</strong>Viewer.1. Connect the camera to your computer inDSC mode (➡P.96).2. When you open the folders shown belowin order, the images in the camera aredisplayed in the thumbnail display area.Windows1Mac OS 8.6-9.2Mac OS X123412343. Click the [Automatic Taking] button.234NOTEOn Windows XP, theremovable disk appearsas “<strong>FinePix</strong>” (for thesecond and subsequent104 connections).Copies multiple imagesat once.
4. Check that the files are downloaded fromthe camera to your computer and that afolder with the photography date iscreated. Open the folder as shown below.TIPTo open a folder, click on the plus “ + ” symbol (Windows)or arrow “ ” (Macintosh) to the left of the folder.Windows5. Double-click a still-image thumbnail toopen an image window.For more information on using the software,refer to “How to use <strong>FinePix</strong>Viewer” in the HELPmenu which was installed from the CD-ROM.Always use the prescribed procedure whendisconnecting or switching off the camera(➡P.102).123Mac OS123OR12Indicates the folder in which <strong>FinePix</strong>Viewer isinstalled.8.2 Making a <strong>FinePix</strong> CD AlbumFor using “ImageMixer VCD for <strong>FinePix</strong>” to createCD albums and video CDs.h To create CD-Rs or video CDs, you will need aCD-R drive.h Refer to the “ImageMixer VCD for <strong>FinePix</strong>” helpfile for more detailed information.h For inquiries regarding “ImageMixer VCD for<strong>FinePix</strong>”PIXELA User Support CenterPIXELA Home Page: http://www.ImageMixer.com/North America (Los Angels) Telephone: +1-213-341-0163Europe (U.K.) Telephone: +44-1489-564-764Asia (Philippines) Telephone: +63-2-438-0090Japan (Osaka) Telephone: +81-72-224-01818105
8.3 Using the <strong>FinePix</strong> Internet ServiceNOTEMac OS X users should refer to P.108.Using <strong>FinePix</strong>Viewer also allows you to access the<strong>FinePix</strong> Internet Service via the Internet.✽ A working Internet connection is required not only for<strong>FinePix</strong> Internet Service, but also online FAQ(<strong>FinePix</strong>Viewer frequently asked and responses) andlatest updates.✽ A <strong>FinePix</strong> Internet Service fees do not include yourInternet service provider (ISP) connection fees or anyphone charges incurred in dialing your ISP’s accesspoint.The figure below gives a general overview of theprocedure.8.4 User Registration■ For Windows and Mac OS 8.6 to 9.2NOTEYour user ID and password are very important. Makesure you do not forget them.First-time usersRegistered usersTo the user registrationwindow106The Internet menu isupdated.
To use the <strong>FinePix</strong> Internet services, users mustfirst register.✽ Follow the steps below to register. Users can beregistered for free.1. Launch <strong>FinePix</strong>Viewer.2. Click the [Register Now] button.✽ If the country or area where you are living doesnot appear in the pull-down list, select “OTHERS”.3. The “User’s Registration for InternetServices” dialog box opens. As shown atright, select [Register Here], then selectthe country or region where you are livingand click the [OK] button.✽ If you are not already connected to the Internet,connect now (A dial-up dialog box may bedisplayed).✽ If you have completed the user registration, select“Already Registered” (E.g. When you want to reinstall<strong>FinePix</strong>Viewer after completing userregistration).4. When the browser starts up, proceed asdirected by the on-screen instructions.8107
5. Enter the required information in the userregistration page.12341 Enter the name of your choice (nickname, etc.).2 Enter a password of your choice using lettersand/or numbers. Then enter the password againfor confirmation.3 Enter your name.4 Enter your E-mail address.5 Enter the remaining required information.✽ After you register, a confirmation E-mail messageis sent to you. Be sure to enter a valid E-mailaddress at which you can receive the message.✽ The actual user registration page may differslightly in appearance from the sample shownhere.6. When you have entered all the requiredinformation, click the [Registration] button108 at the bottom of the page.Once you complete the registration, a confirmationE-mail is sent. Wait a few moments until themessage is sent.■ For Mac OS XTo use the <strong>FinePix</strong> Internet services, users mustfirst register.✽ Follow the steps below to register. Users can beregistered for free.1. Double-click the “<strong>FinePix</strong>Viewer” icon inthe installed folder.2. Click the [User’s Registration] button. The“Operation Selection” dialog box appears.
3. Select “User’s registration” and click the[OK] button.✽ If you are not already connected to the Internet,connect now. (A dial-up dialog box may bedisplayed.)✽ Only select menu acquisition if you have alreadycompleted the user registration process and youhave re-installed “<strong>FinePix</strong>Viewer”, etc.12344. The User’s Registrationdialog box opens.Select the country orarea where you areliving and click the[OK] button.✽ The actual user registration page may differ slightlyin appearance from the sample shown here.✽ If the country or area where you are living doesnot appear in the pull-down list, select “OTHERS”.5. When the browser starts up, proceed asdirected by the on-screen instructions.6. Enter the required information in the userregistration page.1 Enter the name of your choice (nickname, etc.).2 Enter a password of your choice using lettersand/or numbers. Then enter the password againfor confirmation.3 Enter your name.4 Enter your E-mail address.5 Enter the remaining required information.✽ After you register, a confirmation E-mail messageis sent to you. Be sure to enter a valid E-mailaddress at which you can receive the message.✽ The actual user registration page may differ slightlyin appearance from the sample shown here.7. When you have entered all the requiredinformation, click the [Register] button atthe bottom of the page.Once you complete the registration, a confirmationE-mail is sent. Wait a few moments until themessage is sent.1098
8.5 Mastering <strong>FinePix</strong>ViewerFor more information on <strong>FinePix</strong>Viewer functionsnot fully explained in this manual, refer to “How toUse <strong>FinePix</strong>Viewer” in the Help menu for details.■ To read “How to Use <strong>FinePix</strong>Viewer”...You must install Adobe Systems’ Acrobat Reader.See P.91 for information on installing Acrobat Reader.■ What is explained in “How to Use<strong>FinePix</strong>Viewer”...“How to Use <strong>FinePix</strong>Viewer” covers a range of topics,including batch processing and ordering prints.BookmarksContents3. The “Viewing Slide Shows” information isdisplayed. Press the “←” key to view theprevious page or the “→” key to view thenext page.■ Example: Looking up slide shows1. Click “How to Use <strong>FinePix</strong>Viewer” in the<strong>FinePix</strong>Viewer Help menu.2. Search for relevant articles by clicking thecorresponding items in the Help“Bookmarks” or “Contents”. Here, click“Viewing Slide Shows”.✽ For more information on using Acrobat Reader,refer to the Acrobat Reader “Help” menu.110
8.6 Uninstalling the SoftwareOnly perform this operation when you no longerrequire the installed software or when the softwarewas not installed correctly.Windows1. Switch on your PC.2. Disconnect the camera (➡P.102, 103).3. Quit all currently running applications.4. Close all files.5. Open the “My Computer” window, openthe “Control Panel”, and double-click“Add/Remove Programs”.7. When the confirmation message appears,click the [OK] button. Check your selectioncarefully since the process cannot becancelled once you click [OK].6. The “Add/Remove Programs Properties”window appears. Select the software to beuninstalled (<strong>FinePix</strong>Viewer or the driver)and then click the [Add/Remove] button.8. Automatic uninstallation begins.When uninstallation ends, click the [OK]button.8111
MacintoshNOTEOnly perform this operation when you no longer requirethe installed software or when the software was notinstalled correctly.Mac OS 8.6-9.2■ Uninstalling Mass Storage Driver andPC Camera Driver1. Check that the camera is not connected toyour Macintosh.2. Drag all the files that begin with“USB04CB...” to the Trash.3. Restart your Macintosh.4. Select “Empty Trash” in the “Special” menu.<strong>FinePix</strong>Viewer folder to the Trash. Thenclick “Empty Trash” in the “Special” menu.Mac OS X■ Uninstalling <strong>FinePix</strong>ViewerQuit <strong>FinePix</strong>Viewer and DP Editor. Then dragthe installed <strong>FinePix</strong>Viewer folder to the Trashand select “Empty Trash” in the “Special”menu.112■ Uninstalling Exif Launcher,<strong>FinePix</strong>Viewer and DP Editor1. After you have quit Exif Launcher in “ExifLauncher Settings” in the <strong>FinePix</strong>Viewer“Settings” menu, move the Exif Launcherfile from the “Startup Items” folder in theSystem folder to the Trash. Then select“Empty Trash” in the “Special” menu.2. After you have exited <strong>FinePix</strong>Viewer andDP Editor and then drag the installed
System Expansion Optionse By using the <strong>FinePix</strong> <strong>3800</strong> together with other optional FUJIFILM products, your system can beexpanded to fill a wide range of uses.xD-Picture CardImage Memory Card Reader<strong>FinePix</strong> <strong>3800</strong>Digital Camera(USB)(USB)TV monitor(commercially available)PC Card Adapter(PC card slot)Digital Photo Printer CX-400Personal Computer(commercially available)(USB)113
Accessories Guidee The optional accessories (sold separately) can make taking pictures with the <strong>FinePix</strong> <strong>3800</strong> eveneasier. For information on how to attach and use the accessories, refer to the instructions providedwith the accessory used.Visit the FUJIFILM web site for the latest information on camera accessories.http://home.fujifilm.com/products/digital/index.htmlh xD-Picture CardThese are separately available xD-Picture Card cards.Use the following xD-Picture Card:DPC-16 (16MB)/DPC-32 (32MB)/DPC-64 (64MB)/DPC-128 (128MB)● AC Power Adapter AC-5VH/AC-5VHSUse the AC-5VH/AC-5VHS when taking pictures for a long period of time or whenthe <strong>FinePix</strong> <strong>3800</strong> is connected to your PC.✽ The shape of the AC power adapter, the plug and socket outlet depend on the country.● <strong>Fujifilm</strong> Rechargeable Battery 2HR-3UF (2×)The 2HR-3UF includes 2 pieces of high-capacity AA-size Nickel-Metal Hydride (Ni-MH)batteries.114● <strong>Fujifilm</strong> Battery charger with Battery BK-NH (with Euro type or UK type plug)The BK-NH includes the quick battery charger BCH-NH and 2 Ni-MH batteries.The BCH-NH can charge 2 Ni-MH batteries in approximately 120 minutes.Up to 4 Ni-MH batteries can be charged simultaneously.
● SC-FX304This is a special case made of polyester that protects the camera against soiling,dust and minor impacts when it is being carried.h DPC-R1 Image Memory Card ReaderThe DPC-R1 provides a quick and easy way to transfer images back and forthbetween your PC and an image memory card (xD-Picture Card and SmartMedia).The DPC-R1 uses the USB interface for high-speed file transfer.i Compatible with Windows 98/98 SE, Windows Me, Windows 2000 Professional,Windows XP or iMac, Mac OS 8.6 to 9.2, Mac OS X (10.1.2 to 10.1.5) andmodels that support USB as standard.i Compatible with SmartMedia of 3.3V, 4MB to 128MB.h DPC-AD PC Card AdapterThe PC Card Adapter allows the xD-Picture Card and SmartMedia to be used asa PC Card Standard ATA-compliant (PCMCIA 2.1) PC card (Type II).h Compatible with SmartMedia of 5V/3.3V, 2MB to 128MB.115
Notes on Using Your Camera CorrectlyeBe sure to read this information in conjunction with “Safety Notes” (➡P.131), to ensure that you useyour camera correctly.■ Places to AvoidDo not store or use the camera in the following types oflocations:h In the rain or in very humid, dirty or dusty places.h In direct sunlight or in places subject to extremetemperature rises, such as in a closed car in summer.h Extremely cold places.h Places subject to strong vibration.h Places affected by smoke or steam.h Places subject to strong magnetic fields (such as nearmotors, transformers or magnets).h In contact with chemicals such as pesticides or next torubber or vinyl products for long periods of time.■ Notes on Immersion in Water or SandThe <strong>FinePix</strong> <strong>3800</strong> is particularly adversely affected bywater and sand. When you are at the beach or close towater, ensure that the camera is not exposed to water orsand. Take care also not to place the camera on a wetsurface. Water or sand inside the camera can cause faultsthat may be irreparable.■ Notes on CondensationIf the camera is carried suddenly from a cold location into awarm place, water droplets (condensation) may form onthe inside of the camera or on the lens. When this occurs,switch the camera off and wait an hour before using the116 camera. Condensation may also form on the xD-PictureCard. In this event, remove the xD-Picture Card and wait ashort time before using it again.■ When the Camera is Unused for Long PeriodsIf you do not intend to use the camera for a long period oftime, remove the batteries and the xD-Picture Card beforestoring the camera.■ Cleaning Your Camerah Use a blower brush to remove dust from the lens, LCDmonitor screen or viewfinder as these surfaces, and thenwipe lightly with a soft, dry cloth. If any soiling remains,apply a small amount of lens cleaning liquid to a piece ofFUJIFILM lens cleaning paper and wipe gently.h Do not scratch hard objects against the lens, LCDmonitor screen or viewfinder as these surfaces are easilydamaged.h Clean the body of the camera with a soft, dry cloth. Donot use volatile substances such as thinners, benzine orinsecticide, as these may react with camera body andcause deformation or remove the coating.■ Using the Camera OverseasWhen travelling overseas, do not place your camera in thecheck-in baggage. Baggage handling at airports maysubject baggage to violent shocks, and the camera may bedamaged internally even when no external damage isvisible.
Notes on the Power SupplyApplicable Batteriesh AA-size alkaline, Ni-MH (nickel-metal hydride) can beused with this camera.Do not use AA-size manganese, lithium batteries in your<strong>FinePix</strong> <strong>3800</strong> because the heat generated by thebatteries could damage the camera or causemalfunctions.h The operating lives of alkaline batteries vary betweenbrands and the life of batteries you purchase may beshorter than the alkaline batteries provided with thecamera.Notes on the BatteriesIncorrect use of the batteries could cause them to leak,become hot, ignite or burst. Always observe theprecautions given below.h Do not heat the batteries or throw them into a fire.h Do not carry or store the batteries with metal objectssuch as necklaces or hairpins that could come intocontact with the metal positive > and negative < polesof the battery.h Do not expose the batteries to fresh or sea water, andtake particular care to keep the terminals dry.h Do not attempt to deform, disassemble or modify thebatteries.h Do not attempt to peel off or cut the battery casing.h Do not drop, strike or otherwise subject the batteries tostrong impacts.h Do not use the batteries that are leaking, deformed,discolored or exhibit any other obvious abnormality.h Do not store the batteries in very warm or moist locations.h Keep the batteries out of reach of infant and youngchildren.h When loading the batteries into the camera, ensure that thebattery polarity (> and < ) is as indicated on the camera.h Do not use new batteries together with used batteries. Inthe case of rechargeable batteries, do not use chargedand discharged batteries together. Do not use batteriesof different types or brands together.h If you do not intend to use the camera for a long period oftime, remove the batteries from the camera. (Note that ifthe camera is left with the batteries removed, the timeand date settings are cleared.)h The batteries may feel warm immediately after beingused. Before removing the batteries, switch the cameraoff and wait until the batteries cool down.h When replacing the batteries, always fit 4 new batteries.Here, “new batteries” refers to either recently purchasedunused alkaline batteries, or Ni-MH (nickel-metal hydride)batteries that have recently been fully recharged together.h In cold locations (at temperatures of +10°C/+50°F or below),battery performance deteriorates and the time for which theycan be used shortens markedly. This is particularly true ofalkaline batteries. In cold conditions, put the batteries in yourpocket or a similar place to warm them before loading theminto the camera. If you use a body warmer to warm thebatteries, ensure that they are not in direct contact with thewarmer.117
Notes on the Power Supplyh Soil (such as fingerprints) on the battery terminals canmarkedly reduce the number of available shots. Carefullywipe the battery terminals clean with a soft dry cloth beforeloading the batteries.If any liquid at all leaks from the batteries, wipe the batterycompartment thoroughly and then load new batteries.If any battery fluid comes into contact with your hands orclothing, flush the area thoroughly with water. Note thatbattery fluid can cause loss of eyesight if it gets into youreyes. If this occurs, do not rub your eyes. Flush the fluid outwith clean water and contact your physician for treatment.■ Disposing of BatteriesWhen disposing of batteries, do so in accordance with yourlocal waste disposal regulations.■ Notes on Small Rechargeable Batteries (Ni-MHbatteries)h Always use the special battery charger to charge AA-sizeNi-MH batteries. Charge the batteries as described in theinstructions provided with the battery charger.h Do not use the battery charger to charge batteries otherthan those specified for use with the charger.h Note that the batteries may feel warm immediately afterbeing charged.h Ni-MH batteries are not charged at shipment. Be sure tocharge the batteries before using them.h The camera mechanism is such that it draws a minute118 amount of current even when the camera is switched off.Take particular care not to leave Ni-MH batteries in thecamera for a long period of time as they can becomeexcessively discharged and may no longer be usableeven when charged.h Ni-MH batteries self-discharge even when not used.Always charge Ni-MH batteries before using them. If thetime for which a battery provides power shortensmarkedly when it has been correctly charged, thisindicates that the battery has reached the end of itseffective life and should be replaced.h Soiling (fingerprints, etc.) on the terminals of Ni-MHbatteries can greatly reduce the number of availableshots. When this occurs, clean the terminals carefullywith a soft dry cloth. Then use up the remaining charge inthe batteries and recharge them.h Newly purchased batteries or batteries that have beenleft unused for an extended period may not be fullycharged. (This is indicated by the immediate display ofthe battery low warning or a low number of availableshots.) This is a normal characteristic of the batteries anddoes not indicate a fault. Repeatedly charging and usingthe batteries 3 or 4 times will restore them to a normalcondition.h If you repeatedly charge a Ni-MH battery before it is fullydischarged, it will suffer from the “memory effect”*,causing the battery low warning to appear while there isstill ample charge remaining in the battery. To restore thebatteries to their normal condition, use up all the chargein the batteries before recharging them.
✽ Memory effect: A phenomenon affecting the batterycharacteristics such that the apparentbattery capacity decreases.Notes on Using the AC Power AdapterAlways use the AC-5VH/AC-5VHS AC Power Adapter withthe <strong>FinePix</strong> <strong>3800</strong> Camera.The use of an AC power adapter other than the AC-5VH/AC-5VHS could result in damage to your <strong>FinePix</strong> <strong>3800</strong>Digital Camera.h This AC power adapter is designed exclusively for indooruse.h Plug the connection cord plug securely into the DC inputterminal of the FUJIFILM Digital camera.h Turn off the power switch of the FUJIFILM Digital camerabefore disconnecting the connection cord from theFUJIFILM Digital camera’s DC input terminal. Todisconnect, take hold of the plug and pull it out (do notdisconnect it by pulling on the cord).h Do not use this AC power adapter with any device exceptthe specified device.h During use, this AC power adapter will become hot totouch, but this is normal.h Do not disassemble the AC power adapter. Doing socould be dangerous.h Do not use this device in a place with high temperatureand high humidity.h Do not drop or subject this device to strong shocks.h This device may emit a humming noise, but this isnormal.h If used near a radio, this device may cause static, so playthe radio in a distant place.119
Notes on the xD-Picture Card120■Image Memory Cardh This Image Memory Card is a new image recordingmedia (xD-Picture Card) developed for digitalcameras. The Image Memory Card consists of asemiconductor memory (NAND-type flash memory)to record digital image data.The recording process is electrically performed andenables erasure of existing image data as well as rerecordingof new image data.h When using a new Memory Card, or a Memory Cardthat has been initialized by a PC, be sure to initialize(format/initialize) the card with your digital camerabefore using it.■Protecting Your Datah Data may be lost or destroyed in the followingsituations. Please note that FUJIFILM assumes noresponsibility for data that is lost or destroyed.1. Removal of the memory card or turning the poweroff while the memory card is being accessed (i.e.,during record, erase, initialization, and playbackoperations).2. Improper handling and use of the memory card bythe user or third party.h We recommend saving your important data toanother media (i.e., MO disk, CD-R, hard disk, etc.).■Notes on Handling xD-Picture Cardh Keep xD-Picture Cards out of the reach of smallchildren. When storing xD-Picture Cards, ensure thatthey are kept in a location out of the reach of smallchildren to prevent a card being accidentallyswallowed. An xD-Picture Card could cause suffocationif accidentally swallowed. If a child swallows an xD-Picture Card, seek medical advice immediately.h Make sure that the memory card is straight when youinsert into the camera etc.h The memory card is a precision electronic instrument.Do not apply pressure or shock, and avoid bending.h Do not use the memory card in a hot, humid, orcorrosive environment.h If the contact area on the card is soiled (dust,fingerprints, etc.), wipe it clean with a soft, dry cloth.h Clean the memory card with a soft dry piece of clothwhen dirty.h When you carry or store it, always keep the card inthe anti-static case provided. Use a storage case ifavailable.h The memory card can be used reliably for a longperiod of time, but will eventually lose its ability tostore and play back image data. At this point, replacewith a new memory card.h Never remove the xD-Picture Card or switch thecamera off during data recording, during data erasing(xD-Picture Card formatting) or during frame advance
when images are being played back. These actionscould result in damage to the xD-Picture Card.h The use of xD-Picture Cards is recommended withthe <strong>FinePix</strong> <strong>3800</strong>.The camera quality cannot be guaranteed whencards other than those manufactured by FUJIFILMare used.h The xD-Picture Card may feel warm when it isremoved from the camera after extended periods ofpicture taking or image viewing. This is normal anddoes not indicate a fault.h Do not affix labels to the xD-Picture Card.This could result in the label peeling off and causinga fault when the card is inserted or removed.■Notes on Using xD-Picture Card with a PCh If you intend to take photos using an xD-Picture Cardthat has been used on a PC, format the xD-PictureCard on your camera.h When you format an xD-Picture Card in the cameraand then shoot and record images, a directory(folder) is automatically created. Image data is thenrecorded in this directory.h Do not change or delete the directory (folder) namesor file names on the xD-Picture Card from your PC asthis will make it impossible to use the xD-PictureCard in your camera.h Always use the camera to erase image data on anxD-Picture Card.h To edit image data, copy the image data to the PC’shard disk and then edit the copied data.h Do not copy files other than those that will be used bythe camera.■SpecificationsTypeImage memory card for digital cameras(xD-Picture Card)Memory type NAND-type flash memoryConditions for use Temperature:0°C to +40°C (+32°F to +104°F)Humidity:80% max. (no condensation)Dimensions 25 mm × 2.2 mm × 20 mm(0.98 in. × 0.09 in. × 0.79 in.) (W × H × D)121
Warning Displayse The table below lists the warnings that are displayed on the screenWarning Displayed Explanation Remedy (Lit red) (Blinking red)\The batteries in the camera are fully depleted orvery low on charge.There is a strong likelihood of camera shakebecause the shutter speed is slow.Outside the AE continuous range.Replace the batteries or have new batteriesready.Use flash photography. However, a tripodshould be used for some scenes and modes.The shot can be taken, but the exposure will notbe correct.The AF (auto focus) cannot work effectively.No xD-Picture Card is loaded.i If the image is too dark, take the picture at adistance of around 2 m (6.6 ft.) from the subject.i Use AF lock to take the picture.Insert an xD-Picture Card in the correct direction.122i The xD-Picture Card is not formatted.i The xD-Picture Card contact area is soiled.i Camera fault.i The xD-Picture Card contact area is soiled.i The xD-Picture Card is damaged.i The xD-Picture Card format is incorrect.i Camera fault.The xD-Picture Card is fully recorded.i Format the xD-Picture Card.i Wipe the contact area on the xD-Picture Cardwith a soft dry cloth. It may be necessary toformat the xD-Picture Card. If the error messageis still displayed, replace the xD-Picture Card.i Contact your FUJIFILM dealer.i Wipe the contact area on the xD-Picture Cardwith a soft dry cloth. It may be necessary toformat the xD-Picture Card. If the error messageis still displayed, replace the xD-Picture Card.i Contact your FUJIFILM dealer.Erase some images or use an xD-Picture Cardthat has ample free space.
Warning Displayed Explanation Remedyi The file played back was not recorded correctly.i The xD-Picture Card contact area (goldcoloredarea) is soiled.i Camera fault.i You attempted to play a movie that was notrecorded on this camera.i Images cannot be played back.i Wipe the contact area on the xD-Picture Cardwith a soft dry cloth. It may be necessary toformat the xD-Picture Card. If the errormessage is still displayed, replace the xD-Picture Card.i Contact your FUJIFILM dealer.i Movies cannot be played back.The frame number has reached 999–9999.Take the shot using a formatted xD-Picture Card.i The data could not be recorded due to an xD-Picture Card error or a connection errorbetween the xD-Picture Card and camera.i The photographed image cannot be recordedas it is too large to fit in the available space onthe xD-Picture Card.i Re-insert the xD-Picture Card or switch thecamera off and then on again.i Use a new xD-Picture Card.i The voice memo file is faulty.i Camera fault.A protected file was encountered.i The voice memo cannot be played back.i Contact your FUJIFILM dealer.Protected files cannot be erased. Remove theprotection.123
Warning DisplaysWarning Displayed Explanation RemedyPrints were specified for more than 1000 framesin the DPOF frame settings.The maximum number of frames for whichprints can be specified on the same xD-PictureCard is 999.Copy the images for which you want to orderprints onto another xD-Picture Card and thenspecify the DPOF settings.Camera malfunction or fault.i Switch the camera on again, taking care not totouch the lens.i Switch the camera off and on again.124
Troubleshootinge If you think the camera is faulty, check the following once more.Troubleshooting Possible causes SolutionsNo power.Power cuts out duringoperation.i The batteries are exhausted.i The AC power adapter plug has come out ofthe power outlet.i The batteries are loaded the wrong way round.The batteries are exhausted.i Load new fully charged batteries.i Plug the adapter back in.i Load the batteries in the correct direction.Load new fully charged batteries.Batteries runs out quickly.i Camera is being used in extremely coldconditions.i The terminals are soiled.i The batteries have reached the end of theiroperating lives.i Put the batteries in your pocket or anotherwarm place to heat them and then load theminto the camera just before you take a picture.i Wipe the battery terminals with a clean, drycloth.i Load new fully charged batteries.No photograph is takenwhen the shutter button ispressed.i No xD-Picture Card is loaded.i The xD-Picture Card is fully recorded.i The xD-Picture Card is write-protected.i The xD-Picture Card is not formatted.i The xD-Picture Card contact area (goldcoloredarea) is soiled.i The xD-Picture Card is damaged.i The Power Save function has switched thecamera off.i The batteries are exhausted.i Load an xD-Picture Card.i Insert a new xD-Picture Card or erase someunwanted frames.i Remove the write-protection.i Format the xD-Picture Card.i Wipe the xD-Picture Card contact area(gold-colored area) with a clean dry cloth.i Load a new xD-Picture Card.i Switch the camera on.i Load new fully charged batteries.125
Troubleshootinge If you think the camera is faulty, check the following once more.Troubleshooting Possible causes SolutionsCan’t use the flash to takepictures.i The shutter button was pressed while theflash was charging.i The batteries are exhausted.i The Suppressed Flash mode is selected.i Wait until charging is completed beforepressing the shutter button.i Load new fully charged batteries.i Set the flash mode to Auto, Red-eyeReduction or Forced Flash (The flash cannotbe used in some modes).Can only select “SuppressedFlash” flash mode.Continuous shooting is selected.Set continuous shooting to OFF.126The photographed imageis dark even though I usedthe flash.The playback image isfaded when I used theflash to take a picture.The image is blurred.There is speckling on theimage.i The subject is too far away.i Your finger was covering the flash/flashcontrol sensor.i There is dust on the flash control sensor.i The lens is dirty.i You photographed scenery with Macro modeselected.i You took a close-up shot without selectingMacro mode.i You are shooting a subject that is not suitedto autofocusing.The shot was taken with a slow shutter speed (longexposure) in a high-temperature environment.i Move to within the effective flash rangebefore taking the shot.i Hold the camera correctly.i Use an applicator such as a cotton swab toclean the flash control sensor.i Clean the lens.i Cancel Macro mode.i Select Macro mode.i Use AF/AE lock to take the shot.This is a characteristic of CCDs and does notindicate a camera fault.
Troubleshooting Possible causes SolutionsThe camera does not emitany sound.The Frame function doesnot erase the frame.The ERASE ALL functiondoes not erase all the frames.Can’t format the xD-PictureCard.When the camera is connectedto a personal computer (PC),the shot image appears on thecamera’s LCD monitor.i The camera volume is set too low.i The microphone was blocked duringshooting/recording.i There is something covering the speakerduring playback.i DPOF settings are specified for someframes.i Some frames may be protected.The xD-Picture Card is write-protected.i The special <strong>FinePix</strong> <strong>3800</strong> USB cable is notproperly connected to the computer orcamera.i The PC is not switched on.i Adjust the volume.i Take care not to block the microphoneduring shooting/recording.i Ensure that the speaker is uncovered.i Cancel the DPOF settings and try again(➡P.70).i Remove the protection.Remove the write-protection.(Peel off the write-protect sticker.)i Set up the camera and the special <strong>FinePix</strong><strong>3800</strong> USB cable correctly.i Switch the PC on.Nothing happens when Iuse the Mode switch.i Camera malfunction.i The batteries exhausted.i Briefly remove the batteries or disconnectthe AC power adapter. Then reload thebatteries or reconnect the AC power adapterand try again.i Replace the batteries.The camera no longerworks correctly.The camera has suffered an unforeseenproblem.Briefly remove the batteries or disconnect theAC power adapter. Then reload the batteriesor reconnect the AC power adapter and tryagain.127
128SpecificationsSystemh Model: Digital Camera <strong>FinePix</strong> <strong>3800</strong>h Number of effective pixels: 3.2 million pixelsh CCD sensor1/2.7-inch square pixel CCD with RGB FilterNumber of total pixels: 3.34 million pixelsh Number of recorded pixels2048 × 1536 pixels/1600 × 1200 pixels/1280 × 960 pixels/640 × 480 pixelsh File formatStill image: JPEG (Exif Ver.2.2), DPOF-compatibleMovie: AVI format, Motion JPEG✽ Design rule for Camera File system complianth Viewfinder: 0.33 inches 110,000 pixels electronic viewfinderh Lens: Fujinon 6× optical zoom lens F2.8/F4.8/F8.2h Storage media: xD-Picture Card (16MB to 128MB)h Focus distance: f=6 mm-36 mm(equivalent to 38 mm-228 mm on a 35 mm camera)h Exposure control64 zones TTL metering, Program AE(exposure compensation available in <strong>Manual</strong> mode)h Sensitivity: Equivalent to ISO 100h White balanceAuto (7 positions selectable in <strong>Manual</strong> mode)h Focal rangeNormal: Approx. 80 cm/2.6 ft. to infinityMacro: Approx. 10 cm-80 cm/3.9 in.-2.6 ft.h Shutter speedsVariable-speed, 3 sec. to 1/1500 sec. (using AE)h Flash (Auto flash using flash control sensor)Effective range: Wide Approx. 0.3 m-3.5 m (1.0 ft.-11.5 ft.)Tele Approx. 0.8 m-3.5 m (2.6 ft.-11.5 ft.)Flash modes: Auto, Red-Eye Reduction, Forced Flash,Suppressed Flash, Slow Synchro, Red-EyeReduction + Slow Synchro(when the pop-up flash is stowed: Suppressed Flash)h LCD monitor1.8-inches, 62,000 pixels amorphous silicon TFTh Aperture: F2.8/F4.8/F8.2 (Wide) (automatically selected)h Self-Timer: Approx 10 sec. timer clockh Erase modoesErase frame, Erase all frames, Format (initialize)h Number of frames recordedQuality3M · F 3M · N 2M 1M 0.3M #$Number of recorded pixels 2048 × 1536 1600 × 1200 1280 × 960 640 × 480 320 × 240 160 × 120Image Data SizeApprox. 1300KB Approx. 590KB Approx. 390KB Approx. 320KB Approx. 130KBMovieDPC-16 (16MB)12263949122 Approx. 94 sec. Approx. 5 min.DPC-32 (32MB)25537999247 Approx. 191 sec. Approx. 10.1 min.DPC-64 (64MB) 50107159198497 Approx. 6.4 min. Approx. 20.2 min.DPC-128 (128MB) 102 215319398997 Approx. 12.9 min. Approx. 40.6 min.
Input/Output Terminalsh (USB) socketUSB (1) for image data output with a personal computerh DC IN 5V (Power input) socketSocket for specified AC power adapterPower Supply and Othersh Power supplyUse one of the following:• 4 × AA-size alkaline batteries• 4 × AA-size Ni-MH (nickel-metal hydride) batteries (soldseparately)• AC Power Adapter AC-5VH/AC-5VHS (sold separately)h Number of available shots using batteries Using(battery life)Battery typeAlkaline batteriesNi-MH batteriesHR-3UFUsing LCD monitorApprox. 300 frames ✽Approx. 320 frames ✽Using EVFApprox. 320 frames ✽Approx. 350 frames ✽✽ With fully charged batteryThis indicates the number of available frames shotconsecutively at room temperature with a flash use rate of50%. Note that these figures may vary depending on theambient temperature and the amount of charge in thebattery. The number of available shots or availableshooting time will be lower in cold conditions.h Conditions for useTemperature: 0°C to +40°C (+32°F to +104°F); 80%humidity or less (no condensation)h Camera dimensions (W/H/D)99.7 mm × 77.3 mm × 69.3 mm/3.9 in. × 3.0 in. × 2.7 in.(not including accessories and attachments)h Camera mass (weight): Approx. 295 g/10.4 oz.(not including accessories, batteries or xD-Picture Card)h Weight for photography: Approx. 437 g/15.4 oz.(including batteries, xD-Picture Card, lens cap and strap)h Accessories: See P.7h Optional Accessories: See P.114, 115✽ These specifications are subject to change without notice.FUJIFILM shall not be held liable for damages resultingfrom errors in this Owner’s <strong>Manual</strong>.✽ The LCD monitor on your digital camera is manufacturedusing advanced high-precision technology. Even so,small bright points and anomalous colors (particularlyaround text) may appear on the monitor and viewfinder.These are normal display characteristics and do notindicate a fault with the monitor. This phenomenon willnot appear on the recorded image.✽ The operation error may be caused in a digital cameraby the strong radio interference (i. e. electric fields,static electricity, line noise, etc.).✽ Due to the nature of the lens, the edges of photographedimages may appear distorted. This is normal and doesnot indicate a fault.129
Explanation of TermsDPOF: Digital Print Order FormatDPOF is a format used for recording information on a storage media (image memory card, etc.) that allowsyou to specify which of the frames shot using a digital camera are printed and how many prints are made ofeach image.EV:A number that denotes exposure. The EV is determined by the brightness of the subject and sensitivity (speed) ofthe film or CCD. The number is larger for bright subjects and smaller for dark subjects. As the brightness of thesubject changes, a digital camera maintains the amount of light hitting the CCD at a constant level by adjustingthe aperture and shutter speed. When the amount of light striking the CCD doubles, the EV increases by 1.Likewise, when the light is halved, the EV decreases by 1.JPEG:Joint Photographics Experts GroupA file format used for compressing and saving color images. The compression ratio can be selected, but the higher thecompression ratio, the poorer the quality of the expanded image.Motion JPEG:A type of AVI (Audio Video Interleave) file format that handles images and sound as a single file. Images inthe file are recorded in JPEG format. Motion JPEG can be played back by QuickTime 3.0 or later.PC Card:A generic term for cards that meet the PC Card Standard.PC Card Standard:A standard for PC cards determined by the PCMCIA.PCMCIA:Personal Computer Memory Card International Association (US).White Balance:Whatever the kind of the light, the human eye adapts to it so that a white object still looks white. On the otherhand, devices such as digital cameras see a white subject as white by first adjusting the color balance to suitthe color of the ambient light around the subject. This adjustment is called matching the white balance. A130 function that automatically matches the white balance is called an Automatic White Balance function.
Safety Notesh To ensure that you use your <strong>FinePix</strong> <strong>3800</strong> cameracorrectly, read these Safety Notes and your Owner’s<strong>Manual</strong> carefully beforehand.h After reading these Safety Notes, store them in a safeplace.About the IconsThe icons shown below are used in this document toindicate the severity of the injury or damage that can resultif the information indicated by the icon is ignored and theproduct is used incorrectly as a result.This icon indicates that death orWARNING serious injury can result if theinformation is ignored.This icon indicates that personalCAUTION injury or material damage canresult if the information is ignored.The icons shown below are used to indicate the nature ofthe information which is to be observed.Triangular icons notify the user of informationrequiring attention (“Important”).Circular icons with a diagonal bar notify the userthat the action indicated is prohibited(“Prohibited”).Filled circles with an exclamation mark notify theuser of an action that must be performed(“Required”).WARNINGWhen a fault arises, switch the camera offand then remove the batteries anddisconnect the AC power adapter.Continued use of the camera when it isemitting smoke, is emitting any unusual odor,or is in any other abnormal state can cause afire or electric shock.h Contact your FUJIFILM dealer.Do not allow water or foreign objects toenter the camera.If water or foreign objects get inside thecamera, switch the camera off, remove thebattery and disconnect and unplug the ACpower adapter.Continued use of the camera can cause a fireor electric shock.h Contact your FUJIFILM dealer.Do not place the camera on an unstablesurface.This can cause the camera to fall or tip overand cause injury.Unplug frompower socket.Do not use the camera in the bathroom orshower.This can cause a fire or electric shock.Do not use in thebathroom or shower.131
Safety Notes132WARNINGNever attempt to modify or disassemblethe camera. (Never open the casing.)Do not use the camera when it has beendropped or the casing is damaged.This can cause a fire or electric shock.h Contact your FUJIFILM dealer.Never attempt to take pictures while inmotion.Do not use the camera while you are walkingor operating a moving car or other vehicle.This can result in you falling down or beinginvolved in a traffic accident.Do not heat, modify or attempt todisassemble the batteries.Do not drop or subject the batteries toimpacts.Do not attempt to recharge lithium oralkaline batteries.Do not store the batteries with metallicproducts.Any of these actions can cause the batteries toburst or leak and cause fire or injury as a result.Do not touch any metal parts of thecamera during a thunderstorm.This can cause an electric shock due toinduced current from the lightning discharge.Do notdisassemble.WARNINGDo not use the batteries except as specified.Load the batteries with the poles positionedas indicated by the > and < marks.Use only the batteries or AC poweradapter specified for use with this camera.The use of other power sources can cause afire.If the battery leaks and fluid gets into youreyes or comes into contact with your skinor clothing, this can cause injury or loss ofeyesight. Immediately flush the affectedarea thoroughly with clean water and seekmedical treatment.When discarding or storing batteries, coverthe battery terminals with insulation tape.hContact with other metallic objects or batteriescould cause the batteries to ignite or burst.Keep xD-Picture Cards out of the reach ofsmall children.Because xD-Picture Cards are small, theycan be accidentally swallowed by smallchildren. Be sure to store xD-Picture Cardsout of the reach of small children. If a childaccidentally swallows an xD-Picture Card,seek medical advice immediately
CAUTIONKeep out of the reach of small children.This product could cause injury in the handsof a child.Do not use this camera in locationsseverely affected by oil fumes, steam,humidity or dust.This can cause a fire or electric shock.Do not leave this camera in places subjectto extremely high temperatures.Do not leave the camera in locations such asa sealed vehicle or in direct sunlight.This can cause a fire.Do not place heavy objects on the camera.This can cause the heavy object to tip over orfall and cause injury.Do not move the camera while the ACpower adapter is still connected.This can damage the power cord or cablesand cause a fire or electric shock.Do not cover or wrap the camera or theAC power adapter in a cloth or quilt.This can cause heat to build up and distortthe casing or cause a fire.CAUTIONRemove the batteries and disconnect theAC power adapter when you are cleaningthe camera or if you intend to leave thecamera unused for a long period.Failure to do so can cause a fire or electricshock.Using a flash too close to a person’s eyesmay temporarily affect the eyesight.Take particular care when photographinginfants and young children.Request regular internal testing andcleaning for your camera.Build-up of dust in your camera can cause afire or electric shock.h Contact your FUJIFILM dealer to requestinternal cleaning every 2 years.When an xD-Picture Card is removed, thecard may fly completely out of the slot.Use your finger to stop the card flying outbefore removing the card.If an xD-Picture Card is allowed to fly out, itcould hit someone and cause injury.133
EC Declaration of ConformityWeName :Fuji Photo Film (Europe) G.m.b.H.Address : Heesenstrasse 3140549 Dusseldorf, Germanydeclare that the productProduct Name : FUJIFILM DIGITAL CAMERA <strong>FinePix</strong> <strong>3800</strong>Manufacture’s Name : Fuji Photo Film Co., Ltd.Manufacture’s Address : 26-30, Nishiazabu 2-chome, Minato-ku,Tokyo 106-8620, Japanis in conformity with the following StandardsSafety : EN60950EMC : EN55022 : 1998 Classe BEN55024 : 1998EN61000-3-2 : 1995 + A1:1998 + A2:1998following the provision of the EMC Directive (89/336/EEC, 92/31/EEC and93/68/EEC) and Low Voltage Directive (73/23/EEC).Dusseldorf, Germany September 1, 2002Place Date Signature/Managing Director134Bij dit produkt zijn batterijen geleverd. Wanneer deze leeg zijn, moet u ze nietweggooien maar inleveren als KCA
IMPORTANTBe sure to read this page before using theSoftware.NOTICEBEFORE OPENING THE PACKAGE OF CD-ROM PROVIDED BYFUJI PHOTO FILM CO., LTD., PLEASE READ THIS END USERLICENSE AGREEMENT CAREFULLY. ONLY IF YOU DO AGREE TOTHIS AGREEMENT, YOU WILL BE ABLE TO USE THE SOFTWARERECORDED ON THE CD-ROM. BY OPENING THE PACKAGE, YOUACCEPT AND AGREE TO BE BOUND BY THIS AGREEMENT.End User License AgreementThis End User License Agreement (“Agreement”) is an agreement between Fuji PhotoFilm Co., Ltd. (“FUJIFILM”) and you, which sets forth the terms and conditions of thelicense granted for you to use the software provided by FUJIFILM.The CD-ROM contains third party software. In case a separate agreement is provided bya third party supplier for its software, the provisions of such separate agreement shallapply to the use of such third party software, prevailing over those of this Agreement.1. Definitions.(a) “Media” means the CD-ROM titled “Software for <strong>FinePix</strong> SX” which is providedto you together with this Agreement.(b) “Software” means the software which is recorded on Media.(c) “Documentation” means the operation manuals of Software and other relatedwritten materials which are provided to you together with Media.(d) “Product” means Media (including Software) and Documentation collectively.2. Use of Software.FUJIFILM grants to you a nontransferable, nonexclusive license:(a) to install one copy of Software onto one computer in binary machine executable form;(b) to use Software on the computer onto which Software is installed; and(c) to make one backup copy of Software.3. Restrictions.3.1 You shall not distribute, rent, lease or otherwise transfer all or any part ofSoftware, Media or Documentation to any third party without FUJIFILM’s priorwritten consent. You also shall not sublicense, assign or otherwise transfer allor any part of the rights granted to you by FUJIFILM under this Agreementwithout FUJIFILM’s prior written consent.3.2 Except as expressly granted by FUJIFILM hereunder, you shall not copy orreproduce all or any part of Software or Documentation.3.3 You shall not modify, adapt or translate Software or Documentation. You alsoshall not alter or remove copyright and other proprietary notices that appear onor in Software or Documentation.3.4 You shall not, or shall not have any third party, reverse-engineer, decompile,or disassemble Software.4. Ownership.All copyrights and other proprietary rights to Software and Documentation areowned and retained by FUJIFILM or the third party suppliers as indicated on or inSoftware or Documentation. Nothing contained herein shall be construed,expressly or implicitly, as transferring or granting any right, license, or title to youother than those explicitly granted under this Agreement.5. Limited Warranty.FUJIFILM warrants to you that Media is free from any defect in material andworkmanship under normal use for ninety (90) days from the date of your receipt ofMedia. Should Media not meet the foregoing warranty, FUJIFILM shall replacesuch defective Media with other Media bearing no defect. FUJIFILM’s entire liabilityand your sole and exclusive remedy with regard to any defect in Media shall beexpressly limited to such FUJIFILM’s replacement of Media as provided herein6. DISCLAIMER OF WARRANTY.EXCEPT AS PROVIDED IN SECTION 5 HEREIN, FUJIFILM PROVIDESPRODUCT “AS IS” AND WITHOUT WARRANTIES OF ANY KIND, EXPRESS ORIMPLIED. FUJIFILM SHALL MAKE NO WARRANTY, EXPRESS, IMPLIED ORSTATUTORY, AS TO ANY OTHER MATTERS, INCLUDING, BUT NOT LIMITEDTO NON-INFRINGEMENT OF ANY COPYRIGHT, PATENT, TRADE SECRET,OR ANY OTHER PROPRIETARY RIGHTS OF ANY THIRD PARTY,MARCHANTABILITY, OR FITNESS FOR ANY PARTICULAR PURPOSE.7. LIMITATION OF LIABILITY.IN NO EVENT SHALL FUJIFILM HAVE ANY LIABILITY FOR ANY GENERAL,SPECIAL, DIRECT, INDIRECT, CONSEQUENTIAL, INCIDENTAL, OR OTHERDAMAGES (INCLUDING DAMAGES FOR LOSS OF PROFITS OR LOST SAVINGS)INCURRED FROM THE USE OF OR INABILITY TO USE PRODUCT EVEN IFFUJIFILM HAS BEEN ADVISED OF THE POSSIBILITY OF SUCH DAMAGES.8. No export.You acknowledge that neither Software nor any part thereof, will be transferred, orexported to any country or used in any manner in violation of any export controllaws and regulations to which Software is subject.9. Termination.In case you breach any of the terms and conditions hereof, FUJIFILM mayimmediately terminate this Agreement without any notice.10. Term.This Agreement is effective until the date when you cease to useSoftware, unless earlier terminated in accordance with Section 9 hereof.11. Obligation upon termination.Upon termination or expiration of this Agreement, you shall, at your ownresponsibility and expense, delete or destroy immediately all Software(including its copies), Media and Documentation.12. Governing Law.This Agreement shall be governed by and construed in accordance withlaws of Japan.
26-30, Nishiazabu 2-chome, Minato-ku, Tokyo 106-8620, JapanPrinted in JapanPrinted on recycled paper.FGS-204107-FG