LG-E610 User Guide - Cell Phones Etc.
LG-E610 User Guide - Cell Phones Etc.
LG-E610 User Guide - Cell Phones Etc.

Create successful ePaper yourself
Turn your PDF publications into a flip-book with our unique Google optimized e-Paper software.
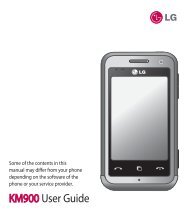
<strong>LG</strong>-<strong>E610</strong> <strong>User</strong> <strong>Guide</strong><br />
This guide helps you to get started using your phone.<br />
• Some of the contents of this manual<br />
may not apply to your phone,<br />
depending on the software and your<br />
service provider.<br />
• This handset is not suitable for people<br />
who have a visual impairment due to<br />
the touch screen keyboard.<br />
• Copyright ©2012 <strong>LG</strong> Electronics,<br />
Inc. All rights reserved. <strong>LG</strong> and the<br />
<strong>LG</strong> logo are registered trademarks of<br />
<strong>LG</strong> Group and its related entities. All<br />
other trademarks are the property of<br />
their respective owners.<br />
• Google, Google Maps, Gmail,<br />
YouTube, Google Talk and<br />
Android Market are trademarks of<br />
Google, Inc.<br />
ENGLISH
Contents<br />
2<br />
<strong>Guide</strong>lines for safe and efficient use .....4<br />
Getting to know your phone ................10<br />
Device components .................................15<br />
Installing the SIM card and battery ...........17<br />
Charging your phone ...............................18<br />
Using the memory card ...........................18<br />
Locking and unlocking the screen ............19<br />
Secure your lock screen ..........................20<br />
Your Home screen ...............................22<br />
Touch screen tips ....................................22<br />
Home screen ..........................................22<br />
Customising the Home screen .................22<br />
Add or remove panels to the<br />
Home screen ..........................................23<br />
Returning to recently-used applications ....23<br />
Notification drawer ..................................23<br />
To customise the notification panel ..........23<br />
Viewing the status bar .............................24<br />
Onscreen keyboard .................................25<br />
Entering accented letters .........................25<br />
Google account set up .........................26<br />
Connecting to Networks and Devices ..27<br />
Wi-Fi ......................................................27<br />
Connecting to Wi-Fi networks ..................27<br />
Bluetooth ................................................27<br />
Sharing your phone's data connection ......29<br />
Using the Wi-Fi Cast................................30<br />
Enabling Wi-Fi Direct to share through<br />
SmartShare ............................................30<br />
Using SmartShare ...................................31<br />
PC connections with a PC data cable .......32<br />
Calls .....................................................34<br />
Making a call ..........................................34<br />
Calling your contacts ...............................34<br />
Answering and rejecting a call .................34<br />
Adjusting call volume ..............................34<br />
Making a second call ..............................34<br />
Viewing your call logs ..............................35<br />
Call settings ...........................................35<br />
Contacts ...............................................37<br />
Searching for a contact ...........................37<br />
Adding a new contact..............................37<br />
Favourite contacts ...................................37<br />
Import or export contacts .........................37<br />
Moving contacts from your old device to<br />
your new device ......................................38<br />
Messaging ...........................................39<br />
Sending a message ................................39<br />
Threaded box ........................................39<br />
Using emoticons .....................................39<br />
Changing your message settings .............39<br />
E-mail ..................................................40<br />
Managing an email account .....................40<br />
Email account screen ..............................40<br />
Working with account folders ...................40<br />
Composing and sending email .................40
Camera ................................................42<br />
Getting to know the viewfinder .................42<br />
Taking a quick photo ..............................43<br />
Using the advanced settings ....................43<br />
View a photo ..........................................44<br />
Video camera .......................................46<br />
Getting to know the viewfinder .................46<br />
Shooting a quick video ............................47<br />
Using the advanced settings ....................47<br />
Play a video ............................................47<br />
Multimedia ...........................................49<br />
Gallery ...................................................49<br />
QuickMemo ............................................50<br />
Music player ...........................................51<br />
FM Radio ................................................52<br />
Searching for stations .............................52<br />
<strong>LG</strong> Tag+ .................................................53<br />
<strong>LG</strong> SmartWorld .....................................54<br />
How to get to <strong>LG</strong> SmartWorld from your<br />
phone ....................................................54<br />
How to use <strong>LG</strong> SmartWorld ......................54<br />
Utilities .................................................55<br />
Setting your alarm...................................55<br />
Using your calculator ...............................55<br />
Adding an event to your calendar .............55<br />
Polaris Office ..........................................55<br />
The web ...............................................57<br />
Internet ..................................................57<br />
Using the web toolbar .............................57<br />
Using options ..........................................57<br />
Settings ...............................................58<br />
Access the Settings menu .......................58<br />
WIRELESS & NETWORKS.........................58<br />
DEVICE ...................................................61<br />
PERSONAL .............................................62<br />
SYSTEM .................................................64<br />
Phone software update ...........................66<br />
DivX Mobile ............................................67<br />
Accessories .........................................68<br />
Troubleshooting ...................................69<br />
FAQ ......................................................71<br />
3
Please read these simple guidelines. Not<br />
following these guidelines may be dangerous<br />
or illegal.<br />
Exposure to radio frequency<br />
energy<br />
Radio wave exposure and Specific<br />
Absorption Rate (SAR) information.<br />
This mobile device, model <strong>LG</strong>-<strong>E610</strong>, has<br />
been designed to comply with applicable<br />
safety requirements for exposure to radio<br />
waves. These requirements are based on<br />
scientific guidelines that include safety<br />
margins designed to assure the safety of all<br />
persons, regardless of age and health.<br />
• The radio wave exposure guidelines<br />
employ a unit of measurement known as<br />
the Specific Absorption Rate, or SAR. Tests<br />
for SAR are conducted using standardised<br />
methods with the phone transmitting at<br />
its highest certified power level in all used<br />
frequency bands.<br />
• While there may be differences between<br />
the SAR levels of various <strong>LG</strong> phone models,<br />
they are all designed to meet the relevant<br />
guidelines for exposure to radio waves.<br />
• The SAR limit recommended by the<br />
International Commission on Non-Ionising<br />
Radiation Protection (ICNIRP) is 2 W/kg<br />
averaged over 10 g of tissue.<br />
4<br />
<strong>Guide</strong>lines for safe and efficient use<br />
• The highest SAR value for this model<br />
phone tested by DASY4 for use at the ear<br />
is 0.904 W/kg (10 g) and when worn on<br />
the body is 0.639 W/Kg (10 g).<br />
• This device meets RF exposure guidelines<br />
when used either in the normal use<br />
position against the ear or when positioned<br />
at least 1.5 cm away from the body.<br />
When a carry case, belt clip or holder is<br />
used for body-worn operation, it should<br />
not contain metal and should position the<br />
product at least 1.5 cm away from your<br />
body. To transmit data files or messages,<br />
this device requires a high-quality<br />
connection to the network. In some cases,<br />
transmission of data files or messages<br />
may be delayed until such a connection<br />
is available. Ensure the above separation<br />
distance instructions are followed until<br />
transmission is complete.<br />
Product care and maintenance<br />
WARNING<br />
Only use batteries, chargers and<br />
accessories approved for use with this<br />
particular phone model. The use of any<br />
other types may invalidate any approval<br />
or warranty applying to the phone, and<br />
may be dangerous.
• Do not disassemble this unit. Take it to a • Do not charge the phone when it is lying<br />
qualified service technician when repairs on soft furnishings.<br />
are required.<br />
• The phone should be charged in a well<br />
• Repairs under warranty, at <strong>LG</strong>'s discretion, ventilated area.<br />
may include replacement parts or boards<br />
that are either new or reconditioned,<br />
provided they have the same functionality<br />
as the parts being replaced.<br />
• Keep the unit away from electrical<br />
appliances such as TVs, radios and<br />
personal computers.<br />
• The unit should be kept away from heat<br />
sources such as radiators or cookers.<br />
• Do not drop.<br />
• Do not subject this unit to mechanical<br />
vibration or shock.<br />
• Do not subject this unit to excess smoke<br />
or dust.<br />
• Do not keep the phone next to credit<br />
cards or transport tickets: it can affect the<br />
information on the magnetic strips.<br />
• Do not tap the screen with any sharp<br />
object, as this may damage the phone.<br />
• Do not expose the phone to liquid or<br />
moisture.<br />
• Use accessories such as earphones<br />
carefully. Do not touch the antenna<br />
unnecessarily.<br />
• Switch off the phone anywhere you<br />
are required to by special regulations.<br />
For example, do not use your phone in<br />
hospitals as it may affect sensitive medical<br />
equipment.<br />
• Do not use, touch or attempt to remove<br />
or fix broken, chipped or cracked glass.<br />
Damage to the glass display due to<br />
abuse or misuse is not covered under the<br />
warranty.<br />
• Do not handle the phone with wet hands<br />
while it is charging. This may cause an<br />
electric shock and could seriously damage<br />
your phone.<br />
•<br />
Your phone is an electronic device that<br />
generates heat during normal operation.<br />
Extremely prolonged, direct skin contact<br />
in the absence of adequate ventilation<br />
• Do not charge a handset near flammable may result in discomfort or minor burns.<br />
material, as the handset may get hot and Therefore, use care when handling<br />
create a fire hazard.<br />
your phone during or immediately after<br />
• Use a dry cloth to clean the outside of the<br />
unit (do not use solvents such as benzene,<br />
thinner or alcohol).<br />
operation.<br />
5
<strong>Guide</strong>lines for safe and efficient use<br />
Efficient phone operation • If you are listening to music while out and<br />
Electronic devices<br />
All mobile phones may receive interference,<br />
which could affect their performance.<br />
• Do not use your mobile phone near medical<br />
about, please ensure the volume is at a<br />
reasonable level so that you are aware<br />
of your surroundings. This is particularly<br />
important near roads.<br />
equipment without asking permission. Avoid Avoid damage to your hearing<br />
placing the phone over pacemakers, for<br />
example, in your breast pocket.<br />
Damage to your hearing can occur if you are<br />
exposed to loud sound for long periods of<br />
• Some hearing aids could be disturbed by time. We therefore recommend that you do<br />
mobile phones.<br />
not turn the handset on or off close to your<br />
• Minor interference may affect TVs, radios,<br />
PCs etc.<br />
ear. We also recommend that music and call<br />
volumes are set to a reasonable level.<br />
Road safety<br />
Check the laws and regulations covering<br />
mobile phone use in the area where you<br />
drive.<br />
• When using headphones, turn the<br />
volume down if you cannot hear the<br />
people speaking near you or if the person<br />
sitting next to you can hear what you are<br />
listening to.<br />
• Do not use a hand-held phone while<br />
driving.<br />
• Give full attention to driving.<br />
NOTE: Excessive sound pressure from<br />
earphones can cause hearing loss.<br />
• Pull off the road and park before making<br />
or answering a call if driving conditions Glass Parts<br />
so require.<br />
Some parts of your mobile device are made<br />
• RF energy may affect some electronic of glass. This glass could break if your<br />
systems in your vehicle, such as car mobile device is dropped on a hard surface<br />
stereos and safety equipment.<br />
or receives a substantial impact. If the glass<br />
• When your vehicle is equipped with an<br />
air bag, do not obstruct it with installed or<br />
portable wireless equipment. It can cause<br />
the air bag to fail or cause serious injury<br />
due to improper performance.<br />
breaks, do not touch it or attempt to remove<br />
it. Stop using your mobile device until the<br />
glass is replaced by an authorised service<br />
provider.<br />
6
Blasting areas<br />
Do not use the phone where blasting is in<br />
progress. Observe restrictions and follow any<br />
regulations or standards.<br />
Potentially explosive<br />
atmospheres<br />
• Do not use your phone at a refuelling<br />
point.<br />
• Do not use it near fuel or chemicals.<br />
• Do not transport or store flammable<br />
gas, liquid or explosives in the same<br />
compartment in your vehicle as your<br />
mobile phone or accessories.<br />
In aircraft<br />
Wireless devices can cause interference in<br />
aircraft.<br />
• Turn your mobile phone off before<br />
boarding any aircraft.<br />
• Do not use it on the ground without<br />
permission from the crew.<br />
Children<br />
Keep the phone in a safe place out of the<br />
reach of small children. It includes small<br />
parts which may cause choking if detached<br />
and swallowed.<br />
Emergency calls<br />
Emergency calls may not be available on<br />
all mobile networks. Therefore you should<br />
never depend solely on your phone to make<br />
emergency calls. Check with your local<br />
service provider.<br />
Battery information and care<br />
• You do not need to completely discharge<br />
the battery before recharging it. Unlike<br />
other battery systems, there is no memory<br />
effect that could compromise the battery's<br />
performance.<br />
• Only use <strong>LG</strong> batteries and chargers. <strong>LG</strong><br />
chargers are designed to maximise battery<br />
life.<br />
• Do not disassemble or short-circuit the<br />
battery.<br />
• Keep the battery's metal contacts clean.<br />
• Replace the battery when it no longer<br />
gives acceptable performance. The battery<br />
pack can be recharged hundreds of times<br />
before it needs replacing.<br />
• Recharge the battery if it has not been<br />
used for a long time, to maximise usability.<br />
• Do not expose the battery charger to<br />
direct sunlight or use it in areas with high<br />
humidity such as bathrooms.<br />
•<br />
Do not leave the battery in hot or cold<br />
places, as this may reduce battery<br />
performance.<br />
7
<strong>Guide</strong>lines for safe and efficient use<br />
• There is a risk of explosion if the battery is<br />
replaced with the wrong type.<br />
• Dispose of used batteries according to the<br />
manufacturer's instructions. Please recycle<br />
when possible. Do not dispose of it as<br />
household waste.<br />
• If you need to replace the battery, take it<br />
to the nearest authorised <strong>LG</strong> Electronics<br />
service point or dealer for assistance.<br />
• Always unplug the charger from the wall<br />
socket after the phone is fully charged<br />
to prevent the charger using power<br />
unnecessarily.<br />
• Actual battery life will depend on network<br />
configuration, product settings, usage<br />
patterns and battery and environmental<br />
conditions.<br />
• Make sure that no sharp-edged objects,<br />
such as animal’s teeth or nails, come into<br />
contact with the battery. This could cause<br />
a fire.<br />
8<br />
DECLARATION OF CONFORMITY<br />
<strong>LG</strong> Electronics hereby declares that this<br />
<strong>LG</strong>-<strong>E610</strong> product is in compliance with the<br />
essential requirements and other relevant<br />
provisions of Directive 1999/5/EC. A copy of<br />
the Declaration of Conformity can be found<br />
at http://www.lg.com/global/support/<br />
cedoc/RetrieveProductCeDOC.jsp<br />
Ambient temperatures<br />
Max: +50°C (discharging),<br />
+45°C (charging)<br />
Min: -10 °C<br />
Notice: Open Source Software<br />
To obtain the corresponding source<br />
code under GPL, <strong>LG</strong>PL, MPL and other<br />
open source licences, please visit http://<br />
opensource.lge.com/<br />
All referred licence terms, disclaimers<br />
and notices are available for download<br />
with the source code.
Disposal of your old appliance<br />
1 When this crossed-out wheeled bin symbol is attached to a product it means<br />
the product is covered by the European Directive 2002/96/EC.<br />
2 All electrical and electronic products should be disposed of separately from<br />
the municipal waste stream via designated collection facilities appointed by<br />
the government or the local authorities.<br />
3 The correct disposal of your old unit will help prevent potential negative<br />
consequences for the environment and human health.<br />
4 For more detailed information about disposal of your old appliance, please<br />
contact your city office, waste disposal service or the shop where you<br />
purchased the product.<br />
Disposal of waste batteries/accumulators<br />
1 When this crossed-out wheeled bin symbol is attached to batteries/<br />
accumulators of a product it means they are covered by the European<br />
Directive 2006/66/EC.<br />
2 This symbol may be combined with chemical symbols for mercury (Hg),<br />
cadmium (Cd) or lead (Pb) if the battery contains more than 0.0005% of<br />
mercury, 0.002% of cadmium or 0.004% of lead.<br />
3 All batteries/accumulators should be disposed separately from the municipal<br />
waste stream via designated collection facilities appointed by the government<br />
or the local authorities.<br />
4 The correct disposal of your old batteries/accumulators will help to prevent<br />
potential negative consequences for the environment, animal and human<br />
health.<br />
5 For more detailed information about disposal of your old batteries/<br />
accumulators, please contact your city office, waste disposal service or the<br />
shop where you purchased the product.<br />
9
10<br />
Getting to know your phone<br />
Before you start using the phone, please read this!<br />
Please check to see whether any problems<br />
you encountered with your phone are<br />
described in this section before taking the<br />
phone in for service or calling a service<br />
representative.<br />
1. Phone memory<br />
When there is less than 10% of space<br />
available in your phone memory, your phone<br />
cannot receive new messages. You need to<br />
check your phone memory and delete some<br />
data, such as applications or messages, to<br />
make more memory available.<br />
To uninstall applications:<br />
1 Touch > Apps tab > Settings ><br />
Apps from the DEVICE category.<br />
2 Once all applications appear, scroll to<br />
and select the application you want to<br />
uninstall.<br />
3 Touch Uninstall.<br />
2. Optimising battery life<br />
Extend your battery's life between charges<br />
by turning off features that you don't need to<br />
having running constantly in the background.<br />
You can monitor how applications and<br />
system resources consume battery power.<br />
Extending your phone's battery life:<br />
• Turn off radio communications you are not<br />
using. If you are not using Wi-Fi, Bluetooth<br />
or GPS, turn them off.<br />
• Reduce screen brightness and set a<br />
shorter screen timeout.<br />
• Turn off automatic syncing for Google<br />
Mail, Calendar, Contacts and other<br />
applications.<br />
• Some applications you have downloaded<br />
may reduce battery power.<br />
To check the battery power level:<br />
• Touch > Apps tab > Settings ><br />
About phone under SYSTEM > Status<br />
The battery status (charging or not charging)<br />
and level (percentage charged) are<br />
displayed.<br />
To monitor and control how battery<br />
power is being used:<br />
• Touch > Apps tab > Settings<br />
> Power Saver from the DEVICE ><br />
Battery use category under BATTERY<br />
INFORMATION.<br />
Battery usage time is displayed on the<br />
screen. It tells you how long it has been<br />
since you last connected your phone to a<br />
power source or, if currently connected, how<br />
long the phone was last running on battery<br />
power. The screen shows the applications or
services using battery power, listed in order<br />
from the greatest to smallest amount used.<br />
3. Using folders<br />
You can combine several app icons in a<br />
folder. Drop one app icon over another on<br />
a Home screen, and the two icons will be<br />
combined.<br />
NOTE: After you open an app, you can<br />
usually adjust its settings by choosing<br />
items from its Menu icon near the top or<br />
bottom of the screen.<br />
4. Before installing an open<br />
source application and OS<br />
WARNING<br />
If you install and use an OS other than<br />
the one provided by the manufacturer, it<br />
may cause your phone to malfunction.<br />
In addition, your phone will no longer be<br />
covered by the warranty.<br />
WARNING<br />
To protect your phone and personal<br />
data, only download applications from<br />
trusted sources, such as Android<br />
Market. If there are improperly<br />
installed applications on your phone, it<br />
may not work normally or a serious error<br />
may occur. You must uninstall those<br />
applications and all associated data and<br />
settings from the phone.<br />
5. Using the hard reset<br />
(factory reset)<br />
If your phone does not restore to the original<br />
condition, use a hard reset (factory reset) to<br />
initialise it.<br />
1 When the phone is switched off, press<br />
and hold the Volume down key +<br />
Power key with your left hand.<br />
2 When the LED on the bottom of the phone<br />
lights up, touch and hold the Menu key<br />
with your right hand. You need to do this<br />
immediately, before the screen displays<br />
the <strong>LG</strong> logo. Make sure your left hand is<br />
still holding the Volume down and Power<br />
keys. Then release the power key when the<br />
phone begins to vibrate.<br />
3<br />
When the <strong>LG</strong> logo is displayed on the<br />
screen, continue to hold the keys for<br />
around two seconds, and then release<br />
11
12<br />
Getting to know your phone<br />
all them at the same time, before the <strong>LG</strong><br />
logo disappears.<br />
Do not operate your phone for at least a<br />
minute, while the hard reset is carried out.<br />
You will then be able to switch your phone<br />
back on.<br />
WARNING<br />
If you perform a hard reset, all user<br />
applications, user data and DRM<br />
licences will be deleted. Please<br />
remember to back up any important<br />
data before performing a Hard Reset.<br />
6. Opening and switching<br />
applications<br />
Multitasking is easy with Android because<br />
you can keep more than one application<br />
running at the same time. There's no<br />
need to quit an application before opening<br />
another. Use and switch between several<br />
open applications. Android manages each<br />
application, stopping and starting them as<br />
needed to ensure that idle applications don't<br />
consume resources unnecessarily.<br />
To view the list of recently used<br />
applications:<br />
Simply press and hold the Home key.<br />
To stop applications:<br />
1 Touch > Apps tab > Settings ><br />
2<br />
Apps from the DEVICE > RUNNING tab.<br />
Scroll and touch the desired application<br />
and touch Stop to stop it.<br />
7. Installing PC software<br />
(<strong>LG</strong> PC Suite)<br />
The <strong>LG</strong> PC Suite is a software package that<br />
helps you connect your device to a PC via a<br />
USB cable and Wi-Fi. Once connected, you<br />
can use the functions of your device from<br />
your PC.<br />
With the <strong>LG</strong> PC Suite software, you can...<br />
• Manage and play your media content<br />
(music, movies, pictures) on your PC.<br />
• Send multimedia content to your device.<br />
• Synchronise data (schedules, contacts,<br />
bookmarks) between your device and PC.<br />
• Backup the applications in your device.<br />
• Update the software in your device.<br />
• Backup and restore the device.<br />
• Play multimedia content from your PC on<br />
your device.<br />
NOTE: You can use the application's<br />
Help menu to find out how to use your<br />
<strong>LG</strong> PC Suite software.<br />
Installing the <strong>LG</strong> PC Suite software<br />
The <strong>LG</strong> PC Suite software can be<br />
downloaded from the <strong>LG</strong> webpage.
1 Go to www.lg.com and select a country of<br />
your choice.<br />
2 Go to Support > Mobile Phone Support<br />
> Select the Model (<strong>LG</strong>-<strong>E610</strong>).<br />
3 Click PC Sync from Download, and<br />
click WINDOW PC Sync Download to<br />
download the <strong>LG</strong> PC Suite software.<br />
System Requirements for the <strong>LG</strong> PC 1<br />
Suite software<br />
• OS: Windows XP 32 bit (Service Pack 2), 2<br />
Windows Vista 32 bit/64 bit, Windows 7<br />
32 bit/64 bit<br />
• CPU: 1 GHz (or faster) processors 3<br />
• Memory: 512 MB (or more) RAM 4<br />
• Graphic card: 1024 x 768 resolution, 32bit<br />
colour (or higher)<br />
• HDD: 100 MB (or more) free hard disk<br />
space (more free hard disk space may be<br />
needed depending on the volume of data<br />
stored)<br />
• Required software: <strong>LG</strong> integrated drivers<br />
NOTE: <strong>LG</strong> integrated USB driver<br />
<strong>LG</strong> integrated USB driver is required to<br />
connect an <strong>LG</strong> device and PC and is<br />
installed automatically when you install<br />
the <strong>LG</strong> PC Suite software.<br />
8. Synchronising your phone to a<br />
computer<br />
Data from your device and PC can be<br />
synchronised easily using the <strong>LG</strong> PC<br />
Suite software. Contacts, schedules, and<br />
bookmarks can be synchronised.<br />
The procedure is as follows:<br />
Connect your device to your PC (use a<br />
USB cable or Wi-Fi connection).<br />
After connection, run the program<br />
and select the device section from the<br />
category on the left side of the screen.<br />
Click [Personal information] to select it.<br />
Tick the checkboxes of the content you<br />
want to synchronise, and click the Sync<br />
button.<br />
9. Synchronising your phone to a<br />
computer via USB<br />
1<br />
NOTE: To synchronise your phone with<br />
your PC using the USB cable, you need<br />
to install <strong>LG</strong> PC Suite on your PC.<br />
Please refer to previous pages to install<br />
<strong>LG</strong> PC Suite.<br />
Touch > Apps tab > Settings ><br />
Storage from the DEVICE tab to check<br />
out the storage media. (If you want to<br />
transfer files to or from a memory card,<br />
insert a memory card into the phone.)<br />
13
14<br />
Getting to know your phone<br />
2<br />
3<br />
4<br />
5<br />
6<br />
Connect the phone to your PC using the<br />
USB cable.<br />
The USB connection mode list will<br />
appear; select the Media sync (MTP)<br />
option.<br />
Open the removable memory folder on<br />
your PC. You can view the mass storage<br />
content on your PC and transfer the files.<br />
Copy the files from your PC to the drive<br />
folder.<br />
Select the charge only option to<br />
disconnect the phone.<br />
TIP! To use the microSD card on your<br />
phone again, you need to open the<br />
notification drawer and touch ><br />
Charge only.<br />
To disconnect your phone from the<br />
computer:<br />
Open the notification drawer and touch<br />
> Charge only to disconnect your<br />
phone from the computer safely.<br />
10. Hold your phone upright<br />
Hold your mobile phone vertically, as you<br />
would a regular phone. The <strong>LG</strong>-<strong>E610</strong> has an<br />
internal antenna. Be careful not to scratch or<br />
damage the back of the phone, as this may<br />
affect performance.<br />
While making/receiving calls or sending/<br />
receiving data, avoid holding the lower part<br />
of the phone where the antenna is located.<br />
Doing so may affect call quality.<br />
11. When the screen freezes<br />
If the screen freezes or the phone does<br />
not respond when you try to operate it:<br />
Remove the battery, reinsert it, then turn the<br />
phone on.<br />
OR<br />
Press and hold the Power/Lock key for<br />
10 seconds to turn it off.<br />
If it still does not work, please contact the<br />
service centre.
Device components<br />
Earpiece<br />
Proximity sensor<br />
Home key<br />
Return to the Home screen from<br />
any screen.<br />
Back key<br />
Return to the previous screen.<br />
NOTE: Proximity sensor<br />
When receiving and making calls, the<br />
proximity sensor automatically turns<br />
the backlight off and locks the touch<br />
screen by sensing when the phone is<br />
near your ear. This extends battery life<br />
and prevents you from unintentionally<br />
activating the touch screen during calls.<br />
Power/Lock key<br />
• Switch your phone on/off by pressing<br />
and holding this key.<br />
• Short press to lock/unlock the<br />
screen.<br />
Menu key<br />
• Check what options are available.<br />
WARNING<br />
Placing a heavy object on the phone or<br />
sitting on it can damage the LCD and<br />
touch screen functions. Do not cover<br />
the LCD proximity sensor with protective<br />
film. This could cause the sensor to<br />
malfunction.<br />
15
16<br />
Getting to know your phone<br />
Power/Lock Key<br />
Earphone Jack<br />
Charger/USB Port<br />
Microphone<br />
Volume Keys<br />
• In the Home screen: Control ringer volume.<br />
• During a call: Control your earpiece<br />
volume.<br />
• When playing a song: Control volume<br />
continuously.<br />
Flash<br />
TIP! Press and hold the Volume Up and<br />
Volume Down Keys for one second to use the<br />
QuickMemo function.<br />
microSD Card<br />
Slot<br />
Camera Lens<br />
SIM Card Slot<br />
Battery Cover<br />
Battery<br />
Speaker
Installing the SIM card and<br />
battery<br />
Before you can start exploring your new<br />
phone, you'll need to set it up. To insert the<br />
SIM card and battery:<br />
1 To remove the battery cover, hold the<br />
phone firmly in one hand. With your other<br />
hand, lift off the battery cover with your<br />
thumbnail as shown in figure.<br />
2<br />
Slide the SIM card into the SIM card slot.<br />
Make sure the gold contact area on the<br />
card is facing downwards.<br />
3<br />
4<br />
Insert the battery into place by aligning<br />
the gold contacts on the phone and the<br />
battery (1) and pressing it down until it<br />
clicks into place (2).<br />
Align the battery cover over the battery<br />
compartment (1) and press it down until it<br />
clicks into place (2).<br />
17
18<br />
Getting to know your phone<br />
Charging your phone<br />
The charger connector is at the bottom of<br />
the phone. Insert the charger and plug it into<br />
an electrical outlet.<br />
NOTE: The battery must be fully charged<br />
initially to improve battery lifetime.<br />
NOTE: Do not open the battery cover<br />
while your phone is charging.<br />
Using the memory card<br />
Your phone supports the use of microSD TM<br />
or microSDHC TM memory cards of up to<br />
32 GB capacity. These memory cards are<br />
specifically designed for mobile phones<br />
and other ultra-small devices, and are ideal<br />
for storing media-rich files such as music,<br />
programs, videos, and photographs for use<br />
with your phone.<br />
To insert a memory card:<br />
Insert the memory card into the slot.<br />
Make sure the gold contact area is facing<br />
downwards.<br />
To safely remove the memory card:<br />
Touch > Apps tab > Settings ><br />
Storage and then DEVICE > Unmount SD<br />
card > OK.<br />
NOTE:<br />
• Use only compatible memory cards<br />
with your phone. Using incompatible<br />
memory cards may damage the card<br />
and data stored on the card, as well<br />
as the phone.<br />
• As the device uses FAT32, the<br />
maximum size for any given file is<br />
4 GB.
WARNING<br />
Do not insert or remove the memory<br />
card when the phone is on. Doing so<br />
may damage the memory card as well<br />
as your phone, and the data stored on<br />
the memory card may become corrupt.<br />
To format the memory card:<br />
Your memory card may already be<br />
formatted. If it isn't, you must format it<br />
before you can use it.<br />
1<br />
2<br />
3<br />
4<br />
5<br />
NOTE: All files on your memory card are<br />
deleted when it is formatted.<br />
Touch to open the application list.<br />
Scroll and touch Settings > Storage<br />
from the DEVICE tab.<br />
Touch Unmount SD card and touch OK<br />
to confirm.<br />
Touch Erase SD card > Erase SD card<br />
> Erase everything, and then confirm<br />
your choice.<br />
If you have set a pattern lock, input<br />
the pattern lock then select Erase<br />
everything.<br />
NOTE: If there is content on your<br />
memory card, the folder structure may<br />
be different after formatting, as all the<br />
files will have been deleted.<br />
Locking and unlocking the<br />
screen<br />
If you do not use the phone for a while, the<br />
screen is turned off and locked automatically.<br />
This helps to prevent accidental touches and<br />
saves battery power.<br />
When you are not using the <strong>LG</strong>-<strong>E610</strong>, press<br />
the Power/Lock key to lock your<br />
phone.<br />
If there are any programs running when you<br />
set lock screen, they may be still running in<br />
Lock mode. It is recommended that you exit<br />
all programs before entering Lock mode to<br />
avoid unnecessary charges (e.g. phone calls,<br />
web access and data communications).<br />
To wake up your phone, press the Power/<br />
Lock key . The lock screen will<br />
appear. Touch and slide the lock screen in<br />
any direction to unlock your home screen.<br />
The last screen you viewed will open.<br />
TIP! To wake up your phone, you can<br />
alternatively use the home key while the<br />
screen is turned off.<br />
19
Secure your lock screen<br />
You can lock the touch screen by activating<br />
the screen lock feature. Your phone will<br />
require the unlock code each time you turn<br />
on the phone or unlock the touch screen.<br />
• <strong>LG</strong> is not responsible for any loss of<br />
security codes or private information or<br />
other damage caused by illegal software.<br />
Set a swipe unlock<br />
1 On the Home screen, touch to open<br />
the application list and select Settings<br />
> Lock screen > Select screen lock<br />
> Swipe.<br />
2 Swipe the screen to unlock the screen.<br />
Set an unlock pattern<br />
1 On the Home screen, touch to open<br />
the application list and select Settings<br />
> Lock screen > Select screen lock<br />
> Pattern.<br />
2 See the on-screen instructions and<br />
example patterns and select Next.<br />
3 Draw a pattern by dragging your finger to<br />
connect at least 4 dots.<br />
4 Select Continue.<br />
5 Draw a pattern again to confirm.<br />
6 Select Confirm.<br />
20<br />
Getting to know your phone<br />
Set an unlock PIN code<br />
1 On the Home screen, touch to open<br />
the application list and select Settings<br />
> Lock screen > Select screen lock<br />
> PIN.<br />
2 Enter a new PIN (numeric) and select<br />
Continue.<br />
3 Enter the PIN again and select OK.<br />
Set an unlock password<br />
1 On the Home screen, touch to open<br />
the application list and select Settings ><br />
Lock screen > Select screen lock ><br />
Password.<br />
2 Enter a new password (alphanumeric)<br />
and select Continue.<br />
3 Enter the password again and select OK.<br />
NOTE:<br />
Precautions to take when using<br />
pattern lock.<br />
It is very important to remember the<br />
unlock pattern you set. You will not be<br />
able to access your phone if you use<br />
an incorrect pattern five times. You<br />
have five chances to enter your unlock<br />
pattern, PIN or password. If you have<br />
used all 5 opportunities, you can try<br />
again after 30 seconds.
When you cannot recall your unlock<br />
pattern:<br />
If you logged in to your Google account on<br />
the phone but failed to enter the correct<br />
pattern 5 times, tap the Forgot pattern<br />
button (or, if you preset the backup PIN, you<br />
can use the backup PIN code to unlock the<br />
pattern). > page 20). You are then required<br />
to log in with your Google account to unlock<br />
your phone.<br />
If you have not created a Google account<br />
on the phone or you forgot it, you have to<br />
perform a hard reset.<br />
If you have forgotten your PIN or<br />
password: If you have forgotten your PIN or<br />
password, you need to perform a hard reset.<br />
21
22<br />
Your Home screen<br />
Touch screen tips<br />
Here are some tips on how to navigate<br />
around your phone.<br />
Touch – To choose a menu/option or open<br />
an application, touch it.<br />
Touch and hold – To open an options menu<br />
or grab an object you want to move, touch<br />
and hold it.<br />
Drag – To scroll through a list or move<br />
slowly, drag across the touch screen.<br />
Flick – To scroll through a list or move<br />
quickly, flick across the touch screen (drag<br />
quickly and release).<br />
NOTE:<br />
• To select an item, touch the centre of<br />
the icon.<br />
• Do not press too hard; the touch<br />
screen is sensitive enough to pick up<br />
a light, firm touch.<br />
• Use the tip of your finger to touch the<br />
option you want. Be careful not to<br />
touch any other keys.<br />
Home screen<br />
Simply swipe your finger to the left or right<br />
to view the panels. You can customise each<br />
panel with apps, downloads, widgets and<br />
wallpapers.<br />
NOTE: Some screen images may vary<br />
depending on your phone provider.<br />
On your Home screen, you can view quick<br />
keys at the bottom of the screen. Quick<br />
keys provide easy, one-touch access to the<br />
functions you use the most.<br />
Touch the Phone icon to bring up the<br />
touch screen dialpad to make a call.<br />
Touch the Messaging icon to access<br />
the messaging menu. This is where you can<br />
create a new message.<br />
Touch the Contacts icon to open your<br />
contacts.<br />
Touch the Apps icon at the bottom<br />
of the screen. You can then view all<br />
your installed applications. To open any<br />
application, simply touch the icon in the<br />
applications list.<br />
Customising the Home screen<br />
You can customise your Home screen<br />
by adding apps, downloads, widgets or<br />
wallpapers. For more convenience when<br />
using your phone, add your favourite widgets<br />
to the Home screen.<br />
1<br />
Home screen > .<br />
or<br />
Touch and hold the empty part of the<br />
Home screen go to the Edit mode screen.
2 The multiple panels of the Home screen<br />
and items in Apps, Downloads, Widgets<br />
or Wallpapers will be displayed on the<br />
Edit mode screen.<br />
3 Scroll left or right to the panel that<br />
contains the item, and then tap and hold<br />
an item you want to move and drag the<br />
item to the desired location or panel.<br />
To remove an item from the Home<br />
screen:<br />
• Home screen > touch and hold the icon<br />
you want to remove > drag it to .<br />
TIP! To add an application icon to the<br />
Home screen from the Applications<br />
menu, touch and hold the application<br />
you want to add.<br />
Add or remove panels to the<br />
Home screen<br />
You can add or remove panels of the Home<br />
screen to organise widgets according to your<br />
preferences and needs.<br />
1 Place two fingers on the screen and<br />
pinch to switch to Edit mode. Then you<br />
can add, remove or change the order of<br />
the panels.<br />
Returning to recently-used<br />
applications<br />
1 Touch and hold the Home key. The<br />
screen displays a pop-up with icons of<br />
applications you used recently.<br />
2<br />
Touch an icon to open the application.<br />
Or touch the Back key to return to your<br />
current application.<br />
Notification drawer<br />
The notification drawer runs across the top<br />
of your screen.<br />
QuickMemo Sound/<br />
Vibrate/<br />
Silent<br />
Wi-Fi<br />
Bluetooth<br />
Edit<br />
To customise the notification<br />
panel<br />
You can customise the notification panel to<br />
match your preferences.<br />
To rearrange items on the notification<br />
panel<br />
Touch . Then, you can check and<br />
rearrange items on the notification panel.<br />
23
24<br />
Your Home screen<br />
To view further notification settings<br />
Touch > .<br />
You can add and remove the items on the<br />
notification panel like Sound profile, Wi-Fi,<br />
Bluetooth, Airplane mode, and so on.<br />
Touch and slide the notification drawer down<br />
with your finger.<br />
Touch > to manage the Notifications.<br />
Here you can check and manage Sound,<br />
Wi-Fi, Bluetooth, Airplane mode, Accounts &<br />
sync, Auto-rotate screen, Brightness, Data<br />
enabled, GPS, NFC, Portable Wi-Fi Hotspot,<br />
and so on.<br />
Viewing the status bar<br />
The status bar uses different icons to display<br />
phone information such as signal strength,<br />
new messages, battery life, and active<br />
Bluetooth and data connections.<br />
Below is a table explaining the meaning of<br />
icons you're likely to see in the status bar.<br />
Icon Description<br />
No SIM card<br />
No signal<br />
Flight mode<br />
Connected to a Wi-Fi network<br />
Icon Description<br />
Power saver is on<br />
Wired headset<br />
Call in progress<br />
Call on hold<br />
Speakerphone<br />
Phone microphone is muted<br />
Missed call<br />
Bluetooth is on<br />
System warning<br />
Alarm is set<br />
New voicemail<br />
Ringer is silenced<br />
NFC is on<br />
Vibrate mode<br />
Battery fully charged<br />
Battery is charging<br />
Phone is connected to PC via<br />
USB cable
Icon Description<br />
Downloading data<br />
Uploading data<br />
GPS is acquiring<br />
Receiving location data from GPS<br />
Data is syncing<br />
New Gmail<br />
New Google Talk message<br />
New message<br />
Song is playing<br />
FM radio turned on in the<br />
background<br />
USB tethering is active<br />
Portable Wi-Fi hotspot is active<br />
Both USB tethering and portable<br />
hotspot are active<br />
NOTE: Icons shown on the display<br />
may vary depending on your region or<br />
service provider.<br />
Onscreen keyboard<br />
You can enter text using the onscreen<br />
keyboard. The on-screen keyboard appears<br />
automatically on the screen when you<br />
need to enter text. To manually display the<br />
keyboard, simply touch a text field where<br />
you want to enter text.<br />
Using the keypad & entering text<br />
Tap once to capitalise the next letter<br />
you type. Double-tap or touch and hold for<br />
all caps.<br />
Tap to switch to the numbers and<br />
symbols keyboard. You can also touch and<br />
hold this tab to view the Settings menu.<br />
Tap to enter a space.<br />
Tap to create a new line in the message<br />
field.<br />
Tap to delete the previous character.<br />
Entering accented letters<br />
When you select French or Spanish as the<br />
text entry language, you can enter special<br />
French or Spanish characters (e.g. ‘á’).<br />
For example, to input ‘á’, touch and hold<br />
the ‘a’ key until the zoom-in key grows<br />
bigger and displays characters from different<br />
languages. Then select the special character<br />
you want.<br />
25
26<br />
Google account set up<br />
When you first turn on your phone, you have<br />
the opportunity to activate the network, to<br />
sign into your Google Account and to decide<br />
how you want to use some Google services.<br />
To set up your Google account:<br />
• Sign into a Google Account from the<br />
prompted set up screen.<br />
OR<br />
•<br />
Touch > Apps tab > select a Google<br />
application (such as Gmail) > select New<br />
to create a new account.<br />
If you have a Google account, touch<br />
Existing, enter your email address and<br />
password, then touch Sign in.<br />
Once you have set up your Google account<br />
on your phone, your phone automatically<br />
synchronises with your Google account on<br />
the web.<br />
Your phone is synchronised with your<br />
contacts, Gmail messages, Calendar<br />
events and other information from these<br />
applications and services on the web. (This<br />
depends on your synchronisation settings.)<br />
After signing in, you can use Gmail and<br />
take advantage of Google services on your<br />
phone.
Connecting to Networks and Devices<br />
Wi-Fi<br />
With Wi-Fi, you can use high-speed Internet<br />
access within the coverage of the wireless<br />
access point (AP). Enjoy wireless Internet<br />
using Wi-Fi, without extra charges.<br />
Connecting to Wi-Fi networks<br />
To use Wi-Fi on your phone, you need to<br />
access a wireless access point or ‘hotspot’.<br />
Some access points are open and you can<br />
simply connect to them. Others are hidden<br />
or use security features; you must configure<br />
your phone to be able to connect to them.<br />
Turn off Wi-Fi when you're not using it to<br />
extend the life of your battery.<br />
NOTE: If you are out of the Wi-Fi zone<br />
or have set Wi-Fi to OFF, additional<br />
charges may be applied by your mobile<br />
operator for mobile data use.<br />
Turning Wi-Fi on and connecting to a<br />
Wi-Fi network<br />
1 Touch > Apps tab > Settings > Wi-<br />
Fi from the WIRELESS & NETWORKS tab.<br />
2 Set Wi-Fi to ON to turn it on and start<br />
scanning for available Wi-Fi networks.<br />
3 Tap the Wi-Fi menu again to see a list of<br />
active and in-range Wi-Fi networks.<br />
• Secured networks are indicated by a<br />
lock icon.<br />
4 Touch a network to connect to it.<br />
• If the network is open, you are asked<br />
to confirm that you want to connect to<br />
that network by touching Connect.<br />
• If the network is secured, you are<br />
prompted to enter a password or<br />
other credentials. (Ask your network<br />
administrator for details)<br />
5<br />
The status bar displays icons that indicate<br />
Wi-Fi status.<br />
Bluetooth<br />
You can use Bluetooth to send data by<br />
running a corresponding application, not<br />
from the Bluetooth menu as on most other<br />
mobile phones.<br />
NOTE:<br />
• <strong>LG</strong> is not responsible for the loss,<br />
interception or misuse of data sent<br />
or received via the Bluetooth wireless<br />
feature.<br />
• Always ensure that you share and<br />
receive data with devices that are<br />
trusted and properly secured. If there<br />
are obstacles between the devices,<br />
the operating distance may be<br />
reduced.<br />
27
28<br />
Connecting to Networks and Devices<br />
• Some devices, especially those<br />
that are not tested or approved by<br />
Bluetooth SIG, may be incompatible<br />
with your device.<br />
Turning on Bluetooth and pairing up your<br />
phone with a Bluetooth device<br />
You must pair up your device with another<br />
device before you connect to it.<br />
1 Touch > Apps tab > Settings > Set<br />
Bluetooth to ON from the WIRELESS &<br />
NETWORKS tab.<br />
2 Tap the Bluetooth menu again. Your<br />
phone will scan for and display the IDs<br />
of all available Bluetooth devices that are<br />
in range. If the device you want to pair<br />
with isn't on the list, make sure the target<br />
device is set to be discoverable, then tap<br />
Search for devices again.<br />
3 Choose the device you want to pair up<br />
with from the list.<br />
Once the paring is successful, your device<br />
will connect to the device.<br />
NOTE: Some devices, especially<br />
headsets or hands-free car kits, may<br />
have a fixed Bluetooth PIN, such as<br />
0000. If the other device has a PIN, you<br />
must enter it.<br />
Send data using the Bluetooth wireless<br />
feature<br />
1 Select a file or item, such as a contact,<br />
calendar event, memo, or media file, from<br />
an appropriate application or Downloads.<br />
2 Select an option for sending data via<br />
Bluetooth.<br />
NOTE: The method for selecting an<br />
option may vary by data type.<br />
3 Search for and pair with a Bluetoothenabled<br />
device.<br />
Receive data using the Bluetooth<br />
wireless feature<br />
1 Touch > Apps tab > Settings > Set<br />
Bluetooth to ON and then tick the<br />
checkbox next to your device.<br />
2<br />
NOTE: To select the length of time that<br />
your device will be visible, touch<br />
> Make phone visible.<br />
Select Pair to confirm that you are willing<br />
to receive data from the device.
Sharing your phone's data<br />
TIP! If your computer is running<br />
connection<br />
Windows 7 or a recent distribution of<br />
USB tethering and portable Wi-Fi hotspot are some flavours of Linux (such as Ubuntu),<br />
great features when there are no wireless you don't usually need to prepare your<br />
connections available. You can share your computer for tethering. But if you're<br />
phone's mobile data connection with a running an earlier version of Windows<br />
single computer via a USB cable (USB or another operating system, you may<br />
tethering). You can also share your phone's need to prepare your computer to<br />
data connection with more than one device establish a network connection via USB.<br />
at a time by turning your phone into a For the most current information about<br />
portable Wi-Fi hotspot.<br />
which operating systems support USB<br />
When your phone is sharing its data<br />
tethering and how to configure them,<br />
connection, an icon appears in the status visit http://www.android.com/tether.<br />
bar and as an ongoing notification in the<br />
notifications drawer.<br />
To rename or secure your portable<br />
For the latest information about tethering hotspot<br />
and portable hotspots, including supported<br />
You can change the name of your phone's<br />
operating systems and other details, visit<br />
Wi-Fi network name (SSID) and secure its<br />
http://www.android.com/tether.<br />
Wi-Fi network.<br />
To change Portable Wi-Fi hotspot 1 On the Home screen, touch > Apps<br />
settings:<br />
tab > Settings.<br />
• Touch > Apps tab > Settings > 2 Touch More from the WIRELESS &<br />
More from the WIRELESS & NETWORKS NETWORKS tab and select Portable Witab<br />
> Portable Wi-Fi hotspot > Choose Fi hotspot.<br />
options that you want to adjust.<br />
3 Ensure Portable Wi-Fi hotspot is ticked.<br />
4 Touch Configure Wi-Fi hotspot.<br />
• The Configure Wi-Fi hotspot dialogue<br />
box will open.<br />
•<br />
You can change the network SSID<br />
(name) that other computers see when<br />
scanning for Wi-Fi networks.<br />
29
30<br />
Connecting to Networks and Devices<br />
• You can also touch the Security menu<br />
to configure the network with Wi-Fi<br />
Protected Access 2 (WPA2) security<br />
using a pre-shared key (PSK).<br />
• If you touch the WPA2 PSK security<br />
option, a password field is added to<br />
the Configure Wi-Fi hotspot dialogue<br />
box. If you enter a password, you will<br />
need to enter that password when you<br />
connect to the phone's hotspot with a<br />
computer or other device. You can set<br />
Open in the Security menu to remove<br />
security from your Wi-Fi network.<br />
5 Touch Save.<br />
ATTENTION!<br />
If you set the security option as Open,<br />
you cannot prevent unauthorised usage<br />
of online services by other people and<br />
additional charges can be incurred.<br />
To avoid unauthorised usage, you are<br />
advised to keep the security option<br />
active.<br />
Using the Wi-Fi Cast<br />
You can share your music, pictures and<br />
video content with users who use Android<br />
<strong>Phones</strong> connected via the same Wi-Fi & Wi-<br />
Fi Directed network.<br />
Check your Wi-Fi & Wi-Fi Directed network<br />
in advance and make sure the users are<br />
connected to the same network.<br />
1 Touch > Apps tab > Settings ><br />
More from the WIRELESS & NETWORKS<br />
tab > Wi-Fi Direct<br />
2 Touch the Wi-Fi direct checkbox to turn<br />
it on.<br />
3 Select a device to connect from the<br />
scanned device list.<br />
4 Touch Connect.<br />
Enabling Wi-Fi Direct to share<br />
through SmartShare<br />
Wi-Fi Direct automatically scans nearby Wi-<br />
Fi Direct devices and the searched devices<br />
are listed as they are found so you can<br />
select a specific device to share multimedia<br />
data with through Smart Share.<br />
NOTE: Wi-Fi Direct cannot be enabled<br />
while using other Wi-Fi functions.<br />
1 Touch > Apps tab > Settings ><br />
More from the WIRELESS & NETWORKS<br />
tab > Wi-Fi Direct.<br />
2 Select a device to connect from the<br />
scanned device list.<br />
CREATE GROUP – Touch to activate group<br />
owner mode, which enables the legacy Wi-Fi<br />
devices to connect by scanning your phone.<br />
In this case you must enter the password<br />
that is set in Password.
NOTE: When your phone becomes<br />
a group owner it will consume more<br />
battery power than when it is a client.<br />
The Wi-Fi Direct connection does not<br />
provide an Internet service. Additional<br />
costs may be incurred when connecting<br />
and using online services. Check data<br />
charges with your network provider.<br />
Using SmartShare<br />
Using your phone, you can allow media<br />
content files on the network to be shared<br />
with other players.<br />
1 Touch and then select SmartShare<br />
.<br />
• Your device should be connected to a<br />
Wi-Fi network. If not, a new window<br />
appears for Wi-Fi connection.<br />
2 From: Set a library to view a content list.<br />
• If there is a previously connected<br />
device, the device's content list of is<br />
displayed.<br />
3 To: Set a player to play the content files.<br />
• You can only play the files on the<br />
supported devices, such as DLNAenabled<br />
TVs and PCs.<br />
• Touch to search for available<br />
devices again.<br />
4 Select a content file you want to play<br />
from the content list.<br />
• Touch and hold a content file to play it<br />
or to view its details.<br />
• Touch the menu button to play, upload/<br />
download, set it or view Help.<br />
5 Upload/download content files to/from the<br />
content list.<br />
• You can upload the content files saved<br />
on your phone to other devices.<br />
• You can download the content files<br />
saved in an external library to your<br />
phone.<br />
• Download/upload progress can be<br />
viewed on the notification bar.<br />
• The uploaded or downloaded content<br />
files are saved in the SmartShare<br />
folder.<br />
6 Enable DMS in the Settings menu.<br />
• Discoverable: Detects your phone<br />
among other DLNA-enabled devices.<br />
• Device name: Sets the name and icon<br />
displayed on other devices.<br />
• Always accept request: Automatically<br />
accepts requests from other devices to<br />
share content files.<br />
• Receive files: Allows other devices to<br />
upload files to your phone.<br />
•<br />
MY SHARE CONTENTS: Allows you<br />
to set the media file type you want to<br />
share.<br />
31
32<br />
Connecting to Networks and Devices<br />
NOTE:<br />
• DMS (Digital Media Server) allows<br />
you to share content files on your<br />
phone with other devices connected<br />
to the same network. With the DMC<br />
(Digital Media Controller) function you<br />
can view and control (playback/stop)<br />
content files on other digital devices.<br />
You can also play content files saved<br />
on other devices on your phone using<br />
the DMP (Digital Media Player).<br />
• You can only play content files in the<br />
formats supported by the DMR. It may<br />
not be possible to play some content<br />
files, depending on the DMR.<br />
• The upload or download function may<br />
not be supported, depending on the<br />
DMS.<br />
PC connections with a PC data<br />
cable<br />
Learn to connect your device to a PC with<br />
a PC data cable in USB connection modes.<br />
By connecting the device to a PC you can<br />
transfer data to and from your device directly<br />
and use the PC software (<strong>LG</strong> PC Suite).<br />
Sync your phone with your computer<br />
To synchronise your phone with your PC<br />
using the USB cable, you need to install<br />
the PC software (<strong>LG</strong> PC Suite) on your PC.<br />
Download the program from the <strong>LG</strong> website<br />
(www.lg.com).<br />
1 Use the USB data cable to connect your<br />
phone to the PC. The USB connection<br />
type list will appear; select <strong>LG</strong> software.<br />
2 Run the <strong>LG</strong> PC Suite program on your PC.<br />
Refer to the PC software (<strong>LG</strong> PC Suite)<br />
help for more information.<br />
NOTE: The <strong>LG</strong> integrated USB driver is<br />
required to connect an <strong>LG</strong> device to a<br />
PC. It is installed automatically when you<br />
install the <strong>LG</strong> PC Suite software.<br />
Transferring music, photos and videos<br />
using USB mass storage mode<br />
1 Connect the <strong>LG</strong>-<strong>E610</strong> to a PC using a<br />
USB cable.<br />
2 If you haven't installed <strong>LG</strong> Android<br />
Platform Driver on your PC, you need to<br />
change the settings manually. Choose<br />
System settings > Connectivity > USB<br />
Connection type, then select Media<br />
sync (MTP).<br />
3 You can view the mass storage content<br />
on your PC and transfer the files.<br />
NOTE: If you installed <strong>LG</strong> Android<br />
Platform Driver, you will immediately see<br />
a pop-up saying Turn on USB storage.
Synchronise with Windows Media Player<br />
Ensure that Windows Media Player is<br />
installed on your PC.<br />
1 Use the USB cable to connect the phone<br />
to a PC on which Windows Media Player<br />
is installed.<br />
2 Select the Media sync (MTP) option.<br />
When connected, a popup window will<br />
appear on the PC.<br />
3 Open Windows Media Player to<br />
synchronise music files.<br />
4 Edit or enter your device’s name in the<br />
popup window (if necessary).<br />
5 Select and drag the music files you want<br />
to the sync list.<br />
6 Start synchronisation.<br />
• The following requirements must be<br />
satisfied to synchronise with Windows<br />
Media Player.<br />
Items Requirement<br />
OS<br />
Window<br />
Media<br />
Player<br />
version<br />
Microsoft Windows XP SP2,<br />
Vista or higher<br />
Windows Media Player 10<br />
or higher<br />
•<br />
If the Windows Media Player version is<br />
lower than 10, install version 10 or higher.<br />
33
34<br />
Calls<br />
Making a call<br />
1<br />
2<br />
3<br />
4<br />
Touch to open the keypad.<br />
Enter the number using the keypad. To<br />
delete a digit, touch the .<br />
Touch to make a call.<br />
To end a call, touch the End icon .<br />
TIP! To enter ‘+’ to make international<br />
calls, touch and hold .<br />
Calling your contacts<br />
1<br />
2<br />
3<br />
Touch to open your contacts.<br />
Scroll through the contact list or enter the<br />
first few letters of the contact you want to<br />
call by touching Search contacts.<br />
In the list, touch the contact you want<br />
to call.<br />
Answering and rejecting a call<br />
When you receive a call in Lock state, hold<br />
and slide the to answer the incoming<br />
call.<br />
Hold and slide the to decline an<br />
incoming call.<br />
Hold and slide the Quick msg icon at the<br />
bottom if you want to send a quick message.<br />
TIP! Quick msg<br />
You can send a message quickly using<br />
this function. This is useful if you need<br />
to reply the message during a meeting.<br />
Adjusting call volume<br />
To adjust the in-call volume during a call,<br />
use the volume up and down keys on the<br />
left-hand side of the phone.<br />
Making a second call<br />
1 During your first call, touch Menu ><br />
Add call and dial the number. You can<br />
also see a list of recently dialled numbers<br />
by touching , or you can search your<br />
contacts by touching and select the<br />
number you want to call.<br />
2 Touch to make the call.<br />
3 Both calls are displayed on the call<br />
screen. Your initial call is locked and put<br />
on hold.<br />
4 Touch the displayed number to toggle<br />
between calls. Or touch Merge call<br />
to make a conference call.<br />
5<br />
To end active calls, touch End or press<br />
the Home Key and slide the notification<br />
bar down and select the End call icon<br />
.
NOTE: You are charged for each call<br />
you make.<br />
Viewing your call logs<br />
On the Home screen, touch and choose<br />
the Call logs tab .<br />
View a complete list of all dialled, received<br />
and missed voice calls.<br />
TIP! Touch any call log entry to view the<br />
date, time and duration of the call.<br />
TIP! Touch the Menu key, and then<br />
touch Delete all to delete all the<br />
recorded items.<br />
Call settings<br />
You can configure phone call settings such<br />
as call forwarding and other special features<br />
offered by your carrier.<br />
1<br />
2<br />
3<br />
On the Home screen, touch .<br />
Touch the Menu key.<br />
Tap Call settings and choose the options<br />
that you want to adjust.<br />
Fixed dialling numbers – To turn on and<br />
compile a list of numbers that can be called<br />
from your phone. You'll need your PIN2,<br />
which is available from your operator. Only<br />
numbers on the fixed dial list can be called<br />
from your phone.<br />
Voicemail service – Allows you to select<br />
your carrier’s voicemail service.<br />
Voicemail settings – If you are using your<br />
carrier’s voicemail service, this option allows<br />
you to enter the phone number to use for<br />
listening to and managing your voicemail.<br />
Save unknown numbers – Add unknown<br />
numbers to contacts after a call.<br />
Call reject – Allows you to set the call reject<br />
function. Choose from Disabled, Reject<br />
calls on list or Reject all calls.<br />
Quick messages – When you want to reject<br />
a call, you can send a quick message using<br />
this function. This is useful if you need to<br />
reject a call during a meeting.<br />
Call forwarding – Choose whether to divert<br />
all calls when the line is busy, when there is<br />
no answer or when you have no signal.<br />
Call barring – Select when you would like<br />
calls to be barred. Enter the call barring<br />
password. Please check with your network<br />
operator about this service.<br />
Call duration – View the duration of calls,<br />
including all calls, dialled calls, received calls<br />
and last call.<br />
Call costs – View the charges applied<br />
to your calls. (This service is network<br />
dependent; some operators do not support<br />
this function.)<br />
35
36<br />
Calls<br />
Additional settings – This lets you change<br />
the following settings:<br />
Caller ID: Choose whether to display your<br />
number on an outgoing call.<br />
Call waiting: If call waiting is activated,<br />
the handset will notify you of an<br />
incoming call while you are on the phone<br />
(depending on your network provider).
Contacts<br />
Add contacts to your phone and synchronise<br />
them with the contacts in your Google<br />
account or other accounts that support<br />
contact syncing.<br />
Searching for a contact<br />
In the Home screen<br />
1 Touch to open your contacts.<br />
2 Touch Search contacts and enter the<br />
contact name using the keyboard.<br />
Adding a new contact<br />
1<br />
2<br />
3<br />
4<br />
5<br />
Touch to open your contacts.<br />
Select .<br />
Select a memory location. If you have<br />
more than one account, select an account<br />
to which you want to add the contact,<br />
such as Phone or Google.<br />
Touch a contact information category and<br />
enter your contact's details.<br />
Touch Save to add the contact to<br />
memory.<br />
You can also create a contact from the<br />
dialling screen.<br />
1 Touch > to open the dial screen.<br />
2 Enter a phone number.<br />
3 Select Add to Contacts > Create new<br />
contact.<br />
4 Select a memory location. If you have<br />
more than one account, select an account<br />
to which you want to add the contact,<br />
5<br />
6<br />
7<br />
such as Phone or Google.<br />
Enter the contact information.<br />
Touch a contact information category and<br />
enter your contact's details.<br />
Touch Save to add the contact to<br />
memory.<br />
Favourite contacts<br />
You can classify frequently called contacts<br />
as favourites.<br />
Adding a contact to your favourites<br />
1<br />
2<br />
3<br />
Touch to open your contacts.<br />
Touch a contact to view their details.<br />
Touch the star to the right of the contact's<br />
name. The star turns yellow.<br />
Removing a contact from your favourites<br />
list<br />
1 Touch to open your contacts.<br />
2 Touch the Favourites tab, and choose a<br />
contact to view its details.<br />
3<br />
Touch the yellow star to the right of the<br />
contact's name. The star will turn grey<br />
and the contact will be removed from<br />
favourites.<br />
Import or export contacts<br />
To import/export contact files (in vcf format)<br />
between a storage memory (internal storage/<br />
memory card) or SIM or USIM card and your<br />
device.<br />
37
38<br />
Contacts<br />
1<br />
2<br />
3<br />
4<br />
Touch to open your contacts.<br />
Touch the Menu key > Import/Export.<br />
Select a desired import/export option. If<br />
you have more than one account, select<br />
an account to which you want to add the<br />
contact.<br />
Select contact files to import/export and<br />
select Import to confirm.<br />
Moving contacts from your old<br />
device to your new device<br />
Export your contacts as a CSV file from<br />
your old phone to your PC, using a PC<br />
sync programme.<br />
1<br />
2<br />
3<br />
4<br />
5<br />
6<br />
First install <strong>LG</strong> PC Suite on the PC.<br />
Run the programme, and connect your<br />
Android mobile phone to the PC using a<br />
USB cable.<br />
From the top of the screen, select Device<br />
> Import personal information ><br />
Import contacts.<br />
A pop-up to open a contacts file will<br />
appear.<br />
Select a contacts file and click Open.<br />
A pop-up to import a new contact from<br />
the PC to the contacts in the device will<br />
appear.<br />
If the contacts in the device and new<br />
contacts from the PC are different, select<br />
a contact you want to import from the PC.<br />
7 Click the [OK] button to import a new<br />
contact from the PC to the device.
Messaging<br />
Your <strong>LG</strong>-<strong>E610</strong> combines SMS and MMS into<br />
one intuitive, easy-to-use menu.<br />
Sending a message<br />
1 Touch on the home screen, and touch<br />
to open a blank message.<br />
2 Enter a contact name or contact number<br />
in the To field. As you enter the contact<br />
name, matching contacts will appear. You<br />
can touch a suggested recipient. You can<br />
add multiple contacts.<br />
3<br />
4<br />
5<br />
6<br />
NOTE: You will be charged for a text<br />
message for every person you send the<br />
message to.<br />
Touch the Enter message field and start<br />
to compose your message.<br />
Touch the Menu key to open the Options<br />
menu. Choose from Add subject,<br />
Discard, Attach, Insert smiley or All<br />
messages.<br />
Touch Send to send your message.<br />
The message screen opens, with your<br />
message after Recipient Name/Number.<br />
Responses will appear on the screen. As<br />
you view and send additional messages,<br />
a message thread will be created.<br />
WARNING: The 160-character<br />
limit may vary from country to country<br />
depending on the language and how the<br />
SMS is coded.<br />
WARNING: If an image, video or<br />
audio file is added to an SMS message,<br />
it is automatically converted into an<br />
MMS message and you are charged<br />
accordingly.<br />
Threaded box<br />
Messages (SMS, MMS) exchanged<br />
with another party can be displayed<br />
in chronological order so that you can<br />
conveniently see an overview of your<br />
conversation.<br />
Using emoticons<br />
Liven up your messages using emoticons.<br />
When writing a new message, touch the<br />
Menu key, then choose Insert smiley.<br />
Changing your message settings<br />
Your <strong>LG</strong>-<strong>E610</strong> message settings are<br />
predefined, so you can send messages<br />
immediately. You can change the settings<br />
based on your preferences.<br />
Touch on the home screen, and touch<br />
the Menu key, then tap Settings.<br />
39
40<br />
E-mail<br />
You can use the Email application to read<br />
emails from services other than Google Mail.<br />
The email application supports the following<br />
account types: POP3, IMAP and Exchange.<br />
Your service provider or system administrator<br />
can provide the account settings you need.<br />
Email account screen<br />
You can touch an account to view its Inbox.<br />
The account from which you send email by<br />
default is indicated with a tick.<br />
– Touch the folder icon to open the<br />
account folders.<br />
Only the most recent emails in your account<br />
are downloaded to your phone.<br />
Managing an email account<br />
The first time you open the E-mail<br />
application, a setup wizard opens to help you<br />
to set up an email account.<br />
To add another email account:<br />
Working with account folders<br />
Each account has an Inbox, Outbox, Sent<br />
and Drafts folder. Depending on the features<br />
• Touch > Apps tab > E-mail > in the supported by your account's service provider,<br />
account screen, touch > Settings you may have additional folders.<br />
> ADD ACCOUNT<br />
After the initial setup, Email displays the<br />
contents of your inbox. If you have added<br />
Composing and sending email<br />
To compose and send a message<br />
more than one account, you can switch 1 While in the E-mail application, touch<br />
among accounts.<br />
the .<br />
To change the settings of an email 2 Enter an address for the message's<br />
account:<br />
intended recipient. As you enter text,<br />
• Touch > Apps tab > E-mail > in the<br />
account screen, touch > Settings<br />
To delete an email account:<br />
• Touch > Apps tab > E-mail > in the<br />
account screen, touch > Settings<br />
> touch an account you want to delete ><br />
Remove account<br />
matching addresses are offered from your<br />
Contacts. Separate multiple addresses<br />
with semicolons.<br />
3 Add Cc/Bcc and add attachment files if<br />
required.<br />
4 Enter the text of the message.<br />
5<br />
Touch the .<br />
If you aren't connected to a network, for<br />
example, if you're working in airplane<br />
mode, the messages that you send
are stored in your Outbox folder until<br />
you're connected to a network again. If<br />
it contains any pending messages, the<br />
Outbox will be displayed on the Accounts<br />
screen.<br />
TIP! When a new email arrives in the<br />
inbox, you will receive a notification<br />
by sound or vibration. Tap the email<br />
notification to stop notifications.<br />
41
42<br />
Camera<br />
Getting to know the viewfinder<br />
Zoom – Zoom in or zoom out. Alternatively, you can use the side volume keys.<br />
Brightness – This defines and controls the amount of sunlight entering the image.<br />
Shot mode – Choose from Normal, Panorama or Continuous shot.<br />
Flash – Allows you to turn on the flash when taking a photo in a dark place.<br />
Settings – Touch this icon to open the Settings menu.<br />
Video mode – Touch this icon to switch to video mode.<br />
Capture – Takes a photo.<br />
Gallery – Touch to view the last photo you captured. This enables you to access your<br />
gallery and view saved photos within camera mode.<br />
NOTE: The memory capacity may differ depending on the shooting scene or shooting<br />
conditions.
Taking a quick photo<br />
1<br />
2<br />
3<br />
4<br />
5<br />
Open the Camera application.<br />
Hold the phone, point the lens towards<br />
the subject you want to photograph.<br />
Touch the screen and a focus box will<br />
appear in the centre of the viewfinder<br />
screen.<br />
When the focus box turns green, the<br />
camera has focused on your subject.<br />
Touch the Capture icon to take the<br />
picture.<br />
Using the advanced settings<br />
In the viewfinder, touch to open all<br />
advanced options.<br />
•<br />
•<br />
•<br />
•<br />
•<br />
- Restore all camera default settings.<br />
- Touch whenever you want to know<br />
how this function operates. This<br />
provides you with a quick guide.<br />
- Focuses on the specific spot.<br />
- Select the image resolution. If you<br />
choose high resolution, the file size will<br />
increase, which means you will be able to<br />
store fewer photos in the memory.<br />
- Finds the colour and light settings<br />
appropriate for the current environment.<br />
Choose from Auto, Portrait, Landscape,<br />
and Sunset.<br />
- The ISO rating determines the<br />
•<br />
sensitivity of the camera's light sensor.<br />
•<br />
•<br />
The higher the ISO, the more sensitive<br />
the camera is. This is useful in darker<br />
conditions when you cannot use the flash.<br />
- Improves colour qualities in different<br />
lighting conditions.<br />
- Choose a colour tone to use for your<br />
new view.<br />
- Takes pictures a few seconds after<br />
•<br />
clicking the shutter. This option is ideal if<br />
you want to be in the picture.<br />
• - Activate to use your phone's locationbased<br />
services. Take pictures wherever<br />
you are and tag them with the location.<br />
If you upload tagged pictures to a blog<br />
that supports geotagging, you can see the<br />
pictures displayed on a map.<br />
NOTE: This function is only available<br />
when GPS is active.<br />
• - Select one of the four shutter sounds.<br />
• - Allows you to review images after<br />
taking pictures.<br />
•<br />
- Select storage to save images.<br />
TIP! When you exit camera mode, some<br />
settings return to their defaults, such as<br />
white balance, timer and scene mode.<br />
Check these before you take your next<br />
photo.<br />
43
44<br />
Camera<br />
TIP! The Settings menu is superimposed<br />
over the viewfinder so, when you<br />
change elements of the image colour or<br />
quality, you see a preview of the image<br />
change behind the Settings menu.<br />
View a photo<br />
Learn to view photos saved in your phone's<br />
storage.<br />
1 On the Home screen, open the application<br />
list and select Gallery.<br />
2 Select a photo to view.<br />
While viewing a photo, use the following<br />
options:<br />
• To view more photos, scroll left or right.<br />
• To zoom in or out, tap the screen with two<br />
fingers and spread them apart (move your<br />
fingers closer together to zoom out).<br />
• To send a photo to others, touch Share<br />
via > desired item like Bluetooth,<br />
Email, Memo, Picasa and so on.<br />
TIP! If you have an SNS account and set<br />
it up on your phone, you can share your<br />
photo with the SNS community.<br />
After taking photos, select the image<br />
viewer icon to view the photos you have<br />
taken.<br />
• To delete a photo, touch Delete .<br />
• To view more photos, scroll left or right.<br />
Touch the Menu key to open all<br />
• To zoom in or out, place two fingers on the advanced options.<br />
screen and spread them apart (move your<br />
Set image as – Touch to use the image as<br />
fingers closer together to zoom out) or<br />
a Contact photo, Lockscreen Wallpaper<br />
double-tap the screen.<br />
or Wallpaper.<br />
• To send a photo to others, touch Share<br />
Move – Touch to move the image to a<br />
via > desired item like Bluetooth,<br />
different place.<br />
E-mail, Memo, Picasa and so on.<br />
Rename – Touch to edit the name of the<br />
• To delete a photo, touch Delete .<br />
selected picture.<br />
Rotate left/Rotate right – Rotate left or<br />
right.<br />
Crop – crop your photo. Move your finger<br />
across the screen to select an area.
Edit – View and edit the picture.<br />
- Select the image resolution. If you<br />
choose high resolution, the file size will<br />
increase, which means you will be able to<br />
store fewer photos in the memory.<br />
- Improves colour qualities in different<br />
lighting conditions.<br />
- Applies artistic effects to the pictures.<br />
- Applies the additional options for<br />
pictures.<br />
Slideshow – Auto review automatically<br />
shows you the picture you just recorded.<br />
Details – Show the picture information.<br />
NOTE: Some file formats are not<br />
supported, depending on the device<br />
software.<br />
NOTE: If the file size exceeds the<br />
available memory, an error can occur<br />
when you open files.<br />
45
46<br />
Video camera<br />
Getting to know the viewfinder<br />
Zoom – Zoom in or zoom out. Alternatively, you can use the side volume keys.<br />
Brightness – This defines and controls the amount of sunlight entering the video.<br />
Video size – Touch to set the size (in pixels) of the video you are recording.<br />
Flash – Allows you to turn on the flash when recording a video in dark conditions.<br />
Settings – Touch this icon to open the settings menu.<br />
Camera mode – Touch this icon to switch to camera mode.<br />
Record – Starts recording.<br />
Gallery – Touch to view the last video you recorded. This enables you to access your<br />
gallery and view your saved videos from within video mode.<br />
NOTE: The zoom function is not available while recording a video.
Shooting a quick video<br />
1 Slide the Camera mode button down and<br />
the icon changes to .<br />
2 The video camera viewfinder appears on<br />
the screen.<br />
3 Holding the phone, point the lens towards<br />
the subject you want to capture in your<br />
video.<br />
4 Press the Record button once to start<br />
recording.<br />
5 A red light appears at the top corner of<br />
the viewfinder with a timer showing the<br />
length of the video.<br />
6 Touch on the screen to stop<br />
recording.<br />
Using the advanced settings<br />
Using the viewfinder, touch to open all<br />
the advanced options.<br />
- Restore all video camera default<br />
settings.<br />
- Improves colour qualities in different<br />
lighting conditions.<br />
- Apply a special effect, such as sepia or<br />
mono tones.<br />
- Activate to use your phone's<br />
location-based services. Records<br />
videos wherever you are and tag<br />
them with the location. If you upload<br />
tagged videos to a blog that supports<br />
geotagging, you can see the videos<br />
displayed on a map.<br />
- Choose Off to record a video without<br />
sound.<br />
- Auto review automatically shows you<br />
the video you just recorded.<br />
- Select storage to save videos.<br />
After recording videos, select the image<br />
viewer icon to view the recorded videos.<br />
• To view more videos, scroll left or right.<br />
• To send a video to others, select Share<br />
via , a desired item like Bluetooth,<br />
Messaging, YouTube and so on.<br />
• To play a video, select Play .<br />
• To delete a video, select Delete .<br />
Play a video<br />
Learn to use the video player to play various<br />
kinds of videos.<br />
1<br />
2<br />
3<br />
4<br />
On the Home screen, open the application<br />
list and select Gallery.<br />
Select a video (with the icon) to play.<br />
Rotate the device to landscape view.<br />
Control playback with the virtual keys.<br />
47
48<br />
Video camera<br />
NOTE:<br />
• Some file formats are not supported,<br />
depending on the device software.<br />
• If the file size exceeds the available<br />
memory, an error can occur when you<br />
open files.<br />
Touch the Menu key to open all<br />
advanced options.<br />
Screen ratio – Tap to select desired screen<br />
ratio.<br />
Brightness – Check for adjusting brightness<br />
level for comfortable video viewing.<br />
Smart Share – Tap to share this video file<br />
through Smart Share.<br />
Details – Tap to see a detailed information,<br />
such as the name, date, time, size and type.<br />
Adjusting the volume when<br />
viewing a video<br />
To adjust the volume of a video while it is<br />
playing, use the volume keys on the lefthand<br />
side of the phone.
Multimedia<br />
You can store multimedia files on a memory<br />
card for easy access to all your image and<br />
video files.<br />
Gallery<br />
Learn to view photos and play videos saved<br />
in your device’s memory and memory card.<br />
1 Touch > Apps tab > Gallery. Open<br />
a list of catalogue bars that store all your<br />
multimedia files.<br />
• Supported file formats (type format)<br />
• Image: bmp, gif, jpg, png<br />
• Video: 3gp, mp4, avi, wmv, flv, mkv<br />
(Codec: MPEG4, H.263, Sorenson<br />
H.263, H.264, VC-1, DivX/XviD)<br />
• Avoid locking the device’s screen while<br />
playing a DivX Video-On-Demand. Each<br />
time you lock the screen while playing a<br />
DivX Video-On-Demand, your available<br />
rental counts will be decremented by one.<br />
• Some file formats are not supported,<br />
depending on the device software.<br />
• If the file size exceeds the available<br />
memory, an error can occur when you<br />
open files.<br />
49
50<br />
Multimedia<br />
QuickMemo<br />
Use QuickMemo to practically and efficiently create memos during a call, with a saved<br />
picture or on the current phone screen.<br />
1 Enter the QuickMemo screen by Or touch and 2 Select the desired 3 Touch in the Edit<br />
pressing both the Volume Up and slide the Status menu option from menu and select<br />
Volume Down Keys for one second Bar downwards Pen type, Color, to save the memo<br />
on the screen you want to capture. and touch . Eraser, and create a with the current<br />
memo.<br />
screen.<br />
NOTE: Please use a fingertip while using the QuickMemo function. Do not use your<br />
fingernail.<br />
Using the QuickMemo options<br />
While using the QuickMemo function, you can easily use the QuickMenu options.<br />
- Select whether you want to use the background screen or not.<br />
- Select the pen type and the colour.<br />
- Erase the memo that you created.<br />
- Set the location where you want to save the memo.<br />
- Save the memo with the current screen.<br />
- Send or share the current QuickMemo to/with others.<br />
Viewing the saved QuickMemo<br />
Touch Gallery and select the QuickMemo album.
Music player<br />
Your phone has a built-in music player that<br />
lets you play all your favourite tracks. The<br />
music player supports the following file<br />
formats: mp3, m4a, mp4, 3gp, 3ga, asf/<br />
wma, ogg, aac, flac, wav.<br />
Add music files to your phone<br />
Start by transferring files to your phone or<br />
memory card:<br />
• Transferring music, photos and videos<br />
using USB mass storage mode =><br />
page 32<br />
• Download from the wireless web =><br />
page 57<br />
• Sync your phone with your computer =><br />
page 32<br />
• Receive via Bluetooth => page 27<br />
• Copy to your memory card.<br />
Play music<br />
After transferring music files to your phone<br />
or memory card.<br />
1<br />
2<br />
3<br />
Touch > Apps tab > Music Player.<br />
Select a music category.<br />
Select a music file. Refer to the following<br />
icons for playback control.<br />
Touch to pause playback.<br />
Touch to resume playback.<br />
Touch to skip to the next track in the<br />
album, playlist or shuffle.<br />
Touch to go back to the beginning of<br />
the song. Touch twice to return to the<br />
previous song.<br />
Touch to manage the music volume.<br />
Touch to set repeat mode.<br />
Touch to play the current playlist in<br />
shuffle mode.<br />
Touch to see the current playlist.<br />
Touch to see lyrics. This option is on only<br />
if the song includes the lyrics.<br />
To change the volume while listening to<br />
music, press the up and down volume keys<br />
on the left-hand side of the phone.<br />
Create a playlist<br />
1<br />
2<br />
3<br />
4<br />
5<br />
6<br />
Touch > Apps tab > Music Player.<br />
Select Playlists.<br />
Press > New playlist.<br />
Enter a title for your new playlist and<br />
select OK.<br />
Select Add music.<br />
Select the files you want to include and<br />
select Add.<br />
TIP! During playback, you can add files<br />
to a playlist by pressing > Add<br />
to playlist.<br />
51
Add songs to the favourite playlist<br />
You can add your favourite song quickly as<br />
a favourite playlist. During playback, press<br />
> Add to favourites to add the<br />
current song to the quick list.<br />
Customise music player settings<br />
52<br />
Multimedia<br />
1<br />
2<br />
3<br />
Touch > Apps tab > Music Player.<br />
Press > Settings.<br />
Adjust the settings to customise your<br />
music player:<br />
NOTE:<br />
• Some file formats are not supported,<br />
depending on the device software.<br />
• If the file size exceeds the available<br />
memory, an error can occur when you<br />
open files.<br />
NOTE: Music file copyrights may be<br />
protected by international treaties and<br />
national copyright laws.<br />
Therefore, it may be necessary to obtain<br />
permission or a licence to reproduce or<br />
copy music.<br />
In some countries, national laws prohibit<br />
private copying of copyrighted material.<br />
Before downloading or copying the file,<br />
check the national laws of the relevant<br />
country concerning the use of such<br />
material.<br />
FM Radio<br />
Your <strong>LG</strong>-<strong>E610</strong> has a built-in FM radio so you<br />
can tune in to your favourite stations and<br />
listen on the go.<br />
NOTE: You need to use your<br />
headphones to listen to the radio. Insert<br />
it into the headphone jack.<br />
Searching for stations<br />
You can tune in to radio stations by searching<br />
for them manually or automatically. They are<br />
then saved to specific channel numbers, so<br />
you don't have to find them again.<br />
You can store up to 48 channels on your<br />
phone.
Tuning in automatically<br />
1 On the Home screen, touch > Apps<br />
tab > FM Radio.<br />
2 Touch , then select Scan.<br />
3 During auto scanning, touch Stop if you<br />
want to stop scanning. Only scanned<br />
channels are saved before you stop<br />
scanning.<br />
NOTE: You can also manually tune in to<br />
a station using the on-screen wheel.<br />
TIP! To improve radio reception, extend<br />
the headset cord as this also functions<br />
as the radio antenna.<br />
If you connect a headset not specifically<br />
made for radio reception, radio reception<br />
may be poor.<br />
<strong>LG</strong> Tag+<br />
<strong>LG</strong> Tag+ allows easy saving and loading to<br />
NFC tag, which can be customised to suit<br />
certain environments. You will receive an<br />
<strong>LG</strong> Tag+ sticker as an accessory with your<br />
phone. Finally, by simply tapping the battery<br />
cover over an NFC tag, your phone will<br />
detect these NFC tags and perform some<br />
customisable action, such as Navigation<br />
mode in your car, silent mode when you’re in<br />
a meeting and more.<br />
1<br />
2<br />
3<br />
4<br />
Press on the Home screen > Apps<br />
tab > <strong>LG</strong> Tag+.<br />
Select the desired mode (Car mode/<br />
Office mode/Sleep mode/<strong>User</strong> mode).<br />
After selecting the item to be set, touch<br />
Write on tag.<br />
Touch the battery cover of your phone<br />
to the tag.<br />
TIP! With the NFC (Near Field<br />
Communication) data transfer<br />
technology, you can use the functions<br />
set for each mode by simply touching<br />
the battery cover to a tag.<br />
53
54<br />
<strong>LG</strong> SmartWorld<br />
<strong>LG</strong> SmartWorld offers an assortment of<br />
exciting content – games, applications,<br />
wallpaper and ringtones – giving <strong>LG</strong> phone<br />
users the chance to enjoy richer ‘Mobile Life’<br />
experiences.<br />
How to get to <strong>LG</strong> SmartWorld<br />
from your phone<br />
1 Touch > Apps tab > <strong>LG</strong> SmartWorld.<br />
2 Tap Sign in and enter ID/PW for<br />
<strong>LG</strong> SmartWorld. If you have not yet<br />
signed up, tap Register and get an <strong>LG</strong><br />
SmartWorld membership.<br />
3 Download the content you want.<br />
NOTE: What if there is no icon?<br />
1 Using a mobile web browser, access<br />
<strong>LG</strong> SmartWorld (www.lgworld.com)<br />
and select your country.<br />
2 Download <strong>LG</strong> SmartWorld App.<br />
3 Execute and install the downloaded<br />
file.<br />
4 Access <strong>LG</strong> SmartWorld by tapping the<br />
<strong>LG</strong> SmartWorld application.<br />
How to use <strong>LG</strong> SmartWorld<br />
• Participate in monthly <strong>LG</strong> SmartWorld<br />
promotions.<br />
• Try the easy ‘Menu’ buttons to find what<br />
you're looking for fast.<br />
Categories – Find content by category<br />
(e.g. Education, Entertainment, Games,<br />
etc.).<br />
Search – Search content.<br />
Apps for you – Recommended content<br />
based on your previous choices.<br />
My Apps – List of downloaded/to-beupdated<br />
content.<br />
Settings – Set profile and display.<br />
Sign in – Set your ID and password.<br />
• Try other useful functions as well. (Content<br />
Detail screen)<br />
NOTE: <strong>LG</strong> SmartWorld may not be<br />
available from all carriers or in all<br />
countries.
Utilities<br />
Setting your alarm<br />
1<br />
2<br />
3<br />
Touch > Apps tab > Alarm/Clock<br />
> .<br />
After you set the time, the <strong>LG</strong>-<strong>E610</strong> lets<br />
you know how much time is left before<br />
the alarm will sound.<br />
Set Repeat, Snooze duration, Vibration,<br />
Alarm sound, Puzzle lock and Memo.<br />
Touch Save.<br />
Using your calculator<br />
1<br />
2<br />
3<br />
4<br />
Touch > Apps tab > Calculator<br />
Touch the number keys to enter numbers.<br />
For simple calculations, touch the<br />
function you want (+, –, x or ÷) followed<br />
by =.<br />
For more complex calculations, touch<br />
, select the Advanced panel, then<br />
choose sin, cos, tan, log and so on.<br />
Adding an event to your<br />
calendar<br />
1 Touch > Apps tab > Calendar<br />
2 Tap the month displayed at left top<br />
corner; here you can find the different<br />
calendar views (Day, Week, Month,<br />
Agenda).<br />
3 Tap the date for the event you want to<br />
add.<br />
4<br />
5<br />
6<br />
7<br />
8<br />
9<br />
Tap to add the event.<br />
Touch Event name, then enter the event<br />
name.<br />
Touch Location and enter the location.<br />
Check the date and enter the time you<br />
want your event to start and finish.<br />
If you want to add a note to your event,<br />
touch Description and enter the details.<br />
If you want to repeat the alarm, set<br />
REPEAT, and set REMINDERS if<br />
necessary.<br />
Touch Save to save the event in the<br />
calendar.<br />
Polaris Office<br />
Polaris Office is a professional mobile office<br />
solution that lets users conveniently view<br />
various types of office documents, including<br />
Word, Excel and PowerPoint files, anywhere,<br />
anytime, using their mobile devices.<br />
Touch > Apps tab > Polaris Office<br />
Managing files<br />
Polaris Office provides mobile users with<br />
convenient file management features,<br />
including copying, moving and pasting, and<br />
deleting files and folders right on the device.<br />
Viewing files<br />
Mobile users can now easily view a wide<br />
variety of file types, including Microsoft<br />
Office and Adobe PDF documents, right<br />
55
56<br />
Utilities<br />
on their mobile devices. When viewing<br />
documents using Polaris Office, the objects<br />
and layout remain the same as in the<br />
original documents.
The web<br />
Internet<br />
Internet gives you a fast, full-colour world of<br />
games, music, news, sport, entertainment<br />
and much more, right on your mobile phone.<br />
Wherever you are and whatever you enjoy.<br />
NOTE: Additional charges apply when<br />
connecting to these services and<br />
downloading content. Check data<br />
charges with your network provider.<br />
Using the web toolbar<br />
Touch to go back a page.<br />
Touch to go forward a page, to the page<br />
you connected to after the current one.<br />
This is the opposite of what happens<br />
when you press the Back key, which<br />
goes to the previous page.<br />
Touch and hold, up and down to zoom in<br />
or out of browser.<br />
Touch to add a new window.<br />
Touch to open a list of saved bookmarks.<br />
Using options<br />
Press to view options.<br />
Refresh – Update the current web page.<br />
Save to bookmarks – Add the current web<br />
page as a bookmark.<br />
Go to Homepage – Allows you to go to the<br />
homepage.<br />
Share page – Allows you to share the web<br />
page with others.<br />
Find on page – Allows you to find letters or<br />
words on the current web page.<br />
Request desktop site – Allows you to view<br />
the web page on the desktop.<br />
Save for offline reading – Allows you to<br />
save current web page and read it on offline<br />
later.<br />
Brightness – Allows you to adjust the<br />
brightness of the screen.<br />
Settings – Displays Internet settings.<br />
Exit – Allows you to exit from the browser.<br />
57
58<br />
Settings<br />
Access the Settings menu<br />
1 On the Home screen, touch > Apps<br />
tab > Settings.<br />
or<br />
On the Home screen, touch ><br />
System settings.<br />
2 Select a setting category and select an<br />
option.<br />
WIRELESS & NETWORKS<br />
Here you can manage Wi-Fi and Bluetooth.<br />
You can also set up mobile networks and<br />
switch to airplane mode.<br />
< Wi-Fi ><br />
Wi-Fi – Turns on Wi-Fi to connect to<br />
available Wi-Fi networks.<br />
Wi-Fi settings – Allows you to set up and<br />
manage wireless access points. Set network<br />
notification or add a Wi-Fi network. The<br />
advanced Wi-Fi settings screen is accessed<br />
from the Wi-Fi settings screen. Press the<br />
and touch Advanced.<br />
TIP! How to obtain the MAC address<br />
To set up a connection in some wireless<br />
networks with MAC filters, you may<br />
need to enter the MAC address of your<br />
<strong>LG</strong>-<strong>E610</strong> into the router.<br />
You can find the MAC address in the<br />
following user interface: Touch Apps<br />
tab > Settings > Wi-Fi > ><br />
Advanced > MAC address..<br />
< Bluetooth ><br />
Turns the Bluetooth wireless feature on or<br />
off. Refer to the Bluetooth information for<br />
more details => page 27<br />
< Data usage ><br />
Displays data usage and allows you to<br />
customise the settings for your data limit.<br />
• Mobile data: Set to use data connections<br />
on any mobile network.<br />
• Set mobile data limit: Set a limit for the<br />
mobile data usage.<br />
• Data usage cycle: Customise the settings<br />
for the limit cycle.<br />
< Call ><br />
You can configure phone call settings such<br />
as call forwarding and other special features<br />
offered by your carrier.<br />
• Fixed dialling numbers - Select Fixed<br />
Dialling Numbers to turn on this feature<br />
and compile a list of numbers that can
e called from your phone. You'll need<br />
your PIN2, which is available from your<br />
operator. Only numbers on the fixed dial<br />
list can be called from your phone.<br />
VOICE MAIL<br />
• Voicemail service - Allows you to select<br />
your carrier's voicemail service. You can<br />
obtain this number from your service<br />
provider.<br />
• Voicemail settings - If you are using<br />
your carrier's voicemail service, this option<br />
allows you to enter the phone number to<br />
use for listening to and managing your<br />
voicemail.<br />
END CALL SETTINGS<br />
• Save unknown numbers - Add unknown<br />
numbers to contacts after a call.<br />
OTHER CALL SETTINGS<br />
• Call reject - Allows you to set the call<br />
reject function. Choose from Disabled,<br />
Reject calls on list or Reject all calls.<br />
• Quick messages - When you want<br />
to reject a call, you can send a quick<br />
message using this function. This is<br />
useful if you need to reject a call during<br />
a meeting.<br />
• Call forwarding - Choose whether to<br />
divert all calls when the line is busy, when<br />
there is no answer or when you have no<br />
signal.<br />
• Call barring - Select when you would like<br />
calls to be barred. Enter the call barring<br />
password. Please check with your network<br />
operator about this service.<br />
• Call duration - View the duration of calls<br />
including all calls, dialled calls, received<br />
calls and last call.<br />
• Call costs - View the charges applied<br />
to your calls. (This service is network<br />
dependent; some operators do not support<br />
this function.)<br />
• Additional settings - This lets you change<br />
the following settings:<br />
• Caller ID - Choose whether to display<br />
your number on an outgoing call.<br />
• Call waiting - If call waiting is<br />
activated the handset will notify you<br />
of an incoming call while you are on<br />
the phone (depending on your network<br />
provider).<br />
< More ... ><br />
• Airplane mode - After switching to<br />
airplane mode, all wireless connections<br />
are disabled.<br />
•<br />
Wi-Fi Direct - Activate the Wi-Fi Direct<br />
feature to connect two devices via a WLAN<br />
without requiring an access point. Refer<br />
to the Wi-Fi information for more details<br />
=> page 30<br />
59
60<br />
Settings<br />
• Portable Wi-Fi hotspot - Activate the<br />
Portable WLAN hotspot feature to share<br />
your device’s mobile network connection<br />
with PCs or other devices through the<br />
WLAN feature.<br />
• Configure Wi-Fi hotspot: Configure<br />
network settings for your WLAN<br />
hotspot.<br />
• Timeout: Set the time for the portable<br />
hotspot timeout.<br />
• Help: View information about using the<br />
tethering features.<br />
• NFC - Your phone is an NFC-enabled<br />
mobile phone. NFC (Near Field<br />
Communication) is a wireless connectivity<br />
technology that enables two-way<br />
communication between electronic<br />
devices. It operates over a distance of<br />
a few centimetres. You can share your<br />
content with an NFC tag or another device<br />
by simply touching it with your device. If<br />
you touch an NFC tag with your device, it<br />
will display the tag content on your device.<br />
NOTE: Be careful not to scratch or<br />
damage the inside of the battery cover,<br />
as this is the NFC antenna.<br />
• To switch NFC on or off: From the<br />
Home screen, touch and slide the<br />
notification drawer down with your<br />
finger, then select the NFC icon to turn<br />
it on.<br />
NOTE: The NFC application can be used<br />
even when Airplane mode is activated.<br />
• Android Beam - You can beam a web<br />
page, video or other content from your<br />
screen to another device by bringing the<br />
devices together (typically back to back).<br />
NOTE: Make sure both devices<br />
are unlocked, support Near Field<br />
Communication (NFC), and have both<br />
NFC and Android Beam turned on.<br />
• VPN settings - Displays the list of Virtual<br />
Private Networks (VPNs) that you've<br />
previously configured. Allows you to add<br />
different types of VPN.<br />
NOTE: You must set a lock screen<br />
PIN or password before you can use<br />
credential storage.<br />
• Mobile networks - Set options for data<br />
roaming, network mode & operators,<br />
access point names (APNs) and so on.<br />
• Data enabled: Set to enable data<br />
access over a mobile network.<br />
• Data roaming: Set the device to<br />
connect to another network when you<br />
are roaming or your home network is<br />
not available.
• Network mode: Select a network type.<br />
• Access point names: Set up access<br />
point names (APNs).<br />
• Use only 2G networks: Select a<br />
network type.<br />
• Network operators: Search for<br />
available networks and select a network<br />
for roaming.<br />
DEVICE<br />
< Sound ><br />
• Sound profile - You can choose from<br />
Sound, Vibrate only or Silent.<br />
• Volumes - You can manage the volume<br />
of music, video, games, other media,<br />
and ringtones & notifications. See ‘Touch<br />
feedback & system’.<br />
RINGTONE & NOTIFICATIONS<br />
• Phone ringtone - Allows you to set your<br />
default incoming call ringtone.<br />
• Notification sound - Allows you to set<br />
your default notification sound.<br />
• Ringtone with vibration - Vibration<br />
feedback for calls and notifications.<br />
• Quiet time - Set times to turn off all<br />
sounds except alarm and media.<br />
TOUCH FEEDBACK & SYSTEM<br />
• Dial pad touch tones - Allows you to set<br />
the phone to play tones when using the<br />
dialpad to dial numbers.<br />
• Touch sounds - Allows you to set your<br />
phone to play a sound when you touch<br />
buttons, icons and other onscreen items<br />
that react to your touch.<br />
• Screen lock sound - Allows you to set<br />
your phone to play a sound when locking<br />
and unlocking the screen.<br />
< Display ><br />
• Brightness - Adjust the screen brightness.<br />
• Auto-rotate screen - Set to switch<br />
orientation automatically when you rotate<br />
the phone.<br />
• Screen timeout - Set the time for screen<br />
timeout.<br />
• Font size - Change the display size.<br />
• Front key light - Set the front key LED<br />
time.<br />
< Home screen ><br />
Home screen - Select a background image<br />
for the Home screen. You can set the<br />
Animation, Screen effect or Wallpaper.<br />
< Lock screen ><br />
Set how to unlock the screen.<br />
• Select screen lock - Set an unlock<br />
pattern to secure your phone. This opens<br />
a set of screens that guide you through<br />
drawing a screen unlock pattern.<br />
• None: Disable the screen lock.<br />
•<br />
Swipe: Set to use the screen lock<br />
61
without a PIN, password, pattern, or<br />
face detection.<br />
• Pattern: Set an unlock pattern to<br />
unlock the screen.<br />
• PIN: Set a PIN (numeric) to unlock the<br />
screen.<br />
• Password: Set to display your own<br />
message for the locked screen.<br />
< Storage ><br />
View memory information for your device<br />
and memory card. You can also format the<br />
USB storage and the memory card.<br />
62<br />
Settings<br />
resource usage.<br />
• Power saver tips: Learn how to reduce<br />
battery consumption by using the power<br />
saving items.<br />
POWER SAVING ITEMS<br />
Set to activate power saving mode according<br />
to your custom settings.<br />
BATTERY INFORMATION<br />
View the amount of power consumed by<br />
your device.<br />
< Apps ><br />
You can view and manage the applications.<br />
WARNING<br />
PERSONAL<br />
Formatting a memory card will<br />
permanently delete all data from the<br />
memory card.<br />
< Accounts & sync ><br />
Permits applications to synchronise data<br />
in the background, whether or not you are<br />
• INTERNAL STORAGE - View the internal<br />
storage usage.<br />
actively working in them. Deselecting this<br />
setting can save battery power and reduces<br />
(but does not eliminate) data usage.<br />
• SD CARD - Check total available SD card<br />
space. Touch Unmount SD card for safe<br />
removal. Erase SD card if you want to<br />
delete all data from the SD card.<br />
< Power Saver ><br />
Here you can manage the battery and check<br />
the power saving items. You can also check<br />
the battery usage.<br />
< Location services ><br />
Change the settings for GPS functionality.<br />
• Google's location service - If you select<br />
Google's location service, your phone<br />
determines your approximate location<br />
using Wi-Fi and mobile networks. When<br />
you select this option, you're asked<br />
whether you consent to allowing Google<br />
• Turn Power saver on: Activate power to use your location when providing these<br />
saving mode to limit some system<br />
services.
• GPS satellites - If you select GPS CREDENTIAL STORAGE<br />
satellites, your phone determines your<br />
location with street level accuracy.<br />
• Trusted credentials - Select certificates<br />
and credentials to ensure secure use of<br />
• Location & Google search - Set the various applications<br />
device to use your current location for<br />
Google search and other Google services.<br />
• Install from storage - Install encrypted<br />
certificates that are stored in the USB<br />
< Security ><br />
storage device.<br />
Change the settings for securing your device • Clear credentials - Erase the credential<br />
and the SIM or USIM card.<br />
contents from the device and reset the<br />
SIM CARD LOCK<br />
password.<br />
• Set up SIM card lock - Set up SIM card < Language & input ><br />
lock or change the SIM PIN.<br />
Use the language & input settings to<br />
• Lock SIM card: Activate or deactivate<br />
the PIN lock feature to require the PIN<br />
before using the device.<br />
• Change SIM PIN: Change the PIN used<br />
select the language for the text on your<br />
phone and for configuring the onscreen<br />
keyboard, including words you've added to<br />
its dictionary.<br />
to access SIM or USIM data.<br />
< Backup & reset ><br />
PASSWORDS<br />
Change the settings for managing your<br />
• Make passwords visible - Show settings and data.<br />
password as you type.<br />
BACKUP & RESTORE<br />
DEVICE ADMINISTRATION<br />
Change the settings for managing your<br />
• Device administrators - View device settings and data.<br />
administrators configured on your device. • Back up my data - Set to back up your<br />
You can activate device administrators to settings and application data to the Google<br />
apply new policies to your device.<br />
server.<br />
• Unknown sources - View device • Backup account - Add and view your<br />
administrators configured on your device. Google account to back up your data.<br />
You can activate device administrators to •<br />
Automatic restore - Set to restore your<br />
apply new policies to your device.<br />
settings and application data when the<br />
applications are reinstalled on your device.<br />
63
Settings<br />
PERSONAL DATA<br />
• Factory data reset - Reset your settings<br />
to the factory default values and delete all<br />
your data. If you reset the phone in this<br />
way, you are prompted to re-enter the<br />
same information that you did when you<br />
first started Android.<br />
NOTE: If you select factory data reset, it<br />
will erase all of your personal data from<br />
your phone’s system memory, including<br />
information about your Google account,<br />
any other accounts, your system/<br />
application data and settings as well as<br />
any downloaded applications and DRM<br />
licences. Resetting the phone does not<br />
erase any system software updates you<br />
have downloaded or any files on your<br />
microSD card or internal memory, such<br />
as music or photos.<br />
So, if you want to erase all the data<br />
in the internal memory while resetting<br />
the phone, select the ‘Erase internal<br />
memory’ checkbox.<br />
SYSTEM<br />
< Date & time ><br />
Use Date & time settings to set how dates<br />
are displayed. You can also use these<br />
settings to set your own time and time zone<br />
rather than obtaining the current time from<br />
64<br />
the mobile network.<br />
• Automatic date & time: Automatically<br />
update the time when you set a time zone.<br />
• Automatic time zone: Automatically<br />
update the time when you move across<br />
time zones.<br />
• Set date: Set the current date manually.<br />
• Set time: Set the current time manually.<br />
• Select time zone: Set your home time<br />
zone.<br />
• Use 24-hour format: Set to the time to<br />
be displayed in 24-hour format.<br />
• Select date format: Select a date format.<br />
< Accessibility ><br />
Use the Accessibility settings to configure<br />
accessibility plug-ins you have installed on<br />
your phone.<br />
NOTE: Requires additional plug-ins.<br />
SYSTEM<br />
• Large text: Set the text size to large.<br />
• Power button ends call: Set the device to<br />
end a call when you press the Power/Lock<br />
key.<br />
• Auto-rotate screen: Set whether or not to<br />
rotate the content automatically when the<br />
device is rotated.<br />
• Touch & hold delay: Set the recognition<br />
time for tapping and holding the screen.
• Install web scripts: Set applications<br />
to install web scripts to make their web<br />
content more accessible.<br />
< Connectivity ><br />
USB CONNECTION<br />
• USB connection type - You can set the<br />
desired mode (Charge only, Media sync<br />
(MTP), USB tethering or <strong>LG</strong> software).<br />
• Ask on connection - Ask to confirm USB<br />
connection mode when connecting to a<br />
computer.<br />
• Help - View information about using the<br />
USB connection type.<br />
<strong>LG</strong> SOFTWARE<br />
• PC Suite Wi-Fi connection - Tick this<br />
checkbox to use <strong>LG</strong> PC Suite with Wi-Fi<br />
connection. Please note that the Wi-Fi<br />
network should be connected for <strong>LG</strong><br />
PC Suite via Wi-Fi connection from the<br />
WIRELESS & NETWORKS tab.<br />
<br />
Change the settings for application<br />
development.<br />
• USB debugging: Select to connect your<br />
device to a PC using a USB cable. This is<br />
for application development.<br />
• Development device ID: View your<br />
device’s development ID.<br />
• Stay awake: Screen will never sleep while<br />
charging.<br />
• Allow mock locations: Allow mock<br />
locations and service information to be<br />
sent to a Location Manager service for<br />
testing. This is for application development.<br />
• Desktop backup password: Set a<br />
password to secure your backup data.<br />
USER INTERFACE<br />
• Strict mode enabled: Set the device<br />
to flash the screen when applications<br />
perform long operations.<br />
• Pointer location: Set to show the<br />
coordinates and traces of the pointer when<br />
you touch the screen.<br />
• Show touches: Set to show the pointer<br />
when you touch the screen.<br />
• Show screen updates: Set to flash areas<br />
of the screen when they are updated.<br />
• Show CPU usage: Set to list all active<br />
processes.<br />
• Force GPU rendering: Set to use 2D<br />
hardware acceleration to improve graphic<br />
performance.<br />
• Window animation scale: Select a speed<br />
for opening and closing pop-up windows.<br />
• Transition animation scale: Select a<br />
speed for switching between screens.<br />
APPS<br />
•<br />
Don't keep activities: Set to end a<br />
running application when you launch a<br />
new application.<br />
65
• Background process limit: Set to limit<br />
the number of processes that can run in<br />
the background.<br />
• Show all ANRs: Set the device to alert<br />
you to unresponsive applications that are<br />
running in the background.<br />
< About phone ><br />
View legal information and check phone<br />
status and software version.<br />
66<br />
Settings<br />
Phone software update<br />
<strong>LG</strong> Mobile phone software update from<br />
the Internet<br />
For more information about using this<br />
function, please visit http://update.lgmobile.<br />
com or http://www.lg.com/common/index.<br />
jsp select country and language.<br />
This feature allows you to update the<br />
firmware on your phone to a newer version<br />
conveniently from the Internet without you<br />
needing to visit a service centre. This feature<br />
will only be available if and when <strong>LG</strong> makes<br />
a newer firmware version available for your<br />
device.<br />
As the mobile phone firmware update<br />
requires the user's full attention for the<br />
duration of the update process, please make<br />
sure you check all instructions and notes<br />
that appear at each step before proceeding.<br />
Please note that removing the USB data<br />
cable or battery during the upgrade may<br />
seriously damage your mobile phone.<br />
NOTE: <strong>LG</strong> reserves the right to make<br />
firmware updates available only for<br />
selected models at its own discretion<br />
and does not guarantee the availability<br />
of the newer version of the firmware for<br />
all handset models.<br />
<strong>LG</strong> Mobile Phone software update via<br />
Over-the-Air (OTA)<br />
This feature allows you to update your<br />
phone's software to a newer version<br />
conveniently via OTA, without connecting<br />
with a USB data cable. This feature will only<br />
be available if and when <strong>LG</strong> makes a newer<br />
firmware version available for your device.<br />
First, you can check the software version<br />
on your mobile phone: System settings ><br />
About phone > Software update > Check<br />
now for update.<br />
You can also delay the update by 1 hour,<br />
4 hours, 8 hours or 1 day. In this case, the<br />
application will notify you to update when the<br />
time is up. You can also perform an update<br />
manually.<br />
NOTE: This feature is dependent on<br />
your network service provider, region<br />
and country.
DivX Mobile<br />
ABOUT DIVX VIDEO: DivX ® is a digital video<br />
format created by DivX, LLC, a subsidiary<br />
of Rovi Corporation. This is an official DivX<br />
Certified ® device that plays DivX video. Visit<br />
divx.com for more information and software<br />
tools to convert your files into DivX videos.<br />
ABOUT DIVX VIDEO-ON-DEMAND: This DivX<br />
Certified ® device must be registered in order<br />
to play purchased DivX Video-on-Demand<br />
(VOD) movies. To obtain your registration<br />
code, locate the DivX VOD section in your<br />
device setup menu. Go to vod.divx.com for<br />
more information on how to complete your<br />
registration.<br />
DivX Certified ® to play DivX ® video up to<br />
320x240.<br />
DivX ® , DivX Certified ® and associated<br />
logos are trademarks of Rovi Corporation<br />
or its subsidiaries and are used under<br />
licence.<br />
67
68<br />
Accessories<br />
These accessories are available for use with the <strong>LG</strong>-<strong>E610</strong>. (Items described below may be optional.)<br />
Travel adaptor Battery<br />
Data cable<br />
Connect your <strong>LG</strong>-<strong>E610</strong><br />
to a PC.<br />
<strong>User</strong> <strong>Guide</strong><br />
Learn more about<br />
your <strong>LG</strong>-<strong>E610</strong>.<br />
Stereo headset <strong>LG</strong> Tag + sticker<br />
NOTE:<br />
• Always use genuine <strong>LG</strong> accessories. Failure to do this may void your warranty.<br />
• Accessories may vary in different regions.
Troubleshooting<br />
This chapter lists some problems you might encounter while using your phone. Some<br />
problems require you to call your service provider, but most are easy to fix yourself.<br />
Message Possible causes Possible corrective measures<br />
SIM error<br />
No network<br />
connection /<br />
Losing network<br />
Codes do not<br />
match<br />
An application<br />
cannot be set<br />
Calls not<br />
available<br />
Phone cannot<br />
be switched on<br />
There is no SIM card in the<br />
phone, or it is inserted incorrectly.<br />
Signal is weak or you're outside<br />
the carrier network.<br />
Operator applied new services.<br />
To change a security code, you<br />
will need to confirm the new code<br />
by re-entering it.<br />
The two codes you have entered<br />
do not match.<br />
Not supported by service provider<br />
or registration required.<br />
Dialling error<br />
New SIM card inserted.<br />
Pre-paid charge limit reached.<br />
On/Off key pressed too briefly.<br />
Battery is not charged.<br />
Battery contacts are dirty.<br />
Make sure the SIM card is correctly inserted.<br />
Move towards a window or into an open area.<br />
Check the network operator coverage map.<br />
Check whether the SIM card is more than 6~12<br />
months old. If so, change your SIM at your<br />
network provider's nearest branch. Contact your<br />
service provider.<br />
If you forget the code, contact your service<br />
provider.<br />
Contact your service provider.<br />
New network not authorised.<br />
Check for new restrictions.<br />
Contact service provider or reset limit with PIN2.<br />
Hold the On/Off key down for at least two<br />
seconds.<br />
Charge battery. Check charging indicator on<br />
the display.<br />
Clean the battery contacts.<br />
69
70<br />
Troubleshooting<br />
Message Possible causes Possible corrective measures<br />
Charging error<br />
Number not<br />
permitted<br />
Impossible to<br />
send/receive<br />
SMS & picture<br />
Files not<br />
opening<br />
SD card not<br />
working<br />
The screen<br />
does not come<br />
on when I<br />
receive a call.<br />
Battery is not charged. Charge battery.<br />
Outside temperature is too hot<br />
or cold.<br />
Contact problem<br />
Make sure the phone is charging at a normal<br />
temperature.<br />
Check the charger and connection to the phone.<br />
Check the battery contacts, and clean them if<br />
necessary.<br />
No voltage Plug the charger into a different socket.<br />
Charger defective Replace charger.<br />
Wrong charger Only use original <strong>LG</strong> accessories.<br />
Battery defective Replace battery.<br />
The Fixed dialling number<br />
function is on.<br />
Check the Settings menu and turn the function<br />
off.<br />
Memory full Delete some messages from the phone.<br />
Unsupported file format Check the file formats that can be supported.<br />
FAT16, FAT32 file system<br />
supported<br />
Proximity sensor problem<br />
No sound Vibration mode<br />
Hang up or<br />
freeze<br />
Intermittent software problem<br />
Check SD card file system via card reader, or<br />
format SD card using the phone.<br />
If you use any protection tape or case, check<br />
to see if it has covered the area around the<br />
proximity sensor. Make sure the area around the<br />
proximity sensor is clean.<br />
Check the settings status of the sound menu to<br />
make sure you are not in vibrate or silent mode.<br />
Remove the battery, reinsert it and switch on<br />
the phone.<br />
Try to perform a software update via the<br />
website.
FAQ<br />
Please check to see if any problems you have encountered with your phone are described in<br />
this section before taking the phone in for service or calling a service representative.<br />
Category<br />
Sub-Category<br />
BT<br />
Bluetooth<br />
Devices<br />
BT<br />
Bluetooth<br />
Headset<br />
Data<br />
Contacts<br />
Back up<br />
Data<br />
Synchronisation<br />
Data<br />
Synchronisation<br />
Question Answer<br />
What are the functions<br />
available via Bluetooth?<br />
If my Bluetooth headset is<br />
connected, can I listen to<br />
my music through my 3.5<br />
mm wired headphones?<br />
How can I back up<br />
Contacts?<br />
Is it possible to set up<br />
one-way sync with Gmail?<br />
Is it possible to<br />
synchronise all the email<br />
folders?<br />
You can connect a Bluetooth audio device<br />
such as a Stereo/Mono headset or Car Kit<br />
and share pictures, videos, contacts, etc. via<br />
Gallery/Contacts menu. Also, when the FTP<br />
server is connected to a compatible device,<br />
you can share content stored in the storage<br />
media (internal memory or SD card).<br />
When a Bluetooth headset is connected, all<br />
system sounds are played over the headset.<br />
As a result, you will not be able to listen to<br />
music through your wired headphones.<br />
The Contacts data can be synchronized<br />
between your phone and Gmail.<br />
Only two-way synchronisation is available.<br />
The Inbox is automatically synchronised. You<br />
can view other folders by pressing the Menu<br />
Key and touching Folders to choose<br />
a folder.<br />
71
72<br />
FAQ<br />
Category<br />
Sub-Category<br />
Google<br />
Service<br />
Gmail Log-In<br />
Google<br />
Service<br />
Google<br />
Account<br />
Phone<br />
Function<br />
Email<br />
Phone<br />
Function<br />
Ringtone<br />
Phone<br />
Function<br />
Message Time<br />
Phone<br />
Function<br />
microSD Card<br />
Phone<br />
Function<br />
Navigation<br />
Question Answer<br />
Do I have to log into Gmail<br />
whenever I want to access<br />
Gmail?<br />
Is it possible to filter<br />
emails?<br />
What happens when<br />
I execute another<br />
application while writing<br />
an email?<br />
Is there a file size<br />
limitation for when I want<br />
to use a .MP3 file as a<br />
ring tone?<br />
My phone does not<br />
display the time of receipt<br />
for messages older than<br />
24 hrs. How can I change<br />
this?<br />
What is the maximum<br />
supported size for a<br />
memory card?<br />
Is it possible to install<br />
another navigation<br />
application on my phone?<br />
Once you log into Gmail, you don't need to<br />
log into Gmail again.<br />
No, email filtering is not supported via the<br />
phone.<br />
Your email will automatically be saved as a<br />
draft.<br />
There is no file size limitation.<br />
You will only be able to see the times for<br />
messages received the same day.<br />
32 GB memory cards are compatible.<br />
Any application that is available on Android<br />
Market and is compatible with the<br />
hardware can be installed and used.
Category<br />
Sub-Category<br />
Phone<br />
Function<br />
Synchronisation<br />
Phone<br />
Function<br />
Wait and<br />
Pause<br />
Phone<br />
Function<br />
Security<br />
Question Answer<br />
Is it possible to<br />
synchronise my contacts<br />
from all my email<br />
accounts?<br />
Is it possible to save a<br />
contact with Wait and<br />
Pause in the numbers?<br />
What are the phone’s<br />
security functions?<br />
Only Gmail and MS Exchange server<br />
(company email server) contacts can be<br />
synchronised.<br />
If you transferred a contact with the W & P<br />
functions saved into the number, you will not<br />
be able to use those features. You will need<br />
to re-save each number.<br />
How to save with Wait and Pause:<br />
1. From the Home screen, press the Phone<br />
icon .<br />
2. Dial the number, then press the Menu<br />
Key .<br />
3. Touch Add 2-sec pause or Add wait.<br />
You are able to set the phone to require the<br />
entry of an Unlock Pattern before the phone<br />
can be accessed or used.<br />
73
74<br />
FAQ<br />
Category<br />
Sub-Category<br />
Phone<br />
Function<br />
Unlock<br />
Pattern<br />
Question Answer<br />
How do I create the<br />
Unlock Pattern?<br />
1. From the Home screen, press the Menu<br />
Key .<br />
2. Touch System Settings > Lock screen.<br />
3. Touch Select screen lock > Pattern. The<br />
first time you do this, a short tutorial about<br />
creating an Unlock Pattern appears.<br />
4. Set up by drawing your pattern once, then<br />
again for confirmation.<br />
Precautions to take when using pattern<br />
lock.<br />
It is very important to remember the unlock<br />
pattern you set. You will not be able to<br />
access your phone if you use an incorrect<br />
pattern five times. You have five chances to<br />
enter your unlock pattern, PIN or password.<br />
If you have used all 5 opportunities, you can<br />
try again after 30 seconds. (Or, if you preset<br />
the backup PIN, you can use the backup PIN<br />
code to unlock the pattern => page 20)
Category<br />
Sub-Category<br />
Phone<br />
Function<br />
Unlock<br />
Pattern<br />
Question Answer<br />
What should I do if I forget<br />
the unlock pattern and I<br />
didn’t create the Google<br />
account on the phone?<br />
If you have forgotten your pattern:<br />
If you logged in to your Google account on<br />
the phone but failed to enter the correct<br />
pattern 5 times, touch the forgot pattern<br />
button. You are then required to log in with<br />
your Google account to unlock your phone.<br />
If you have not created a Google account<br />
on the phone or you forgot it, you have to<br />
perform a hard reset.<br />
Caution: If you perform a factory reset,<br />
all user applications and user data will<br />
be deleted. Please remember to back up<br />
any important data before performing a<br />
factory reset.<br />
How to perform a factory reset:<br />
1. When the phone is switched off, press and<br />
hold the Volume down key + Power key<br />
with your left hand.<br />
2. When the LED on the bottom of the phone<br />
lights up, touch and hold the Menu key<br />
with your right hand. You need to do this<br />
immediately, before the screen displays<br />
the <strong>LG</strong> logo. Make sure your left hand is<br />
still holding the Volume down and Power<br />
keys. Then release the power key when<br />
the phone begins to vibrate.<br />
75
76<br />
FAQ<br />
Category<br />
Sub-Category<br />
Phone<br />
Function<br />
Memory<br />
Phone<br />
Function<br />
Language<br />
Support<br />
Phone<br />
Function<br />
VPN<br />
Question Answer<br />
Will I know when my<br />
memory is full?<br />
Is it possible to change<br />
the language?<br />
How do I set up a VPN?<br />
3. When the <strong>LG</strong> logo is displayed on the<br />
screen, continue to hold the keys for<br />
around two seconds, and then release all<br />
them at the same time, before the <strong>LG</strong> logo<br />
disappears.<br />
Do not operate your phone for at least a<br />
minute, while the hard reset is carried out.<br />
You will then be able to switch your phone<br />
back on.<br />
Yes, you will receive a notification.<br />
The phone has multilingual capabilities.<br />
To change the language:<br />
1. From the Home screen, press the Menu<br />
Key and touch System Settings.<br />
2. Touch Language & input > Select<br />
language.<br />
3. Touch the desired language.<br />
VPN access configuration is different<br />
according to each company. To configure<br />
VPN access from your phone, you must<br />
obtain the details from your company’s<br />
network administrator.
Category<br />
Sub-Category<br />
Phone<br />
Function<br />
Screen time<br />
out<br />
Phone<br />
Function<br />
Wi-Fi & 3G<br />
Phone<br />
Function<br />
Home screen<br />
Phone<br />
Function<br />
Application<br />
Question Answer<br />
My screen turns off after<br />
only 15 seconds. How can<br />
I change the amount of<br />
time for the backlight to<br />
turn off?<br />
When Wi-Fi and 3G are<br />
both available, which<br />
service will my phone<br />
use?<br />
Is it possible to remove an<br />
application from the Home<br />
screen?<br />
I downloaded an<br />
application and it causes<br />
a lot of errors. How do I<br />
remove it?<br />
1. From the Home screen, press the Menu<br />
Key .<br />
2. Touch System Settings > Display.<br />
3. Under Display settings, touch Screen<br />
timeout.<br />
4. Touch the preferred screen backlight<br />
timeout time.<br />
When using data, your phone may default to<br />
the Wi-Fi connection (if Wi-Fi connectivity on<br />
your phone is set to On). However, there will<br />
be no notification when your phone switches<br />
from one to the other.<br />
To know which data connection is being<br />
used, view the 3G or Wi-Fi icon at the top of<br />
your screen.<br />
Yes. Just touch and hold the icon until the<br />
dustbin icon appears at the bottom-centre of<br />
the screen. Then, without lifting your finger,<br />
drag the icon to the rubbish bin.<br />
1. From the Home screen, press the Menu<br />
Key .<br />
2. Touch App settings > Downloaded.<br />
3. Touch the application, then touch<br />
Uninstall.<br />
77
78<br />
FAQ<br />
Category<br />
Sub-Category<br />
Phone<br />
Function<br />
Charger<br />
Phone<br />
Function<br />
Alarm<br />
Phone<br />
Function<br />
Alarm<br />
Phone<br />
Function<br />
Alarm<br />
Recovery<br />
Solution<br />
Hard Reset<br />
(Factory Reset)<br />
Question Answer<br />
Is it possible to charge<br />
my phone by USB data<br />
cable without installing the<br />
necessary USB driver?<br />
Can I use music files for<br />
my alarm?<br />
Will my alarm be audible<br />
or will it go off if the<br />
phone is turned off?<br />
If my ringer volume is set<br />
to Off or Vibrate, will I hear<br />
my Alarm?<br />
How can I perform a<br />
factory reset if I can’t<br />
access the phone’s setting<br />
menu?<br />
Yes, the phone will be charged by the USB<br />
cable irrespective of whether the necessary<br />
drivers are installed or not.<br />
Yes. After saving a music file as a ringtone,<br />
you can use it for your alarm.<br />
1. Touch and hold a song in a library list.<br />
In the menu that opens, touch Set as<br />
ringtone.<br />
2. In an alarm clock setting screen, select the<br />
song as a ringtone.<br />
No, this is not supported.<br />
Your Alarm is programmed to be audible<br />
even in these scenarios.<br />
If your phone does not restore to the original<br />
condition, use a hard reset (factory reset) to<br />
initialise it. =>page 11