Instruction Manual
Instruction Manual
Instruction Manual

Create successful ePaper yourself
Turn your PDF publications into a flip-book with our unique Google optimized e-Paper software.
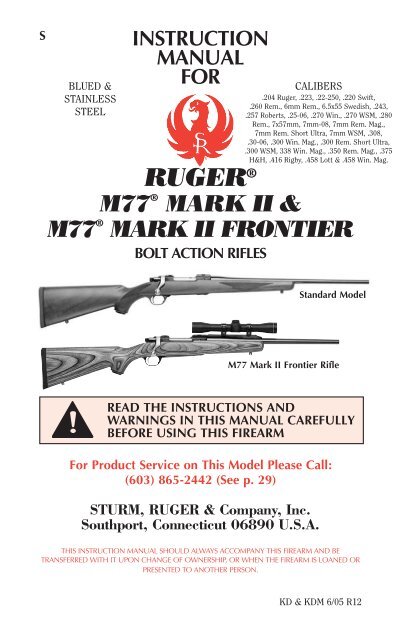
SBLUED &STAINLESSSTEELINSTRUCTIONMANUALFORCALIBERS.204 Ruger, .223, .22-250, .220 Swift,.260 Rem., 6mm Rem., 6.5x55 Swedish, .243,.257 Roberts, .25-06, .270 Win., .270 WSM, .280Rem., 7x57mm, 7mm-08, 7mm Rem. Mag.,7mm Rem. Short Ultra, 7mm WSM, .308,.30-06, .300 Win. Mag., .300 Rem. Short Ultra,.300 WSM, 338 Win. Mag., .350 Rem. Mag., .375H&H, .416 Rigby, .458 Lott & .458 Win. Mag.RUGER ®M77 ®MARK II &M77 ® MARK II FRONTIERBOLT ACTION RIFLESStandard ModelM77 Mark II Frontier RifleREAD THE INSTRUCTIONS ANDWARNINGS IN THIS MANUAL CAREFULLYBEFORE USING THIS FIREARMFor Product Service on This Model Please Call:(603) 865-2442 (See p. 29)STURM, RUGER & Company, Inc.Southport, Connecticut 06890 U.S.A.THIS INSTRUCTION MANUAL SHOULD ALWAYS ACCOMPANY THIS FIREARM AND BETRANSFERRED WITH IT UPON CHANGE OF OWNERSHIP, OR WHEN THE FIREARM IS LOANED ORPRESENTED TO ANOTHER PERSON.KD & KDM 6/05 R12
State-By-State WarningsCertain states require by law that their own specified warningnotices in larger-than-normal type be conspicuously included bythe manufacturer, distributor, or retail dealer with firearms soldin that state. Sturm, Ruger sells its products in compliance withapplicable laws and regulations. Because our products may besold in these states, we include the following:California:WARNING“Children are attracted to andcan operate firearms that cancause severe injuries or death.Prevent child access by alwayskeeping guns locked away andunloaded when not in use. If youkeep a loaded firearm where achild obtains and improperly usesit, you may be fined or sent toprison.”ADVERTENCIA“A los niños los atraen las armasde fuego y las pueden hacerfuncionar. Ellos pueden causarseslesions graves y la muerte. Eviteque los niños tengan accesso a lasarmas de fuego guardándolassiempre con llave y descargadascuando no las esté utilizando. Siusted tiene un arma de fuegocargada en un lugar en que unniño tiene acceso a ella y la usaindebidamente, le pueden dar unamulta o enviarlo a la carcel.”Connecticut:“UNLAWFUL STORAGE OF A LOADED FIREARM MAYRESULT IN IMPRISONMENT OR FINE.”Florida:“IT IS UNLAWFUL, AND PUNISHABLE BYIMPRISONMENT AND FINE, FOR ANY ADULT TOSTORE OR LEAVE A FIREARM IN ANY PLACE WITHINTHE REACH OR EASY ACCESS OF A MINOR UNDER 18YEARS OF AGE OR TO KNOWINGLY SELL OROTHERWISE TRANSFER OWNERSHIP OR POSSESSIONOF A FIREARM TO A MINOR OR A PERSON OFUNSOUND MIND.”3
Maine:“ENDANGERING THE WELFARE OF A CHILD IS ACRIME. IF YOU LEAVE A FIREARM AND AMMUNITIONWITHIN EASY ACCESS OF A CHILD, YOU MAY BESUBJECT TO FINE, IMPRISONMENT OR BOTH. KEEPFIREARMS AND AMMUNITION SEPARATE. KEEPFIREARMS AND AMMUNITION LOCKED UP. USETRIGGER LOCKS.”Maryland:“WARNING: Children can operate firearms which may causedeath or serious injury. It is a crime to store or leave a loadedfirearm in any location where an individual knew or shouldhave known that an unsupervised minor would gain access tothe firearm. Store your firearm responsibly!”Massachusetts:“WARNING FROM THE MASSACHUSETTS ATTORNEYGENERAL: This handgun is not equipped with a device thatfully blocks use by unauthorized users. More than 200,000firearms like this one are stolen from their owners every yearin the United States. In addition, there are more than athousand suicides each year by younger children andteenagers who get access to firearms. Hundreds more die fromaccidental discharge. It is likely that many more childrensustain serious wounds, or inflict such wounds accidentally onothers. In order to limit the chance of such misuse, it isimperative that you keep this weapon locked in a secure placeand take other steps necessary to limit the possibility of theftor accident. Failure to take reasonable preventive steps mayresult in innocent lives being lost, and in some circumstancesmay result in your liability for these deaths.”“IT IS UNLAWFUL TO STORE OR KEEP A FIREARM,RIFLE, SHOTGUN OR MACHINE GUN IN ANY PLACEUNLESS THAT WEAPON IS EQUIPPED WITH ATAMPER-RESISTANT SAFETY DEVICE OR IS STOREDOR KEPT IN A SECURELY LOCKED CONTAINER.”4
New Jersey:“IT IS A CRIMINAL OFFENSE TO LEAVE A LOADEDFIREARM WITHIN EASY ACCESS OF A MINOR.”New York City:“THE USE OF A LOCKING DEVICE OR SAFETY LOCK ISONLY ONE ASPECT OF RESPONSIBLE FIREARMSSTORAGE. FOR INCREASED SAFETY, FIREARMSSHOULD BE STORED UNLOADED AND LOCKED IN ALOCATION THAT IS BOTH SEPARATE FROM THEIRAMMUNITION AND INACCESSIBLE TO CHILDREN ANDOTHER UNAUTHORIZED PERSONS.”North Carolina:“IT IS UNLAWFUL TO STORE OR LEAVE A FIREARMTHAT CAN BE DISCHARGED IN A MANNER THAT AREASONABLE PERSON SHOULD KNOW IS ACCESSIBLETO A MINOR.”Texas:“IT IS UNLAWFUL TO STORE, TRANSPORT, ORABANDON AN UNSECURED FIREARM IN A PLACEWHERE CHILDREN ARE LIKELY TO BE AND CANOBTAIN ACCESS TO THE FIREARM.”Wisconsin:“IF YOU LEAVE A LOADED FIREARM WITHIN THEREACH OR EASY ACCESS OF A CHILD YOU MAY BEFINED OR IMPRISONED OR BOTH IF THE CHILDIMPROPERLY DISCHARGES, POSSESSES, OR EXHIBITSTHE FIREARM.”***************** *****Please check with your licensed retailer or state police foradditional warnings which may be required by local law orregulation. Such regulations change constantly, and localauthorities are in the best position to advise you on such legalmatters.5
LOCKING DEVICEINSTALLATION INSTRUCTIONSWARNING – USE OF LOCKING DEVICES• Always keep your firearm pointed in a safe direction,including when you are installing or removing yourlocking device.• Always verify that your firearm is completely unloadedbefore installing your locking device.• Do not install locking devices in the trigger guard;always keep your fingers, clamp and locking deviceoutside the trigger guard during device installation andremoval.• Store firearms, ammunition and keys separately andsecurely, away from children and careless adults; do notstore your firearm with the keys in the locking device.• Do not attempt to work the action of your firearm withthe locking device in place; this may damage yourfirearm.• While locking devices are an important aid to securitymeasures, they are not a substitute for safe firearmhandling and proper storage. Remember that anymechanical device can be bypassed with enough time,knowledge, determination and equipment.LOCKING DEVICES MUST BE USEDSAFELY AND RESPONSIBLYUse the Correct Lock: While the basic locking device is substantially similarfor all Ruger ® firearms, due to the different shapes of the many Ruger ®firearms, some firearms utilize different locking devices. The 2 1/2” lock isfor use with the M77 MARK II rifles. It is important to use the correctlocking device!To Install the Factory-Supplied Locking Device:1. Keep the muzzle pointed in a safe direction and your fingers outside thetrigger guard at all times!2. Be sure the firearm and its magazine are completely unloaded and containno cartridges or cartridge cases!3. Open the action completely by drawing the bolt fully to the rear.6
4. Release the floorplate latch and allow the floorplate to hang open.5. Apply the lock directly to your M77 Mark II rifle as shown below.6. Close the lock by pressing the shackle into the body of the lock (the partthat receives the key) as tightly together as possible. The lock hasbumpers and the shackle is coated with a non-marring material that willnot harm the metal finish of your firearm; be careful not to dent orscratch the wooden stock.7. Once the lock is securely closed, remove the key. Pull firmly on thelock to test the connection and be sure it is locked. Do not leave or storeyour firearm with the key in the lock! Store your locked unloadedfirearm and the key in secure, separate locations, away fromammunition, children, or unauthorized adults.Correct Installation of LockFor Ruger® M77 Mark II Rifles Only7
FIREARMS SAFETY-YOUR RESPONSIBILITYSAFETY MUST BE THE FIRST AND CONSTANTCONSIDERATION OF EVERY PERSON WHO HANDLESFIREARMS AND AMMUNITION.This <strong>Instruction</strong> <strong>Manual</strong> is designed to assist you in learning how to use and carefor your RUGER ® M77 ® MARK II rifle properly.Only when you are certain you fully understand the <strong>Manual</strong> and can properlycarry out its instructions should you practice loading, etc. with live ammunition.If you have any doubts about your ability to handle or use a particular type of gunsafely, then you should seek supervised instruction. Such personalized instructionis often available from gun dealers, gun clubs or police departments. If none ofthese sources can help you, write to the National Rifle Association, 11250 WaplesMill Road, Fairfax, VA 22030-7400. They will assist you.The person with a gun in their possession has a full-time job. You cannot guess;you cannot forget. You must know how to use your firearm safely. Do not use anyfirearm without having a complete understanding of its particular characteristicsand safe use. Remember: There is no such thing as a foolproof gun.TABLE OF CONTENTSPageState-By-State Warnings . . . . . . . . . . . . . . . . . . . . . . . . . . . . . . . . . . . . . . . . . . . . .3Locking Device Installation <strong>Instruction</strong>s . . . . . . . . . . . . . . . . . . . . . . . . . . . . . . . .6General Information and Mechanical Characteristics . . . . . . . . . . . . . . . . . . . . . . 9Target Trigger Information . . . . . . . . . . . . . . . . . . . . . . . . . . . . . . . . . . . . . . . . . .11Operation of Safety . . . . . . . . . . . . . . . . . . . . . . . . . . . . . . . . . . . . . . . . . . . . . . . . .11Ammunition . . . . . . . . . . . . . . . . . . . . . . . . . . . . . . . . . . . . . . . . . . . . . . . . . . . . . 13To Load and Fire . . . . . . . . . . . . . . . . . . . . . . . . . . . . . . . . . . . . . . . . . . . . . . . . . . 14To Unload Rifle and Magazine . . . . . . . . . . . . . . . . . . . . . . . . . . . . . . . . . . . . . . . 16To Clear a Malfunction (“Jam”) . . . . . . . . . . . . . . . . . . . . . . . . . . . . . . . . . . . . . . 17To Minimize Malfunctions (“Jams”) . . . . . . . . . . . . . . . . . . . . . . . . . . . . . . . . . . 19Basic Disassembly and Reassembly . . . . . . . . . . . . . . . . . . . . . . . . . . . . . . . . . . . 19Care and Cleaning . . . . . . . . . . . . . . . . . . . . . . . . . . . . . . . . . . . . . . . . . . . . . . . . . 23Storage . . . . . . . . . . . . . . . . . . . . . . . . . . . . . . . . . . . . . . . . . . . . . . . . . . . . . . . . . .24Maintenance of Stainless Steel Rifles . . . . . . . . . . . . . . . . . . . . . . . . . . . . . . . . . . 25Attaching Ruger Scope Rings . . . . . . . . . . . . . . . . . . . . . . . . . . . . . . . . . . . . . . . 26Sight Adjustment . . . . . . . . . . . . . . . . . . . . . . . . . . . . . . . . . . . . . . . . . . . . . . . . . 26Sight Picture and Adjustment for Magnum and Express Models Only . . . . . . . .27Special <strong>Instruction</strong>s and Warning For Frontier Rifle . . . . . . . . . . . . . . . . . . . . .28Service and Parts Policy . . . . . . . . . . . . . . . . . . . . . . . . . . . . . . . . . . . . . . . . . . . . 29Shipping Firearms for Repair . . . . . . . . . . . . . . . . . . . . . . . . . . . . . . . . . . . . . . . .29Ordering Parts . . . . . . . . . . . . . . . . . . . . . . . . . . . . . . . . . . . . . . . . . . . . . . . . . . . .30Parts List . . . . . . . . . . . . . . . . . . . . . . . . . . . . . . . . . . . . . . . . . . . . . . . . . . . . .31 - 37Parts Drawings . . . . . . . . . . . . . . . . . . . . . . . . . . . . . . . . . . . . . . . . . . . . . . . . 38 - 41The Basic Rules of Safe Firearms Handling . . . . . . . . . . . . . . . . . . . . . . . . 42 - 45Warranty Information . . . . . . . . . . . . . . . . . . . . . . . . . . . . . . . . . . . . . . . . . . . . . . 48“Ruger” & “M77” are registered U.S. trademarks.8
WARNINGS OF GREAT IMPORTANCE AREFOUND ON THE FOLLOWING PAGES:Locking Devices 6 Unloading 17Alterations 9 Malfunctions 18Target Trigger 11 Disassembly 19<strong>Manual</strong> Safety 12 Lubrication 24Lead Exposure 13 Storage 25Ammunition 14 Scope Mounting 28Loading 14 Shipping 29Handling 15 Parts Purchasers 30Firing 16OTHER CAUTIONS AND WARNINGS APPEARTHROUGHOUT THE MANUAL.FIREARMS ARE DANGEROUS WEAPONS –READ THE INSTRUCTIONS AND WARNINGSIN THIS MANUAL THOROUGHLY ANDCAREFULLY BEFORE USING.WARNING–ALTERATIONSThis product was designed tofunction properly in its originalcondition. Alterations can make itunsafe. Do not alter any part or addor substitute parts or accessoriesnot made by Sturm, Ruger & Co. Inc.DO NOT ALTER ANY GUNGENERAL INFORMATIONAND MECHANICAL CHARACTERISTICSThe RUGER ® M77 ® MARK II is a bolt action, magazine fed, repeating rifle.The receiver on all versions of the RUGER ® M77 ® MARK II rifleincorporates integral scope mount bases (see the illustration on p. 10). A set oftwo steel one-inch scope rings is included.Other notable features of RUGER ® M77 ® MARK II rifles include: A threepositionsafety, a fast lock-time steel trigger mechanism, a patented beddingsystem, quick release hinged floorplate with a newly designed floorplate latch,cut-checkered walnut stock with rubber recoil pad, and studs to which slingswivels can be attached. An “All-Weather ® ” version featuring stainless steelconstruction and a warp-proof synthetic stock is also available.9
All mechanical components are made of heat-treated chrome-molybdenum or stainlesssteel with music wire coil springs throughout the mechanism (except the magazinespring). The rifle is available in short, standard, and magnum action lengths, and in righthandedand left-handed versions.The RUGER ® M77 ® MARK II Magnum Rifles are the first true “magnum length”actions offered by Sturm, Ruger. By combining a specially reinforced and lengthenedreceiver with a massive banded barrel, with an integral solid rib onto which specialfolding leaf Express sights with wide “V” notches have been dovetail mounted, Ruger hasproduced a modern big game rifle for the discriminating sportsman.The RUGER ® M77 ® MARK II Express Rifles are the first deluxe standard lengthactions offered by Sturm, Ruger. The barrel incorporates an integral solid rib onto whichspecial folding leaf Express sights with wide “V” notches have been dovetail mounted.This is a modern deluxe rifle with superior quality wood and features usually found onlyon custom rifles.The RUGER ® M77 ® MARK II Target Rifle is purpose-built for long range precisiontarget shooting. It features a heavyweight hammer-forged barrel, target grade laminatedwood stock, and a special two-stage target trigger (see p. 11 “Special Safety Note”). Allexposed stainless steel components on the Target Grey TM model feature Ruger’s unique,corrosion-resistant, low-glare finish.The RUGER ® M77 ® MARK II Compact Model has a specially designed stock with a12 3/4” length of pull, shorter forend, and a 16 1/2” lightweight barrel for ease of carry indense cover.The RUGER ® M77 ® MARK II Frontier Rifle features a shorter stock and 16 1/2”barrel like the Compact Model and includes front scope mounting barrel ribs. TheFrontier Rifle allows for fast “eyes-open” target acquisition in a short, easy to carrypackage. Patented Ruger scope rings and a Weaver-style scope base adapter are included.NOMENCLATURESAFETY SELECTOR (shown on “SAFE”)COCKING PIECEBOLT SLEEVESCOPE MOUNT BASES (integral)RECEIVERBARRELTRIGGERBOLT HANDLETRIGGER GUARDFLOORPLATE LATCHEXTRACTOR STOCKFLOORPLATE(Standard Model Shown)Figure 1. Right-handed version shown. In this illustration the cocking piece is showncocked (protruding from the rear of the bolt sleeve). The bolt stop (on the left side of thereceiver) permits the bolt to be withdrawn simply by pulling it out to the left. The safetyselector should be in the “Load-Unload” position when the bolt is being removed or installed.10
SPECIAL SAFETY NOTEM77 MARK II TARGET RIFLE ONLYThe special model you have selected is specifically designed for long-rangeprecision target shooting. As such, it demands that you take extra safetyprecautions.The special trigger in the Target version of the RUGER ® M77 ® MARK IIhas a two-stage pull, both for safety and precise placement of shots. Initialmovement of the trigger is relatively “slack” until resistance is felt afterapproximately 1/8” of travel. Final let-off of the trigger is then crisp and light.You should practice “dry-firing” an empty rifle (with it pointing in a safedirection) to learn the “feel” of the trigger before ever loading it withammunition.WARNING –TARGET TRIGGERThis precision Target trigger has beencarefully adjusted at the factory to aminimum safe weight of pull (part#D02202), overtravel (part #D02201), andsear engagement (part #D02201).Do not alter any factory setting! You cancreate an unsafe condition and the riflemay fire unexpectedly.You should be especially careful to keepthe safety on at all times except whenactually firing and keep your finger offthe trigger unless you are squeezing it tofire, in order to minimize the possibilityof accidental discharge.DO NOT TAMPER WITH TRIGGER –KEEP SAFETY ON UNLESS FIRINGOPERATION OF SAFETYThe RUGER ® M77 ® MARK II rifle has a three-position safety. The safetyselector is located at the right of the bolt sleeve (on the left of the bolt sleeve onleft-handed versions).The safety selector can be moved from the “Fire” position to its two otherpositions (“Load-Unload” and “Safe”) only when the firing pin is cocked. Fullyraising the bolt handle cocks the firing pin.The bolt handle can be raised and lowered only when the safety selector is ineither the “Fire” or the “Load-Unload” position. When the safety selector is in the11
“Safe” position, the bolt handle is locked in the closed (full down) position, inorder to prevent inadvertent lifting of the bolt handle and to ensure that the riflewill be ready to fire when the safety is moved to the “fire” position.Practice (with an unloaded rifle) moving the safety selector to the three positionsuntil you know the position of the safety selector for the three modes– “Fire,”“Load-Unload,” and “Safe.” WARNING: When manipulating the safety selector,DO NOT HAVE ANY FINGER INSIDE THE TRIGGER GUARD! When the safetyselector is in the “Fire” position and the trigger is pulled, the rifle will fire.The safety selector should always be in the “Safe” position except when the gunuser is actually firing or unloading the rifle. The safety selector shouldunfailingly be moved to the “Safe” position when the gun user ceases firing.SAFETY POSITIONS(Right-handed rifle shown)Figure 2. Safety selector in“FIRE” (full forward) position.The safety selector should bemoved to this position only whenthe gun user is actually firing therifle. When the safety selector isin the fire position, it is referredto as being “off.” (When the safetyis in the “SAFE” position, it isreferred to as being “on.”)Figure 3. Safety selector in“LOAD-UNLOAD” (middle)position. The safety selector shouldbe in this position when the bolt isbeing cycled to load a cartridge, orto unload a live round. As soon asa cartridge is chambered, thesafety selector should be moved tothe “SAFE” position unless therifle is to be fired immediately.Figure 4. Safety selector in“SAFE” (full rearward) position.The safety selector is fully nestedin the groove in the cocking piece.When the safety selector is in thisposition, the bolt handle cannotbe raised. The curved arrow on thebolt sleeve indicates the directionand motion of the safety selectorto bring it to the “SAFE” position.Keep the safety selector in thisposition except when actuallyloading, unloading, or firing.WARNING –MANUAL SAFETY1 SAFE3 FIRE2LOAD-UNLOADKeep the safety on unless actually firing. Alwaysmove the safety fully to its intended position andcheck it. The safety has three positions –“SAFE,”“LOAD-UNLOAD,” and “FIRE.” Never depend on asafety mechanism or any other mechanical device tojustify careless handling or permitting the rifle topoint in an unsafe direction. The only “safe” rifle isone in which the bolt is open and the chamber andmagazine are empty.KNOW HOW TO USE THE SAFETY12
The safety selector is held in each of its three positions by a plunger that is underspring tension. Therefore, the gun user should frequently check the position ofthe safety selector to be certain it has not been inadvertently moved. If the safetydoes not function properly, or if the selector seems to move too easily, or if thesafety selector does not seem firmly positioned in any of its three positions, therifle should be discontinued from use and returned to the Newport ProductService Department for repair (see p. 29).WARNING – LEAD EXPOSUREDischarging firearms in poorly ventilatedareas, cleaning firearms, or handlingammunition may result in exposure tolead and other substances known to thestate of California to cause birth defects,reproductive harm, and other seriousphysical injury. Have adequate ventilationat all times. Wash hands thoroughly afterexposure.SHOOTING OR CLEANING GUNSMAY EXPOSE YOU TO LEADAMMUNITIONRUGER ® M77 ® MARK II rifles are chambered for many of the mostpopular factory-loaded cartridges manufactured in accordance with U.S. industrypractice. The particular caliber for each rifle is rollmarked on the barrel. Usecartridges only of the designated caliber that is marked on the barrel. Please see“Warning - Ammunition” and “Warning - Loading” on page 14.Ruger M77 Mark II Express bolt action rifles are chambered for either the .270,.300 Magnum, 7mm, .338 Magnum, or .30/06 cartridges in all factory loadings.The Ruger Express Rifle magazine capacity is three cartridges.Ruger M77 Mark II Magnum bolt action rifles are chambered for either the .416Rigby, .404 Jeffery, .375 H&H Magnum, or .458 Lott cartridges in all factoryloadings. The Ruger Magnum Rifle magazine capacity is three cartridges in .416Rigby, three cartridges in .404 Jeffery, four cartridges in .375 H&H, and fourcartridges in .458 Lott.AMMUNITION (CARTRIDGES) NOTICEWE SPECIFICALLY DISCLAIM RESPONSIBILITY FOR ANY DAMAGEOR INJURY WHATSOEVER OCCURRING IN CONNECTION WITH, ORAS A RESULT OF, THE USE IN ANY RUGER FIREARMS OF FAULTY,OR NON-STANDARD, OR “REMANUFACTURED” OR HAND-LOADED(RELOADED) AMMUNITION, OR OF CARTRIDGES OTHER THANTHOSE FOR WHICH THE FIREARM WAS ORIGINALLY CHAMBERED.13
WARNING –AMMUNITIONDeath, serious injury, and damagecan result from the use of wrongammunition, bore obstructions,powder overloads, or incorrectcartridge components. Even thestrongest gun can be blown up byexcess pressure. Only use correctammunition loaded to U.S. IndustryStandards. Always wear shootingglasses and hearing protectors.IMPROPER AMMUNITIONDESTROYS GUNSTO LOAD AND FIREPractice the important aspects of gun handling described below (with anunloaded rifle) until you can perform each of the steps with skill and confidence.But before loading the rifle, please read completely through this manual, and becertain the muzzle is pointing in a safe direction. Do not load the rifle until youare ready to use it!(The following procedure assumes a new rifle with the bolt out).1. Keep the muzzle pointed in a safe direction (See Rule 2, p. 42).2. Position the safety selector in the “Load-Unload” position (see Figure 3, p. 12).3. Insert the bolt in the receiver in accordance with “To replace bolt” instructionson Page 22.4. Draw the bolt fully to the rear.WARNING –LOADINGKnow the caliber of your rifle you are loading and loadcartridges of only that caliber into it!Before loading, be certain the primer of each cartridge is seatedflush with, or below, the surface of the cartridge case base. Acartridge discharged by the closing of the bolt can result inpossible serious injury to the shooter and those nearby.If a cartridge does not chamber readily, do not force it. Checkthe bore and chamber to be certain that each cartridge is theproper caliber and of correct dimensions. If you cannotdetermine why the cartridge will not fit, clear the rifle of allcartridges and write or call the factory.The wrong ammunition can destroy your gun and result inserious injury.BE SURE WHAT YOU LOADIS CORRECT14
Loading the magazine: (Safety should be in “Load-Unload” position.) With the boltopen, and the floorplate in its closed and latched position, load cartridges of thecorrect caliber directly into the magazine from the top by pressing one cartridge ata time into the magazine.Loading the chamber: (Safety should be in “Load-Unload” position.) Do notchamber a cartridge until you are ready to shoot immediately. After loading themagazine, push the bolt handle forward. This will strip a cartridge from themagazine and push the cartridge ahead of the bolt into the chamber. Close the bolthandle fully downward and put the safety fully rearward to the “Safe” position.WARNING –HANDLINGNever carry the rifle loaded with thesafety selector in the “FIRE” position. Ifdropped or struck with the safety off, therifle may fire. Such a discharge can occurwith or without the trigger being directlystruck or touched. Never rest a loadedrifle against any object (wall, fence,vehicle, tree, etc.) because there is alwaysthe possibility that the rifle will be jarredor slide from its position and fall withsufficient force to discharge. Keep safetyon unless actually firing.Never lower (uncock) the firing pin witha loaded cartridge in the chamber. Undersuch circumstances the firing pin will bein direct contact with the primer of theloaded cartridge and a light accidentalblow to the firing pin can readily causethe gun to discharge.ANY GUN MAY FIRE IFDROPPEDTo single-load: (Safety should be in “Load-Unload” position.) Place a cartridgedirectly into the chamber and close the bolt. If there are cartridges in themagazine and it is desired to single-load a cartridge directly into the chamber,depress the top cartridge and push the bolt forward until the bolt face is wellahead of the rim of the top cartridge in the magazine. Then, close the bolt.WARNING: DO NOT TOUCH THE TRIGGERUNTIL YOU ARE ACTUALLY READYTO FIRE THE RIFLE.15
To fire the rifle: When a cartridge is chambered and the rifle is pointed in a safedirection, put the safety in the “Fire” position. Pulling (squeezing) the triggerwill discharge the cartridge. Always be certain that you know where the bulletwill strike when you fire the rifle. Never allow the thumb to touch the cockingpiece when firing as it can be pinched when the cocking piece moves forward tofire the rifle.IMPORTANT SAFETY NOTEOWNERS OF M77 MARK II TARGET RIFLES - SEE PAGE 11 FORIMPORTANT INFORMATION ABOUT FIRING YOUR RIFLE,WHICH IS EQUIPPED WITH A SPECIAL TARGET TRIGGER.WARNING –FIRINGWhen firing the M77 ® Mark II be sure thatbystanders are well clear of the shooter andstanding a safe distance to the rear. Emptycartridge cases are hot and are normally ejectedfrom the rifle to the right. They could causeinjury to any person who is standing too closelyalongside the shooter. Shooters who fire righthandedrifles from their left shoulder should beparticularly cautious concerning ejectedcartridge cases and the back of the bolt as it isdrawn rearward.EJECTED BRASS IS HOTTO UNLOAD RIFLE AND MAGAZINE(Keep the Rifle Pointed in a Safe Direction)UNLOAD THE RIFLE IMMEDIATELY WHEN YOU ARE FINISHED SHOOTING.1. Move the safety selector to the “Load-Unload” position if the firing pin iscocked.2. Lift the bolt handle fully and then pull it completely to the rear to ejectchambered cartridge.3. Inspect the chamber to be certain the cartridge has been extracted. Leave boltopen. Do not unload magazine by feeding cartridges into chamber.4. Push rearward the small latch in the front of the trigger guard to open thehinged floorplate and empty the cartridges from the magazine. Hold the otherhand under the floorplate so as to retard the opening of the spring loadedfloorplate and catch the cartridges in the palm of the hand.5. Close the bolt fully.6. Move the safety selector in the “Fire” position and with the rifle pointed in asafe direction, pull the trigger.16
CORRECT UNLOADING SEQUENCE2SAFETY IN"LOAD-UNLOAD"POSITION134WARNING – UNLOADING17Removing cartridges from the magazinedoes not prevent the rifle from being fired!When there is a cartridge in the chamberand the safety selector is in the “Fire”position, the cartridge will discharge if thetrigger is pulled. It is absolutely essentialfor the user to know how to completelyunload it.“Completely” means emptying themagazine and removing a chamberedcartridge. The safety selector shouldalways be in the “Load-Unload” positionwhen the rifle is being unloaded. See the“Operation of Safety” section of thismanual.GUN WILL FIRE WITHEMPTY MAGAZINETO CLEAR A MALFUNCTION (“JAM”)If a jam occurs, immediately put the safety selector in the “Load-Unload’position and be certain the muzzle of the rifle is at all times pointing in asafe direction.Then study the situation to determine the nature of the jam and how best toclear it.–If a cartridge or fired case is caught between the bolt and the barrel, oragainst a cartridge that is in the chamber, open the hinged floor plate andempty the cartridges from the magazine. Then retract the bolt fully andremove the jammed cartridge or case.
–When attempting to extract a cartridge that is “stuck” in the chamber donot use any type of tool that is likely to act as a “firing pin” and dischargethe cartridge should the tool impact on the primer.–After clearing a jam, inspect the gun mechanism to determine if dirt mightbe the cause of the problem. Excess lubricant or grease can causecartridges to feed sluggishly or fail to extract. An accumulation of grease ordirt on the face of the bolt, under the extractor, in the chamber, or in themagazine can contribute to cartridge feeding problems. (See section on“Care and Cleaning” page 23.)–After clearing a jam, inspect all cartridges that have been removed fromthe gun. Safely dispose of any cartridges which are in any way damaged.–If it appears that the rifle is not at fault and that the jam was caused by thetype of cartridge being used, then try another type.–Examine your fired cartridge cases. If they have split, blown or bulgedheads, stop using that ammunition and promptly return the rifle to thefactory for examination.–If the above procedures do not result in a smooth and reliable feedingfirearm, don’t use the rifle. The RUGER ® M77 ® MARK II can bereturned directly to our Newport Product Service Department forinspection and repair, if required. See the “Service and Parts Policy”section of the manual for packing and shipping information.WARNING – MALFUNCTIONS➞If a cartridge hangs up, jams, or binds whenbeing chambered or when being fed from themagazine into the chamber, do not attempt toforce it into the chamber by pushing or strikingthe bolt handle.Most failures of a cartridge to feed or tochamber are caused by improper loading of themagazine or ammunition that is incorrect ordefective.Whatever the cause, the gun user must, aboveall, recognize that jams can result in the verypotentially dangerous situation of a cartridgedischarging before it is chambered. If thisoccurs, the cartridge case will rupture and itsfragments will fly out of the gun with sufficientforce to cause injury. Always wear shootingglasses and hearing protectors!STRIKING PRIMER CANBURST CARTRIDGE18
TO MINIMIZE MALFUNCTIONS (“JAMS”)Firearms of all makes and types are susceptible to occasional malfunctioning dueto a cartridge not feeding from the magazine to the chamber, or due to acartridge or fired case not being extracted and ejected.To minimize the possibility of such occurrences the gun user should:–Use ammunition of the correct caliber and type which is loaded to U.S.Industry Specifications. Do not use cartridges that are deformed orcartridges that have been reloaded.–Clean and lubricate the gun in accordance with the instructions in thismanual.–Learn to correctly operate the bolt and how to properly load and empty thechamber and magazine.–If the mechanism shows signs of not functioning correctly, or if a part isdamaged or broken – don’t use the rifle. Have it inspected and repaired.For most repairs we recommend that Ruger guns be returned to the factory.However, if a gun has a cartridge in it which cannot be removed, then it is aviolation of Federal Regulations to ship that loaded gun whether it be by U.S.Mail or by common carrier. Contact our Newport Product Service Department at(603) 865-2442.BASIC DISASSEMBLY AND REASSEMBLYWARNING –DISASSEMBLY2SAFETY IN"LOAD-UNLOAD"POSITION13Always unload a firearmbefore cleaning, lubrication,disassembly or assembly.4UNLOAD BEFORECLEANINGIt is preferable to carry out these procedures on a workbench or table which hasa covered top. A piece of shallow nap rug or an old, coarse blanket is an idealcovering. Such a covering not only reduces the chances of the rifle slipping andbeing scratched, but it serves also to trap pins, plungers and springs that mayotherwise get lost. It is advisable to have a container – such as a shoebox – inwhich each part can be placed as it is removed from the gun.19
Before attempting to disassemble the rifle for the first time, study the partsdrawing and parts list so as to be familiar with the relative position, appearanceand name of each part. Carry out the disassembly slowly and carefully note theposition of the part in the gun before starting to remove it. If a part is underspring tension (such as, the Safety Selector, Bolt Stop, Trigger) remove itcautiously and anticipate the direction the spring and plunger are most likely to“jump.”WARNING: If a spring or plunger become lost do not use a substitute. Springs ofcorrect tension are vital to the safe and reliable performance of firearms. Beforestarting disassembly, remove the sling, scope and rings and place the rear sightblade in its down flat position.DISASSEMBLY(Rifle Must Be Unloaded Prior To Disassembly)1. Keep the rifle pointed in a safe direction! Put the safety in the “Load-Unload”position.2. CHECK TO BE CERTAIN THAT THE CHAMBER AND MAGAZINE ARE EMPTY.3. To remove the bolt: Open bolt and pull to the rear while at the same timepivoting open the bolt stop which is located on the left side of the receiver onthe right-handed version and the right side of the receiver on the left-handedversion. This is as far as you need to dismantle the rifle for a routine cleaning.It is rarely necessary to proceed further.4. To remove firing pin assembly from bolt: With bolt out of the rifle and firingpin cocked, insert a pin or nail into the “disassembly hole” in the cockingpiece.NOTE: The pin or nail should be as close as possible in size to the holediameter, and at least 2 inches long so that it can be used to ‘lever’ the firingpin to the rear when reassembling the firing pin assembly into the bolt.Unscrew firing pin assembly and remove from bolt. (Caution: Do not removethe restraining pin until firing pin assembly is reassembled into bolt).CAUTION: The firing pin assembly is intended to be a permanentassembly and should not be disassembled. The parts are under greatspring pressure and if disassembled could fly apart with sufficient force tocause serious injury. Also, special tools are required to correctlyreassemble this part.5. To remove stock: Open floorplate and while holding it up out of the way,loosen and remove the screw that holds the floorplate hinge assembly. Next,loosen and remove the screw that is just forward of the trigger guard. Removetrigger guard. Remove magazine box. (If magazine box does not come outreadily, do not force it. It can be lifted out with the barrel-receiver assembly,but it must be done with great care.) Lift barrel from the stock very carefully.Lift the receiver at the same time as the barrel is lifted so that the barrelreceivercomes out of the stock level and not at an angle.6. To remove the trigger: (Safety Selector should be in the “Fire” position.)While holding the trigger in place, press out the trigger pivot pin.(Caution: Trigger is spring loaded.)20
7. To remove the sear:a. Press out the sear pivot pin.b. Turn receiver upside down and slide sear forward. Sear will drop out of thetop slot in the receiver.8. To remove safety assembly:a. Rotate the safety selector so that the upper section is positioned fully overthe center of the receiver tang.b. While holding the safety selector in place with thumb and forefinger, slidethe retainer up out of receiver. (Caution: Safety Selector is under springtension from a spring and plunger acting against the lower section of thesafety selector. The spring and plunger will jump out if not contained.)c. Lift out the safety selector.d. Remove the safety selector detent and safety selector detent spring.REASSEMBLY(Again, Be Sure Rifle Is Unloaded)1. To replace the safety assembly:a. Place the safety selector detent and safety selector detent spring into thehole in the receiver.b. Set the safety selector in place with its upper section positioned over thecenter of the receiver tang.c. While holding the safety selector in place with thumb and forefinger whileapplying downward pressure, slide the safety selector retainer into dovetailfrom the top. Align the notch in the safety selector retainer with the sear pivotpin hole.2. To replace the sear:a. Place the rear end (the end with the hole in it) of the sear into the slot fromthe top of the receiver. Swing the rear end of the sear up and slide the searinto position until the hole in the sear is aligned with the mating holes in thereceiver.b. Insert the sear pivot pin.3. To replace the trigger:a. Place the trigger/sear spring over the dimple in the trigger.b. Assemble the trigger while aligning the spring with the dimple on the sear.c. While holding the trigger in position, replace the trigger pivot pin.4. To replace the stock:a. Install magazine box on receiver.b. Place barrel-action assembly – with magazine box in place – into stock.c. Replace trigger guard and loosely install screws.d. Install floorplate hinge assembly and firmly tighten screw. (This screw isangled and draws the barrel-action assembly into the bedding surface of thestock.)e. Tighten the two trigger guard screws as follows: Do not tighten one screwall the way and then tighten the other. Instead, alternately tighten each one –a partial turn at a time – so that the screws will be tightened equally until bothare snugly tightened.21
5. To reassemble firing pin assembly into bolt:Screw the assembly fully into the bolt. The assembly is properly positioned inthe bolt when the flat on the bottom right side of the bolt sleeve (front of boltfacing you) is aligned with the flat on the bottom end of the bolt handle. Note:There is a shallow notch on the rear end of the bolt body – at the end of thecam cut – into which the nose of the cocking piece ‘fits.’ When the firing pinassembly is being turned into the bolt body, it may be necessary to use therestraining pin as a lever to slightly retract the cocking piece nose so it can bemoved into the notch. When the firing pin assembly is correctly positioned inthe bolt body, the restraining pin can be removed, but not before!6. To replace bolt:a. With bolt handle in an upward position and bolt head away from you, alignthe extractor with the right hand locking lug in the right-handed version orthe left locking lug in the left-handed version. Align the locking lugs with thechannels in each side of the rear of the receiver and partially insert the bolt.b. Push the bolt fully forward.REGARDING ACCURACY: The accuracy of any rifle can vary depending upon themake and type of cartridges used in it. Such being the case, if your RUGER ®M77 ® MARK II rifle does not perform to expectations, it is advisable to tryseveral brands and types of cartridges to determine which one delivers the bestaccuracy, before proceeding further. If your rifle is not as “accurate” as youbelieve it should be, before concluding that some serious fault exists, run thefollowing checks:1. Be certain the two trigger guard screws and the floorplate hinge screw aresnugly tightened as described in Step 4, p. 21, of the “Reassembly” section ofthis manual.2. Be certain the bore is clean and free from accumulated metal fouling(deposited by metal jacketed and lead bullets). See the “Care and Cleaning”section of this manual.3. Check the sights for tightness, setting and alignment.If everything is tight, the bore is clean, the sights are properly aligned and securebut the accuracy problem persists, DO NOT alter the stock bedding in any way.Do not scrape away wood and do not bed with “glass,” plastic, epoxy, etc. Once arifle stock has been altered, it cannot be reworked by our Product ServiceDepartment.If you still have an accuracy problem, write a brief letter to our Product ServiceDepartment in Newport, New Hampshire 03773 and describe the nature of theproblem based on the use of factory-loaded cartridges – not reloads. You willreceive a prompt response from us and if indicated, detailed instructions withregard to the return of the rifle.22
CARE AND CLEANINGWARNING: BEFORE CLEANING, BE CERTAIN THE RIFLEAND ITS MAGAZINE CONTAIN NO CARTRIDGES.A firearm must be free of rust, dirt, grease and firing residues to function safelyand reliably. Periodic maintenance, which includes inspection of components todetermine if they are in proper working order, is absolutely essential. Firingdeposits particles of bullet lubricant and powder in the bore, chamber, bolt,receiver, magazine and other parts of the rifle. There is no fixed rule as to howfrequently the cleaning should be carried out, but the alert gun owner soonlearns that any firearm functions most reliably and accurately when it is free ofaccumulations of grease and other firing residues.Basic cleaning equipment includes: A correct size cleaning rod equipped withbore brushes (fiber and brass) and a tip in which a cloth patch can be inserted,patches, powder solvent, lubricant, small lint-free cloths and a toothbrush. Usecorrect size patches and brushes. Larger sizes will bind in the bore and can bevery difficult to remove! Insert rod from the chamber end of the barrel and pushfirmly so the patch or brush emerges from the muzzle. Don’t reverse the rodwhen a brush or patch is being used – it may bind. Don’t use patches or brushesdripping with solvent or oil. Use rod and brushes with care so as not to damagegun.1. For routine cleaning it is necessary only to remove the bolt and open thefloorplate.2. Push-pull a solvent-wetted patch through the bore several times. Next, using asolvent-wetted brush, run it the full length of the bore as many times as isnecessary to completely remove all foreign matter from the bore and chamber.Dry the bore with clean patches and examine it. If bore remains fouled, repeatthe brushing. Complete the cleaning by dry-patch wiping of bore and chamber.3. Use a clean, solvent-wetted patch to remove firing residue and dirt from all“reachable” surfaces inside the receiver. Use the solvent-wetted toothbrush todislodge caked dirt from all parts of the bolt assembly and from surfaces insidethe receiver that can’t be reached with a patch. Use cleaning patches or thecloth to remove the solvent.4. Wipe all surfaces – internal and external – with a very light coat of oil. Oil andsimilar preparations “collect” dirt particles which can interfere with reliablefunctioning of the rifle. Therefore, use these preparations very sparingly. Adrop of oil applied to the bolt assembly components, the pivot points of thetrigger mechanism, the safety, the bolt stop, and the magazine latch, will workinto all the parts that need lubrication.5. Reassemble the rifle and carefully wipe all solvent, lubricating and preservativepreparations from the stock.23
6. If the rifle is to be stored for an extended period, clean the rifle thoroughly.Disassemble to the extent described elsewhere in this manual, taking care toput pins and similar easily mislaid and “rolling” components in a tray. Rewipeall surfaces with preservative oil. Reassemble and store properly.WARNING –LUBRICATIONOILFiring a rifle with oil, grease, or any other material evenpartially obstructing the bore may result in damage to therifle and serious injury to the shooter and those nearby.Do not spray or apply lubricants directly on ammunition.If the powder charge of a cartridge is affected by thelubricant, it may not be ignited, but the energy from theprimer may be sufficient to push the bullet into the borewhere it may become lodged. Firing a subsequent bulletonto the obstructed bore may damage the rifle and causeserious injury or death to the shooter and those nearby.Use lubricants properly. You are responsible for the propercare and maintenance of your firearm.IMPROPER LUBRICATIONDESTROYS GUNSSTORAGEGUNS SHOULD NOT BE STORED LOADED!USE THE LOCKING DEVICE SUPPLIED WITH THE RIFLE FOR STORAGE.(SEE PAGE 6)Sturm, Ruger also offers gun safes for sale as a means to secure more than onefirearm. Please call (801) 377-7199 for details and ordering information.Do not store the rifle in a leather case or scabbard. Leather attracts moisture,even though it may appear to be dry.TO RENDER THE RIFLE INOPERATIVE FOR SAFE STORAGEWith the muzzle pointed in a safe direction, remove the magazine (if applicable),open the bolt, and check the chamber and the magazine to be sure the rifle iscompletely unloaded! Depress the bolt latch, located at the left rear of thereceiver on the right-handed version and the right rear of the receiver on theleft-handed version. Now pull the bolt fully to the rear. The bolt will come outthe rear of the receiver.Store the rifle and the bolt in different locations. When disassembled in thismanner, the rifle is inoperable. It is impossible to fire the rifle until the bolt hasbeen correctly replaced into the rifle’s receiver.To reassemble the rifle for firing, reinsert the bolt into the receiver from therear. With the muzzle pointed in a safe direction, close the bolt. Check to be surethat the bolt can be operated fully and freely. The rifle is now reassembled andcan be loaded and fired normally.24
While the rifle is less likely to be used by unauthorized persons whendisassembled in the above manner, it is always safest to store a firearm withthe supplied locking device correctly installed, or to store the firearm in a gunsafe or other secure location, away from children and unauthorized adults.Guns should always be stored securely, unloaded and separate from theirammunition.WARNING –STORAGENever place or store any firearm insuch a manner that it may bedislodged. Firearms should always bestored securely and unloaded, awayfrom children and careless adults. Usethe locking device originally suppliedwith this firearm for storage.The use of a locking device or safetylock is only one aspect of responsiblefirearms storage. For increased safety,firearms should be stored unloaded andlocked in a location that is bothseparate from their ammunition andinaccessible to children and any otherunauthorized person.STORE SECURELY & UNLOADEDMAINTENANCE OF STAINLESS STEEL RIFLESFirearms and components made of stainless steel are relatively more resistant tocorrosion than those of blued steel. However, in the interest of proper operationand long life of a stainless steel firearm, inspect it frequently and clean, lubricateand apply an appropriate rust preventative.Sometimes discoloration occurs from perspiration or from contact with sometypes of gun cases. Rusting may occur as a result of the firearm being exposed tomoisture, salt air or chemicals.Minor discoloration can usually be removed by rubbing the stainless area with anabrasive ink eraser, crocus cloth, or a “metal polishing” compound. When usingany of these abrasives, proceed with care and use light pressure to achieve ablending of “color” with those areas that are not discolored.25
External surfaces most subject to rusting from handling, or from exposure to theelements should be cleaned and wiped dry after use or after exposure to adverseconditions. If the rifle is to be stored, coat it with a light film of oil orpreservative. Where the rifle is in continuing use, and the presence of oil orgrease would be objectionable, then the external surfaces can be coated (aftercleaning and drying) with a paste wax formulated for use on metals. Apply thewax sparingly, allow time for it to dry hard, then buff lightly with a soft cloth.When applying the wax, take care that it does not get into the mechanism or onthe functioning parts or in the bore.ATTACHING RUGER SCOPE RINGSEach Ruger telescope ring is a mated assembly of a top and a base. Do not mixthe parts of the two ring assemblies as they are not interchangeable. On theunderside of each mounting ring assembly there is an integral lug, located offcenter with respect to the front and back sides of the mount. The lug is nearer tothe front surface. By reference to the lug, the mounting ring can be correctlyassembled with the front of the ring toward the muzzle of the rifle.1. Disassemble one ring and reassemble over the scope body between the turretand the eyepiece. Remember - the lug on the base should be on the front sideof the scope.2. Install the four top screws. Do not tighten.3. Disassemble the other ring and install it on the forward section of the scopetube with the lug forwardly also. Install the four top screws. Again, do nottighten.4. Assemble the rings to the receiver with the lugs engaging the recesses in thetop surface of the receiver. Tighten the clamp nuts so that the rings are lockedto the semicircular cuts on the sides of the receiver.5. Rotate the scope until cross-hairs are aligned properly and slide scope todesired eye relief. Then tighten the eight top screws each a bit at a time to gripthe scope body.6. Sight in according to the directions with your scope.SIGHT ADJUSTMENT(For Standard Rifles Equipped With Open Sights)The folding leaf rear sight is adjustable for elevation and windage. The slide mustbe moved one graduation to change the point of impact by approximately oneinch at 25 yards. Shooting to determine the slide setting for ‘zero’ at a particulardistance should be done from a bench rest and over a measured distance. Useonly a small screwdriver with a blade tip that exactly fits the screw-head. Loosenthe screws only slightly so the slide doesn’t move too freely. Move the slide in thedirection you want the point of impact of the bullet to move. When the slide ispositioned at the desired height, carefully tighten both screws.Lateral (windage) adjustment is made by “drifting’ the sight base in its slot. To26
move the sight, loosen the slotted screw (in the front section of the base) untilthe sight can be moved. Place a short brass rod against the sight base (and onlythe base) and tap the sight in the direction you wish to move the point of impact,then tighten the slotted screw.NOTE: The ‘rule’ of rear sight adjustment is: Move the sight in the directionthat you want the point of impact of the bullet to move. As examples, to raise thepoint of bullet impact, raise the elevation slide (blade). To move the point ofbullet impact to the right, move the sight to the right.SUGGESTED SIGHT PICTURETop of front sight even with top ofrear sight slide. Front sightcentered in notch of rear sightslide. Target bull’s-eye centered ontop of front sight.SIGHT PICTURE AND ADJUSTMENT FORMAGNUM AND EXPRESS MODELS ONLYBoth the Ruger Magnum and Express bolt action rifles are equipped with specialExpress type folding leaf rear sights mounted on a base dovetailed into the solidbarrel rib. The nonfolding leaf is set for approximately 50 yards. Use whicheverleaf is appropriate for the type of shooting you anticipate. Changes in elevationcan be made by raising or lowering the different sight leaves.Lateral (windage) adjustment is made by loosening the rear sight base lock screw(located atop the rib immediately behind the rear sight base) and carefullymoving the entire base in the direction you wish to move the bullet's point ofimpact. Tighten the screw securely before shooting the rifle. Repeat as necessaryuntil the rifle is zeroed.SIGHT PICTURE FOR MAGNUMAND EXPRESS MODELFront sight bead center inV-notch of rear sight. Targetplaced directly above bead.27
SPECIAL INSTRUCTIONS AND WARNINGFOR THE M77 ® MARK II FRONTIER RIFLEATTACHING WEAVER SCOPE BASE ADAPTER(for non-Ruger rings)1. Remove the two barrel screws(Key Nos. 4 & 5) as shown inFigure 5a. (Do not remove thetwo remaining screws.)2. Attach the sight base (Key No.7) using the two screwsremoved in step 1, and the twoscrews (Key Nos. 7a & 7b)provided with the base asshown in Figure 5b. Be carefulto locate the screws in thecorrect holes as shown inFigure 5b. Apply a removableliquid threadlocker per themanufacturer’s instructions.Figure 5aFigure 5bWARNING – SCOPE MOUNTINGThe Ruger M77 Mark II FrontierRifle is a compact rifle with ashorter stock, chambered forpowerful magnum cartridges thatgenerate heavy recoil. If you aregoing to mount a scope on yourFrontier Rifle, always use the frontscope mounting barrel rib to avoidinjury from the scope duringrecoil.If you are using a scope, you mustuse a scope designed with“intermediate eye relief” of from 7to 15 inches. Consult your scopemanufacturer for this information.DO NOT MOUNT SCOPEON RECEIVER OFM77 MKII FRONTIER RIFLES28
SERVICE AND PARTS POLICYIf you have any question with regard to the performance of your RUGER ®M77 ® MARK II rifle please write or call (603-865-2442) our Product ServiceDepartment in Newport, New Hampshire 03773, fully describing allcircumstances and conditions involved. If you should return your rifle to thefactory for repair, or order parts for it, please comply with the followingsuggestions for prompt service:WARNING: BEFORE SHIPPING ANYFIREARM, BE ABSOLUTELY CERTAIN THAT ITAND ITS MAGAZINE ARE UNLOADED. DONOT SHIP CARTRIDGES WITH A FIREARM.SHIPPING FIREARMS FOR REPAIRRUGER M77 ® MARK II rifles returned to the factory for repair should besent to: Sturm Ruger & Company, Inc., Product Service Department, 411 SunapeeStreet, Newport, New Hampshire 03773. Telephone (603) 865-2442.Guns should be sent prepaid. We will not accept collect shipments.The Federal Gun Control Act, as well as the laws of most States and localities, donot prohibit an individual (who is not otherwise barred from purchasing orpossessing a firearm) from shipping a firearm directly to the manufacturer forrepair. However, before you ship your rifle to us, be certain that your State orlocality does not have a law or regulation which will prohibit you from receivingthe rifle from us after it has been repaired. If such receiving is prohibited, thenplease have a Federally Licensed firearms dealer ship the gun to us. If your rifle issent to us by a dealer, it will be returned to him after being repaired. If a handgun(pistol or revolver) is shipped by an individual who does not hold a FederalFirearms License, it must be shipped for overnight delivery via U.P.S., FederalExpress or other, similar private overnight service. NOTE: Firearms may not beshipped via U.S. Mail. Persons who do not hold a Federal Firearms License areprohibited by Federal law from shipping a handgun by Mail. Handguns mailed inviolation of the law are impounded by the Post Office.DO NOT SEND GUN BOXES OR LITERATURE THAT YOU CONSIDER TO BECOLLECTOR’S ITEMS – THESE ARE INVARIABLY DAMAGED OR DESTROYEDIN SHIPMENT. Please do not include rifle case, sling, telescopic sights or customaccessories with a firearm being shipped to the factory for service. Rifles andshotguns may be shipped via Parcel Post. Always insure your shipment.Enclose a letter which includes your name, address, telephone number, serialnumber and model of the firearm. Describe in detail the trouble you haveexperienced with your firearm, or the work you wish to have done. Merely statingthat the firearm “needs repair” is inadequate information.29
Work performed will bear a net minimum labor charge of $20.00 plus a $12.00shipping and handling charge. The charge for rebluing the M77 ® MARK IIrifle is $50.00 plus a $12.00 shipping and handling charge. Custom gunsmithingservice for nonstandard alterations are NOT AVAILABLE from Ruger ProductService Departments.WARNING –PARTS PURCHASERSIt is the purchaser’s responsibility to beabsolutely certain that any parts ordered fromthe factory are correctly fitted and installed.Firearms are complicated mechanisms andIMPROPER FITTING OF PARTS MAY RESULTIN A DANGEROUS MALFUNCTION, DAMAGETO THE FIREARM, AND SERIOUS INJURY TOTHE SHOOTER AND OTHER PERSONS. Thepurchaser and installer of parts must accept fullresponsibility for the correct adjustment andfunctioning of the rifle after such installation.PARTS MUST FIT CORRECTLYORDERING PARTSPlease contact the New Hampshire Product Service Department for partsavailability and current prices. All parts orders for the RUGER ® M77 ®MARK II should be sent to: Sturm, Ruger & Co., Inc., Product ServiceDepartment, 411 Sunapee Street, Newport, New Hampshire, 03773, 603-865-2442. We cannot comply with open account or C.O.D. requests. Payment in theform of a check, money order, Visa or Mastercard must accompany your order.Credit Card orders must include the account number, expiration date andwhether it is a Visa or Mastercard account. Minimum parts order is $1.00 plus a$3.50 shipping and handling charge. Order parts by Part Number and Part Nameand include the entire serial number of the firearm for which the parts are beingordered. There is a minimum net labor charge of $20.00 plus $12.00 shippingand handling if the parts are factory fitted. All factory-fitted parts are fitted on anexchange basis only. We will not return the replaced parts.Because the receiver of the M77 ® MARK II rifle is a serial numberedcomponent, it is defined as a “firearm” by Federal law and is not sold as aseparate component.*Parts designated by an asterisk must be factory fitted. These parts are fitted onan exchange basis only. We will not return the replaced parts. We will not returnany part that is broken, malfunctioning, badly worn or has been modified. See“Warning — Parts Purchasers,” above.CAUTION: Firearm users are cautioned that a gun containingmodified, broken, malfunctioning, or badly worn parts should notbe fired.30
RUGER ® M77 ® MARK II RIFLEPARTS LISTDesign, prices and specifications subject to change without notice.SPECIFY MODEL AND CALIBER WHEN ORDERING(See Exploded Views on Pages 38 - 41)31Part Name Part No. Model* Barrel - Blued 0D8014 Standard, Ultra Light, Left-handed - Blued Models* Barrel - Stainless K0D8014 Ultra Light, Left-handed, Sporter - Stainless Models* Barrel - Blued 0D8080 Magnum* Barrel - Blued 0D8055 Express* Barrel - Blued 0D8004 International* Barrel - Stainless K0D8062 Target* Barrel - Blued 0D8085 Compact* Barrel - Stainless K0D8085 CompactBarrel Band, Not Illustrated D-66 Magnum 416 RigbyBarrel Band, Not Illustrated D06602 Magnum 375 H & H* Bolt Assembly, Complete - Blued 70011 All Blued Models* Bolt Assembly, Complete - Stainless 70010 All Stainless ModelsBolt Stop - Blued D-53 All Blued ModelsBolt Stop - Stainless KD-53 All Stainless ModelsBolt Stop Plunger D-56 All Blued ModelsBolt Stop Plunger KD-56 All Stainless ModelsBolt Stop Plunger Spring D-57 All ModelsBolt Stop Plunger Spring Retaining Pin D-59 All Blued ModelsBolt Stop Plunger Spring Retaining Pin KD-59 All Stainless ModelsBolt Stop Stud Bushing D-55 All Blued ModelsBolt Stop Stud Bushing KD-55 All Stainless Models
32Part Name Part No. ModelBolt Stop Stud Screw - Blued Models D-54 Standard, Ultra Light, Left-handed, Express, Magnum, International, CompactBolt Stop Stud Screw - Stainless Models KD-54 Ultra Light, Left-handed, Sporter, CompactBolt Stop Stud Screw KD-54T TargetCenter Mounting Screw D04700 All Blued ModelsCenter Mounting Screw KD04700 All Stainless ModelsCocking Piece, Not Illustrated - Blued D01801 Standard, Ultra Light, Express, Magnum, International, CompactCocking Piece, Not Illustrated - Stainless KD01801 Ultra Light, Sporter, CompactCocking Piece, Not Illustrated D01803 Left-handed - Blued ModelCocking Piece, Not Illustrated KD01803 Left-handed - Stainless ModelCocking Piece, Not Illustrated KD01801T TargetEjector - Blued D00803 All Blued ModelsEjector - Stainless KD00803 All Stainless ModelsEjector Pivot Pin KD09000 All ModelsEjector Spring KD00900 All ModelsEscutcheon, Not Illustrated D05100 MagnumExtractor KD01434 All ModelsExtractor Band KD-15 All Models except Target ModelExtractor Band KD-15T TargetFerrule, Left Side, 3 Req’d W01015 Standard & Ultra Light Models with Synthetic StockFerrule, Right Side, 3 Req’d W01014 Standard & Ultra Light Models with Synthetic Stock* Firing Pin Assembly - Blued D21102 All Blued Models except Left-handed Model* Firing Pin Assembly - Stainless KD21102 All Stainless Models except Left-handed Model* Firing Pin Assembly - Blued D21105 Left-handed - Blued Model* Firing Pin Assembly - Stainless KD21105 Left-handed - Stainless ModelFiring Pin Cross Pin D-19 All ModelsFiring Pin Spring D-135 All ModelsFloor Plate D00501 Magnum
33Part Name Part No. ModelFloor Plate Assembly - Alloy, Long Action D20511 ExpressFloor Plate Assembly - Satin Finish, KD20511 All Models with Laminated StocksLong ActionFloor Plate Assembly - Aluminum - Blued D20506 Standard, Ultra Light, Left-handed, International, Compact - Blued ModelsFloor Plate Assembly - Aluminum - Clear D20503 Ultra Light, Left-handed, Target, Sporter, Compact - Stainless ModelsFloor Plate Hinge - Blued Models D-7 Standard, Ultra Light, Left-handed, Express, Magnum, International, CompactFloor Plate Hinge - Stainless Models KD-7 Ultra Light, Left-handed, Sporter, CompactFloor Plate Hinge KD-7T TargetFloor Plate Latch - Blued Models D03100 Standard, Ultra Light, Left-handed, Express, Magnum, International, CompactFloor Plate Latch - Stainless Models KD03100 Ultra Light, Left-handed, Sporter, CompactFloor Plate Latch KD03100T TargetFloor Plate Pivot Pin D-6 All Blued ModelsFloor Plate Pivot Pin KD-6 All Stainless ModelsForearm Insert, Right Side, Black Plastic J00430 Standard & Ultra Light Models with Synthetic StockForearm Insert, Left Side, Black Plastic J00431 Standard & Ultra Light Models with Synthetic StockForearm Insert, Right Side, Wood J00411 Standard & Ultra Light Models with Synthetic StockForearm Insert, Left Side, Wood J00412 Standard & Ultra Light Models with Synthetic StockFront Mounting Screw D04601 All Blued ModelsFront Mounting Screw KD04601 All Stainless ModelsFront Sight Base - Blued D06502 InternationalFront Sight Base - Blued D06507 ExpressFront Sight Base - Blued S06502 MagnumFront Sight Base - Stainless KS06500 Stainless Models w/SightsFront Sight Base Set Screw D-70 Standard & Sporter Models w/Sights, Express, Magnum, InternationalFront Sight Blade Assembly D06702A Standard & Sporter Models w/Sights, InternationalFront Sight Blade Assembly D06709A ExpressFront Sight Blade Assembly S06702A Magnum
34Part Name Part No. ModelFront Sight Plunger Spring D-69 Standard & Sporter Models w/Sights, Express, Magnum, InternationalFront Sight Retainer Plunger D-68 Standard & Sporter Models w/Sights, Express, Magnum, InternationalFront Sling Swivel Screw S-86B Standard, Ultra Light, Left-handed, Target, Sporter, CompactFront Sling Swivel Screw D-75A Express, MagnumFront Sling Swivel KJ00420 Standard & Ultra Light Models with Synthetic StockFront Sling Swivel Pin KJ00422 Standard & Ultra Light Models with Synthetic StockInsert Screw, Rear, Black Plastic KD00491 Standard & Ultra Light Models with Synthetic StockInsert Screw, Front, Black Plastic KD00490 Standard & Ultra Light Models with Synthetic StockMagazine Box D22703 MagnumMagazine Box - Long Action D22707 Specify Model & CaliberMagazine Box - Short Action D22700 Specify Model & Caliber (except 22/250)Magazine Box - Short Action D22710 22/250 Caliber OnlyMagazine Follower KD03004 MagnumMagazine Follower, with tab - Long Action KD03023 Specify Model & CaliberMagazine Follower, with tab - Short Action KD03025 Specify Model & Caliber (except 22/250)Magazine Follower - Short Action D-147 22/250 Caliber OnlyMagazine Latch Spring D-32 All ModelsMagazine Spring - Short Action D-149 22/250 Caliber OnlyMagazine Spring D-148 All Models except 22/250 CaliberPistol Grip Cap - Plastic D08003 Standard, Express, Ultra Light, Left-handed, International, Sporter, CompactPistol Grip Cap - Steel S-97 MagnumPistol Grip Cap Medallion D-82 Standard, Express, Ultra Light, Left-handed, International, Sporter, CompactPistol Grip Cap Medallion - Brass S-61 MagnumPistol Grip Cap Screw C-96SM Standard, Express, Ultra Light, Left-handed, International, Sporter, CompactPistol Grip Cap Screw S-36 MagnumPistol Grip Insert, Right Side, Black Plastic J00428 Standard & Ultra Light Models with Synthetic StockPistol Grip Insert, Left Side, Black Plastic J00429 Standard & Ultra Light Models with Synthetic Stock
35Part Name Part No. ModelPistol Grip Insert, Right Side, Wood J00409 Standard & Ultra Light Models with Synthetic StockPistol Grip Insert, Left Side, Wood J00410 Standard & Ultra Light Models with Synthetic StockPistol Grip Insert Screw KW01300 Standard & Ultra Light Models with Synthetic StockPlunger Latch Spring SC-41 TargetRear Mounting Screw D04800 Standard, Ultra Light, Left-handed, International, Compact - Blued ModelsRear Mounting Screw KD04800 Ultra Light, Left-handed, Sporter, Compact - Stainless ModelsRear Mounting Screw D04802 Express, MagnumRear Mounting Screw KD04800T TargetRear Sight, Complete D-77 Standard & Sporter Models with Sights, International* Rear Sight, Complete D07707 Express* Rear Sight, Complete D07702 MagnumRear Sight Clamp Screw, 2 Req’d D-64 Standard & Sporter Models with Sights, Express, Magnum, InternationalRear Sight Williams Gib Lock Clamp, D-83 Standard & Sporter Models with Sights, Express, Magnum, International2 Req’dRear Sling Swivel KJ00421 Standard & Ultra Light Models with Synthetic StockRear Sling Swivel Pin KJ00423 Standard & Ultra Light Models with Synthetic StockRear Sling Swivel Stud S-87 All ModelsRecoil Pad D06304 All Models except StainlessRecoil Pad OU06308 Stainless ModelsRecoil Pad, with Spacer & Insert D06315 Old Synthetic Stock ModelsRecoil Pad Screw, 2 Req’d D-84 All ModelsRecoil Pad Screw, 2 Req’d B-91 Standard & Ultra Light Models with Synthetic Stock* Recoil Plate Assembly, Not Illustrated D29204 Magnum* Recoil Plate Mounting Screw, Not Illustrated D-75 Magnum* Safety Selector - Blued Models J03800 Standard, Express, Magnum, Ultra Light, International, Compact* Safety Selector - Stainless Models KJ03800 Ultra Light, Target, Sporter, Compact* Safety Selector D03802 Left-handed - Blued Models* Safety Selector KD03802 Left-handed - Stainless ModelsSafety Selector Detent J04300 All ModelsSafety Selector Detent Spring D-32 All Models
36Part Name Part No. Model* Safety Selector Retainer - Blued Models J02100 Standard, Express, Magnum, Ultra Light, International, Compact* Safety Selector Retainer - Stainless Models KJ02100 Ultra Light, Target, Sporter, Compact* Safety Selector Retainer D02101 Left-handed - Blued Models* Safety Selector Retainer KD02101 Left-handed - Stainless ModelsScope Base Clamp D-74 All Blued ModelsScope Base Clamp KD-74M All Stainless ModelsScope Base Nut D-73 All Blued ModelsScope Base Nut KD-73M All Stainless ModelsScope Base Torx ® Head Screw, 8 Req’d MPF07602 All Blued ModelsScope Base Torx ® Head Screw, 8 Req’d KMPF07602 All Stainless ModelsScope Rings, Medium rings, D71M All Blued ModelsAccomodates 42mm LensScope Rings, Medium rings, KD71M All Stainless ModelsAccomodates 42mm LensScope Rings, Medium rings, Gray Stainless KD71HTG Target* Sear KD02302 All Models Except Target Model* Sear KD02306 TargetSear Pivot Pin D04200 All ModelsStock Assembly, Walnut D00408 Standard, Ultra LightStock Assembly, Old Style Synthetic, D20410 Standard, Ultra LightComplete with Plastic InsertsStock Assembly, Synthetic, D30436 Standard, Ultra LightFull ContourStock Assembly, Laminated D00477 SporterStock Assembly, Laminated D00450 Left-handed - Stainless ModelsStock Assembly, Walnut D00461 Left-handed - Blued Models* Stock Assembly, Circassian Walnut D20486 Express* Stock Assembly, Circassian Walnut D20488 MagnumStock Assembly, Walnut Manlicher D00462 InternationalStock Assembly, Laminated D00495 Target
37Part Name Part No. ModelStock Assembly, Walnut D00443 Compact - Blued ModelsStock Assembly, Black Laminated D00444 Compact - Stainless ModelsStock Cross Bolt, Not Illustrated D-91 MagnumStock Cross Bolt Nut, Not Illustrated D-90 MagnumTake Down Screw, Not Illustrated B-65 MagnumTorx ® Key Wrench, Not Illustrated MPF07601 All Models(for scope base Torx ® Head Screw)* Trigger KD02001 Standard, Express, Ultra Light, International, Sporter, Compact* Trigger KD02005 Magnum* Trigger KD02007 Left-handed* Trigger, Primary KD02017 Target* Trigger, Secondary KD02019 TargetTrigger Adjustment Screw D02202 Target(weight of pull)Trigger Adjustment Spring D04901 TargetTrigger Guard Assembly D20201 Standard, Ultra Light, International, Compact - Blued ModelsTrigger Guard Assembly KD20201 Ultra Light, Target, Sporter, Compact - Stainless ModelsTrigger Guard Assembly D20202 Express, Magnum, Left-handedTrigger Guard Assembly KD20202 Left-handed - Stainless ModelsTrigger Overtravel/Sear Engagement Screw, D02201 Target2 Req’dTrigger Pivot Pin D-19 All ModelsTrigger/Sear Spring J02400 All Models Except Target ModelTrigger/Sear Spring D02401 TargetTrigger Spring Seat KD02021 Target* PARTS SO MARKED MUST BE FITTED
RUGER ® M77 ® MARK II RIFLEEXPLODED VIEW38
RUGER ® M77 ® MARK IIMAGNUMEXPLODED VIEW39
RUGER ® M77 ® MARK IITARGET RIFLESYNTHETIC STOCK40
RUGER ® M77 ® MARK IIFRONTIER RIFLECOMPONENT PARTS LIST(See Exploded View on Page 38 for Other Parts)Key No. Part Name Part No.1 Barrel Rib Dowel, Front S-1522 Barrel Rib Dowel, Rear S-1513 Barrel Rib D013304 Barrel Rib Screws, 2 Req’d S-1385 Barrel Rib Center Screws, 2 Req’d D061016 Scope Rings, Low, Sold as Pair S100RL7 Scope Base Adapter D08800(Includes Key Nos. 7a & 7b)7a Scope Base Screw, Front D061027b Scope Base Screw, Rear D0610141
THE BASIC RULES OF SAFE FIREARMS HANDLINGWe believe that Americans have a right to purchase and use firearms for lawfulpurposes. The private ownership of firearms in America is traditional, but thatownership imposes the responsibility on the gun owner to use his firearms in away which will ensure his own safety and that of others. When firearms are used ina safe and responsible manner, they are a great source of pleasure and satisfaction,and represent a fundamental part of our personal liberty.Firearms do not cause accidents! Firearms accidents are almost always found tohave been the result of carelessness, or ignorance on the part of the shooter of thebasic rules of safe gun handling.The following rules must be observed by gun users at all times. Safe gun handlingis not just desirable, it is absolutely essential to your safety, the safety of others, andthe continuation of gun ownership and sport shooting as we know it today.1. LEARN THE MECHANICAL AND HANDLINGCHARACTERISTICS OF THE FIREARM YOU ARE USING.Not all firearms are the same. Themethod of carrying and handlingfirearms varies in accordance with themechanical provisions for avoidingaccidental discharge and the variousproper procedures for loading andunloading. No person should handleRUGER ®INSTRUCTION MANUALREAD THE INSTRUCTIONSAND WARNINGS IN THISMANUAL CAREFULLY BEFOREUSING THIS FIREARM.any firearm without first havingthoroughly familiarized himself withthe particular type of firearm he isusing, and with safe gun handling ingeneral.2. ALWAYS KEEP THEMUZZLE POINTED IN ASAFE DIRECTION.Be sure of the bullet stop behind yourtarget, even when dry-firing. Never letthe muzzle of a firearm point at anypart of your body or at another person.This is particularly important whenloading or unloading a firearm. In theevent of an accidental discharge, noinjury can occur as long as the muzzleis pointing in a safe direction. A safedirection means a direction which willnot permit a discharged bullet to strikea person, or to strike an object fromwhich the bullet may ricochet.42
A safe direction must take into account the fact that a bullet maypenetrate a wall, ceiling, floor, window, etc., and strike a person ordamage property. Make it a habit to know exactly where the muzzle ofyour gun is pointing whenever you handle it, and be sure that you arealways in control of the direction in which the muzzle is pointing, evenif you fall or stumble. Keep your finger off the trigger until you are readyto shoot.3. FIREARMS SHOULD BE UNLOADED WHEN NOT INUSE.2SAFETY IN"LOAD-UNLOAD"POSITION134Firearms should be loaded onlywhen you are in the field or on thetarget range or shooting area,ready to shoot. Firearms andammunition should be securelylocked in safes, racks or cabinets,or by using the locking devicesupplied with the firearm, whennot in use. Ammunition shouldsafely be stored separate fromfirearms. Store your firearms outof sight of visitors and children. Itis the gun owner’s responsibility tobe certain that children andpersons unfamiliar with firearmscannot gain access to firearms,ammunition, or components.4. BE SURE THE BARREL IS CLEAR OF OBSTRUCTIONSBEFORE SHOOTING.Even a bit of mud, snow or excesslubricating oil or grease in thebore may cause the barrel tobulge, or even burst on firing, andcan cause serious injury to theshooter and bystanders. Be surethat you are using ammunition ofthe proper caliber and loading forthe gun you are using. If thereport or recoil on firing seemsweak, or doesn’t seem quite right,CEASE FIRING IMMEDIATELY,unload your firearm, and check tobe sure that no obstruction hasbecome lodged in the barrel.Never try to shoot out an obstruction!43
5. BE SURE OF YOURTARGET BEFORE YOUSHOOT.Don’t shoot unless you knowexactly where your bullet is goingto strike. Be sure of the bulletstop behind your target, evenwhen dry-firing with an unloadedgun. If you are in the fieldhunting, do not fire at amovement or noise. Take the timeto be absolutely certain of yourtarget before you pull the trigger.6. WEAR SHOOTINGGLASSES AND HEARINGPROTECTORS WHENYOU SHOOT.All shooters should wearprotective shooting glasses andadequate hearing protectors whenshooting. Exposure to shootingnoise can damage hearing, andadequate eye protection whenshooting is essential.7. NEVER CLIMB A TREEOR FENCE WITH ALOADED FIREARM.Put the firearm down carefullybefore climbing a fence, andunload it before climbing ordescending a tree or jumping overa ditch or other obstruction. Neverpull or push a loaded firearmtoward yourself or another person.When in doubt, or whenever youare about to do anything awkward,unload your gun!44
8. DON’T SHOOT AT AHARD SURFACE, OR ATWATER.Bullets can glance off manysurfaces like rocks or the surfaceof water and travel inunpredictable directions withconsiderable velocity.9. NEVER TRANSPORT ALOADED FIREARM.Firearms should always beunloaded before being placed in avehicle. A suitable carrying caseor scabbard should be used tocarry an unloaded firearm to andfrom the shooting area.10. AVOID ALCOHOLICBEVERAGES WHENSHOOTING.Don’t drink until the day’sshooting is over. Handlingfirearms while under theinfluence of alcohol in any form,or medications that could affectyour judgement or coordination,constitutes a criminal disregardfor the safety of others.45
A BRIEF ACCOUNT OF AN EXTRAORDINARYACHIEVEMENT: RUGER FIREARMSOne of the few American firearms manufacturers whose management hasremained in the same family since starting in business, Sturm, Ruger &Company, Inc., had its beginning in a small machine shop occupying arented frame building in Southport, Connecticut. In January, 1949, withan initial investment of only $50,000 and an idea, William B. Ruger andAlexander M. Sturm started production of a 22 caliber autoloadingpistol–a design which was so successful that it became the cornerstoneupon which one of the most comprehensive lines of sporting firearmsever made in America was established. After Alex Sturm’s death in 1951,William B. Ruger continued to direct the Company until his death in2002. Today, William B. Ruger, Jr. continues to provide guidance whichhas made this Company a sound and successful enterprise.Sturm, Ruger & Company, in this relatively short time, has establisheditself as a leading small arms design organization, developing a uniqueand broad line of fine quality sporting, military and police firearms tobecome one of the world’s most famous producers of revolvers, pistols,rifles and shotguns. Since 1949 Ruger craftsmen have built manymillions of firearms.During its five decades of growth and progress under the leadership ofWilliam B. Ruger, the Company developed a business philosophy andimplemented policies which represent a constructive influence in the lifeof modern America. From the beginning, Sturm, Ruger & Companyplayed a positive role in conservation efforts and has supported theinterests of shooters through such groups as the National RifleAssociation, National Shooting Sports Foundation, and many regionalsportsmen’s organizations.The Company has always endeavored to market its firearms forconstructive and recreational purposes, to emphasize the traditionalaspects of shooting, to render meaningful public services and toencourage shooters in constructive, responsible, and safe participation inthe shooting sports. Its motto is “Arms Makers For ResponsibleCitizens.”Today, Sturm, Ruger & Company is particularly mindful of thoseelements which have contributed to the creation of its success, andextends heartfelt thanks to its many loyal employees and customers.A current catalog of Ruger firearms is available free upon request toSturm, Ruger & Co., Inc., Southport, CT 0689046
WHY NO WARRANTY CARD HAS BEENPACKED WITH THIS NEW RUGER FIREARMThe Magnuson-Moss Act (Public Law 93-637) does not require anyseller or manufacturer of a consumer product to give a writtenwarranty. It does provide that if a written warranty is given, it must bedesignated as “limited” or as “full” and sets minimum standards for a“full” warranty. Sturm, Ruger & Company, Inc. has elected not toprovide any written warranty, either “limited” or “full”, rather than toattempt to comply with the provisions of the Magnuson-Moss Act andthe regulations issued thereunder. There are certain impliedwarranties under state law with respect to sales of consumer goods. Asthe extent and interpretation of these implied warranties varies fromstate to state, you should refer to your state statutes. Sturm, Ruger &Company wishes to assure its customers of its continued interest inproviding service to owners of Ruger firearms.STURM, RUGER & Company, Inc.Southport, Connecticut 06890 U.S.A.www.ruger.comArms Makers For Responsible Citizens ®A COPY OF THE INSTRUCTION MANUAL FOR ANY RUGERFIREARM IS AVAILABLE FROM THE FACTORY FREE ON REQUEST, OR IT MAYBE DOWNLOADED FROM OUR WEBSITE AT WWW.RUGER.COM.THESE INSTRUCTION MANUALS CONTAIN IMPORTANTWARNINGS WHICH MUST BE UNDERSTOODBEFORE USING THESE FIREARMS.“10/17,” “22/45,” “Model 96,” “P90,” “P91,” “P93,” “P94,” “P95,” “P97,” “P345,” “P345D,” “Mark III,”“P345PR,” and “Super Redhawk Alaskan” are RUGER TRADEMARKS. “RUGER,” THE STURM, RUGERLOGO, “AC-556,” “Arms Makers For Responsible Citizens,” “10/22,” “All-Weather,” “Bearcat,” “Bisley,”“Blackhawk,” “Gold Label,” “GP100,” “Hawkeye,” “M77,” “Mini Thirty,” “Mini-14,” “Old Army,” “P85,”“Redhawk,” “Ruger Titanium,” “77/17,” “77/22,” “77/44,” “77/50,” “SP101,” “Vaquero,” “Security-Six,”“Service-Six,” “Single Six,” “Speed-Six,” the “SR” Design and “Target Grey” areREGISTERED U.S. TRADEMARKS.“DEERFIELD” is a registered trademark of Blount, Inc.