Modensa Chest - Mamas & Papas
Modensa Chest - Mamas & Papas
Modensa Chest - Mamas & Papas
- No tags were found...

You also want an ePaper? Increase the reach of your titles
YUMPU automatically turns print PDFs into web optimized ePapers that Google loves.
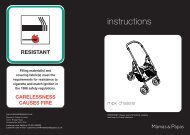
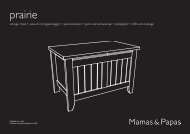
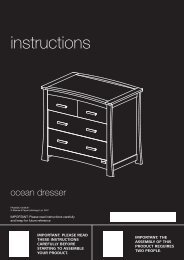
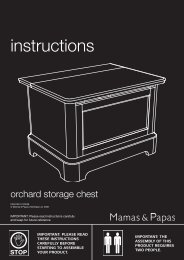
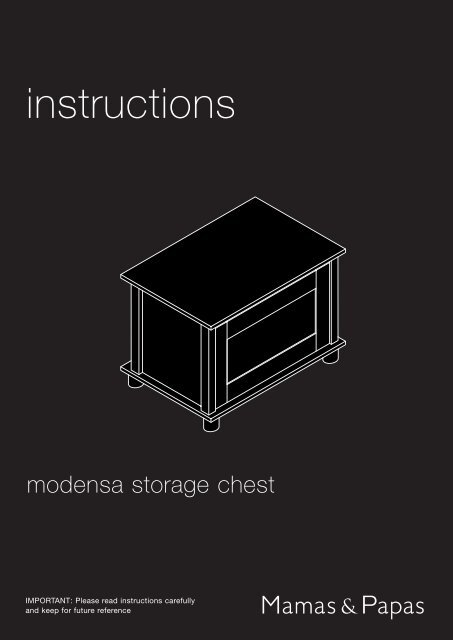
instructionsmodensa storage chestIMPORTANT: Please read instructions carefullyand keep for future reference
MODENSA STORAGE CHESTTHESE INSTRUCTIONS ARE IMPORTANT. PLEASE READ THEM CAREFULLY AND RETAIN FOR FUTURE REFERENCE.Before assembling your storage chest...Unpack all wooden components / fittings and identify them against the fittings andcomponents lists (below and over the page).Do not discard any packaging until you are certain you have all the correct panels and fittingsIf any items are damaged or missing, contact us on 01484 438222. Please do not contactthe retailer.WOODEN COMPONENTS65312747Item Name Part no. Qty1 Base panel 3547---00001 12 Left side panel 3547---00002 13 Right side panel 3547---00003 1Item Name Part no. Qty5 Back panel 3547---00005 16 Top 3547---00006 17 Feet 3523---00008 44 Front panel 3547---00004 1- 2 -
A x 12FITTINGSB x 12Wooden dowelsC x 12Cam studsD x 12CamsE x 2Assembly screwsF x 2Hinge plateG x 2Hinge armH x 1Fall stayGlueTOOLSFittings pack part no. 3547---00001Cross-head ScrewdriversTo fit: B, D & G.HammerTo be used for: AFlat-head ScrewdriverTo fit: C.GLUING THE DOWELSWhen fitting the dowelsplace a small amount ofglue (T) in the holesprior to pushing thedowels into them.Any excess glue shouldbe wiped awayimmediately using adamp cloth.- 3 -
STEP 2Select the base panel (1)from the woodencomponents.Turn it upside down soyou can see the fourmetal inserts.Screw the threaded pinson the ends of the feet(7) into the metal insertsin the base panel.71STEP 3Turn the base over andscrew four cam studs(B) into the smallerholes in the top of thebase panel using a crossheadscrewdriver, seediagram.B- 4 -
Lay the two side panels(2/3) flat on the floorwith the fittings holesfacing upwards.32STEP 4Insert four cams (C) intothe large holes on theinside faces of bothpanels. Ensure the arrowon the top of the camfaces the connectinghole.Insert four dowels (A)into the holes along thebottom edges of theside panels. Do notinsert dowels into thecams connection holes,see diagram.CAYou may need to gentlytap the dowels into thepanels using a smallhammer.3STEP 5Screw eight cam studs(B) into the smallerholes in the legs on bothof the sides.Screw the cams in usinga cross-head screwdriver.2B- 5 -
Insert eight cams (C)into the largest holes onthe inside faces of boththe front (4) and back(5) panels. Ensure thearrow on the top of thecam faces theconnecting hole.4STEP 6Insert eight dowels (A)into the holes along theouter edges of both thefront and back panels.Do not insert dowelsinto the cams connectionholes, see diagram.5CYou may need to gentlytap the dowels into thepanels using a smallhammer.A5STEP 7Attach the hinge plates(E) to the top of theback panel (5).Tighten the screws intothe pre-drilled holes inthe panel using a crossheadscrewdriver.E- 6 -
35STEP 8Connect the front (4)and back (5) panels tothe left side panel (3).Insert all of the dowelsand cam studs into therelevant holes, seediagram.Ensure that all the headsof the cams face into thechest before turningthem clockwise with aflat bladed screwdriveruntil they are tight.42STEP 9Connect the right sidepanel (2) to the otherend of the front andback panel.Insert all of the dowelsand cam studs into therelevant holes, seediagram.Turn the cams clockwisewith a flat bladedscrewdriver until theyare tight.- 7 -
STEP 10Align the cam studs onthe base and the dowelson the sides, front &back panels with theirrelevant holes and pushtogether, see diagram.Tighten the cams byturning them clockwisewith a flat bladedscrewdriver until theyare tight.STEP 11Attach the two hingearms (F) to the top (6).Insert the front of thehinge arms into the largerecesses in the top, fix inposition using fourassembly screws (D) anda cross-head screwdriver.D6F- 8 -
Fasten the lid to thestorage chest by slidingthe hinge arm onto thehinge mounting plate.Once both of the hingearms are positioned onthe hinge mounting platesyou can tighten themounting screws ‘A’.STEP 12To adjust the lidforward/backward:Loosen screw A then turnscrew B clockwise/anticlockwise.Re-tightenscrew A.To adjust the lidup/down:Loosen screw A and slidethe hinge up or down.Re-tighten screw A.ABDSTEP 13Attach the fall stays (G)to the sides of thestorage chest by aligningthe holes in the plateson the fall stays with thepre-drilled holes in thesides of the chest.Screw four assemblyscrews (D) through theholes in the plates intothe pre-drilled holes inthe sides using a crossheadscrewdriver.G- 9 -
STEP 14Attach the fall stays (G)to the storage cheststop by aligning the holesin the brackets on thefall stays with the predrilledholes in the topof the chest.Screw assembly screws(D) through the holes inthe brackets into thepre-drilled holes in thetop using a cross-headscrewdriver.DSTEP 15To adjust the speed ofthe drop on the fall stay.Twist the plastic knob atthe bottom of the stayclockwise to increase thespeed of the lid shuttingand anti-clockwise toslow the speed of thetop shutting.- 10 -
INSTRUCTIONS FOR SAFE USE & MAINTENANCE1. WARNING: Never leave your child unattended. The safety of your child is your responsibility.2. Before use, ensure the storage chest is on a stable, level surface.3. Do not allow children to climb on the storage chest.4. Never use the storage chest if any parts are broken or missing.5. Wood is a natural product and as such it can be subject to occasional variations in colour. This isnot a defect and will not detract from the strength or performance of the storage chest.6. Never pivot or drag the storage chest on its feet, the storage chest must always be lifted by atleast two people when moved.7. Do not place the storage chest in the near vicinity of open fires or other sources of strong heat,such as electric or gas fires.8. Always leave the storage chest clean and dry. Wipe away any spillage straight away. Thestorage chest can be cleaned with a damp cloth or silicon wax polish. Never use abrasive, bleach orstrong detergents.9. Check regularly that all fittings and screws are correctly tightened and are not damaged.Due to constant updating and improvements, some components may occasionally differ slightly from the diagrams shown inthese instructions. Any spare components should be thrown away after you have fully constructed your product. We reservethe right to change the specifications of any piece of furniture without prior notice.AFTER SALES SERVICE: If when you receive your <strong>Mamas</strong> & <strong>Papas</strong> product you needassistance, spare parts or if you are unhappy with any aspect of the goods, pleasecontact our Customer Care Helpline on: 01484 438222, or e-mail us oncustomer.care@mamasandpapas.co.uk where one of our trained advisors will be ableto help you.You can also visit our website at www.mamasandpapas.co.uk for the latest product information.I0149: V1/01/03ALL OUR PRODUCTS ARE MADE FROM THE FINEST QUALITY MATERIALSAND ARE MANUFACTURED UNDER THE STRICTEST QUALITY CONTROLSWe guarantee all our products or part thereof, for a period of six months from the date of purchaseagainst faulty manufacture. This guarantee is not effective against damage caused as a resultof incorrect usage of the product or accidental damage. This in no way affects your statutory rights.GUARANTEETo validate this guarantee, please fill in the coupon and return to:<strong>Mamas</strong> & <strong>Papas</strong> Ltd, Colne Bridge Road, Huddersfield, West Yorkshire. HD5 0RH.Or alternatively, call our Guarantee Registration Line on 01484 438225 with your details, or visit our website on: www.mamasandpapas.co.uk.NameAddressPostcodeRetailerHome Phone No.Item purchased <strong>Modensa</strong> Storage <strong>Chest</strong> Purchase Date PriceBy validating your guarantee, your information will be entered onto our database. If you do not wish to receive information from other reputable companies, please let us know.- 11 -
www.mamasandpapas.co.uk<strong>Mamas</strong> & <strong>Papas</strong> LimitedColne Bridge RoadHuddersfield HD5 0RHcustomer care helpline: 01484 438222customer care e-mail: customer.care@mamasandpapas.co.uk