Model 610AR Installation and Maintence Instructions Drive Axle Air ...
Model 610AR Installation and Maintence Instructions Drive Axle Air ...
Model 610AR Installation and Maintence Instructions Drive Axle Air ...

You also want an ePaper? Increase the reach of your titles
YUMPU automatically turns print PDFs into web optimized ePapers that Google loves.
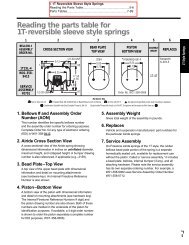
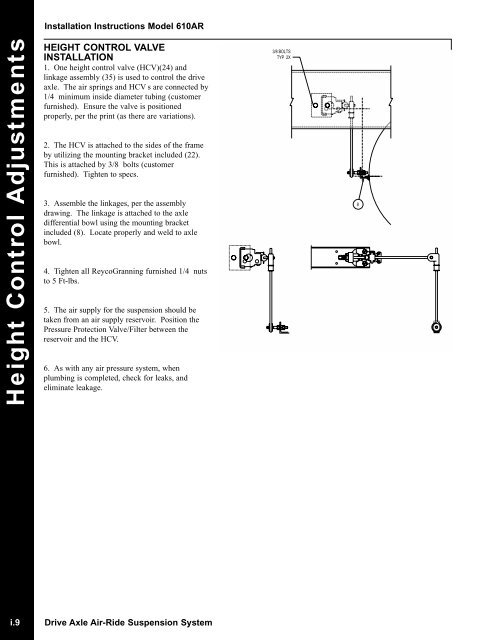
<strong>Installation</strong> <strong>Instructions</strong> <strong>Model</strong> <strong>610AR</strong>Height Control AdjustmentsHEIGHT CONTROL VALVEINSTALLATION1. One height control valve (HCV)(24) <strong>and</strong>linkage assembly (35) is used to control the driveaxle. The air springs <strong>and</strong> HCV s are connected by1/4 minimum inside diameter tubing (customerfurnished). Ensure the valve is positionedproperly, per the print (as there are variations).2. The HCV is attached to the sides of the frameby utilizing the mounting bracket included (22).This is attached by 3/8 bolts (customerfurnished). Tighten to specs.3. Assemble the linkages, per the assemblydrawing. The linkage is attached to the axledifferential bowl using the mounting bracketincluded (8). Locate properly <strong>and</strong> weld to axlebowl.4. Tighten all ReycoGranning furnished 1/4 nutsto 5 Ft-lbs.5. The air supply for the suspension should betaken from an air supply reservoir. Position thePressure Protection Valve/Filter between thereservoir <strong>and</strong> the HCV.6. As with any air pressure system, whenplumbing is completed, check for leaks, <strong>and</strong>eliminate leakage.3/8 BOLTSTYP 2X8i.9 <strong>Drive</strong> <strong>Axle</strong> <strong>Air</strong>-Ride Suspension System