i-Stat Kaolin Activated Clotting time - Point of Care Testing
i-Stat Kaolin Activated Clotting time - Point of Care Testing
i-Stat Kaolin Activated Clotting time - Point of Care Testing
- No tags were found...

Create successful ePaper yourself
Turn your PDF publications into a flip-book with our unique Google optimized e-Paper software.
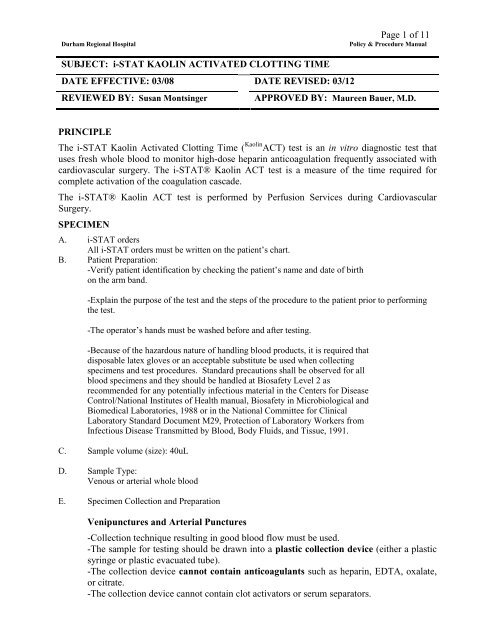
Durham Regional HospitalPage 1 <strong>of</strong> 11Policy & Procedure ManualSUBJECT: i-STAT KAOLIN ACTIVATED CLOTTING TIMEDATE EFFECTIVE: 03/08 DATE REVISED: 03/12REVIEWED BY: Susan Montsinger APPROVED BY: Maureen Bauer, M.D.PRINCIPLEThe i-STAT <strong>Kaolin</strong> <strong>Activated</strong> <strong>Clotting</strong> Time ( <strong>Kaolin</strong> ACT) test is an in vitro diagnostic test thatuses fresh whole blood to monitor high-dose heparin anticoagulation frequently associated withcardiovascular surgery. The i-STAT® <strong>Kaolin</strong> ACT test is a measure <strong>of</strong> the <strong>time</strong> required forcomplete activation <strong>of</strong> the coagulation cascade.The i-STAT® <strong>Kaolin</strong> ACT test is performed by Perfusion Services during CardiovascularSurgery.SPECIMENA. i-STAT ordersAll i-STAT orders must be written on the patient’s chart.B. Patient Preparation:-Verify patient identification by checking the patient’s name and date <strong>of</strong> birthon the arm band.-Explain the purpose <strong>of</strong> the test and the steps <strong>of</strong> the procedure to the patient prior to performingthe test.-The operator’s hands must be washed before and after testing.-Because <strong>of</strong> the hazardous nature <strong>of</strong> handling blood products, it is required thatdisposable latex gloves or an acceptable substitute be used when collectingspecimens and test procedures. Standard precautions shall be observed for allblood specimens and they should be handled at Biosafety Level 2 asrecommended for any potentially infectious material in the Centers for DiseaseControl/National Institutes <strong>of</strong> Health manual, Biosafety in Microbiological andBiomedical Laboratories, 1988 or in the National Committee for ClinicalLaboratory Standard Document M29, Protection <strong>of</strong> Laboratory Workers fromInfectious Disease Transmitted by Blood, Body Fluids, and Tissue, 1991.C. Sample volume (size): 40uLD. Sample Type:Venous or arterial whole bloodE. Specimen Collection and PreparationVenipunctures and Arterial Punctures-Collection technique resulting in good blood flow must be used.-The sample for testing should be drawn into a plastic collection device (either a plasticsyringe or plastic evacuated tube).-The collection device cannot contain anticoagulants such as heparin, EDTA, oxalate,or citrate.-The collection device cannot contain clot activators or serum separators.
Page 2 <strong>of</strong> 11-The sample should be immediately dispensed into the sample well <strong>of</strong> a cartridge.-If a second measurement is required, a fresh sample must be obtained.Note: CLSI guidelines recommend drawing and discarding a sample <strong>of</strong> at least 1 mLprior to drawing sample for coagulation testing.In-dwelling line-Fluid drip through the line must be discontinued.-If blood must be drawn from an indwelling line, possible heparin contamination andspecimen dilution should be considered. The line should be flushed with 5 mL <strong>of</strong> salineand the first 5 mL <strong>of</strong> blood or six dead space volumes should be discarded.-Withdraw the sample for testing into a fresh plastic syringe.-The collection syringe cannot contain anticoagulants such as heparin, EDTA, oxalate,or citrate.-The sample should be immediately dispensed into the sample well <strong>of</strong> a cartridge.-If a second measurement is needed, draw a fresh sample.Extracorporeal line-Flush the extracorporeal blood access line by withdrawing 5 mL <strong>of</strong> blood into a syringeand discard the syringe.-Withdraw the sample for testing into a fresh plastic syringe.-The collection syringe cannot contain anticoagulants such as heparin, EDTA, oxalate,or citrate.-The sample should be immediately dispensed into the sample well <strong>of</strong> a cartridge.-If a second measurement is needed, draw a fresh sample.F. Criteria for Specimen Rejection-Sample drawn in a glass syringe or tube-Sample drawn in a device containing anticoagulants-Sample drawn in a device containing clot activators or serum separators-Sample not dispensed into cartridge immediatelyG. Sample Transfer DeviceBlunt End DispensersTo avoid the use <strong>of</strong> needles when transferring a blood sample from an evacuatedtube, a blunt end dispenser can be used.REAGENTS AND SUPPLIESA. ReagentsTest CartridgesThe i-STAT Test Cartridge is a self contained testing system. Each cartridge isconsidered a "run", with no reuse <strong>of</strong> reagents or carry-over <strong>of</strong> specimen.Each i-STAT <strong>Kaolin</strong> ACT cartridge provides a sample collection chamber, sensors to detectthe coagulation endpoint, and dry reagents necessary to initiate and allow coagulation.Stabilizers and reagents are coated on a section <strong>of</strong> the sensor channel and include kaolinand thrombin substrate as active ingredients.
Page 3 <strong>of</strong> 11Cartridges in sealed pouches are stable through the expiration date when storedrefrigerated at 2 to 8°C and for two weeks at room temperature (18 - 30°C). DO NOTRETURN CARTRIDGES TO THE REFRIGERATOR ONCE THEY HAVE COME TOROOM TEMPERATURE.Upon removal from refrigeration, a box <strong>of</strong> 25 cartridges requires one hour equilibration atroom temperature before use. Individual cartridges require five minutes equilibration. Acartridge should be used immediately after it is removed from the pouch.B. Supplies1. i-STAT System Componentsa. Portable Clinical Analyzerb. Electronic Simulatorc. Reagent Cartridged. Printer (hand held)e. IR Interface Cradlef. Disposables (as appropriate for sample application)2. Blood Collection SuppliesQUALITY CONTROLa. 2 x 2 Gauzeb. Alcohol Padsc. Tourniquetd. Venipuncture Supplies (Needles, Syringes)Quality control (QC) is the process designed to ensure that a test system is working properly. Thei-STAT system daily quality control is an electronic simulator. Liquid control solutions for verification <strong>of</strong>cartridges are tested by the laboratory for each new lot number and/or shipment <strong>of</strong> cartridges received.Test comparisons for ACT kaolin and ACT celite are performed every 6 months in conjunction withcalibration verification.Pr<strong>of</strong>iciency <strong>Testing</strong> is performed 2 <strong>time</strong>s per year.1. Electronic Simulatora. External Electronic SimulatorThe Electronic Simulator is a stable electronic device whichverifies the electrical measurement circuits by producing signals attwo levels to check the accuracy and integrity <strong>of</strong> the circuits andthe electrical isolation between individual measurement channels.The results <strong>of</strong> the Electronic Simulator are "PASS" or "FAIL".External Electronic Simulator is used to verify a failed internal simulator test.Remove the external Electronic Simulator from storage. Insert the externalElectronic Simulator into the cartridge door to the i-STAT instrument.CONTRACTING CARTRIDGES will be displayed.Wait 70 seconds. PASS or FAIL will be displayed at the end <strong>of</strong> thesimulator test. The acceptable limits for the simulator are set internally;FAIL will be displayed if the limits are exceeded.If PASS is displayed, patient testing may be initiated.
Page 4 <strong>of</strong> 11If FAIL is displayed on the analyzer screen: Repeat the procedure with thesame external Electronic Simulator. If PASS is displayed use the analyzeras required. If FAIL is displayed repeat the procedure with a differentexternal Electronic Simulator.If PASS is displayed with the second external Electronic Simulator: Use theanalyzer as required. Deliver the questionable external Electronic Simulatorto the <strong>Point</strong> <strong>of</strong> <strong>Care</strong> <strong>Testing</strong> <strong>of</strong>fice.If FAIL is DISPLAYED with the second external Electronic Simulator: DONOT analyze patient samples with the analyzer. Transmit the results to theInformation Management System (IMS). Deliver the faulty analyzer to thelaboratory. The POC Coordinator will document the failure along with theaction taken in the IMS.Remove the external Electronic Simulator after the locked message “LCK”is no longer displayed and return to storage.The results <strong>of</strong> the external Electronic Simulator, the date, <strong>time</strong> and operatorID will be transmitted to the IMS via the infrared cradle for review andrecord keeping.Perform the Electronic QC in the following situations:1) When an internal Electronic Simulator fails.2) When an analyzer is brought from a cold environment to ahot, humid environment to insure that any moisture thatmay have condensed on the internal connector hasevaporated before performing patient tests.3) When the analyzer's batteries are changed.b. Internal Electronic SimulatorThe internal Electronic Simulator is selected on an 8/24 hour schedule.The internal Electronic Simulator will run every 8 hours for pH, pCO2,pO2, hematocrit and ACT channels and every 24 hours for all otherchannels.QC Lockout is enabled on all analyzers. This setting prevents analyzersfrom running a cartridge after a failed internal Electronic Simulator test.An internal Electronic Simulator is a circuit in the Analyzer whichverifies the performance <strong>of</strong> each Analyzer by testing signalsconsistent with both very low and very high concentrations <strong>of</strong> each <strong>of</strong>the analytes. The s<strong>of</strong>tware in the analyzer and module measure thesesignals as it would measure signals from a cartridge. The s<strong>of</strong>twarechecks the measurements against predetermined thresholds andindicates their acceptability to the use via a PASS/FAIL message.ACT analyte has quality control tested every 8 hours.The internal Electronic Simulator is triggered by inserting a cartridge.If the s<strong>of</strong>tware detects that the specified <strong>time</strong> has elapsed since thelast Electronic Simulator test (internal or external), it willautomatically perform the internal test before the sample is tested,adding about 15-20 seconds to the testing cycle. A failed Simulator
Page 5 <strong>of</strong> 11test stops the cycle, the FAIL simulator result will be displayed on thescreen, and the sample will not be analyzed. If the test passes, thecartridge cycle continues to completion and the cartridge results aredisplayed.What to do when the internal Electronic Simulator Test FAILS:ACT testing: Collect a new sample and repeat in another analyzer.Rerun the cartridge in the analyzer that failed to ensure that the FAILwas not due to a one-<strong>time</strong> spike <strong>of</strong> electrical noise. (Do not use theACT results <strong>of</strong> the rerun cartridge.) If the test fails again, use anexternal Electronic Simulator to verify proper performance <strong>of</strong> theFAILED analyzer. If the Analyzer passes the external simulator testyou may continue to use the analyzer. If the external simulator testfails send the analyzer to the laboratory for replacement.2. Verification <strong>of</strong> Cartridgesa. Verification <strong>of</strong> newly received cartridges (performed by Laboratory POC<strong>Testing</strong>.) Verify that the transit temperatures <strong>of</strong> each shipment were satisfactory usingthe four window temperature indicator strip affixed to the cartridge box. From each lot <strong>of</strong> i-STAT kaolin ACT test cartridges, two levels <strong>of</strong> controlsare tested each in duplicate, using any verified analyzer. Perform a parallel reagent check by testing quality control from theprevious lot numbers. Perform QC on the old cartridge lot number alongwith the new cartridge lot number and record results. Two levels <strong>of</strong> controls are tested monthly on each analyzer.i-STAT ACT Control Level 1 and Level 2Storage:i-STAT ACT controls are contained in 6-mL glass vials. Separate 6-mL Vials contain 1-3 ml <strong>of</strong> calcium chloride solution for reconstitution. Refrigerated storage at 2- 8 Cshould be maintained until the printed expiration date on the box and vial labels.Precautions:Use standard precautions when handling control solutions.Directions for use:Prior to testing cartridges for coagulation,vials containing the lyophilized plasma andreconstituting fluid should stand at room temperature (18 - 30 C) for a minimum <strong>of</strong> 45minutes. For best results, vials, cartridges, and analyzers should be at the sametemperature.Each control level is clearly marked on the box. It is important to work with only onecontrol at a <strong>time</strong>. Control solutions must be used immediately (less than 30 seconds)after completing the reconstitution and mixing steps. Reconstitute only one level <strong>of</strong>control plasma at a <strong>time</strong>.STEPACTION1 After 45 minute room temperature equilibration, remove the cap fromone lyophilized human plasma control vial and one vial <strong>of</strong> calciumchloride reconstituting fluid.2 Pour the entire contents <strong>of</strong> the calcium chloride vial into the lyophilized
Page 6 <strong>of</strong> 11human plasma control vial. Place the cap back on the reconstitutedcontrol, sealing the cap appropriately so that the contents do not leak orspill out.3 Allow the vial to sit at room temperature for 1 minute.4 Mix the contents <strong>of</strong> the vial by swirling gently for 1 minute, theninverting slowly for 30 seconds. NOTE: to minimize foaming <strong>of</strong> thecontrol sample,avoid vigorous or rapid mixing motion. Visuallyinspect the control vial to ensure that the sample is fully reconstituted.If not, discard the reconstituted fluid and start over with fresh vials.5 Using a plastic transfer pipette, plastic syringe, or plastic capillary tubewith no anticoagulant, immediately transfer the solution from the vialinto the ACT cartridge.6 Immediately seal the cartridge and insert it into an analyzer.NOTE: additional ACT Cartridges may be tested with the remainingfluids if used within 30 seconds <strong>of</strong> complete reconstitution <strong>of</strong> thesample.Control Target Values and Expected RangesValue assignment sheets for each s<strong>of</strong>tware update and lot number <strong>of</strong> cartridges areavailable on the Abbott POC website. The ranges displayed represent the maximumdeviation expected when controls and cartridges are performing properly. Themanufacturer’s ranges are acceptable by historical data. Should results outside the rangebe obtained, refer to the Cartridge Troubleshooting section <strong>of</strong> the i-STAT SystemManual. Always be sure that the lot number printed on the value assignment sheetmatches the lot number on the label <strong>of</strong> the vial in use, and that the s<strong>of</strong>tware revisionabove the table matches the s<strong>of</strong>tware revision in the analyzer (check the status page <strong>of</strong> theanalyzer).b. Storage Conditionsi) Refrigerated Cartridgesa) Verify that the cartridges stored in the designated refrigerator areall within the expiration date printed on the boxes. Deliver anyexpired cartridges to the Laboratory POCT <strong>of</strong>fice.b) Verify that the refrigerator did not exceed the limits <strong>of</strong> 2-8 o C(25-46 o F).c) Document the refrigerator temperature daily.If the temperature <strong>of</strong> the cartridge storage refrigerator iswithin the range <strong>of</strong> 2-8 o C (35-46 o F), use cartridges asrequired.If the temperature is outside the range <strong>of</strong> 2-8oC (25-46oF)quarantine the cartridges in the storage refrigerator. Notifythe Laboratory POC Coordinator, Manager, or Supervisorimmediately. DO NOT USE the cartridges from the out-<strong>of</strong>-
Page 7 <strong>of</strong> 11control refrigerator. Record the QC failure with the actiontaken via a SRS report.ii.Room Temperature Cartridgesa) Verify that all boxes <strong>of</strong> cartridges at room temperature havebeen out <strong>of</strong> the refrigerator less than two weeks. Deliverany expired cartridges to the POCT <strong>of</strong>fice.b) If the measured temperature <strong>of</strong> the room has beencontinuously within the acceptable range (18°C- 30°C) usecartridges as required.If the measured room temperature has been outside theacceptable range (18°C- 30°C) for any period <strong>of</strong> <strong>time</strong>:Quarantine the cartridges. Notify the Laboratory POCCoordinator, Manager, or Supervisor immediately. DONOT use the cartridges. Record the out <strong>of</strong> control eventand the action taken via a SRS report.PROCEDUREA. The cartridge should be handled as follows to avoid difficulty in filling orrejection by the analyzer:-Do not contaminate the contact pads with finger prints or talc from gloves as theanalyzer may not be able to make proper contact with the cartridge.-Do not block the air vent as the sample will not be able to flow to the fill markand the calibrant solution will not be able to flow to the sensors.-Do not use a cartridge on which blood or any other fluid is spilled.B. Fill Test Cartridge1. Remove the cartridge from the protective foil pouch after it has come to room temperature.2. Place cartridge on a flat surface or hold it horizontally. Do not hold cartridge between thefingers if using a syringe with needle to fill the sample well.3. Collect the blood specimen.4. Direct the pipette tip or needle into the sample well.5. Dispense sample slowly and steadily until it reaches the FILL TO mark. Avoid theintroduction <strong>of</strong> air bubbles into the sample well.6. Leave some sample in the sample well.7. Complete the procedure without delay.C. Seal Test Cartridge1. Fold the plastic snap closure over the sample well.2. Press on the rounded end <strong>of</strong> the closure until it snaps into place. Slightly lift finger or thumb
Page 8 <strong>of</strong> 11and ensure that the cartridge is closed before completely removing finger or thumb from theclosure.3. Failure to seal the cartridge will prevent patient testing.D. Insert Test Cartridge into the i-STAT Analyzer1. The analyzer must remain on a flat surface with the display facing upduring testing. If the analyzer is not level, the ACT result may beextended by more than 10 %.2. Hold the analyzer firmly in one hand. Grasp the test cartridge by the sides, labelfacing up, with the other hand.3. Push the cartridge slowly and smoothly through the cartridge door until it will gono further.Do not attempt to remove a test cartridge while the "LCK" prompt is displayedindicating that the cartridge should not be removed. The force necessary toremove the cartridge would damage the analyzer and invalidate the results.E. Enter Identification Numbers1. Enter your DUHS Unique ID number for operator ID. Press the "ENT" key toEnter the completed number.2. After the ENT key is pressed, the prompt "Repeat #, ENT" appears in the box.Repeat the operator identification number as above and press ENT to signal theanalyzer that the last digit has been entered.3. Patient identification: enter the patient's account number in the same manner asthe operator ID number.4. If either the operator identification or the patient identification numbers are notentered correctly in duplicate, the message "ID DID NOT MATCH STARTAGAIN" will display. Re-enter the ID number that was in error.Operating rooms and “codes” present a unique testing situation in that tests are runrepeatedly on the same patient. Pressing the DIS key when prompted forPatient ID will recall the last Patient ID entered into the analyzer. The repeatrequest for Patient ID may also be entered by pressing the Display key.F. Test Cancelation OptionWhen testing an ACT kaolin cartridge, an option to cancel the test will appear on theanalyzer screen. The cancel test option will only appear after all the data entry has beencompleted. If the operator chooses to cancel the test, the result will display as “0”.G. View Results
Page 9 <strong>of</strong> 11The Portable Clinical Analyzer will display test results once the cartridge has been unlocked and theLCK prompt disappears. Results will be displayed for 45 seconds. Results can be recalled to thedisplay screen by pressing the display key.Results should either be transcribed onto the patient’s medical record ortransmitted to the portable printer or the IMS.H. Remove the Test Cartridge1. Remove the cartridge any <strong>time</strong> after the "LCK" prompt disappears from the display screen.Discard the cartridge in an appropriate Biohazard Waste receptacle.2. The analyzer display will deactivate after 45 seconds to save the battery. The last results canbe recalled by pushing "DISPLAY".3. Once a cartridge is removed, even if results are still displayed, theanalyzer is ready to accept another cartridge.I. Reporting Resultsi-STAT ACT results are displayed on the LED display as “WBT sec ___”.The i-STAT Analyzer will produce an audible beep as soon as the results are displayed. The resultsare displayed in numerical form. Results may be recorded on the patient's chart directly from the i-STAT LED display or printed and the printout placed on the patient's chart until the patient'slaboratory cumulative summary is charted. The i-STAT will accumulate a total <strong>of</strong> 50 test records(patients, control material, and electronic simulator tests). All information will be transmitted to theIMS, located in the Laboratory, via the IR Cradle.Expected ValuesReportable Range:Normal Baseline Reference Range:Initiation <strong>of</strong> CPBEmergency CPB50 -1000 seconds100-137 secondsgreater than 400 secondsgreater than 300 secondsUnusual or unexpected results should be recorded, reported to the physician and repeated asrequested.PTT is available if needed in the lab for further evaluation <strong>of</strong> questionable results.Report FormatRecord results in seconds on Perfusion record in OR.Printing Results:1. Place the analyzer in the printer cradle. Turn the printer on (printer light green) or press thepaper advance key to reactivate.2. To print the displayed test record, press the PRT key on the analyzer. The most recent testrecord can be printed only if a patient identification number has been entered or activelybypassed.3. Do not move the analyzer while "Printing" is displayed. Note: Results printed on thermalpaper will fade with <strong>time</strong> and, therefore, not acceptable as permanent chartable record.
Page 10 <strong>of</strong> 114. Write the patient's name on the Pt name line, the physician's name on the Physician line, andthe Sample type on the Sample type line.5. A stored test record can be printed without recalling the results to the screen. Press theMENU s<strong>of</strong>t key, select STORED RESULTS by pressing the "2" key. From the STOREDRESULTS Menu select PRINT RESULTS by pressing the "2" key. Use the s<strong>of</strong>t keys to pageup or down through the 10 pages <strong>of</strong> stored test records, press the 1 to 5 keys to select thedesired records on each page. When a key is pressed, the number selected will reserve video(dark background, light lettering). To deselect a record, re-press the key, the number willreturn to light background, dark lettering.The list <strong>of</strong> stored results can be listed with Cartridge Type or Date/Time. Use the DIS key totoggle between these display modes. When all the test records desired are selected, press thePRT key. The message "PRINTING..." will be displayed while the records are transmitted tothe printer. Each record will take about 45 seconds to print.6. To stop printing before all test records are printed, press the * key.7. A test record cannot be printed from a position displaying INVALID or NO DATA, anElectronic Simulator test or an error code.Transmitting Results to the Information Management System (IMS)1. Respiratory Therapy will transmit results to the IMS every 8 hours.2. Place the analyzer in the IR Interface cradle. The IR Interface light must be green.3. To transmit all stored test records, press the * key or access STORED RESULTS from themenu. Press the "3" key on the analyzer to transmit all test records.4. Do not move the analyzer while "Transmitting" is displayed.5. During transmission the IR Interface light will blink alternately red and green. Iftransmission is successful, the interface will emit a single high pitched beep, and the light willreturn to green. An unsuccessful transmission is indicated by three low tone beeps. In thiscase repeat the transmission process. If unsuccessful the second <strong>time</strong>, notify the LaboratoryPOC Coordinator.Transmitting Results from the IMS to the Lab Computer SystemTest records will be routinely transmitted to LIS/HIS automatically via an HL7 interface.CLINICAL SIGNIFICANCEThe ACT is primarily used to monitor a patient’s state <strong>of</strong> anticoagulation due to heparin that isadministered during a medical or surgical procedure. It is commonly employed in cardiaccatheterization, Percutaneous Transluminal Coronary Angioplasty (PTCA), renal dialysis,hemodialysis, and extra-corporeal circulation during bypass.LIMITATIONS OF PROCEDUREThe i-STAT <strong>Kaolin</strong> ACT test is to be used with fresh venous or arterial whole blood samples. Thepresence <strong>of</strong> exogenously added heparin, citrate, oxalate, or EDTA will interfere with test results.Poor technique in sample collection may also compromise the results. Samples drawn frominsufficiently flushed catheters or from traumatic venipunctures may be contaminated withinterfering substances. Samples should be collected into plastic syringes or tubes. Collectioninto glass may prematurely activate coagulation resulting in accelerated clotting <strong>time</strong>s.
Page 11 <strong>of</strong> 11The i-STAT kaolin ACT test is not significantly prolonged in the presence <strong>of</strong> aprotinin.The analyzer should remain on a level surface with the display facing up during testing. If theanalyzer is not level, the ACT result may be affected by more than 10%.Hemodilution may affect test results.Platelet dysfunction, hereditary or acquired, may affect test results. This includes theadministration <strong>of</strong> pharmacological compounds known as platelet inhibitors which affect plateletfunction. Factor deficiencies, dysprothrombinemias, other coagulopathies, and otherpharmacological compounds may also affect results.REFERENCEi-STAT kaolin ACT Cartridge and Test Information Sheet, revision 08/11. Abbott <strong>Point</strong> <strong>of</strong> <strong>Care</strong> Inc., EastWindsor, New Jersey.i-STAT System Manual, revised August, 2011. Abbott <strong>Point</strong> <strong>of</strong> <strong>Care</strong> Inc., East Windsor, New Jersey.Procedure Written By: Susan Montsinger, 03/08Procedure Revised By: Susan Montsinger, 06/09, 09/09, 02/12Procedure Reviewed By:___________________________________Maureen Bauer, M.D. Date Susan Montsinger, BS,MT(ASCP) DateSection Pathologist<strong>Point</strong> <strong>of</strong> <strong>Care</strong> Coordinator