Staff Training ACCU-CHEK® Inform Glucose Meter - Point of Care ...
Staff Training ACCU-CHEK® Inform Glucose Meter - Point of Care ...
Staff Training ACCU-CHEK® Inform Glucose Meter - Point of Care ...

You also want an ePaper? Increase the reach of your titles
YUMPU automatically turns print PDFs into web optimized ePapers that Google loves.
<strong>ACCU</strong>-CHEK® <strong>Inform</strong><strong>Glucose</strong> <strong>Meter</strong><strong>Point</strong>-<strong>of</strong><strong>of</strong>-<strong>Care</strong> Testing (POCT)<strong>Staff</strong> <strong>Training</strong>
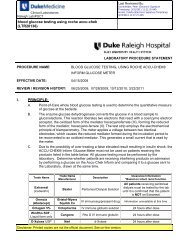
Scan barcode on the front <strong>of</strong> your badge.What is an Operator ID?• Your Duke Unique ID is yourOperator ID and is used toidentify you as the personperforming a glucose test.• Scan the bar-code on the front <strong>of</strong>your badge.• If your ID comes up “OperatorID is invalid” contact your unitPOC trainer.
Quality Control Frequency• Control testing must be performed at thefollowing times:– Within 24 hours <strong>of</strong> last control testing, or meterswill lock out patients testing.– When a new vial <strong>of</strong> test strips are opened– When a vial <strong>of</strong> strips has been left opened– If the meter is dropped,– When troubleshooting the meter, and– When patient test results contradict clinicalsymptoms.
<strong>ACCU</strong>-CHEK® Controls:• When opening a new box <strong>of</strong> <strong>ACCU</strong>-CHEK®Controls,– record the 90 day opened expiration date on each bottle’slabel, or.– Circle the manufacturer’s expiration date printed on thelabel, if less than 90 days.• Prior to performing QC, check the expiration dateon the control vials.• Store glucose control solutions at roomtemperature (less than 90°F, 32°C). Do not freeze.
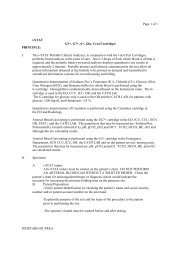
Touch “Control Test”and follow theprompts.Control TestingScan the barcodeon the control vial.
• Scan the barcode onthe glucose strip vial.• Remove strip from thevial.• Recap the vialimmediately.• With yellow target areafacing up, gently insertthe strip into the meter.Control Testing
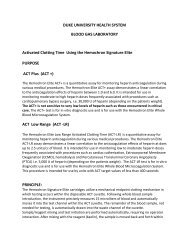
Start Patient Testing• Scan your Unique ID• Select “Patient Test” on the screen.• Scan the patient’s armband• Note: If the patient’s armband cannot be scanned, carefullyenter the patient’s encounter (account) number manually, andverify the identification in the meter before accepting the entry.
Always Identify the patientPer Hospital policy all patients must be identified with twoidentifiersPer hospital policy: “No hospital employee is to perform any test or procedure or transportany patient when an armband is missing or defaced” .ONLY USE ARMBANDS ATTACHED TO PATIENT….DO NOT USE:• Found laying in the patient’sroom,• Taped to the bed,• Found in the chart box,• Or at the nursing station.Who does the armband belong to?
“000001”• “Five zeros and a one” is used ONLY for CodesBlues and medical emergencies when the person isnot a registered patient or identifiable.• You must call the POCT <strong>of</strong>fice with the followinginformation:oooooyour name,location,date and time <strong>of</strong> test, result andthe patient’s name,and history or account number.• The POCT <strong>of</strong>fice must be notified <strong>of</strong> this result tocorrectly identify the patient and send the results tothe patient’s electronic record.
• Scan the barcode onthe strip vial.• Remove the strip fromthe vial and replace captightly.Note: Strip must be used within 3minutes after removing it from thevial.• Insert strip with yellowtarget area facing up.• Touch and hold seconddrop <strong>of</strong> blood to theside curved edge <strong>of</strong>strip.
Fill the test area!• Check strip whenapplying sample tomake sure that theyellow target areais filled.• Short sample =inaccurate results!• Repeat TestNO
Do not lay meter on s<strong>of</strong>tmaterials• There is a hole onthe bottom <strong>of</strong> thestrip.• The sample willdrain out <strong>of</strong> thestrip causinginaccurate resultsif the meter lays ona s<strong>of</strong>t surface.
CORRECT APPLICATION OF SAMPLEINCORRECT APPLICATION OFSAMPLENONOCORRECT APPLICATION OFSAMPLE• Place strip to the side <strong>of</strong> thedrop <strong>of</strong> blood to allow thetarget area to fill by capillaryaction.• When the hour glass appearson the meter check the yellowtarget area to verify there isno yellow showing in thetarget area.INCORRECT APPLICATION OFSAMPLE• DO NOT apply sample to thetop <strong>of</strong> the strip.• DO NOT REPORT the glucoseresult, if yellow is showing inthe target area <strong>of</strong> the stripand the test has begun.
INTERPRETATION OF RESULTS:Reference RangesNon-Fasting Reference Range:Normal: 70-140 mg/dLFasting Reference Range:• Normal• Pre-diabetes• Diabetes70-99 mg/dL100-125 mg/dL125 mg/dL
Alert ValuesAlert Values: 350 mg/dLNeonate Alert Values: 250 mg/dL• All alert values must be repeated using a fresh sample fromnew stick. Actions taken must be documented in the meterby entering a comment.• Report to caregiver or provider, and follow his/herrecommendations.• Alert values obtained by any NCA must be reportedimmediately to the care nurse for assessment <strong>of</strong> thepatient.• Results must be verified by the clinical laboratory ifrequested by the provider.
CONTRAINDICATIONSCAUTION: Due to the possibility <strong>of</strong> over treating a falsely elevated resultand resulting in insulin shock, , do not test patients receiving the productslisted in the table below.Note: All glucose testing must be performed by the laboratory on these patients.Manufacturer Trade Name DescriptionMaltose Interfering Clearance<strong>Inform</strong>ation*Based on intact renal function.BaxterExtraneal(icodextrin)Peritoneal Dialysis SolutionAll dialysis patientsreceiving peritoneal dialysis must be tested bythe lab until it is confirmed that the patient isNOT on Extraneal.Bristol-MyersSquibb CompanyOrencia(Abatacept)IV immunosuppressant drug<strong>Inform</strong>ation unavailable at this time.Octapharma Octagam 5% IV immune globulin solution 24 hours after doseCangeneNerl Diagnostics,othersWinRho SDF -Liquid formonlyRho D IV immune globulin24 hours after doseD-Xylose USP d-Xylose 24 hours after doseInnovata PLCADEPT(4% Icodextrin)A fluid used during or afterlaparoscopic GYN surgery to separateand protect tissues and decreaseadhesions.<strong>Inform</strong>ation unavailable at this time.CangeneVacciniaImmuneGlobulin(Human)IV immune for vaccinia virus24 hours after dose and with lab to meterverification.CangeneHepaGam BHepatitis B immune globulin for acuteexposure to blood containing HBsAgexposure.<strong>Inform</strong>ation unavailable at this time.CSL Intragam P IV Immune globulin <strong>Inform</strong>ation unavailable at this time.GSKBexxarTositumomab and Iodine I 131Tositumomab used for non-Hodgkinslymphoma<strong>Inform</strong>ation unavailable at this time.
Other Limitations• Caution must be taken in the interpretation <strong>of</strong> neonate glucoselevels below 50mg/dL.• In situations <strong>of</strong> decreased peripheral blood flow, whole bloodglucose results must be carefully evaluated and confirmed bylaboratory testing, if necessary. Examples are patients withexcessive water loss or dehydration, shock, or hyperglycemichyperosmolarstate.• Do not expose the meter to excessive sources <strong>of</strong> heat for over 10seconds at a time. This includes Bilirubin lights, bed warmers, orisolettes.• At glucose concentrations above 200 mg/dL, low hematocrits(below 20%) may cause elevated results and high hematocrits(above 55%) can cause reduced results.• Xylose will interfere with results. Do not use meter during Xyloseabsorption testing.
LIMITATIONS AND PRECAUTIONS OF THEPROCEDURE:Error Flags (Possibly Caused by <strong>Glucose</strong> <strong>of</strong>>600mg/dL or 600mg/dL.• “LO” - the blood glucose result may be lower than
• Use <strong>of</strong> <strong>ACCU</strong>-CHEK®<strong>Inform</strong> Code Key– By reading the data from theCode Key, the meterautomatically calibrates to thespecific lot number found on thebottle/vial <strong>of</strong> strips, when themeter is turned on.• Replacement <strong>of</strong> Code Key– If the Code Key in the meterdoes not match the lot number<strong>of</strong> the scanned test strip vial,, isdisplayed. The Code Key mustbe replaced before testing canproceed.• NOTE : The meter must be turned <strong>of</strong>fwhen replacing the Code Key.What is a CODE KEY?
• If the meter locks upand will not respondperform thefollowing:1. Perform a “s<strong>of</strong>treset” by insertingpaper clip, asshown, or call POCTfor help.2. Place meter in thecharging base,3. Verify the greenlight is ON at thebase unit.
IMPORTANTSummary for Accurate Results• Finger stick:Remove/dry all alcohol form puncture site.Wipe first drop <strong>of</strong> blood <strong>of</strong>f and use seconddrop for testing.• Applying Sample:Make sure the yellow target area is filled withblood.Do not lay meter on s<strong>of</strong>t surfaces.• Repeat test if results are alert values or ifthey appear inconsistent with patient’ssymptoms.• Close lid containing strip TIGHTLY.• Do not use results if patient has beengiven any interfering drugs/solutionscontaining Maltose.
<strong>Training</strong> CompetencyStep One• Print out the documentation showing you havepassed the test.Step Two• Let your Unit POCT Trainer know you havecompleted this portion <strong>of</strong> your training and presenthim/her with the printed list.Step Three• Demonstrate your performance <strong>of</strong> a <strong>ACCU</strong>-CHEK®<strong>Inform</strong> <strong>Glucose</strong> test for your trainer.