Operating and installation instructions Built-in coffee machines CVA ...
Operating and installation instructions Built-in coffee machines CVA ...
Operating and installation instructions Built-in coffee machines CVA ...
- No tags were found...

You also want an ePaper? Increase the reach of your titles
YUMPU automatically turns print PDFs into web optimized ePapers that Google loves.
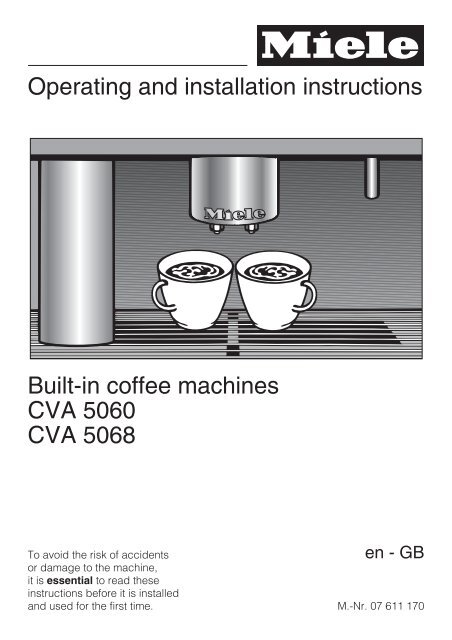
<strong>Operat<strong>in</strong>g</strong> <strong>and</strong> <strong><strong>in</strong>stallation</strong> <strong><strong>in</strong>structions</strong><strong>Built</strong>-<strong>in</strong> <strong>coffee</strong> mach<strong>in</strong>es<strong>CVA</strong> 5060<strong>CVA</strong> 5068To avoid the risk of accidentsen-GBor damage to the mach<strong>in</strong>e,it is essential to read these<strong><strong>in</strong>structions</strong> before it is <strong>in</strong>stalled<strong>and</strong> used for the first time. M.-Nr. 07 611 170
ContentsCar<strong>in</strong>g for the environment. .........................................5Guide to the mach<strong>in</strong>e ..............................................6Accessories supplied ..............................................8Optional accessories. ..............................................9Warn<strong>in</strong>g <strong>and</strong> Safety <strong><strong>in</strong>structions</strong> ....................................10Functions .......................................................14Us<strong>in</strong>g the <strong>coffee</strong> mach<strong>in</strong>e - first steps ................................16Controls .........................................................16Display ..........................................................16Before us<strong>in</strong>g for the first time. ........................................16Switch<strong>in</strong>g on ...................................................16Switch<strong>in</strong>g off ...................................................17Fill<strong>in</strong>g the water <strong>and</strong> <strong>coffee</strong> bean conta<strong>in</strong>ers ..........................18Fill<strong>in</strong>g the water conta<strong>in</strong>er ...........................................18Fill<strong>in</strong>g the <strong>coffee</strong> bean conta<strong>in</strong>er ......................................19Mak<strong>in</strong>g dr<strong>in</strong>ks. ...................................................20Switch<strong>in</strong>g on .....................................................20Pre-warm<strong>in</strong>g cups .................................................20Adjust<strong>in</strong>g the height of the central spout. ...............................21Prepar<strong>in</strong>g espresso <strong>and</strong> <strong>coffee</strong> from freshly ground beans .................21Double portion .................................................22Cancell<strong>in</strong>g preparation ...........................................22Mak<strong>in</strong>g espresso <strong>and</strong> <strong>coffee</strong> us<strong>in</strong>g ready ground <strong>coffee</strong> ...................22Add<strong>in</strong>g ground <strong>coffee</strong>. ...........................................22To make a dr<strong>in</strong>k ................................................23To cancel preparation. ...........................................23Dr<strong>in</strong>ks with milk ...................................................23Sta<strong>in</strong>less steel milk flask ..........................................23Cappucc<strong>in</strong>o, latte macchiato, hot milk, milk froth. ......................24User profile dr<strong>in</strong>ks .................................................25After use. ........................................................25Sett<strong>in</strong>g the <strong>coffee</strong> gr<strong>in</strong>der ..........................................26
ContentsClean<strong>in</strong>g <strong>and</strong> care ................................................48Chart ...........................................................48R<strong>in</strong>se the system ..................................................49Milk pipework. ....................................................50R<strong>in</strong>se milk pipework .............................................50Clean milk pipework .............................................50Sta<strong>in</strong>less steel milk flask ............................................51Central spout .....................................................52Water conta<strong>in</strong>er ...................................................53Waste conta<strong>in</strong>er ...................................................53Drip tray ........................................................54Drip tray cover ....................................................54Coffee bean conta<strong>in</strong>er ..............................................55Central spout connector ............................................55Interior <strong>and</strong> mach<strong>in</strong>e door ...........................................55Brew unit ........................................................56Degreas<strong>in</strong>g the brew unit .........................................57Mach<strong>in</strong>e front .....................................................58Descal<strong>in</strong>g the mach<strong>in</strong>e ............................................60To run the descal<strong>in</strong>g programme .....................................61Problem solv<strong>in</strong>g guide ............................................62After sales service ................................................69Electrical connection U.K., ZA, IRL ..................................70Installation ......................................................71Build<strong>in</strong>g-<strong>in</strong> <strong>and</strong> comb<strong>in</strong>ation options ...................................71Installation. ....................................................72Adjust<strong>in</strong>g the door h<strong>in</strong>ges. ........................................73
Car<strong>in</strong>g for the environmentDisposal of the pack<strong>in</strong>gmaterialThe transport <strong>and</strong> protective pack<strong>in</strong>ghas been selected from materials whichare environmentally friendly fordisposal, <strong>and</strong> can normally berecycled.Ensure that any plastic wrapp<strong>in</strong>gs,bags, etc. are disposed of safely <strong>and</strong>kept out of the reach of babies <strong>and</strong>young children. Danger of suffocation.Dispose of or recycle all packag<strong>in</strong>gmaterials safely as soon as possible.Rather than just throw<strong>in</strong>g thesematerials away, please ensure that theyare recycled.Disposal of your old mach<strong>in</strong>eElectrical <strong>and</strong> electronic mach<strong>in</strong>esoften conta<strong>in</strong> materials which, ifh<strong>and</strong>led or disposed of <strong>in</strong>correctly,could be potentially hazardous tohuman health <strong>and</strong> to the environment.They are, however, essential for thecorrect function<strong>in</strong>g of your mach<strong>in</strong>e.Please do not therefore dispose of itwith your household waste.Please dispose of it at your localcommunity waste collection/recycl<strong>in</strong>gcentre, or contact your Dealer foradvice. Ensure that it presents nodanger to children while be<strong>in</strong>g storedfor disposal.It should be disconnected from thema<strong>in</strong>s electricity supply by a competentperson.5
Guide to the mach<strong>in</strong>eExterior viewa On/Off sensor for switch<strong>in</strong>g the <strong>coffee</strong> mach<strong>in</strong>e on <strong>and</strong> offb Displayc Left arrow, for scroll<strong>in</strong>g through the various programme optionsd OK sensor, for confirm<strong>in</strong>g the selection of a programme option <strong>and</strong> for sav<strong>in</strong>g asett<strong>in</strong>ge Right arrow, for scroll<strong>in</strong>g through the various programme optionsf Sensor for select<strong>in</strong>g hot waterg Door griph Hot water spouti Light<strong>in</strong>gj Drip tray coverk Central spout, height-adjustablel Sta<strong>in</strong>less steel milk flask6
Guide to the mach<strong>in</strong>eInterior viewa Master switchb Ground <strong>coffee</strong> chute coverc Ground <strong>coffee</strong> chuted Slide control to select f<strong>in</strong>eness of ground <strong>coffee</strong>e Coffee bean conta<strong>in</strong>erf Drip tray with grid for easier carry<strong>in</strong>gg Water conta<strong>in</strong>erh Brew uniti Waste conta<strong>in</strong>erj Central spout connector (connect<strong>in</strong>g the brew unit <strong>and</strong> the central <strong>coffee</strong> spout)k Sta<strong>in</strong>less steel milk flask7
Accessories suppliedSta<strong>in</strong>less steel milk flaskFor stor<strong>in</strong>g <strong>and</strong> keep<strong>in</strong>g milk cold, with lid (with h<strong>and</strong>le) <strong>and</strong>additional cap(not suitable for clean<strong>in</strong>g <strong>in</strong> a dishwasher)Conta<strong>in</strong>ersLarge <strong>and</strong> small conta<strong>in</strong>ers for clean<strong>in</strong>g <strong>and</strong> r<strong>in</strong>s<strong>in</strong>g the milkpipeworkCoffee spoonFor add<strong>in</strong>g the correct amount of ground <strong>coffee</strong>Clean<strong>in</strong>g powderFor daily clean<strong>in</strong>g of the milk pipeworkClean<strong>in</strong>g tabletsFor clean<strong>in</strong>g the brew unitDescal<strong>in</strong>g tabletsFor descal<strong>in</strong>g the water pipeworkOther accessories <strong>and</strong> spare parts– Test strips for determ<strong>in</strong><strong>in</strong>g the water hardness level– Bypass tube for plac<strong>in</strong>g on the central spout– Silicone grease for lubricat<strong>in</strong>g the cap on the central spoutconnector– Brush for clean<strong>in</strong>g the milk pipework– Ma<strong>in</strong>s connection cable8
Miele accessories <strong>and</strong> clean<strong>in</strong>g <strong>and</strong> condition<strong>in</strong>g productsare available for your <strong>coffee</strong> mach<strong>in</strong>e.These can be ordered via the <strong>in</strong>ternet atwww.miele-shop.com, from the Miele Spare Parts Departmentor from your Miele Dealer.Sta<strong>in</strong>less steel milk flask with capFor stor<strong>in</strong>g <strong>and</strong> keep<strong>in</strong>g milk cold(not suitable for clean<strong>in</strong>g <strong>in</strong> a dishwasher)Optional accessoriesClean<strong>in</strong>g powderFor daily clean<strong>in</strong>g of the milk pipeworkClean<strong>in</strong>g tabletsFor clean<strong>in</strong>g the brew unitDescal<strong>in</strong>g tabletsFor descal<strong>in</strong>g the water pipeworkE-Cloth (microfibre cloth)Removes f<strong>in</strong>ger marks <strong>and</strong> light soil<strong>in</strong>gSilicone greaseFor lubricat<strong>in</strong>g the cap on the central spout connector
Warn<strong>in</strong>g <strong>and</strong> Safety <strong><strong>in</strong>structions</strong>This mach<strong>in</strong>e conforms with allrelevant legal safety requirements.Improper use can, however, lead topersonal <strong>in</strong>jury <strong>and</strong> damage toproperty.To avoid the risk of accidents <strong>and</strong>damage to the mach<strong>in</strong>e, pleaseread these <strong><strong>in</strong>structions</strong> carefullybefore us<strong>in</strong>g it for the first time.They conta<strong>in</strong> important notes on the<strong><strong>in</strong>stallation</strong>, safety, operation <strong>and</strong>care of the mach<strong>in</strong>e.Keep these <strong><strong>in</strong>structions</strong> <strong>in</strong> a safeplace <strong>and</strong> pass them on to anyfuture owner.Correct application~ The mach<strong>in</strong>e is <strong>in</strong>tended fordomestic use only for the preparation ofespresso, cappucc<strong>in</strong>o, latte macchiatoetc. Any other usage is not supportedby the manufacturer <strong>and</strong> could bedangerous. The manufacturer cannotbe held liable for damage result<strong>in</strong>gfrom <strong>in</strong>correct or improper use of theappliance.~ This <strong>coffee</strong> mach<strong>in</strong>e is not <strong>in</strong>tendedfor use by persons (<strong>in</strong>clud<strong>in</strong>g children)with reduced physical, sensory ormental capabilities, or lack ofexperience or knowledge, unless theyare supervised whilst us<strong>in</strong>g it or havebeen shown how to use it correctly by aperson responsible for their safety.Safety with children~ Keep children away from themach<strong>in</strong>e at all times. It is not a toy! Toavoid the risk of <strong>in</strong>jury do not allowchildren to play on or near it or to playwith its controls. Supervise childrenwhilst you are us<strong>in</strong>g it. Children's sk<strong>in</strong> isvery sensitive, <strong>and</strong> reacts to hottemperatures. Danger of burn<strong>in</strong>g.~ Older children may only use the<strong>coffee</strong> mach<strong>in</strong>e when its operation hasbeen clearly expla<strong>in</strong>ed to them <strong>and</strong>they are able to use it safely,recognis<strong>in</strong>g the dangers of misuse.Remember that <strong>coffee</strong> <strong>and</strong> espressoare not suitable dr<strong>in</strong>ks for children.Technical safety~ Before sett<strong>in</strong>g up the mach<strong>in</strong>e,check it for any externally visibledamage. Never <strong>in</strong>stall or attempt to usea damaged mach<strong>in</strong>e. Danger of <strong>in</strong>jury.~ To avoid the risk of damage to themach<strong>in</strong>e, make sure that the rat<strong>in</strong>g onthe data plate corresponds to thevoltage <strong>and</strong> frequency of the householdsupply, before connect<strong>in</strong>g the mach<strong>in</strong>eto the ma<strong>in</strong>s supply. Consult a qualifiedelectrician if <strong>in</strong> any doubt.10
Warn<strong>in</strong>g <strong>and</strong> Safety <strong><strong>in</strong>structions</strong>~ The electrical safety of this mach<strong>in</strong>ecan only be guaranteed whencont<strong>in</strong>uity is complete between it <strong>and</strong>an effective earth<strong>in</strong>g system whichcomplies with local <strong>and</strong> national safetyregulations. It is most important that thisbasic safety requirement is present <strong>and</strong>tested regularly, <strong>and</strong> where there is anydoubt the household wir<strong>in</strong>g systemshould be <strong>in</strong>spected by a qualifiedelectrician.The manufacturer cannot be held liablefor the consequences of an <strong>in</strong>adequateearth<strong>in</strong>g system (e.g. electric shock).~ The mach<strong>in</strong>e must only be operatedwhen built <strong>in</strong>, to ensure that allelectrical components are shielded.Ensure power is not supplied to themach<strong>in</strong>e until after <strong><strong>in</strong>stallation</strong>, repairwork or ma<strong>in</strong>tenance work has beencarried out.~ Do not connect the mach<strong>in</strong>e to thema<strong>in</strong>s electricity supply by amulti-socket unit or an extension lead.These do not guarantee the requiredsafety of the mach<strong>in</strong>e (e.g. danger ofoverheat<strong>in</strong>g).~ The second electrical connectionsocket on the back of the <strong>CVA</strong> 5060<strong>coffee</strong> mach<strong>in</strong>e may only be used forconnect<strong>in</strong>g a Miele EGW 4000-14,EGW 4000-29 or 5000-14 plate warmer.Connect<strong>in</strong>g any other appliance woulddamage the mach<strong>in</strong>e.~ The mach<strong>in</strong>e is not suitable for use<strong>in</strong> the open air, even when <strong>in</strong>stalled <strong>in</strong> amobile unit (optional extra).~ This equipment may only be used <strong>in</strong>mobile <strong><strong>in</strong>stallation</strong>s if a risk assessmentof the <strong><strong>in</strong>stallation</strong> has been carried outby a suitably qualified eng<strong>in</strong>eer.~ Installation work <strong>and</strong> repairs mayonly be carried out by suitably qualified<strong>and</strong> competent persons <strong>in</strong> strictaccordance with current local <strong>and</strong>national safety regulations. Repairs <strong>and</strong>other work by unqualified personscould be dangerous <strong>and</strong> themanufacturer will not be held liable.~ While the mach<strong>in</strong>e is underguarantee, repairs should only beundertaken by a service technicianauthorised by the manufacturer.Otherwise the guarantee will be<strong>in</strong>validated.~ Faulty components must only bereplaced by genu<strong>in</strong>e Miele orig<strong>in</strong>alspare parts. The manufacturer can onlyguarantee the safety of the appliancewhen Miele replacement parts areused.~ The mach<strong>in</strong>e is only completelyisolated from the electricity supplywhen:– the ma<strong>in</strong>s fuse is disconnected,– the screw-out fuse is removed (<strong>in</strong>countries where this is applicable),– it has been switched off at the wallsocket <strong>and</strong> the plug has beenwithdrawn.11
Warn<strong>in</strong>g <strong>and</strong> Safety <strong><strong>in</strong>structions</strong>~ Never open the outer cas<strong>in</strong>g of themach<strong>in</strong>e. Tamper<strong>in</strong>g with electricalconnections or components <strong>and</strong>mechanical parts is highly dangerousto the user <strong>and</strong> can cause operationalfaults or electric shock.~ If the <strong>coffee</strong> mach<strong>in</strong>e is to be built <strong>in</strong>above another appliance, there mustbe a full-width, closed shelf betweenthem (except when it is comb<strong>in</strong>ed witha Miele built-<strong>in</strong> plate warm<strong>in</strong>g drawer).~ In areas which may be subject to<strong>in</strong>festation by cockroaches or otherverm<strong>in</strong>, pay particular attention tokeep<strong>in</strong>g the mach<strong>in</strong>e <strong>and</strong> itssurround<strong>in</strong>gs <strong>in</strong> a clean condition at alltimes. Any damage which may becaused by cockroaches or other verm<strong>in</strong>will not be covered by the mach<strong>in</strong>eguarantee.Correct useCaution. Danger of burn<strong>in</strong>g. Theliquids dispensed are very hot.Never look directly at the light<strong>in</strong>g oruse optical <strong>in</strong>struments to look at it.~ The water pipework <strong>and</strong> milkpipework must be r<strong>in</strong>sed through <strong>and</strong>the mach<strong>in</strong>e <strong>and</strong> sta<strong>in</strong>less steel milkflask cleaned thoroughly before the firstdr<strong>in</strong>k is prepared.~ Only cold, fresh tap water should beused to fill the water conta<strong>in</strong>er. Warm orhot water or other liquids could damagethe mach<strong>in</strong>e. Change the water everyday to prevent a build-up of bacteria.~ Do not on any account use m<strong>in</strong>eralwater. M<strong>in</strong>eral water will cause seriouslimescale deposits to build up <strong>in</strong> yourmach<strong>in</strong>e <strong>and</strong> damage it.~ Never put anyth<strong>in</strong>g other thanroasted espresso/<strong>coffee</strong> beans <strong>in</strong> the<strong>coffee</strong> bean conta<strong>in</strong>er. It must never befilled with ground <strong>coffee</strong> as this coulddamage the gr<strong>in</strong>der.~ The ground <strong>coffee</strong> chute must neverbe filled with anyth<strong>in</strong>g other thanground <strong>coffee</strong> or brew unit clean<strong>in</strong>gtablets. Otherwise the mach<strong>in</strong>e will bedamaged.~ Do not use milk with additives.Sugar additives will adhere to the milkpipework <strong>and</strong> damage the mach<strong>in</strong>e.~ Do not use <strong>coffee</strong> beans which havebeen treated with anyth<strong>in</strong>g conta<strong>in</strong><strong>in</strong>gcaramel, any k<strong>in</strong>d of sugar or any othersubstances. Do not put dr<strong>in</strong>ksconta<strong>in</strong><strong>in</strong>g sugar, or <strong>in</strong>stant <strong>coffee</strong> <strong>in</strong>the mach<strong>in</strong>e.~ Never place a dr<strong>in</strong>k with ignitedalcohol under the central spout of the<strong>coffee</strong> mach<strong>in</strong>e. The flames could igniteplastic components <strong>and</strong> cause firedamage.~ Hot water <strong>and</strong> steam could causescald<strong>in</strong>g. Be very careful when us<strong>in</strong>gthese functions. Make sure you do notcome <strong>in</strong>to contact with steam or hotwater. The mach<strong>in</strong>e must not be usedfor clean<strong>in</strong>g objects.~ Do not use a steam cleaner to cleanthis mach<strong>in</strong>e. Steam could reach theelectrical components <strong>and</strong> cause ashort circuit.12
Warn<strong>in</strong>g <strong>and</strong> Safety <strong><strong>in</strong>structions</strong>~ Clean the mach<strong>in</strong>e every day toprevent a build-up of bacteria. All parts,except the brew unit, the <strong>coffee</strong> beanconta<strong>in</strong>er, the sta<strong>in</strong>less steel milk flask<strong>and</strong> lid, <strong>and</strong> the cover of the centralspout are dishwasher safe.~ The mach<strong>in</strong>e should be descaledregularly, depend<strong>in</strong>g on the hardnessof the water, with the descal<strong>in</strong>g tabletssupplied. The harder the water, themore often the mach<strong>in</strong>e must bedescaled. The manufacturer cannot beheld liable for damage aris<strong>in</strong>g from<strong>in</strong>sufficient descal<strong>in</strong>g.~ Only use the descal<strong>in</strong>g tabletssupplied by Miele <strong>and</strong> follow the<strong><strong>in</strong>structions</strong> on the packet carefully.Use the exact proportionsrecommended. Otherwise the mach<strong>in</strong>ewill be damaged.~ Depend<strong>in</strong>g on the natural oil contentof the <strong>coffee</strong> used, the brew unit couldbecome blocked. It is importanttherefore to clean the brew unit with aclean<strong>in</strong>g tablet after approx. 200<strong>coffee</strong>s. (A rem<strong>in</strong>der will appear <strong>in</strong> thedisplay),~ Used <strong>coffee</strong> grounds should be putwith the organic rubbish or on thecompost heap, but not emptied downthe s<strong>in</strong>k, as they could block it.~ Never sw<strong>in</strong>g from or hang anyth<strong>in</strong>gon the front when it is open as thiscould damage the mach<strong>in</strong>e.~ The mach<strong>in</strong>e is designed to be used<strong>in</strong> areas with an ambient temperature of+15 °C to +60 °C. Please do not use itanywhere with an ambient temperatureoutside this range.The manufacturer cannot be heldliable for damage caused bynon-compliance with these Warn<strong>in</strong>g<strong>and</strong> safety <strong><strong>in</strong>structions</strong>.13
FunctionsThis mach<strong>in</strong>e can be used to prepareespresso, <strong>coffee</strong>, cappucc<strong>in</strong>o, lattemacchiato, milk froth, hot milk <strong>and</strong>hot water.Milk can be stored for several hours <strong>in</strong>the sta<strong>in</strong>less steel milk flaskdepend<strong>in</strong>g on the type <strong>and</strong> on theambient temperature of the room.This mach<strong>in</strong>e has a conta<strong>in</strong>er for <strong>coffee</strong>beans so that they can be freshlyground on dem<strong>and</strong> for every cup tobenefit fully from the flavour. You canalso make <strong>coffee</strong> with a portion ofready ground <strong>coffee</strong> should someoneprefer a cup of decaff<strong>in</strong>ated <strong>coffee</strong>, forexample.After gr<strong>in</strong>d<strong>in</strong>g, the ground <strong>coffee</strong> canalso be moistened with hot water todevelop the aroma (Pre-brew<strong>in</strong>g - seeSett<strong>in</strong>gs: Customis<strong>in</strong>g your mach<strong>in</strong>e).Then hot water is forced at highpressure through the ground <strong>coffee</strong>.If the mach<strong>in</strong>e is used by variouspeople with different tastes <strong>and</strong>preferences, you can programmespecific sett<strong>in</strong>gs for up to n<strong>in</strong>e<strong>in</strong>dividual users (User profiles).The used <strong>coffee</strong> grounds areautomatically emptied <strong>in</strong>to the wasteconta<strong>in</strong>er. There is no need to removethe grounds manually after each cup.The size of different cups <strong>and</strong> glassescan be programmed <strong>in</strong> so that thecorrect amount is dispensed.The amount of Espresso, milk or milkfroth can also be programmed formak<strong>in</strong>g Cappucc<strong>in</strong>o <strong>and</strong> LatteMacchiato.If two cups of <strong>coffee</strong> or espresso arerequired at the same time, the OKsensor has to be touched twice briefly.The mach<strong>in</strong>e will fill the two cups oneafter the other, with a slight pause <strong>in</strong>between.Up to 8 cups of <strong>coffee</strong> can be preparedautomatically one after the other via theCoffee jug function.The mach<strong>in</strong>e can be programmed togr<strong>in</strong>d from 6 to 14 g of <strong>coffee</strong>,depend<strong>in</strong>g on the type. Theprogrammed amount of <strong>coffee</strong> will bethe same for all sizes of cup (espresso,<strong>coffee</strong>, Cappucc<strong>in</strong>o, Latte Macchiato).The f<strong>in</strong>eness to which the <strong>coffee</strong> isground can be set.For safety reasons, the electricitysupply to the brew<strong>in</strong>g system <strong>and</strong> the<strong>coffee</strong> gr<strong>in</strong>der cuts out when themach<strong>in</strong>e door is opened. The mach<strong>in</strong>ealso features a system lock to preventchildren from operat<strong>in</strong>g the mach<strong>in</strong>e.The easy-to-use programm<strong>in</strong>g facility<strong>in</strong> the Sett<strong>in</strong>gs menu allows, amongstother th<strong>in</strong>gs, the language <strong>in</strong> thedisplay to be changed <strong>and</strong> the waterhardness to be programmed <strong>in</strong>.14
FunctionsTo ensure that the flavour can developfully <strong>and</strong> be ma<strong>in</strong>ta<strong>in</strong>ed for longer themach<strong>in</strong>e has an additional function toautomatically r<strong>in</strong>se <strong>and</strong> pre-warm thesystem when the mach<strong>in</strong>e is cold. Thisautomatic r<strong>in</strong>s<strong>in</strong>g function is also usedto flush <strong>coffee</strong> rema<strong>in</strong>s out of thesystem <strong>and</strong> the central spout after use.The hot water from the hot water spoutis ideal for pre-warm<strong>in</strong>g the cups.So that the mach<strong>in</strong>e rema<strong>in</strong>s ready foruse but does not use electricityunnecessarily, it will switch <strong>in</strong>to Energysav<strong>in</strong>g mode after a programmablelength of time.If you wish the mach<strong>in</strong>e to switch on oroff at a certa<strong>in</strong> time, you canprogramme the mach<strong>in</strong>e accord<strong>in</strong>gly.15
Us<strong>in</strong>g the <strong>coffee</strong> mach<strong>in</strong>e - first stepsThe follow<strong>in</strong>g notes should help you getto know your <strong>coffee</strong> mach<strong>in</strong>e beforestart<strong>in</strong>g to use it.ControlsThis mach<strong>in</strong>e has sensor controls whichreact to touch. To operate the mach<strong>in</strong>e,you only need to touch the relevantsensor. There are five sensors:s On/Off sensor: For switch<strong>in</strong>g themach<strong>in</strong>e on or off< > Left/right arrows:For scroll<strong>in</strong>g through the variousprogramme optionsOK sensor: For confirm<strong>in</strong>g theselection of a programme option<strong>and</strong> for sav<strong>in</strong>g a sett<strong>in</strong>g Hot water sensorDisplayEspressoq r H I J L n m CThe follow<strong>in</strong>g symbols come up <strong>in</strong> thedisplay <strong>in</strong> the ma<strong>in</strong> menu:q Espressor CoffeeHIJLnCappucc<strong>in</strong>oLatte MacchiatoHot milkMilk frothUser profile for up to 9 differentusersG Ma<strong>in</strong>tenance programme for milkpipework, brew unit, descal<strong>in</strong>g,r<strong>in</strong>s<strong>in</strong>gC Sett<strong>in</strong>gs: Customis<strong>in</strong>g yourmach<strong>in</strong>e^ The arrow sensors are used to selecta programme option <strong>in</strong> the display.Touch the OK sensor when the optionyou want appears highlighted <strong>in</strong> thedisplay.Before us<strong>in</strong>g for the first timeThe mach<strong>in</strong>e must be correctly<strong>in</strong>stalled <strong>and</strong> connected (see"Electrical connection" <strong>and</strong>"Installation") before it is used for thefirst time. It must then be cleaned(see "Clean<strong>in</strong>g <strong>and</strong> care").Remove any protective foil from thefront of the mach<strong>in</strong>e.Switch<strong>in</strong>g on^ Touch the On/Off sensor s to switchon the mach<strong>in</strong>e.When the mach<strong>in</strong>e is switched on forthe first few times with the masterswitch, a welcome screen <strong>and</strong> someother messages will appear briefly. Thewelcome screen will be displayed eachtime the mach<strong>in</strong>e is switched on until 5dr<strong>in</strong>ks have been prepared.MíeleWillkommen16
Us<strong>in</strong>g the <strong>coffee</strong> mach<strong>in</strong>e - first stepsWhen you use the mach<strong>in</strong>e for the veryfirst time, you will be prompted toselect a language.^ Use the right or left arrow until thelanguage you want appears <strong>in</strong> thedisplay.^ Touch the OK sensor.The language you have chosen isnow set.The request to set the clock format willthen appear.^ Use the arrows to select the clockformat you want (12 h or 24 h), <strong>and</strong>then touch the OK sensor.^ Enter the time of day: First set thehour with the arrow sensors <strong>and</strong> thentouch the OK sensor. Then set them<strong>in</strong>utes <strong>in</strong> the same way.^ Now decide when you want the timeof day to be displayed, <strong>and</strong> press theOK sensor.– "On": The display will always showthe time of day (even when themach<strong>in</strong>e is switched off).– "On for 60 seconds": The displaywill show the time for 60 seconds,<strong>and</strong> then go dark after the mach<strong>in</strong>eis switched off.– "Do not display": The display willonly show the time of day when themach<strong>in</strong>e is switched on, <strong>and</strong> will godark as soon as it is switched off.^ Press the OK sensor to confirm thatyour mach<strong>in</strong>e is communicationenabled.If everyth<strong>in</strong>g has been enteredcorrectly, Set up successful willappear <strong>in</strong> the display.^ Confirm this message by touch<strong>in</strong>gthe OK sensor.To get the best out of your<strong>coffee</strong> mach<strong>in</strong>e <strong>and</strong> to set itup for your specificrequirements, please cont<strong>in</strong>ue to workthrough these operat<strong>in</strong>g <strong><strong>in</strong>structions</strong>.Switch<strong>in</strong>g off^ Touch the On/Off sensor s to switchoff the mach<strong>in</strong>e.If automatic r<strong>in</strong>s<strong>in</strong>g is switched on,provid<strong>in</strong>g that <strong>coffee</strong> or a milk dr<strong>in</strong>khas actually been dispensed frommach<strong>in</strong>e, the r<strong>in</strong>s<strong>in</strong>g process willbeg<strong>in</strong>. After this the mach<strong>in</strong>e willswitch off automatically.17
Fill<strong>in</strong>g the water <strong>and</strong> <strong>coffee</strong> bean conta<strong>in</strong>ersThe <strong>coffee</strong> mach<strong>in</strong>e must becleaned thoroughly (see "Clean<strong>in</strong>g<strong>and</strong> care") before you fill it with water<strong>and</strong> <strong>coffee</strong> beans.It is vital that you programme <strong>in</strong>the water hardness level of yourwater (see "Sett<strong>in</strong>gs: Customis<strong>in</strong>gyour mach<strong>in</strong>e - Sett<strong>in</strong>g the waterhardness").Fill<strong>in</strong>g the water conta<strong>in</strong>erThe quality of the water playsan important part <strong>in</strong> theoverall quality of the <strong>coffee</strong>.The water conta<strong>in</strong>er should therefore beemptied <strong>and</strong> filled with fresh tap waterevery day.Hot water <strong>and</strong> other liquids coulddamage the mach<strong>in</strong>e. Only usecold, clean tap water <strong>and</strong> fill themach<strong>in</strong>e every day. Do not on anyaccount use m<strong>in</strong>eral water. M<strong>in</strong>eralwater will cause serious limescaledeposits to build up <strong>in</strong> your mach<strong>in</strong>e<strong>and</strong> damage it.^ Pull the water conta<strong>in</strong>er forwards toremove it.^ Remove the lid, <strong>and</strong> fill the waterconta<strong>in</strong>er with cold, clean tap waterup to the "Max." mark.A valve at the front of the waterconta<strong>in</strong>er will ensure that watercannot escape.^ Put the lid back on <strong>and</strong> replace theconta<strong>in</strong>er <strong>in</strong> the mach<strong>in</strong>e, push<strong>in</strong>g itright to the back until it clicks <strong>in</strong>toposition.The water conta<strong>in</strong>er must click <strong>in</strong>toposition <strong>and</strong> sit <strong>in</strong> the mach<strong>in</strong>ecorrectly to ensure the valve issealed. If you do not hear it click <strong>in</strong>toposition or the water conta<strong>in</strong>erprotrudes slightly or does not sit flaton the floor, check whether thesurface that the water conta<strong>in</strong>er sitson is dirty <strong>and</strong> clean it if necessary.^ Open the mach<strong>in</strong>e door.18
Fill<strong>in</strong>g the <strong>coffee</strong> beanconta<strong>in</strong>erFill<strong>in</strong>g the water <strong>and</strong> <strong>coffee</strong> bean conta<strong>in</strong>ersOnly put roasted espresso or <strong>coffee</strong>beans <strong>in</strong> the conta<strong>in</strong>er. Anyth<strong>in</strong>gelse, <strong>in</strong>clud<strong>in</strong>g ground <strong>coffee</strong>, willdamage the gr<strong>in</strong>der.Do not use <strong>coffee</strong> beans which havebeen treated with caramel, sugar orother substances. Do not put dr<strong>in</strong>ksconta<strong>in</strong><strong>in</strong>g sugar, or <strong>in</strong>stant <strong>coffee</strong> <strong>in</strong>the mach<strong>in</strong>e. Sugar will damage themach<strong>in</strong>e.^ Pull out the <strong>coffee</strong> bean conta<strong>in</strong>er.^ Push back the lid <strong>and</strong> fill theconta<strong>in</strong>er with roasted <strong>coffee</strong> beans.^ Slide the lid back <strong>in</strong>to place,^ push the <strong>coffee</strong> bean conta<strong>in</strong>er back<strong>in</strong>to the mach<strong>in</strong>e <strong>and</strong> close themach<strong>in</strong>e door.19
Mak<strong>in</strong>g dr<strong>in</strong>ksImportant: the water pip<strong>in</strong>g must ber<strong>in</strong>sed through every day <strong>and</strong> themach<strong>in</strong>e cleaned thoroughly beforethe first dr<strong>in</strong>k of the day is prepared.This will take place automatically ifthe R<strong>in</strong>s<strong>in</strong>g programme option hasbeen set to "On" <strong>and</strong> the mach<strong>in</strong>e iscold. Hot water will run out of thecentral spout <strong>in</strong>to the drip tray oncethe mach<strong>in</strong>e has heated up.If the R<strong>in</strong>s<strong>in</strong>g programme option hasbeen set to "Off", select "R<strong>in</strong>s<strong>in</strong>g" <strong>in</strong>the display to r<strong>in</strong>se out the system(see "Clean<strong>in</strong>g <strong>and</strong> care").Switch<strong>in</strong>g on^ Touch the On/Off sensor s.The follow<strong>in</strong>g message will thenappear:Heat<strong>in</strong>g phasePre-warm<strong>in</strong>g cupsThe cups should always bepre-warmed to allow the flavour todevelop <strong>and</strong> be reta<strong>in</strong>ed. The aroma ofespresso does not react well to cold.The smaller the volume of<strong>coffee</strong>/espresso <strong>and</strong> the thicker thecup, the more important it is topre-warm the cup. Use a plate warm<strong>in</strong>gdrawer if you have one. If not, you canwarm them as follows:^ Place the cup to be warmed underthe hot water spout.^ Touch the Hot water sensor.^ Run a little hot water <strong>in</strong>to the cup towarm it.^ Touch the OK sensor to stop the flowof water.^ Leave the cup for about a m<strong>in</strong>uteuntil it is warm, then pour the wateraway.If the automatic R<strong>in</strong>s<strong>in</strong>g programmeoption has been set to "On" (factorydefault sett<strong>in</strong>g), the follow<strong>in</strong>g willappear after the mach<strong>in</strong>e has heatedup:R<strong>in</strong>s<strong>in</strong>gWater will run out of the central spout.The ma<strong>in</strong> menu will then appear <strong>in</strong> thedisplay:Espressoq r H I J L n m C20
Mak<strong>in</strong>g dr<strong>in</strong>ksAdjust<strong>in</strong>g the height of thecentral spoutThe height of the central spout can beadjusted to suit the height of the cup sothat the dr<strong>in</strong>k will not cool down asquickly as it would if the spout werefurther away from the cup. The cremawill also be a better quality if the <strong>coffee</strong>does not have so far to go!^ Place a cup under the central spout.The <strong>coffee</strong> is always dispensedsimultaneously from both spouts.Espresso^ Slowly pull the central spoutdownwards.Prepar<strong>in</strong>g espresso <strong>and</strong> <strong>coffee</strong>from freshly ground beansYou can programme the sizeof portion dispensed forespresso <strong>and</strong> <strong>coffee</strong>accord<strong>in</strong>g to taste (see "Programm<strong>in</strong>gthe amount: sett<strong>in</strong>g the portion sizes").Espresso, <strong>coffee</strong>, double espresso <strong>and</strong>double <strong>coffee</strong> are all dispensed <strong>in</strong> thesame way:q r H I J L n m C^ Select the dr<strong>in</strong>k you want us<strong>in</strong>g thearrow sensors, <strong>and</strong> touch the OKsensor once.The mach<strong>in</strong>e will now gr<strong>in</strong>d the <strong>coffee</strong>beans, pre-brew the ground <strong>coffee</strong> (ifthe "Pre-brew<strong>in</strong>g" option has been setto "On") <strong>and</strong> the <strong>coffee</strong> will then bedispensed from the <strong>coffee</strong> spouts.Do not open the mach<strong>in</strong>e doordur<strong>in</strong>g the brew<strong>in</strong>g process. This willdamage the mach<strong>in</strong>e.To ensure that any <strong>coffee</strong> residuesfrom the factory test<strong>in</strong>g process areremoved from the brew<strong>in</strong>g system,please throw away the first twocups of <strong>coffee</strong>.21
Mak<strong>in</strong>g dr<strong>in</strong>ksDouble portionIf you want to dispense a doubleportion of <strong>coffee</strong> or espresso or todispense two portions at the same time:^ touch the OK sensor twice whilst"2 portions?" is <strong>in</strong> the display.The two portions will be dispensed oneafter the other.Mak<strong>in</strong>g espresso <strong>and</strong> <strong>coffee</strong>us<strong>in</strong>g ready ground <strong>coffee</strong>Add<strong>in</strong>g ground <strong>coffee</strong>If you want to make espresso or <strong>coffee</strong>us<strong>in</strong>g ready ground <strong>coffee</strong>, you canadd ground <strong>coffee</strong> to the speciallydesigned <strong>coffee</strong> chute.^ To prepare two cups at the sametime, place one cup under each jet.Cancell<strong>in</strong>g preparation^ Touch the OK sensor when "Stop" isshow<strong>in</strong>g <strong>in</strong> the display.Preparation will be halted.^ Pull the cover for the <strong>coffee</strong> chuteright out of the mach<strong>in</strong>e <strong>and</strong> open upthe lid (a) to the chute.^ Use the scoop supplied <strong>and</strong> placeone level scoop of ground <strong>coffee</strong> <strong>in</strong>tothe <strong>coffee</strong> chute (b). Close the lid.Push the cover <strong>in</strong>to the mach<strong>in</strong>e <strong>and</strong>close the mach<strong>in</strong>e door.Make the <strong>coffee</strong>?YesNo^ Use the arrow sensor to highlight"Yes".The display will change to the ma<strong>in</strong>menu <strong>and</strong> you can select the dr<strong>in</strong>k youwant.22
Mak<strong>in</strong>g dr<strong>in</strong>ksIf you have not added anyground <strong>coffee</strong>, you mustselect "No". Otherwise themach<strong>in</strong>e will assume that there isground <strong>coffee</strong> <strong>in</strong> the chute, <strong>and</strong> onlywater will be dispensed the next time<strong>coffee</strong> is made!To make a dr<strong>in</strong>k^ Place a cup under the central spout.^ Touch the OK sensor.The mach<strong>in</strong>e will prepare espresso or<strong>coffee</strong>, which will then be dispensedfrom the central spouts.Do not open the mach<strong>in</strong>e doordur<strong>in</strong>g the brew<strong>in</strong>g process. This willdamage the mach<strong>in</strong>e.At the end of the process, the <strong>coffee</strong>mach<strong>in</strong>e will revert automatically tomak<strong>in</strong>g <strong>coffee</strong> with <strong>coffee</strong> beans.To cancel preparation^ Touch the OK sensor.Preparation will be halted.Only one portion can be prepared ata time when us<strong>in</strong>g ready ground<strong>coffee</strong>. This is because the mach<strong>in</strong>ewill use all the ground <strong>coffee</strong> whichhas been added to the chute toprepare one <strong>coffee</strong>.Dr<strong>in</strong>ks with milkSta<strong>in</strong>less steel milk flaskThe sta<strong>in</strong>less steel milk flask is vacuum<strong>in</strong>sulated to keep the milk cold for aperiod of time. With an ambienttemperature of about 20°C, milk at 6°Ccan be stored for 11-12 hours <strong>and</strong>rema<strong>in</strong> under 13°C. (Milk that is warmerthan 13°C should not be used becauseit will not make good milk froth.) Milkcannot be stored for as long as 11-12hours if there is a warm<strong>in</strong>g drawerunderneath the <strong>coffee</strong> mach<strong>in</strong>e.Do not fill the sta<strong>in</strong>less steel milkflask to the rim. You need to leave agap of at least 2 -3 cm below therim.It is important to keep the top of theflask <strong>and</strong> the seals clean (whilstfill<strong>in</strong>g it <strong>and</strong> carry<strong>in</strong>g it). Any soil<strong>in</strong>gcan lead to a malfunction of the flask<strong>in</strong> the mach<strong>in</strong>e.Good milk froth can be madewith cow's milk that has a fatcontent of 0.3 - 3.8%, lactosefree milk, soya milk, goats milk <strong>and</strong> ricemilk. It is important to pre-heat thecup with hot water before mak<strong>in</strong>g yourdr<strong>in</strong>k.23
Mak<strong>in</strong>g dr<strong>in</strong>ksTo make dr<strong>in</strong>ks with milk,^ place the lid on the sta<strong>in</strong>less steelmilk flask by twist<strong>in</strong>g it anticlockwiseuntil it locks <strong>in</strong>to place.Cappucc<strong>in</strong>o, latte macchiato, hotmilk, milk froth^ Place a suitable cup or glass underboth jets.For best results with lattemacchiato, the glass shouldbe placed beneath the jetssuch that the espresso flows <strong>in</strong>to thecentre of the milk froth.Cappucc<strong>in</strong>oq r H I J L n m C^ Touch the right arrow sensor untilsymbol for the dr<strong>in</strong>k you want ishighlighted <strong>and</strong> then touch the OKsensor once.^ Touch the OK sensor aga<strong>in</strong> to stopdispens<strong>in</strong>g.^ Open the mach<strong>in</strong>e door <strong>and</strong> hang themilk flask <strong>in</strong> the mach<strong>in</strong>e asillustrated, ensur<strong>in</strong>g that the milkpipework is correctly engaged.^ Then close the mach<strong>in</strong>e door.You can then specify the proportionsof <strong>coffee</strong>, milk froth <strong>and</strong> hot milkrequired for the dr<strong>in</strong>k (see"Programm<strong>in</strong>g the amount: sett<strong>in</strong>gthe portion sizes").24
Mak<strong>in</strong>g dr<strong>in</strong>ksUser profile dr<strong>in</strong>ksThe User profile function is used toselect the quantity of water <strong>and</strong> milk foryour dr<strong>in</strong>k, as well as the f<strong>in</strong>eness of theground, temperature <strong>and</strong> pre-brew<strong>in</strong>gto suit your taste <strong>and</strong> that of yourguests (see "Sett<strong>in</strong>g up user profiles").If you have set the mach<strong>in</strong>e up for aspecific user profile you must firstselect the user profile required <strong>and</strong>then the type of dr<strong>in</strong>k.After useBefore switch<strong>in</strong>g the mach<strong>in</strong>e off forany length of time, the pipework, brewsystem, spouts <strong>and</strong> milk pipework needto be cleaned (see "Clean<strong>in</strong>g <strong>and</strong> care:"R<strong>in</strong>se the system" <strong>and</strong> "Clean the milkpipework").User profileq r H I J L n m C^ Touch the right arrow to highlight theUser profile symbol <strong>and</strong> then touchthe OK sensor.^ Select "Select" with the arrow sensors<strong>and</strong> touch the OK sensor.^ Select the user profile you want withone of the arrow sensors <strong>and</strong> touchthe OK sensor.A large user profile symbol nwill now appear <strong>in</strong> thedisplay to show that a userprofile has been selected.This function operates <strong>in</strong> the sameway as a st<strong>and</strong>ard profile.25
Sett<strong>in</strong>g the <strong>coffee</strong> gr<strong>in</strong>derA good espresso or <strong>coffee</strong> with a thick,even crema depends not only on thequality, pressure <strong>and</strong> temperature ofthe water <strong>and</strong> the quality of the <strong>coffee</strong>beans, but also on the quantity ofbeans <strong>and</strong> how f<strong>in</strong>ely they are ground.The crema should have an evennut-brown colour with dark stripesrunn<strong>in</strong>g through it.You can set the amount of <strong>coffee</strong> beansto be ground <strong>in</strong> the ma<strong>in</strong> menu (see"Sett<strong>in</strong>gs: Customis<strong>in</strong>g your mach<strong>in</strong>e -Sett<strong>in</strong>g the amount of <strong>coffee</strong>").Always adjust the amount of beansto be ground one stage at a timeonly <strong>and</strong> then let the mach<strong>in</strong>e gr<strong>in</strong>dthis quantity before adjust<strong>in</strong>g theamount aga<strong>in</strong>. Otherwise themach<strong>in</strong>e will be damaged.There are various ways to tell whetherthe <strong>coffee</strong> gr<strong>in</strong>der is set correctly:Espresso or <strong>coffee</strong> flows <strong>in</strong>to the cuptoo quicklyThe beans have been ground toocoarsely <strong>and</strong> the pressure is notsufficient. Set the gr<strong>in</strong>der on a f<strong>in</strong>ersett<strong>in</strong>g.Espresso or <strong>coffee</strong> only trickles <strong>in</strong>tothe cupThe beans have been ground too f<strong>in</strong>ely<strong>and</strong> the <strong>coffee</strong> will be bitter. Set thegr<strong>in</strong>der on a coarser sett<strong>in</strong>g.The crema is evenly coloured butpaleThe beans have been ground toocoarsely. Set the gr<strong>in</strong>der on a f<strong>in</strong>ersett<strong>in</strong>g.The crema is very dark brown on oneside, graduat<strong>in</strong>g almost to white onthe otherThe beans have been ground too f<strong>in</strong>ely.Set the gr<strong>in</strong>der on a coarser sett<strong>in</strong>g.To alter the gr<strong>in</strong>der sett<strong>in</strong>g^ Push the slide control one sett<strong>in</strong>g tothe left (for f<strong>in</strong>er gr<strong>in</strong>d<strong>in</strong>g) or onesett<strong>in</strong>g to the right (for coarsergr<strong>in</strong>d<strong>in</strong>g).You should be able to feel the notcheswhen mov<strong>in</strong>g the slide control.^ If the slide control refuses to move,close the mach<strong>in</strong>e <strong>and</strong> dispense acup of espresso <strong>coffee</strong>.Then try the slide control aga<strong>in</strong>.26
Sett<strong>in</strong>gs: customis<strong>in</strong>g your mach<strong>in</strong>eIt is easy to customise your mach<strong>in</strong>e tosuit your exact requirements.Sett<strong>in</strong>gs menuTo select the various programmeoptions:Sett<strong>in</strong>gs Fq r H I J L n m C^ Touch the right arrow sensor until"Sett<strong>in</strong>gs" appears <strong>in</strong> the display, <strong>and</strong>then touch the OK sensor.^ Touch one of the arrow sensors untilthe option you want is highlighted.^ Then touch the OK sensor to selectthe highlighted option.The option that is currently active on themach<strong>in</strong>e will have a tick next to it.Possible sett<strong>in</strong>g optionsLanguage F: 22 different languagesare available to choose fromTime of day: You can set either a 24hour or 12 hour clock, <strong>and</strong> choose tohave the Time of day display on or offTimer: Here, you can set or activate theTimer. The follow<strong>in</strong>g options areavailable <strong>in</strong> the "Set" menu:– Switch on at: The mach<strong>in</strong>e can beset to switch on at a specific time ofday.– Switch off after: The mach<strong>in</strong>e canbe set to switch off after a pre-settime. A time of between 15 m<strong>in</strong>utesto 9 hours can be set.– Switch off at: The mach<strong>in</strong>e can beset to switch off at a specific time ofday.Coffee jug: 3 to 8 cupsProgramm<strong>in</strong>g the amount: Espresso,<strong>coffee</strong>, cappucc<strong>in</strong>o, latte macchiato,hot milk, milk froth <strong>and</strong> hot water (see"Programm<strong>in</strong>g the amount: sett<strong>in</strong>g theportion sizes").Amount of <strong>coffee</strong>: You can setdifferent amounts of <strong>coffee</strong> forespresso, <strong>coffee</strong>, cappucc<strong>in</strong>o <strong>and</strong> lattemacchiato.Pre-brew<strong>in</strong>g: Long, Normal, WithoutTemperature: The temperature forespresso, <strong>coffee</strong>, cappucc<strong>in</strong>o, lattemacchiato <strong>and</strong> hot water can be setfrom m<strong>in</strong>imum to maximum.Automatic r<strong>in</strong>s<strong>in</strong>g: On, OffSteam system: On, OffLight<strong>in</strong>g: BrightnessInfo: No. of dr<strong>in</strong>ks, Portions untildescal<strong>in</strong>gSafety: System lock (On, Off)27
Sett<strong>in</strong>gs: customis<strong>in</strong>g your mach<strong>in</strong>eWater hardness: Soft, Medium, Hard,Very hardDisplay: Contrast, BrightnessVolume: Buzzer tones, Keypad tonePlate warmer (<strong>CVA</strong> 5060 only): Automatic,On, OffShowroom prog.: Demo programme,OffFactory default: All sett<strong>in</strong>gs can bereset to the factory default <strong>and</strong> userprofiles deletedTo return to the previous option <strong>in</strong>the menu, select "Back" A".Further details about the differentoptions can be found <strong>in</strong> the pagesthat follow.Select<strong>in</strong>g a languageIf you want to change the languageused <strong>in</strong> the display, use the Sett<strong>in</strong>gsmenu <strong>and</strong> follow the flag symbol.^ Select "Sett<strong>in</strong>gs F" from the ma<strong>in</strong>menu <strong>and</strong> touch the OK sensor.Sett<strong>in</strong>gsLanguage FTime of day^ Touch the OK sensor.^ Touch one of the arrow sensors untilthe language you want is highlighted.^ Touch the OK sensor.The sett<strong>in</strong>g is saved automatically <strong>and</strong>the display will go back to the previousscreen.All display texts will now appear <strong>in</strong> thelanguage you have just selected.If you select the wrong language bymistake, f<strong>in</strong>d the "Language" optionvia the flag symbol F aga<strong>in</strong>.28
Sett<strong>in</strong>gs: customis<strong>in</strong>g your mach<strong>in</strong>eSett<strong>in</strong>g the time of day^ Select "Sett<strong>in</strong>gs F" from the ma<strong>in</strong>menu <strong>and</strong> touch the OK sensor.Sett<strong>in</strong>gsTime of dayTimer^ Touch the right arrow sensor until"Time of day" is highlighted <strong>and</strong> touchthe OK sensor.There are three options:DisplayThe Time of day display can beswitched on or off.^ Use the arrow sensors to select"Display".You can now choose one of threeoptions:– "On": The display will always showthe time of day (even when themach<strong>in</strong>e is switched off).– "On for 60 seconds": If the mach<strong>in</strong>eis switched off, the display will showthe time for 60 seconds, <strong>and</strong> then godark.– "Do not display": The display willonly show the time of day when themach<strong>in</strong>e is switched on, <strong>and</strong> will godark as soon as it is switched off.^ Once you have selected the displayformat you require, touch OK.Clock format^ Use the arrow sensors to select"Clock format".^ Use the right arrow to select a 24 h or12 h clock.^ Touch the OK sensor when the optionyou want is highlighted.The clock format you have chosen willbe saved.Sett<strong>in</strong>g the time of day^ Use the arrow sensors to select "Set".^ First set the hour with one of thearrow sensors. Touch the OK sensor.^ Then use the arrow sensors to set them<strong>in</strong>utes. Touch the OK sensor.The time of day is now saved.29
Sett<strong>in</strong>gs: customis<strong>in</strong>g your mach<strong>in</strong>eSett<strong>in</strong>g the timer^ Select "Sett<strong>in</strong>gs F" from the ma<strong>in</strong>menu <strong>and</strong> touch the OK sensor.Sett<strong>in</strong>gsTimerCoffee jug^ Touch the right arrow sensor until"Timer" is highlighted <strong>and</strong> touch theOK sensor.^ Select "Set" with the arrow sensors<strong>and</strong> touch the OK sensor.There are three options:Switch on at:You can choose a time for the <strong>coffee</strong>mach<strong>in</strong>e to switch on automatically,e.g. <strong>in</strong> the morn<strong>in</strong>g for breakfast.^ Select "Switch on at" with the arrowsensors <strong>and</strong> touch the OK sensor.^ First set the hour with one of thearrow sensors. Touch the OK sensor.^ Then use the arrow sensors to set them<strong>in</strong>utes. Touch the OK sensor.If you activate the Timer, the <strong>coffee</strong>mach<strong>in</strong>e will switch on every day at thetime you have set (see "Activate")If Automatic r<strong>in</strong>s<strong>in</strong>g is set to "On", themach<strong>in</strong>e will automatically carry outa brief r<strong>in</strong>se when it switches itselfon.If the System lock is activated, themach<strong>in</strong>e will not switch itself on atthe pre-set time.If the mach<strong>in</strong>e has switched itself onautomatically 3 times <strong>and</strong> no dr<strong>in</strong>ksor hot water have been dispensed,the mach<strong>in</strong>e will not switch itself onaga<strong>in</strong> automatically. Theprogrammed times will, however,rema<strong>in</strong> <strong>in</strong> memory <strong>and</strong> will bereactivated after manually switch<strong>in</strong>gthe mach<strong>in</strong>e on aga<strong>in</strong>. This preventsthe mach<strong>in</strong>e switch<strong>in</strong>g itself onunnecessarily, for example whilstyou are away on holiday, <strong>and</strong> youhave not cancelled the automaticswitch<strong>in</strong>g on procedure.Switch off after:To save energy, the mach<strong>in</strong>e can beset to switch off automatically byselect<strong>in</strong>g the "Switch off after" option. Atime of between 15 m<strong>in</strong>utes to 9 hourscan be set. This time is measured fromthe last time a dr<strong>in</strong>k was dispensed.^ Select "Switch off after" with the arrowsensors <strong>and</strong> touch the OK sensor.For example, 1:00 means that themach<strong>in</strong>e will switch off after 1 hour.30
Sett<strong>in</strong>gs: customis<strong>in</strong>g your mach<strong>in</strong>e^ First set the hour with one of thearrow sensors. Touch the OK sensor.^ Then use the arrow sensors to set them<strong>in</strong>utes. Touch the OK sensor.The mach<strong>in</strong>e will now switch off afterthe time you have set.If Automatic r<strong>in</strong>s<strong>in</strong>g is set to "On"<strong>and</strong> the mach<strong>in</strong>e has been used formak<strong>in</strong>g dr<strong>in</strong>ks, it will automaticallycarry out a brief r<strong>in</strong>se before itswitches itself off.Switch off at:If you always use your mach<strong>in</strong>e at aparticular time of the day you can set itto switch off automatically at a specifictime.^ Select "Switch off at" with the arrowsensors <strong>and</strong> touch the OK sensor.^ First set the hour with one of thearrow sensors. Touch the OK sensor.^ Then use the arrow sensors to set them<strong>in</strong>utes. Touch the OK sensor.If you activate the Timer, the <strong>coffee</strong>mach<strong>in</strong>e will switch off every day at thetime you have set (see "Activate").Activate^ Select "Activate" with the arrowsensors <strong>and</strong> touch the OK sensor.The "Switch on at" <strong>and</strong> "Switch off at"options will show <strong>in</strong> the display.Activate8 Switch on at8 Switch off at^ Select the option required with one ofthe arrow sensors.Touch<strong>in</strong>g the OK sensor activates theoption (ticked box) or deactivates (notick).^ Use one of the arrow sensors toselect "Accept" <strong>and</strong> then touch theOK sensor.^ Now use one of the arrow sensors toselect "Back A" <strong>and</strong> touch the OKsensor.If Automatic r<strong>in</strong>s<strong>in</strong>g is set to "On"<strong>and</strong> the mach<strong>in</strong>e has been used formak<strong>in</strong>g dr<strong>in</strong>ks, it will automaticallycarry out a brief r<strong>in</strong>se before itswitches itself off.31
Sett<strong>in</strong>gs: customis<strong>in</strong>g your mach<strong>in</strong>eCoffee jug (mak<strong>in</strong>g severalcups one after the other)This function can be used to make upto 8 cups of <strong>coffee</strong> automatically oneafter the other.^ Select "Sett<strong>in</strong>gs F" from the ma<strong>in</strong>menu <strong>and</strong> touch the OK sensor.Sett<strong>in</strong>gsCoffee jugProg. the amount^ Touch the right arrow sensor until"Coffee jug" is highlighted, <strong>and</strong> touchthe OK sensor.^ Select the number of cups you wishto make (3 to 8), <strong>and</strong> confirm withOK.^ Place a <strong>coffee</strong> jug of a suitable sizeunder the central spout, <strong>and</strong> followthe directions <strong>in</strong> the display.The <strong>coffee</strong> for each cup is <strong>in</strong>dividuallyground, brewed <strong>and</strong> poured. Eachstage of the process is shown <strong>in</strong> thedisplay. You can cancel the process atany stage by touch<strong>in</strong>g the OK sensor("Stop").^ When Programme f<strong>in</strong>ished shows <strong>in</strong>the display, confirm with OK.Sett<strong>in</strong>g the amount of <strong>coffee</strong>Both the flavour <strong>and</strong> the crema on the<strong>coffee</strong> depend on the quantity ofground <strong>coffee</strong> used.6 to 14 grams of <strong>coffee</strong> beans are usedper cup, depend<strong>in</strong>g on the type of<strong>coffee</strong>. The greater the quantity, thestronger the espresso, <strong>coffee</strong>,cappucc<strong>in</strong>o, latte macchiato orcappucc<strong>in</strong>o.The quality of the crema is also affectedby the quantity:– If the crema is evenly coloured butpale, it could mean that too little<strong>coffee</strong> is be<strong>in</strong>g used.– If the crema is very dark brown onone side, graduat<strong>in</strong>g almost to whiteon the other, it could mean that toomuch <strong>coffee</strong> is be<strong>in</strong>g used.You can set differentamounts of <strong>coffee</strong> beans tobe ground for espresso,<strong>coffee</strong>, cappucc<strong>in</strong>o <strong>and</strong> lattemacchiato.^ Select "Sett<strong>in</strong>gs F" from the ma<strong>in</strong>menu <strong>and</strong> touch the OK sensor.Sett<strong>in</strong>gsAmount of <strong>coffee</strong>Pre-brew<strong>in</strong>g^ Touch the right arrow sensor until"Amount of <strong>coffee</strong>" is highlighted <strong>and</strong>touch the OK sensor.32
Sett<strong>in</strong>gs: customis<strong>in</strong>g your mach<strong>in</strong>e^ Use the arrow sensor to select thedr<strong>in</strong>k that you wish to set the amountof <strong>coffee</strong> for <strong>and</strong> then touch the OKsensor.^ Use the arrow sensor to set theamount to "more" or "less".^ Touch the OK sensor to save thesett<strong>in</strong>g.Sett<strong>in</strong>g Pre-brew<strong>in</strong>gWhen the Pre-brew<strong>in</strong>g function isswitched on, the freshly ground <strong>coffee</strong>is first moistened with a little hot water.Then the rema<strong>in</strong><strong>in</strong>g water is forcedthrough the moistened <strong>coffee</strong> at highpressure. This will make the aroma ofthe <strong>coffee</strong> considerably more <strong>in</strong>tensive.Without pre-brew<strong>in</strong>g, hot water isforced straight away at high pressurethrough the ground <strong>coffee</strong>.You can select a normal or extra longPre-brew<strong>in</strong>g, or deselect Pre-brew<strong>in</strong>galtogether. The mach<strong>in</strong>e is deliveredwith Pre-brew<strong>in</strong>g set at Off (=Without).^ Select "Sett<strong>in</strong>gs F" from the ma<strong>in</strong>menu <strong>and</strong> touch the OK sensor.Sett<strong>in</strong>gsPre-brew<strong>in</strong>gTemperature^ Touch the right arrow sensor until"Pre-brew<strong>in</strong>g" is highlighted <strong>and</strong>touch the OK sensor.^ Use the arrow sensors to highlightthe Pre-brew<strong>in</strong>g option.^ Touch the OK sensor to save thesett<strong>in</strong>g.Sett<strong>in</strong>g the temperatureDifferent temperature ranges can beselected to take account of mak<strong>in</strong>g<strong>coffee</strong> at different altitudes. If themach<strong>in</strong>e is located above 2000 metersabove sea level the temperatures needto be set lower due to the change <strong>in</strong>pressure.There is a choice of three temperatureranges for each type of <strong>coffee</strong>, <strong>and</strong> twofor hot water.Not all types of <strong>coffee</strong> canwithst<strong>and</strong> a high temperature.Certa<strong>in</strong> types are too delicate<strong>and</strong> the crema on top would not be sogood.^ Select "Sett<strong>in</strong>gs F" from the ma<strong>in</strong>menu <strong>and</strong> touch the OK sensor.Sett<strong>in</strong>gsTemperatureAutomatic r<strong>in</strong>s<strong>in</strong>g^ Touch the right arrow sensor until"Temperature" is highlighted, <strong>and</strong>then touch the OK sensor.^ Use the arrow sensors to highlightthe dr<strong>in</strong>k for which you wish to set thetemperature, <strong>and</strong> then touch the OKsensor.^ Use the arrow sensors to highlightthe temperature option.^ Touch the OK sensor to save thesett<strong>in</strong>g.33
Sett<strong>in</strong>gs: customis<strong>in</strong>g your mach<strong>in</strong>eSett<strong>in</strong>g Automatic r<strong>in</strong>s<strong>in</strong>gTo remove any <strong>coffee</strong> grounds <strong>and</strong>residual milk from the system, the waterpip<strong>in</strong>g must be r<strong>in</strong>sed through beforethe first dr<strong>in</strong>k of the day is prepared. IfAutomatic r<strong>in</strong>s<strong>in</strong>g is selected, the r<strong>in</strong>secycle will take place automaticallywhilst the mach<strong>in</strong>e is still cold when themach<strong>in</strong>e is switched on. This will alsopre-heat the system because hot wateris used for the r<strong>in</strong>se process. Amessage will appear <strong>in</strong> the display tolet you know what is happen<strong>in</strong>g. Themach<strong>in</strong>e will also run an automatic r<strong>in</strong>sebefore it switches off, if it has beenused to prepare a dr<strong>in</strong>k.The mach<strong>in</strong>e is delivered with theAutomatic r<strong>in</strong>s<strong>in</strong>g option set to "On".To prevent water fromrunn<strong>in</strong>g <strong>in</strong>to the drip tray,always place an empty cupor the small clean<strong>in</strong>g conta<strong>in</strong>er underthe central spout before mak<strong>in</strong>g the firstdr<strong>in</strong>k.^ Select "Sett<strong>in</strong>gs F" from the ma<strong>in</strong>menu <strong>and</strong> touch the OK sensor.Sett<strong>in</strong>gsAutomatic r<strong>in</strong>s<strong>in</strong>gSteam system^ Touch the right arrow sensor until"Automatic r<strong>in</strong>s<strong>in</strong>g" is highlighted <strong>and</strong>touch the OK sensor.^ Touch one of the arrow sensors toselect "On" or "Off" <strong>and</strong> touch the OKsensor.34It is a good idea to set thisoption to "On" so that ther<strong>in</strong>se process cannot beforgotten.Sett<strong>in</strong>g the Steam systemThe mach<strong>in</strong>e has two heat<strong>in</strong>g systems.The Steam system enables milk froth orhot milk, <strong>and</strong> <strong>coffee</strong> or espresso to bemade at the same time. To saveenergy, the Steam system can beswitched off if steam is not required allthe time.If this option is switched off, milkfroth <strong>and</strong> hot milk can still be made;however the mach<strong>in</strong>e must beheated up first.The Steam heat<strong>in</strong>g system rema<strong>in</strong>sactive as long as the mach<strong>in</strong>e is stillon.^ Select "Sett<strong>in</strong>gs F" from the ma<strong>in</strong>menu <strong>and</strong> touch the OK sensor.Sett<strong>in</strong>gsSteam systemLight<strong>in</strong>g^ Touch the right arrow sensor until"Steam system" is highlighted, <strong>and</strong>then touch the OK sensor.^ Touch one of the arrow sensors toselect "On" or "Off", <strong>and</strong> then touchthe OK sensor.
Sett<strong>in</strong>gs: customis<strong>in</strong>g your mach<strong>in</strong>eLight<strong>in</strong>g: Sett<strong>in</strong>g thebrightnessYou can set how bright the light<strong>in</strong>gshould be on the mach<strong>in</strong>e:^ Select "Sett<strong>in</strong>gs F" from the ma<strong>in</strong>menu, <strong>and</strong> then touch the OK sensor.Sett<strong>in</strong>gsLight<strong>in</strong>gInfo^ Touch the right arrow sensor until"Light<strong>in</strong>g" is highlighted, <strong>and</strong> thentouch the OK sensor.^ Select "Brightness", <strong>and</strong> then touchthe OK sensor.^ Touch one of the arrow sensors toselect a lighter or darker sett<strong>in</strong>g, <strong>and</strong>then touch the OK sensor.If you cont<strong>in</strong>ue towards the left untilnone of the small white bars is show<strong>in</strong>g,the light<strong>in</strong>g will be switched off.Light<strong>in</strong>g: Sett<strong>in</strong>g the switch-offtimeThe mach<strong>in</strong>e lights up when switchedon. It switches off automatically after15 m<strong>in</strong>utes of <strong>in</strong>activity to save energy.The light<strong>in</strong>g can be set to rema<strong>in</strong> onafter the mach<strong>in</strong>e is switched off, <strong>and</strong>then to go out automatically after aspecified time if the mach<strong>in</strong>e is notused.This duration can be set to between15 m<strong>in</strong>utes <strong>and</strong> 6 hours:^ Switch the mach<strong>in</strong>e off.^ Touch the OK sensor whilst themach<strong>in</strong>e is off.^ Select "Light<strong>in</strong>g" <strong>and</strong> touch the OKsensor.^ Select "Switch off after" <strong>and</strong> touch theOK sensor.^ Select the switch-off time you wantwith the arrow sensors <strong>and</strong> touch theOK sensor.^ Select "Brightness", <strong>and</strong> touch the OKsensor.^ Touch one of the arrow sensors toselect a lighter or darker sett<strong>in</strong>g, <strong>and</strong>then touch the OK sensor to save thesett<strong>in</strong>g (factory default sett<strong>in</strong>g: Off).^ Touch "Back A" twice to leave themenu.The light<strong>in</strong>g will switch off automaticallyafter the duration set.35
Sett<strong>in</strong>gs: customis<strong>in</strong>g your mach<strong>in</strong>eInfo (show<strong>in</strong>g the number ofdr<strong>in</strong>ks)The "Info" option enables you to checkhow many dr<strong>in</strong>ks the mach<strong>in</strong>e hasalready dispensed or how many youcan still dispense before it has to bedescaled.^ Select "Sett<strong>in</strong>gs F" from the ma<strong>in</strong>menu, <strong>and</strong> then touch the OK sensor.Sett<strong>in</strong>gsInfoSafety^ Touch the right arrow sensor until"Info" is highlighted <strong>and</strong> touch the OKsensor.^ Select "No of dr<strong>in</strong>ks" or "Portions untildescale" with the arrow sensors <strong>and</strong>touch the OK sensor.With "No of dr<strong>in</strong>ks" you can check the"Total number of <strong>coffee</strong>s" or the numberof portions dispensed to date of aparticular type of <strong>coffee</strong>, milk froth, hotmilk or hot water.^ Touch the OK sensor to return to theprevious display.Safety (Activat<strong>in</strong>g the Systemlock)The mach<strong>in</strong>e can be locked to ensurethat it is not operated by unsupervisedchildren or persons who areunacqua<strong>in</strong>ted with the operat<strong>in</strong>g<strong><strong>in</strong>structions</strong>.When the mach<strong>in</strong>e is locked, the"Switch on at" sett<strong>in</strong>g of the timer willnot work.To activate or deactivate the Systemlock^ Select "Sett<strong>in</strong>gs F" from the ma<strong>in</strong>menu, <strong>and</strong> then touch the OK sensor.Sett<strong>in</strong>gsSafetyWater hardness^ Select "Safety" with the arrow sensors<strong>and</strong> touch the OK sensor.^ Use an arrow sensor to highlight"System lock" <strong>and</strong> then touch the OKsensor.^ Select "On" with the arrow sensors<strong>and</strong> touch the OK sensor.The mach<strong>in</strong>e will now lock as soon as itis switched off <strong>and</strong> cannot be switchedon aga<strong>in</strong>. If a sensor is touched, amessage <strong>and</strong> a locked padlock X willappear <strong>in</strong> the display.To deactivate the System lock,proceed as above, but select "Off".36
To override the System lock^ Touch the OK sensor for about3 seconds.The mach<strong>in</strong>e is now temporarilyunlocked <strong>and</strong> can be used to makedr<strong>in</strong>ks aga<strong>in</strong>. It locks itself as soon asthe mach<strong>in</strong>e is switched off.Sett<strong>in</strong>gs: customis<strong>in</strong>g your mach<strong>in</strong>eSett<strong>in</strong>g the water hardnessFor trouble-free operation of the <strong>coffee</strong>mach<strong>in</strong>e, <strong>and</strong> to ensure that thedescal<strong>in</strong>g rem<strong>in</strong>der appears <strong>in</strong> thedisplay at the appropriate time, it isimportant to set the water hardnesslevel. The water hardness level<strong>in</strong>dicates how much calcium isdissolved <strong>in</strong> the water. The higher thecalcium content, the harder the water,<strong>and</strong> the harder the water, the moreoften the mach<strong>in</strong>e will need to bedescaled.The mach<strong>in</strong>e measures the amount ofwater which has been taken <strong>in</strong>(<strong>in</strong>clud<strong>in</strong>g the amount required forproduc<strong>in</strong>g steam). The amount of waterwhich the mach<strong>in</strong>e can use before itneeds to be descaled will depend onthe water hardness level set. Lesswater will be used <strong>in</strong> hard water areasthan <strong>in</strong> soft water areas.Your local water authority will be able totell you the hardness of water <strong>in</strong> yourarea. Alternatively, you can measurethe hardness yourself us<strong>in</strong>g theenclosed test strip:^ Dip the strip <strong>in</strong> your dr<strong>in</strong>k<strong>in</strong>g water forapproximately a second, then shakeoff any excess water. The result willbe evident after about a m<strong>in</strong>ute.If the water is harder than40 °d/7.0 mmol/l, limescale will buildup more rapidy than with soft water.Descal<strong>in</strong>g will need to be carried outmore regularly than stated toprevent limescale damage to themach<strong>in</strong>e.The mach<strong>in</strong>e has four programmablelevels:– Soft:Local water hardness level 10-3 °d (0-0.6 mmol/l)Water through-flow: approx. 100 lSteam through-flow: approx. 120 m<strong>in</strong>.– Medium:Local water hardness level 14-7 °d (0.7-1.3 mmol/l)Water through-flow: approx. 80 lSteam through-flow: approx. 90 m<strong>in</strong>.– Hard:Local water hardness level 27-14 °d (1.3-2.5 mmol/l)Water through-flow: approx. 60 lSteam through-flow: approx. 60 m<strong>in</strong>.37
Sett<strong>in</strong>gs: customis<strong>in</strong>g your mach<strong>in</strong>e– Very hard:Local water hardness levels 3-414-21 °d (2.5-3.8 mmol/l) or moreWater through-flow: approx. 40 lSteam through-flow: approx. 30 m<strong>in</strong>.^ Select "Sett<strong>in</strong>gs F" from the ma<strong>in</strong>menu, <strong>and</strong> then touch the OK sensor.Sett<strong>in</strong>gsWater hardnessDisplay^ Use the arrow sensors to highlight"Water hardness" <strong>and</strong> then touch theOK sensor.^ Touch one of the arrow sensors to setthe water hardness, <strong>and</strong> then touchthe OK sensor.The water hardness level selected issaved to memory.Sett<strong>in</strong>g the displayYou can adjust both the contrast <strong>and</strong>the brightness of the display:^ Select "Sett<strong>in</strong>gs F" from the ma<strong>in</strong>menu, <strong>and</strong> then touch the OK sensor.Sett<strong>in</strong>gsDisplayVolume^ Touch the right arrow sensor until"Display" is highlighted <strong>and</strong> touch theOK sensor.^ Touch one of the arrow sensors toselect "Contrast" or "Brightness" <strong>and</strong>touch the OK sensor.^ Touch one of the arrow sensors to setthe contrast lower or higher or thebrightness lighter or darker.^ Touch the OK sensor to save thesett<strong>in</strong>g.Sett<strong>in</strong>g the volume (keypadtone, buzzer)You can choose for a keypad tone tosound each time a sensor is touched.The volume of the tone can also beadjusted:^ Select "Sett<strong>in</strong>gs F" from the ma<strong>in</strong>menu, <strong>and</strong> then touch the OK sensor.Sett<strong>in</strong>gsVolumePlate warmer^ Touch the right arrow sensor until"Volume" is highlighted, <strong>and</strong> thentouch the OK sensor.^ Touch one of the arrow sensors toselect "Buzzer tones" or "Keypadtone" <strong>and</strong> touch the OK sensor.^ Touch one of the arrow sensors to setthe volume quieter or louder.If you cont<strong>in</strong>ue towards the left untilnone of the small white bars is show<strong>in</strong>g,the tone will be switched off.^ Touch the OK sensor to save thesett<strong>in</strong>g.38
Sett<strong>in</strong>gs: customis<strong>in</strong>g your mach<strong>in</strong>eActivat<strong>in</strong>g the plate warmer(<strong>CVA</strong> 5060 only)You can connect a Miele EGW 4000-14,-29 or an EGW 5000-14 to the <strong>coffee</strong>mach<strong>in</strong>e us<strong>in</strong>g a special connectioncable available as an optionalaccessory from your Miele Dealer or theMiele Spare Parts Department.Once the plate warmer is connected,you will need to "<strong>in</strong>stall" the platewarmer <strong>in</strong> the "Sett<strong>in</strong>gs" menu.^ Select "Sett<strong>in</strong>gs F" from the ma<strong>in</strong>menu, <strong>and</strong> then touch the OK sensor.Sett<strong>in</strong>gsPlate warmerShowroom prog.^ Touch the right arrow sensor until"Plate warmer" is highlighted <strong>and</strong>touch the OK sensor.There are three options:AutomaticThe plate warmer will switch on <strong>and</strong> offtogether with the <strong>coffee</strong> mach<strong>in</strong>e. Theplate warmer must be switched on withthe On/Off control.If you have programmed the <strong>coffee</strong>mach<strong>in</strong>e to switch on at a specific time,the plate warmer will always switch onapprox. 30 m<strong>in</strong>utes before the <strong>coffee</strong>mach<strong>in</strong>e is due to switch on so thatyour cups are warmed up ready foryour <strong>coffee</strong>.OnYou can switch the plate warmer on<strong>and</strong> off manually whenever you want,<strong>in</strong>dependently of the <strong>coffee</strong> mach<strong>in</strong>e.OffThe plate warmer will not switch onbecause the <strong>coffee</strong> mach<strong>in</strong>e is notsupply<strong>in</strong>g it with any electricity. The<strong>coffee</strong> mach<strong>in</strong>e is delivered with "Off"as the default sett<strong>in</strong>g.To switch the plate warmer on<strong>in</strong>dependently of the <strong>coffee</strong> mach<strong>in</strong>eYou can switch the plate warmer on viathe <strong>coffee</strong> mach<strong>in</strong>e, even without the<strong>coffee</strong> mach<strong>in</strong>e be<strong>in</strong>g switched on.^ Touch the OK sensor whilst themach<strong>in</strong>e is off.^ Select "Plate warmer" <strong>and</strong> touch theOK sensor.^ Select "Manual - on" <strong>and</strong> touch theOK sensor.The plate warmer is now switched on.To switch the plate warmer off aga<strong>in</strong>,proceed as above aga<strong>in</strong>, but select"Manual - off" <strong>in</strong>stead of "Manual -on".If you have forgotten to switch theplate warmer off, it will switch itselfoff automatically after a maximum of9 hours.39
Sett<strong>in</strong>gs: customis<strong>in</strong>g your mach<strong>in</strong>eShowroom programmeThis function enables the mach<strong>in</strong>e to beillum<strong>in</strong>ated <strong>in</strong> a showroom situtationwithout the heaters work<strong>in</strong>g.Resett<strong>in</strong>g the factory defaultsett<strong>in</strong>gsThe "factory default" sett<strong>in</strong>g is used toreset the various sett<strong>in</strong>gs back to thedefault status.From here you can select whether toreset all sett<strong>in</strong>gs back to the default orto delete any user profiles.^ Select "Sett<strong>in</strong>gs F" from the ma<strong>in</strong>menu, <strong>and</strong> then touch the OK sensor.Sett<strong>in</strong>gsFactory defaultBack #^ Use an arrow sensor to highlight"Factory default", <strong>and</strong> then touch theOK sensor.Various options will then be available:All sett<strong>in</strong>gsThis option sets "All sett<strong>in</strong>gs" back tothe factory default.^ Select "Reset" under "All sett<strong>in</strong>gs",<strong>and</strong> touch the OK sensor.All sett<strong>in</strong>gs are then reset to the default.If you select "Reset" bymistake, switch the <strong>coffee</strong>mach<strong>in</strong>e off: Resett<strong>in</strong>g to thefactory defaults will not be carried out.Factory default sett<strong>in</strong>gs (the <strong>coffee</strong>mach<strong>in</strong>e is delivered with thefollow<strong>in</strong>g sett<strong>in</strong>gs)– Amount of <strong>coffee</strong> (medium)– Temperatures for <strong>coffee</strong> <strong>and</strong> hotwater (medium sett<strong>in</strong>gs for both)– Pre-brew<strong>in</strong>g (without)– Automatic r<strong>in</strong>s<strong>in</strong>g <strong>and</strong> Steam system(both set to "On")– Plate warmer <strong>and</strong> Showroom prog.(both set to "Off")– Time of day display (On for60 seconds),Clock format (24 h),Timer - Switch on at (12:00),Timer - Switch off after (1:00),Timer - Switch off at (12:00), (Switchon at <strong>and</strong> Switch off at are bothdeactivated)– Coffee jug (3 cups)– Light<strong>in</strong>g: Brightness (medium)– Safety: System lock (Off)– Water hardness (Very hard 4)40
Sett<strong>in</strong>gs: customis<strong>in</strong>g your mach<strong>in</strong>e– Display: Contrast (medium),Brightness (maximum)– Volume: Volume of buzzer tones <strong>and</strong>keypad tone (maximum sett<strong>in</strong>g forboth)– User profile: Revert (when switchedon).Miele|homeWith Miele|home, the <strong>coffee</strong> mach<strong>in</strong>ebecomes communication-enabled <strong>and</strong>can be monitored or operated via a pcor mobile phone. For further<strong>in</strong>formation, contact your nearest Mielesales office.User profilesYou can delete all user profiles exceptfor the st<strong>and</strong>ard one under "UserProfiles".^ Select "Reset" under "User profiles",<strong>and</strong> touch the OK sensor.User profiles are then deleted.If you select "Reset" bymistake, switch the <strong>coffee</strong>mach<strong>in</strong>e off: Resett<strong>in</strong>g to thefactory defaults will not be carried out.41
Programm<strong>in</strong>g the amount: sett<strong>in</strong>g the portion sizesThe flavour of the <strong>coffee</strong> produceddepends on the type of <strong>coffee</strong>, howf<strong>in</strong>ely the beans are ground <strong>and</strong> thequantity of water used. Not all espresso<strong>and</strong> <strong>coffee</strong> cups are the same size. Toensure the mach<strong>in</strong>e uses the rightamount of water to suit your taste <strong>and</strong>your cups, you can programme theamount to use.With milky dr<strong>in</strong>ks the proportions ofespresso, milk <strong>and</strong> milk froth areimportant for the taste. Theseproportions can be set for cappucc<strong>in</strong>o<strong>and</strong> latte macchiato.You can programme the amount <strong>in</strong> twoways, either by touch<strong>in</strong>g the OK sensorcont<strong>in</strong>ually, or via the "Sett<strong>in</strong>gs" option.If a User profile has been activated,the proportions for this particularUser profile will be set.If you wish to set the proportions forall of the User profiles, select the"St<strong>and</strong>ard" user profile.Programm<strong>in</strong>g the amount ofespresso, <strong>coffee</strong>, hot milk <strong>and</strong>milk froth via the OK sensor^ Place the appropriate cup for theamount you want to programmeunder the spouts.^ Select the type of dr<strong>in</strong>k you require.^ Touch the OK sensor until "Prog. theamount" appears <strong>in</strong> the display.^ When sufficient liquid has flowed <strong>in</strong>tothe cup touch the OK sensor aga<strong>in</strong>."Save" will then appear <strong>in</strong> the display.The volumes of water or milkprogrammed <strong>in</strong> will now be dispensedevery time that particular dr<strong>in</strong>k isselected.Water flow stops automatically whenthe maximum amount possible isreached. The maximum amountpossible for that type of dr<strong>in</strong>k will besaved.If there is <strong>in</strong>sufficient water or milk <strong>in</strong>the water conta<strong>in</strong>er or milk flask, theprocess will be stopped <strong>and</strong> theamount will not be saved.42
Programm<strong>in</strong>g the amount: sett<strong>in</strong>g the portion sizesProgramm<strong>in</strong>g the proportionsfor cappucc<strong>in</strong>o or lattemacchiato via the OK sensor^ Place the appropriate cup or glassfor the amount you want toprogramme under the spouts.^ Select Cappucc<strong>in</strong>o or LatteMacchiato.^ Touch the OK sensor until the displayshows the options for Cappucc<strong>in</strong>o(Milk froth, Espresso) or LatteMacchiato (Hot milk, Milk froth,Espresso).^ Once sufficient has flown <strong>in</strong>to the cupor glass <strong>and</strong> "Save" shows <strong>in</strong> thedisplay, press the OK sensor to savethe amount.Each subsequent dr<strong>in</strong>k of this type willthen have the same proportions of<strong>coffee</strong>, milk etc.8 Hot milk8 Milk frothLatte Macchiato^ Use the arrow sensor to select thecomponent you wish to set theamount for.^ Touch the OK sensor to activate atick next the component you haveselected so that you can thenprogramme its amount.^ Repeat this for all componentsrequired for that dr<strong>in</strong>k.^ Select "Start" with the arrow sensors<strong>and</strong> touch the OK sensor.The mach<strong>in</strong>e will now start the processfor mak<strong>in</strong>g a cappucc<strong>in</strong>o or lattemacchiato.As soon as the component requiredstarts to flow <strong>in</strong>to the cup or glass"Programme the amount" will appear <strong>in</strong>the display.43
Programm<strong>in</strong>g the amount: sett<strong>in</strong>g the portion sizesProgramm<strong>in</strong>g the amount forhot water via the Hot watersensor^ Place the appropriate cup for theamount you want to programmeunder the hot water spout.^ Touch the Hot water sensor until"Prog. the amount" appears <strong>in</strong> thedisplay.^ When sufficient water has flowed <strong>in</strong>tothe cup touch the Hot water sensoraga<strong>in</strong>. "Save" will then appear <strong>in</strong> thedisplay.Each subsequent portion of hot waterwill then have the same amount.Programm<strong>in</strong>g the amount via"Sett<strong>in</strong>gs"^ Select "Sett<strong>in</strong>gs F" from the ma<strong>in</strong>menu, <strong>and</strong> then touch the OK sensor.Sett<strong>in</strong>gsProg. the amountAmount of <strong>coffee</strong>^ Use the arrow sensors to highlight"Prog. the amount", <strong>and</strong> then touchthe OK sensor.^ Use the arrow sensor to select thedr<strong>in</strong>k you wish to set the amount for.^ Select "Start" <strong>and</strong> touch the OKsensor.The procedure is now the same as forprogramm<strong>in</strong>g the amount us<strong>in</strong>g the OKsensor or the Hot water sensor.44
Sett<strong>in</strong>g up User profilesTo cater for different tastes <strong>and</strong>preferences, you can enter up to 9<strong>in</strong>dividual User profiles. For each Userprofile, you can select the follow<strong>in</strong>g<strong>in</strong>dividual sett<strong>in</strong>gs:– The amount of water for<strong>coffee</strong>-based dr<strong>in</strong>ks <strong>and</strong> hot water– The amount of milk for dr<strong>in</strong>ks withmilk– The amount of <strong>coffee</strong>– The water temperature– Pre-brew<strong>in</strong>g(See "Programm<strong>in</strong>g the amount: sett<strong>in</strong>gthe proportions" <strong>and</strong> "Sett<strong>in</strong>gs:customis<strong>in</strong>g your mach<strong>in</strong>e").User profileq r H I J L n m C^ Touch the right arrow sensor until"User profile" is highlighted, <strong>and</strong> thentouch the OK sensor.You can now:– Select User profile from the Userprofiles which are already allocated.– Create User profile, if you want toenter a new User profile.The follow<strong>in</strong>g options only appear if youhave already entered a new Userprofile <strong>in</strong> addition to the St<strong>and</strong>ard Userprofile:– Change User profile, if you want toalter a User profile.– Delete User profile, if you want todelete a User profile.– Revert: You can programme themach<strong>in</strong>e so that it always reverts tothe St<strong>and</strong>ard User profile or so that itcont<strong>in</strong>ues to operate us<strong>in</strong>g a Userprofile you have set.Select<strong>in</strong>g a User profile^ Select the User profile you want withthe arrow sensors <strong>and</strong> touch the OKsensor.Espresso+ Georgeq r H I J L n m CTo show that a user hasbeen selected, the top l<strong>in</strong>e ofthe display will now show alarge symbol for a "user"!45
Sett<strong>in</strong>g up User profilesCreat<strong>in</strong>g a User profile^ Use the arrow sensors to highlight"Create", <strong>and</strong> then touch the OKsensor.You can allocate up to 9 Userprofiles. If you try to allocate morethan 9 User profiles, "Memory full"will appear <strong>in</strong> the display <strong>and</strong> youwill need to delete one name tocreate space.Letters <strong>and</strong> numbers will now appear <strong>in</strong>the display. Use the arrow sensors toselect the letters <strong>and</strong> numbers yourequire.A new word always starts with a capitalletter. The rest of the word willautomatically be <strong>in</strong> lower case.Hyphens <strong>and</strong> spaces can be usedbetween lower case letters.^ Use the arrow sensors to select thecharacters you require.^ Confirm each one with the OKsensor.The characters you have chosen willappear <strong>in</strong> the top l<strong>in</strong>e of the display.If you make a mistake, usethe arrow sensors to selectthe b<strong>in</strong> symbol <strong>and</strong> touch theOK sensor. The last character will bedeleted.Sav<strong>in</strong>g an entry^ When you have f<strong>in</strong>ished mak<strong>in</strong>g yourentry, use the arrow sensors tohighlight the word "OK" <strong>and</strong> thentouch the OK sensor.The User profile welcome screen willappear briefly <strong>in</strong> the display, <strong>and</strong> thenthe Ma<strong>in</strong> menu.Not sav<strong>in</strong>g an entry^ If you don't wish to save your entry,use the arrow sensors to highlight theword "Back A" <strong>and</strong> then touch theOK sensor.Chang<strong>in</strong>g a User profileOnce you have selected the "Change"option <strong>and</strong> confirmed your selectionwith OK,^ select the User profile, <strong>and</strong> touch theOK sensor.Now proceed as described <strong>in</strong> "Creat<strong>in</strong>ga User profile".– To delete a letter, select the b<strong>in</strong>symbol.– To enter new characters, select therelevant character <strong>and</strong> confirm withOK.– Save the new name by select<strong>in</strong>g"OK" <strong>in</strong> the display <strong>and</strong> touch<strong>in</strong>g theOK sensor.46
Sett<strong>in</strong>g up User profilesDelet<strong>in</strong>g a User profileIf you want to delete the User profilecompletely,^ Select "Delete User profile" us<strong>in</strong>g theOK sensor.^ Use the arrow sensors to select theuser profile you want to delete.^ Touch the OK sensor.A tick will appear after the user profile<strong>and</strong> after a short while it will be deleted.RevertYou can programme the mach<strong>in</strong>e sothat it reverts to the St<strong>and</strong>ard Userprofile after you have made each dr<strong>in</strong>k,or so that it cont<strong>in</strong>ues to operate us<strong>in</strong>ga User profile you have set.To set the profile to be used:^ Select "Revert" with one of the arrowsensors.You can now select one of thefollow<strong>in</strong>g:After each useThe mach<strong>in</strong>e will automatically revert tothe St<strong>and</strong>ard User profile each time adr<strong>in</strong>k is dispensed.^ Select "After each use" with the arrowsensors <strong>and</strong> touch the OK sensor.When switched onEach time the mach<strong>in</strong>e is switched on itwill automatically select the St<strong>and</strong>ardUser profile regardless of which Userprofile was set before the mach<strong>in</strong>e waslast switched off.^ Select "When switched on" with thearrow sensors <strong>and</strong> touch the OKsensor.ManuallyThe <strong>coffee</strong> mach<strong>in</strong>e will store the userprofile you have selected until youselect another one.^ Select "Manually" with the arrowsensors <strong>and</strong> touch the OK sensor.47
Clean<strong>in</strong>g <strong>and</strong> careChartTime <strong>in</strong>tervalEach time milk is used to make adr<strong>in</strong>k, if more than one hour haspassed s<strong>in</strong>ce the last dr<strong>in</strong>k wasmadeEvery day(usually at the end of the day,before the mach<strong>in</strong>e is switched off)Once a week(or more often if badly soiled)Once a monthApprox. every 200 portionsDepend<strong>in</strong>g on the hardness of thewaterWhat do I have to do?R<strong>in</strong>se milk pipeworkR<strong>in</strong>se the system (pipework)Clean the milk pipework (with clean<strong>in</strong>g agent)Clean the sta<strong>in</strong>less steel milk flask <strong>and</strong> lidClean the central spoutClean the water conta<strong>in</strong>erClean the <strong>in</strong>dividual conta<strong>in</strong>ersClean the drip tray <strong>and</strong> the drip tray coverClean the <strong>coffee</strong> bean conta<strong>in</strong>erClean the central spout connectorClean the <strong>in</strong>side of the mach<strong>in</strong>eClean the drip tray <strong>in</strong>side the mach<strong>in</strong>e doorClean the brew unitClean the front of the mach<strong>in</strong>e (especially straight afterdescal<strong>in</strong>g)Lubricate the cap on the central spout connectorDegrease the brew unit (with clean<strong>in</strong>g tablets)Descale the mach<strong>in</strong>e48
Clean<strong>in</strong>g <strong>and</strong> careAlways allow the mach<strong>in</strong>e to cooldown before clean<strong>in</strong>g. Please beaware that the water <strong>in</strong> the drip traywill be hot.Danger of scald<strong>in</strong>g.Do not clean the mach<strong>in</strong>e with asteam cleaner as this will damagethe mach<strong>in</strong>e.Do not use cleaners conta<strong>in</strong><strong>in</strong>gchlorides, acids, soda or scour<strong>in</strong>gagents. These would damage thesurface.It is important to clean the mach<strong>in</strong>eregularly, as the used <strong>coffee</strong> groundswill soon go mouldy.All removable parts can be cleaned <strong>in</strong>the dishwasher except for:– the brew unit– the <strong>coffee</strong> bean conta<strong>in</strong>er– the sta<strong>in</strong>less steel milk flask <strong>and</strong> lid– the cover to the central spout.If the parts are cleaned frequently <strong>in</strong> adishwasher, they can becomediscoloured from regular contact withfood residues (e.g. tomatoes) <strong>in</strong> thedishwasher, or the surface can becomedamaged.R<strong>in</strong>se the systemBefore switch<strong>in</strong>g the mach<strong>in</strong>e off forany length of time, the pipework, brewsystem <strong>and</strong> central spout need to becleaned.If you have switched the automaticr<strong>in</strong>s<strong>in</strong>g function off, you will need tor<strong>in</strong>se the system through manually.Place the smaller of the two conta<strong>in</strong>ersunder the central spout.Ma<strong>in</strong>tenanceq r H I J L n m C^ Touch the right arrow sensor tohighlight the ma<strong>in</strong>tenance symbol<strong>and</strong> touch the OK sensor.^ Select "R<strong>in</strong>se the system" <strong>and</strong> touchthe OK sensor.^ Select "Start" <strong>and</strong> touch the OKsensor.The ma<strong>in</strong> menu will reappear <strong>in</strong> thedisplay after the pipework has beenr<strong>in</strong>sed. The mach<strong>in</strong>e can then beswitched off.49
Clean<strong>in</strong>g <strong>and</strong> careMilk pipeworkR<strong>in</strong>se milk pipeworkTo prevent milk go<strong>in</strong>g off <strong>in</strong> themach<strong>in</strong>e <strong>and</strong> the pipework gett<strong>in</strong>gclogged up, it should be r<strong>in</strong>sed throughafter use. R<strong>in</strong>s<strong>in</strong>g is not a substitute forclean<strong>in</strong>g the pipework through at theend of the day.Ma<strong>in</strong>tenanceq r H I J L n m C^ Touch the right arrow sensor tohighlight the ma<strong>in</strong>tenance symbol<strong>and</strong> touch the OK sensor.^ Select "R<strong>in</strong>se milk pipework" <strong>and</strong>touch the OK sensor.^ Select "Start" <strong>and</strong> touch the OKsensor.Follow the <strong><strong>in</strong>structions</strong> <strong>in</strong> the display.Clean milk pipeworkTo prevent milk go<strong>in</strong>g off <strong>in</strong> themach<strong>in</strong>e <strong>and</strong> the pipework gett<strong>in</strong>gclogged up it should be cleaned at theend of each day us<strong>in</strong>g the clean<strong>in</strong>gagent supplied.^ If the milk pipework <strong>in</strong> the lid isclogged, use the clean<strong>in</strong>g brush toclean it under runn<strong>in</strong>g water.Insert the brush <strong>in</strong> the pipework <strong>and</strong>move it back <strong>and</strong> forth as far as it willgo until all the milk deposits areremoved.Ma<strong>in</strong>tenanceq r H I J L n m C^ Touch the right arrow sensor tohighlight the ma<strong>in</strong>tenance symbol<strong>and</strong> touch the OK sensor.^ Select "Clean milk pipework" <strong>and</strong>touch the OK sensor.^ Select "Start" <strong>and</strong> touch the OKsensor.The display will let you know the currentstatus of the mach<strong>in</strong>e or what actionneeds to be taken.^ Follow the <strong><strong>in</strong>structions</strong> step by step.To r<strong>in</strong>se the pipework <strong>in</strong> the lid forthe sta<strong>in</strong>less steel milk flask, fill thelarger of the two plastic conta<strong>in</strong>ersto the "max." mark with cold water.Fit the lid from the milk flask to theconta<strong>in</strong>er, mak<strong>in</strong>g sure that itengages correctly. Hang it <strong>in</strong> themach<strong>in</strong>e where the sta<strong>in</strong>less steelmilk flask normally sits.50
Clean<strong>in</strong>g <strong>and</strong> careSta<strong>in</strong>less steel milk flaskThe sta<strong>in</strong>less steel milk flask <strong>and</strong> lidmust be washed by h<strong>and</strong> us<strong>in</strong>g hotwater.To clean the pipework <strong>in</strong> the lid forthe sta<strong>in</strong>less steel milk flask, fill thelarger of the two plastic conta<strong>in</strong>ersto the "max." mark with lukewarmwater to dissolve the clean<strong>in</strong>g agent.Fit the lid from the milk flask to theconta<strong>in</strong>er, mak<strong>in</strong>g sure that itengages correctly. Hang it <strong>in</strong> themach<strong>in</strong>e where the sta<strong>in</strong>less steelmilk flask normally sits.It is important to use the Mieleclean<strong>in</strong>g agent as it has beendeveloped for this <strong>coffee</strong> mach<strong>in</strong>e. Itis available via the <strong>in</strong>ternet atwww.miele-shop.com, from yourMiele Dealer or from the Miele SpareParts Department.It is important to keep the top of theflask <strong>and</strong> the seals clean (whilst fill<strong>in</strong>g it<strong>and</strong> carry<strong>in</strong>g it). Any soil<strong>in</strong>g can lead toa malfunction of the flask <strong>in</strong> themach<strong>in</strong>e.^ Clean the sta<strong>in</strong>less steel flask withhot water after use to remove anyresidual milk.^ Clean the h<strong>and</strong>le under the tap <strong>and</strong>then clean it thoroughly with a cle<strong>and</strong>amp cloth to remove any milkresidues.^ If the milk pipework <strong>in</strong> the lid isclogged, use the clean<strong>in</strong>g brush toclean it under runn<strong>in</strong>g water.Insert the brush <strong>in</strong> the pipework <strong>and</strong>move it back <strong>and</strong> forth as far as it willgo until all the milk deposits areremoved.The milk pipework will now be cleaned.The pipework is clean once Prog.f<strong>in</strong>ished appears <strong>in</strong> the display. Youcan then switch the mach<strong>in</strong>e off.51
Clean<strong>in</strong>g <strong>and</strong> careCentral spout^ Pull the central spout down as far asit will go (a), <strong>and</strong> pull the coverforwards to remove.^ Remove the two rubber stoppers,<strong>and</strong> manually clean these <strong>and</strong> thejets thoroughly.^ Replace the stoppers.^ Turn the cover around, push the<strong>in</strong>sert up <strong>and</strong> out <strong>and</strong> then clean bothparts thoroughly.^ Slide the <strong>in</strong>sert back <strong>in</strong>to the coveruntil it clicks <strong>in</strong>to place.^ After clean<strong>in</strong>g, push the jets firmlyback <strong>in</strong>to place on the central spout,ensur<strong>in</strong>g they are secure.^ Replace the cover <strong>and</strong> then push thecentral spout back up <strong>in</strong>to position.^ Pull the jets out of the central spout.52
Clean<strong>in</strong>g <strong>and</strong> careWater conta<strong>in</strong>erEmpty the water conta<strong>in</strong>er daily <strong>and</strong> fillwith fresh, cold tap water just beforeuse.When clean<strong>in</strong>g, make sure that thereis no soil<strong>in</strong>g <strong>in</strong> the area around thevalve. Otherwise the conta<strong>in</strong>er willnot sit correctly <strong>and</strong> this could result<strong>in</strong> water leak<strong>in</strong>g from the mach<strong>in</strong>e.^ Clean the surface the water conta<strong>in</strong>ersits on thoroughly, tak<strong>in</strong>g specialcare to clean the channels properly.Waste conta<strong>in</strong>erAfter a certa<strong>in</strong> period of time a rem<strong>in</strong>derto empty the waste conta<strong>in</strong>er willappear <strong>in</strong> the display. The wasteconta<strong>in</strong>er must be cleaned when thismessage appears. However it is betterto clean the waste conta<strong>in</strong>er every dayto prevent <strong>coffee</strong> grounds from turn<strong>in</strong>gmouldy.There will probably also be water <strong>in</strong> thewaste conta<strong>in</strong>er left over from ther<strong>in</strong>s<strong>in</strong>g process.L<strong>in</strong><strong>in</strong>g the waste conta<strong>in</strong>erwith one or two pieces ofkitchen paper towel willmake it easier to tip the grounds out.^ Clean the waste conta<strong>in</strong>er with hotwater <strong>and</strong> a little wash<strong>in</strong>g-up liquid or<strong>in</strong> the dishwasher, <strong>and</strong> dry with acloth.^ Also clean the now accessible area<strong>in</strong> the mach<strong>in</strong>e where the wasteconta<strong>in</strong>er sits, thoroughly.53
Clean<strong>in</strong>g <strong>and</strong> careDrip trayThere is a sensor <strong>in</strong> the drip tray whichcauses a message to appear <strong>in</strong> thedisplay when the drip tray is full <strong>and</strong>needs to be emptied. Remove the tray<strong>and</strong> empty <strong>and</strong> clean it when thismessage appears.However, to avoid a build-up of odours,the drip tray should be cleaned everyday.After runn<strong>in</strong>g the last r<strong>in</strong>se, youshould leave the drip tray <strong>in</strong> positionfor a while before clean<strong>in</strong>g it so thatyou catch any rema<strong>in</strong><strong>in</strong>g water fromthe system.Remove the drip tray carefully, asthe water <strong>in</strong> it could be very hot.Danger of scald<strong>in</strong>g.^ Open the mach<strong>in</strong>e door <strong>and</strong> carefullyremove the drip tray from themach<strong>in</strong>e.The grid <strong>in</strong> the drip tray prevents thewater from spill<strong>in</strong>g out of the traywhen it is be<strong>in</strong>g carried.^ Clean the drip tray <strong>and</strong> the grid withhot water <strong>and</strong> a little wash<strong>in</strong>g-upliquid, or <strong>in</strong> the dishwasher <strong>and</strong> drywith a cloth.Make sure that the metal contactdiscs at the top of the drip tray arecleaned <strong>and</strong> dried properly. Thesemetal discs send a signal to themach<strong>in</strong>e when the drip tray is full orif it is not <strong>in</strong> the mach<strong>in</strong>e. The discswill not convey these messages ifthey are dirty or damp.^ Push the drip tray with the grid alongthe right h<strong>and</strong> edge back <strong>in</strong>to themach<strong>in</strong>e.^ Close the door.Drip tray cover^ Take the drip tray cover out <strong>and</strong>wash it.54
Clean<strong>in</strong>g <strong>and</strong> careCoffee bean conta<strong>in</strong>erThe <strong>coffee</strong> bean conta<strong>in</strong>er must becleaned by h<strong>and</strong> with hot water <strong>and</strong>a little wash<strong>in</strong>g-up liquid.^ Take the <strong>coffee</strong> bean conta<strong>in</strong>er out ofthe mach<strong>in</strong>e <strong>and</strong> then push the lidback to remove it.^ Clean the <strong>coffee</strong> bean conta<strong>in</strong>er <strong>and</strong>the lid, <strong>and</strong> then dry them boththoroughly.^ Replace the lid, <strong>and</strong> push theconta<strong>in</strong>er back <strong>in</strong>to place <strong>in</strong> themach<strong>in</strong>e.Central spout connectorInterior <strong>and</strong> mach<strong>in</strong>e door^ First take out all removable parts <strong>and</strong>then clean the <strong>in</strong>terior <strong>and</strong> themach<strong>in</strong>e door with a mild solution ofhot water <strong>and</strong> wash<strong>in</strong>g-up liquid.Use your vacuum cleaner toremove dry ground <strong>coffee</strong>residues.^ Also clean the small drip tray <strong>in</strong> thelower part of the <strong>in</strong>side of the doorthoroughly.The part which connects the brew unit<strong>and</strong> the central spout is located on the<strong>in</strong>side of the mach<strong>in</strong>e door.^ Clean this connection regularly with adamp cloth, tak<strong>in</strong>g care not to wipethe grease off the cap.^ Lubricate the cap regularly, once amonth, with the silicone greasesupplied.55
Clean<strong>in</strong>g <strong>and</strong> careBrew unitThe brew unit must be cleaned oncea week by h<strong>and</strong> <strong>and</strong> without us<strong>in</strong>gwash<strong>in</strong>g-up liquid, because themov<strong>in</strong>g parts are lubricated <strong>and</strong> therubber seals could become brittle <strong>in</strong>a dishwasher.Leave the h<strong>and</strong>le <strong>in</strong> the sameposition, otherwise the brew unit willbe out of alignment <strong>and</strong> you will notbe able to push it back <strong>in</strong>to the<strong>coffee</strong> mach<strong>in</strong>e.^ Remove the water conta<strong>in</strong>er, wasteconta<strong>in</strong>er <strong>and</strong> the <strong>coffee</strong> chute cover.^ Press the light coloured button underthe h<strong>and</strong>le of the brew unit a <strong>and</strong>whilst do<strong>in</strong>g so turn the h<strong>and</strong>le <strong>in</strong> thedirection of the arrow b.^ Press the catch <strong>in</strong> front of the brewunit c downwards, <strong>and</strong> pull the brewunit carefully out of the mach<strong>in</strong>e.If the brew unit is difficult to remove,it is not correctly positioned (see"Problem solv<strong>in</strong>g guide").^ Clean the brew unit thoroughly underhot runn<strong>in</strong>g water without us<strong>in</strong>gwash<strong>in</strong>g-up liquid.^ Wipe any rema<strong>in</strong><strong>in</strong>g <strong>coffee</strong> off the twofilters. One filter is located <strong>in</strong> thefunnel a <strong>and</strong> the other to the left ofthe funnel b.^ Dry the funnel area a to preventground <strong>coffee</strong> from stick<strong>in</strong>g to it.^ Clean the <strong>in</strong>side of the mach<strong>in</strong>e <strong>and</strong>remove any <strong>coffee</strong> residues.Use your vacuum cleaner toremove dry ground <strong>coffee</strong>residues.^ Place the brew unit on the guiderunners <strong>and</strong>, keep<strong>in</strong>g it straight, pushit <strong>in</strong>to the mach<strong>in</strong>e.56
Clean<strong>in</strong>g <strong>and</strong> careMa<strong>in</strong>tenance^ Press the light-coloured button underthe h<strong>and</strong>le of the brew unit a <strong>and</strong>whilst do<strong>in</strong>g so turn the h<strong>and</strong>le <strong>in</strong> thedirection of the arrow b.Degreas<strong>in</strong>g the brew unitDepend<strong>in</strong>g on the natural oilcontent of the <strong>coffee</strong> used,the brew unit could becomeblocked. It should therefore be cleanedafter approx. 200 portions have beenprepared us<strong>in</strong>g the clean<strong>in</strong>g tabletssupplied with the mach<strong>in</strong>e. Thesehave been specially formulated for use<strong>in</strong> this <strong>coffee</strong> mach<strong>in</strong>e <strong>and</strong> are availablevia the <strong>in</strong>ternet at www.miele-shop.com,from your Miele Dealer or from theMiele Spare Parts Department.q r H I J L n m C^ Touch the right arrow sensor tohighlight the ma<strong>in</strong>tenance symbol<strong>and</strong> touch the OK sensor.^ Select "Clean brew unit" <strong>and</strong> touchthe OK sensor.^ Select "Start" <strong>and</strong> touch the OKsensor.Various messages will now appear <strong>in</strong>the display.^ Follow the <strong><strong>in</strong>structions</strong> given.So that you do not have toempty the drip tray toofrequently, place a smallconta<strong>in</strong>er under the central spout.However, s<strong>in</strong>ce the <strong>in</strong>side of themach<strong>in</strong>e is also be<strong>in</strong>g r<strong>in</strong>sed through,you will still need to empty the drip trayso that the clean<strong>in</strong>g programme cancont<strong>in</strong>ue.To rem<strong>in</strong>d you to degrease the brewunit, the message "Please run theclean<strong>in</strong>g programme" will appear <strong>in</strong>the display after 200 portions. It willnot go out until the clean<strong>in</strong>gprogramme has been carried out.The clean<strong>in</strong>g programme lasts forapprox. 6 m<strong>in</strong>utes.57
Clean<strong>in</strong>g <strong>and</strong> careWhen prompted to Drop a clean<strong>in</strong>gtablet <strong>in</strong> the ground <strong>coffee</strong> chute,^ remove the <strong>coffee</strong> chute cover <strong>and</strong>open the lid of the <strong>coffee</strong> chute.^ Place a clean<strong>in</strong>g tablet <strong>in</strong>to the <strong>coffee</strong>chute.^ Close the lid, replace the <strong>coffee</strong>chute cover <strong>and</strong> close the mach<strong>in</strong>edoor.^ Follow the <strong><strong>in</strong>structions</strong> given.When "Prog. f<strong>in</strong>ished" appears <strong>in</strong> thedisplay,^ touch the OK sensor.The brew unit has now been degreased<strong>and</strong> dr<strong>in</strong>ks can be prepared aga<strong>in</strong>.Mach<strong>in</strong>e frontIf soil<strong>in</strong>g is not removed promptly itcould cause the surface of themach<strong>in</strong>e to alter or discolour.Remove any soil<strong>in</strong>g immediately.^ Switch the mach<strong>in</strong>e off with theOn/Off button.^ Clean the front us<strong>in</strong>g a damp Mielemicrofibre E-cloth or with a cleansponge <strong>and</strong> a solution of hot water<strong>and</strong> wash<strong>in</strong>g-up liquid. Wipe dryus<strong>in</strong>g a soft cloth.Make sure that water cannot getbeh<strong>in</strong>d the display.All external surfaces are susceptibleto scratch<strong>in</strong>g. Scratches on glasssurfaces could even cause abreakage.Contact with unsuitable clean<strong>in</strong>gagents can discolour the externalsurfaces.Wipe up any spillages or splashesof descal<strong>in</strong>g agent immediately.58
Clean<strong>in</strong>g <strong>and</strong> careAvoid the follow<strong>in</strong>g on all types offront:– clean<strong>in</strong>g agents conta<strong>in</strong><strong>in</strong>g soda,amonia, acids or chlorides,– solvent-based clean<strong>in</strong>g agents,– clean<strong>in</strong>g agents conta<strong>in</strong><strong>in</strong>gdescal<strong>in</strong>g agents,– sta<strong>in</strong>less steel clean<strong>in</strong>g agents,– dishwasher cleaner,– abrasive clean<strong>in</strong>g agents, e.g.powder cleaners <strong>and</strong> creamcleaners,– hard, abrasive sponges, e.g. potscourers, brushes or sponges whichhave been previously used withabrasive clean<strong>in</strong>g agents,– sharp metal scrapers.59
Descal<strong>in</strong>g the mach<strong>in</strong>eThe mach<strong>in</strong>e should be descaledregularly to ensure that it functionscorrectly. It will rem<strong>in</strong>d you when thisneeds to be carried out.When only 50 portions can be madebefore the next descal<strong>in</strong>g programmehas to be run, the follow<strong>in</strong>g messagewill appear <strong>in</strong> the display the first time:No. of portions until descal<strong>in</strong>g: 50.The rema<strong>in</strong><strong>in</strong>g number of dr<strong>in</strong>ks thatcan be made before descal<strong>in</strong>g will nowshow <strong>in</strong> the display after each dr<strong>in</strong>k ismade.^ Confirm the message by touch<strong>in</strong>g theOK sensor.If you let it run to 0, "Descal<strong>in</strong>gprogramme must be carried out" willappear <strong>in</strong> the display.Touch the OK sensor to startthe descal<strong>in</strong>g programme. Ifyou do not have time to waituntil the descal<strong>in</strong>g programme hasf<strong>in</strong>ished (it takes approx. 20 m<strong>in</strong>utes)you can switch the mach<strong>in</strong>e off.However, you will not be able to makeany more dr<strong>in</strong>ks until the descal<strong>in</strong>gprogramme has been carried out.Only use the descal<strong>in</strong>g tabletssupplied with the mach<strong>in</strong>e. (Makesure you use the correct tablets -approx. 5 cm diameter, pack of 6).These have been speciallyformulated for use <strong>in</strong> this <strong>coffee</strong>mach<strong>in</strong>e <strong>and</strong> are available from theMiele Spare Parts Department or viathe <strong>in</strong>ternet at www.miele-shop.com.Other types of descal<strong>in</strong>g agents willdamage the mach<strong>in</strong>e <strong>and</strong> affect thetaste.Follow the <strong><strong>in</strong>structions</strong> on thepackage carefully to avoiddamag<strong>in</strong>g the mach<strong>in</strong>e.Make sure that you wipe up anyspillages or splashes of descal<strong>in</strong>gagent immediately to avoiddamag<strong>in</strong>g the mach<strong>in</strong>e front.After runn<strong>in</strong>g the descal<strong>in</strong>gprogramme, remember to clean thewater conta<strong>in</strong>er <strong>and</strong> the drip traythoroughly to remove any descal<strong>in</strong>gresidues.60
Descal<strong>in</strong>g the mach<strong>in</strong>eTo run the descal<strong>in</strong>gprogrammeMa<strong>in</strong>tenanceq r H I J L n m C^ Touch the right arrow sensor until"Ma<strong>in</strong>tenance" is highlighted, <strong>and</strong>confirm with OK, or,^ If the mach<strong>in</strong>e is switched off, touchthe OK sensor whilst the mach<strong>in</strong>e isswitched off.^ Select "Descale" <strong>and</strong> touch the OKsensor.^ Select "Start" <strong>and</strong> touch the OKsensor.The display will guide you through thewhole procedure. Please follow the<strong><strong>in</strong>structions</strong> to, for example, empty thedrip tray, fill the water conta<strong>in</strong>er etc.If the mach<strong>in</strong>e has already heatedup, it will cool down for approx.10 m<strong>in</strong>utes before start<strong>in</strong>g to runthe descal<strong>in</strong>g programme.The descal<strong>in</strong>g programme cannotbe cancelled once the OK sensorhas been touched. The programmehas to be completed through to theend. This is a safety measure toensure that the mach<strong>in</strong>e is fullydescaled, <strong>and</strong> is important for thelong-term protection of the mach<strong>in</strong>e<strong>and</strong> to ensure it functions correctly.To dissolve the descal<strong>in</strong>g tablets^ take the water conta<strong>in</strong>er out <strong>and</strong> fill itto the k mark with lukewarm water.(Do not use less water than thisbecause this would cause thedescal<strong>in</strong>g programme to f<strong>in</strong>ish beforeit has been completed properly).^ Drop 2 descal<strong>in</strong>g tablets <strong>in</strong> thewater. Allow the tablets to dissolvefully before shutt<strong>in</strong>g the lid <strong>and</strong>putt<strong>in</strong>g the water conta<strong>in</strong>er back <strong>in</strong>the mach<strong>in</strong>e.Dur<strong>in</strong>g the descal<strong>in</strong>g programme, waterconta<strong>in</strong><strong>in</strong>g descal<strong>in</strong>g agent will run outof the hot water <strong>and</strong> the central spouts.This is followed by an activation periodbefore a little more descal<strong>in</strong>g agent isdispensed.^ When a message ask<strong>in</strong>g you to fillthe water conta<strong>in</strong>er with freshwater appears, you should removethe conta<strong>in</strong>er <strong>and</strong> r<strong>in</strong>se it outthoroughly with clean water. Makesure all traces of descal<strong>in</strong>g agent areremoved, <strong>and</strong> then fill it up to the kmark with clean tap water.Water will flow out of the spouts dur<strong>in</strong>gthe r<strong>in</strong>s<strong>in</strong>g process. Because the <strong>in</strong>sideof the mach<strong>in</strong>e is also cleaned dur<strong>in</strong>gthis process you will be prompted toEmpty the drip tray at the end.Programme f<strong>in</strong>ished will appear <strong>in</strong> thedisplay. Follow the <strong><strong>in</strong>structions</strong> given.The mach<strong>in</strong>e will then run a shortr<strong>in</strong>s<strong>in</strong>g cycle.61
Problem solv<strong>in</strong>g guideRepairs to electrical appliancesshould only be carried out by asuitably qualified <strong>and</strong> competentperson <strong>in</strong> strict accordance withcurrent local <strong>and</strong> national safetyregulations. Repairs <strong>and</strong> other workby unqualified persons could bedangerous. The manufacturercannot be held liable forunauthorised work.Various messages will appear <strong>in</strong> thedisplay to warn of certa<strong>in</strong> problems.Follow the <strong><strong>in</strong>structions</strong> which appear <strong>in</strong>the display to remedy the problem.Other problems or situations whichoccur <strong>in</strong> general use are described <strong>in</strong>this section. With the help of thefollow<strong>in</strong>g notes m<strong>in</strong>or faults <strong>in</strong> theperformance of the mach<strong>in</strong>e, some ofwhich may result from <strong>in</strong>correctoperation, can be put right withoutcontact<strong>in</strong>g the Service Department.What to do if .... . . the mach<strong>in</strong>e does not light upafter it has been switched on.Has the light<strong>in</strong>g been switched off?^ If is has, switch it back on (see"Sett<strong>in</strong>gs: customis<strong>in</strong>g your mach<strong>in</strong>e -Light<strong>in</strong>g: Sett<strong>in</strong>g the switch-off time").^ If not, then the light<strong>in</strong>g is defective.Call the Miele Service Department.. . . noth<strong>in</strong>g appears <strong>in</strong> the display.The mach<strong>in</strong>e is not connected to theelectricity supply.^ Is the master switch <strong>in</strong> the 0 position?^ Is it plugged <strong>in</strong> <strong>and</strong> switched on atthe socket?^ Check that the fuse is not defective<strong>and</strong> that the ma<strong>in</strong>s fuse has nottripped. If it has, contact the MieleService Department.. . . the mach<strong>in</strong>e suddenly switchesitself off.The mach<strong>in</strong>e will switch itself offautomatically after a certa<strong>in</strong> length oftime if it is not be<strong>in</strong>g used. This timedepends on the switch off time whichhas been programmed.There could be stones <strong>in</strong> amongst the<strong>coffee</strong> beans. If this is the case, themach<strong>in</strong>e will switch itself offautomatically with<strong>in</strong> 20 seconds toavoid damage. Call the Miele ServiceDepartment.^ Is it plugged <strong>in</strong> <strong>and</strong> switched on atthe socket?62
Problem solv<strong>in</strong>g guide. . . the light<strong>in</strong>g suddenly switchesitself off.If the mach<strong>in</strong>e has not been used for15 m<strong>in</strong>utes the light<strong>in</strong>g will switch itselfoff automatically (see "Sett<strong>in</strong>gs:customis<strong>in</strong>g your mach<strong>in</strong>e - Light<strong>in</strong>g:Sett<strong>in</strong>g the switch-off time").. . . the mach<strong>in</strong>e does not switch oneven though the "Switch on at"sett<strong>in</strong>g for the timer has beenactivated.The system lock has been activated.^ Deactivate it. (See "Sett<strong>in</strong>gs:customis<strong>in</strong>g your mach<strong>in</strong>e - Safety(Activat<strong>in</strong>g the System lock)").The mach<strong>in</strong>e was not used after be<strong>in</strong>gswitched on automatically 3 times <strong>in</strong>succession.Switch the mach<strong>in</strong>e on <strong>and</strong> make adr<strong>in</strong>k.. . . you cannot read the display.If the mach<strong>in</strong>e is <strong>in</strong>stalled too low down,the display can be hard to see.^ Try to improve this by adjust<strong>in</strong>g thedisplay contrast or brightness (see"Sett<strong>in</strong>gs: customis<strong>in</strong>g your mach<strong>in</strong>e -Sett<strong>in</strong>g the display").. . . milk froth or milk is not flow<strong>in</strong>gout of the central spout.The spout is clogged up.^ Clean the central spout - especiallythe rubber stoppers - <strong>and</strong> the milkpipework (see "Clean<strong>in</strong>g <strong>and</strong> care -"Central spout" <strong>and</strong> "Milk pipework")....amessage appears <strong>in</strong> the displayrem<strong>in</strong>d<strong>in</strong>g you to fill or replace themilk flask even though it is full <strong>and</strong>positioned correctly.^ Clean the flask thoroughly, pay<strong>in</strong>gparticular attention to the area aroundthe h<strong>and</strong>le <strong>and</strong> the neck (see"Clean<strong>in</strong>g <strong>and</strong> care - Sta<strong>in</strong>less steelmilk flask").Any soil<strong>in</strong>g <strong>in</strong> these areas canprevent the sensors for the milk flaskfrom work<strong>in</strong>g properly.. . . the <strong>coffee</strong> gr<strong>in</strong>der makes a loudernoise than usual.There may be stones <strong>in</strong> amongst the<strong>coffee</strong> beans, or the bean conta<strong>in</strong>ermay have emptied dur<strong>in</strong>g gr<strong>in</strong>d<strong>in</strong>g.^ Switch the mach<strong>in</strong>e off immediately.^ If the bean conta<strong>in</strong>er is not emptycall the Miele Service Department. Ifit is empty fill the conta<strong>in</strong>er with freshbeans.. . . the espresso is dispensed tooquickly.The <strong>coffee</strong> is too coarsely ground.^ Set the gr<strong>in</strong>der on a f<strong>in</strong>er sett<strong>in</strong>g (see"Sett<strong>in</strong>g the <strong>coffee</strong> gr<strong>in</strong>der").. . . the espresso is dispensed tooslowly.The <strong>coffee</strong> is too f<strong>in</strong>ely ground.^ Set the gr<strong>in</strong>der on a coarser sett<strong>in</strong>g(see "Sett<strong>in</strong>g the <strong>coffee</strong> gr<strong>in</strong>der").63
Problem solv<strong>in</strong>g guide. . . the espresso is not hot enough.^ Have the cups <strong>and</strong> system beenpre-warmed?The smaller <strong>and</strong> thicker the cup, themore important it is to pre-warm it.^ Check the temperatures the differenttypes of <strong>coffee</strong> have been set to (see"Sett<strong>in</strong>gs: customis<strong>in</strong>g your mach<strong>in</strong>e -Sett<strong>in</strong>g the temperature").^ Check whether the brew unit isblocked. If it is, clean it (see"Clean<strong>in</strong>g <strong>and</strong> care - Brew unit").. . . <strong>coffee</strong> is not dispensed, eventhough the beans have been ground<strong>and</strong> there is sufficient water <strong>in</strong> thewater conta<strong>in</strong>er.^ Check whether the slide control forthe f<strong>in</strong>eness of the <strong>coffee</strong> is at thef<strong>in</strong>est sett<strong>in</strong>g, or if the amount of<strong>coffee</strong> to be ground has been set atthe largest amount.Because the process is time controlled,it is possible that the process has takenso long that there is no time left forbrew<strong>in</strong>g.^ Select a slightly coarser <strong>coffee</strong> gr<strong>in</strong>dsett<strong>in</strong>g or a lower sett<strong>in</strong>g for theamount of <strong>coffee</strong> to be ground (see"Sett<strong>in</strong>g the <strong>coffee</strong> gr<strong>in</strong>der" <strong>and</strong>"Sett<strong>in</strong>gs: customis<strong>in</strong>g your mach<strong>in</strong>e -Sett<strong>in</strong>g the amount of <strong>coffee</strong>").. . . the mach<strong>in</strong>e door will not close.^ Are the conta<strong>in</strong>ers <strong>in</strong> positioncorrectly?^ It might be necessary to adjust thedoor h<strong>in</strong>ges (see "Installation -Adjust<strong>in</strong>g the door h<strong>in</strong>ges").. . . the steam system is switched offbut milk froth can still be made.If the steam system is still hot, milk frothcan still be made. However, if thesteam system has cooled down afterbe<strong>in</strong>g switched off, it will need to heatup aga<strong>in</strong> before steam is available forfroth<strong>in</strong>g milk.. . . <strong>coffee</strong> preparation has been<strong>in</strong>terrupted.If the water conta<strong>in</strong>er empties whilst adr<strong>in</strong>k is be<strong>in</strong>g prepared, a message willappear <strong>in</strong> the display to ask if you wishfor the dr<strong>in</strong>k preparation to cont<strong>in</strong>ueafter the water conta<strong>in</strong>er has beenrefilled. If you do not respond to thisquestion with "OK" with<strong>in</strong> 5 m<strong>in</strong>utes, thedr<strong>in</strong>k will be cancelled.64
Problem solv<strong>in</strong>g guide. . . only water is dispensed when<strong>coffee</strong> has been selected.The lid of the ground <strong>coffee</strong> chute hasbeen opened <strong>and</strong> closed, <strong>and</strong> then the"Make the <strong>coffee</strong>?" (with ground <strong>coffee</strong>)option has been selected. However, the<strong>coffee</strong> chute has not been filled withground <strong>coffee</strong>.After the dr<strong>in</strong>k has been dispensed, the<strong>coffee</strong> mach<strong>in</strong>e will revert automaticallyto mak<strong>in</strong>g <strong>coffee</strong> with <strong>coffee</strong> beans.The beans may have become jammed.Pull the bean conta<strong>in</strong>er out of themach<strong>in</strong>e <strong>and</strong> then push it back <strong>in</strong>aga<strong>in</strong>. (Very large beans, e.g. "ARKORMEXICO MELANGE", can cause ablockage)....amessage keeps appear<strong>in</strong>gask<strong>in</strong>g you to empty the drip trayeven though it is empty.^ Have the contacts been properlycleaned <strong>and</strong> dried?^ Is the drip tray positioned correctly <strong>in</strong>the mach<strong>in</strong>e?^ Switch the mach<strong>in</strong>e off <strong>and</strong> then backon aga<strong>in</strong> with the master switch.^ Buff the contacts a little, e.g. with f<strong>in</strong>eglasspaper or emery cloth.^ If this fault message cont<strong>in</strong>ues toappear, please call the Miele ServiceDepartment.. . . the mach<strong>in</strong>e does not r<strong>in</strong>sethrough when switched on, eventhough the Automatic r<strong>in</strong>s<strong>in</strong>gprogramme is set to "On".If the temperature of the mach<strong>in</strong>e isabove 60 °C, r<strong>in</strong>s<strong>in</strong>g cannot take place.. . . water or milk stops flow<strong>in</strong>g whilstprogramm<strong>in</strong>g <strong>in</strong> the amount todispense.The flow stops automatically when themaximum fill quantity is reached. Themaximum quantity is stored <strong>in</strong> memory.If there was not enough water or milk <strong>in</strong>the water conta<strong>in</strong>er or milk flask, theamount that has been dispensed willnot be saved to memory.^ Fill the water conta<strong>in</strong>er or the milkflask, <strong>and</strong> repeat the process toprogramme <strong>in</strong> the amount.. . . there is water <strong>in</strong> the wasteconta<strong>in</strong>er.This is not a fault. The water is left overfrom the brew<strong>in</strong>g <strong>and</strong> clean<strong>in</strong>g process.. . . there is a lot of residual "<strong>coffee</strong>water" <strong>in</strong> the waste conta<strong>in</strong>er.If the slide control for the gr<strong>in</strong>der is setto too coarse a sett<strong>in</strong>g, too muchresidual "<strong>coffee</strong> water" can be left <strong>in</strong> thewaste conta<strong>in</strong>er.^ Set the gr<strong>in</strong>der on a slightly f<strong>in</strong>ersett<strong>in</strong>g (see "Sett<strong>in</strong>g the <strong>coffee</strong>gr<strong>in</strong>der").^ If necessary, adjust the amount of<strong>coffee</strong> (see "Sett<strong>in</strong>gs: customis<strong>in</strong>gyour mach<strong>in</strong>e - Sett<strong>in</strong>g the amount of<strong>coffee</strong>").65
Problem solv<strong>in</strong>g guide. . . the descal<strong>in</strong>g programme wasstarted by mistake.The descal<strong>in</strong>g programme cannot becancelled once you have touched theOK sensor. The programme has to becompleted through to the end. This is asafety measure to ensure that themach<strong>in</strong>e is fully descaled, <strong>and</strong> isimportant for the long-term protection ofthe mach<strong>in</strong>e <strong>and</strong> to ensure it functionscorrectly.^ Descale the mach<strong>in</strong>e (see "Descal<strong>in</strong>gthe mach<strong>in</strong>e").. . . the <strong>coffee</strong> mach<strong>in</strong>e makes loudnoises dur<strong>in</strong>g the descal<strong>in</strong>gprogramme.Dur<strong>in</strong>g the descal<strong>in</strong>g programme youwill hear loud noises as water is flushedthrough the mach<strong>in</strong>e under highpressure. These are no cause forconcern.. . . the heat<strong>in</strong>g-up time is gett<strong>in</strong>glonger, the amount of water com<strong>in</strong>gthrough is <strong>in</strong>correct <strong>and</strong> the mach<strong>in</strong>eis not perform<strong>in</strong>g properly.The mach<strong>in</strong>e needs descal<strong>in</strong>g.^ Descale the mach<strong>in</strong>e (see "Descal<strong>in</strong>gthe mach<strong>in</strong>e").. . . the brew unit or the wasteconta<strong>in</strong>er cannot be pulled out of themach<strong>in</strong>e.The brew unit is not <strong>in</strong> the correctposition. This can happen if, forexample, the mach<strong>in</strong>e door is openeddur<strong>in</strong>g gr<strong>in</strong>d<strong>in</strong>g or brew<strong>in</strong>g.^ Close the door. The brew unit willposition itself correctly automatically.. . . the crema is not as it should be.^ Check that the gr<strong>in</strong>der sett<strong>in</strong>g is nottoo coarse or too f<strong>in</strong>e, <strong>and</strong> adjustaccord<strong>in</strong>gly (see "Sett<strong>in</strong>g the <strong>coffee</strong>gr<strong>in</strong>der").^ Check the temperatures the differenttypes of <strong>coffee</strong> have been set to. Ifthe temperature is too high, there willbe dark patches <strong>in</strong> the crema.Reduce the temperature (see"Sett<strong>in</strong>gs: customis<strong>in</strong>g your mach<strong>in</strong>e -Sett<strong>in</strong>g the temperature").The crema will not form correctly if stale<strong>coffee</strong> or an unsuitable <strong>coffee</strong> blend isused or if the central spout is set toohigh....nowater comes out of the centralspout.The filters <strong>in</strong> the brew unit are dirty.^ Remove the brew unit <strong>and</strong> clean thefilters with your f<strong>in</strong>ger (see "Clean<strong>in</strong>g<strong>and</strong> care - Brew unit").66
Problem solv<strong>in</strong>g guide. . . the message "Push waterconta<strong>in</strong>er <strong>in</strong> as far as it will go"appears <strong>in</strong> the display.Water has not been taken <strong>in</strong>.^ The water conta<strong>in</strong>er is not correctlypositioned <strong>in</strong>side the mach<strong>in</strong>e. Takeit out <strong>and</strong> push it back <strong>in</strong>to themach<strong>in</strong>e so that it clicks <strong>in</strong>to position.^ This error message also appears ifthe water conta<strong>in</strong>er was not correctlyfilled for descal<strong>in</strong>g. Fill the waterconta<strong>in</strong>er up to the marker.If this fault message still cont<strong>in</strong>ues toappear <strong>in</strong> the display, repeat the stepsdescribed above. If neither is the case<strong>and</strong> the fault message still appears <strong>in</strong>the display, call the Miele ServiceDepartment.. . . too much crema has formed <strong>and</strong>is overflow<strong>in</strong>g above the centralspout.Some types of <strong>coffee</strong> will produce toomuch crema if the <strong>coffee</strong> or espressotemperature is set to maximum <strong>and</strong> theamount of <strong>coffee</strong> to be ground is set toohigh.^ Set a lower temperature <strong>and</strong> reducethe amount of <strong>coffee</strong> to be ground(see: "Sett<strong>in</strong>gs: customis<strong>in</strong>g yourmach<strong>in</strong>e - Sett<strong>in</strong>g the temperature<strong>and</strong> Sett<strong>in</strong>g the amount of <strong>coffee</strong>").. . . the slide control for the gr<strong>in</strong>dersett<strong>in</strong>g will not move.^ Close the mach<strong>in</strong>e door <strong>and</strong>dispense a cup of espresso <strong>coffee</strong>.The gr<strong>in</strong>der sett<strong>in</strong>g slide control willnow move.. . . "Fault - 1" to "Fault - 4" or"Fault - 80" to "Fault - 83" appears <strong>in</strong>the display.^ Switch off the mach<strong>in</strong>e us<strong>in</strong>g theOn/Off sensor, <strong>and</strong> wait for one hourbefore switch<strong>in</strong>g it on aga<strong>in</strong>.If the Fault message appears <strong>in</strong> thedisplay aga<strong>in</strong>, contact the Servicedepartment.. . . the message "Fault - 28" appears<strong>in</strong> the display.Enough ground <strong>coffee</strong> for one portion,i.e. a level <strong>coffee</strong>spoonful of ground<strong>coffee</strong>, passes through the ground<strong>coffee</strong> chute. If there is too muchground <strong>coffee</strong>, the mach<strong>in</strong>e is unable toprocess it so that it can be emptied <strong>in</strong>tothe waste conta<strong>in</strong>er, <strong>and</strong> a faultmessage appears <strong>in</strong> the display.^ Switch the mach<strong>in</strong>e off <strong>and</strong> then onaga<strong>in</strong> after a short while.67
Problem solv<strong>in</strong>g guide. . . the message "Fault -73" appears<strong>in</strong> the display.The brew unit cannot be positionedcorrectly.^ Take the brew unit out of the mach<strong>in</strong>e<strong>and</strong> clean it thoroughly (see"Clean<strong>in</strong>g <strong>and</strong> care - Brew unit").^ Push the <strong>coffee</strong> ejector of the brewunit <strong>in</strong>to the correct position.^ Set the brew unit to one side <strong>and</strong>replace the waste conta<strong>in</strong>er <strong>and</strong> thewater conta<strong>in</strong>er <strong>in</strong> the mach<strong>in</strong>e.^ Close the door.The brew unit motor will now move<strong>in</strong>to the correct position.^ When "Fit the brew unit" appears <strong>in</strong>the display, open the door <strong>and</strong>replace all the parts <strong>in</strong> the mach<strong>in</strong>e.^ Close the door.If the fault message cont<strong>in</strong>ues toappear <strong>in</strong> the display, please call theMiele Service department, quot<strong>in</strong>g thefault code.. . . "Fault - 74" or "Fault - 77"appears <strong>in</strong> the display?^ Switch the mach<strong>in</strong>e off <strong>and</strong> then onaga<strong>in</strong> after a short while.If the Fault message appears <strong>in</strong> thedisplay aga<strong>in</strong>, contact the Servicedepartment.. . . the message "Check the brewunit" appears <strong>in</strong> the display.The brew unit may be dirty.^ Follow the <strong><strong>in</strong>structions</strong> <strong>in</strong> the display.^ Clean the brew unit (see "Clean<strong>in</strong>g<strong>and</strong> care - Brew unit").^ Set a medium gr<strong>in</strong>der sett<strong>in</strong>g <strong>and</strong> amedium amount of <strong>coffee</strong> (see"Sett<strong>in</strong>g the <strong>coffee</strong> gr<strong>in</strong>der" <strong>and</strong>"Sett<strong>in</strong>gs: customis<strong>in</strong>g your mach<strong>in</strong>e -Sett<strong>in</strong>g the amount of <strong>coffee</strong>").Set the gr<strong>in</strong>der sett<strong>in</strong>g <strong>and</strong> theamount of <strong>coffee</strong> to medium <strong>in</strong> anyUser profiles as well.. . . the ground <strong>coffee</strong> chute covercannot be pushed <strong>in</strong> properly.^ Is the lid of the ground <strong>coffee</strong> chuteclosed?...itisdifficult to open or close thedoor of the mach<strong>in</strong>e.^ Align the door us<strong>in</strong>g the h<strong>in</strong>ges (see"Installation - Adjust<strong>in</strong>g the doorh<strong>in</strong>ges").^ Lubricate the cap of the central spoutconnector with the silicone greasesupplied.68
After sales serviceIn the event of a fault which you cannotcorrect yourself, please contact:– your Miele Dealeror– the Miele Service Department (seeback cover for address).When contact<strong>in</strong>g your Dealer or theService Department, please quote themodel <strong>and</strong> serial number of yourmach<strong>in</strong>e. These are shown on the dataplate <strong>in</strong>side the mach<strong>in</strong>e.Please note that telephone calls maybe monitored <strong>and</strong> recorded fortra<strong>in</strong><strong>in</strong>g purposes (UK only).N.B. A call-out charge will be appliedfor unnecessary service visits where theproblem could have been rectified asdescribed <strong>in</strong> these <strong><strong>in</strong>structions</strong>.69
Electrical connection U.K., ZA, IRLAll electrical work should be carried outby a suitably qualified <strong>and</strong> competentperson only, <strong>in</strong> strict accordance withcurrent national <strong>and</strong> local safetyregulations (BS 7671 <strong>in</strong> the UK).Installation, repairs <strong>and</strong> other work byunqualified persons could bedangerous. The manufacturer cannotbe held liable for unauthorised work.Ensure power is not supplied to themach<strong>in</strong>e until after <strong><strong>in</strong>stallation</strong> work hasbeen carried out.The voltage <strong>and</strong> connected load aregiven on the data plate. Please ensurethese match the household ma<strong>in</strong>ssupply. The fuse rat<strong>in</strong>g is quoted on theplug.The mach<strong>in</strong>e is supplied with a ma<strong>in</strong>scable with moulded plug for connectionto a 230 - 240 V ma<strong>in</strong>s supply.Connection should be made via a fusedplug <strong>and</strong> suitable switched socketwhich is easily accessible after<strong><strong>in</strong>stallation</strong>.Do not connect via an extension lead.For extra safety it is advisable to <strong>in</strong>stalla suitable residual current device(RCD). Contact a qualified electricianfor advice.If the socket is not accessible after<strong><strong>in</strong>stallation</strong> (depend<strong>in</strong>g on country) anadditional means of disconnection mustbe provided for all poles.Non-rewireable plugs BS 1363The fuse cover must be refitted whenchang<strong>in</strong>g the fuse, <strong>and</strong> if the fuse coveris lost, the plug must not be used until asuitable replacement is obta<strong>in</strong>ed. Thecolour of the correct replacement coveris that of the coloured <strong>in</strong>sert <strong>in</strong> the baseof the plug, or the colour that isembossed <strong>in</strong> words on the base of theplug (as applicable to the design ofplug fitted).Replacement fuses should be ASTAapproved to BS 1362 <strong>and</strong> have thecorrect rat<strong>in</strong>g. Replacement fuses <strong>and</strong>fuse covers may be purchased fromyour local electrical supplier.WARNING: THIS APPLIANCEMUST BE EARTHED70
InstallationBuild<strong>in</strong>g-<strong>in</strong> <strong>and</strong> comb<strong>in</strong>ation optionsThe appliance is designed to be built <strong>in</strong>to a tall unit.It can also be comb<strong>in</strong>ed with other Miele built-<strong>in</strong> appliances. If the <strong>coffee</strong> mach<strong>in</strong>eis to be built <strong>in</strong> above another appliance, there must be a full-width, closed shelfbetween them (except when it is comb<strong>in</strong>ed with a Miele built-<strong>in</strong> plate warm<strong>in</strong>gdrawer).The plate warmer can be connected directly to a socket at the rear of the<strong>CVA</strong> 5060 <strong>coffee</strong> mach<strong>in</strong>e us<strong>in</strong>g a special connection cable (available as anoptional accessory from your Miele Dealer or the Miele Spare PartsDepartment) so that it can be <strong>in</strong> use or ready for use whenever the <strong>CVA</strong> 5060<strong>coffee</strong> mach<strong>in</strong>e is be<strong>in</strong>g used. This ensures that you always have pre-warmedcups ready for use.Only a Miele EGW 4000-14 or -29 or 5000-14 plate warmer can be connecteddirectly to the <strong>CVA</strong> 5060 <strong>coffee</strong> mach<strong>in</strong>e. Connect<strong>in</strong>g any other appliancewould damage the <strong>coffee</strong> mach<strong>in</strong>e.The mach<strong>in</strong>e can also be <strong>in</strong>stalled <strong>in</strong> a mobile unit which is available to purchase.71
InstallationInstallationBefore <strong><strong>in</strong>stallation</strong> make sure thatthere is no power supply to themach<strong>in</strong>e. This also applies should itever need to be taken out of itshous<strong>in</strong>g unit.The mach<strong>in</strong>e may only be usedwhen it has been built <strong>in</strong>. It can onlybe used <strong>in</strong> areas with an ambienttemperature of +15 °C to +60 °C.You will need two Allen keys (size 3<strong>and</strong> 5) for <strong>in</strong>stall<strong>in</strong>g the mach<strong>in</strong>e.^ If the furniture unit walls are 19 mmthick you will need to drill four holes<strong>in</strong> the sides for secur<strong>in</strong>g the mach<strong>in</strong>e.To mark the position of these holes:– Align the mach<strong>in</strong>e <strong>in</strong> the niche.Screw the side socket screws <strong>in</strong>sidethe mach<strong>in</strong>e <strong>in</strong> a little so that theymake <strong>in</strong>dents <strong>in</strong> the side walls, <strong>and</strong>then unscrew them aga<strong>in</strong>.– Take the mach<strong>in</strong>e out of the niche<strong>and</strong> drill ø 4.5 mm holes, 2 mm deepwhere you made the <strong>in</strong>dentations.^ Connect the appliance to theelectricity supply.^ Push it all the way <strong>in</strong>to the niche untilyou feel resistance.^ Open the mach<strong>in</strong>e door, <strong>and</strong> partiallytighten the side socket screws.^ Us<strong>in</strong>g the large allen key, unscrew allfour feet out by about 2 mm.^ Push the mach<strong>in</strong>e all the way <strong>in</strong>to theniche until there is a resistance. Thencheck the height to make sure it issitt<strong>in</strong>g centrally <strong>in</strong> the unit <strong>and</strong> that itis level.If this is not the case, realign the 4feet underneath the mach<strong>in</strong>e us<strong>in</strong>gthe large allen key.The feet can be unscrewed by up toapprox. 10 mm.^ Carefully turn the lower socketscrews a to centre the mach<strong>in</strong>e <strong>in</strong>the niche.^ Tighten both upper socket screws bby h<strong>and</strong> to secure the mach<strong>in</strong>e <strong>in</strong> theunit. Do not overtighten them.72
InstallationAdjust<strong>in</strong>g the door h<strong>in</strong>gesIf the mach<strong>in</strong>e door becomes difficult toopen or close after <strong><strong>in</strong>stallation</strong> you canadjust the h<strong>in</strong>ges to realign it:^ To adjust the door <strong>in</strong> direction a,turn screw a.^ To adjust the door forwards orbackwards (direction b), turn screwb.73
Alteration rights reserved / 2809M.-Nr. 07 611 170 / 01<strong>CVA</strong> 5060, <strong>CVA</strong> 5068