ADMINISTRATOR'S PLUS FAMILY FEATURE - Rediker Software, Inc.
ADMINISTRATOR'S PLUS FAMILY FEATURE - Rediker Software, Inc.
ADMINISTRATOR'S PLUS FAMILY FEATURE - Rediker Software, Inc.

Create successful ePaper yourself
Turn your PDF publications into a flip-book with our unique Google optimized e-Paper software.
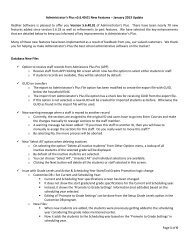
ADMINISTRATOR’S <strong>PLUS</strong><strong>FAMILY</strong> <strong>FEATURE</strong><strong>Rediker</strong> <strong>Software</strong>2 Wilbraham RoadHampden, MA 01036Phone 800-882-2994Fax 413-566-2194www.rediker.comAdministrator’s Plus Version 5.3.37.01 September 2009
<strong>Rediker</strong> <strong>Software</strong>, <strong>Inc</strong>. Page | 2
TABLE OF CONTENTSABOUT THIS DOCUMENT .............................................................................................................................................. 4ACCESSING HELP ............................................................................................................................................................ 5CHAPTER 1 – INTRODUCTION ..................................................................................................................................... 6BENEFITS OF ENABLING THE <strong>FAMILY</strong> <strong>FEATURE</strong>: ................................................................................................................. 7SINGLE YEAR VERSUS GLOBAL ......................................................................................................................................... 8What are single year family codes? .............................................................................................................................. 8What are global family codes? ..................................................................................................................................... 8How do I know which type my school is currently using? ............................................................................................ 8CHAPTER 2 – GLOBAL <strong>FAMILY</strong> <strong>FEATURE</strong> .............................................................................................................. 9QUICK STEP GUIDE FOR ENABLING THE GLOBAL <strong>FAMILY</strong> <strong>FEATURE</strong> ............................................................................... 10ACCESSING THE <strong>FAMILY</strong> <strong>FEATURE</strong> .................................................................................................................................. 11SETTING UP THE GLOBAL <strong>FAMILY</strong> <strong>FEATURE</strong> .................................................................................................................... 12Selecting Family Fields .............................................................................................................................................. 13Accessing the Global Family Setup Wizard ................................................................................................................ 14Select a Base School ...................................................................................................................................................................15Select the Global Family Path ....................................................................................................................................................15Select More Schools ...................................................................................................................................................................16Consolidating Families ...............................................................................................................................................................17Making Changes to Family Codes ..............................................................................................................................................18SYNCHRONIZE FAMILIES .................................................................................................................................................. 19ASSIGNING NEW CODES .................................................................................................................................................. 20Assign Family Codes .................................................................................................................................................. 20New Files .................................................................................................................................................................... 22LINKING NEW STUDENTS TO A <strong>FAMILY</strong> ........................................................................................................................... 23CHAPTER 3 – “SINGLE YEAR” <strong>FAMILY</strong> <strong>FEATURE</strong> .............................................................................................. 24QUICK STEP GUIDE FOR ENABLING THE “SINGLE YEAR” <strong>FAMILY</strong> <strong>FEATURE</strong> .................................................................... 25ACCESSING THE <strong>FAMILY</strong> <strong>FEATURE</strong> .................................................................................................................................. 26SETTING UP THE <strong>FAMILY</strong> <strong>FEATURE</strong> – SINGLE YEAR ........................................................................................................ 27Selecting Family Fields .............................................................................................................................................. 28Generating Initial Family Accounts ............................................................................................................................ 29Verifying Families (Print Family Reports) ................................................................................................................. 31Editing Family Codes ................................................................................................................................................. 33Synchronize Families .................................................................................................................................................. 34ASSIGNING NEW CODES .................................................................................................................................................. 35Assign Family Codes .................................................................................................................................................. 35LINK NEW STUDENTS TO A <strong>FAMILY</strong> ................................................................................................................................. 36<strong>Rediker</strong> <strong>Software</strong>, <strong>Inc</strong>. Page | 3
ABOUT THIS DOCUMENTThis document should be used by anyone who is going to set up the Family Feature in Administrator’s Plus. Itis organized in such a way as to provide information as you need it.CHAPTER 1 – INTRODUCTION: Introduces the feature, explains the differences between current yearfamily codes and global codes and provides information on where to find additional help. (Thischapter should be read by technical personnel or system administrators to determine which type ofcodes are best for your school/district.)CHAPTER 2 – GLOBAL <strong>FAMILY</strong> <strong>FEATURE</strong>: Explains how to set up and use the Global FamilyFeature. (This chapter should be read only by administrators who will be setting up Global familycodes.)CHAPTER 3 – “SINGLE YEAR” <strong>FAMILY</strong> <strong>FEATURE</strong>: Explains how to set up and use Single Year familycodes. (This chapter should be read only by administrators who will be setting up Single Year familycodes.)As you read through the document, you will see four icons. These icons will provide you with quickinformation regarding the program.For YourInformation (FYI):How Do I:Helpful Hint:Quick Step Guide:FYI sections provide additional information regarding a particular topic.How Do I sections provide step-by-step instructions on how to perform acertain task.Helpful Hint sections provide extra information regarding usage of theprogram.Quick Step Guide sections provide a general order of how to proceed througheach section.We are constantly working to improve our software based on feedback from you, our customers. Because ofthis, the manual may not always match what you see on the screen. If you have any comments or suggestionson this manual, please e-mail us at doc@rediker.com.We keep the most up-to-date version of this document on our manuals page:http://www.rediker.com/support/manuals/manuals.php<strong>Rediker</strong> <strong>Software</strong>, <strong>Inc</strong>. Page | 4
ACCESSING HELPIf you find that you need additional help, please contact our Technical Support department by either phone ore-mail.BY PHONE: Toll Free 800-882-2994 select option 4 for Administrator’s PlusLocal413-566-2491 select option 4 for Administrator’s PlusMonday – ThursdayFriday7:30 a.m. – 6:30 p.m. ET7:30 a.m. – 5:00 p.m. ETInternational Supportvia Skype : 10:30 p.m. – 7:30 a.m. ET <strong>Rediker</strong>.International.SupportBY E-MAIL: U.S. Customers aplus-support@rediker.comInternational Customersinternationalsupport@rediker.comIn your e-mail, please include your name, your school’s complete name, zip code (if applicable) and a phonenumber. We will respond to e-mails within one business day.<strong>Rediker</strong> <strong>Software</strong>, <strong>Inc</strong>. Page | 5
CHAPTER 1 – INTRODUCTIONThe family feature is a way within Administrator’s Plus to link siblings with each other. Creating family codesand synchronizing families is a way to save on duplicate data entry. Once linked, changes in a family field forone sibling will be carried to all siblings in your school or district. Family fields are those fields that you wishto be the same, without exception, for each child in the family. Family codes can be set up for a single schoolyear or across schools and years.The following topics will be covered in this chapter:• Benefits of enabling the family feature• Differences between single year and global family codes<strong>Rediker</strong> <strong>Software</strong>, <strong>Inc</strong>. Page | 6
BENEFITS OF ENABLING THE <strong>FAMILY</strong> <strong>FEATURE</strong>:• Saves time. Enter demographic data only once per family. When you add or edit demographicinformation for any student, the designated family fields are automatically copied into each sibling’srecord. This could be all siblings within the current school year or all siblings regardless of schools oryears. You choose which data fields should be common among siblings.• Quick navigation. Use the family lookup menus to quickly jump from the Address program screen ofone student to that of all of their siblings.• Group siblings. When new students are added, you can identify and select their siblings using afamily lookup of: students with the same last name; all students in your school; or, if you enabledGlobal Family, siblings in different schools.• Family reports. Ability to print reports (in Data Base and Billing modules) by family.<strong>Rediker</strong> <strong>Software</strong>, <strong>Inc</strong>. Page | 7
SINGLE YEAR VERSUS GLOBALThe family feature can be implemented for a single school year or it can be implemented across your districtglobally. The “Single Year” family feature has been in the program since version 1 of Administrator’s Plusand it is what most schools are using. In version 5.1 of Administrator’s Plus, we introduced the Global familyfeature.WHAT ARE SINGLE YEAR <strong>FAMILY</strong> CODES?The Single Year family feature generates unique family codes for all students within a specific school year andsynchronizes family fields between all siblings within that school year. Upon importing the following year’sstudents into Administrator’s Plus, you will need to update or regenerate these codes each year.• Setting up and using the family feature within a single school year will be covered in Chapter 3.WHAT ARE GLOBAL <strong>FAMILY</strong> CODES?The Global family feature generates unique family codes for all students in the selected school(s) and schoolyear(s). These codes will synchronize family fields between all siblings across multiple schools and years.These family codes are stored outside of the school year and will remain permanently in the system. When achild enrolls in your district, the system will remember their graduated siblings and assign the same familycode. This ensures continuity of data throughout the system.• Setting up and using the global family feature will be covered in Chapter 2.You must enable the Global family feature in order to use the Contact DB or if yourschool is using our accounting software, AP Accounting.HOW DO I KNOW WHICH TYPE MY SCHOOL IS CURRENTLY USING?The key is the family lookup. If you go into DATA BASE ADDRESS and click on Familyshortcut bar, one of the <strong>FAMILY</strong> F CODE screens shown below will come up.in the<strong>Rediker</strong> <strong>Software</strong>, <strong>Inc</strong>. Page | 8
CHAPTER 2 – GLOBAL <strong>FAMILY</strong> <strong>FEATURE</strong>The Global family feature generates unique family codes for all students in the selected school(s) and schoolyear(s) which are permanently stored in the system.This chapter will cover the following topics:• Quick Step Guide for Enabling Global Family• Accessing the family feature• Selecting fields to synchronize• Accessing the global family feature menuoooooSelecting the base schoolIdentify the global family pathSelecting additional schools and yearsCreating the global family codesConsolidating families• Synchronizing Families• Using Global Family Codes<strong>Rediker</strong> <strong>Software</strong>, <strong>Inc</strong>. Page | 9
QUICK STEP GUIDE FOR ENABLING THE GLOBAL <strong>FAMILY</strong> <strong>FEATURE</strong> Verify that all users are out of Administrator’s Plus. Make a backup of all the schools you wish to include in the global family file. Go to DATA BASE CUSTOMIZE DB SETUP <strong>FAMILY</strong> <strong>FEATURE</strong> Select option 1) Select Family Fields and select the fields that you wish to synchronize betweensiblings. Select option 5) Enable Global Family Codes to access the Global Family Wizard.1 Select the base school. The base school is the school whose family codes will not bemodified.2 Select the location of the global family folder. The Global Family folder is where theglobal family files are stored.3 Select more schools (and/or years) to be in the global family file.4 Create Global Family Codes. (If you are in the Select More Schools screen, codes willbe created automatically upon clicking Finish or Next from that screen. Or, you can selectCreate Global Family Files from the main menu.)5 Use the Consolidate Families screen to verify family groupings. Once the families have been verified, select option 4) Synchronize Families to synchronize theexisting demographic data for each family to ensure that all siblings have matching data in all oftheir family fields.In order to use the Global Family Feature across multiple schools in multiple RS4 folders*, you mustturn on Enhanced Security at each school. To check to see whether or not Enhanced Security has beenenabled at the school, click on FILE in the menu toolbar at the top of the screen. If you see Users/Security(Enhanced), then you have Enhanced Security turned on. If you see Add/Remove Users, then EnhancedSecurity has not been enabled.For more information, go to our Manuals site (Hhttp://www.rediker.com/support/manuals/manuals.phpH)and under Administrator’s Plus, there is a document for Enhanced Security.*The RS4 folder is where your Administrator’s Plus data is stored.<strong>Rediker</strong> <strong>Software</strong>, <strong>Inc</strong>. Page | 10
ACCESSING THE <strong>FAMILY</strong> <strong>FEATURE</strong>Before you can use the Global family feature, it must be activated using the Customize Data Base program.Only users with either supervisory or assistant supervisory rights can set up the Global family feature.Navigate to the Setup Family Feature menu by right-clicking on the background, selecting SETUP GENERAL G and Setup Family Feature, or click on the Cust DB iconselect 6) Setup Family Feature from the menu.in the shortcut bar and<strong>Rediker</strong> <strong>Software</strong>, <strong>Inc</strong>. Page | 11
SETTING UP THE GLOBAL <strong>FAMILY</strong> <strong>FEATURE</strong>The process of setting up the Global Family Feature involves the following steps: First, turn on the familyfeature by selecting the database fields you wish to designate as “family fields”. Then, enter the EnableGlobal Family Wizard by clicking on Setup Global Family Codes and select a base school. Next, select thelocation of the global family folder. Then, select any more schools (and/or years) that you want to include inthe global family file. The program will then create family codes for all students in all the selected schools –siblings will be grouped together across schools and years. Next, use the Consolidate Family feature to makesure your families are accurate. If any changes need to be made in the family code assignment, you can makesome changes directly from the Consolidate Families screen. Finally, synchronize the existing demographicdata for each family to ensure that all siblings have matching data in all of their family fields.Select Family FieldsGenerate Initial Family AccountsPrint Family ReportSynchronize FamiliesSetup Global Family CodesAssign Family CodeChoose which fields you want to be synchronized betweensiblings. By definition, these fields will always be thesame, without exception, for each child in a family. If youwant them to be different, do not make the field a familyfield. Note that you can later add or remove family fields.Enables you to generate family accounts within a singleschool year. It is also here where you can delete old familycodes. You will not have to select this option for globalfamily codes.Use the reports found under this option to verify that yourfamilies are accurate. You will not have to select thisoption for global family codes.Enables you to go through all of your families andsynchronize the data between those siblings.Brings up the Global Family Feature menu. If you aregoing to use the Global Family Feature, you will select thismenu option after selecting your Family Fields.Assigns family codes to any student in the system withoutone. This is usually run after you have imported your newstudents for the coming year. You will use this option onlyif you deleted a family code from a student.<strong>Rediker</strong> <strong>Software</strong>, <strong>Inc</strong>. Page | 12
SELECTING <strong>FAMILY</strong> FIELDSThe first step in the process is to select the fields that you want to synchronize between siblings. By definition,these fields will always be the same for each child, without exception, in a family. Any field that could beunique to the student, like homeroom, birth date, locker, etc., should not be a family field. Family fields shouldonly be fields whose data will be the same for each sibling.Because the Global Family Feature synchronizes data across schools, it is important that all fields to besynchronized are in the same location (same field #) across each school. If not, data in those fields will notbe synchronized. The field type (e.g. Text, Date, Derived, etc.) should also match for family fields.This screen allows you to choose your family fields. These are the database fields which will be synchronizedamong siblings.1 Select and move the desired fields from the left window Available Fields to the right windowSelected Fields.2 Once all the family fields have been selected, click Accept [F10] .Helpful Hint: Moving multiple fields• To select and move multiple fields listed in order, click the first field in the range, hold down theSHIFT key, and click the last field in the range.• To select and move multiple fields that are not listed in order, hold down the CTRL key and clickthe desired fields.<strong>Rediker</strong> <strong>Software</strong>, <strong>Inc</strong>. Page | 13
ACCESSING THE GLOBAL <strong>FAMILY</strong> SETUP WIZARDOnce you have selected the family fields you wish to synchronize, you will need to enable and create theglobal family codes. This is done by following the steps in the Global Family Wizard. The Wizard will walkyou through the following steps in order: Select a base school, Select the location of the global family folder,Select any other schools (and/or years) that you want to include in the global family file and Consolidatefamilies.3 Select option 5) Setup Global Family Codes from the main SETUP <strong>FAMILY</strong> <strong>FEATURE</strong> menu toaccess the Global Family Wizard.When you select Setup Global Family Codes, you will see a red warning message stating thatthere should be no other users logged into Administrator’s Plus. If this is the case press Yes. If not,please get all other users out of Administrator’s Plus and then click on Setup Global Family Codes.Select the Base SchoolSelect Global Family File PathSelect More SchoolsCreate Global Family CodesConsolidate FamiliesSelect which school will serve as the base school for familycodes. The codes generated from the base school will notbe modified.Identify where your global family files will be stored. Iflinking multiple schools, all schools will need access to thislocation.Identify the other schools and/or years that you want toinclude. You will have the ability to create global familycodes from within this screen.Generates the global family codes. If you created familycodes from the Select More Schools screen, you can skipthis step.Verify that family groupings are correct. You can makechanges to family codes from this screen.4 Click Next .<strong>Rediker</strong> <strong>Software</strong>, <strong>Inc</strong>. Page | 14
Select a Base SchoolThe base school is the school whose family codes will not be modified. This school’s family codes will serveas the base for all other codes. If you are setting up Global Family within a district, it is recommended that thebase school be the highest school (i.e. a high school or upper school) in the district.5 Once you have selected the base school, click Next tosave the selection. You will be brought to the Select the GlobalFamily File path screen.Select the Global Family PathAll global family files are stored in a folder titled GlobalFamily. By default, this folder is stored in the RS4folder that houses your base school’s data. If you are setting up Global Family to work within a district, allschools that are going to be included in the global family file must be able to access this folder.6 Once you have selected the location of the global family files, click Next to save the path.You will be brought to the Select More Schools screen.<strong>Rediker</strong> <strong>Software</strong>, <strong>Inc</strong>. Page | 15
Select More SchoolsYou can select other schools and/or years to be included in your global family file. All schools that you haveaccess to will be displayed on the screen. This includes schools that are located in other RS4 folders, but onlyif you have set those schools up as remote schools within Enhanced Security. To select a school, check the boxnext to the school name and then check any additional years from that school that you wish to include.7 Select any additional schools and/or years. Upon clicking either Next or Create Global Family Filesyou will see a red warning message stating that you should back up all of the schools you want toinclude. If you have done this, click Yes. If not, click No and back up the schools and then come backto this screen.8 Once the files have been created, you will see a green congratulations message. Click Done.<strong>Rediker</strong> <strong>Software</strong>, <strong>Inc</strong>. Page | 16
Consolidating FamiliesOnce you have created the global family codes, you must go to the Consolidate Families screen to verify thatfamily groupings are correct. When there is an exact match of student’s last name, parent/guardian, phonenumber and family code, there is no doubt these students are in the same family. The Consolidate Familiesscreen enables you to view students in groups where some of these elements do not match.There are four different criteria that can be used in combination, or separately, to match groups of students.• Last Name – This is the last name of the student.• Parent/Guardian – This is the entry in the Parent/Guardian field of the database.• Student Phone – This is the entry in the Student Phone field of the database.• Family Code – This is the code given to the student by the program.You can select from any or all of the first three criteria – family code is always included in the list – to displaygroups of students that DO NOT match on the unselected criteria or family code. For example, in the screenshot below, Last Name, Parent/Guardian and Student Phone are selected; the students that displayed havefamily codes that do not match.It is suggested, when consolidating families, that you go from students who match on the most criteria tostudents who match on the least. The reasoning behind this is that if a student matches on Last Name,Parent/Guardian and Student Phone, it is relatively safe to assume that these students are in the same family.As students match on fewer and fewer criteria, the chances they are in the same family decrease. By goingfrom most in common to the least in common, you narrow the list of students for whom you may have to dosome digging to determine if not they are in the same family.When viewing families, you may see students with numbers appended to their family codes (see below).What happened was that the program encountered a duplicate or questionable family code in one of thenon-base schools and it modified that code by appending the school id at the end of it.<strong>Rediker</strong> <strong>Software</strong>, <strong>Inc</strong>. Page | 17
Making Changes to Family CodesFamily codes can be modified by clicking in the family code box and on the drop-down button . The dropdownwill display any existing family codes for the family (i.e. any codes that begin with the same first threeletters), New Family Code and Delete Family Code. The options to generate a new code or delete the currentcode mean that a new code can be created at a later date.• New Family Code – assigns a new family code to the student(s) once you click Accept, provided youalso checked the Verified checkbox.• Delete Family Code – removes the family code from the student(s) once you click Accept, providedyou also checked the Verified checkbox. If you delete family codes, you will be able to create a newcode at a later date by either going into NEW FILES or selecting option 6) Assign Family Codes fromthe <strong>FAMILY</strong> <strong>FEATURE</strong> main menu (see page 20).To change a family code, select an option from the family code drop-down and click the Verified box for thefamily. Any changes made to family codes will be made when the Accept button is clicked.The Verified CheckboxThe Verified Checkbox serves two different purposes. The first is that if you have made changes to studentfamily codes, you will need to check the Verified checkbox and click Accept in order for the change infamily code to be saved. The second purpose is to remove the family grouping from the list.Once a family has been verified, you will no longer see it when you Review Groups of Families based on theselection criteria. To see verified families, check the Show Verified Families checkboxat the top of the screen. When viewing verified families, you will have the option to unverify the family. If youunverify a family, they will reappear on the Review Groups of Families list.When you have finished verifying families, you can cancel out of the Setup Global Family Wizard. If youever need to change/add schools, consolidate families, etc. you can always come back into the wizard.You will notice that the option on the Family Feature menu will be changed to option 5) View/EditGlobal Family Codes.<strong>Rediker</strong> <strong>Software</strong>, <strong>Inc</strong>. Page | 18
SYNCHRONIZE FAMILIESOnce you have created global family codes and consolidated families, the next step is to synchronize familyfield data across schools (and years). The Synchronize Families screen lists each student in a family and thefamily field entries that are not the same for each member. It also references the school and school year inwhich the data is found. Use this step to select the desired field entry to appear in each family member’srecord. During the synchronize process, use school records, if available, to determine which entry for eachfamily field should be duplicated for all siblings.You may choose not to synchronize any family field, or all family fields, during this process.However, when new entries are made, or existing entries are edited in family fields, they will alwaysbe duplicated into the corresponding fields for all siblings.How do I? … Synchronize Families Select SYNCHRONIZE FAMILIES from the Family Feature menu. Starting with the first family that appears, highlight the student whose data fields are to be copiedinto his siblings’ records. Click Synchronize. Upon clicking Synchronize, you will be brought to the next field(for this family), or the next family with non-synchronized data.<strong>Rediker</strong> <strong>Software</strong>, <strong>Inc</strong>. Page | 19
ASSIGNING NEW CODESIf, in the consolidation process, you deleted any existing family codes, you will need to assign new codes tothese students. There are two ways to assign new codes. The first is through the Assign Family Codes optionlocated in <strong>FAMILY</strong> <strong>FEATURE</strong> main menu, and the second is through the NEW FILES program.ASSIGN <strong>FAMILY</strong> CODESHow do I? … Assign a New Family Code using Assign Family Codes DATA BASE CUSTOMIZE DB <strong>FAMILY</strong> <strong>FEATURE</strong> Select option 6) Assign Family Codes. You will see a red warning message asking if you want to continue with the process of assigningfamily codes. Click Yes. Another message will appear stating that no other users should be in the program. Click Yes.<strong>Rediker</strong> <strong>Software</strong>, <strong>Inc</strong>. Page | 20
How do I? … Assign a New Family Code using Assign Family Codes (continued)The program will begin to go through all of the students. When it finds a student without a family code,a lookup will appear. The lookup will be displaying all students in the same school with the same lastname in the most recent year. Use the radio buttons at the top to view students with Any Last Name orstudents in All District Schools. When you have found the sibling in the lookup, highlight that student and click the button statingthat “[the student] is the sibling or click “This student does not have a sibling” to have a newcode assigned.This will continue until each of your students has been assigned a family code. You will then bereturned to the main family feature menu.<strong>Rediker</strong> <strong>Software</strong>, <strong>Inc</strong>. Page | 21
NEW FILESHow do I? … Assign a student a new family code or change an existing code through New Files DATA BASE NEW FILES Look up the student. Click on the Browse Button next to Family Code. Select a sibling from the lookup and click “[Student Name] is the sibling” and the incomingstudent will be linked to the selected family. Any family field information will be immediatelyentered for the child. If the student does not have a sibling, click “This student does not have asibling” and the student will be given a new family code, and demographic data will need to beentered for the student.<strong>Rediker</strong> <strong>Software</strong>, <strong>Inc</strong>. Page | 22
LINKING NEW STUDENTS TO A <strong>FAMILY</strong>After the family feature has been enabled, you will be required to link any new student added through NewFiles to a family or to indicate that the child does not have a sibling, in which case the child will be given anew family code.How do I? … Link a newly added student to a family DATA BASE NEW FILES Select the appropriate grade level and click Add [F2]. Type in the Last Name and First Name of the student and click Address [F9] or Save [F10]. Select a sibling from the lookup and click “’Student Name’ is the sibling” and the incomingstudent will be linked to the selected family. Any family field information will be immediatelyentered for the child. If the student does not have a sibling, click “This student does not have asibling” and the student will be given a new family code and demographic data will need to beentered for the student.<strong>Rediker</strong> <strong>Software</strong>, <strong>Inc</strong>. Page | 23
CHAPTER 3 – “SINGLE YEAR” <strong>FAMILY</strong> <strong>FEATURE</strong>The family feature generates unique family codes for all students in the selected school for one year. Thesecodes will synchronize family fields between all siblings within that school year.This chapter will cover the following topics:• Accessing the Family Feature• Setting the family featureooooSelecting fields to synchronizeGenerating Family AccountsPrinting family reportsSynchronizing families• Using Family Codes<strong>Rediker</strong> <strong>Software</strong>, <strong>Inc</strong>. Page | 24
QUICK STEP GUIDE FOR ENABLING THE “SINGLE YEAR” <strong>FAMILY</strong><strong>FEATURE</strong> Go to DATA BASE CUSTOMIZE DB SETUP <strong>FAMILY</strong> <strong>FEATURE</strong> Select option 1) Select Family Fields and select the fields that you wish to synchronize betweensiblings. Select option 2) Generate initial family accounts to generate family accounts. Family accountscan either be generated based on data in a data base field or they can be generated based on phonenumber. After the codes have been generated, select option 3) Print Family Reports to verify that yourfamily groupings are accurate.• If you need to change some of the family codes, go into New Files to generate a newfamily code for any student. Once the families have been verified, select option 4) Synchronize Families to synchronize theexisting demographic data for each family to ensure that all siblings have matching data in all oftheir family fields.<strong>Rediker</strong> <strong>Software</strong>, <strong>Inc</strong>. Page | 25
ACCESSING THE <strong>FAMILY</strong> <strong>FEATURE</strong>Before you can use the family feature, it must be activated using the Customize Data Base program. Onlyusers with either supervisory or assistant supervisory rights can set up the family feature.Navigate to the Setup Family Feature menu by right-clicking on the background, selecting SETUP GENERAL G and Setup Family Feature, or click on the Cust DB iconselect 6) Setup Family Feature from the menu.in the shortcut bar and<strong>Rediker</strong> <strong>Software</strong>, <strong>Inc</strong>. Page | 26
SETTING UP THE <strong>FAMILY</strong> <strong>FEATURE</strong> – SINGLE YEARThe process of setting up the Family Feature for a single school year involves the following steps: First, turnon the family feature by selecting the database fields you wish to designate as “family fields”. Then, create apreliminary list of families based on student phone numbers or another family code you have stored in theData Base Plus module. Next, use the family reports to make sure your families are accurate. If any changesneed to be made in the family code assignment, use the New Files program to do so. Finally, synchronize theexisting demographic data for each family to ensure that all siblings have matching data in all of their familyfields.Select Family FieldsGenerate Initial FamilyAccountsPrint Family ReportSynchronize FamiliesSetup Global FamilyCodesAssign Family CodeChoose which fields you want to be synchronized between siblings.By definition, these fields will always be the same for each child,without exception, in a family. If you want them to be different, donot make the field a family field. Note that you can later add orremove family fields.Enables you to generate family accounts within a single school year.Students with the same family code are considered to be siblings.Using New Files, you may edit family codes to move students fromone family to another.Use the reports found under this option to verify that your familiesare accurate. Family codes may be edited in the New Files programby clicking on the button to the right of the family code.Enables you to go through all of your families and synchronize thedata between those siblings.Brings up the Global Family Feature menu. You will not have toselect this option if you are creating Single Year family codes.Assigns family codes to any student in the system without one. Thisis usually run after you have imported your new students for thecoming year.<strong>Rediker</strong> <strong>Software</strong>, <strong>Inc</strong>. Page | 27
SELECTING <strong>FAMILY</strong> FIELDSThe first step in the process is to select the fields that you want to synchronize between siblings. By definition,these fields will always be the same for each child, without exception, in a family. Any field that could beunique to the student, like homeroom, birth date, locker, etc., should not be a family field. Family fields shouldonly be fields whose data will be the same for each sibling.This screen allows you to choose your family fields. These are the database fields which will be synchronizedamong siblings.1 Select and move the desired fields from the left window Available Fields to the right windowSelected Fields.2 Once all the family fields have been selected, click Accept [F10] .Helpful Hint: Moving multiple fields• To select and move multiple fields listed in order, click the first field in the range, hold down theSHIFT key, and click the last field in the range.• To select and move multiple fields that are not listed in order, hold down the CTRL key and clickthe desired fields.<strong>Rediker</strong> <strong>Software</strong>, <strong>Inc</strong>. Page | 28
GENERATING INITIAL <strong>FAMILY</strong> ACCOUNTSThe next step in the process is to assign family codes to your students. This process automatically assigns afamily code to each student. This new code can then be viewed or edited using the New Files program. Theseven-digit family code will consist of the first three characters of the student’s last name followed by a fourdigitnumber. Administrator’s Plus recognizes students with the same family code as siblings.3 Select option 2) Generate Initial Family Accounts from the SETUP <strong>FAMILY</strong> <strong>FEATURE</strong> mainmenu.Depending upon certain program settings, you may see the menu on the left or the menu on the right. Both ofthese menu options will enable you to generate initial family codes. In the past, there was a need to generatefamily codes from an existing code in a Data Base field; now, codes are generated by phone number.From an Existing DB FieldFrom Phone NumbersDelete All Existing Family CodesSelecting this option enables you to generate family codesbased on a database field. If you have an existing familycode in a database field, you can use this option to copythat code into a new family code. You may not see thisoption on the menu.Selecting this option enables you to generate family codesbased on the student’s phone number field. If the phonenumber is an exact match (this includes punctuation usedsuch as parentheses and dashes) then the students will begiven the same family code.Selecting this option will erase all existing family codes.You should select this option first if you have never turnedon the family feature or if you want to clear out old codesfrom the previous school year.4 If you are creating family codes for the first time, you should select the Delete All Existing FamilyCodesSelect the From Phone Numbers option and click Next.<strong>Rediker</strong> <strong>Software</strong>, <strong>Inc</strong>. Page | 29
4 A message will appear stating that family codes will be generated based upon the phone number. Eachchild with the same phone number will have the same family code. Click Yes.Once the codes have been successfully generated, another message will appear on the screen. ClickDone.<strong>Rediker</strong> <strong>Software</strong>, <strong>Inc</strong>. Page | 30
VERIFYING FAMILIES (PRINT <strong>FAMILY</strong> REPORTS)Once the family codes have been generated, you should verify that the family groupings are correct. There aretwo types of family reports you can print to help make any necessary corrections to the automatically assignedfamily codes. The All Families report shows a listing of students per family code, with synchronized as wellas non-synchronized family field entries. It can be used as a reference for editing students’ family codes. Itlists all students, grouped by family code. In some cases, students will be assigned a family code that does notmatch the family code of the other siblings. This may happen due to differences in the phone number or thedata field used to generate the family code. In looking through the report, you may see that some fieldsbetween siblings are designated as NOT SYNCHRONIZED. This indicates that there is a difference in thefield information between the siblings. The Non-synchronized Families Only report generates a list of onlythose families who have different information in one or more family fields.All FamiliesNon-synchronized Families OnlyPage SetupPrinter SetupShows a listing of students per family code, withsynchronized as well as non-synchronized family fieldentries.Generates a list of only those families who have differentinformation in one or more family fields.Opens up the page setup screen. It is in page setup whereyou can set margins, paper size and orientation.Opens up the printer setup screen. It is in printer setupwhere you can select a printer.In addition to the All Families report, you can use any of our Excel ® features, either the Excel Wizard orSend to Excel through the Advanced Lookup, to verify family code assignments.Go to TOOLS EXCEL WIZARD DATA BASE <strong>PLUS</strong> STUDENT DATA. Select the Family Codefield {306} and any other fields you wish to export. (Phone Number and Parent/Guardian may be helpful todetermine whether students are siblings.) Click Next. Excel will open and you can review family codes.<strong>Rediker</strong> <strong>Software</strong>, <strong>Inc</strong>. Page | 31
Below are samples of the All Families Report (left), the Non-Synchronized Family Report (right) and a resultof an export to Excel using the Excel Wizard (below).If you need to edit any family codes, you will need to go to New Files and edit students’ family codes (see thefollowing page). If you do not need to edit any codes, you can synchronize family accounts (see page 34).<strong>Rediker</strong> <strong>Software</strong>, <strong>Inc</strong>. Page | 32
EDITING <strong>FAMILY</strong> CODESIf, after reviewing the All Family Report or the student data in Excel, you determine that a student’s familycode must be edited, you will need to go into the NEW FILES program. Simply call up the student and clickon the browse buttonnext to the Family Code field. The Family Lookup will appear on the screen.The family lookup will list all students with the same last name as the student being viewed in New Files. Ifthe selected student has a last name that is different from his siblings, click the Show All [F6] buttonto view all students in your school by family code.How do I? … Change a Family Code? Go into DATA BASE NEW FILES. Call up the student and click on the browse buttonnext to the Family Code field. Highlight the student’s sibling from the list. If you need to view all students in your school, clickShow All [F6] . Click Select.<strong>Rediker</strong> <strong>Software</strong>, <strong>Inc</strong>. Page | 33
SYNCHRONIZE FAMILIESThe Synchronize Families screen lists each student in a family, along with the family field entries that are notthe same for each member. Use this step to select the desired field entry to appear in each family member’srecord. During the synchronize process, use your own school records, if available, to determine which entryfor each family field should be duplicated for all siblings.You may choose not to synchronize any family field, or all family fields, during this process.However, when new entries are made, or existing entries are edited in family fields, they will alwaysbe duplicated into the corresponding fields for all siblings.How do I? … Synchronize Families Select SYNCHRONIZE FAMILIES from the Family Feature menu. Starting with the first family that appears, highlight the student whose data fields are to be copiedinto his siblings’ records. Click Synchronize. Upon clicking Synchronize, you will be brought to the nextfield (for this family), or the next family with non-synchronized data.<strong>Rediker</strong> <strong>Software</strong>, <strong>Inc</strong>. Page | 34
ASSIGNING NEW CODESIf you have received students for your coming school year through an Administrator’s Plus import, or throughthe Import Wizard, you may see a message similar to the one below appear on the screen after the import.ASSIGN <strong>FAMILY</strong> CODESHow do I? … Assign a New Family Code using Assign Family Codes DATA BASE CUSTOMIZE DB <strong>FAMILY</strong> <strong>FEATURE</strong> Select option 6) Assign Family Codes. You will see a red warning message asking if you want to continue with the process of assigningfamily codes. Click Yes. Another message will appear stating that no other users should be in the program. Click Yes.The program will begin to go through all of the students. When it finds a student without a family code,a code will be assigned automatically. When finished, you will be returned to the main family featuremenu. Once codes have been assigned, use the family reports or Excel to verify the family codeassignments (see page 31).<strong>Rediker</strong> <strong>Software</strong>, <strong>Inc</strong>. Page | 35
LINK NEW STUDENTS TO A <strong>FAMILY</strong>How do I? … Link a newly added student to a family DATA BASE NEW FILES Select the appropriate grade level and click Add [F2]. Type in the Last Name and First Name of the student and click Address [F9] or Save [F10]. Select a sibling from the lookup and click Select. Any family field information will be immediatelyentered for the child. If the student does not have a sibling, highlight “No Siblings Exist” and clickSelect. The student will be given a new family code and demographic data will need to be enteredfor the student.<strong>Rediker</strong> <strong>Software</strong>, <strong>Inc</strong>. Page | 36
<strong>Rediker</strong> <strong>Software</strong>, <strong>Inc</strong>. Page | 37