Compact / Hardwired / Logic Controller / Twido ... - Schneider Electric
Compact / Hardwired / Logic Controller / Twido ... - Schneider Electric
Compact / Hardwired / Logic Controller / Twido ... - Schneider Electric

Create successful ePaper yourself
Turn your PDF publications into a flip-book with our unique Google optimized e-Paper software.
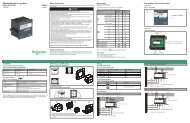
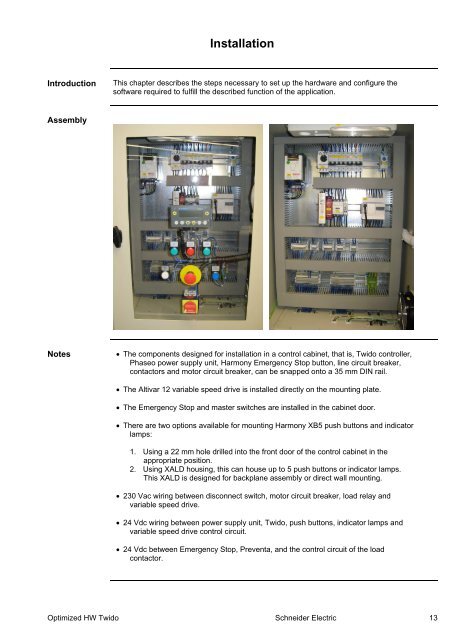
InstallationIntroductionThis chapter describes the steps necessary to set up the hardware and configure thesoftware required to fulfill the described function of the application.AssemblyNotes The components designed for installation in a control cabinet, that is, <strong>Twido</strong> controller,Phaseo power supply unit, Harmony Emergency Stop button, line circuit breaker,contactors and motor circuit breaker, can be snapped onto a 35 mm DIN rail. The Altivar 12 variable speed drive is installed directly on the mounting plate. The Emergency Stop and master switches are installed in the cabinet door. There are two options available for mounting Harmony XB5 push buttons and indicatorlamps:1. Using a 22 mm hole drilled into the front door of the control cabinet in theappropriate position.2. Using XALD housing, this can house up to 5 push buttons or indicator lamps.This XALD is designed for backplane assembly or direct wall mounting. 230 Vac wiring between disconnect switch, motor circuit breaker, load relay andvariable speed drive. 24 Vdc wiring between power supply unit, <strong>Twido</strong>, push buttons, indicator lamps andvariable speed drive control circuit. 24 Vdc between Emergency Stop, Preventa, and the control circuit of the loadcontactor.Optimized HW <strong>Twido</strong> <strong>Schneider</strong> <strong>Electric</strong> 13