Protocols: The RADIUS Protocol - Encore Networks
Protocols: The RADIUS Protocol - Encore Networks
Protocols: The RADIUS Protocol - Encore Networks

You also want an ePaper? Increase the reach of your titles
YUMPU automatically turns print PDFs into web optimized ePapers that Google loves.
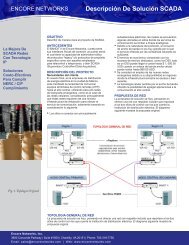
encor! •enetworks TMVersion A, September 2010© 2010 <strong>Encore</strong> <strong>Networks</strong>, Inc.All rights reserved.<strong>The</strong> <strong>RADIUS</strong> <strong>Protocol</strong>This chapter discusses configuration and use of the Remote Authentication Dial-In UserService (<strong>RADIUS</strong>) networking protocol on a BANDIT device.Note: <strong>The</strong> BANDIT devices use <strong>RADIUS</strong> only for Telnet logins. For all other logins, standardBANDIT authentication is used.If the login is via Telnet, the BANDIT’s network access server identifier (NAS ID) determineswhether the login uses <strong>RADIUS</strong> or standard authentication and selects the appropriate loginroutine.See the following sections:• <strong>The</strong> <strong>RADIUS</strong> Networking <strong>Protocol</strong>• Configuring the BANDIT as a <strong>RADIUS</strong> ClientNote: See the <strong><strong>Protocol</strong>s</strong> Module for a full list of BANDIT protocols.10.1 <strong>The</strong> <strong>RADIUS</strong> Networking <strong>Protocol</strong><strong>RADIUS</strong> is a centralized authentication, authorization, and accounting (AAA) managementsystem:• Authentication verifies that the proper user credentials have been submitted for access todevices in the network.• Authorization indicates which devices and services the user can have access to.• Accounting tracks the use of the devices and services.<strong>The</strong> BANDIT’s use of the <strong>RADIUS</strong> protocol conforms to RFC 2865, which describes the <strong>RADIUS</strong>protocol’s authentication and authorization, and RFC 2866, which describes the <strong>RADIUS</strong>protocol’s accounting.<strong>The</strong> BANDIT device is a <strong>RADIUS</strong> client. When a user logs in over a Telnet connection, theBANDIT sends the user credentials to the <strong>RADIUS</strong> server for verification. <strong>The</strong> <strong>RADIUS</strong> serverusually resides at a network operation center (NOC), such as a headquarters (HQ) site or a centralhub site.Note: Configuration of <strong>RADIUS</strong> user names, passwords, and access levels is performed on the<strong>RADIUS</strong> server. See the server manufacturer’s literature to configure <strong>RADIUS</strong> on the server.For information on trademarks, safety, limitationsof liability, and similar topics, see Notices.Home Module: <strong><strong>Protocol</strong>s</strong>Document 10
<strong>The</strong> <strong>RADIUS</strong> <strong>Protocol</strong> Page 3<strong>RADIUS</strong> CONFIG PARAMETERS-------------------------1) <strong>RADIUS</strong> Admin Status : Enabled2) Primary <strong>RADIUS</strong> Server IP : 0.0.0.03) Secondary <strong>RADIUS</strong> Server IP : 0.0.0.04) <strong>RADIUS</strong> NAS IP : 0.0.0.05) <strong>RADIUS</strong> Shared Secret : ****6) <strong>RADIUS</strong> Server UDP Port : 07) <strong>RADIUS</strong> Retry Timeout : 08) <strong>RADIUS</strong> Maximum Retries : 0Enter Choice :4 On the <strong>RADIUS</strong> Configuration Parameters Menu, select each parameter (as describedin step 5 through step 12) to configure the BANDIT as a <strong>RADIUS</strong> client.5 On the <strong>RADIUS</strong> Configuration Parameters Menu, select <strong>RADIUS</strong> Admin Status.❖ <strong>The</strong> following prompt is displayed.<strong>RADIUS</strong> Admin Status(1.Disable, 2.Enable): (1 to 2)[1] :a Do one of the following:i To refrain from using <strong>RADIUS</strong>, select Disable.❖ This BANDIT device will not use <strong>RADIUS</strong>. <strong>The</strong> <strong>RADIUS</strong> Configuration ParametersMenu is redisplayed. Go to step 13.ii To use <strong>RADIUS</strong>, select Enable.❖ This BANDIT device will be a <strong>RADIUS</strong> client. <strong>The</strong> <strong>RADIUS</strong> ConfigurationParameters Menu is redisplayed. Continue to configure <strong>RADIUS</strong> parameters.<strong>RADIUS</strong> CONFIG PARAMETERS-------------------------1) <strong>RADIUS</strong> Admin Status : Enabled2) Primary <strong>RADIUS</strong> Server IP : 0.0.0.03) Secondary <strong>RADIUS</strong> Server IP : 0.0.0.04) <strong>RADIUS</strong> NAS IP : 0.0.0.05) <strong>RADIUS</strong> Shared Secret : ****6) <strong>RADIUS</strong> Server UDP Port : 07) <strong>RADIUS</strong> Retry Timeout : 08) <strong>RADIUS</strong> Maximum Retries : 0Enter Choice :6 On the <strong>RADIUS</strong> Configuration Parameters Menu, select Primary <strong>RADIUS</strong> Server IP.❖ <strong>The</strong> following prompt is displayed.
Page 4 <strong><strong>Protocol</strong>s</strong> Module, Document 10Enter Primary <strong>RADIUS</strong> Server IP (N.N.N.N) :a Type the IP address of the primary server for the <strong>RADIUS</strong> application, and press Enter.❖ <strong>The</strong> IP address is accepted and is displayed in the <strong>RADIUS</strong> Configuration ParametersMenu.<strong>RADIUS</strong> CONFIG PARAMETERS-------------------------1) <strong>RADIUS</strong> Admin Status : Enabled2) Primary <strong>RADIUS</strong> Server IP : 192.10.168.243) Secondary <strong>RADIUS</strong> Server IP : 0.0.0.04) <strong>RADIUS</strong> NAS IP : 0.0.0.05) <strong>RADIUS</strong> Shared Secret : ****6) <strong>RADIUS</strong> Server UDP Port : 07) <strong>RADIUS</strong> Retry Timeout : 08) <strong>RADIUS</strong> Maximum Retries : 0Enter Choice :7 If your network includes a secondary <strong>RADIUS</strong> server, then, on the <strong>RADIUS</strong>Configuration Parameters Menu, select Secondary <strong>RADIUS</strong> Server IP.❖ <strong>The</strong> following prompt is displayed.Enter Seconday <strong>RADIUS</strong> Server IP (N.N.N.N) :a Type the IP address of the secondary server for the <strong>RADIUS</strong> application, and pressEnter.❖ <strong>The</strong> IP address is accepted and is displayed in the <strong>RADIUS</strong> Configuration ParametersMenu.<strong>RADIUS</strong> CONFIG PARAMETERS-------------------------1) <strong>RADIUS</strong> Admin Status : Enabled2) Primary <strong>RADIUS</strong> Server IP : 192.10.168.243) Secondary <strong>RADIUS</strong> Server IP : 192.10.168.44) <strong>RADIUS</strong> NAS IP : 0.0.0.05) <strong>RADIUS</strong> Shared Secret : ****6) <strong>RADIUS</strong> Server UDP Port : 07) <strong>RADIUS</strong> Retry Timeout : 08) <strong>RADIUS</strong> Maximum Retries : 0Enter Choice :
<strong>The</strong> <strong>RADIUS</strong> <strong>Protocol</strong> Page 58 On the <strong>RADIUS</strong> Configuration Parameters Menu, select <strong>RADIUS</strong> NAS IP.❖ <strong>The</strong> following prompt is displayed.Enter NAS IP (Local IP) (N.N.N.N) :Note: <strong>The</strong> BANDIT functions as a network access server (NAS) for <strong>RADIUS</strong>, and usesone of its IP addresses (usually its WAN IP address) to identify itself to the <strong>RADIUS</strong>server.a Type the BANDIT’s IP address for its <strong>RADIUS</strong> application NAS function, and pressEnter.❖ If the IP address entered is not one of the BANDIT’s current IP addresses, thefollowing message is displayed.WARNIING: IP Address is not part of the active interfaces!Caution: If you see this message, the NAS IP is not one of the BANDIT’s current IPaddresses. Make sure the BANDIT’s NAS IP address corresponds to an IP address forone of the BANDIT’s ports. You may need to repeat step 8.❖ <strong>The</strong> <strong>RADIUS</strong> Configuration Parameters Menu is redisplayed, with the specified IPaddress.<strong>RADIUS</strong> CONFIG PARAMETERS-------------------------1) <strong>RADIUS</strong> Admin Status : Enabled2) Primary <strong>RADIUS</strong> Server IP : 192.10.168.243) Secondary <strong>RADIUS</strong> Server IP : 192.10.168.44) <strong>RADIUS</strong> NAS IP : 192.10.168.105) <strong>RADIUS</strong> Shared Secret : ****6) <strong>RADIUS</strong> Server UDP Port : 07) <strong>RADIUS</strong> Retry Timeout : 08) <strong>RADIUS</strong> Maximum Retries : 0Enter Choice :9 On the <strong>RADIUS</strong> Configuration Parameters Menu, select <strong>RADIUS</strong> Shared Secret.❖ <strong>The</strong> following prompt is displayed.Enter <strong>RADIUS</strong> Shared Secret:
Page 6 <strong><strong>Protocol</strong>s</strong> Module, Document 10!Note: <strong>The</strong> <strong>RADIUS</strong> shared secret is used to negotiate the connection between the NASand the <strong>RADIUS</strong> server. <strong>The</strong> <strong>RADIUS</strong> shared secret must be determined in advanceand must be distributed to each party in the connection.Caution: Do not distribute the <strong>RADIUS</strong> shared secret to any entities other than thosethat must use that shared secret.Note: <strong>The</strong> <strong>RADIUS</strong> definition of “shared secret” corresponds to “secret key” (alsoknown as “pre-shared key” or “shared key”). It is not a generated shared secret such asthat used in a key-agreement protocol (for example, a Diffie–Hellman exchange).a Type the <strong>RADIUS</strong> shared secret exactly as it is presented, including special charactersand uppercase or lowercase letters. (<strong>The</strong> <strong>RADIUS</strong> shared secret cannot contain spaces.)<strong>The</strong>n press the Enter key.❖ <strong>The</strong> following prompt is displayed.ReEnter <strong>RADIUS</strong> Shared Secret:b Retype the <strong>RADIUS</strong> shared secret exactly as it is presented, including special charactersand uppercase or lowercase letters. <strong>The</strong>n press the Enter key.❖ If the entries are not the same, the following error message is displayed. <strong>The</strong>n the<strong>RADIUS</strong> Configuration Parameters Menu is redisplayed. Perform step 9 again.ERROR: Entered Strings differ!!Caution: If you see this message, the <strong>RADIUS</strong> shared secret might have been typedincorrectly; it must be re-entered. You must perform step 9 again, making sure that, inboth substep a and substep b, you type the <strong>RADIUS</strong> shared secret exactly as it ispresented.❖ If the entries are the same, the <strong>RADIUS</strong> shared secret is accepted. <strong>The</strong>n the <strong>RADIUS</strong>Configuration Parameters Menu is redisplayed.<strong>RADIUS</strong> CONFIG PARAMETERS-------------------------1) <strong>RADIUS</strong> Admin Status : Enabled2) Primary <strong>RADIUS</strong> Server IP : 192.10.168.243) Secondary <strong>RADIUS</strong> Server IP : 192.10.168.44) <strong>RADIUS</strong> NAS IP : 192.10.168.105) <strong>RADIUS</strong> Shared Secret : ****6) <strong>RADIUS</strong> Server UDP Port : 07) <strong>RADIUS</strong> Retry Timeout : 08) <strong>RADIUS</strong> Maximum Retries : 0Enter Choice :
<strong>The</strong> <strong>RADIUS</strong> <strong>Protocol</strong> Page 710 On the <strong>RADIUS</strong> Configuration Parameters Menu, select <strong>RADIUS</strong> Server UDP Port.❖ <strong>The</strong> following prompt is displayed.<strong>RADIUS</strong> Server UDP Port(1.Old_1645, 2.New_1812): (1 to 2)[2] :Note: To determine whether to use the old or new <strong>RADIUS</strong> UDP port number, see thevendor’s instructions for the <strong>RADIUS</strong> server.a Select the UPD port for <strong>RADIUS</strong> transmissions.❖ <strong>The</strong> <strong>RADIUS</strong> Configuration Parameters Menu is redisplayed with the selected<strong>RADIUS</strong> UDP port number.<strong>RADIUS</strong> CONFIG PARAMETERS-------------------------1) <strong>RADIUS</strong> Admin Status : Enabled2) Primary <strong>RADIUS</strong> Server IP : 192.10.168.243) Secondary <strong>RADIUS</strong> Server IP : 192.10.168.44) <strong>RADIUS</strong> NAS IP : 192.10.168.105) <strong>RADIUS</strong> Shared Secret : ****6) <strong>RADIUS</strong> Server UDP Port : 18127) <strong>RADIUS</strong> Retry Timeout : 08) <strong>RADIUS</strong> Maximum Retries : 0Enter Choice :11 On the <strong>RADIUS</strong> Configuration Parameters Menu, select <strong>RADIUS</strong> Retry Timeout.❖ <strong>The</strong> following prompt is displayed.<strong>RADIUS</strong> Retry Timeout: (1 to 30)[3] :a Type the number of seconds for the BANDIT to wait for a response from the <strong>RADIUS</strong>server, and press Enter.❖ <strong>The</strong> <strong>RADIUS</strong> Configuration Parameters Menu is redisplayed with the selected timefor the <strong>RADIUS</strong> retry timeout.
Page 8 <strong><strong>Protocol</strong>s</strong> Module, Document 10<strong>RADIUS</strong> CONFIG PARAMETERS-------------------------1) <strong>RADIUS</strong> Admin Status : Enabled2) Primary <strong>RADIUS</strong> Server IP : 192.10.168.243) Secondary <strong>RADIUS</strong> Server IP : 192.10.168.44) <strong>RADIUS</strong> NAS IP : 192.10.168.105) <strong>RADIUS</strong> Shared Secret : ****6) <strong>RADIUS</strong> Server UDP Port : 18127) <strong>RADIUS</strong> Retry Timeout : 48) <strong>RADIUS</strong> Maximum Retries : 0Enter Choice :12 On the <strong>RADIUS</strong> Configuration Parameters Menu, select <strong>RADIUS</strong> Maximum Retries.❖ <strong>The</strong> following prompt is displayed.<strong>RADIUS</strong> Max Retries: (0 to 20)[3] :a Type the maximum number of retries for the BANDIT to contact the <strong>RADIUS</strong> server,and press Enter.❖ <strong>The</strong> <strong>RADIUS</strong> Configuration Parameters Menu is redisplayed with the indicatedmaximum number of retries.<strong>RADIUS</strong> CONFIG PARAMETERS-------------------------1) <strong>RADIUS</strong> Admin Status : Enabled2) Primary <strong>RADIUS</strong> Server IP : 192.10.168.243) Secondary <strong>RADIUS</strong> Server IP : 192.10.168.44) <strong>RADIUS</strong> NAS IP : 192.10.168.105) <strong>RADIUS</strong> Shared Secret : ****6) <strong>RADIUS</strong> Server UDP Port : 18127) <strong>RADIUS</strong> Retry Timeout : 48) <strong>RADIUS</strong> Maximum Retries : 4Enter Choice :13 After you have finished configuring the <strong>RADIUS</strong> configuration parameters, press theEscape key until you reach the Main Menu.
<strong>The</strong> <strong>RADIUS</strong> <strong>Protocol</strong> Page 9Main Menu----------1) QuickStart Config Builder2) Typical Configurations3) Advanced Configurations4) ToolsV) View Current Unit StatusF) Cellular Fast ConnectL) Load Factory DefaultsP) Load Plug and Play DefaultsW) Write ConfigurationR) Reset UnitX) eXit SessionS) StatisticsY) sYstem AdministrationEnter Choice :14 On the Main Menu, select Write Configuration, to save the new configuration. (Fordetails, see Saving (Writing) a Configuration.)15 <strong>The</strong>n, also on the Main Menu, select Reset Unit, to use the newly saved configuration.(For details, see Resetting the Device.)
Page 10 <strong><strong>Protocol</strong>s</strong> Module, Document 10