Willow Wardrobe instructions - Mamas & Papas
Willow Wardrobe instructions - Mamas & Papas
Willow Wardrobe instructions - Mamas & Papas

Create successful ePaper yourself
Turn your PDF publications into a flip-book with our unique Google optimized e-Paper software.
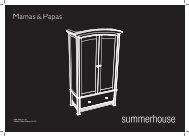
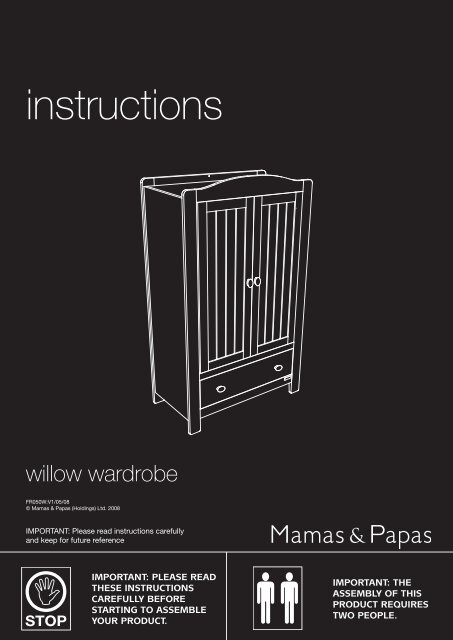
<strong>instructions</strong>willow wardrobeFR050W:V1/05/08© <strong>Mamas</strong> & <strong>Papas</strong> (Holdings) Ltd. 2008IMPORTANT: Please read <strong>instructions</strong> carefullyand keep for future referenceImportant: Please readthese <strong>instructions</strong>carefully beforestarting to assembleyour product.Important: theassembly of thisproduct requirestwo people.<strong>Willow</strong> <strong>Wardrobe</strong> V1.indd 1 14/4/09 13:04:06
A x 4FittingsB x 8HandlesC x 8Handle boltsD x 8Barrel nutsE x 56Drawer screwsF x 32Cam studsG x 24DowelsH x 56Small screwsI x 4CamsJ x 1Hinge armsK x 4Wall StrapL x 4Hinge platesM x 2Hanger rail screwsN x 1Door stopFlat head screwdriver-3-<strong>Willow</strong> <strong>Wardrobe</strong> V1.indd 3 14/4/09 13:04:10
1ASTEP 1Attach the two of thehandles (A) to the drawerfront (1) using the fourlong handle screws (B)and a X-head screwdriver.BSTEP 2Insert eight drawer barrelnuts (C) into the drawerfront (1) and drawer back(2).To ensure that the hole inthe barrel nut is alignedcorrectly, the line onthe top of the barrelnut should be pointedtowards the outer edge ofthe panel.1C2-4-<strong>Willow</strong> <strong>Wardrobe</strong> V1.indd 4 14/4/09 13:04:12
4STEP 5Slide the base (4) into thegrooves in the front andback panel.Push the base down untilit slots into the groove inthe side panel.3DSTEP 6Attach the remainingdrawer side (3) to theassembled sections usingthe four remaining drawerscrews (D) and the X-headscrewdriver.-6-<strong>Willow</strong> <strong>Wardrobe</strong> V1.indd 6 14/4/09 13:04:16
STEP 7The drawer is now fullyassembled.Keep in a safe place awayfrom children whilstassembling the wardrobe.1413STEP 8Select the left rear (13)and right rear legs (14).Screw twenty two camstuds (E) into the insertsin the legs using a X-headscrewdriver.E-7-<strong>Willow</strong> <strong>Wardrobe</strong> V1.indd 7 14/4/09 13:04:18
1617STEP 9Insert ten dowels (F) intothe ends of the top (15),middle (16) and bottom(17) back rails.Screw two cam studs (E)into the top and middleback rails using a X-headscrewdriver.15EF1415STEP 10Slot the top (15), middle(16) and bottom (17)back rails onto the rightrear leg (14) as shown.Insert three cams (H)into the holes in the railsand turn clockwise tolock using a flat headscrewdriver.1716H-8-<strong>Willow</strong> <strong>Wardrobe</strong> V1.indd 8 14/4/09 13:04:19
18STEP 13Slide the remaining topback panel (18) and thebottom panel (20) intothe grooves in the backrails.Push the top back panelalong the rails until itslots into the H-section.Push the bottom backpanel along the rails untilit slots in the legs.20STEP 14Attach the left rear leg(13) to the assembledrails as shown in thediagram.Fasten the leg in placeusing three cams (H)and lock them by turningthem clockwise using aflat head screwdriver.H13-10-<strong>Willow</strong> <strong>Wardrobe</strong> V1.indd 10 14/4/09 13:04:20
10STEP 15Attach the two magneticcatches (M) to the toppanel (10) using foursmall screws (G) and aX-head screwdriver.MGEFSTEP 16Screw eight cam studs (E)into the two side panels(11) using a X-headscrewdriver.Insert eight carcassdowels (F) into the sidesof the panel as shown.1111-11-<strong>Willow</strong> <strong>Wardrobe</strong> V1.indd 11 14/4/09 13:04:22
1011STEP 17Slot the top panel ontoone of the side panels(11) as shown.Fasten the top panel tothe side panel by insertingtwo cams (H).Lock the cams by turningthem clockwise by using aflat head screwdriver.HSTEP 18Slot the base panel (12)onto side panel as shown.Insert two cams (H)into the holes in thebase panel and rotateclockwise using a flathead screwdriver.12H-12-<strong>Willow</strong> <strong>Wardrobe</strong> V1.indd 12 14/4/09 13:04:23
11STEP 19Slot the remaining sidepanel (11) onto theassembled section.Insert four cams (H) intothe holes in the ends ofthe top and base panels.Turn the cams clockwisewith a flat headscrewdriver.HIMPORTANT: You mayneed the assistanceof another person tocomplete this step.STEP 20Slot the assembled panelsonto the back frame asshown.Fasten the two sectionstogether using sixteencams (H) and lock thecams using flat headscrewdriver.H-13-<strong>Willow</strong> <strong>Wardrobe</strong> V1.indd 13 14/4/09 13:04:26
56STEP 21Select the front left (5)and right legs (6). Screwtwenty two cam studs(E) into the inserts inthe legs using a X-headscrewdriver.EIGSTEP 22Slot the four hinge arms(I) into the holes in thelegs as shown.Fasten the hinge arms tothe legs using eight smallscrews (G) and a X-headscrewdriver.-14-<strong>Willow</strong> <strong>Wardrobe</strong> V1.indd 14 14/4/09 13:04:30
EFSTEP 23Insert ten dowels (F) intothe ends of the top (7),middle (8) and bottom(9) front rails.Screw two cam studs (E)into the top and middlefront rails using a X-headscrewdriver.978HSTEP 24Slot the left (5) and right(6) legs onto the top (7),middle (8) and bottom (9)rails as shown.Fasten the rails to thelegs by inserting six cams(H) into the holes in therails.Turn the cams clockwiseusing a flat headscrewdriver.58967-15-<strong>Willow</strong> <strong>Wardrobe</strong> V1.indd 15 14/4/09 13:04:33
21FSTEP 25Insert four dowels (F)into the ends of the left(21) and right (22) runnersupports.Slot the left (21) andright (22) runner supportsonto the front legs asshown.Insert one cam (H) intoeach runner support andlock the cams by turningthem clockwise using aflat head screwdriver.22HSTEP 26With the help ofanother person, slot theassembled back sectiononto the other assembledsection.Fasten in place witheighteen cams (H) andlock them with a flat headscrewdriver.H-16-<strong>Willow</strong> <strong>Wardrobe</strong> V1.indd 16 14/4/09 13:04:36
STEP 27IMPORTANT: You mayneed the assistanceof another person tocomplete this step.Stand the wardrobe upupright.STEP 28Attach the wall strap (J)to the top back rail.Slot the screw throughthe washer, then throughone end of the strap.Tighten the screw intothe top back rail of thewardrobe using a X-headscrewdriver.J-17-<strong>Willow</strong> <strong>Wardrobe</strong> V1.indd 17 14/4/09 13:04:39
23STEP 29Attach the four hingeplates (K) to the left (23)and right (24) doors usingtwelve small screws (G)and a X-head screwdriver.24GK24STEP 30Attach the two remaininghandles (A) to the left(23) and right (24) doorsusing the four handlebolts (B) and a X-headscrewdriver.B23A-18-<strong>Willow</strong> <strong>Wardrobe</strong> V1.indd 18 14/4/09 13:04:42
25L26STEP 31Slot the door hangermounts (25) onto theends of door hanger pole(26).Attach the mounts tothe right door (24) usingthe four door hangerscrews (L) and a X-headscrewdriver.2524STEP 32Swing the hinge armson the front legs of thewardrobe outwards.Slot the claws on theunderside of the hingearms into the ends of thehinge plates on the doors.Push the ends of thehinge arms down ontothe hinge plates until theylock onto them.The doors can be removedby pushing the platesin the ends of the hingearms inwards.ClawsPlate-19-<strong>Willow</strong> <strong>Wardrobe</strong> V1.indd 19 14/4/09 13:04:45
STEP 35The wardrobe is fullyassembled. Check allfittings are fully tightenedbefore use.When moving thewardrobe, with the helpof another person, alwayslift it off the ground. Donot drag the wardrobe.Adjusting the gapbetween the doors.Loosen screw ‘A’, turnscrew ‘B’ clockwise oranti-clockwise until thegap between the doors isequal then tighten screw‘A’.STEP 36Adjusting the angle ofthe door.Loosen screw ‘A’ andslide the hinge arm eitherforwards or backwardsuntil the door is verticalthen tighten screw ‘A’.The wardrobe is now fullyassembled. Check thatall of the fittings are fullytightened before use.-21-<strong>Willow</strong> <strong>Wardrobe</strong> V1.indd 21 14/4/09 13:04:47
WALL STRAP INFORMATIONThe wall strap is only intended to be used with the <strong>Mamas</strong> and <strong>Papas</strong> product that it issupplied with.Never attempt to modify or change the wall attachment strap in any way. Never use anyother fittings for attaching the strap to your furniture than those supplied.Never use the screw provided to attach the strap to the wall. No wall attachment fittings aresupplied. This is because the type of fittings required to attach the strap to the chosen wallis determined by the composition of the wall. If you are in any doubt about the correct typeof fittings to use, consult a professional before attempting to attach the strap to the wall.The wall strap must not be used to replace any other fitting supplied with your piece offurniture.Furniture falling over is generally due to the surface the furniture is placed on. A warpedfloor or wall-to-wall carpeting will enable the furniture to rock, so greatly increasing thepotential for the furniture to fall. If the furniture is placed on a flat level wood or tiled floorthe risk is reduced, but we still recommend the wall strap is fitted.INSTRUCTIONS FOR SAFE USE & maintenance• WARNING: DO NOT LEAVE YOUR CHILD UNATTENDED. The safety of your child is yourresponsibility.• Before use, ensure the wardrobe is on a stable, level surface.• Do not allow children to climb on the wardrobe.• Never use the wardrobe if any parts are broken or missing.• Never pivot or drag the wardrobe on its plinth. The wardrobe must always be lifted by atleast two people when moved.• Do not place the wardrobe in the near vicinity of open fires or other sources of strongheat, such as electric or gas fires.• Always leave the wardrobe clean and dry. Wipe away any spillage straight away. Thewardrobe can be cleaned with a damp cloth. Never use abrasive, bleach or strongdetergents.• Check regularly that all fittings and screws are correctly tightened and are notdamaged. Loose screws can pinch parts of the body and clothing resulting in the risk ofstrangulation.Due to constant updating and improvements, some components may occasionally differ slightly from the diagrams shown inthese <strong>instructions</strong>. We reserve the right to change the specifications of any product without prior notice.After sales Service: If you need assistance, spare parts or you are unhappy with any aspect of the goods pleasecontact Customer Services on: +44 (0)485 268 2000, or e-mail us at: customer.care@mamasandpapas.com.Visit our website at mamasandpapas.com for the latest product information.-22-<strong>Willow</strong> <strong>Wardrobe</strong> V1.indd 22 14/4/09 13:04:47
notes...-23-<strong>Willow</strong> <strong>Wardrobe</strong> V1.indd 23 14/4/09 13:04:47
mamasandpapas.com<strong>Mamas</strong> & <strong>Papas</strong>Colne Bridge RoadHuddersfield, HD5 0RH, UKcustomer services helpline: +44 (0)845 268 2000customer care email: customer.care@mamasandpapas.com-24-<strong>Willow</strong> <strong>Wardrobe</strong> V1.indd 24 14/4/09 13:04:48