Full-Custom Analog IC Design using Cadence DFII Virtuoso/Assura
Full-Custom Analog IC Design using Cadence DFII Virtuoso/Assura
Full-Custom Analog IC Design using Cadence DFII Virtuoso/Assura
- No tags were found...

You also want an ePaper? Increase the reach of your titles
YUMPU automatically turns print PDFs into web optimized ePapers that Google loves.
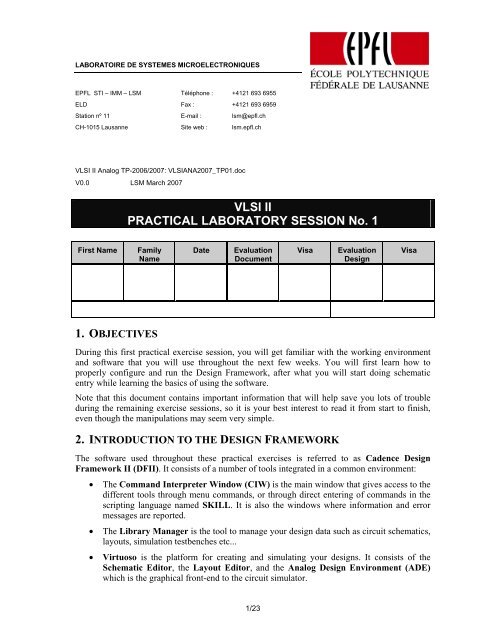
LABORATOIRE DE SYSTEMES M<strong>IC</strong>ROELECTRONIQUESEPFL STI – IMM – LSMELDStation nº 11CH-1015 LausanneTéléphone :Fax :E-mail :Site web :+4121 693 6955+4121 693 6959lsm@epfl.chlsm.epfl.chVLSI II <strong>Analog</strong> TP-2006/2007: VLSIANA2007_TP01.docV0.0 LSM March 2007VLSI IIPRACT<strong>IC</strong>AL LABORATORY SESSION No. 1First NameFamilyNameDateEvaluationDocumentVisaEvaluation<strong>Design</strong>Visa1. OBJECTIVESDuring this first practical exercise session, you will get familiar with the working environmentand software that you will use throughout the next few weeks. You will first learn how toproperly configure and run the <strong>Design</strong> Framework, after what you will start doing schematicentry while learning the basics of <strong>using</strong> the software.Note that this document contains important information that will help save you lots of troubleduring the remaining exercise sessions, so it is your best interest to read it from start to finish,even though the manipulations may seem very simple.2. INTRODUCTION TO THE DESIGN FRAMEWORKThe software used throughout these practical exercises is referred to as <strong>Cadence</strong> <strong>Design</strong>Framework II (<strong>DFII</strong>). It consists of a number of tools integrated in a common environment:• The Command Interpreter Window (CIW) is the main window that gives access to thedifferent tools through menu commands, or through direct entering of commands in thescripting language named SKILL. It is also the windows where information and errormessages are reported.• The Library Manager is the tool to manage your design data such as circuit schematics,layouts, simulation testbenches etc...• <strong>Virtuoso</strong> is the platform for creating and simulating your designs. It consists of theSchematic Editor, the Layout Editor, and the <strong>Analog</strong> <strong>Design</strong> Environment (ADE)which is the graphical front-end to the circuit simulator.1/23
• <strong>Assura</strong> is the suite for full-custom layout verification and parasitics extraction. It allowsto check your layout against your schematic <strong>using</strong> the LVS (Layout vs Schematic) tool,to verify that your layout is compliant with the foundry’s design rules <strong>using</strong> the DRC(<strong>Design</strong> Rules Check) tool, and to extract from your layout a detailed schematiccontaining parasistics for accurate post-layout simulation with the RCX (ParasiticsExtraction) tool.3. CONFIGURING AND RUNNING THE SOFTWARE3.1. SETTING UP YOUR WORKING ENVIRONMENTEach project is usually held in a separate directory, which groups together the differentconfiguration files and the design data. Because many tools use configuration files that arestored in the current directory, the project directory actually defines a working environment. Wewill now create a directory for our project. You will use the same directory throughout thelaboratory sessions. Create a directory for your project.[5]edatp0@immsunsrv1-edatp0> mkdir vlsi2007_analog [6]edatp0@immsunsrv1-edatp0> cd vlsi2007_analog 3.2. RUNNING <strong>DFII</strong> FOR THE FIRST TIMEWhen you run the software for the first time, some additional configuration steps need to betaken. We will proceed step-by-step for the first time. Make sure you are in your project directoryedatp0> cd ~/vlsi2007_analog It is extremely important to always start the tools from your project directory. Becauseyour project directory will contain many configuration files, the tools will not work asexpected when run from a different place. Even worse, it may override other configurationfiles, especially when run from your home directory – this is a common mistake. Run the software by typing :vlsi2007_analog> cds ams_cds –tech c35b4 –mode fb & Since this is our first time running the design framework, we need to specify the technologyto be used (-tech option). We chose the c35b4 technology, which stands for0.35μm CMOS with 4 metal layers. The software can run in different modes (-modeoption), but we will allways chose the front-to-back (fb) mode for our needs. The trailing &runs the command in the background, so that the terminal does not freeze.At this point, the software should start and the CIW window should appear, followed by theLibrary Manager.2/23
Figure 1 - The CIW (Command Interpreter Window)Figure 2 - The Library Manager Window A window will pop up prompting you to select a process option to use. Select the C35B4M6option.Figure 3 - Process option selection A text window displaying information about the design kit will also pop up. You don’t need toread its content. Select File→Off At Startup from the window menu to keep this window fromshowing up every time at startup. Exit the design framework by either :• choosing File→Exit from the CIW menu,• closing the CIW window, or• typing exit in the command prompt at the bottom of the CIW window.3/23
3.3. THE LIBRARY MANAGER AND DESIGN HIERARCHYThe Library Manager is the graphical interface to manipulate the design data in the <strong>DFII</strong>environment. It should appear automatically at startup, but if it does not or if you accidentallyclose it, you can always open it by choosing Tools→Library Manager from the CIW menu.In the <strong>DFII</strong> environment, all the design data is stored in a collection of libraries. Librariesgather together sets of related cells, each cell in a library being an individual circuit. Cells havemultiple views, that are different ways of representing the circuit. For example, the same circuitcan be represented as a symbol, a full circuit schematic, or a mask layout. The figure belowpictures the organisation of cells and views in a library as a tree. The term cellview refers to aparticular view of a particular cell, i.e. actual design data.Figure 4 - Sample library structureBy default, a number of libraries will be available to you: some are the tool’s default, and someare provided by the foundry design kit. Following is a list with a brief description of the mostimportant ones:• basic contains mostly graphical elements for circuit schematics.• analogLib contains many elements useful for simulation such as voltage andcurrent sources, ideal resistors, capacitors and inductors, switches etc… Thesecells are mostly used to create simulation testbenches.• PRIMLIB contains all the primitive devices (MOSFETS, resistors, capacitors,inductors, …) from the foundry design kit. You will use these devices to createyour own designs.• CORELIB contains standard logic cells from the foundry design kit.In the next steps, we will create a new library for your designs, and experiment some features ofthe library manager. Make sure you are in your project directory, and start the software.edatp0> cd ~/vlsi2007_analog vlsi2007_analog> ams_cds –m fb & Now that the tool has been configured, specifying the technology(-tech) is not necessaryanymore. We still must specify the mode (-mode, abbreviated as –m).4/23
Creating an new library Using the library manager, create a new library by choosingFile→New→Library… from the menu. You are prompted to enter aname for your library : enter VLSITP. Below is a space to specify thedirectory where the data will be physically stored on the disk. Youdon’t have to change anything there. You will be prompted to attach atechnology file to the new library. Thetechnology file contains technologyspecificinformation, mostly related tolayout, and is provided by the foundrydesign kit. Select Attach to an existingtechfile and then choose the technology library TECH_C35B4.Creating cellviews Now create a cellview in your new library. Select VLSITP inthe Library field, and then choose File→New→CellView…from the menu. Enter test as the cell name, and schematic asthe view name.Notice the Tool field. When changing the tool, the viewname changes. This is because different tools areassociated with different views : schematic editor,symbol editor, layout editor (<strong>Virtuoso</strong>), etc… Eachview type has a standard name (i.e. schematic for acircuit schematic) but they can be changed.. It is however advised to keep the defaultnames to avoid problems. A cell named test is created, with one view named schematic, and the schematic editor appearsto edit your new cellview. Choose <strong>Design</strong>→Check And Save from the schematic editor menu, to have the cellview datawritten to the disk. Then close the schematic editor.Deleting, copying and renaming cellviews In the Library Manager, select the VLSITP library, then right-click on the testcell. In the context menu, choose Delete… then press OK. The cell is deleted withall its views. You can experiment with different commands such as copying, renaming anddeleting libraries, cells and views.5/23
3.4. THE GRAPH<strong>IC</strong>S EDITORDifferent tools that need graphical editing, as the schematic editor, symbol editor and the layouteditor, use a similar interface named the graphics editor. We will now experiment with thefeatures of graphical editing by creating a simple circuit schematic. Create a new schematic cellview named DiffPair / schematic in your VLSITP library. Theschematic editor will appear.In the next steps, we will create a simple schematic shown on the figure below, while learning touse the graphics editor.Figure 5 - The schematic Editor WindowCreating instancesThe term instance denotes the occurrence of a cell inside of another. A cell can be instanciatedmultiple times in another. Instances define a hierarchical relationship between cells, where thecontaining cell is higher in the hierarchy than the instanciated cell.6/23
Choose Add→Instance from the menu, or use the keyboard shortcut for this command bysimply pressing i on the keyboard.Most commands have a keyboard shortcut, or bindkey. They are shown on the right of the commandname on the menus. Learn to use these bindkeys to save you a lot of time. An option form appears, which prompts you for the library / cell / view name of the cellviewyou wish to instantiate. Type PRIMELIB / nmos4 / symbol, or, alternatively, click on theBrowse button and select this cell in the library manager. Use the nmos4 and pmos4 cells from the PRIMLIB library for N- and P- MOStransistors. Set appropriate size of transistors. Select the object (being one of the transistors in yourdesign) with the left mouse button. Use either the Edit→Properties→Objects pull-downmenu or press “q”. A pop-up window will appear as show in the previous Figure. Set the gate width andlength as provided in Figure 5. Repeat this process until you have modified all the transistors in the design When you are done, Check and Save your schematic. Correct any errors or warnings,until no more are reported.Notice how you can add more instance as long as you do not cancel the command. Many commandswork in this way: activating the commands bring you into a new “mode” that lasts until you pressEscape. Some don’t, and work only once.7/23
Creating pinsPins define the connections between a cell and its environment. Pins have a name and adirection (input, output or inputOutput). The direction is used to check for wrong connections(i.e. two outputs shorted together, or floating inputs). inputOutput pins are typically used forpower supplies. Choose Add→Pin from the menu. The option form appears, prompting you to enter the name ofthe pin as well as different options (see figure below). Enter vin as the pin name, and place thepin on the schematic. Once this is done, return to the option form and enter the name vo for thesecond pin. Change the pin direction to output and place the pin on your schematic. Then pressEscape or click Cancel on the form. Repeat this work for the rest of pins.Creating wires and labeling netsWires define the connections between the different instances in a cell. Wires connect to the pinsor to other wires. All connecting wires – that are electrically at the same potential – define a net.Nets can be labeled to make the schematic and simulation results more readable – if they are notlabeled, they are assigned an automatic name. Choose Add→Wire (narrow) from the menu, and add wires to your schematic to connect thedifferent elements as shown on the figure.Use the Zoom (Window→Zoom→Zoom In… or z) and Fit (Window→Fit… or f) commands toadjust the zoom. You can even use these commands while in the middle of creating a wire withoutinterrupting. Choose Add→Wire Name from then menu. In the option form, type ABC as the wire name andplace it anywhere on the wire which connects the three inverters together.If your label is not placed on a wire, you will be prompted to click on a wire to which the labelshould be attached..Moving and stretching objects Left click on an inverter instance to select it. It should highlight. Then chooseEdit→Move from the menu or press Shift+m. Left click anywhere to define the reference point,8/23
then drag the inverter to a new location and left click again to execute the move.Multiple objects can be selected at the same time. Left-click and drag the mouse to select multipleobjects. Hold the Shift key whick clicking to add objects to the selection, and the Ctrl key to removeobjects from the selection. Choose Edit→Undo or press u to cancel the move. Then press Ctrl+d to clear the selection.Then press Shift+m to start a new move. Click on an inverter, then drag it to a new location andrelease it. Press u to undo the move, and click on another inverter then move it. Undo the moveagain and press Escape.Commands that work on objects, such as move, stretch or delete,need a selection to work on. If anobject or a set of object is selected before applying the command, it will operate on this existingselection. If not, you are prompted to select objects first.Notice two differences : when there is an exisiting selection, you need to select a reference point.Also, when there is an existing selection, you can move the object only once before the commandexits, while you can move multiple objects when there is no prior selection. Thus, in one case you canapply multiple actions, sqeuentially, to a set of selected objects, and in the other case you can applythe same action to a number of sequentially selected objects. Remember Ctrl+d to clear the selection. Repeat the same manipulations with the Stretch command instead (Edit→Stretch or m).Observe that with the stretch command, wires connected to the instance are rerouted to keep theconnections, while with the move command, the selected objects were moved regardless of theconnections.Stretch also allows to reshape existing wires. When moving or stretching an object, try pressing the F3 key before releasing the object to itsnew location. In the option form showing up, there are buttons for rotating and mirroring theinstance. Try these.Many commands have an option form which does not allways show up automatically. Use the F3 keyto show or hide this option form.Deleting objectsThe Delete command (Edit→Delete or Del) works in the same way as Move or Stretch with respect to theselection. Objects can be accidentally deleted if they are selected prior to pressing Del.Checking and saving the schematic Choose <strong>Design</strong>→Check and Save (or Shift-X) to save your design. The schematic will bechecked for errors, and a dialog box will inform you if there is any error or warning.When something goes wrong, always check the CIW for error or warnings. Much more informationis reported there.Generating the symbolA symbol is a graphical abstraction of a cell that provides only the necessary information for<strong>using</strong> the cell at a higher hierarchical level – that is, it provides information on how to connectthe cell from the outside. Symbols also provide visual clue on the function of the underlyingcircuit. As such, symbols are only made of pins (connections) and graphical shapes.9/23
Symbols can be created manually by choosing the Composer-Symbol tool when creating a newcellview, then drawing the shapes and pins. However, it is also possible and much moreconvenient to have them generated automatically. A square box with pins is generated, that canthen be modified if wanted – it provides a good starting point. From the Schematic Editor menu, choose <strong>Design</strong>→Create Cellview->From Cellview. In the first form coming up, all options should be set correctly. Press Ok. In the second form, you get a chance to specify the location of the pins on your symbols. It iscommon to have input pins on the left, output pins on the right, and power/ground pins on thetop and bottom of the symbol. When you are done, press Ok. Do any changes you like to your symbol, then Check and Save it.3.5. CREATING A HIERARCH<strong>IC</strong>AL CIRCUITIn the following steps, you will create the circuit schematic for a 4-to-1 multiplexer. You willfirst create the schematic for a 2-to-1 multiplexer <strong>using</strong> standard cells, then use this cell to createthe 4-to-1 multiplexer in a hierarchical manner. Create a new schematic in your VLSITP library. Name it DiffPair2. Draw the schematic as shown on figure 6. Use the DiffPair subcircuits from the VLSITP library..Figure 6 - The circuit schematic of two differential pairs10/23
When you are done, Check and Save your schematic. Correct any errors or warnings, until nomore are reported. Create a symbol for the DiffPari2. Create another new schematic in your VLSITP library. Name it ADC2.Figure 7 - The 2-bit ADC circuit schematic Draw the schematic as on figure 7, <strong>using</strong> your own ADC2 symbol. Create a symbol for the 2-bit ADC.Checkpoint Please call an assistant and show him/her that you have reachedthis point before working on further stepsVisaMoving up and down the hierarchyNow that you have designed a hierarchical schematic, you can experience moving up and downthe hierarchy. Open the ADC2 schematic. Select one of the instances of your ADC2 cell. Choose <strong>Design</strong>→Hierarchy→Descend Edit or press Shift+e. You will be prompted to select aview: choose the schematic view. The current schematic will be changed to DiffPair2. To return up the hierarchy to ADC2,choose <strong>Design</strong>→Hierarchy→Return or press Ctrlt+e.11/23
4. CREATING THE TEST BENCH Create a new schematic view in your library (VLSITP) named DiffPair2_tb. Instantiate the symbol of the ADC2 schematic that you have already generated inprevious section into the new schematic entry window. Then complete the schematicas shown in Figure 6.Figure 8 - The schematic of the test bench for the ADC2 For the DC source use vdc component from analogLib library, and set the DC voltageproperty to 3.3V. For the load capacitors shown in the schematic, use the cap element from analogLib,and edit the capacitance property to enter the provided value in the schematic (50 fF). For the ground symbol, use gnd cell symbol view from analogLib library. gnd symbol12/23
will provide the zero reference voltage level for your simulation. Use Add→Wire Name or pres “l” to place labels accordingly on to input/output signalsas shown in Figure 86. Check and Save your design.Parameter ValueDC voltage: V2 vdc VDC Voltage: V0 3.3 VDC Voltage: V1 0.0 VDC Current: I0 100u ATable. 1. Parameters for the inputs.Checkpoint Please call an assistant and show him/her that you have reachedthis point before working on further stepsVisaSIMULATING THE PERFORMANCE OF THE DESIGN For opening of the simulation environment click on Tools→<strong>Analog</strong> Environment onthe very left upper corner of the schematic window. <strong>Analog</strong> <strong>Design</strong> Environmentwindow will pop-up, Fig. 9.Figure 9- The <strong>Analog</strong> <strong>Design</strong> Environment (ADE) Window13/23
Setting up Variables and Outputs Copy your design <strong>using</strong> Variables→Copy from Cellview menu command. The variables will appear in the “<strong>Design</strong> Variables” pane (Figure 10). Double click on each of the variables available in the list and set their values to nominalvalue (in this case vdc = 1.6 V). Use Outputs→To be Plotted/Select on Schematic command in the <strong>Analog</strong> <strong>Design</strong>Environment. Select vi, b0 and b1 nets by clicking on them sequentially (by this all selected nets willbe highlighted in different colours). Also, select the vdd pin of your ADC2 to monitor the current consumption of the design(a coloured circle will appear around the selected pin). All selected signals should appear in the “Outputs” pane of the <strong>Analog</strong> <strong>Design</strong>Environment. The final setup for the DC simulation should look like the one shown inFigure 10.DC ANALYSISSetup a DC analysis in order to simulate the voltage transfer curve (VTC) of the NAND2 gate.This analysis allows you to verify the DC characteristics of the design, like switching threshold,noise margins, logic levels, etc. Use Analysis→Choose in order to select the type of the simulation you would like torun. In the pop-up window, edit the necessary properties as shown in Figure 10. Use Session→Save State to save your simulation setup so you can reload it at a futuretime To run simulation use Simulation→Netlist and Run command from the <strong>Analog</strong> <strong>Design</strong>Environment window.This command will generate the netlist of your design automatically and run the specified simulationsetup on this netlist. The progress of the simulation is displayed on the screen as a text window. Assoon as the simulation is completed, a “Waveform Window” appears with all the selected signalsdisplayed in a single graph.14/23
Figure 10- DC simulation setupWorking with the “Waveform Window” To split the Waveform window view into multiple graphs use Axes→To Stripcommand. To combine the waveforms on one graph drag and drop them. The final waveformshould look like the one presented in Figure 11 (combine only voltage curves). To zoom, use the Zoom menu or press “z” X/Y coordinates pointed by the mouse are displayed on the top of the window, near thetitle bar.Figure out the switching threshold from the waveforms. Now quit the <strong>Analog</strong> <strong>Design</strong> Environment by simply selecting Session→Quit.15/23
Figure 11- DC simulation results5. CREATING LAYOUTTHE LAYOUT EDITORAs mentioned in the laboratory session no.1 there are different tools used for graphical editing.The tool used as a layout editor is called <strong>Virtuoso</strong> Layout Editor. To start a tool you create anew cellview in your library. The goal of this session will be to draw a layout for DiffPair gateand check it for <strong>Design</strong> Rules. Now create a cellview in your new library. Select VLSITP library and DiffPair cell andchoose File→New→CellView. Select layout as the view name.Notice the Tool field. There it should be written Viruoso for a layout editor.16/23
All available layers and their related design rules are provided in the AMS 0.35um technology<strong>Design</strong> Rule Manual (DRM) – confidential yellow notebook. Minimum spacing betweenvarious layers and minimum width specification of all layers are the most critical rules to berespected.For each layer that you can observe in LSW - Layer Selection Window (Figure 13)there is a separate page in DRM containing a certain number of rules. Most importantlayers are NTUB, DIFF, POLY1, PPLUS, NPLUS, CONT and MET1 (see Figure12).Each rule in DRM consists of a “Rule” code, “Description” and “Value”. For examplelook at the page 21 at the rule with the code CO.S.1. Description is: Minimum CONTspacing and Value is 0.3um.In the following online Layout tutorial for any of the drawing steps a page and a Rulecode will be given.Wafer Cross-SectionMOS Transistor LayoutFigure 12 – Cross-Section and MOS transistor LayoutIn the Figure 13 you can see the initial <strong>Virtuoso</strong> Layout Editor window in which you will drawyour layout and LSW-Layer Selection Window.17/23
Figure 13 – Initial Layout Editor windowEach layer in LSW consists of layer texture, layer name and layer type (Figure 14 isan example for POLY1 dg layer). You should always use dg layer type (not pn) unlessit is explicitly said to use other.Left click on the layer in LSW which makes that layer selected (marked with red framein Figure 16) and then you can use it for drawing.There are 4 possible types of selection in the LSW window. AV which means all the layers arevisible, NV makes all the layers invisible, AS which means that all the layers are selectable andNS which makes none of the layers selectable (NV clicked in Figure 14).Figure 14 – LSW in detailDetailed steps for drawing a layout of NOR circuit are shown in an online LayoutTutorial that you can access athttp://moodle.epfl.ch/mod/resource/view.php?id=9282. Please passcarefully through this tutorial in order to learn how to do basic operations. Each step isexplained and keyboard shortcut as well as menu shortcut is given. Moreover in each18/23
step involved design rules are listed with their names and pages in DRM.Short list of the most important keyboard shortcuts is given in the following table.<strong>Design</strong> Rules Check (DRC)After drawing a layout it is necessary to do a <strong>Design</strong> Rules Check (DRC). Do a <strong>Design</strong>→Save or press “F2”. Use <strong>Assura</strong>→Run DRC from Layout Editor menu to start DRC dialog. Click on Set Switches field and do the selection according to Figure 15. Click OK to run DRC.19/23
Figure 15 – <strong>Assura</strong> set-upAfter DRC finishes in case there are errors the Error Layer Window will pop-up (example inFigure 16). To correct the error do the following Select error in Error Layer Window. The error will be marked in the Layout Editor. Read description and if necessary find the error according to Rule code in DRM. Correct the error. Repeat the procedure until all the errors are corrected. Do a <strong>Design</strong>→Save or press “F2”. Use <strong>Assura</strong>→Close Run from the menu to stop current check. Repeat DRC procedure until you get the message “No DRC errors found” (Figure 17).20/23
Figure 16 – Example for error in layout and its descriptionFigure 17 – Clean DRC – no errorsCheckpoint Please call an assistant and show him/her that you have reachedthis point before working on further stepsVisa21/23
Once you have a DRC clean layout, run the LVS tool (<strong>Assura</strong> -> LVS). LVS tool is tocompare the netlist of your main schematic to the netlist which is extracted from layout.You should find the reason for each mismatch report and try to solve it on your layout.Figure 18- LVS windows pops up after running LVSFigure 19- Typical LVS error report page Once your LVS is clean, create an extracted view (<strong>Assura</strong> -> RCX) of the layout. In thisway the netlist extracted from your layout will be created. Now, you can re-run yoursimulation with the new netlist includes parasitic effects raised in layout. Then run a post layout simulation <strong>using</strong> the same simulation environment that you usedfor the pre layout simulation. For this purpose you just need to change the set-up of yourADE. In ADE just add “av_extracted” in Setup -> Environment menu as the first itemon the switch view list:22/23
Figure 20- Set up for post-layout simulationCheckpoint Please call an assistant and show him/her that you have reachedthis point before working on further stepsVisa23/23