Installation Manual - Unical Lattner Condensing Hot Water Boilers
Installation Manual - Unical Lattner Condensing Hot Water Boilers
Installation Manual - Unical Lattner Condensing Hot Water Boilers

Create successful ePaper yourself
Turn your PDF publications into a flip-book with our unique Google optimized e-Paper software.
General Information1.8 - TOOLS, MATERIALS ANDADDITIONAL EQUIPMENTFor the installation and maintenance of the boiler youwill need:- Standard tools for space heating, gas and water fitting- Digital manometer that is capable of reading both positiveand negative pressures- Combustion analyzer- Digital multimeter- pH digital meter- Metric Allen wrenches- Metric socket wrenchesIn addition, a handtruck with a fastening belt is useful.1.9 - DISPOSAL- Dispose of the boiler packaging in an environmentallysound manner.- Dispose of components of the heating system (e.g. boileror control device), that must be replaced in an environmentallyresponsible manner.Operating Limits of the boiler:Max. boiler temperature: 176 °F (80 °C)Max Allowable Working Temperature ASME: 200 °FMax. Allowable Working Pressure ASME: 92 psi1.10 - GENERAL WARNINGSThis instruction manual is an integral and indispensablepart of the product and must be retained by the person incharge of the appliance.Do not obstruct the intake/outlet terminal ducts.In the event of failure and/or faulty functioning of the appliance,switch off the boiler. Do not attempt to make any repairs:contact qualified technicians.Any repairs must be carried out by LATTNER authorizedtechnicians and using only original spare parts. Nonobservanceof the above requirement may jeopardize thesafety of the appliance.To guarantee the efficiency and correct functioning of theappliance it is indispensable to have the boiler servicedannually by a qualified person.If the boiler remains unused for long periods, ensure that anydangerous parts are rendered innocuous.Before putting again into service an appliance which has beenunused for a certain time, proceed to rinse the domestic hotwater circuit, making the water flowing for the time necessaryto draw the full content of the domestic circuit.If the appliance is sold or transferred to another owner or ifthe present user moves home and leaves the applianceinstalled, ensure yourself that the manual always follows theappliance so that it can be consulted by the new owner and/or installer.Only original accessories must be used for all appliancessupplied with optionals or kits (including electrical ones).This appliance must be used only for the purposes for whichit has been expressively designed. Any other use shall beconsidered incorrect and therefore dangerous.Please read carefully the instructions contained in this manualas they provide important indications regarding the safeinstallation, use and servicing of this appliance.Keep this manual in a safe place for future reference.The installation and servicing must be carried out inaccordance with the regulations in force according to themanufacturer’s instructions and by legally competentauthorized persons.The installations for the domestic hot water productionMUST be build, in their entirety, with materials (taps, pipes,fittings, etc.) approved for drinkable water.By a competent person, we imply a person who has a specifictechnical qualification in the field of components for centralheating systems for domestic use, domestic hot waterproduction and servicing. The person must have thequalifications foreseen by the current laws in force.Bad or irregular servicing could compromise the safeoperation of the appliance, and could cause injury to persons,animals or damage to property. The manufacturer shall notbe held liable for any such injury and/or damage.Before carrying out any cleaning or servicing turn off theelectrical supply to the boiler by means of the ON/OFF switchand/or by means of the appropriate shutdown devices.7
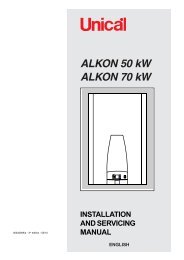
Technical features and dimensions2TECHNICAL FEATURESAND DIMENSIONS2.1 - TECHNICAL FEATURESThe ALKON 50 and ALKON 70 boilers are a thermals gas firedunits with an atmospheric fully pre-mixed burner.They are supplied only in heating version.These boilers have an input head power of:176,000 Btu or 227,500 Btu (51,58 or 66,67 kW), These boilersare designed for use on gas category IV.The ALKON boiler is supplied complete with all the safetyand control devices in accordance with all the currentregulations and its technical and functional features complywith the regulations prescribed by:ANSI Z21.13 / CSA 4.9 - Gas-fired low pressuresteam and hot water boilersDESCRIPTION OF COMPONENTS AND FEATURES:• Aluminium heat exchanger/condenser;• Fully premixed burner working at constant CO2;• Electronic ignition;• Safety high limit thermostat;• Flow temperature sensor;• Return temperature sensor;• Automatic air vent;• Drain condensate siphon• Control panel with electrical protection;• eBUS device;• CH temperature selector switch: 86 ÷176 °F (30 ÷ 80°C);• Flame modulation in function of the absorbed power;• Pump overrun function;• Additional functions : diagnostics of operation parametersand troubles, antifreeze, technical functions and digital indicationof failures.• Constant combustion ratio• Self adapting output depending on the length of flue ducts• Pump (only ALKON 70)• Smoke pressure switchOPTIONAL KITS:• Kit of manifold for additional safety devices• Krömschröder controller E8/Expansion modules andmodulating thermostats(case for wall mounting)• Mixing bottle Kit• Chimney for single, battery or cascade mounting• Supporting frames• Kit of blind flanges and hydraulic manifolds• On-Off pump for ALKON 50.2.2 - DIMENSIONS10.5’’(266 mm)24.2’’(615 mm)VIEW FROM ABOVE16.9’’(430mm)4.2’’ 3.1’’(107 mm) (78 mm)4.9’’(125 mm)AS7.0’’(179 mm)10.5’’(266 mm)VIEW FROM BELOW36.6’’(930 mm)7,1’’(180mm)5,3’’(135mm)SVR M GScScf3,1’’(78mm)3,3’’ 4,3’’ 4,3’’ 5,2’’ 3,9’’ 3,1’’(85 mm) (110 mm) (110 mm) (132 mm) (100 mm) (78 mm)RMGScCH system return 1 ¼’’CH flow system 1 ¼’’Gas Inlet Ø ¾’’Outlet condensate drain siphon (from aluminium body)ScfSVASOutlet condensate drain siphon (from the flue pipe)Safety valve outletAir intakeFlue Outlet8
Technical features and dimensions2.3 - MAIN COMPONENTSALKON 50AIRVENTVALVEIGNITIONELECTRODEIGNITIONTRANSFORMERMODULATINGFANSMOKEPRESSURESWITCHFLUEOUTLET PIPE(Ø 3.14’’- 80 mm)AIR INTAKEOPENING(Ø 3.14’’- 80 mm)ALUMINIUM HEATEXCHANGER/CONDENSEROVERHEATTHERMOSTATFLOWTEMPERATURESENSORGAS VALVEPIPE WITHSMOKESAMPLINGRETURNTEMPERATURESENSORSPACER PIPEREPLACEABLEFOR MOUNTINGOF OPTIONALCIRCULATORR1’’ ¼R1’’ ¼G¾’’SAFETY VALVEMIN. WATERPRESSURESWITCHSIPHONN.B.:The boiler cannot work on natural circulationCONDENSATEDRAIN(Ø 1‘‘ - 25 mm)9
2.4 - BOILER WATER CIRCUIT DIAGRAMTechnical features and dimensions871695610111232411513 14RM6040 8020 1000 12017GATTENTION!THE PRE- FORMING FOR THE BOILER PUMPIS ONLY FOR THE PUMP KIT SUPPLIED BYLATTNER1 Gas valve2 CH flow temperature sensor3 CH return temperature sensor4 Condensate drain siphon5 Overheat thermostat6 Heat exchanger7 Burner8 Air vent valve9 Flue outlet / Air intake10 Fan11 Premix12 Room sealed chamber13 Replaceable pipe for insertion optional pump(only for ALKON 50)pump only for ALKON 7014 Pressure switch against lack of water15 Safety valve supplied16 Smoke pressure switch17 Manomètre (optionelle)MGRC.H flowGas supplyC.H. return11
Technical features and dimensions2.5 - PERFORMANCE DATAFor information regarding the adjustment of: INJECTORS - BURNER PRESSURES – DIAPHRAGMS – OUTPUTS – GAS CONSUMPTIONSplease refer to the paragraph BURNER ADJUSTMENT.ALKON 50 ALKON 70Minimum heat inputNominal heat input (low)(*) Nominal heat input (high) (reduction for Altitude)Nominal heat output (HT)Minimum heat output (HT)Efficiency at full load (100%)Efficiency at min loadNominal heat output in condensing modeMinimum heat output in condensing modeEfficiency at nominal load in condensing modeEfficiency at min load in condensing modeCombustion efficiency at nominal loadCombustion efficiency at min loadStand-by lossesFlue gas temperature (Flue gas temp - room temp)Air excess λCondensate production max[Btu/hr (kW)][Btu/hr (kW)][Btu/hr (kW)][Btu/hr (kW)][Btu/hr (kW)][%][%][Btu/hr (kW)][Btu/hr (kW)][%][%][%][%][%][°F (°C)][%][lb/hr (kg/hr)]38,500176,000158,400154,00032,90087.6685.50161,00037,20091.696.7097.898.40.311020.616.5(11.28)(51.58)(46.42)(45.13)(9.6)(47.2)(10.9)(43.3)(7.5)55,800227,500204,750199,00047,70087.4585.50298,60054,00091.4696.798.498.30.2212420.620.3(16.35)(66.67)(60.01)(58.32)(13.98)(70.0)(15.83)(51.1)(9.2)Boiler categoryMinimum water flow rate in CH circuit Δt 36°F (20°C)Min. pressure in CH circuitMax. allowable pressure in CH circuit<strong>Water</strong> content in primary circuitMaximum operating temperatureMinimum operating temperature[gal/min (l/min)][psi (kPa)][psi (kPa)][gal (L)][°F (°C)][°F (°C)]IV1.017.392117686(3.86)(50)(634)(3.9)(80)(30)IV1.437.392117686(5.40)(50)(634)(3.9)(80)(30)Electrical supply[V-Hz]120 - 60120 - 60Net weightGross weight[lb (kg)][lb (kg)]111121(50)(55)130141(59)(64)Max dynamic gas pressure A (natural)Nominal dynamic gas pressure A (natural)Min. dynamic gas pressure A (natural)[in wc (kPa)][in wc (kPa)][in wc (kPa)]10.57.03.5(2.61)(1.74)(0.87)Max dynamic gas pressure E (Propan HD)Nominal dynamic gas pressure E (Propan HD)Min. dynamic gas pressure E (Propan HD)[in wc (kPa)][in wc (kPa)][in wc (kPa)]13.011.08.0(3.23)(2.74)(1.99)(*) For adjustments, refer to section 3.26 and 3.2712
3INSTRUCTIONS FORTHE INSTALLERInstructions for the installer3.1 - GENERAL WARNINGSWARNING!This boiler has to be destined for the use forwhich it has been expressively designed for.Any other use shall be considered improperand therefore dangerous.This boiler is designed to heat water at atemperature inferior to boiling point at anatmospheric pressure.WARNING!These appliances are exclusively designedto be installed inside adequate boiler rooms.Therefore these appliances must not beinstalled and operated externally. An outdoorinstallation could cause malfunctioning andcould be dangerous. For externalinstallations, it is recommended to useappliances which are specifically designedand predisposed for this purpose.WARNING!The appliance must be installed by a qualifiedengineer, who complies to the technicalprofessionalrequirements, who, under his ownresponsibility, guarantees the compliance ofthe standards according to the latestregulations.WARNING!The appliance must be installed only on aclosed, vertical flat wall, made of noncombustible material.The appliance must be positioned so that atleast the minimum operational and servicingclearances are provided.The boiler must be connected to a heating system which iscompatible to its performance and output.Before installing the boiler the following pointshave to be carried out by a competent engineer:a) The whole system should be thoroughlyflushed in order to remove any residual dirt orgrime which could compromise the correctboiler operation.b) Check that the boiler has been preset foroperating with the gas type available.This is verifiable via the indication on thepackaging and on the data badge;c) Check that the chimney/flue pipe has anadequate draught,does not have anyconstrictions, and that no other appliance’s flueoutlets have been fitted, unless the chimneyis serving more than one heating appliance,according to the specific standards andregulations in force.The connection between the boiler andchimney/flue outlet can be made only after thisverification has been carried out.WARNING!In rooms where there is the presence ofaggressive vapours or dust the appliancemust operate independently from the airpresent in the boiler’s location room!Before boiler installation, complete all of thefollowing instructions:The installation must conform to the requirements of theauthority having jurisdiction or, in the absence of suchrequirements, to one of the following:- United States - <strong>Installation</strong> must conform to the requirementsof the National Fuel Gas Code, ANSI Z223.1/NFPA 54.- Canada - <strong>Installation</strong> must conform to the requirements ofCAN/CSA-B149.1 - Natural Gas and Propane <strong>Installation</strong>CodeWhere required by the authority having jurisdiction, theinstallation must conform to the Standard ASME CSD-1Controls and Safety Devices for Automatically Fired <strong>Boilers</strong>NOTES:- Installers must follow local regulations with respect toinstallation of Carbon Monoxide (CO) Detectors. Also, followthe maintenance recommendations in this manual.- FOR MASSACHUSETTS INSTALLATIONS: The boiler mustbe installed by a plumber or gas fitter licensed within theCommonwealth of Massachusetts.13
Instructions for the installer3.2 - CODE AND STANDARDSAPPROVALSALKON 50 - 70 has been reviewed for compliance with theapplicable sections of the following NorthAmerican Standards:ANSI Z21.13 / CSA 4.9 - Gas-fired low pressuresteam and hot water boilersASME SECTION IV: ASME Boiler and Pressure VesselCode with addenda, Section IV: Rules for Construction ofHeating <strong>Boilers</strong>SCAQMD RULE 1146.2. EMISSIONS OF OXIDES OFNITROGEN FROM LARGE WATER HEATERS AND SMALLBOILERS AND PROCESS HEATERSCSD-1: CONTROLS AND SAFETY DEVICES FORAUTOMATICALLY FIRED BOILERS3.3 - PACKAGINGThe ALKON 50/70 boiler is supplied fully assembled in astrong cardboard box.After having unpacked the boiler check that it isintact and undamaged.CAUTIONKeep the packaging material (cardboard box,plastic bags, polyester protection etc.) out ofthe reach of children as they can bedangerous.LATTNER refuses all liability for injury topersons, animals or damage to propertyderiving from not having respected the abovementioned recommendations.In the packaging, in addition to the boiler, you can also findthe following contents:- Tecnical documetation set- N° 3 plastic plugs for fixing boiler Ø 0,47‘‘ (12 mm)- Boiler support bracket- Condensate evacuation siphon- Aluminum pipe Ø 3.1‘‘ (80 mm) for smoke evacuation- Thread Adapter Kit NPT/gas (Supply - Return - Gas),with sealing rings.- Gas Ball Valve 3/4”14.6’’(370 mm)28.1’’(715 mm)40.4’’(1025 mm)CAUTIONThe boiler may be damaged when not securedproperly.- Only transport the boiler using appropriate transportationequipment, such as a handtruck with a fastening belt orspecial equipment for maneuvering steps.- When shipping the boiler must be secured on the transportationequipment to prevent it from falling off.- Protect all parts against impacts if they are to be transported.- Follow the transportation markings on the packaging.• Packaged boilers must always be lifted and carried by twopeople, or you must use a handtruck or special equipmentfor transport.14
Instructions for the installer- Remove the packaging materials.- Do not tear the packaging.- Lay the boiler on its back during unpacking. Whenunpacking, the casing can be removed from the boiler.This part can be kept apart during installation. It must beplaced on the boiler and fixed with the screw behind thedoor before the boiler is started up.- The boiler can be mounted practically to any wall with thesuspension bracket and the enclosed mounting equipment.- The wall must be flat and of sufficient strength in order tobe able to securely hold and support the boiler weightwith its water content.- Take note of the necessary space around the boiler forinstallation of venting system, pipework and servicing. Seedrawing in section 3.4The location of the boiler can be determined by using thedraw on page 16. Remember to account for the spacing of theplumbing kit.- Drill the necessary holes- Install the mounting bracket to the wall using the suppliedmounting materialsCAUTIONLifting and carrying precautions.To avoid personal injury please follow theserecommendations:- Always lift the boiler with 2 people or usespecial equipment.- When lifting the boiler, bend the knees, andkeep the back straight and feet apart.- Do not lift and twist at the same time.- Lift and carry the boiler close to the body.- Wear protective clothing and gloves to protectfrom any sharp edges.11.8’’300 mm39.4’’1000 mm 23.6’’(600 mm)12.3’’(311.5 mm)11.8’’300 mmCAUTIONLift the boiler only by the boiler's rear wall.- Dispose the packaging materials.3.4 - MINIMUM CLARANCE FORSERVICINGObserve minimum distance of the boilerTOP of the boiler: 24’’ (600 mm)FRONT of the boiler: 12” + 24” = 36” (900 mm)RIGHT side: 12’’ (300 mm)LEFTside: 12’’ (300 mm)FLOOR/GROUND: 40’’ (1000 mm)BACK of the boiler: 0’’Maintain an installation clearance from combustible constructionfrom hot water piping of at least 1" (25 mm).10.5’’266 mmOperatingspace23.6’’600 mm15
Instructions for the installer3.5 - BOILER LOCATION INSIDE A BOILER HOUSESpecial attention shall be paid to local regulations and lawsabout boiler houses and particularly to the obligation ofkeeping minimum clearances and empty space around theboiler. The installation shall be in compliance with all latestregulations and laws about boiler houses, installations ofheating and hot-water systems, ventilation, chimneys capableof evacuating the flue gases of condensing boilers and anyother applicable requirement.When selecting the position for the installation of the boilerplease comply to the following safety requirements:• Guarantee an easy access to the components of the boilerto facilitate the possible operations of ordinary and extraordinarymaintenance.• The room where the boiler will be placed must always befrost free.• The appliance must be installed exclusively on a verticaland solid wall, capable of adequately supporting the weightof the boiler;• The wall must not be made of inflammable material.• Do not store or use gasoline or other flammable vaporsand liquids in the vicinity of this or any other appliance.• Never use or store any chlorinated detergents or halogenatedhydrocarbons (e.g. in spraycans, solvents and detergents,paints, adhesives) in proximity of the boiler.1.8’(45 mm)12.3’’(311,5 mm)10.4’’(265 mm)4.1’’(103 mm)• The boiler must be installed in such a way that it is protectedfrom water (dripping, spraying, rain, etc.) duringoperation and service (circulator replacement, condensatetrap, control replacement, etc.)• This boiler is for intended for indoor installations only.Products to avoid present in boiler roomand/or around combustion air intakeSpray cans containing chloro-/fluorcarbonsAmmonium and/or ammonium solutionsPermanent wave solutionsChlorinated waxes and/or cleanersSwimming pool chemicals based on chlorineCalcium chloride used for thawingSodium chloride used for water softeningRefrigerant leaksPaint or varnish removersHydrochloric acid/muriatic acidCements and gluesAntistatic fabric softeners used in clothes dryersChlorine-type bleaches, detergents, and cleaning solventsfound in household laundry roomsAdhesives used to fasten building products andother similar productsAreas likely to have contaminantsDry cleaning/laundry areas and establishmentsSwimming poolsMetal fabrication plantsBeauty shopsRefrigeration repair shopsPhoto processing plantsAuto body shopsPlastic manufacturing plantsFurniture refinishing areas and establishmentsNew building constructionRemodeling areasGarages with workshops34.1’’(865.5 mm)33.7’’(856 mm)2.2’’(56.5 mm)R M G S3.3’’ 4.3’’ 4.3’’ 5.2’’7.0’’(85 mm) (110 mm) (110 mm) (132 mm) (177 mm)16
Instructions for the installer34.1’’(865.5 mm)33.7’’(856 mm)1.8’’(4.5 mm)12.3’’(311,5 mm)10.4’’(265 mm)4.1’’(103 mm)2.2’’(56.5 mm)0,5’’(12 mm)0,5’’(12 mm)0,5’’(12 mm)MRRGG• Mark the 3 holes with the wall bracket, using a spirit level.• Install the wall bracket with the 3 screws• With 2 people, lift the boiler by holding it by its back and bythe transport rail and install it on the wall bracket• The boiler can be moved sideways to get the correct position.3.6 - CONNECTIONSA) Thread Adapter Kit NPT/gasM = CH system flow 1’’¼R = CH system return 1’’¼G = Gas Ball Valve ¾”RGS= Gas Adaptor ¾‘‘= Condensate DrainAR M G S3.3’’ 4.3’’ 4.3’’(85 mm) (110 mm) (110 mm)5.2’’(132 mm)7.0’’(177 mm)S3.7 - INSTALLATION ON EXISTINGHEATING SYSTEMS- The circulation pump’s output, the head and flow directionare suitable.- The gas feeding supply pipe and the eventual tank areconstructed according to the regulations in force.- The expansion vessels assure the total absorption of thedilatation of the fluid contained in the system.- The system has been cleaned of impurities and lime scale.Boiler system flushing(Not Boiler heat exchanger)When replacing an existing boiler the heatingsystem should be flushed with the old boiler inplace before the new boiler is added to the system.If the old boiler has already been removed a bypassmust be piped in when the new boiler is installed in orderto facilitate the flushing of the system.The boiler must be valved off from the system, while thesystem is flushed.No system cleaner should ever enter the boiler heatexchanger because of its caustic nature it could damagethe heat exchanger.When the appliance is installed on existing systems, ensureyourself that:- The flue outlet pipe is suitable for condensing boilers, forthe temperature of the products of combustion, calculatedand manufactured according to the regulations in force. Itmust be installed as much as possible in a straight line,17
Instructions for the installertested for soundness, insulated and must not have anyocclusions or restrictions.- The flue outlet pipe has a connection for the discharge ofcondensate.- The boiler room has a suitable outlet for the discharge ofcondensate produce by the boiler.- The electrical system has been fitted in compliance to thespecific norms and the work has been carried out by acompetent person.18
3.8 - GAS CONNECTIONDANGERThe gas connection must be carried out by aregistered engineer who will have to respectand comply to the regulations in force and tothe requirements indicated by the local gassupplier. An incorrect installation couldcause injury to persons, animals or damageto property. The manufacturer shall not beheld liable for any injury and/or damage.WARNINGLATTNER wall mounted boilers are built to runon Natural Gas or Propane Gas.The gas type the boiler is suitable for isindicated on the packaging label and on thedata plate boiler.First check the identification plate on the boilerfor the suitable gas type.DANGERDo not use the boiler for another type of gasthan indicated on the identification plate of theboiler. This will cause improper functioning andcan damage the boiler.Natural gas: refer to chapter 3.8.1Propane gas: refer to chapter 3.8.2The gas supply connection must comply with localregulations or, if such regulations do not exist,with the National Fuel Gas Code, ANSI Z223.1/NFPA 54.For Canada, the gas connection must comply withlocal regulations or, if such regulations do not exist,with the CAN/CSA-B149.1-05 - Natural Gas andPropane <strong>Installation</strong> CodeBefore installing the boiler it is recommended tothoroughly clean all the supply piping in order toremove any eventual residual grime which couldcompromise the boilers correct functioning.As a safety measure against gas leaks,LATTNER recommends installing a surveillanceand protective system made up of a gas leakagedetector combined with an on-off selenoid valveon the gas supply line.DANGERAlways check the safety of the gas pipe systemby means of a bubble test using leak-searchspray.The boiler and its individual shut off valve mustbe disconnected from the gas supply piping systemduring any pressure testing of that systemat test pressures in excess of 1/2 PSI (3.5kPa).The boiler must be isolated from the gas supplypiping system by closing its individual manualshutoff valve during any pressure testing of thegas supply piping system at test pressures equalto or less than 1/2 PSI (3.5 kPa).Instructions for the installer3.8.1 - GAS CONNECTION WITH NATURAL GASPipe sizing for natural gas- Contact gas supplier to size the gas supply line and meter.Gas pipingThe boiler gas pipe is equipped with external 3/4" M-NPTthread, onto which the tail piece of the gas shut off valve canbe connected. Use appropriate sealing.The connection to the boiler must include a suitable methodof disconnection and a gas control valve must be installedadjacent to the boiler for isolation purposes. The nominal inletworking gas pressure measured at the boiler should be 7"W.C. (18 mbar) for Natural gas (Gas A).Maximum pressure with no flow (lockup) or with the boilerrunning is 10.5 inches W.C. Minimum pressure with the gasflowing (verify during boiler startup) is 4.0 inches W.C.3.8.2 - GAS CONNECTION WITH PROPANE GASPipe sizing for propane gas- Contact gas supplier to size pipes, tanks, and 100% lockupgas pressure regulator.Propane Supply Pressure Requirements- Adjust propane supply regulator provided by the gas supplierfor 13 inches W.C. maximum pressure.- Pressure required at gas valve inlet pressure port:- Maximum 13 inches W.C. with no flow (lockup) or withboiler running.- Minimum 8 inches W.C. with gas flowing (verify duringboiler startup).Ensure that the high gas pressure regulator is installed atleast 6 to 10 feet upstream of the boiler.Gas piping- Use a gas shut off valve compatible with propane gases.- A sediment trap must be provide upstream of the gas controls.The boiler pipe is provided with external 3/4" M-NPT thread,onto which the tail piece of the gas shut off valve can bescrewed. Use appropriate sealing.The connection to the boiler must include a suitable methodof disconnection.The nominal inlet working gas pressure measured at the boilershould be 11" W.C. (27 mbar) for Propane gas (Gas E).A gas control valve must be installed adjacent to the boiler forisolation purposes. The nominal inlet working gas pressuremeasured at the boiler should be 11 inch W.C. (27 mbar) forPropane gas (Gas E).19
Instructions for the installer3.9 - FLOW AND RETURN PIPE CONNECTIONSNOTICEWhen using plastic pipes, observe the supplier’sinstructions especially those referring to recommendedjointing techniques and the notes relatingto the heating system water.NOTICETo prevent contamination in the heating systemwe recommend you integrate a dirt filter in thereturn pipe, near the boiler. In an old system it isa requirement to install a dirt filter. Also installshutoff valves to enable filter cleaning immediatelyupstream and down stream of the dirt filter(scale cartridge or y-strainer).When determining the size of the CH circuit pipes it isessential to bear in mind the pressure losses induced by anyof the system’s components and by the configuration of thesame system.The route of the piping has to be conceived taking all thenecessary precautions in order to avoid air locks and tofacilitate the continuous purging of the system.- Connect CH flow pipe to the Supply connection makingsure it is not under stress. Use a supply pipe with a minimumdiameter of 1’’¼ (32 mm).- Connect the return pipe with a fiat rubber seal installed tothe Return connection making sure it is not under stress.Use a return pipe with a minimum diameter of 1’’¼ (32mm).WARNING!Before installing the boiler we recommendthat the system is flushed out with a suitableproduct, in order to eliminate any metallictooling or welding residues, oil and grimewhich could reach the boiler and affect theproper running of the boiler.RMGATEVALVESWARNING!Ensure yourself that the system’s piping is notused as the earth clamps for the electrical ortelephonic system. They are absolutelyunsuitable for this use. In a short time this couldcause serious damage to the piping, boilerand radiators.NOTICEThe pipe to be connected to the boiler must becleaned before connecting in order to preventdirt from entering and damaging the boiler.WARNING!IT IS ABSOLUTELY FORBIDDEN TO FIT ON-OFFVALVES ON THE GENERATOR TO THE FOREOF THE SAFTEY DEVICES20
3.10 - PRIMARY BOILER PUMP OR BOILER SYSTEM PUMPInstructions for the installerThe following table gives an indication of the pump’s flow ratein function of the Δt of the primary circuit.Power supply in btu (kW)ALKON 50 ALKON 70154,000(45,13)199,000(58,32)Size of the pumpsIf determined by the installeror technical engineers mustbe sized according to thedata of boiler and system.Max flow ratedemanded in gal/h (l/h) ΔT 27°F (15°C)Max flow ratedemanded in gal/h (l/h) ΔT 36°F (20°C)683(2826)513(2120)683(3927)663(2946)In case of fixed raet pump isrecommended to choose acirculator with flow rate andhead at about 2/3 of thecharacteristic curve.The chart below shows, respectively:A) Prevalence available net losses of the boiler (For boilersequipped with a pump supplied by LATTNER)The Δt between supply andreturn boiler should never beless than 27 °F (15 K).B) Pressure drop between Return and Delivery (For boilerssupplied without pump)PRESSURE AVAIBLE TO THE SYSTEM (red)PRESSURE LOSSES (Blue)Pressure losses in wcPRESSURE AVAIBLEALKON 70 (1)ALKON 50 (2) (1)APRESSURE LOSSESALKON 50B(1) VALUES REFER TO THE MAX SPEED(2) IF EQUIPPED WITH OPTIONAL PUMPQ: water flow rate gal/hNOTE: The use of a mixing header fitted between the boiler circuit and the system circuit is always advisable.It becomes INDISPENSABLE if the system requires flow rates superior to the maximum permitted boiler flowrates, which is to say lower than 27 °F (15 K).21
Instructions for the installer3.14 - UNDERFLOOR HEATING SYSTEM(PLASTIC PIPES)NOTICEWhen using oxygen-permeable pipes, e. g. forfloor heating systems, you must separate thesystem using plate heat exchangers.No recourse can be made to the terms of thewarranty in the event of failure to observe theregulations pertaining to plastic underfloorheating pipes.3.15 - CONDENSATE DRAINNOTICEUse materials approved by the authority havingjurisdiction. in the absence of such authority, PVCand CPVC pipe must comply with ASTM D1785,F441 or D2665. Cement and primer must complywith ASTM D2564 or F493.For Canada, use ULC certified PVC or CPVCpipe, fittings and cement.Condensate inletcoming from theflue outletCDuring the combustion process the boiler producescondensate which, through the “A” pipe, flows into the siphon.The condensate which forms inside the boiler has to be routedinto an adequate drain by means of the pipe “B”. otherwisethe boiler will not function and can cause property damage.The condensate must be drained from the boiler in accordancewith local, state or federal rules and regulations.DANGER!Before commissioning the appliance fill thesiphon and check the correct drainage of thecondensate.If the appliance is used with the condensatedrain siphon empty there could be danger ofintoxication resulting from the escape of fluegasses.The connection between the appliance and the sewage systemmust be carried out in compliance with the specific referencestandards, and in particular:- prevent the end user utilizing the condensate produced;- a siphon must be fitted (supplied with the boiler);- there must be no bottlenecks;- the connection must be made just under the bottom part ofthe boiler;- it must be installed so as to avoid freezing of the liquidwhen the boiler is operating and prevent the eventual pressurizationof the sewage system;- consent the correct downflow of the appliance’s liquid discharges;- it must be made with materials which are resistant to condensate- if the condensate outlet of the boiler is lower than the drain,a condensate pump must be used.- The condensate produced by the boiler has a pH valuebetween 3 and 4.- Do not drain the condensation water to the external raingutter because of the danger of freezing and blockage ofthe drain.- Install a neutralization unit if required by the local codeWARNINGBefore putting the boiler into operation fill thecondensate trap with 1.27 cups / 300 ml of water.If the boiler will be installed in a high temperatureinstallation such as baseboard with asupply temperature of 160°F or above, fill thecondensate trap with vegetable oil instead ofwater.BCondensate drainpipe of boiler andchimney(to connect to thesewage systemACondensateinlet comingfrom the heatexchangerPeriodic cleaning of the condensate disposal systemmust be carried out.23
Instructions for the installer3.16 - WATER TREATMENTThe chemical/physical features of the heating system’s waterare fundamental for the boiler’s correct operation and safety.Among the inconvenients caused by the bad quality of thefeeding water, the most frequent and the most serious is theincrustation of the boiler thermal exchange surfaces.Less frequent, but also serious, is the hydraulic circuitsurfaces.It is ascertained that the boiler incrustations, due to their lowthermal conductivity, highly reduce the thermal exchange, evenif with a thickness of some millimetres and provoque a verydangerous localised overheating.We suggest to make the water treatment of the heating circuitin the following cases:a) When the hardness of the water is higher than 9 grains(15°f);b) For C.H. installations with large water content;c) Renewal of the water system due to uncontrolled leakages;d) Subsequent refilling of the system due to maintenanceworks on the installation;e) Presence of different metals in the hydraulic circuit.The scope of this treatment is finalized for eliminating orsubstantially reducing the following problems:- lime scale deposit- corrosion sludge- deposits- microbiological growths (moulds, bacteria etc.)An appropriate treatment of the supply water will preventthe above stated problems and will maintain the correctoperation and efficiency of the generator in time.For this purpose it will be necessary to fix the followingchemical-physical characteristics of the water:PH include between 6,5 and 8Hardness 6 ÷ 9 grains (9 ÷ 15 fr)<strong>Water</strong> hardnessWhen there is a water hardness of more than 6 to 9 grainshardness a water softener must be installed.SedimentIf there is sediment in your domestic water supply sedimentfilter or other suitable device should be used to remove it.THE INSTALLATION MUST BE FORESEEN ON THE RETURNPIPE OF THE PRIMARY CIRCUIT DOWNSTREAM OF THECIRCULATING PUMP.WARNING!All necessary precautions must be taken forpreventing the formation and localization ofoxygen in the system’s water. For this reason,ensure yourself that the plastic piping used inunderfloor heating systems is impermeableto oxygen.If any anti-freeze solutions are used ensure that they arecompatible with aluminium and any other boilercomponents and materials.WARNING!Any damage caused to the boiler due to theformation of lime scale or by corrosive waterwill not be covered by the warranty.WARNINGAppropriate steps must be taken to ensurethe indirect tank water heater does not becomeplugged by scale caused by hard wateror sediment.If the indirect tank water heater becomesplugged by either scaling from hard water ofsediment it is not the responsibility of LATT-NER.24
3.17 - COMBUSTION AIR AND VENTILATIONOPENINGSProvisions for combustion and ventiiation air must be madein accordance with section 5.3, Air for Combustion and Ventilation,of the National Flue Gas Code, ANSI Z223.1/NFPA 54.,or Sections 7.2, 7.3 or 7.4 of CAN/CSA-B149.1-05,installationCodes, or appiicabie provisions of the local building codes.CAUTIONBOILER DAMAGE AND OPERATIONALFAILURESDue to insufficient or improper openings for combustionair and/or ventiiation of the boiler room.Provisions for combustion air and ventiiation arealways required, regardiess whether the combustionair is taken from the outside (sealed combustion)or inside (room air for combustion).Insufficient ventilation of the boiler room can leadto high air temperatures. This can result in boilerdamage.- Make sure that intake and exhaust openingsare sufficiently sized and no reduction or closureof openings takes place.- When the problem is not resolved, do not operatethe boiler.- Please note these restrictions and its dangersto the operator of the boiler.WARNINGBOILER DAMAGE !Due to contaminated air.- Boiler must be clear and free from combustiblematerials, gasoline and other flammable vaporsand liquids, and corrosive liquids and vapors.Never use chiorine and hydrocarbon containingchemicals (such as spray chemicals, solutionand cleaning agents, paints, giues etc) in thevicinity of the boiler.- Do not store and use these chemicals in theboiler room.- Avoid excessive dust formation and buildup.NOTICEWhen one expects contaminated combustion air(near swimming pools, chemical cleaning operationsand hair salons),sealed combustion operation is recommended.Instructions for the installerAll Air from inside the Building (room air)The closet shall be provided with two permanent openingscommunicating directly with an additional room(s). The totalinput of all gas utilization equipment installed in the combinedspace shall be considered in making this determination.Each opening shall have a minimum free area of 1 squareinch per 1,000 Btu per hour of total input rating of all gasutilization equipment in the confined space, but no less than100 square inches. One opening shall commence within 12inches (305 mm) of the top, and one opening shall commencewithin 12 inches (305 mm) of the bottom of the enclosure.The minimum dimension of air openings shall be not lessthan 4 inches (101 .6 mm).All Air from Outdoor (seaied combustion)The cioset shall be provided with two permanent openings,one commencing within 12 inches (305 mm) from the top,and one commencing within 12 inches (305 mm) from thebottom of the enclosure. The openings shall communicatedirectly, or by ducts, with the outdoors or spaces (crawi orattic) that freely communicate with the outdoors.The minimum dimension of air openings shall be no lessthan 4 inches (101.6 mm).1. Where directly communicating with the outdoors, each openingshall have a minimum free area of 1 square inch per4,000 Btu/hr of total input rating of all equipment in the enclosure.2. Where communicating with the outdoors through verticalducts, each opening shall have a minimum free area of 1square inch per 4,000 Btu/hr of total inputrating of ali equipment in the enclosure.3. Where communicating with the outdoors through horizontal ducts, each opening shall have a minimum free area of 1square inch per 2,000 Btu/hr of total input rating of ali equipmentin the enclosure.4. Where ducts are used, they shall be of the same crosssectionalarea as the free area of the opening to which theyconnect.DANGERFire danger due to flammable materials or liquids.- Do not store flammable materials and liquids inthe immediate vicinity of the boiler.25
Instructions for the installer3.18 - INSTALLATION OF THE EXHAUSTAND AIRINTAKE SYSTEMNOTICEConsult local and state codes pertaining to specialbuildingcode and fire department requirements. Adhereto nationalcode requirements.12’’ (305 mm)minimumEXHAUST12’’ (305 mm)minimumNOTICEObserve the listed maximum lengths of vent systemwhich are boiler model dependent.The maximumpermissible lenghts are listed at page 26- 2912’’ (305 mm)minimumINTAKE12’’ (305 mm)minimum12’’ (305 mm)minimumMinimum clearance of 4 ft (1.22m) horizontally from, and in nocase above or below, unless a 4 ft (1.22 m) horizontal distanceis maintained, from electric meters, gas meters, regulatorsand relief equipment.The minimum distance from adjacent public walkways, adjacentbuildings, openable windows and building openings shallnot be less than those values specified in the National FuelGas Code, ANSI Z223.1 / NFPA 54 and / or the Natural Gasand Propane <strong>Installation</strong> Code, CAN/CSA B149.1Do not extend exposed vent pipe outside the building beyondrecommended distance. Condensate could freeze and blockvent pipe.Vent should terminate at least 3 ft (915 mm) away from adjacentwalls, inside corners and 5 ft (1525 mm) below roof overhang(see figure).it is not recommended to terminate vent above any door orwindow, condensate can freeze causing ice formations.Do not use chimney as a raceway if another boiler or fireplace is vented into or through chimney.NOTICETerminals should be positioned as to avoid productsof combustion entering openings into buildingsor other vents.NOTICETerminals should be positioned as to avoid productsof combustion entering openings into buildingsor other vents.NOTICEMaintain 12” of clearance above the highest anticipatedsnow level or grade or, whichever is greater.Please refer to your local codes for the snowlevel in your area.NOTICEThe whole route of the vent system must be installedupwards, never downwards,completely nor partly.NOTICEThe terminal should be located where dispersalof combustion products is not impeded and withdue regard for the damage or discolouration thatmight occur to building products in the vicinity(see above figure).In certain weather conditions condensation mayalso accumulate on the outside of the air inletpipe. Such conditions must be considered andwhere necessary insulation of the inlet pipe maybe required.In cold and/or humid weather water vapor maycondense on leaving the vent terminal. The effectof such ‘water condensation’ must be considered.The terminal must be located in a place not likelyto cause a nuisance.26
Instructions for the installerThe flue system must be installed inaccordance with the local and nationalStandards.Use only original LATTNER flue outlet systems, which areprovided from the follow manufacturer:TABLE FLUE OUTLET SYSTEM3.19 - ROOM AIR SYSTEMFOR INSTALLATION USING INDOORCOMBUSTION AIRBoiler designed to be connected to an open flue which willterminate vertically through the roof. The combustion air iswithdrawn directly from the room where the boiler is installed.ItemDecriptionConcenticextension3.28 ftManufacturerGROPPALLIMaterialStainlessSteelC o d eLATTNER00362445WARNING: for this type of connection the room must complywith the same installation regulations valid for openchimney boilers.The chimney must comply to the current regulations.Concenticextension1.62 ftGROPPALLIStainlessSteel00362446Elbow 90°GROPPALLIStainlessSteel00362442Elbow 45°HorizontalFlue terminalVentingterminalVerticalFlueTerminalGROPPALLIGROPPALLIGROPPALLISTABILEStainlessSteelStainlessSteelStainlessSteelStainlessSteel00362441003624390036244000362244Damages caused by installation errors and for nonobservanceof the instructions given by the manufacturerwill invalidate all the supplier’s contractual or extracontractual responsibilities.If the boiler has to be replaced ALWAYS replace the flueoutlet system.The boiler has been tested and approved with the terminalsdistributed by LATTNER that comply the requirements of ANSIZ21.13 / CSA 4.9 for the following flue configurations.When using indoor air, LATTNER strongly recommends theuse of an indoor air filter.This boiler requires adequate combustion air for ventilationand dilution of flue gases.Failure to provide adequate combustion air can result in unitfailure, fire, explosion, serious bodily injury or death.Use the following methods to ensure adequate combustionair is available for correct and safe operation of this boiler.Important: Combustion air must be free of corrosive chemicals.Do not provide combustion air from corrosive environments.Appliance failure due to corrosive air is not covered bywarranty.Combustion air must be free of acid forming chemical such assulfur, fluorine and chlorine. These chemicals have been foundto cause rapid damage and decay and can become toxic whenused as combustion air in gas appliances. Such chemicalscan be found in, but not limited to bleach, ammonia, cat litter,aerosol sprays, cleaning solvents, varnish, paint and air fresheners.Do not store these products or similar products in thevicinity of this boiler.Flue outlet systems must be purchasedfrom the dealer of products LATTNER.27
Instructions for the installerThe total allowed linear maximum length of thesmoke evacuation and air intake pipes, of Ø 3.15‘‘(80 mm), is 787.4‘‘ (20 m), including one wideradius curve and one evacuation terminal.L1ATTENTION!In the case in which danger of freezing subsists,the insulation of the smoke evacuation pipe isrecommended on the whole length, in bothcases, outside or in the chimney.L2ATTENTION!For boiler have horizontal runs slopingupwards not less than 1/4 in / ft (21 mm / m)from the boiler to the vent terminal.FLUE OUTLETS Ø 3.15‘‘ (80 mm)L max = L1+L2L min = 39.4‘‘ (1 m)L max = 787.4‘‘ (20 m)Preliminary operations:Fit the smoke evacuation pipe Ø 3.15‘‘ (80 mm), supplied inthe carton, as shown in the picture.L1L2L max = L1+L228L min = 39.4‘‘ (1 m)L max = 787.4‘‘ (20 m)
Instructions for the installer3.20 - VENT AND AIR SUPPLY SYSTEMFOR ORIZONTAL DIRECT VENTSYSTEMCOMBINATION DIRECT VENT SYSTEMBoiler with separate air inlet and products outlet. These ductscan discharge into areas with different pressure.The two terminals must not be fitted on to two opposite walls.Boiler designed for connection to horizontal inlet and out- letterminals, which admit fresh air to the burner and dischargethe products of combustion to the outside through concentricor twin ducts.The minimum distance between the inlet air duct and the flueoutlet duct must be of 9.8 in and both terminals must be positionedwithin a 19.6 in square section.Smoke evacuation by two separate ductsØ 3.15‘‘ (80 mm)L min = 78.7‘‘ (2m)39.37‘‘ (1 m) air intake + not less than 39.4 (1 m)smoke evacuationL max = 787.4‘‘ (20 m)393.7‘‘ (10 m) air intake + 393.7‘‘ (10 m) smoke evacuationATTENTION!For boiler have horizontal runs slopingupwards not less than 1/4 in / ft (21 mm / m)from the boiler to the vent terminal.Smoke evacuation by two separate ductsØ 3.15‘‘ (80 mm)L min = 78.7‘‘ (2m)39.37‘‘ (1 m) air intake + not less than 39.37 (1 m)smoke evacuationL1L max = 787.4‘‘ (20 m)393.70‘‘ (10 m) air intake + 393.7‘‘ (10 m) smoke evacuationL1L2L229
Instructions for the installer3.21 - ELECTRICAL CONNECTIONSRegulations in forceThe electrical connections to the boiler must be made in accordancewith all applicablelocal codes and the latest revision of the NFPA 70: NationalElectrical Code<strong>Installation</strong>s should also conform with C22.1 - Canadianelectrical code, part I (21st edition), safety standard for electricalinstallations if installed in Canada.CAUTIONThe boiler must be electrically grounded in accordancewith local codes, or in absence of localcodes, with the National Electrical Code,NFPA 70: National Electrical Code C22.1- Canadianelectrical code, part I (21st edition), safetystandard for electrical installationsThe gas, D.H.W. and the CH system pipes cannotbe used as ground plates.Ensure that the above safety electrical requirements subsist;in case of doubt, ask for a professionally qualified technicianto check the appliance’s electrical system.LATTNER refuses responsibility for any damages arising fromfailure to earth the boiler correctly.It is necessary that a qualified technician verifies that theelectrical system is adequate to the appliance’s maximumabsorbed power, indicated on the data plate, verifying inparticular that the section of the system’s cables is suitableto the appliance’s maximum absorbed power.CAUTIONFor the appliance’s general electrical supply theuse of adaptors, multiple sockets and/orextension cords is strictly forbidden.The use of any power supplied equipmentimplies the observance of several fundamentalrules, such as:- Do not touch the appliance with any wet part of your bodyand/or barefooted;- Do not pull the supply cables- Do not expose the boiler to sunlight, rain, etc., unless it isexplicitly foreseen;- Do not permit children or inexpert people to use theappliance.CAUTIONExternal connection board connectionsWARNINGDanger of fatal accident due to electric shock.120 VAC connections may be present on theexternal connection board when power is suppliedto the boiler.- No changes may be made to the wiring of theboiler.- All connections should be designed in accordance with the applicable regulations.- Label all wires prior to disconnection whenservicing controls. Wiring errors can cause improper and dangerous operation.Mains electrical supply connection120 V - 60 HzPower supply cordThe boiler is provided complete with a power supply cord59‘‘ (1,5 m) long and with a cross section area of 3 x 16 AWGThe electric connections of the boiler are shown in the sectionnamed “ACTUAL WIRING DIAGRAM” (paragraph 3.22)WARNING!We remind you that upstream of the electricalconnection, it will be necessary to foresee aservice relay (NOT SUPPLIED) which, whenthe additional electrical safety devices (ifany) intervene, shuts down the electricalsupply to the on-off fuel valve fitted on thegas supply circuit, but not to the boiler so asto guarantee the running of the pump andpermit the boiler to cool down.DANGER!The electrical connections must be carriedout only by a qualified engineer.Before carrying out the connections or anyother operation on the electrical parts,always switch off and disconnect theelectricity supply and ensure yourself that itcannot be accidentally turned on.It is necessary to fit a double pole switch onthe electrical supply line, having a contactseparation in both poles, in an easy accessibleposition in order to make quick and safe theservicing operations.FASTON BLOCKINGIf necessary the faston can be disconnected byslightly folding up, with a point, the blockingtongue ‘’ Á. ‘’.A30- Verify proper operation after operation servicing.
Room thermostat and/or E8 heating controller connectionInstructions for the installerCAUTIONSwitch off and disconnect the electricitysupply before carrying out any operations onthe electrical parts.For the connection of the E8heating controller, to remove the“bridge wire” existing between theterminals 1 and 2.RoomthermostatE8 heatingcontroller- Gain access to the Y1 terminal board- A Room Thermostat will be connected to theterminals 1 and 2 after removal of the existing bridgewire.- For the Heating Controller connection use theconnecting terminals 3 and 4.Connection of the additional safety devicesCAUTION!Switch off and disconnect the electricitysupply before carrying out any operationson the electrical parts.- For the connection remove the existing jumper.LIGHTBLUELIGHTBLUELIGHTBLUECDS - 1Prearrangement for theconnection of theadditional safety devicesA hot water boiler installed above radiationlevel or as required by the Autority havingjurisdiction, must be provided with a low watercutoff devices either as a part of the boiler or atthe time of boiler installation.31
543Instructions for the installer3.22 - WIRING DIAGRAM for ALKON 5000333986Only withMDVPPORBOILERYELL-GREENDKWHITE (DHW)GREENRED (CH)WHITEBROWNBLACKBLACKBLACKWHITEBLUEBROWNORANGEBLACK (-)BROWN (PWM)BLUE (TACHO)RIL./REG.VMSSSRRSRBROWNBLUEGREENGREENWHITEWHITEBLUEBROWNBLUEBROWNORANGE +BROWN (L1)BLUE (N)2 1 1 2ALIM.120V1 (NC) BROWN3 ( C ) WHITEBLUEBLUEBROWNBLUEBROWNBLUEBROWNYEL/GREENVGPFCDS-1BLACKBLUEBLUEFs1BLUEBROWNBLUEBROWNBROWN - LBLUE - NYEL/GREENTFTLWHITEE. RIV.YELL/GREENBROWNBLUEL1N120 V - 60 HzIGYELL-GREENPSYSTEMREDTR. ACCE. ACCDKE. ACCE. RIV.IGPSRSRRTLTFTR.ACCVGVM= Minimum water pressure switch= Ignition electrode= Detection electrode= Power switch On-Off= Pump boiler (optional)= CH sensor= CH return sensor= Limit thermostat= Smoke thermostat (only pre-arrangement)= Ignition transformer= Gas valve= Modulating fan detection/adjustmentCSD - 1Prearrangement for theconnection of theadditional safety devicesNote: Any accessories shown in the drawnare not available for this model of boilerMDVP SYST.SS= Motor 3 way valve= Pump system= DHW sensorLabel all wires prior to disconnection whenservicing controls. Wiring errors can causeimproper and dangerous operation.32
543WIRING DIAGRAM for ALKON 70Instructions for the installerPBOILERYELL-GREENDKWHITEBROWNBLACKBLACKBLUEBROWNORANGEBLACK (-)BROWN (PWM)BLUE (TACHO)ORANGE +2 1RIL./REG.VMSRRSRGREENGREENWHITEWHITEBLUEBROWNBLUEBROWNBROWN (L1)BLUE (N)1 2ALIM.120V1 (NC) BROWN3 ( C ) WHITEBLUEBLUEBROWNBLUEBROWNBLUEBROWNYEL/GREENVGPFCDS-1BLACKBLUEBLUEFs1BLUEBROWNBLUEBROWNBROWN - LBLUE - NYEL/GREENTFTLWHITEE. RIV.YELL/GREENBROWNBLUEL1N120 V - 60 HzIGYELL-GREENPSYSTEMREDTR. ACCE. ACCDKE. ACCE. RIV.IGPSRSRRTLTFTR.ACCVGVM= Minimum water pressure switch= Ignition electrode= Detection electrode= Power switch On-Off= Pump boiler= CH sensor= CH return sensor= Limit thermostat= Smoke thermostat (only pre-arrangement)= Ignition transformer= Gas valve= Modulating fan detection/adjustmentCSD - 1Prearrangement for theconnection of theadditional safety devicesNote: Any accessories shown in the drawnare not available for this model of boilerP SYST.= Pump systemLabel all wires prior to disconnection whenservicing controls. Wiring errors can causeimproper and dangerous operation.33
Instructions for the installer3.23 - GENERAL LADDER DIAGRAMSRRSRPFCDS-1TLDKSL (**)A4-2A3-6A3-5 A3-4A3-3 A4-6 A4-5 A4-4 A4-5A4-1A2-3 A2-1A4-4A4-3DISPLAY8 8 8LIGRIBBON CABLEA3AC/DCIGNA8 - 1A8 - 2CPURODFs1FLAMEGRL 4A8 - 2A8 - 1RL 3A1 - 4A1 - 3A1 - 2A1 - 1A9 - 2FA9 - 1RL 1A9 - 6P(*)A9 - 5120 VACRL 2A6 - 6 A6 - 515 kVSPARKCAUTIONHIGH VOLTAGE SPARK LEADATTENTION AUTE TENSION CÂBLE D’ALLUMAGE34
Instructions for the installer3.24 - STARTING UP: Filling and de-aeratingthe boiler and installationCAUTIONObserve the following rules of safety:- All work on the unit must take place in adry environment.- LATTNER units may never be in operationwithout their housing, except in connectionwith maintenance or adjustments.- Never allow electrical or electroniccomponents to come into contact withwater.NOTICECarry out the following tasks in connectionwith maintenance, etc. to an already installedunit:- Shut down all programs- Close the gas shut off valve- Shut off the power at the main power switch- Close the service valves (supply and return)NOTICETake note of the following when maintenanceor adjustments are needed:- The unit must be able to function during theseactivities; for this reason, the unit’s supplyvoltage, gas pressure and water pressuremust be maintained. Ensure that this is not asource of potential danger during theseactivities.WARNINGFollowing maintenance or other activities;always check the installation of allparts through which gas flows (with bubbletest using leak-search spray).3.25 - FILLING THE SYSTEMWARNING!Do not mix the CH system’s water with antifreezeor anti-corrosion solutions using wrongconcentrations! It could cause damage to thewashers and could provoke noise duringnormal boiler operation.LATTNER refuses all liability for injury topersons, animals or damage to propertyderiving from not having respected the abovementioned recommendations.Before filling the heating system, the complete system, includingall zones, must be thoroughly cleaned and flushed toremove sediment.Flush until clean water runs free of sediment. LATTNER suggestsusing an approved system cleaner to flush the system,but not the boiler. Always use LATTNER approved antifreezes.See the list at page 7.Never use reverse osmosis, D.I., or distilled water for fillingthe heating system.WARNING!Do not use petroleum-based cleaning or sealingcompounds in the boiler system. Damageof seals and gaskets in boiler and system couldoccur, resulting in substantial property damage.The central heating installation needs to be filledwith potable water.Use only potable water or approved glycol forfilling the heating system.When the water hardness of the filling waterexceeds > 8 gpg the water has to be treateduntil below the maximum value of 8 gpgThe pH value of the installation water must bebetween 6.5 and 8.5. Check the pH value using proper equipmentor by having the water analyzed by a water treatmentcompany.If pH differs from above, contact LATTNER engineering forfurther assistance.Failure to adhere to the water quality requirements will resultin a void of warranty.Once all the connections are made, it is possible to fill thecircuit.This operation has to be performed very carefully, by observingthe following steps (boiler in Off position):- open the radiator bleeds and make ascertain the goodoperation of the automatic air vent fitted in the boiler.- open progressively the filling valve and make sure theautomatic air vent, in the system, work properly.- close the bleeders of the radiators when water starts tocome out.- control via manometer (Optional) that the water pressurehas reached a minimum value of 11,6/14,5 psi (0,8/1) bar- close the filling valve and bleed again all the radiators.- inspect for the soundness all the hydraulic connections.- after the commissioning of the boiler and the reaching ofthe normal operation temperature, switch off the operationof the boiler and the pump and repeate the bleed operation.- let the installation cool down and, if necessary, add waterin order to reach the minimum presure of 11,6/14,5 psi(0,8/1) bar35
36Instructions for the installer
Instructions for the installer3.26 - INITIAL LIGHTINGPRELIMIARY CHECKSCAUTIONThe first ignition must be carried out by aqualified technician. Failure to do so couldcause injury to persons, animals or damageto property. LATTNER shall not be held liablefor any injury and/or damage.Before lighting the boiler check that:- the boiler installation has been carried out in accordancewith the specific Standards and regulations in force forthe gas part and for the electrical part;- the air supply and the discharge of the products ofcombustion are carried out in the correct way inaccordance to the specific Standards and regulations inforce;- the gas supply system is correctly dimensioned for theboiler’s output and is fitted with all the safety and controldevices prescribed by the regulations in force;- the electrical supply must be 120 V - 60 Hz;- the system has been filled with water (pressureregistered on the gauge 11,6/14,5 psi (0,8/1) bar withpump not running);- any on-off valves of the system are open;- the mains supply gas corresponds to the one which theboiler has been calibrated for: otherwise convert the boilerto use the available gas (Using kit code and follow theinstruction “GAS CONVERSION”); this operation must becarried out by a qualified technician in compliance to theregulations in force;- the gas supply cock is open;- there are no gas leaks;- the external mains supply switch is on;- the system’s safety valve on the boiler is not blocked andthat it is connected to the sewage system;- the condensate drain siphon has been filled with water;DANGER!Before commissioning the appliance fill thesiphon and check the correct drainage of thecondensate.If the appliance is used with the condensatedrain siphon empty there could be danger ofintoxication resulting from the escape of fluegasses.- there are no water leaks;- all the necessary ventilation conditions and minimumclearance distances are guaranteed for subsequentservicing.LIGHTING AND SHUTTING DOWN PROCEDURESFor lighting and shutting down the boiler refer to the“INSTRUCTIONS GUIDE FOR THE PERSON IN CHARGE OFTHE APPLIANCE”Information to be passed on to the user.The usert be instructed on the use and operation of theboiler and in particular:- Hand the booklet: “USER’S OPERATINGINSTRUCTIONS”, as well as all the other literaturerelative to the appliance, and placed in the envelopecontained in the packaging, to the user.The user must retain this literature for any futurereference.- Inform the user of the importance of the air vents and ofthe flue outlet system, stressing the fact that absolutelyno modification can be made.- Inform theuser regarding the control of the system waterpressure and how to restore it to the correct value.- Explain and demonstrate to the user the correct functionand adjustment of the temperature, thermostats andradiators for the economic use of the system.- Remind the user that a comprehensive service and themeasurement of the combustion efficiency should becarried out regularly (as requested by the national law).- If the appliance is sold or transferred to another owneror if the present user moves home and leaves theappliance installed, ensure yourself that the manualalways follows the appliance so that it can be consultedby the new owner and/or installer.37
Instructions for the installer3.27 - TESTING THE IGNITION SAFETYSHUT OFF DEVICE- Power on by switching ON-OFF switch- Check that the boiler is connected to the electricalsupply; the green indicator led “Q” ( ) on the controlpanel must be illuminated.- Create a request in CH by pressing key indicate.- Turn the gas valve knob, in OFF position.- After 1sec, boiler switch off,Lock-out indicatorled illuminated+ fault indicator ledLIGHTBLUE- Press Reset Key will displayed the fault code LF (lossof flame), the boiler will retry ignition cycle (7 seconds)after which if was not removed the cause of the fault(gas tap) the boiler will shut off.38
Instructions for the installer3.28 - BURNER ADJUSTMENTWARNING!All the instructions indicated below are for theexclusive use of qualified LATTNER servicetechnicians or installers.All the boilers are supplied already calibratedand tested. If it is necessary to change thecalibration due to gas conversion or adaptationto the mains supply system, the gas valve mustbe re-calibrated.A) Max output adjustment- Connect a suitable C0 2gas analyser to the samplingpoint in the flue inlet/outlet terminal.MAXIMUM OUTPUTADJUSTMENT SCREW (A)B) Min output adjustment- By pressing the key “- decrease” again the boiler willoperate at the minimum output (led 1 blinking).1VIOLETLIGHTBLUE- Pressing simultaneously the keys + (plus) and –(minus) for at least 3 seconds the boiler will operatein the CH mode at the maximum output (led 1illuminated).- Check that the C0 2values are within the valuesindicated in the table “Burner pressures”- If necessary correct the value by turning the adjustmentscrew “A” in a CLOCKWISE direction to decrease thevalue and in an ANTICLOCKWISE direction in order toincrease it.1YELLOWVIOLETBLUE-To disenable the CHIMNEY SWEEPER MODEpress the keys + (increase) and – (decrease)simultaneously (led 1 off).1LIGHTBLUEVIOLETLIGHTBLUEYELLOWBLUEYELLOWBLUE- Check that the C0 2values are within the values indicatedin the table “Burner pressures”39
Instructions for the installer- If necessary correct the value by turning the adjustmentscrew “B” in a CLOCKWISE direction to increase the valueand in an ANTICLOCKWISE direction in order to decreaseit.C) COMPLETION OF THE BASIC ADJUSTMENTS- Check the C0 2values at the minimum and maximumoutlet- If necessary make the required adjustmentsTo ensure correct operation the C0 2valueshave to be adjusted with extreme carerespecting the values indicated in the table.- Close the sampling test point in the flue inlet/outletterminal with the appropriate cap C.MINIMUM OUTPUTADJUSTMENTSCREW (B)Tighten the maximum adjustment screw “A”in a clockwise direction until you arrive tothe abutting end, than slacken for 7 turns.Verify the boiler ignition; if the boiler goesinto lockout slacken the screw “A” again ofone turn, than retry the ignition. If the boilergoes into lockout again, carry out the aboveindicated operations until the boiler islighted.At this point carry out the burner adjustmentas previously indicated.INJECTORS – PRESSURESALKON 50Type ofGasSupplypressurein wc (kPa)CO 2level(%)minCO 2level(%)maxFan speedmin max(FL) (FH)Ø MixerinjectorsØin (mm)Check the C0 2levels often, especially at low flow rateMinimum gasconsumptionft 3 /hr (m 3 /hr)Maximum gasconsumptionft 3 /hr (m 3 /hr)Startoutput %IGV maxfunFUA (Natural)E (Propan HD)A (Natural)E (Propan HD)7 (1,74)11 (2,74)7 (1,74)11 (2,74)9.510.89.510.89.510.89.510.8242492930.22 (5,6)0.22 (5,6)FOR HIGH ALTITUDE242482830.22 (5,6)0.22 (5,6)0.038 (1,07)0.015 (0,42)0.038 (1,07)0.015 (0,42)0.173 (4,91)0.067 (1,90)0.156 (4,42)0.060 (1,71)4050405010101010ALKON 70Type ofGasSupplypressurein wc (kPa)CO 2level(%)minCO 2level(%)maxFan speedmin max(FL) (FH)Ø MixerinjectorsØin (mm)Minimum gasconsumptionft 3 /hr (m 3 /hr)Maximum gasconsumptionft 3 /hr (m 3 /hr)Startoutput %IGV maxfunFUA (Natural)E (Propan HD)A (Natural)E (Propan HD)7 (1,74)11 (2,74)7 (1,74)11 (2,74)9.510.89.510.89.510.89.510.8212181800.35 (9,0)0.35 (9,0)FOR HIGH ALTITUDE242473720.22 (5,6)0.22 (5,6)0.055 (1,56)0.021 (0,60)0.055 (1,56)0.021 (0,60)0.224 (6.35)0.087 (2,46)0.156 (5,72)0.060 (2,21)505050501212121240
3.29 - PROGRAMMING OF THE OPERATING PARAMETERSInstructions for the installerWARNING! THESE OPERATIONS ARE ACCESSIBLE TO TRAINED INSTALLERS AND SERVICE ENGINEERSONLY FOR CHANGING THE PARAMETER SETTINGSPress the YELLOW key and the LIGHT BLUE key simultaneouslyto enter in the service mode SE and change the valuesof the pre-set operating parameters.(Operation C)After setting the desired value pressing the YELLOW key storesthis new value in the memory.VIOLETLIGHTBLUEVIOLETLIGHTBLUEYELLOWBLUEYELLOWBLUEBURNER MODULATION LEVEL IN IGNITION (IG)By pressing the YELLOW key you have access to the firstadjustable parameter BURNER MODULATION LEVEL INIGNITION (IG).ALKON 50 70Standard Natural Gas setting 40 % 50 %Standard LPG setting 50 % 50 %PUMP OVERRUNVIOLETLIGHTBLUEContinue to change to the parameters by pressing the – key(decrease).The successive parameter which can be changed is: PUMPOVERRUN (Po).YELLOWBLUE(Operation A)By pressing the YELLOW key again the standard parametersetting is displayed.VIOLETYELLOWLIGHTBLUEBLUEVIOLETYELLOWLIGHTBLUEBLUERepeat the operations A-B-C for setting the desired valuefrom 1 to 10 minutes.Standard setting: 5 minutes(Operation B)By pressing the keys + (increase) or – (decrease) a numberof times the parameter can be changed.VIOLETLIGHTBLUEYELLOWBLUECAUTION!DO NOT CHANGE THE PARAMETER41
Instructions for the installerSETTING OF THE MINIMUM HEATING TEMPERATUREContinue to change to the parameters by pressing the – key(decrease).The successive parameter which can be changed is: SETTINGOF THE MINIMUM HEATING TEMPERATURE (HL).3.30 - VARIATION OF INPUT RANGE FORHIGH ALTITUDEIt is necessary adjust nominal heat input by reducingthe fan speed.VIOLETLIGHTBLUEModify the parameter FH from the boiler panel board:See factory parameter (supplied separately and modifiableonly with access code).YELLOWBLUEVIOLETLIGHTBLUERepeat the operations A-B-C for setting the desired valuefrom 68 to 140 °F (20 to 60°C)Standard setting: 95° F (35°C)SETTING OF THE MAXIMUM HEATING TEMPERATU-REYELLOWVIOLETYELLOWChooseBLUELIGHTBLUEBLUEContinue to change to the parameters by pressing the – key(decrease).The successive parameter which can be changed is: SETTINGOF THE MAXIMUM HEATING TEMPERATURE (HHVIOLETLIGHTBLUEVIOLETYELLOWInsertCodeLIGHTBLUEBLUEYELLOWBLUERepeat the operations A-B-C for setting the desired valuefrom 149 to 185 °F (65 to 85°C)Standard setting: 176° F (80°C)Reach the FH parameter by pressing key - several timeVIOLETYELLOWLIGHTBLUEBLUE(Operation A)By pressing the YELLOW key again, the standard parametersetting is displayed.VIOLETLIGHTBLUEYELLOWBLUE(Operation B)By pressing the keys + (increase) or – (decrease) a numberof times the parameter can be changed.(Operation C)After setting the desired value pressing the YELLOW key storesthis new value in the memory.See value of parameter FH at tableINJECTOR - PRESSURES page 38.42
4 INSPECTION AND SERVICING SCHEDULEServicing scheduleCAUTIONTo ensure the continued safe and efficientoperation of the boiler it is highlyrecommended that it is checked at regularintervals and serviced when necessary, andthat only original spare parts are used.Regular attention will prolong the life of theboiler.DANGERIf the boiler is not checked and servicedregularly it could cause material and personaldamages.For this reason LATTNER recommends that a servicingcontract should be made with our authorized After SalesService Assistance Centre.The boiler must have regular maintenance and cleaning inorder to ensure reliable and efficient operation. Regularattention will prolong the life of the boiler.The frequency of servicing will be determined by the serviceengineer and will depend on the appliance’s state of condition.4.1 - INSTRUCTIONS FOR INSPECTIONAND SERVICINGCAUTIONTo ensure a long life to all your boilercomponents and in order not to alter theconditions of the approved product, onlyoriginal LATTNER spare parts must be used.Before servicing always carry out the following steps:- Disconnect the mains electricity supply.- Separate the appliance from the electrical supply by meansof a separating device with an opening contact of atleast 3 mm (for example safety devices or power switches)and ensure yourself that it cannot be accidentally reinserted.- Close the on-off valve fitted upstream of the boiler.- If necessary, and in function of the type of work to be carriedout, close any on-off valves fitted on the CH flow andreturn pipes, as well as the cold water inlet valve.- Remove the appliance’s front panel.After having carried out all the necessary maintenance workalways follow these steps:- Open the CH flow and return valves as well as the coldinlet valve (if previously closed),- Purge and, if necessary, proceed with restoring the heatingsystem’s pressure until a pressure of 0,8/1 bar is reached.- Open the on-off gas cock.- Reconnect the appliance to the electrical supply and switchon the mains electrical supply.- Test for gas soundness, on the gas side and on the waterside.- Replace the appliance’s front panel.IMPORTANT:After having performed the maintenance ofthe appliance remember to reset the counterby selecting “Cr” from the parameters menùand introducing the relevant resetting code.TABLE OF THE RESISTANCE VALUES IN FUNCTION OF THE HEATING SENSOR (SR) AND RETURN HEATING SENSORTEMPERATURE (SRR)T° F (C) 32 (0) 33.8 (1) 35.6 (2) 37.2 (3) 39.2 (4) 41 (5) 42.8 (6) 44.6 (7) 46.4 (8) 48.2 (9)32 (0) 32755 31137 29607 28161 26795 25502 24278 23121 22025 2098750 (10) 20003 19072 18189 17351 16557 15803 15088 14410 13765 1315368 (20) 12571 12019 11493 10994 10519 10067 9636 9227 8837 846686 (30) 8112 7775 7454 7147 6855 6577 6311 6057 5815 5584104 (40) 5363 5152 4951 4758 4574 4398 4230 4069 3915 3768122 (50) 3627 3491 3362 3238 3119 3006 2897 2792 2692 2596140 (60) 2504 2415 2330 2249 2171 2096 2023 1954 1888 1824152 (70) 1762 1703 1646 1592 1539 1488 1440 1393 1348 1304176 (80) 1263 1222 1183 1146 1110 1075 1042 1010 979 949194 (90) 920 892 865 839 814 790 766 744 722 701Relation between the temperature (°C) and the nom.resistance (Ohm) of the heating sensor SR and the returnheating sensor SRR.Ex:At 101 °F (25°C), the nominal resistance is 10067 OhmAt 194 °F (90°C), the nominal resistance is 920 Ohm43
Servicing schedule4.2 - PERIODIC EXAMINATION OF VENTINGSYSTEMThe inspection of the boiler and venting system should bedone every 1 years and full maintenance every 2 years,whichever occurs first. When doing this the circumstances ofthe boiler’s location must be taken into account. From thisone can determine whether to deviate from this advice.Please contact LATTNER for further guidance on thefrequency and service requirements. Contact details canbe found on the back page of this manual.Verify that the air ventilation system, air intake and airintake pipes are unobstructed.4.3 - PROPER PROCEDURE FORCLEANING FLUE GASPASSAGEWAYS(After 1 year maintenance)Verify that the system of flue and chimney areunobstructed.4.4 - PROPER PROCEDURE FORCLEANING THE BURNER(After 1 year maintenance)• Perform cleaning of the burners only by blowing, with compressedair, acting from the “side flame”• Verify visually the state of the spot weldings of the L profilesand the burner mesh.• Wash with water the combustion chamber, avoiding towet the electrical harnessDuring this operation it will be necessary to ascertainthat the condensate drain pipe is free, so that the washingwater does not come out from the inspection hole.• Blow the combustion chamber with compressed air, tryingto remove all the dirt still fixed to the fins.• Once the washing of the aluminium sections is finished,make sure the siphon for the evacuation of the condensateis free: if necessary clean it.Compressed air44
Servicing schedule4.5 - VISUAL INSPECTION OF THE FLAME(2 and 4 year maintenance)The burner must flame evenly over the entire surface whenoperating correctly. The flame must burn with a clear, ORAN-GE, stable flame.SATISFACTORYCheck the flame through the inspection glassThe flame pattern should be as shown in the figures below.ORANGE FLAMEFLAME:YELLOW = CO2 HIGH NOT SATISFACTORYBLUE = CO2 LOW NOT SATISFACTORYORANGE = OK SATISFACTORY4.6 - PROPER REASSEMBLY ANDRESEALING OF THE VENT-AIRINTAKE SYSTEMAfter removing, inspected and possibly cleaned, Flue pipesand air intake, replace the tubes correctly.AAttention to the sense of double lip seals.ADOUBLE LIP SEAL45
Servicing schedule4.6 CLEANING THE CONDENSATE DRAINSIPHONIn order to check and clean the siphon carry out the followingsteps:- unscrew the plastic nuts (1) and (2) and to remove thesiphon;- Verify if there are any deposits flush them out with cleanwater;- reassemble the siphon in reverse order.DANGERBefore commissioning the appliance fill thesiphon via the filling hole and check thecorrect drainage of the condensate.If the appliance is used with the condensatedrain siphon empty, the combustionadjustments could result completely wrong.Furthermore this could lead to danger ofintoxication following the escape of fluegasses.214.7 SEALING GASKET BETWEENDISTRIBUTOR AND BOILER BODYDANGER!It is absolutely necessary to replace thegasket at any time the inspection or maintenanceis made on the burner.When refitting the mixer tighten the nutsprogressively and in crossed way, by using adynamometric wrench adjusted at 7.37 lbf x ft(10 Nm).MixerGasketbetweenmixer andboiler body.BurnerBody46
Fault finding5 FAULT FINDING5.1 - ERROR CODESThe boiler is fitted with an integrated diagnostic readout which,in case of malfunction, consents the immediate individuationof the type of fault directly on the control panel displayIn the following fault finding table our purpose is to give sometechnical information regarding the solutions to any problemswhich could occur during boiler operation or commissioningof the boiler.When the fault signalling led (1) is on, press the LIGHT BLUEkey (2) to check the error code on the display (3).Code:Code:Description: Over high temperature detected bythe heating sensor (SR) >203°F (>95°C)Corrective action: Check the system’s watercirculationDescription: Loss of flame signal during boileroperation12Corrective action: Press the reset key on the panelVIOLETLIGHTBLUECode:Description: No flame detected during the ignitionphase.YELLOW3BLUECorrective action: Press the reset key on thecontrol panelCode:Description: Mains voltage < 96 VacCode:Description: Modulating fan failureCorrective action: Check that the mains voltageis
Fault findingCode:Code:Code:Description: Common chimney obstructionCorrective action: Verify the chimneyDescription: Heating sensor failureCorrective action: Check the sensor’s efficiencyand/or wiringDescription: Alteration of the operatingparameters caused by EMC disturbances5.2 - REQUEST OF MAINTENANCEThe boiler has an integrated system that, after 15.000ignitions (3 value displayed x 5000) Value switching On or3.000 (3 value displayed x 1000) hours of operation of theburner, provides to signal that the boiler needsmaintenance.Such information is indicated on the display by the lightingof the code .The flashing of the code doesn’t inhibit thenormal operation of the boiler.Service the appliance and subsequently reset the counterby selecting “Cr” from the parameters menù andintroducing the relevant resetting code.Corrective action: Restore the factory parametersVIOLETLIGHTBLUECode:Description: Flame signal detected before theignition cycleYELLOWBLUECorrective action: Disconnect the detectionelectrode’s wire from the control board; if the errorcode disappears replace the cable, otherwisereplace the control board.VIOLETChooseLIGHTBLUECode:Description: Flame detected after burner OFFYELLOWBLUECorrective action: Disconnect the gas valve’s wirefrom the control board; if the error codedisappears replace the control board, otherwisereplace the gas valve.VIOLETYELLOWInsertCodeLIGHTBLUEBLUECode:Description: Internal failureVIOLETLIGHTBLUECorrective action: Replace the control boardYELLOWBLUEVIOLETLIGHTBLUEYELLOWVIOLETConfirm (yellow)to reset valueBLUELIGHTBLUE48YELLOWBLUE
49Spare partsALKON 5013363741 39 3839332331432010321211821416225422264442728178216297356391124425154444344045
Spare partsALKON 70122404426242827141825161121784453415524216630133942444436 37 41 39 383539431012333220233150
Spare partsSpare parts listPos. Code Description1 95000023 Assorted gasket2 95000426 Gas valve gasket (10 pcs.)3 95000610 Grommet (6 pcs.)4 95000657 Silicon pipe 4x85 95000679 Sight glass6 95000680 CH flow sensor7 95000781 Safety valve 6 bar8 95000936 Heat exchanger Alkon 50/709 95000933 PCB Alkon 7095000934 PCB Alkon 5010 951000105 Dash board Alkon 70951000104 Dash board Alkon Alkon 5011 95212123 RH casing12 95212125 Front casing13 95212658 LH casing14 95250489 Fan seal15 95251384 Ignition electrode16 95251500 Burner seal17 95251502 Burner18 95260588 Automatic air vent20 95261102 Switch21 95261494 Overheat thermostat 203°F (95°C)22 95261988 3.15’’ (80mm) seal (2 pcs.)23 95261999 Cover protection switch24 95262087 3.15’’ (80mm) seal25 95262128 Gas valve26 95263579 Ignition transformer27 95263551 Fan Alkon 7095263552 Fan Alkon 5028 95262451 Mixer Alkon 7095262789 Mixer Alkon 5029 95262604 Low water switch30 95263555 Pump GRUNFDFOS UPS 26-99 FC31 95310239 Display case32 95310726 Fascia board33 95310885 Programming keys34 95263580 Gas tap 3/4"NPT35 95263581 Condensate trap36 95600402 Wiring VM R – TL37 95600403 Wiring SR – SRR38 95600406 Wiring ALIM. 120V39 95600405 Wiring E. RIL.40 95603418 Smoke Pressostat41 95600407 Wiring T.ACC.-VG-VM(A)-P (Alkon 70)95600404 Wiring T.ACC.-VG-APM-VM(A) Alkon 5042 95600377 Ignition lead43 95630163 Display board44 95251826 Adapter F 1" 1/4 GAZ - 1" 1/4 NPT45 95251827 Adapter F 3/4" GAZ - 3/4" NPT51
®LATTNER<strong>Lattner</strong> Boiler Mfg. Co.1411 9 th St. S.W. - P.O. Box 1527 - Cedar Rapids, IA 52404319 - 366 - 0778 - 800 - 345 - 1527 - Fax: 319 - 366-0770www.lattner.comLATTNER declines every responsibility for the possible inaccuracies if owed to errors oftranscript or press. Also reserves the right to bring those changes that it will holdnecessary to it own products or profits, without jeopardizing its essential characteristics.