User Manual - Unical Lattner Condensing Hot Water Boilers
User Manual - Unical Lattner Condensing Hot Water Boilers
User Manual - Unical Lattner Condensing Hot Water Boilers
- No tags were found...

You also want an ePaper? Increase the reach of your titles
YUMPU automatically turns print PDFs into web optimized ePapers that Google loves.
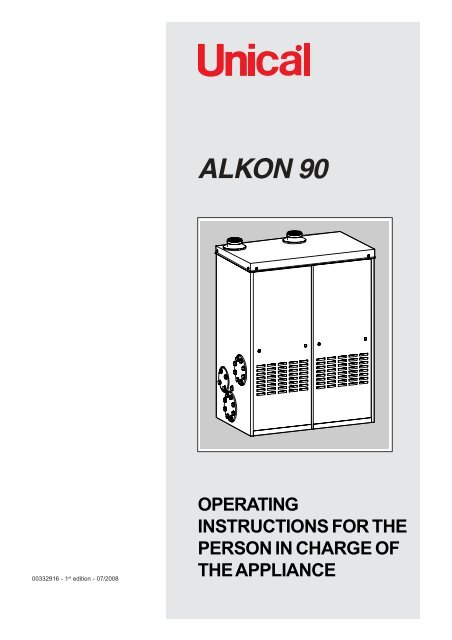
ALKON 9000332916 - 1 st edition - 07/2008OPERATINGINSTRUCTIONS FOR THEPERSON IN CHARGE OFTHE APPLIANCE
ContentsCONTENTS1 Symbols used in this guide ...................................................................................................................................................... 22 Correct use of the appliance .................................................................................................................................................... 23 <strong>Water</strong> treatment ......................................................................................................................................................................... 24 Information to be passed over to the person in charge of the appliance .............................................................................. 35 Safety warnings ......................................................................................................................................................................... 36 Operating instructions .............................................................................................................................................................. 46.1 Control panel ...................................................................................................................................................................... 46.2 Controlling the operating parameters ............................................................................................................................... 76.3 Checks before commissioning the boiler ........................................................................................................................ 76.4 Operating the boiler ........................................................................................................................................................... 86.5 Shutting down the boiler .................................................................................................................................................... 86.6 Eliminating the faults ......................................................................................................................................................... 87 Operating instructions for the E8 heating controller ............................................................................................................... 97.1 Operating functions ........................................................................................................................................................... 97.2 General settings................................................................................................................................................................. 97.3 <strong>User</strong> settings .................................................................................................................................................................... 111 - SYMBOLS USED IN THIS GUIDEWhen reading this guide particular care has to be given to the parts marked with the followings symbols:DANGER!Indicates serious dangerfor your personal safetyand for your lifeWARNING!Indicates a potentially dangeroussituation for the product and theenvironmentNOTE!Suggestions for theuser2. - CORRECT USE OF THE APPLIANCEThe ALKON appliance has been designed utilizing today’s heating technology and in compliance with thecurrent safety regulations.However, following an improper use, dangers could arise for the safety and lifeof the user or of other people, or damage could be caused to the appliance or other objects.The applianceis designed to be used in pumped hot water central heating systems. Any other use of this appliance will beconsidered improper.UNICAL declines any responsibility for any damages or injuries caused by an improperuse; in this case the risk is completely at the user’s responsibility.In order to use the appliance accordingto the scopes it was designed for it is essential to carefully follow the instructions indicated in this guide.3 - WATER TREATMENT• The hardness of the mains water supply conditions the frequency with which the heat exchanger is cleaned.• In hard water areas where the main water can exceed 15°f total hardness, a scale reducing device isrecommended. The choice of this device has to be made taking into consideration the characteristics ofthe water.• In order to improve the resistance to lime scale it is recommended to adjust the domestic hot water temperatureas near as possible to the one you really require.• The use of a modulating room thermostat reduces the dangers of lime scale formation.• We recommend you to check the state of cleanliness of the domestic hot water heat exchanger at the end ofthe first year and subsequently, on the basis of the lime scale found, this period can be extended to two years.2
Contents4 - INFORMATION TO BE HANDED OVER TO THE USERThe user has to be instructed on the use and operation of his heating system, in particular:- Hand over these instructions to the end user, together with any other literature regarding this appliance,placed inside the envelope contained in the packaging. The user has to keep these documents in a safeplace in order to always have them at hand for future reference.- Inform the user on the importance of air vents and of the flue outlet system, stressing the fact that is absolutelyforbidden to make any alterations to the boiler.- Inform the user how to check the system’s water pressure as well as informing him how to restore the correctpressure.- Explain the function of time and temperature controls, thermostats, heating controls and radiators, to ensurethe greatest possible fuel economy.- Remind the user that it is obligatory to carry out a comprehensive service annually and a combustion analysisevery two years (in compliance with the national law).- If the appliance is sold or transferred to another owner or if the present user moves home and leaves theappliance installed, ensure yourself that the manual always follows the appliance so that it can be consultedby the new owner and/or installer.Failure to follow the instructions indicated in this guide, which is supplied with the boiler, could cause injuryto persons, animals or damage to property. The manufacturer shall not be held liable for any such injury and/or damage.5 - SAFETY WARNINGSWARNING!The installation, adjustment, and servicing of this appliance must be carried out by a competent person andinstalled in accordance with the current standards and regulations. Failure to correctly install this appliancecould cause injury to persons, animals or damage to property. The manufacturer shall not be held liable forany such injury and/or damage.DANGER!NEVER try to service or repair the appliance yourself.All types of servicing or repairs must be carried out by a professionally qualified person, authorized by UNICAL;UNICAL recommends drawing up a service contract. Bad or irregular servicing could compromise the safeoperation of the appliance, and could cause injury to persons, animals or damage to property for which UNICALshall not be held liable.Modifications to parts connected to the applianceDo not carry out any modifications to the following parts:- the boiler- to the gas, air, water supply pipes and electrical current- to the flue pipe, safety relief valve and its drainage pipe- to the constructive components which influence the appliance’s safe operationSmell of gasIf you smell gas follow these safety indications:• Do not turn on or off electrical switches• Do no smoke• Do not use the telephone• Close the On/Off gas cock• Open all windows and doors where the gas leakage has occurred• Inform the gas society or a specialized companyExplosive and easily inflammable substancesDo not use or leave explosive or easily inflammable material (as for example: petrol, paint, paper) in the roomwhere the appliance has been installed.3
Operating instructionsReset key/error code display”Chimneysweeper” function indicator ledThis key has a dual function:- it will reset correct boiler operation after the cut-off devicehas shutdown the boiler (red “G” led indicator illuminated)MODEWARNING!This operation can be carried outexclusively by personnel from authorizedAfter Sales Service centres. The person incharge of the appliance is NOT authorized to activate thefollowing described function.This “N” indicator led will illuminate, when the“Chimneysweeper” function is activated by a qualifiedprofessional service engineer. This means that the boiler willoperate forcefully at the maximum (or minimum) output so asto permit the adjustment operations and the combustionanalysis.- it will display the boiler’s error code, instead of thetemperature “U”, after the fault indicating led “R” hasilluminated.Central heating mode indicator ledMODEThe led indicator “P” will illuminate when there is a requestfor central heating.Temperature control /error code displayThis displays:- The CH circuit temperature (during central heatingoperation)- The CH return temperature (by pressing simultaneouslythe LIGHT BLUE “I” and BLUE “L” keys)- The set temperature of the CH circuit (by pressing theYELLOW “B” key).Power On indicator ledThe led indicator “Q” will illuminate when the boiler isconnected to the electricity supply6
Operating instructionsFault indicator ledWhen this led is illuminated on the display it indicates thatthe boiler has detected a failure in normal boiler operation oris in lock-out due to a permanent failure.The code which identifies the cause can be viewed in placeof the centigrade temperature scale by pressing the LIGHTBLUE “I” reset key (for the list of error codes refer to paragraph5 – “error codes” in the servicing and installation instructionsmanual).6.2 - CONTROL OF THE OPERATINGPARAMETERSCentral Heating circuit temperatureBy pressing the YELLOW key on the control panel it is possibleto control the set value of the CH circuit temperature (valuebetween 30° and 80°).SETSETBurner On indicator ledWhen the “S” led is illuminated it indicates that the burner isfunctioning correctly, both in central heating request modeand in domestic hot water production modeError codeWhen the fault indicator led “R” is illuminated on the display,by pressing the LIGHT BLUE key on the control panel, it ispossible to control the Error codes (for the list of error codesrefer to paragraph 5 – “error codes” in the servicing andinstallation instructions manual).MODELock-out indicator ledWhen this led (G) is illuminated it indicates that the burner’ssafety cut-off device has shut-down the boiler, due to thefollowing causes:- presence of air in the piping (if it is a new system or aftera long inactivity of the boiler).- no gas supplyIf this is the case, and the burner fails to light, it will benecessary to check that the gas supply cock is in the Onposition.MODEIf the cut-off device operates more than 3times, causing boiler shutdown, do not try toreset the boiler yourself. Contact yournearest After Sales Service Centre.6.3 - CHECK LIST BEFORECOMMISSIONINGBefore commissioning the appliance it is recommended tocheck the following points:- Check that the On-Off gas valve, positioned upstream ofthe boiler, is in the On position.- Check that any On-Off valves fitted on the flow and returnpipes for servicing purposes are in the On position.- Check that any On-Off valves fitted on the cold water inletfor servicing purposes are in the On position.- Check that the boiler is connected to the electrical supply;the indicator led “P” on the control panel must beilluminated.- Check the heating system pressure, indicated by thepressure gauge. For correct operation the pressure shouldbe between 0,8 and 1 bar (with the pump not running).- If the pressure falls below 0,7 bar when the system iscold and the boiler not operating, than restore the correctpressure by operating the filling valve foreseen on thesystem.7
Operating instructions6.4 - BOILER OPERATIONCentral Heating modePress the BLUE “L” key and select the mode: Central Heating(the green indicator led “M” will illuminate).SETSETMODEYou can adjust the central heating temperature by keepingthe YELLOW “B” key pressed down, and simultaneouslypressing the keys “+” to increase the temperature or “-” toreduce it.SET6.6 - ELIMINATING THE FAULTSWhen the “Q” led is illuminated on the control panel displayit indicates that the boiler has detected a failure in normalboiler operation or is in lock-out due to a permanent failure.The code which identifies the cause can be viewed in placeof the centigrade temperature scale by pressing the LIGHTBLUE “H” reset key (for the list of error codes refer toparagraph 5 – “error codes” in the servicing and installationinstructions manual).The person in charge of the appliance can try to reset normalboiler operation only in the following cases:- Burner Off indicator led illuminatedFor all the other error codes, the person incharge of the appliance is NOT authorized toreset the boiler. Your nearest <strong>Unical</strong> authorizedAfters Sales Service Centre should becontacted as soon as possible.SETIf a room thermostat has been installed, checkthat the desired temperature has been set..6.5 - SHUTTING DOWN THE BOILERFor switching the boiler completely Off, switchthe “A” switch in 0 position: the display will be Off.To completely shut down the boiler switch off the mainselectricity supply.Lock-out indicatorled illuminatedDescription:The burner’s lock-out device has intervened due to:- no gas supply- presence of air in the piping (if it is a new system or aftera long inactivity of the boiler).Eliminating the fault:Check that the gas supply cock is in theOn position and press the reset key to restore correctboiler operation.If the cut-off device operates repeatedly (a maximum of 3times), causing boiler shutdown, do not try to relight theboiler yourself. Contact your nearest <strong>Unical</strong> authorizedAfter Sales Service Centre.- no gas supplyIf the boiler will remain shut down for a longer period, turn theOn/Off gas cock into the Off position and, if fitted, turn off thecold water supply valve.WARNING!If the boiler will remain shut downfor a prolonged period, and frost is likely, theentire system should be drained.However, it is possible to avoid this operationby using specific frost protection productssuitable for multi-metal systems.8
7 - USER’S INSTRUCTIONS for E8 HEATING CONTROLLEROperating instructionsWARNING: HERE BELOW YOU CAN FIND INDICATED THE BASIC FUNCTIONS. FOR FURTHER AND MORE DETAILEDINSTRUCTIONS PLEASE REFER TO THE “USER’S INSTRUCTIONS” SUPPLIED TOGETHER WITH THE HEATINGCONTROLLER E8.5064 V1ABCDEFGDisplayPC connection via optical adapterProgramming keyChange LedAutomatic/<strong>Manual</strong> operating switchRotary knob = used to search for value/level or modifyvalueDisplay of the active heating program11222418612A®121231 24AssistenzaData/Ora/FerieVisualizzareUtenteProgr. TempoTec nicoImpiantoAcq ua sanitariaCircuito riscaldamento ICircuito riscaldamento IISolar7.1 - OPERATING MODE SELECTION (withdisplay cover closed)Standby/OFF1 Automatic mode 12 Automatic mode 2Summer modeDay modeNight modeService modeBy turning the “rotary knob (“F”) it is possibleto select the required operating mode7.2 - GENERAL SETTINGSDATETIME SETTINGOpen the E8 heating controller’s display cover.B C D E FG Display of the active heating programH eBUS connectionIDisplay indicating the selected levelL Operating modeM Display of current temperatureN Display of number of active heat generatorsO Freely selectable display (refer to “DISPLAY SEL”parameter)P Status displayQ Current timeQ P O NTurn the rotary knob (F) until the triangle “selected level” (I) ispositioned on DATE/TIME/HOLIDAYAssistenzaData/Ora/FerieVisualizzareUtenteProgr. TempoTecnicoImpiantoAcqua sanitariaCircuito riscaldamento ICircuito riscaldam ento IISolarPress the programming key (C), the TIME—DATE level will bedisplayed.24Press the programming key (C) once again, the red ChangeLed will remain illuminated (D); at this point it is possible toproceed and change the values.186121 2GHILM9
Operating instructionsTurn the rotary knob (F) to change the value.Turn the rotary knob (F) until the HOLIDAY level is displayed.Press the programming key (C) again (the red Change Led(D) will remain illuminated) to save the adjustment and passon to changing the successive value.Press the programming key (C), the red Change Led will beilluminated (D); at this point it is possible to proceed andchange the values.In the TIME-DATE level it is possible to change, following thesteps previously described, these values:minutes>time>year>month>dayTurn the rotary knob (F) to change the value.To return to the superior level DATE/TIME turn the rotary knob(F) until RETURN is viewed on the display, therefore press theprogramming key (C).Press the programming key (C) again (the red Change Led(D) will remain illuminated) to save the adjustment and passon to changing the successive value.HOLIDAY SETTINGOpen the E8 heating controller’s display cover.Turn the rotary knob (F) until the triangle “ selected level “ (I) ispositioned on DATE/TIME/HOLIDAYIn the HOLIDAY level it is possible to change, following thesteps previously described, these values:STARTYEAR>START MONTH>START DAY>STOP YEAR>STOPMONTH>STOP DAYAssistenz aData/Ora/FerieVisualiz zareUtenteProgr. TempoTecnic oImpiantoAcqua sanitariaCircuito riscaldamento ICircuito riscaldamento IISolarTo return to the superior level DATE/TIME turn the rotary knob(F) until RETURN is viewed on the display, then press theprogramming key (C).Press the programming key (C), the TIME-DATE level will bedisplayed.10
Operating instructionsSUMMER TIME.Open the E8 heating controller’s display cover.Turn the rotary knob (F) until the triangle “selected level” (I) ispositioned on DATE/TIME/HOLIDAYIn the SUMMER TIME level it is possible to change, followingthe steps previously described, these values:STARTMONTH>START DAY>STOP MONTH>STOP DAYTo return to the superior level DATE/TIME turn the rotary knob(F) until RETURN is viewed on the display, then press theprogramming key (C).Assistenz aData/Ora/FerieVisualizzareUtenteProgr. TempoTecnic oImpiantoAcqua sanitariaCircuito riscaldamento ICircuito riscaldamento IISolarBy pressing the programming key (C), the TIME-DATE levelwill be displayed.7.3 - USER’s SETTINGSOpen the E8 heating controller’s display cover.Turn the rotary (F) until the triangle “selected level” (I) ispositioned on USER.Turn the rotary knob (F) until the SUMMER TIME level isdisplayed.AssistenzaData/Ora/FerieVisualizzareUtenteProgr. TempoTecnicoImpiantoAcqua sanitariaCircuito riscaldamento ICircuito riscaldamento IISolarPress the programming key (C), the red Change Led will beilluminated (D); at this point it is possible to proceed andchange the values.For several seconds the word USER is viewed on the displaythen the word INSTALLAT will appear.By turning the rotary knob (F) the following levels of the USERarea will be displayed:INSTALLAT>HOT WATER>HEATING CIRCUIT I>HEATINGCIRCUIT II>SOLAR/MFTurn the rotary knob (F) to change the value.INSTALLAT LEVELPress the programming key (C) to pass to the lower level.Press the programming key (C) again (the red Change Led(D) will remain illuminated) to save the adjustment and passon to changing the successive value.By turning the rotary knob (F) it is possible to change thefollowing sub-levels:LANGUAGE>CONTRAST>DISPLAY SEL>RETURN11
Operating instructionsLanguage selectionBy pressing the programming key (C), the red Change Ledwill illuminate (D); at this point it is possible to proceed andchange the language.Press the programming key (C) again to save the adjustment(the red Change Led (D) will turn off).Turn the rotary knob (F) to select the language.Display selectionBy turning the rotary knob (F) it is possible to pass onto thesuccessive parameter DISPLAY SEL.Press the programming key (C) again to save the adjustment(the red Change Led (D) will turn off)By pressing the programming key (C), the red Change Ledwill illuminate (D); at this point it is possible to proceed andselect the supplemental display in standard operation.Contrast selectionBy turning the rotary knob (F) it is possible to pass onto thesuccessive parameter CONTRAST.Turn the rotary knob (F) to select the supplemental display. Itis possible to select the following displays:T OUTSIDE > T—FLOW > T—DHW > T—BOILER > T—ROOM > ——> WEEKDAYBy pressing the programming key (C), the red Change Ledwill illuminate (D); at this point it is possible to adjust thecontrast.Press the programming key (C) again to save the adjustment(the red Change Led (D) will turn off).Turn the rotary knob (F) to adjust the contrast (from -20 to 20).To return to the superior level INSTALLAT. turn the rotary knob(F) until RETURN appears on the display, then press theprogramming key (C).12
Operating instructions"DHW” MENUFrom the <strong>User</strong>’s area, by turning the rotary knob (F), selectthe DHW level on the display.Press the programming key (C) again to save the adjustment(the red Change Led (D) will turn off).AssistenzaData/Ora/FerieVisualizzareUtenteProgr. TempoTecnicoImpiantoAcqua sanitariaCircuito riscaldamento ICircuito riscaldamento IISolarPress the programming key (C) to pass onto the lower level.Adjustment parameter “T—DHW 1”By turning the rotary knob (F) you pass onto the successiveparameter T—DHW 1..°CBy turning the rotary knob (F) it is possible to change thefollowing sub-levels:1X DHW > T—DHW 1 > T—DHW 2 > T-DHW 3 > BOB — VALUE > CIRCL-P-DHW> ANTILEGION >RETURNBy pressing the programming key (C), the red Change Ledwill illuminate (D); at this point it is possible to proceed andchange the T—DHW 1 parameter.°CAdjustment parameter “1X DHW”By pressing the programming key (C), the red Change Ledwill illuminate (D); at this point it is possible to proceed andchange the 1X DHW parameter .This parameter permits the adjustment of the desired hotwater temperature setting.The temperature can be adjustedfrom 10°C to 70°C.60°C = preset factory valueTurn the rotary knob (F) to adjust the desired temperaturevalue.°CThis parameter enables/disenables the charging of aneventual storage tank outside the programmed times.00 = OFF (preset factory value)01 = ONTurn the rotary knob (F) to change the parameter (00 or 01).Press the programming key (C) again to save the adjustment(the red Change Led indicator (D) will turn off).°C13
Operating instructionsAdjustment parameter “BOB—VALUE”By turning the rotary knob (F) you pass onto the successiveparameter “BOB—VALUE”.By pressing the programming key (C), the red Change Ledwill illuminate (D); at this point it is possible to proceed andchange the CIRCL-P parameter.°CBy pressing the programming key (C), the red Change Ledwill illuminate (D); at this point it is possible to proceed andchange the BOB—VALUE parameter.This parameter enables/disenables the running of the DHWcirculation pump.00 = OFF (preset factory value)01 = ON°CThis parameter activates the energy saving function for solaror solid fuel integrations.The temperature can be adjustedfrom 0°K to 25°K0°C = preset factory settingTurn the rotary knob (F) to change the temperature value.Press the programming key (C) again to save the adjustment(the red Change Led (D) will turn off).°CPress the programming key (C) again to save the adjustment(the red Change Led (D) will turn off).Adjustment parameter “ANTILEGION”By turning the rotary knob (F) you pass onto the successiveparameter ANTILEGION.°CAdjustment parameter “CIRCL-P-DHW”By turning the rotary knob (F) you pass onto the successiveparameter CIRCL-P-DHW.By pressing the programming key (C), the red Change Ledwill illuminate (D); at this point it is possible to proceed andchange the ANTILEGION parameter.This parameter enables/disenables the antilegion function.00 = OFF (preset factory value)01 = ON14
Operating instructionsTurn the rotary knob (F) to change the value.Press the programming key (C) again to save the adjustment(the red Change Led (D) will turn off).To return to the superior level DHW, turn the rotary knob (F)until RETURN appears on the display, then press theprogramming key (C).15
AG S.P.A.46033 casteldario - mantova - italia - tel. 0376/57001 (r.a.) - fax 0376/660556www.unical.ag - info@unical-ag.comThe <strong>Unical</strong> declines every responsibility for the possible inaccuracies if owed to errors of transcript or press. Also reservesthe right to bring those changes that it will hold necessary to it own products or profits, without jeopardizing its essentialcharacteristics.