Camera Installation Manual Ver 1.0 - Platinum CCTV Downloads
Camera Installation Manual Ver 1.0 - Platinum CCTV Downloads
Camera Installation Manual Ver 1.0 - Platinum CCTV Downloads

You also want an ePaper? Increase the reach of your titles
YUMPU automatically turns print PDFs into web optimized ePapers that Google loves.
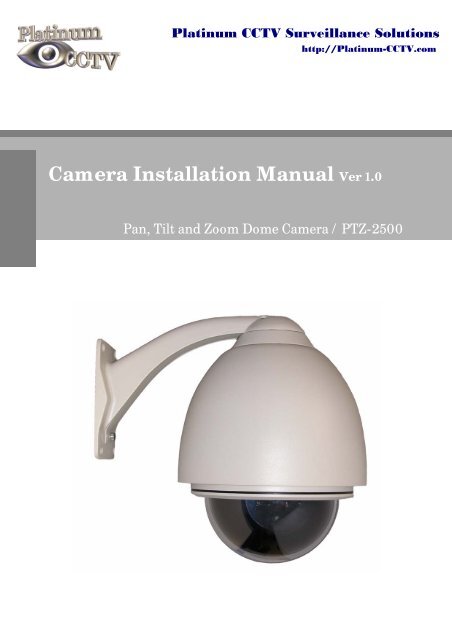
<strong>Camera</strong> <strong>Installation</strong> <strong>Manual</strong> <strong>Ver</strong> <strong>1.0</strong>Pan, Tilt and Zoom Dome <strong>Camera</strong> / PTZ-2500
○1 IntroductionFeatures 3Components 4System Configuration 5○2 <strong>Installation</strong>Wall Mount 6Ceiling Mount 7Final Assembly 8○3 <strong>Camera</strong> Addressing<strong>Camera</strong> Address Setting 9Protocol and Baud Rate Settings 11○4 Advanced FeaturesAuto Scan 12<strong>Camera</strong> Power 12Back Light Compensation 12ICR 12Digital Zoom 13Focus Mode 13Iris Mode 13White Balance Mode 13Auto Cruise 13○5 On Screen DisplayMain Menu 14Focus Set 15Auto White Balance 15Auto Exposure 16Special Functions 16Motion Detection 17Function On Screen Display 17○6 Parts Description and Function 18○7 Product Specifications 19Pan, Tilt and Zoom Dome <strong>Camera</strong> / PTZ-25002
Introduction1Features <strong>Camera</strong> Specification• Sony Module 480 Lines• .2 Lux (Color Operation)• 18X Optical Zoom• 10X Digital Zoom• Total Zoom 180X• 24v AC Complete View• 360 Degree Pan, 90 Degree Tilt. For No Blind Spots Housing• Indoor / Outdoor use, Weather Proof Housing.• Multiple Mounting Configurations.• Operating Temperatures: 0 Deg. C ~ 40 Deg. C PTZ Control• RS-485 Communication, MAX 256 Multi-drop• <strong>Ver</strong>satile Pelco-D and Pelco P Protocol• Variable Pan and Tilt Speed• 64 Programmable Presets• OSD Setup• Up to 6 Programmable Cruise SequencesPan, Tilt and Zoom Dome <strong>Camera</strong> / PTZ-25003
Introduction1Components Parts InformationItem Part No. DescriptionDome <strong>Camera</strong> and Housing PTZ-2500 NTSC Dome <strong>Camera</strong>, Weather Proof Housing, Including TransparentDomeWall Mount BracketBracket for mounting PTZ to WallCeiling Mount BracketBracket for mounting PTZ to CeilingMounting Screws & WrenchAllen Screws for mounting PTZ to MountPower Supply24v AC Power Supply<strong>Manual</strong><strong>Manual</strong> for PTZ-2500-22 Default ComponentsDome <strong>Camera</strong> and HousingWall Mount BracketCeiling Mounting BracketAccessories<strong>Manual</strong>PTZ-2500 <strong>Manual</strong>Screws, Wrench and Power SupplyPan, Tilt and Zoom Dome <strong>Camera</strong> / PTZ-25004
INSTALLATION<strong>Installation</strong>2System <strong>Installation</strong> Wall Mount <strong>Installation</strong> using Outdoor Housing Assembly1) Attach the Wall Mount Bracket to the wall.Make sure the wall can support the weight andvibration of the camera and housing.2) Remove thumb screw holding access cover inplace on Mounting Arm.3) Route the wiring through the inside of the armand out the access hole.4) Assemble and screw the Outdoor HousingAssembly on the Mount Bracket while routingthe wiring from the camera through the neck ofthe bracket and out the access hole.Continue to page 8Pan, Tilt and Zoom Dome <strong>Camera</strong> / PTZ-25006
INSTALLATION<strong>Installation</strong>2 Ceiling Mount <strong>Installation</strong> using Outdoor Housing Assembly1) Mount the Top Ceiling Mount Bracket to theCeiling. Make sure the Ceiling can support theweight and vibration of the camera andhousing.2) Route the wiring through the bottom CeilingMount Bracket and Extension.3) Attach assembly to the PTZ camera using theincluded Allen Screws. Tighten setscrews.4) Align the PTZ Assembly into the top of theceiling mount. Turn clockwise to threadextension into mount. Tighten setscrews.Continue to Next PagePan, Tilt and Zoom Dome <strong>Camera</strong> / PTZ-25007
<strong>Installation</strong>25) Unscrew Polycarbonate dome cover counterclockwise.6) Remove BLACK camera cover inside ofhousing.7) Set DIP switches according to Protocol andBaud rate desired. (See page 9 for details)8) Replace BLACK camera cover andPolycarbonate dome cover.Pan, Tilt and Zoom Dome <strong>Camera</strong> / PTZ-25008
<strong>Camera</strong> Addressing3<strong>Camera</strong> Addressing RS-485 communicationRS-485 communication is used to control the camera. Protocol, Baud rate and <strong>Camera</strong> Address areset using 2 Dip Switch sets under the BLACK camera cover inside the PTZ housing. Each cameraconnected to the PTZ controller must have a unique address.• Specification• Number of wire• ProtocolStandard RS-485 with MAX. 256 <strong>Camera</strong> Control2 Wire (D+, D-)Pelco-D, Pelco-P, A01, B01, Santachi, Longcomity and HUNDA600 SW 1 : <strong>Camera</strong> Address SettingsON1 2 3 4 5 6 7 8• Factory Default ID is 1• When a dip switch is ON, its bit logic is 1• Dip Switch 9 and 10 are always set to OFFSW1SW1:Address Setting (1~255)NO.Value.1 2 3 4 5 6 7 81 2 4 8 16 32 64 128DipswitchSW2DipswitchSW1Pan, Tilt and Zoom Dome <strong>Camera</strong> / PTZ-25009
<strong>Camera</strong> Addressing3 SW 1 : <strong>Camera</strong> Address Settings (continued)When using more than 1 RS-485 device each unit must be given a unique address. Refer to thechart on the previous page for the value of each dip switch. For each dip switch that is ON thevalue/values are added together, the total is the address of that unit.For Example:For an address of 1:Dip switch #1 (value = 1) will be ON all others OFFFor an address of 5:Dip switch #1 (value = 1) & #3 (value = 4) will be ON all others OFFFor an address of 157:Dip Switch #1 (value = 1), #3 (value = 4), #4 (value = 8), #5 (value = 16), #8 (value =128) will be ON all others OFFPan, Tilt and Zoom Dome <strong>Camera</strong> / PTZ-250010
<strong>Camera</strong> Addressing3 SW 2 : <strong>Camera</strong> Protocol and Baud Rate SettingsThis camera supports multiple RS-485 Protocols and Baud Rates. The Default is Pelco-D 2400 baud.The Baud rate is set separately from the Protocol on the SW2 Dip switch located under the BLACKcamera cover. The table below contains a list of protocols supported by the camera and the default baudrate for the protocol.Default BaudSupported Selection Of ProtocolsRatesProtocol1 st 2 nd 3 rd 4 th 5 th 6 thPelco D /2400 ON ON OFF OFF OFF OFFPelco P /4800 OFF OFF ON OFF ON OFFPelco P /9600 OFF OFF ON OFF OFF ONA01 OFF OFF OFF OFF ON OFFB01 ON OFF OFF OFF OFF ONSantachi OFF ON OFF OFF OFF ONLongcomity OFF ON ON OFF OFF ONHunda600 ON ON ON OFF OFF ONDip Switch settings for configuring the camera to use Pelco D Protocol at 2400 Baud:Below is a table showing the proper settings of the 5 th and 6 th dip switch on SW2 for settingpreferred baud rate.Baud RateSelection Of Protocols Baud Rates1 st 2 nd 3 rd 4 th 5 th 6 th2400 OFF OFF4800 ON OFF9600 OFF ON19200 ON ONPan, Tilt and Zoom Dome <strong>Camera</strong> / PTZ-250011
Advanced Functions4Advanced FunctionsAll of the Advanced Functions of this camera are controlled by calling and setting specific presets toenable and disable the functions. This includes the OSD (On Screen Display) Setup. Your PTZ controllermust be able to call and set presets 51 through 63 to be able to access the Advanced Functions of thiscamera. Auto Scan:This camera is equipped with an AUTO SCAN function that allows you to pan between 2programmable points. You are able to select between 3 different pan speeds while in AUTO SCAN mode.To use the AUTO SCAN you must first program the START POINT and END POINT. Once the STARTPOINT and END POINT are programmed you can activate the AUTO SCAN feature while selecting theSCAN SPEED.FunctionAction on ControllerSet START POINT Set preset 52Set END POINT Set preset 53Enable AUTO SCAN (Low Speed) Call preset 51Enable AUTO SCAN (Medium Speed) Call preset 52Enable AUTO SCAN (High Speed) Call preset 53 <strong>Camera</strong> Power:The CAMERA POWER feature allows you to power the camera ON or OFF remotely.FunctionAction on Controller<strong>Camera</strong> POWER ON Call preset 54<strong>Camera</strong> POWER OFF Set preset 54 Back Light Compensation:Back Light Compensation allows the camera to compensate for bright lights in the picture. You canset the BLC ON or OFF manually by using the method below or by setting the BLC to AUTO in the OSD(On Screen Display).FunctionAction on ControllerBLC ON Call preset 55BLC OFF Set preset 55Pan, Tilt and Zoom Dome <strong>Camera</strong> / PTZ-250012
Advanced Functions (continued) Focus Mode:The Focus Mode can be set using this function or in the OSD.FunctionAction on ControllerFOCUS MODE – AUTO Call preset 59FOCUS MODE - MANUAL Set preset 59 Iris Mode:The Iris Mode can be set using this function or in the OSD.FunctionAction on ControllerIRIS MODE – AUTO Call preset 60IRIS MODE - MANUAL Set preset 60 White Balance Mode:The White Balance Mode can be set using this function or in the OSD.FunctionAction on ControllerWHITE BALANCE MODE - AUTO Call preset 61WHITE BALANCE MODE – MANUAL Set preset 61WHITE BALANCE MODE – INDOOR Call preset 62WHITE BALANCE MODE – OUTDOOR Set preset 62WHITE BALANCE MODE – ATW Call preset 63WHITE BALANCE MODE – ONE PUSH WHITE BALANCE Set preset 63 Auto Cruise:Auto Cruise allows you to scan from a selection of presets. Program the presets into the camera thatyou would like to scan between. Presets must be in the sequence you would like them to scan startingwith preset 1. To activate the Auto Cruise SET preset 51FunctionAction on ControllerACTIVATE AUTO CRUISE Set preset 51Pan, Tilt and Zoom Dome <strong>Camera</strong> / PTZ-250013
On Screen Display5On Screen Display (continued)OSD Main Menu Page 2Menu OptionZOOM STARTZOOM STOPBRIGHTNESSSHARPNESSFOCUSINIT SETDescriptionLimit Zoom Start PositionLimit Zoom Stop PositionAdjust BrightnessAdjust SharpnessAuto/PushReset to Factory DefaultsPan, Tilt and Zoom Dome <strong>Camera</strong> / PTZ-250015
PART Parts DESCRIPTION Description AND and FUNCTION Function6 Wiring:24v ACBNC Video OutA (+) InputRS-485 InputB (-) Input 24v AC Terminal• Screw Terminal Power connector:24v AC wired directly to this plug. BNC Connector for Video Out• Video out BNC connectorConnect to units such as monitor, VCR and etc. RS-485 Communication Terminal• RS-485 Communication Screw TerminalConnectorABSignal+ Input- InputPan, Tilt and Zoom Dome <strong>Camera</strong> / PTZ-250016
Product Specification7PTZ-2500 SpecificationsModelPTZ-2500Video FormatNTSC<strong>Camera</strong>Device1/4'' Color CCDPixel410K pixels752(H) × 582(V)H. Resolution More then 480 TV LinesMin. Illuminance0.2 LuxFocusAuto/<strong>Manual</strong>IrisAuto/<strong>Manual</strong>LensZoom18x Optical Zoom, 10x Digital Zoom, Total 180x ZoomAperture F1.6Focal Lengthf=4 ~ 88mmPan/TiltAngle Pan 360° (Endless) / Tilt : 0~90°Pan SpeedVariable 0.2° to 300°/sec (Zoom Proportional)Tilt SpeedVariable 0.2° to 300°/sec (Zoom Proportional)Presets128 Programmable PresetsAuto Cruise1 Programmable Cruise SequenceAuto PanProgrammable Start, Stop and SpeedGeneralControlRS-485CommunicationPelco-D, Pelco-P, A01, B01, Santachi, Longcomity,Hunda600Power AC 24V / 1.25ADimension186∅ × 135(H) mmWeightApprox. 3.5KgOperating Temp. 0°C ~ 40°C* Specification & design are subject to change without noticeCeiling MountDimensionsWall MountDimensionsPan, Tilt and Zoom Dome <strong>Camera</strong> / PTZ-250017
MemoMEMOPan, Tilt and Zoom Dome <strong>Camera</strong> / PTZ-250018