Power 46 Brushless Outrunner Instructions - Horizon Hobby
Power 46 Brushless Outrunner Instructions - Horizon Hobby
Power 46 Brushless Outrunner Instructions - Horizon Hobby
You also want an ePaper? Increase the reach of your titles
YUMPU automatically turns print PDFs into web optimized ePapers that Google loves.
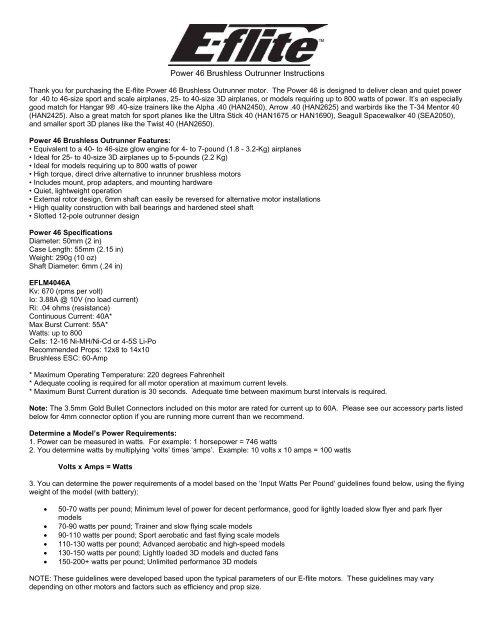
<strong>Power</strong> <strong>46</strong> <strong>Brushless</strong> <strong>Outrunner</strong> <strong>Instructions</strong>Thank you for purchasing the E-flite <strong>Power</strong> <strong>46</strong> <strong>Brushless</strong> <strong>Outrunner</strong> motor. The <strong>Power</strong> <strong>46</strong> is designed to deliver clean and quiet powerfor .40 to <strong>46</strong>-size sport and scale airplanes, 25- to 40-size 3D airplanes, or models requiring up to 800 watts of power. It’s an especiallygood match for Hangar 9® .40-size trainers like the Alpha .40 (HAN2450), Arrow .40 (HAN2625) and warbirds like the T-34 Mentor 40(HAN2425). Also a great match for sport planes like the Ultra Stick 40 (HAN1675 or HAN1690), Seagull Spacewalker 40 (SEA2050),and smaller sport 3D planes like the Twist 40 (HAN2650).<strong>Power</strong> <strong>46</strong> <strong>Brushless</strong> <strong>Outrunner</strong> Features:• Equivalent to a 40- to <strong>46</strong>-size glow engine for 4- to 7-pound (1.8 - 3.2-Kg) airplanes• Ideal for 25- to 40-size 3D airplanes up to 5-pounds (2.2 Kg)• Ideal for models requiring up to 800 watts of power• High torque, direct drive alternative to inrunner brushless motors• Includes mount, prop adapters, and mounting hardware• Quiet, lightweight operation• External rotor design, 6mm shaft can easily be reversed for alternative motor installations• High quality construction with ball bearings and hardened steel shaft• Slotted 12-pole outrunner design<strong>Power</strong> <strong>46</strong> SpecificationsDiameter: 50mm (2 in)Case Length: 55mm (2.15 in)Weight: 290g (10 oz)Shaft Diameter: 6mm (.24 in)EFLM40<strong>46</strong>AKv: 670 (rpms per volt)Io: 3.88A @ 10V (no load current)Ri: .04 ohms (resistance)Continuous Current: 40A*Max Burst Current: 55A*Watts: up to 800Cells: 12-16 Ni-MH/Ni-Cd or 4-5S Li-PoRecommended Props: 12x8 to 14x10<strong>Brushless</strong> ESC: 60-Amp* Maximum Operating Temperature: 220 degrees Fahrenheit* Adequate cooling is required for all motor operation at maximum current levels.* Maximum Burst Current duration is 30 seconds. Adequate time between maximum burst intervals is required.Note: The 3.5mm Gold Bullet Connectors included on this motor are rated for current up to 60A. Please see our accessory parts listedbelow for 4mm connector option if you are running more current than we recommend.Determine a Model’s <strong>Power</strong> Requirements:1. <strong>Power</strong> can be measured in watts. For example: 1 horsepower = 7<strong>46</strong> watts2. You determine watts by multiplying ‘volts’ times ‘amps’. Example: 10 volts x 10 amps = 100 wattsVolts x Amps = Watts3. You can determine the power requirements of a model based on the ‘Input Watts Per Pound’ guidelines found below, using the flyingweight of the model (with battery):• 50-70 watts per pound; Minimum level of power for decent performance, good for lightly loaded slow flyer and park flyermodels• 70-90 watts per pound; Trainer and slow flying scale models• 90-110 watts per pound; Sport aerobatic and fast flying scale models• 110-130 watts per pound; Advanced aerobatic and high-speed models• 130-150 watts per pound; Lightly loaded 3D models and ducted fans• 150-200+ watts per pound; Unlimited performance 3D modelsNOTE: These guidelines were developed based upon the typical parameters of our E-flite motors. These guidelines may varydepending on other motors and factors such as efficiency and prop size.
Option 2:Motor: <strong>Power</strong> <strong>46</strong>ESC: Castle Creations Phoenix 60 (Standard settings with 12V Soft Li-Po cut off and no brake)Prop: APC 13x8EBattery: Thunder <strong>Power</strong> PRO LITE 4200mAh 4S2P (THP42002S2PPL x2 in series)Flying Weight w/Battery: 5.4 lbsAmps Volts Watts Input Watts/Pound RPM47.4 14.1 670 124 8220Expect strong performance with very short take off rolls and a great balance of thrust and top speed. Average duration is approximately8-15 minutes depending on throttle management.Option 3:Motor: <strong>Power</strong> <strong>46</strong>ESC: Castle Creations Phoenix 60 (Standard settings with 12V Soft cut off and no brake)Prop: APC 13x8EBattery: Sanyo RC-3000HV 14-Cells (7-Cell packs x2 in series)Flying Weight w/Battery: 6.7 lbsAmps Volts Watts Input Watts/Pound RPM44.0 13.4 590 89 7950Expect good performance with a good balance of thrust and top speed. Average duration is approximately 5-7 minutes depending onthrottle management.Accessories:See our web site at www.E-fliteRC.com or www.horizonhobby.com for our complete line of brushless motors. We have posted aspecification comparison sheet on our web site so you can compare the different motors we offer.EFLA110 <strong>Power</strong> Meter (measures power output in amps, volts, watts, and capacity)EFLA241 Gold Bullet Connector Set, 3.5mm (3)EFLA249 Gold Bullet Connector Set, 4mm (3)EFLM1926 Prop Adapter w/ Collet, 6mmReversing the Shaft:This <strong>Outrunner</strong> motor has a shaft, which exits through the rotating part of the motor. If you want to reverse the shaft to exit through thefixed part of the motor, follow these instructions carefully for changing the shaft installation.1. Loosen the set screw on the shaft collar and remove the collar from its location against the bearing.2. Remove the small black donut washer that rests against the bearing.3. Loosen the two set screws in the rotating part of the motor.4. Slide the shaft through the motor. It may be necessary to use a small hammer to lightly tap the shaft. It is very important thatyou do not bend the shaft in this process so use extreme caution to assure this does not happen.5. Re-install the donut washer against the bearing.6. Re-install the shaft collar back against the washer and bearing.7. Retighten all setscrews making sure you line up with the flat spot on the shaft.Replacement shafts are available separately. Order EFLM40<strong>46</strong>1 for a <strong>Power</strong> <strong>46</strong> BL <strong>Outrunner</strong> shaft.Operating <strong>Instructions</strong>:1. This brushless motor requires the use of a sensorless brushless speed control. Failure to use the correct speed control mayresult in damage to the motor and/or speed control.2. When mounting the motor, be sure the correct length of screws are used so damage to the inside of the motor will not occur.We suggest you use the mounting hardware included with your motor. The use of long screws will damage the motor.3. You may connect the three motor wires directly to the controller with solder or use connectors such as gold plated brushlessbullet connectors (EFLA241), which will also need to be soldered properly to your wires. The three motor wires can beconnected in any order to the three output wires or output port on a sensorless brushless speed control. Be sure to use heatshrink tubing to properly insulate the wires so the wires will not short. Shorting may damage the motor and speed control.4. If you add connectors and you no longer wish to use them, never cut the motor wires. Remove them by properly desolderingthem. Shortening the motor wires is considered an improper modification of the motor and may cause the motor to fail.5. When you connect the motor to the esc, check the rotation direction of the motor. If you find the rotation is reversed,switching any two motor wires will reverse the direction so the motor rotates properly.6. Proper cooling of the motor is very important during operation. New technology has brought much higher capacity batterieswith higher discharge rates, which can cause extreme motor temperatures during operation. It is the responsibility of the userto monitor the temperature and prevent overheating. Overheating of the motor is not covered under any warranty.7. You can install the propeller on the motor shaft after you have confirmed proper rotation direction. Also consult the instructionincluded with your sensorless electronic speed control for proper adjustments and timing.8. Once the battery is connected to the motor, please use extreme caution. Stay clear of the rotating propeller since spinningpropellers are very dangerous as the motors produce high amounts of torque.9. Never disassemble the motor. This will void any warranty.
Installation:NOTE: Photo shows typical installation of motor and x-mount directly to the outside of the firewall. There are other options availableincluding mounting the motor inside the fuselage (requires reversing the shaft direction) or extending the motor further forward usingaftermarket mount extensions when using cowls.1. You can first trial fit the aluminum x-mount against the front of the firewall and use a Sharpie® to mark the locations of fourholes and drill appropriate size hole to fit the blind nuts provided. Always be sure to maintain the proper thrust line andaccount for adequate prop/spinner clearance.2. Attach aluminum x-mount to the outrunner motor using the four flat head (countersunk) screws provided with the motor.3. Install four blind nuts on the inside of the firewall.4. Attached the aluminum x-mount and motor to the outside of the firewall using the four 3mm socket head cap screws andwashers.Warranty and Repair Policy:The <strong>Power</strong> <strong>46</strong> <strong>Brushless</strong> <strong>Outrunner</strong> Motor is guaranteed to be free from original manufacturing defects in material and workmanship atthe date of purchase. No term warranty applies to this product. This warranty does not cover any component parts damaged by use,misuse, unauthorized service or any form of modification. <strong>Horizon</strong> <strong>Hobby</strong> assumes no liability for damages caused during theinstallation of this motor. At no time will <strong>Horizon</strong> <strong>Hobby</strong> be responsible for collateral or incidental damages caused during the operationof this motor. We reserve the right to change or modify this warranty at any time.To speak to a service technician, call (877) 504-0233.Warranty Repairs:To receive warranty service, you must include your original sales receipt verifying the proof-of-purchase date. Providing that warrantyconditions have been met, your motor will be repaired free of charge.Non-Warranty Repairs:Should your repair cost exceed 50% of the retail purchase cost, you will be provided with an estimate advising you of your options. Anyreturn freight for non-warranty repairs will be billed to the customer. For non-warranty repairs, please advise us of the credit card thatyou prefer to use. <strong>Horizon</strong> Service Center accepts Visa or MasterCard. Include your card number and the expiration date. <strong>Horizon</strong>Service Center also accepts money orders.If your motor needs to be repaired, ship the motor in its original box (freight prepaid) to:<strong>Horizon</strong> Service CenterAttn: E-flite Service Center4105 Fieldstone Rd.Champaign, IL 61822Include your complete name and address information inside the carton, as well as clearly writing it on the outer label/return addressarea. Include a brief summary of the difficulty. Date your correspondence and be sure that your name and address appear on thisenclosure. Also, please include a phone number where you can be reached during the business day.E-flite is an exclusive brand of<strong>Horizon</strong> <strong>Hobby</strong>, Inc.4105 Fieldstone RoadChampaign, IL 61822(877) 504-0233www.E-fliteRC.com / www.horizonhobby.com© 2005 <strong>Horizon</strong> <strong>Hobby</strong>, Inc


