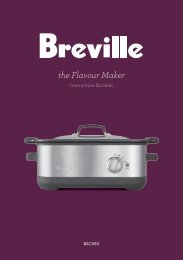
the Custom Loaf - Breville
the Custom Loaf - Breville
the Custom Loaf - Breville

Create successful ePaper yourself
Turn your PDF publications into a flip-book with our unique Google optimized e-Paper software.
34<br />
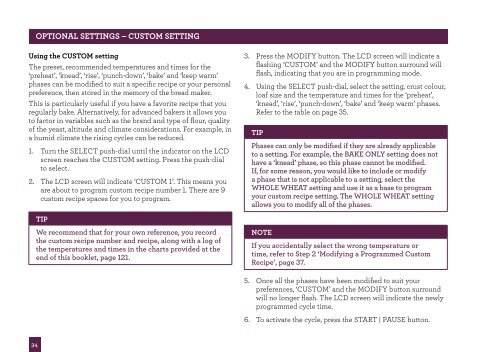
OPTIONAL SETTINGS – CUSTOM SETTING<br />
Using <strong>the</strong> CUSTOM setting<br />
The preset, recommended temperatures and times for <strong>the</strong><br />
‘preheat’, ‘knead’, ‘rise’, ‘punch-down’, ‘bake’ and ‘keep warm’<br />
phases can be modified to suit a specific recipe or your personal<br />
preference, <strong>the</strong>n stored in <strong>the</strong> memory of <strong>the</strong> bread maker.<br />
This is particularly useful if you have a favorite recipe that you<br />
regularly bake. Alternatively, for advanced bakers it allows you<br />
to factor in variables such as <strong>the</strong> brand and type of flour, quality<br />
of <strong>the</strong> yeast, altitude and climate considerations. For example, in<br />
a humid climate <strong>the</strong> rising cycles can be reduced.<br />
1. Turn <strong>the</strong> SELECT push-dial until <strong>the</strong> indicator on <strong>the</strong> LCD<br />
screen reaches <strong>the</strong> CUSTOM setting. Press <strong>the</strong> push-dial<br />
to select.<br />
2. The LCD screen will indicate ‘CUSTOM 1’. This means you<br />
are about to program custom recipe number 1. There are 9<br />
custom recipe spaces for you to program.<br />
TIP<br />
We recommend that for your own reference, you record<br />
<strong>the</strong> custom recipe number and recipe, along with a log of<br />
<strong>the</strong> temperatures and times in <strong>the</strong> charts provided at <strong>the</strong><br />
end of this booklet, page 121.<br />
3. Press <strong>the</strong> MODIFY button. The LCD screen will indicate a<br />
flashing ‘CUSTOM’ and <strong>the</strong> MODIFY button surround will<br />
flash, indicating that you are in programming mode.<br />
4. Using <strong>the</strong> SELECT push-dial, select <strong>the</strong> setting, crust colour,<br />
loaf size and <strong>the</strong> temperature and times for <strong>the</strong> ‘preheat’,<br />
‘knead’, ‘rise’, ‘punch-down’, ‘bake’ and ‘keep warm’ phases.<br />
Refer to <strong>the</strong> table on page 35.<br />
TIP<br />
Phases can only be modified if <strong>the</strong>y are already applicable<br />
to a setting. For example, <strong>the</strong> BAKE ONLY setting does not<br />
have a ‘knead’ phase, so this phase cannot be modified.<br />
If, for some reason, you would like to include or modify<br />
a phase that is not applicable to a setting, select <strong>the</strong><br />
WHOLE WHEAT setting and use it as a base to program<br />
your custom recipe setting. The WHOLE WHEAT setting<br />
allows you to modify all of <strong>the</strong> phases.<br />
NOTE<br />
If you accidentally select <strong>the</strong> wrong temperature or<br />
time, refer to Step 2 ‘Modifying a Programmed <strong>Custom</strong><br />
Recipe’, page 37.<br />
5. Once all <strong>the</strong> phases have been modified to suit your<br />
preferences, ‘CUSTOM’ and <strong>the</strong> MODIFY button surround<br />
will no longer flash. The LCD screen will indicate <strong>the</strong> newly<br />
programmed cycle time.<br />
6. To activate <strong>the</strong> cycle, press <strong>the</strong> START | PAUSE button.