Trio Tuner Program Manager Software Instructions Ver L1 - Sonance
Trio Tuner Program Manager Software Instructions Ver L1 - Sonance
Trio Tuner Program Manager Software Instructions Ver L1 - Sonance
- No tags were found...

Create successful ePaper yourself
Turn your PDF publications into a flip-book with our unique Google optimized e-Paper software.
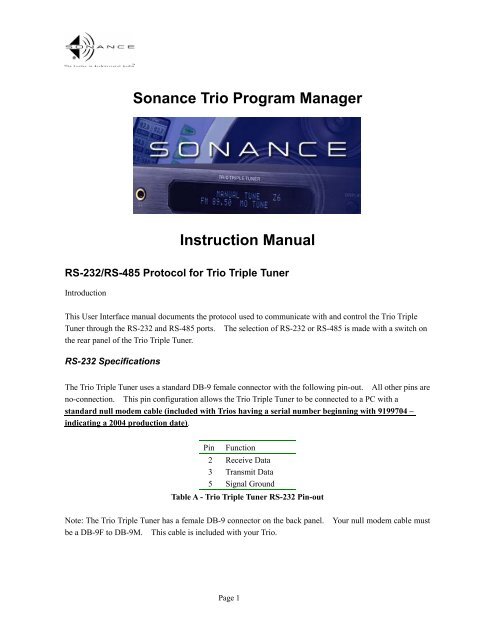
<strong>Sonance</strong> <strong>Trio</strong> <strong>Program</strong> <strong>Manager</strong>Instruction ManualRS-232/RS-485 Protocol for <strong>Trio</strong> Triple <strong>Tuner</strong>IntroductionThis User Interface manual documents the protocol used to communicate with and control the <strong>Trio</strong> Triple<strong>Tuner</strong> through the RS-232 and RS-485 ports. The selection of RS-232 or RS-485 is made with a switch onthe rear panel of the <strong>Trio</strong> Triple <strong>Tuner</strong>.RS-232 SpecificationsThe <strong>Trio</strong> Triple <strong>Tuner</strong> uses a standard DB-9 female connector with the following pin-out. All other pins areno-connection. This pin configuration allows the <strong>Trio</strong> Triple <strong>Tuner</strong> to be connected to a PC with astandard null modem cable (included with <strong>Trio</strong>s having a serial number beginning with 9199704 –indicating a 2004 production date).Pin Function2 Receive Data3 Transmit Data5 Signal GroundTable A - <strong>Trio</strong> Triple <strong>Tuner</strong> RS-232 Pin-outNote: The <strong>Trio</strong> Triple <strong>Tuner</strong> has a female DB-9 connector on the back panel. Your null modem cable mustbe a DB-9F to DB-9M. This cable is included with your <strong>Trio</strong>.Page 1
RS-485 SpecificationsThe <strong>Trio</strong> Triple <strong>Tuner</strong> uses a standard RJ-45 female connector with the following pin-out. All other pinsare no-connection. The command protocol for RS-232 and RS-485 are the same.PinFunction1 RS-485 +2 RS-485 -7 Signal Ground (tied to pin 8)8 Signal Ground (tied to pin 7)Table B - <strong>Trio</strong> Triple <strong>Tuner</strong> RS-485 Pin-out<strong>Trio</strong> <strong>Program</strong> <strong>Manager</strong> <strong>Software</strong> InstallationThe <strong>Trio</strong> <strong>Program</strong> <strong>Manager</strong> <strong>Software</strong> CD is included in the box with your <strong>Trio</strong> Triple <strong>Tuner</strong>. You can alsodownload the <strong>Trio</strong> <strong>Program</strong> <strong>Manager</strong> software from the electronics section of the <strong>Sonance</strong> website:www.sonance.comWhen you download the file, you will receive a zip file containing all the files needed to install and run the<strong>Trio</strong> <strong>Program</strong> <strong>Manager</strong> on Windows 98, Windows 2000, or Windows XP Operating Systems.To install the software from the CD, insert the CD into your computer and follow the on-screen instructions.NOTE: To properly install the zipped software, you must follow these steps:1) Create a folder someplace on your computer (desktop is acceptable) – folder title is not important.2) Extract all the files from the downloaded zip file into that new folder.3) Run the Setup executable (setup.exe) from within that folder. Follow the instructions on the screen.The <strong>Trio</strong> <strong>Program</strong> <strong>Manager</strong> will be added to your <strong>Program</strong>s group under the Start Button.Page 2
3. The <strong>Trio</strong> <strong>Program</strong> <strong>Manager</strong> will load default station presets from the default file (the default files areempty until you change them). To open previously saved information, go to that menu item underFile(F)/Open.Note: Each file contains information for only 1 zone. You can open the same file into multiplezones if your installation has the same presets in multiple zones.4. The Save function under File(F) saves only the zones that have preset information changed duringthis use of the <strong>Trio</strong> <strong>Program</strong> <strong>Manager</strong>. (See Figure 3.) Any zones with new information will beselectable for saving. Select each zone you would like to save to the default files. In this example,Zones 1 through 3 were modified, but only zone 1 has been selected to be saved.Note: The default zone setup files are named zonex.txt, where x is zone 1 through 6.Note: We recommend you use the Save As function for your installations.Figure 3 – <strong>Trio</strong> <strong>Program</strong> <strong>Manager</strong> Zone Save Screen5. The Save As function is the recommended way to save your customer setup files. When you usethe Save As function, only the presets associated with the current zone are saved to the file. (Thecurrent zone is the one shown in the top right corner of the Preset Setup section, see Figure 4. Thecurrent zone in Figure 4 is zone 3.)Page 4
Figure 4 – <strong>Trio</strong> <strong>Program</strong> <strong>Manager</strong> Preset Information ExampleIf all zones in your installation use the same preset data, you will need to save only one zone’sinformation. (See Figure 5 for an example of saving an installation (the Jones’ house) where allzones use the same preset information.)Figure 5 – <strong>Trio</strong> <strong>Program</strong> <strong>Manager</strong> Save As Example(All zones use the same presets in this example)If the zones in your installation use different preset information, we recommend that you go to eachzone, select Save As, and indicate which zone is being saved in the filename. (See Figure 6 for anPage 5
example of saving where the Jones’ house installation uses different presets in different zones.)Figure 6 – <strong>Trio</strong> <strong>Program</strong> <strong>Manager</strong> Save As Example(All zones use different presets in this example)6. When you want to open a file into a specific zone, you must select the proper zone in the zonepull-down window of the preset setup section and then select the specific file to open.7. If your installation uses the same presets in multiple zones, you can copy from one zone to the nextby using the Copy Current Zone To command under the File(F).8. The File(F) / Print option allows you to print the default zone information. Figure 7 shows theinformation contained in a standard zone preset file.Figure 7 – <strong>Trio</strong> <strong>Program</strong> Manger Preset Text File ExampleNote: If you have saved your information under a different file name, it is recommended thatyou open the zone preset information in Notepad or another text editor and print the presetinformation from that program.Page 6
<strong>Trio</strong> <strong>Program</strong> <strong>Manager</strong> OperationFigures 1 and 4 show the standard interface screen of the <strong>Trio</strong> <strong>Program</strong> <strong>Manager</strong>.tuner directly from this window and may also upload any desired station presets.the different functions available through the software.A user can control theBelow is a description ofPreset Setup Section:Zone selection:Select the zone to be controlled or loaded with station presets.Zones 1 through 6 are available.Adding presets:The preset display window shows the presets currently defined for either the default setting file or thecurrently opened file. It shows preset number, frequency, and preset name (if one has been defined).To add a preset, select the preset number (if you use 0 or leave this block blank, the <strong>Trio</strong> <strong>Program</strong> <strong>Manager</strong>will use the next lowest available preset), the frequency, and a name (if you wish to define a name). Thename can be up to 8 characters long. Press the Add button to save this preset in the preset window.Note: If you already have a preset in that position, you will get a warning that the current preset willbe deleted (see Figure 8). You must select OK if you want to overwrite the existing preset.Figure 8 – <strong>Trio</strong> <strong>Program</strong> <strong>Manager</strong> Warning Regarding Overwriting a PresetNote: The maximum number of presets available for each zone is 45, which can be freely selectedbetween AM and FM Channels.Note: If you would like to see the presets defined in the software for a given zone, select that zone onthe <strong>Trio</strong> Triple <strong>Tuner</strong> by selecting that zone in the Zone pull-down.Deleting presets:Presets can be deleted separately or in groups. Simply select (or highlight) the presets you want to deleteby using your left mouse button in the Preset Setup window, and press the Delete Button.Page 7
Copying presets:You can copy the presets from any zone to any other zone by going to File(F)/Copy Current Zone to andselecting the zone you would like to copy the presets to. All presets shown in the current zone will becopied to the selected zone. Any presets currently in the selected “copy to” zone will be deleted andreplaced.Send All / Send Select presets to the <strong>Trio</strong>:When you have defined all the presets you will need for the installation, you can send all or a subset of thepresets to the <strong>Trio</strong>.The Send All button will program the <strong>Trio</strong> Triple <strong>Tuner</strong> with all the presets shown in the display windowinto the zone selected in the top right corner. To save to another zone, you must select the new zone in theZone pull-down.The Send Select button will send only those presets highlighted. To highlight a preset (or set of presets),use the left button on your mouse to select presets in the Preset Setup window.Receiving presets from the <strong>Trio</strong>:To receive the preset information currently residing in the <strong>Trio</strong> Triple <strong>Tuner</strong>’s memory, select the zone youwant information from in the Zone pull-down and press the Receive button. The information received willbe displayed in the Preset Setup window.Clearing presets in the Preset Setup window:Pressing the Clear button will delete all data in the Preset Setup window for the current zone.Note: This will not delete the presets stored in the <strong>Trio</strong> Triple <strong>Tuner</strong>.<strong>Tuner</strong> State Section:The <strong>Trio</strong> Triple <strong>Tuner</strong> provides a status update with each command action executed (whether front panel, IR,RS-232, or RS-485). All information given is for the zone most recently acted upon (the one displayed onthe front panel of the <strong>Trio</strong>). To update the status, either press the Refresh button or use the GetStatecommand for the desired zone in the Execution Command section (described below).<strong>Tuner</strong> status includes: PsName (RDS station identification information when available), Switch setting (On /Off), <strong>Ver</strong>sion (US / Europe), ST/MO (Stereo / Mono), Zone (1-6), AM/FM, Mute (On / Off), Freq, PresetPage 8
Number (if the frequency is stored in a preset).Command Execution Section:It is possible to control the tuner by sending commands directly via the Command window and CommandExecution button.The command frame consists of command + parameter1 + parameter2 + parameter3. All commands listedin the table below can be used to control the tuner:Parameter1 Parameter2 Parameter3PreSet Zone (1,2,3/4,5,6) Preset (1-45) NonePreset Up Zone (1,2,3/4,5,6) None nonePreset Down Zone (1,2,3/4,5,6) None noneTune Zone (1,2,3/4,5,6) None Frequency of FM/AM*Scan Up Zone (1,2,3/4,5,6) None noneScan Down Zone (1,2,3/4,5,6) None noneTune Up (single step) Zone (1,2,3/4,5,6) None noneTune Down (single step) Zone (1,2,3/4,5,6) None noneAM/FM Zone (1,2,3/4,5,6) AM/FM NoneDisplay Zone (1,2,3/4,5,6) None NoneClear all Zone (1,2,3/4,5,6) None NoneMute Zone (1,2,3/4,5,6) ON/OFF NoneAntenna ** Zone (1,2,3/4,5,6) 1/2 NoneGet State Zone (1,2,3/4,5,6) None NoneStereo/Mono None Stereo/Mono NoneSet Default None US/Europe NoneIR code None A/B NonePower ON None None NonePower OFF None None NoneTable C - <strong>Trio</strong> <strong>Program</strong> <strong>Manager</strong> Executable Commands* Note: The frequency range of FM (both in the US and Europe settings) is 87.50MHz to 108.00MHz. Theincremental frequency step size is 50kHz steps for both US and European settings. The frequency range ofAM when the tuner is set to US is 520kHz to 1610kHz in 10kHz incremental steps. The frequency rangeof AM when the tuner is set to Europe 522kHz to 1611kHz in 9kHz incremental steps. You do not need totype AM or FM in this block. The <strong>Trio</strong> <strong>Program</strong> <strong>Manager</strong> automatically adds that based on the frequencynumbers entered.** Note: Using the Command Execution function (or RS-232 command) to change the antenna while inthe Manual Tuning mode will not affect any presets. Using the Command Execution function (or RS-232Page 9
command) to change the antenna while in the Preset Tuning mode will change the antenna associated withthe active preset.Exit.Before exiting the program, you should consider saving the tuner data. (Note: The data in the list fieldswill not be saved unless they are actively saved.) Data can be saved as default values or in a custom file asdescribed above.Protocol between <strong>Trio</strong> <strong>Program</strong> <strong>Manager</strong> and <strong>Trio</strong> Triple <strong>Tuner</strong>Below is a description of the command format to use between any PC and a <strong>Trio</strong> Triple <strong>Tuner</strong> when usingRS-232 or RS-485 to control the unit.Code From To Description“AAY” PC <strong>Tuner</strong> MCU Preparatory command to indicate that information will becoming to the <strong>Tuner</strong> from a control device.“ERRY” MCU PC The MCU has received corrupted information and the PCmust send it again.“RCMD” MCU PC <strong>Tuner</strong> received the preparatory AAY and is ready for theexecutable.“REOK” MCU PC The MCU has received a correct command text and is readyfor the next command.“SSPN” MCU PC This preceeds RDS information sent from the zone currentlydisplayed.“STAT” MCU PC This is the status message indication.Table D – Commands between the <strong>Trio</strong> Triple <strong>Tuner</strong> and a PCList of available commandsNOTE: The $ is not a don’t care character. You must use a $ as defined in the protocol and shownin the examples. The command string is always the same length, so this character is a space fillerto maintain that length.NOTE: You should add a pause (~2 seconds) in your macros. There is a single processor in the<strong>Trio</strong> Triple <strong>Tuner</strong> that processes and executes all commands. If the processor does not finish thecurrent task when you send another command, you will receive “ERRY” and the unit will need toclear the error before it will execute another command. This could take up to 5 seconds to clear,longer than the original recommended delay. An easy place to see this would be to repeatedly sendtune up or down commands one after the other.Page 10
CommandStartStart Zone Command Zone Channel/Freq.StopContextstringBytes A/B type BANDDataBytesExamples Preset Start A/B Type Zone Ch/Band Freq Stop ContextPreset 1 in Zone 1 AAY 11 0 0 0 00 $$$$$$ ;0 “AAY” then “1100000$$$$$$;0”Preset 10 in Zone 1 AAY 11 0 0 0 09 $$$$$$ ;0 “AAY” then “1100009$$$$$$;0”Preset 15 in Zone 1 AAY 11 0 0 0 14 $$$$$$ ;0 “AAY” then “1100014$$$$$$;0”Preset 21 in Zone 1 AAY 11 0 0 0 20 $$$$$$ ;0 “AAY” then “1100020$$$$$$;0”Preset 5 in Zone 2 AAY 11 0 0 1 04 $$$$$$ ;0 “AAY” then “1100104$$$$$$;0”Preset 10 in Zone 2 AAY 11 0 0 1 09 $$$$$$ ;0 “AAY” then “1100109$$$$$$;0”Preset 5 in Zone 3 AAY 11 0 0 2 04 $$$$$$ ;0 “AAY” then “1100204$$$$$$;0”Preset 10 in Zone 3 AAY 11 0 0 2 09 $$$$$$ ;0 “AAY” then “1100209$$$$$$;0”Preset 5 in Zone 4 AAY 11 1 0 0 04 $$$$$$ ;0 “AAY” then “1110004$$$$$$;0”Preset 10 in Zone 4 AAY 11 1 0 0 09 $$$$$$ ;0 “AAY” then “1110009$$$$$$;0”Preset 5 in Zone 5 AAY 11 1 0 1 04 $$$$$$ ;0 “AAY” then “1110104$$$$$$;0”Preset 10 in Zone 5 AAY 11 1 0 1 09 $$$$$$ ;0 “AAY” then “1110109$$$$$$;0”Preset 5 in Zone 6 AAY 11 1 0 2 04 $$$$$$ ;0 “AAY” then “1110204$$$$$$;0”Preset 10 in Zone 6 AAY 11 1 0 2 09 $$$$$$ ;0 “AAY” then “1110209$$$$$$;0”Preset Up in Zone 1 AAY 11 0 1 0 $$ $$$$$$ ;0 “AAY” then “11010$$$$$$$$;0”Preset Up in Zone 2 AAY 11 0 1 1 $$ $$$$$$ ;0 “AAY” then “11011$$$$$$$$;0”Preset Up in Zone 3 AAY 11 0 1 2 $$ $$$$$$ ;0 “AAY” then “11012$$$$$$$$;0”Preset Up in Zone 4 AAY 11 1 1 0 $$ $$$$$$ ;0 “AAY” then “11110$$$$$$$$;0”Preset Up in Zone 5 AAY 11 1 1 1 $$ $$$$$$ ;0 “AAY” then “11111$$$$$$$$;0”Preset Up in Zone 6 AAY 11 1 1 2 $$ $$$$$$ ;0 “AAY” then “11112$$$$$$$$;0”Preset Down in Zone 1 AAY 11 0 2 0 $$ $$$$$$ ;0 “AAY” then “11020$$$$$$$$;0”Preset Down in Zone 2 AAY 11 0 2 1 $$ $$$$$$ ;0 “AAY” then “11021$$$$$$$$;0”Preset Down in Zone 3 AAY 11 0 2 2 $$ $$$$$$ ;0 “AAY” then “11022$$$$$$$$;0”Preset Down in Zone 4 AAY 11 1 2 0 $$ $$$$$$ ;0 “AAY” then “11120$$$$$$$$;0”Preset Down in Zone 5 AAY 11 1 2 1 $$ $$$$$$ ;0 “AAY” then “11121$$$$$$$$;0”Preset Down in Zone 6 AAY 11 1 2 2 $$ $$$$$$ ;0 “AAY” then “11122$$$$$$$$;0”Examples Tune Start A/B Type Zone Ch/Band Freq Stop ContextTune 101.10MHz in Zone 1 AAY 11 0 3 0 $$ 101.10 ;0 “AAY” then “11030$$101.10;0”Tune 93.90MHz in Zone 1 AAY 11 0 3 0 $$ 093.90 ;0 “AAY” then “11030$$093.90;0”Tune 640kHz in Zone 1 AAY 11 0 3 0 $$ AM0640 ;0 “AAY” then “11030$$AM0640;0”Tune 101.10MHz in Zone 2 AAY 11 0 3 1 $$ 101.10 ;0 “AAY” then “11031$$101.10;0”Tune 640kHz in Zone 2 AAY 11 0 3 1 $$ AM0640 ;0 “AAY” then “11031$$AM0640;0”Tune 101.10MHz in Zone 3 AAY 11 0 3 2 $$ 101.10 ;0 “AAY” then “11032$$101.10;0”Page 11
Tune 640kHz in Zone 3 AAY 11 0 3 2 $$ AM0640 ;0 “AAY” then “11032$$AM0640;0”Tune 101.10MHz in Zone 4 AAY 11 1 3 0 $$ 101.10 ;0 “AAY” then “11130$$101.10;0”Tune 640kHz in Zone 4 AAY 11 1 3 0 $$ AM0640 ;0 “AAY” then “11130$$AM0640;0”Tune 101.10MHz in Zone 5 AAY 11 1 3 1 $$ 101.10 ;0 “AAY” then “11131$$101.10;0”Tune 640kHz in Zone 5 AAY 11 1 3 1 $$ AM0640 ;0 “AAY” then “11131$$AM0640;0”Tune 101.10MHz in Zone 6 AAY 11 1 3 2 $$ 101.10 ;0 “AAY” then “11132$$101.10;0”Tune 640kHz in Zone 6 AAY 11 1 3 2 $$ AM0640 ;0 “AAY” then “11132$$AM0640;0”Auto Scan Up in Zone 1 AAY 11 0 4 0 $$ $$$$$$ ;0 “AAY” then “11040$$$$$$$$;0”Auto Scan Up in Zone 2 AAY 11 0 4 1 $$ $$$$$$ ;0 “AAY” then “11041$$$$$$$$;0”Auto Scan Up in Zone 3 AAY 11 0 4 2 $$ $$$$$$ ;0 “AAY” then “11042$$$$$$$$;0”Auto Scan Up in Zone 4 AAY 11 1 4 0 $$ $$$$$$ ;0 “AAY” then “11140$$$$$$$$;0”Auto Scan Up in Zone 5 AAY 11 1 4 1 $$ $$$$$$ ;0 “AAY” then “11141$$$$$$$$;0”Auto Scan Up in Zone 6 AAY 11 1 4 2 $$ $$$$$$ ;0 “AAY” then “11142$$$$$$$$;0”Auto Scan Down in Zone 1 AAY 11 0 5 0 $$ $$$$$$ ;0 “AAY” then “11050$$$$$$$$;0”Auto Scan Down in Zone 2 AAY 11 0 5 1 $$ $$$$$$ ;0 “AAY” then “11051$$$$$$$$;0”Auto Scan Down in Zone 3 AAY 11 0 5 2 $$ $$$$$$ ;0 “AAY” then “11052$$$$$$$$;0”Auto Scan Down in Zone 4 AAY 11 1 5 0 $$ $$$$$$ ;0 “AAY” then “11150$$$$$$$$;0”Auto Scan Down in Zone 5 AAY 11 1 5 1 $$ $$$$$$ ;0 “AAY” then “11151$$$$$$$$;0”Auto Scan Down in Zone 6 AAY 11 1 5 2 $$ $$$$$$ ;0 “AAY” then “11152$$$$$$$$;0”Tune Up in Zone 1 AAY 11 0 6 0 $$ $$$$$$ ;0 “AAY” then “11060$$$$$$$$;0”Tune Up in Zone 2 AAY 11 0 6 1 $$ $$$$$$ ;0 “AAY” then “11061$$$$$$$$;0”Tune Up in Zone 3 AAY 11 0 6 2 $$ $$$$$$ ;0 “AAY” then “11062$$$$$$$$;0”Tune Up in Zone 4 AAY 11 1 6 0 $$ $$$$$$ ;0 “AAY” then “11160$$$$$$$$;0”Tune Up in Zone 5 AAY 11 1 6 1 $$ $$$$$$ ;0 “AAY” then “11161$$$$$$$$;0”Tune Up in Zone 6 AAY 11 1 6 2 $$ $$$$$$ ;0 “AAY” then “11162$$$$$$$$;0”Tune Down in Zone 1 AAY 11 0 7 0 $$ $$$$$$ ;0 “AAY” then “11070$$$$$$$$;0”Tune Down in Zone 2 AAY 11 0 7 1 $$ $$$$$$ ;0 “AAY” then “11071$$$$$$$$;0”Tune Down in Zone 3 AAY 11 0 7 2 $$ $$$$$$ ;0 “AAY” then “11072$$$$$$$$;0”Tune Down in Zone 4 AAY 11 1 7 0 $$ $$$$$$ ;0 “AAY” then “11170$$$$$$$$;0”Tune Down in Zone 5 AAY 11 1 7 1 $$ $$$$$$ ;0 “AAY” then “11171$$$$$$$$;0”Tune Down in Zone 6 AAY 11 1 7 2 $$ $$$$$$ ;0 “AAY” then “11172$$$$$$$$;0”Examples AM/FM Start A/B Type Zone Ch/Band Freq Stop ContextAM/FM Select FM in Zone 1 AAY 11 0 8 0 01 $$$$$$ ;0 “AAY” then “1108001$$$$$$;0”AM/FM Select AM in Zone 1 AAY 11 0 8 0 00 $$$$$$ ;0 “AAY” then “1108000$$$$$$;0”AM/FM Select FM in Zone 2 AAY 11 0 8 1 01 $$$$$$ ;0 “AAY” then “1108101$$$$$$;0”Page 12
AM/FM Select AM in Zone 2 AAY 11 0 8 1 00 $$$$$$ ;0 “AAY” then “1108100$$$$$$;0”AM/FM Select FM in Zone 3 AAY 11 0 8 2 01 $$$$$$ ;0 “AAY” then “1108201$$$$$$;0”AM/FM Select AM in Zone 3 AAY 11 0 8 2 00 $$$$$$ ;0 “AAY” then “1108200$$$$$$;0”AM/FM Select FM in Zone 4 AAY 11 1 8 0 01 $$$$$$ ;0 “AAY” then “1118001$$$$$$;0”AM/FM Select AM in Zone 4 AAY 11 1 8 0 00 $$$$$$ ;0 “AAY” then “1118000$$$$$$;0”AM/FM Select FM in Zone 5 AAY 11 1 8 1 01 $$$$$$ ;0 “AAY” then “1118101$$$$$$;0”AM/FM Select AM in Zone 5 AAY 11 1 8 1 00 $$$$$$ ;0 “AAY” then “1118100$$$$$$;0”AM/FM Select FM in Zone 6 AAY 11 1 8 2 01 $$$$$$ ;0 “AAY” then “1118201$$$$$$;0”AM/FM Select AM in Zone 6 AAY 11 1 8 2 00 $$$$$$ ;0 “AAY” then “1118200$$$$$$;0”Examples Display Start A/B Type Zone Ch/Band Freq Stop ContextDisplay Zone1 AAY 11 0 9 0 $$ $$$$$$ ;0 “AAY” then “11090$$$$$$$$;0”Display Zone 2 AAY 11 0 9 1 $$ $$$$$$ ;0 “AAY” then “11091$$$$$$$$;0”Display Zone 3 AAY 11 0 9 2 $$ $$$$$$ ;0 “AAY” then “11092$$$$$$$$;0”Display Zone 4 AAY 11 1 9 0 $$ $$$$$$ ;0 “AAY” then “11190$$$$$$$$;0”Display Zone 5 AAY 11 1 9 1 $$ $$$$$$ ;0 “AAY” then “11191$$$$$$$$;0”Display Zone 6 AAY 11 1 9 2 $$ $$$$$$ ;0 “AAY” then “11192$$$$$$$$;0”Examples clear Start A/B Type Zone Ch/Band Freq Stop ContextClear All Zone1 AAY 11 0 : 0 $$ $$$$$$ ;0 “AAY” then “110:0$$$$$$$$;0”Clear All Zone2 AAY 11 0 : 1 $$ $$$$$$ ;0 “AAY” then “110:1$$$$$$$$;0”Clear All Zone3 AAY 11 0 : 2 $$ $$$$$$ ;0 “AAY” then “110:2$$$$$$$$;0”Clear All Zone4 AAY 11 1 : 0 $$ $$$$$$ ;0 “AAY” then “111:0$$$$$$$$;0”Clear All Zone5 AAY 11 1 : 1 $$ $$$$$$ ;0 “AAY” then “111:1$$$$$$$$;0”Clear All Zone6 AAY 11 1 : 2 $$ $$$$$$ ;0 “AAY” then “111:2$$$$$$$$;0”Examples mute Start A/B Type Zone Ch/Band Freq Stop ContextSetMute ON in Zone 1 AAY 11 0 ; 0 01 $$$$$$ ;0 “AAY” then “110;001$$$$$$;0”SetMute OFF in Zone 1 AAY 11 0 ; 0 00 $$$$$$ ;0 “AAY” then “110;000$$$$$$;0”SetMute ON in Zone 2 AAY 11 0 ; 1 01 $$$$$$ ;0 “AAY” then “110;101$$$$$$;0”SetMute OFF in Zone 2 AAY 11 0 ; 1 00 $$$$$$ ;0 “AAY” then “110;100$$$$$$;0”SetMute ON in Zone 3 AAY 11 0 ; 2 01 $$$$$$ ;0 “AAY” then “110;201$$$$$$;0”SetMute OFF in Zone 3 AAY 11 0 ; 2 00 $$$$$$ ;0 “AAY” then “110;200$$$$$$;0”SetMute ON in Zone 4 AAY 11 1 ; 0 01 $$$$$$ ;0 “AAY” then “111;001$$$$$$;0”SetMute OFF in Zone 4 AAY 11 1 ; 0 00 $$$$$$ ;0 “AAY” then “111;000$$$$$$;0”SetMute ON in Zone 5 AAY 11 1 ; 1 01 $$$$$$ ;0 “AAY” then “111;101$$$$$$;0”SetMute OFF in Zone 5 AAY 11 1 ; 1 00 $$$$$$ ;0 “AAY” then “111;100$$$$$$;0”SetMute ON in Zone 6 AAY 11 1 ; 2 01 $$$$$$ ;0 “AAY” then “111;201$$$$$$;0”SetMute OFF in Zone 6 AAY 11 1 ; 2 00 $$$$$$ ;0 “AAY” then “111;200$$$$$$;0”Examples Antenna Start A/B Type Zone Ch/Band Freq Stop ContextAntenna 1, Zone 1 AAY 11 0 < 0 00 45$$$$ ;0 “AAY” then “110
Antenna 1, Zone 2 AAY 11 0 < 1 00 45$$$$ ;0 “AAY” then “110200$$$$$$;0”Mono select, Zone 3 AAY 11 0 > 2 01 $$$$$$ ;0 “AAY” then “110>201$$$$$$;0”Stereo select, Zone 4 AAY 11 1 > 0 00 $$$$$$ ;0 “AAY” then “111>000$$$$$$;0”Mono select, Zone 4 AAY 11 1 > 0 01 $$$$$$ ;0 “AAY” then “111>001$$$$$$;0”Stereo select, Zone 5 AAY 11 1 > 1 00 $$$$$$ ;0 “AAY” then “111>100$$$$$$;0”Mono select, Zone 5 AAY 11 1 > 1 01 $$$$$$ ;0 “AAY” then “111>101$$$$$$;0”Stereo select, Zone 6 AAY 11 1 > 2 00 $$$$$$ ;0 “AAY” then “111>200$$$$$$;0”Mono select, Zone 6 AAY 11 1 > 2 01 $$$$$$ ;0 “AAY” then “111>201$$$$$$;0”Examples Load default Start A/B Type Zone Ch/Band Freq Stop ContextLoadDault Europe version AAY 11 0 ? $ 01 $$$$$$ ;0 “AAY” then “110?$01$$$$$$;0”LoadDault US version AAY 11 0 ? $ 00 $$$$$$ ;0 “AAY” then “110?$00$$$$$$;0”Examples IR code Start A/B Type Zone Ch/Band Freq Stop ContextIRCode A (Z1,2,3) AAY 11 0 @ $ 00 $$$$$$ ;0 “AAY” then “110@$00$$$$$$;0”IRCode B (Z4,5,6) AAY 11 1 @ $ 01 $$$$$$ ;0 “AAY” then “111@$01$$$$$$;0”Examples Power on/off Start A/B Type Zone Ch/Band Freq Stop ContextPower ON Separate command AAY 11 0 A $ $$ $$$$$$ ;0 “AAY” then “110A$$$$$$$$$;0”Power OFF Separate command AAY 11 0 B $ $$ $$$$$$ ;0 “AAY” then “110B$$$$$$$$$;0”Page 14
Memory commandAAY 11 0 D $ $$ $$$$$$ ;0 “AAY” then “110D$$$$$$$$$;0”(to save a preset – send 2X)Table E – <strong>Trio</strong> RS-232 and RS-485 Command ExamplesIn general, controlling the <strong>Trio</strong> Triple <strong>Tuner</strong> via RS-232 or RS-485 consists of 2 items:1. A preparatory command (AAY): This lets the <strong>Trio</strong> know that a command is coming.Note: You must immediately follow the AAY command with the executable shown below. Thereshould be no other commands inserted between these two items or you will get an error message(ERRY).2. The executable command.a) If the command is for a zone for the other IR Code Set (A = Zones 1-3, B = Zones 4-6), the <strong>Trio</strong>Triple <strong>Tuner</strong> will ignore the command. For instance, if the <strong>Trio</strong> Triple <strong>Tuner</strong> is setup as Zones 4-6and it receives a command for Zone 2, the command will be ignored.b) If the command is for a zone other than that currently displayed, the following actions will occur:i. The <strong>Trio</strong> Triple <strong>Tuner</strong> active zone (the zone shown on the display) will change to the zone tobe acted uponii. The <strong>Trio</strong> Triple <strong>Tuner</strong> will send “REOK” and then executes the commandiii. The <strong>Trio</strong> Triple <strong>Tuner</strong> will send a status update showing the current state of the tunerSee next page for command examples.Page 15
2) Change <strong>Trio</strong> <strong>Tuner</strong> Zone 4 to Preset 05Control device (PC) sends “AAY”<strong>Tuner</strong> will immediately follow up with “RCMD” – ready to receive commandControl device sends “1110004$$$$$$;0”<strong>Tuner</strong> sends “REOK” to indicate that the <strong>Trio</strong> received the command OK.<strong>Tuner</strong> will change to Zone 4 (assuming that it is setup for IR Code Set B, Zones 4-6)<strong>Tuner</strong> will then change to Preset mode and go to preset 05<strong>Tuner</strong> will send a Status Update Message with the following format (identical to above example):STAT251040102.3105.9005Power106;0STAT indicates this is a status message25 is the length of the data string (25 characters) remainingThis length is the remaining characters after the STAT and data length bits1 indicates Power status (1 = Power is ON, 0 = Power is OFF)0 is the Default (Country) setup (1 = Europe, 0 = US)4 indicates the Zone (could be 1, 2, 3, 4, 5, or 6)0 indicates Stereo or Mono operations (1 = Mono, 0 = Stereo)1 indicates the band (1 = FM, 0 = AM)0 indicates Mute status (1 = Mute ON, 0 = Mute OFF)2.3 indicates the firmware loaded in the <strong>Trio</strong> (version 2.3 for this example)05 indicates the current presetNote: If the <strong>Trio</strong> Triple <strong>Tuner</strong> is in Manual Tune mode on a station that is not in the presetlist, this will show two dollar signs ($$).105.90 indicates the frequency the tuner is currently on (Preset 05 is 105.90 FM)Power106 indicates either:RDS information (if broadcast)Preset name (if named and no RDS is available)Blank when neither of the other 2 conditions is true.Note: This is always 8 bits. If there is not 8 bits of information, there will be blanks tofill in the 8 spaces.;0 indicates the end of the status messagePage 17
H. RS-232 -----<strong>Trio</strong> Triple <strong>Tuner</strong> Connection pins indicationFigure 9 – Null Modem Cable ConfigurationNOTE: Pins 2 and 3 are switched in Null Modem Cables. This allows Pin 2 of the PC (Receive) to beconnected to Pin 3 of the <strong>Trio</strong> Triple <strong>Tuner</strong> (Transmit) and vice versa.© 2004 <strong>Sonance</strong>. All rights reserved. 33-3643 7.04<strong>Sonance</strong> · 212 Avenida Fabricante · San Clemente, CA 9272-7531, USA · (800) 582-7777 or (949) 492-7777 · Fax: (949) 361-5151 · Technical Support: (800) 582-0772www.sonance.comPage 18