Manual (PDF) - Univers by FTE - Select your country
Manual (PDF) - Univers by FTE - Select your country
Manual (PDF) - Univers by FTE - Select your country

You also want an ePaper? Increase the reach of your titles
YUMPU automatically turns print PDFs into web optimized ePapers that Google loves.
English<br />
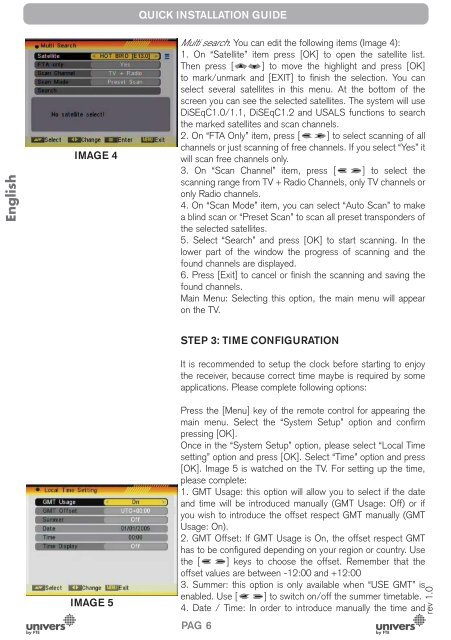
IMAGE 4<br />
IMAGE 5<br />
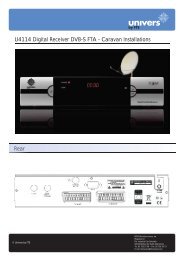
QUICK INSTALLATION GUIDE<br />
Multi search: You can edit the following items (Image 4):<br />
1. On “Satellite” item press [OK] to open the satellite list.<br />
Then press [ ] to move the highlight and press [OK]<br />
to mark/unmark and [EXIT] to fi nish the selection. You can<br />
select several satellites in this menu. At the bottom of the<br />
screen you can see the selected satellites. The system will use<br />
DiSEqC1.0/1.1, DiSEqC1.2 and USALS functions to search<br />
the marked satellites and scan channels.<br />
2. On “FTA Only” item, press [ ] to select scanning of all<br />
channels or just scanning of free channels. If you select “Yes” it<br />
will scan free channels only.<br />
3. On “Scan Channel” item, press [ ] to select the<br />
scanning range from TV + Radio Channels, only TV channels or<br />
only Radio channels.<br />
4. On “Scan Mode” item, you can select “Auto Scan” to make<br />
a blind scan or “Preset Scan” to scan all preset transponders of<br />
the selected satellites.<br />
5. <strong>Select</strong> “Search” and press [OK] to start scanning. In the<br />
lower part of the window the progress of scanning and the<br />
found channels are displayed.<br />
6. Press [Exit] to cancel or fi nish the scanning and saving the<br />
found channels.<br />
Main Menu: <strong>Select</strong>ing this option, the main menu will appear<br />
on the TV.<br />
STEP 3: TIME CONFIGURATION<br />
It is recommended to setup the clock before starting to enjoy<br />
the receiver, because correct time maybe is required <strong>by</strong> some<br />
applications. Please complete following options:<br />
Press the [Menu] key of the remote control for appearing the<br />
main menu. <strong>Select</strong> the “System Setup” option and confi rm<br />
pressing [OK].<br />
Once in the “System Setup” option, please select “Local Time<br />
setting” option and press [OK]. <strong>Select</strong> “Time” option and press<br />
[OK]. Image 5 is watched on the TV. For setting up the time,<br />
please complete:<br />
1. GMT Usage: this option will allow you to select if the date<br />
and time will be introduced manually (GMT Usage: Off) or if<br />
you wish to introduce the offset respect GMT manually (GMT<br />
Usage: On).<br />
2. GMT Offset: If GMT Usage is On, the offset respect GMT<br />
has to be confi gured depending on <strong>your</strong> region or <strong>country</strong>. Use<br />
the [ ] keys to choose the offset. Remember that the<br />
offset values are between -12:00 and +12:00<br />
3. Summer: this option is only available when “USE GMT” is<br />
enabled. Use [ ] to switch on/off the summer timetable.<br />
4. Date / Time: In order to introduce manually the time and<br />
PAG. 6<br />
rev 1.0