Leica TPS1200 System Field Manual
Leica TPS1200 System Field Manual
Leica TPS1200 System Field Manual
- No tags were found...

Create successful ePaper yourself
Turn your PDF publications into a flip-book with our unique Google optimized e-Paper software.
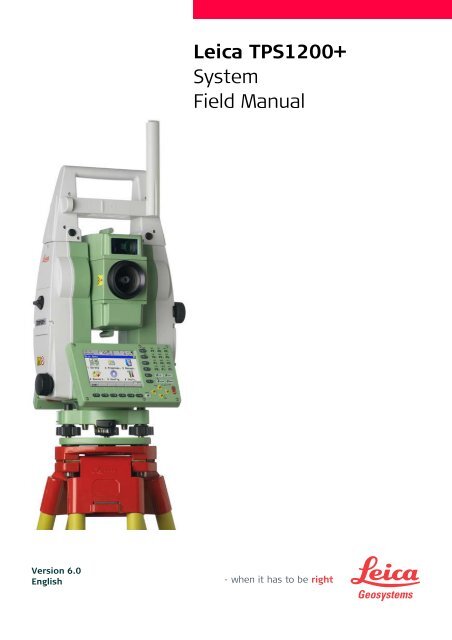
Version 6.0English<strong>Leica</strong> <strong>TPS1200</strong>+<strong>System</strong><strong>Field</strong> <strong>Manual</strong>
IntroductionPurchaseProductidentificationCongratulations on the purchase of a <strong>TPS1200</strong>+ series instrument.To use the product in a permitted manner, please refer to the detailed safety directionsin the User <strong>Manual</strong>.The type and the serial number of your product are indicated on the type plate.Enter the type and serial number in your manual and always refer to this informationwhen you need to contact your agency or <strong>Leica</strong> Geosystems authorized serviceworkshop.Type:Serial No.:______________________________SymbolsThe symbols used in this manual have the following meanings:TypeDescriptionImportant paragraphs which must be adhered to in practice asthey enable the product to be used in a technically correct andefficient manner.Trademarks • CompactFlash and CF are trademarks of SanDisk Corporation• Bluetooth is a registered trademark of Bluetooth SIG, IncAll other trademarks are the property of their respective owners.AvailabledocumentationRefer to the following resources for all <strong>TPS1200</strong>+ documentation and software• the SmartWorx DVD• http://www.leica-geosystems.com/downloads2 <strong>TPS1200</strong>+ Introduction
Table of ContentsIn this manual Chapter Page1 User Interface 71.1 Keyboard 71.2 Screen 81.3 Operating Principles 91.4 Icons 101.5 Symbols 172 Configurable Keys 192.1 Hot Keys 192.2 USER Key 203 Quick Settings - SHIFT USER 214 Instrument Setup 234.1 Instrument Setup 234.2 Levelling Up with the Electronic Level 254.3 SmartStation Setup 264.4 Instrument Setup for Remote Control 285 Setup, Measure and Record 296 Manage... - Getting Started 317 Manage...\Jobs 357.1 Overview 357.2 Creating a New Job/Editing a Job 368 Manage...\Data 398.1 Overview 398.2 Point Management 408.2.1 Creating a New Point/Editing a Point 408.2.2 Mean Page 448.3 Line/Area Management 478.3.1 Overview 478.3.2 Creating a New Line/Area/Editing a Line/Area 488.4 Point Sorting and Filters 518.4.1 Sorting and Filters for Points, Lines and Areas 518.4.2 Point, Line and Area Code Filter 539 Manage...\Codelists 559.1 Creating a New Codelist/Editing a Codelist 559.2 Creating a New Code/Editing a Code 5610 Linework 5910.1 Performing Linework 5910.2 Combining Linework and Coding 62Table of Contents <strong>TPS1200</strong>+ 3
11 Manage...\Coordinate <strong>System</strong>s 6511.1 Overview 6511.2 Creating a New Coordinate <strong>System</strong>/Editing a Coordinate <strong>System</strong> 6611.3 Transformations/Ellipsoids/Projections 6811.3.1 Accessing Transformation/Ellipsoid/Projection Management 6811.3.2 Creating/Editing a Transformation/Ellipsoid/Projection 6911.4 Geoid/CSCS Models 7112 Manage...\Configuration Sets 7312.1 Overview 7312.2 Creating a New Configuration Set 7412.3 Editing a Configuration Set 7513 Manage...\Reflectors 7713.1 Overview 7713.2 Creating a New Reflector/Editing a Reflector 7814 Convert...\Export Data from Job 7914.1 Overview 7914.2 Exporting ASCII Data 8014.3 Exporting DXF Data 8214.4 Exporting LandXML Data 8315 Convert...\Import Data to Job 8515.1 Overview 8515.2 Importing ASCII/GSI Data 8615.3 Importing DXF Data 8816 Convert...\Copy Points Between Jobs 8917 Config...\Survey Settings... 9117.1 ID Templates 9117.1.1 Overview 9117.1.2 Creating a New ID Template/Editing an ID Template 9217.2 Display Settings 9317.3 Coding & Linework Settings 9517.4 Offsets 9718 Config...\Instrument Settings... 9918.1 EDM & ATR Settings 9918.2 Search Windows 10318.3 Automatic Prism Search 10518.4 TPS Corrections 10618.5 Compensator 10918.6 Instrument ID 11018.7 Telescope Accessories 11119 Config...\General Settings... 11319.1 Wizard Mode 11319.2 Hot Keys & User Menu 11419.3 Units & Formats 11619.4 Language 11919.5 Lights, Display, Beeps, Text 12019.6 Start Up & Power Down 1224 <strong>TPS1200</strong>+ Table of Contents
20 Interfaces, Ports, Devices 12520.1 Interfaces 12520.1.1 Overview of Interfaces 12520.1.2 Configuring an Interface 12620.2 Ports 12720.3 Devices 12820.3.1 Overview of Devices 12820.3.2 Configuring a Device 12920.3.3 Controlling a Device 13020.3.4 Creating a New Device/Editing a Device 13121 Config...\Interfaces... - Editing the Interface 13321.1 GSI Output 13321.2 GeoCOM Mode 13421.3 RCS Mode 13521.4 Export Job 13621.5 GPS RTK 13721.6 Internet 13822 Config...\Interfaces... - Controlling the Device 13922.1 Digital Cellular Phones 13922.2 Modems 14222.3 Radios for GPS Real-Time 14322.4 Radios for Remote Control 14422.5 RS232 14522.6 GPRS / Internet Devices 14622.7 Internet 14722.8 Creating a New Station to Dial/Editing a Station to Dial 14922.9 Creating a New Server to Connect/Editing a Server to Connect 15123 Config...\SmartStation... 15323.1 Real-Time Mode 15323.2 Point Occupation Settings 15723.3 Satellite Settings 16023.4 Local Time Zone 16223.5 Quality Control Settings 16323.6 Logging of Raw Obs 16424 Tools... 16524.1 Format Memory Device 16524.2 Transfer Objects... 16624.3 Upload <strong>System</strong> Files... 16724.4 Calculator and File Viewer 16924.5 Licence Keys 17024.6 <strong>Field</strong> to Office 171Table of Contents <strong>TPS1200</strong>+ 5
25 STATUS 17325.1 STATUS: Station Information 17325.2 STATUS: Battery & Memory 17425.3 STATUS: <strong>System</strong> Information 17525.4 STATUS: Interfaces... 17725.5 STATUS: Bluetooth 17825.6 STATUS: Level & Laser Plummet 17925.7 STATUS SmartStation... 18025.7.1 Satellite Status 18025.7.2 Real-Time Status 18225.7.3 Current Position 18725.7.4 Logging Status 18925.7.5 SmartAntenna <strong>System</strong> Info 19126 NTRIP via Internet 19326.1 Overview 19326.2 Configuring SmartStation for Using NTRIP Service 19426.2.1 Configuring an Access to the Internet 19426.2.2 Configuring to Connect to a Server 19626.2.3 Using the NTRIP Service with SmartStation 19827 Menu Tree 201Index 2036 <strong>TPS1200</strong>+ Table of Contents
1 User Interface1.1 KeyboardKeysKeyDescriptionHot keys F7-F12 • User definable keys to execute commands or accesschosen screens.• Refer to "2 Configurable Keys" for further details.•Alphanumeric keys • To type letters and numbers.CE • Clears all entry at the beginning of user input.• Clears the last character during user input.ESC • Leaves the current menu or dialog without storingchanges made.USER • Calls the user defined menu.• Refer to "2 Configurable Keys" for further details.PROG (ON) • If the instrument is off: to turn the instrument on.• If the instrument is on: to access the Programs menu.ENTER • Selects the highlighted line and leads to the next logicaldialog/menu.• Starts the edit mode for edit fields.• Opens a list box.SHIFT • Changes between the first and the second level of functionkeys.Arrow keys • Move the focus on the screen.Function keys F1-F6 • Correspond to the six softkeys that appear on the bottomof the screen when the screen is activated.Key combinationsKeysPROG plus USERSHIFT F12SHIFT F11SHIFT USERSHIFTSHIFTDescriptionTurns the instrument off, when in <strong>TPS1200</strong>+ Main Menu.Calls STATUS Level & Laser Plummet.Calls CONFIGURE Lights, Display, Beeps, Text.Calls QUICK SET Change Settings to.Refer to "3 Quick Settings - SHIFT USER" for further details.Pages up.Pages down.User Interface <strong>TPS1200</strong>+ 7
1.2 ScreenScreenabcdeTPS12_081kfghija) Timeb) Captionc) Titled) Screen areae) Message linef) Iconsg) ESCh) CAPSi) SHIFT iconj) Quick coding iconk) SoftkeysElements of thescreenElement DescriptionTimeThe current local time is shown.CaptionShows location either in Main Menu, under PROG key orUSER key.TitleName of the screen is shown.Screen area The working area of the screen.Message line Messages are shown for 10 s.IconsShows the current status information of the instrument. Referto "1.4 Icons". Can be used with touch screen.ESCCan be used with touch screen. Same functionality as the fixedkey ESC. The last operation will be undone.CAPSThe caps mode for upper case letters is active.The caps modeis activated and deactivated by pressing UPPER (F5) orLOWER (F5) in some screens.SHIFT icon Shows the status of the SHIFT key; either first or second levelof softkeys is selected. Can be used with touch screen and hasthe same functionality as the fixed key SHIFT.Quick coding icon Shows the quick coding configuration. Can be used with touchscreen to turn quick coding on and off.SoftkeysCommands can be executed using F1-F6 keys. Thecommands assigned to the softkeys are screen dependent.Can be used directly with touch screen.Scroll bar Scrolls the screen area up and down.8 <strong>TPS1200</strong>+ User Interface
1.3 Operating PrinciplesKeyboard andtouch screenThe user interface is operated either by the keyboard or by the touch screen withsupplied stylus. The workflow is the same for keyboard and touch screen entry, theonly difference lies in the way information is selected and entered.Operation by keyboardInformation is selected and entered using the keys. Refer to "1.1 Keyboard" forfurther details of the keys on the keyboard and their function.Operation by touch screenInformation is selected and entered on the screen using the supplied stylus.OperationTo select an itemTo start the edit mode in input fieldsTo highlight an item or parts of it foreditingTo accept data entered into an input fieldand exit the edit modeDescriptionTap on the item.Tap on the input field.Drag the supplied stylus from the left tothe right.Tap somewhere else on the screenoutside of the input field.Turn instrument on Press and hold PROG for 2 s.Turn instrument offstep-by-stepStep DescriptionThe instrument can only be turned off in <strong>TPS1200</strong>+ Main Menu.1. Press and hold both USER and PROG simultaneously.2. Press YES (F6) to continue or NO (F4) to cancel.Lock/UnlockkeyboardOption DescriptionLock To lock the keyboard press and hold SHIFT for 3 s. The message’Keyboard locked’ is momentariliy displayed on the Message Line.Unlock To unlock the keyboard press and hold SHIFT for 3 s. The message’Keyboard unlocked’ is momentariliy displayed on the Message Line.User Interface <strong>TPS1200</strong>+ 9
1.4 IconsDescriptionAllocation of iconsThe screen icons display the current status information of the instrument.TPS specific and common iconsTPS12_172ab c d e f g h ijka) ATR/LOCK/PSb) Reflectorc) EDMd) Compensator/face I&IIe) RCSf) Bluetoothg) Line/areah) CompactFlash card/internal memoryi) Batteryj) SHIFTk) Quick codingGPS specific and common iconsTPS12_172aa b c d e f g h ijka) GNSS Position statusb) Number of visible satellitesc) Contributing satellitesd) Real-time device and real-timestatus, Internet online statuse) Position modef) Bluetoothg) Line/areah) CompactFlash card/internal memoryi) Batteryj) SHIFTk) Quick codingATR/LOCK/PS • The currently active ATR/LOCK/PS settings or prism searches are displayed.• Touch screen: Tapping the icon leads to QUICK SET Change Settings to.IconDescriptionATR active.Low Visability mode is active.Short Range mode is active.LOCK active.LOCK active.Prism being followed.10 <strong>TPS1200</strong>+ User Interface
IconDescriptionLOCK active. Prism lost.Instrument locks onto reflector if in field of view.ATR Searching.PowerSearch window.PowerSearch active.Prediction.Reflector • The currently active reflector is displayed.• Touch screen: Tapping the icon leads to MANAGE Reflectors.IconDescription<strong>Leica</strong> Circ Prism.<strong>Leica</strong> 360 ° Prism.<strong>Leica</strong> Mini Prism.<strong>Leica</strong> Mini 0.<strong>Leica</strong> Mini 360 °.<strong>Leica</strong> HDS Target.<strong>Leica</strong> ReflTape.Reflectorless.User defined prism.EDM • The currently active EDM measurement settings are displayed.• Touch screen: Tapping the icon leads to CONFIGURE EDM & ATR Settings.User Interface <strong>TPS1200</strong>+ 11
IconDescriptionEDM type: Reflector IR, possible modes are:• STD - Standard.• FAST - Fast.• TRK - Tracking.• AVG - Averaging.• SYNC - SynchroTrack•Red laser is turned on.EDM type: Reflectorless RL, possible modes are:• STD - Standard.• TRK - Tracking.• AVG - Averaging.EDM type: Long Range LO, possible modes are:• STD - Standard.• AVG - Averaging.Auto points are being recorded by time.Auto points are being recorded by distance or height.Auto points are being recorded by stop & go.Compensator/face I&II• Compensator off or face I&II icon is displayed.• Touch screen: Tapping the icon leads to CONFIGURE Compensator.IconDescriptionCompensator is turned off.Compensator is turned on, but is out of range.The current face of the instrument is shown, if the compensatorand the Hz-correction are turned on.12 <strong>TPS1200</strong>+ User Interface
RCS • RCS settings are displayed.• Touch screen: Tapping the icon leads to CONFIGURE Interfaces.IconDescriptionThe RCS is turned o n.The RCS is turned on and is receiving messages.Bluetooth • The status of the Bluetooth port and any Bluetooth connection is displayed.• Touch screen: Tapping the icon leads to STATUS Bluetooth.IconDescriptionThe Instrument is Bluetooth capable.(The instrument must have a Communication side cover)The Bluetooth connection on Port 3 is established and is readyto be used.The Bluetooth connection on Port 3 is established, active andis communicating data.Line/area • The number of lines and areas currently open in the active job is displayed.• Touch screen: Tapping the icon leads to MANAGE Data: Job Name.IconDescriptionThe number of lines and areas which are currently open in theactive job is shown.CompactFlashcard/internalmemory• The status of the CompactFlash card and internal memory are displayed.• For the CompactFlash card, the capacity of used space is shown in seven levels.• For the internal memory, the capacity of used memory is shown in nine levels.• Touch screen: Tapping the icon leads to STATUS Battery & Memory.IconDescriptionThe CompactFlash card is inserted and can be removed.The CompactFlash card is inserted and cannot be removed.It is strongly recommended not to remove the CompactFlashcard to avoid loss of data.The internal memory is the active memory device.No iconThe CompactFlash card is the active memory device. NoCompactFlash card is inserted.User Interface <strong>TPS1200</strong>+ 13
GPS Positionstatus• Displays the status of the current position.• Touch screen: Tapping the icon leads to STATUS Position.IconNo iconDescriptionNo position availableAutonomous solution available.Code solution available.Phase fixed solution available. The ticks indicate that an ambiguitycheck is being made.Number of visiblesatellites• Displays the number of theoretically visible satellites above the configured cutoff angle according to the current almanac.• Touch screen: Tapping the icon leads to STATUS Satellites.IconDescriptionThe number of visible satellites.Contributingsatellites• Displays the number of satellites that are contributing to the currently computedposition solution.• Touch screen: Tapping the icon leads to STATUS Satellites..IconDescriptionWhen a position status icon is displayed, the number of satellitescurrently used for the position computation are shown.If no position is currently available but satellites are beingtracked then the L1 and L2 values (GPS only) or the G and Rvalues (GPS & GLONASS) show how many satellites arebeing tracked.The number of contributing satellites can differ fromthe number of visible satellites. This may be eitherbecause satellites cannot be viewed or theobservations to these satellites are considered to betoo noisy to be used in the position solution.The number of contributing GLONASS satellitescould be zero if five or more GPS satellites are usedfor the position computation. The processing algorithmautomatically selects the best possible set ofsatellite combinations for the position computation.A position computation with R = 0 is certainly withinthe specified reliability.User Interface <strong>TPS1200</strong>+ 15
Real-time deviceandReal-time status• Displays the real-time device configured to be used and its status.• Touch screen: Tapping the icon leads to STATUS Real-Time Input.• Real-time mode: Rover - An arrow pointing down indicates a rover configuration.The arrow flashes when real-time messages are received.IconDescriptionDigital cellular phone connectingDigital cellular phone receivingRadio receivingRS232 receivingBluetooth enabled device attached and receiving. A digitalcellular phone is shown as an example.Internet onlinestatusIconDescriptionSmartStation is online in the Internet.Position mode • Displays the current position mode depending on the configuration defined. Assoon as this icon becomes visible SmartStation is in a stage where practicaloperation can commence.• Touch screen: Tapping the icon leads to STATUS Logging.Icon Position mode Point occupation Raw data loggingStatic Yes NoStatic Yes YesMoving No No16 <strong>TPS1200</strong>+ User Interface
1.5 SymbolsDescriptionFilterThe symbols provide information regarding settings.Symbol Description ExampleThe filter symbol is shown on the Points, Lines,Area or Map page if a point, line or area filter isactive.AttributesSymbol Description ExampleThe attribute symbol is displayed in MANAGECodes to indicate codes that have attributesattached.LimitsSymbol Description ExampleIndicates a defined limit has been exceeded. Forexample, the exceeding of a residual limit in theDetermine Coordinate <strong>System</strong> applicationprogram.Largest residualSymbol Description ExampleThis symbol is used to indicate the largestresidual in DET C SYS Step 4: Check Residuals.Staked outSymbol Description ExampleThis symbol is used in MANAGE Data: JobName to indicate points which have been stakedout. The staked out flag can be reset in MANAGEStakeout Filter.User Interface <strong>TPS1200</strong>+ 17
18 <strong>TPS1200</strong>+ User Interface
2 Configurable Keys2.1 Hot KeysDescription • Two levels of hot keys exist:• The first level are the keys F7, F8, ..., F12• The second level is the combination of SHIFT and F7, F8, ..., F12Functionality • Hot keys provide a shortcut for quickly and directly carrying out functions orstarting application programs assigned to the keys. The assignment of functionsand application programs to hot keys is user configurable.Access • The first level is accessed by pressing F7, F8, ..., F12 directly.• The second level is accessed by pressing SHIFT first followed by F7, F8, ..., F12• Hot keys can be pressed at any time. It is possible that a function or applicationprogram assigned to a hot key cannot be executed in certain situations.Defining hot keys • Refer to "19.2 Hot Keys & User Menu" for further details.Configurable Keys <strong>TPS1200</strong>+ 19
2.2 USER KeyDescription • The USER key opens the user defined menu.Functionality • The user defined menu can be configured to contain the most used functionsand/or the most used application programs.• Selecting an option in the user defined menu carries out the function or starts theapplication program assigned to the option.Access • Press USER to access <strong>TPS1200</strong>+ User Menu: configuration set.• This menu cannot be accessed when a CONFIGURE screen is open.Defining USER key • Refer to "19.2 Hot Keys & User Menu" for further details.<strong>TPS1200</strong>+User Menu:configuration set• This is an example of what a user defined menu can look like. The softkeys andtheir order is fixed. The functions and application programs which are assignedto the individual places in the user defined menu can differ depending on theconfiguration.• The user defined menu is stored with the currently active configuration set.CONT (F1)To execute the selected function.CONF (F2)To configure the user menu.STAT (F3)To access the Status Menu.20 <strong>TPS1200</strong>+ Configurable Keys
3 Quick Settings - SHIFT USERDescriptionAccessQUICK SETChange SettingsToThis screen displays the possible settings to change to. All possible settings havetwo states and allow very quick setting changes. Highlight a field and press ENTERto change to the displayed setting or press the number next to the function.Press SHIFT USER.COMPS (F1)To turn the instrument usingcompass readings.Hz/V (F2)To turn the instrument to a specificentered position.JSTCK (F3)To turn the instrument using thearrow keys.CHKPT (F4)To check a point or the instrumentorientation.L.GO (F5) or L.INT (F5)L.GO (F5) to start an ATR search, toset and tolock onto the reflector.L.INT (F5) to interrupt LOCK.PS (F6)Starts a prism search with Power-Search.Description of fields<strong>Field</strong> Option DescriptionATR Turn ON To activate ATR, . Turn OFF To deactivate ATR, .LOCK Turn ON To activate LOCK, . Turn OFF To deactivate LOCK, .EDM Type Change to IR To activate measurements to reflectors,. Change to RL To activate reflectorless measurements,. DeactivatesATR and LOCK, .EDM Mode Change to TRK To activate tracking with continuous measurements,. Change to STD To activate single measurements, .Quick Settings - SHIFT USER <strong>TPS1200</strong>+ 21
<strong>Field</strong> Option DescriptionRCS Mode Turn ON To activate RCS mode and LOCK, in CONFIGURE RCS Mode,. Turn OFF To deactive RCS mode, in CONFIGURE RCS Mode.PS Window Turn ON To activate the PowerSearch window, . Prisms are searched for withPowerSearch in the PS window when PS (F6)is pressed.If is selectedand reflectorless measurements isstill set, , then this is changed tomeasurements to reflectors, . Turn OFF To deactivate the PowerSearch window . A 360° search is performedwhen PS (F6) is pressed.V-Angle Hold The displayed value for the vertical angle isheld after DIST (F2) and until REC (F3) ispressed, .ChangeFace Runningno choicesThe displayed value for the vertical angle isupdated after DIST (F2) is pressed, .Be aware that after restarting theinstrument this setting remains andis not changed.To change the face of the telescope.Next stepHighlight the desired item and press ENTER.ORPress the desired softkey.22 <strong>TPS1200</strong>+ Quick Settings - SHIFT USER
4 Instrument Setup4.1 Instrument SetupDescriptionThis topic describes an instrument setup over a marked ground point using the laserplummet. It is always possible to set up the instrument without the need for a markedground point.Important features:• It is always recommended to shield the instrument from direct sunlight andavoid uneven temperatures around the instrument.• The laser plummet described in this topic is built into the vertical axis of theinstrument. It projects a red spot onto the ground, making it appreciably easierto centre the instrument.• The laser plummet cannot be used in conjunction with a tribrach equippedwith an optical plummet.• Refer to "<strong>TPS1200</strong>+ Technical Reference <strong>Manual</strong>" for additional informationon using the laser plummet.Setup step-by-step273SHIFTF126115 4515TPS12_019StepShieldDescriptionthe instrument from direct sunlight and avoid uneven temperaturesaround the instrument.1. Extend the tripod legs to allow for a comfortable working posture. Positionthe tripod over the marked ground point, centring it as well as possible.2. Fasten the tribrach and instrument onto the tripod.3. Turn on the instrument by pressing PROG for 2 s. Press SHIFT (F12) toaccess STATUS Level & Laser Plummet, activating the laser plummet.4. Move the tripod legs (1) and use the tribrach footscrews (6) to centre theplummet (4) over the ground point.5. Adjust the tripod legs to level the circular level (7).6. By using the electronic level turn the tribrach footscrews (6) to preciselylevel the instrument.Instrument Setup <strong>TPS1200</strong>+ 23
StepDescription7. Centre the instrument precisely over the ground point (4) by shifting thetribrach on the tripod plate (2).8. Repeat steps 6. and 7. until the required accuracy is achieved.24 <strong>TPS1200</strong>+ Instrument Setup
4.2 Levelling Up with the Electronic LevelDescriptionThe STATUS Level & Laser Plummet screen can be used to precisely level up theinstrument with the electronic level using the foot screws of the tribrach. The longitudinaland transverse tilt of the instruments vertical axis is graphically and numericallydisplayed.Access Press SHIFT F12.Levelling theinstrument with theelectronic levelstep-by-stepStep Description1. STATUS Level & Laser PlummetUse the foot screws to move the electronic level to the centre.The level moves linear with the inclination values and .On the screen closest to the circular level, the electronic level moves downif the value in gets bigger and vice versa. If the value for gets bigger the level moves left and vice versa.The electronic level never disappears even if the instrument is not level.2. When the electronic level is centred, the instrument has been perfectlylevelled up.3. CONT (F1) to exit STATUS Level & Laser Plummet.For instruments with two displays:• The display closer to the circular level shows the movement of the electroniclevel in the same direction as the movement of the circular level.• The other display shows the movement of the electronic level in the oppositedirection of the circular level movement.Instrument Setup <strong>TPS1200</strong>+ 25
4.3 SmartStation SetupSetup step-by-stepStepReferDescriptionto "4.1 Instrument Setup" for the initial instrument setup onto atripod. Remove the instrument carry handle by simultaneously pressingand holding-in the four push buttons.TPS12_194Step Description1. A circular screw is located at one end of the clip-on-housing. Ensure thatthe circular screw is in the unlocked position. Turn it anticlockwise, asshown by the lock and arrow symbols on the screw.2. Slide the clip-on-housing into position underneath the SmartAntennaAdapter, such that the guide rails on the clip-on-housing and the guiderails on the SmartAntenna Adapter are aligned.Ensure that the connector located at the end of the clip-on-housing fits intoits port of the SmartAntenna Adapter.3. Lock the circular screw by turning it clockwise, as shown by the lock andarrow symbols on the screw. The clip-on-housing is now locked into position.4. Thread the antenna onto the clip-on-housing.TPS12_19526 <strong>TPS1200</strong>+ Instrument Setup
Step Description5. Place the SmartAntenna Adapter with attached clip-on-housing onto theinstrument by simultaneously pressing and holding-in the four pushbuttons.Ensure that the interface connection on the underside of the Smart-Antenna Adapter is on the same side as the Communication side cover.TPS12_209Step Description6. Place the SmartAntenna onto the SmartAntenna Adapter by simultaneouslypressing and holding-in the two press clips.Ensure that the clip-on-contacts on the underside of the SmartAntennaare aligned to the clip-on-contacts of the SmartAntenna Adapter.Instrument Setup <strong>TPS1200</strong>+ 27
4.4 Instrument Setup for Remote ControlSetup step-by-step132242TPS12_196StepReferDescriptionto "4.1 Instrument Setup" for the initial instrument setup onto atripod. Remove the instrument carry handle by simultaneously pressingand holding-in the four push buttons.1. Place the RadioHandle onto the instrument by simultaneously pressingand holding-in the four push buttons.Ensure that the interface connection on the underside of the RadioHandleis on the same side as the Communication side cover.2. Swing the RadioHandle antenna into an upright position.Refer to "RX1200 User <strong>Manual</strong>" for further details.28 <strong>TPS1200</strong>+ Instrument Setup
5 Setup, Measure and RecordDescription • The Setup application program is used to define the job settings and to set upand orient the instrument. The routine is accessible from each applicationprogram.• Independent of the chosen Setup application program method, the job settingscan be defined in the Begin screen of any application program by moving thefocus to and pressing ENTER.Setup step-by-stepThe quickest setup method is described. Refer to "<strong>TPS1200</strong>+ Applications <strong>Field</strong><strong>Manual</strong>" for further details on additional setup methods.Step Description1. PROG highlight Setup and ENTER to access SETUP Station SetupBegin.2. CONT (F1) to access SETUP Station Setup.3. SETUP Station SetupSelect the job which contains the fixpoints. .Select the setup method. .4. Select the source for the station coordinates. For and CONT (F1) to accessSETUP Select Station.5. Type in and CONT (F1) to access SETUP Set Stn & Ori - Set Azimuth.6. Aim at the target point and enter the Azimuth and Backsight ID. A distanceto the target point may also be measured.7. Enter the height of the target point.8. Decide whether all angle measurements at the station are to be updated.Az=0 (F4) to set the azimuth to 0.000.9. SET (F1) to set station and orientation.Measure andrecordstep-by-stepThe SURVEY Survey: Job Name screen can be accessed from many applicationprograms where point measurement is required. The ALL (F1), DIST (F2) and REC(F3) keys are used for measuring and storing the point data. The measurementsettings depend on the current configuration set.Step Description1. Refer to paragraph "Setup step-by-step" for information on how to set upthe instrument.2. Select Main Menu: Survey.3. SURVEY Survey BeginCONT (F1) to access SURVEY Survey: Job Name, Survey page.Setup, Measure and Record <strong>TPS1200</strong>+ 29
StepDISTRECALLDescription(F2) to measure a distance and to display the distance and theangles. The update of the vertical angle after DIST (F2) depends on thesetting of in CONFIGURE Units & Formats, Angle page.• For the vertical angle remains fixed untilREC (F3) is pressed.• For the vertical angle is continuously updatedaccording to the telescope movement.(F3) to store either the displayed distance if measured with DIST (F2)and angles or angles and no distance. The displayed point ID is increasedaccording to the active point ID template. After REC (F3) is pressed, thedistance related values are cleared.(F1) to measure and store distance and angles. The displayed pointID is increased according to the active point ID template. After ALL (F1)is pressed, the distance related values are cleared. Pressing ALL (F1)works in the same way as pressing DIST (F2) and then REC (F3).4. ALL (F1) to measure distance and angles.Combining DIST(F2) and REC (F3)step-by-stepThe key combination of DIST (F2) and REC (F3) can be used to measure non accessiblepoints with the reflector, for example building corners.TPS12_039TPS12_040Step Description1. Position the reflector at the same distance from the instrument as thebuilding corner to be measured.2. DIST (F2) to measure the distance.3. REC (F3) to store the measured distance to the reflector and the anglesto the corner of the house.For measurements without reflector must be set.For , continuous distance measurements are executedonce ALL (F1) or DIST (F2) is pressed.30 <strong>TPS1200</strong>+ Setup, Measure and Record
6 Manage... - Getting StartedAccessingMANAGE XXstep-by-stepStep Description1. Select Main Menu: Manage....2. <strong>TPS1200</strong>+ ManagementSelect an option in the menu.3. CONT (F1) to access MANAGE XX.MANAGE XX can be accessed directly from a choicelist in some screens,for example from the begin screen from an application program.MANAGEXX• MANAGE Jobs (Device) is shown as an example. Additional softkeys are availableon other screens. The listed options are stored in the database DB-X. Anyunavailable information is shown as -----.• The screen for MANAGE Data: Job Name consists of several pages. Theobjects listed and their order depend on the active sort and filter settings. Anactive filter for a page is indicated by shown to the right of the name of thepage. On the Lines (X) page and the Areas (X) page, the number in bracketsnext to the name of the page indicate the number of open lines/areas. Example:Lines (2)/Areas (2) means that two lines are open.CONT (F1)To select an option and to return tothe previous screen. For MANAGECodelists, the codes from the highlightedcodelist are copied to theactive job.NEW (F2)To create an option. After storing anew line/area, all existing lines andareas which are open are closed.EDIT (F3)To edit the option. For MANAGEConfiguration Sets, the first screenof the sequential configuration setwizard for the highlighted configurationset is accessed.DEL (F4)To delete the option. Available unlessMANAGE Data: Job Name, Lines(X) page and MANAGE Data: JobName, Areas (X) page.DATA (F5)To view, edit and delete points, linesand areas stored with the job. Points,lines and areas are shown on separatepages. Selected sort and filtersettings apply.Manage... - Getting Started <strong>TPS1200</strong>+ 31
CLOSE (F4) and OPEN (F4)To change between the options in theOpen column for the highlightedline/area. The options are:Yes: The line/area is open. Measuredpoints are assigned to the line/area.No: The line/area is closed. Measuredpoints are not assigned to theline/area.MORE (F5)To display more information in thesecond column. Available unlessMANAGE Jobs (Device).PAGE (F6)To change to another page on thisscreen. Available for MANAGE Data:Job Name.CFCRD (F6) or INTL (F6)To change between viewing jobsstored on the CompactFlash card orinternal memory. Available forMANAGE Jobs. Available for instrumentswith internal memory.SHIFT LOG (F4)To view points, lines, areas and freecodes stored with the job sorted bytime. Available for MANAGE Data:Job Name, Points page.SHIFT DEL (F4)To delete the line/area. Available forMANAGE Data: Job Name, Lines(X) page and MANAGE Data: JobName, Areas (X) page.SHIFT SET-D (F4)To turn the highlighted coordinatesystem/configuration set into a userdefined default coordinatesystem/configuration set stored in theinstrument. Available for MANAGECoordinate <strong>System</strong>s and MANAGEConfiguration Sets. Availableunless a default coordinatesystem/configuration set is highlighted.SHIFT FILT (F5)To define sort and filter settings.Available for MANAGE Data: JobName.32 <strong>TPS1200</strong>+ Manage... - Getting Started
SHIFT DEFLT (F5)To recall the deleted default coordinatesystems/configuration sets andto reset default configuration sets tothe default settings. Available forMANAGE Coordinate <strong>System</strong>s andMANAGE Configuration Sets.Next stepIF an optionis to be selectedis to be created oreditedTHENhighlight the desired option. CONT (F1) closes the screen andreturns to the screen from where MANAGE XX wasaccessed.highlight the option and NEW (F2)/EDIT (F3). Refer to theindividual chapters.Manage... - Getting Started <strong>TPS1200</strong>+ 33
34 <strong>TPS1200</strong>+ Manage... - Getting Started
7 Manage...\Jobs7.1 OverviewDescriptionJobs:• structure surveying projects.• contain all points, lines, areas and codes that are recorded and stored.• can be downloaded to LGO for post-processing or for data transfer to a furtherprogram.• can be uploaded from LGO, for example for stakeout operations.• may be stored on the CompactFlash card or internal memory, if fitted.When a job becomes active, then the sort and filter settings of this job are saved inthe <strong>System</strong>RAM. If the CompactFlash card is formatted then these last used sort andfilter settings are used for the job Default.Manage...\Jobs <strong>TPS1200</strong>+ 35
7.2 Creating a New Job/Editing a JobAccessstep-by-stepMANAGEXX Job,General pageStep Description1. Refer to "6 Manage... - Getting Started" to access MANAGE Jobs(Device).2. In MANAGE Jobs (Device) highlight a job. When creating a new job, thesettings, including sort and filter settings, of this job are applied to the newjob, the codelist must be selected.3. NEW (F2)/EDIT (F3) to access MANAGE New Job/MANAGE Edit Job.Editing jobs is similar to creating a new job. For simplicity, the screens are calledMANAGE XX Job and differences are clearly outlined.STORE (F1)To store the settings and to return toMANAGE Jobs (Device).DATA (F5)Available for editing a job. To view,edit and delete points, lines andareas stored with the job. Points,lines and areas are shown on separatepages. Selected sort and filtersettings apply.SHIFT LOG (F5)Available for editing a job. To view,edit and delete points, lines andareas stored with the job. Points,lines and areas are sorted by time inone list.Description of fields<strong>Field</strong> Option Description User input A unique name for the new job. The namemay be up to 16 characters long and mayinclude spaces. Input required. User input Two lines for a detailed description of thejob. This can be for example, work to beperformed or the classes contained in thejob. Input optional. User input The person’s name who iscreating/editing the job. Input optional.The device on which the job will bestored.Choicelist For instruments with internal memory.OutputFor instruments without internal memoryand when editing a job.36 <strong>TPS1200</strong>+ Manage...\Jobs
Next stepPAGE (F6) changes to the Codelist page.MANAGEXX Job,Codelist pageSTORE (F1)To store the settings and to return toMANAGE Jobs (Device).IMPRT (F2)Available for editing a job. To addadditional codes from a new codelistto the job. The name of this codelist iscopied to the job.CODES (F4)Available for editing a job. To view,edit, delete, sort and group codescurrently stored in the job. The functionalityof this screen is mainly thesame as for MANAGE Codes.DATA (F5)To view, edit and delete points, linesand areas stored with the job. Points,lines and areas are shown on separatepages. Selected sort and filtersettings apply.SHIFT EXPRT (F2)Available for editing a job. To copycodes from the job to an existing ornew codelist.Description of fields<strong>Field</strong> Option Description Choicelist Available for creating a new job or forediting a job if no codes are stored in thejob. Choosing a codelist copies the codesto the job.OutputAvailable for editing a job if codes arestored in the job. If codes had beencopied from a <strong>System</strong> RAM codelist, thenthe name of the codelist is displayed. Ifcodes have not been copied from a<strong>System</strong> RAM codelist but typed in manually,then the name of the active job isdisplayed.Next stepPAGE (F6) changes to the Coord <strong>System</strong> page.Manage...\Jobs <strong>TPS1200</strong>+ 37
MANAGEXX JobCoord <strong>System</strong>pageMANAGEXX JobAvge pageChoosing a coordinate system attaches it to the job. All other fields on this screenare output fields. They depend on the transformation type of the selected coordinatesystem.Next stepPAGE (F6) changes to the Avge page.In order to check measurements, the same point can be measured more than once.If activated, an average or an absolute difference is calculated. Refer to paragraph"MANAGE XX Job, General page" for information on the softkeys.Description of fields<strong>Field</strong> Option DescriptionDefines the averaging principles formultiple measured points.Average Computes the average for the positionand the height. Points exceeding thedefined limits are marked with inMANAGE Edit Point, Mean page.Absolute Diffs Computes the absolute differencesbetween two points selected from a list ofmeasured points which are all stored withthe same point ID.OffAveraging is turned off.Available for . The method used forcomputing the average.Weighted Computes a weighted average.No Weighting Computes an arithmetic average. Choicelist The type of points which will be taken intoaccount for averaging or for absolutedifferences.andFromtoUser inputUser inputAvailable for . The acceptable difference forthe position and height components.Available for . The acceptable absolutedifferences for each coordinate component.Next stepSTORE (F1) stores the job and returns to MANAGE Jobs (Device).38 <strong>TPS1200</strong>+ Manage...\Jobs
8 Manage...\Data8.1 OverviewDescription • Data is a generic term for points, lines and areas.• Data management is the administration of data stored in the active job, including• viewing data with their related information.• editing data.• creating new data.• deleting existing data.• filtering existing data.ObjectsObjects:• are points, lines and areas.• have a unique identification ID. This is the point ID, the line ID and the area ID.• may or may not have a code attached. This is a point code for a point, a line codefor a line and an area code for an area.Manage...\Data <strong>TPS1200</strong>+ 39
8.2 Point Management8.2.1 Creating a New Point/Editing a PointAccessstep-by-stepMANAGEXX Point,Coords pageStep Description1. Refer to "6 Manage... - Getting Started" to access MANAGE Data: JobName, Points page2. MANAGE Data: Job Name, Points pageIf a point is to be edited, then highlight the point.3. NEW (F2)/EDIT (F3) to access MANAGE New Point/MANAGE EditPoint: Point ID.Editing points is similar to creating a new point. For simplicity, the screens are calledMANAGE XX Point and differences are clearly outlined. If editing a point, then thevisible pages and softkeys on this screen depend on the properties of the point beingedited.STORE (F1)To store the point and all associatedinformation and to return toMANAGE Data: Job Name, Pointspage.COORD (F2)To view other coordinate types.NORTH (F3) or SOUTH (F3)Available for local geodetic orWGS 1984 geodetic coordinateswhen or is highlighted. To changebetween North and South latitude.EAST (F3) or WEST (F3)Available for local geodetic orWGS 1984 geodetic coordinateswhen or is highlighted. To changebetween East and West longitude.SHIFT ELL H (F2) or SHIFT ORTH (F2)Available for local coordinates. Tochange between the ellipsoidal andthe orthometric height.SHIFT INDIV (F5) or SHIFT RUN (F5)To change between entering an individualpoint ID different to the definedID template and the running point IDaccording to the ID template.40 <strong>TPS1200</strong>+ Manage...\Data
Description of fields<strong>Field</strong> Option Description User input The name of the new point. The configuredpoint ID template is used. The ID canbe changed.• To start a new sequence of point ID’sovertype the point ID.• For an individual point ID independentof the ID template SHIFT INDIV (F5).SHIFT RUN (F5) changes back to thenext free ID from the configured IDtemplate.If editing a point, then changing the pointID for a point of any class applies this newpoint ID to all other points with the sameoriginal name, regardless of class.OutputPoints of cannot berenamed.Coordinates User input Negative geodetic coordinates are interpretedas being of the opposite hemisphereor other side of the centralmeridian. For example, entering -25 °Nwill be stored as 25 °S, entering -33 °E willbe stored as 33 °W.OutputIf editing, then points of cannot be renamed.Next stepPAGE (F6) changes to the next page. Refer to the relevant paragraph below.MANAGEEdit Point: Point ID,Obs pageFor GNSS pointsThe name of the real-time reference station from where the GNSS point was measured,the name of antenna used to measure the point and the baseline values areshown in output fields.For TPS pointsIt is possible to edit the reflector height. Changing the reflector height recalculatesthe point height. The name of the station from where the point was measured isshown in an output field. The distance variables ΔHz, ΔV, ΔSlop Dist are shown inan output field, whenever a measurement has been taken in both faces.Next stepPAGE (F6) changes to the next page. Refer to the relevant paragraph below.Manage...\Data <strong>TPS1200</strong>+ 41
MANAGEXX Point,Code pageThe setting for in CONFIGURE Coding Settings determinesthe availability of the subsequent fields and softkeys. For none of the keys is available except for STORE (F1).STORE (F1)To store the point and all associatedinformation and to return toMANAGE Data: Job Name, Pointspage.NEW-A (F2)To create additional attributes for thepoint code.NAME (F3) or VALUE (F3)Available for attributes for which anattribute name can be typed in.To highlight or thefield for the attribute value. The nameof can be edited andan attribute value can be typed in.LAST (F4)To recall the last used attributevalues which were stored with thispoint code.DEFLT (F5)To recall the default attribute valuesfor the selected code.Description of fields<strong>Field</strong> Option Description Choicelist Available for . All point codes of the jobcodelist can be selected. The descriptionof the code is shown as an output field.The attributes are shown as output, inputor choicelist fields depending on theirdefinition. User input Available for . The code to be stored with thepoint. A check is performed to see if apoint code of this name already exists inthe job. If so, the according attributes areshown. User input Available for . Up to eight attribute valuesare available.42 <strong>TPS1200</strong>+ Manage...\Data
Next stepIFcreating a pointTHENSTORE (F1) stores the point and all associated informationand returns to MANAGE Data: Job Name, Points page.editing a point • PAGE (F6) changes to the Annots page, if available.• PAGE (F6) changes to the Mean page, if available. Referto "8.2.2 Mean Page" for information on softkeys andfields on the Mean page.MANAGEEdit Point: Point ID,Annots pageThe comments to be stored with the point can be edited except for if a GPSseismic value has been recorded.Next stepSTORE (F1) stores the changes and returns to MANAGE Data: Job Name.Manage...\Data <strong>TPS1200</strong>+ 43
8.2.2 Mean PageDescription • Various measured coordinate triplets for one point can be recorded using thesame point ID. If the averaging mode is activated, an average is calculated.• It is checked if the deviations of each single point are within the configured limits.• After averaging, the Mean page becomes available in MANAGE Edit Point:Point ID and accessible from the Survey application program SURVEY Survey:Job Name, Survey page.AveragingDefining the averaging mode and configuring the limitsThe averaging mode and the limits are configured in MANAGE New Job, Avgepage or in MANAGE Edit Job: Job Name, Avge page. Refer to "7.2 Creating a NewJob/Editing a Job" for further details.Description of averaging modesAveraging modeAverageAbsolute DiffsOffDescriptionThe horizontal and height distances from the measured pointsto the average are computed and displayed on the Meanpage. Depending on the selected averaging method, theaverage will be computed weighted or arithmetic (noweighting).The same as for Average above applies for Absolute Diffs.Additionally, the absolute difference between two pointsselected from a list of measured points which are all storedwith the same point ID are computed and checked for beingwithin the defined limits.Averaging functionality is turned off.Accessstep-by-stepAccess within data managementStep Description1. Refer to "6 Manage... - Getting Started" to access MANAGE Data: JobName.2. In MANAGE Data: Job Name, Points page highlight a point to be edited.3. EDIT (F3) to access MANAGE Edit Point: Point ID, Mean page.44 <strong>TPS1200</strong>+ Manage...\Data
MANAGEEdit Point: Point ID,Mean pageAll measured coordinate triplets recorded using the same point ID are shown.STORE (F1)To store the changes and to return tothe screen from where this screenwas accessed.USE (F2)To include or exclude the highlightedcoordinate triplet in or from the calculationof the average.EDIT (F3)To view and edit the highlightedmeasured coordinate triplet.DEL (F4)To delete the highlighted coordinatetriplet. The average is recomputed.MORE (F5)To display more information in thesecond column.SHIFT DIFFS (F5)Available for and Yes is set in theUse column for exactly two measurements.To display the absolute coordinatedifferences. Differencesexceeding the defined limit are indicatedby .Description of columnsColumnUsedPosDescriptionThe use of a measured coordinate triplet in the averaging.• AutoThe coordinate triplet is included in the averaging computationif within the defined averaging limit.• YesThe coordinate triplet is always included in the averagingcomputation even if it would fall outside the defined averaginglimit.• NoThe coordinate triplet is never included in the averagingcomputation.• -----The coordinate triplet cannot be included in the averagingcomputation. Automatically set by the system.USE (F2) changes between the options.The horizontal distance from the measured coordinate tripletto the average.Manage...\Data <strong>TPS1200</strong>+ 45
ColumndHtDescriptionThe height distance from the measured coordinate triplet tothe average.Available for measured coordinate triplets with Auto or Yes inthe Use column if . Indicates anexceeding of the limits.Next stepIF a measuredcoordinate tripletis not to be viewedis to be viewedTHENSTORE (F1) stores the changes and returns to MANAGEData: Job Name.highlighta measured coordinate triplet and EDIT (F3).Codes cannot be changed. A change in codes mustbe an overall change for the average point.46 <strong>TPS1200</strong>+ Manage...\Data
8.3 Line/Area Management8.3.1 OverviewDescription • A line/area consists of points and can be created/edited in MANAGE Data: JobName. The individual points are measured within any application program.These can be all points, except auxillary points. Points can be simultaneouslyassigned to one or more lines and/or areas.• A line/area can have:• a style for display in MapView.• a code independent of the point code of the points comprising the line/area.Points are assigned to a line/area when the line/area is open. Press USE (F4) toopen/close a line/area.Manage...\Data <strong>TPS1200</strong>+ 47
8.3.2 Creating a New Line/Area/Editing a Line/AreaCreating/editing lines/areas and the functionality of all screens and fields are similarfor lines/areas. For simplicity, only the creation/editing of a line is explained in thischapter.Accessstep-by-stepMANAGEXX Line,General pageStep Description1. Refer to "6 Manage... - Getting Started" to access MANAGE Data: JobName.2. PAGE (F6) until the Lines (X) page is active.3. MANAGE Data: Job Name, Lines (X) pageIf a line is to be edited, then highlight the line.4. NEW (F2)/EDIT (F3) to access MANAGE New Line/MANAGE Edit Line:Line ID.Editing lines/areas is similar to creating a new line/area. For simplicity, the screensare called MANAGE XX Line and differences are clearly outlined.STORE (F1)To store the line and all associatedinformation and to return toMANAGE Data: Job Name, Lines(X) page. Any existing lines andareas which are open are closed.MORE (F5)Available on MANAGE Edit Line:Line ID. To display additional fieldswith more information.SHIFT INDIV (F5) or SHIFT RUN (F5)To change between entering an individualline ID different to the definedID template and the running line IDaccording to the ID template.Description of fields<strong>Field</strong> Option Description User input The name of the new line. All Points,Only Msd Pts,Only Auto Pts,Only Offset1 PtsorOnly Offset2 PtsThe type of points which are used to formthe line during a survey.48 <strong>TPS1200</strong>+ Manage...\Data
<strong>Field</strong> Option Description Choicelist Available on MANAGE New Line. This isthe line style in which lines/areas arerepresented in MapView and LGO. For on the Code pagea line style can be selected from achoicelist. Otherwise the line style asdefined for the selected line code on theCode page is shown. Output The number of points contained within theline. Output Available on MANAGE Edit Line: LineID. The sum of the distances between thepoints in the sequential order in whichthey are stored for the line. This can be ahorizontal grid distance or a geodeticdistance on the WGS 1984 ellipsoid. and andOutputOutputAvailable on MANAGE Edit Line: LineID. The time/date when the line wascreated.Available on MANAGE Edit Line: Line IDafter pressing MORE (F5). The time/datewhen the last point was added to the line.The values do not change after deletingthe last added point or after editing unlessan additional point is added to the line.Next stepIFcreating a lineediting a lineTHENPAGE (F6) changes to the Code page. Refer to paragraph"MANAGE XX Line, Code page".PAGE (F6) changes to the Points page. Refer to paragraph"MANAGE Edit Line: Line ID, Points page".Manage...\Data <strong>TPS1200</strong>+ 49
MANAGEEdit Line: Line ID,Points pageAll points belonging to the line are listed. The point that was added last to the line isat the top of the list.ADD (F2)To add an existing point from theactive job to the line. A new point isadded before the point which washighlighted when ADD (F2) waspressed.EDIT (F3)To edit the highlighted point from theline.REMOV (F4)To remove the highlighted point fromthe line. The point itself is not deleted.MORE (F5)To display more information in thesecond column.Next stepPAGE (F6) changes to the Code page.MANAGEXX Line,Code pageCreatinglines/areas mostefficientlyThe functionality is very similar to MANAGE New Point, Code page. Refer to "8.2.1Creating a New Point/Editing a Point".Next stepSTORE (F1) stores the changes and returns to MANAGE Data: Job Name, Lines(X) page.IF the task is tocreatemultiple lines/areaswith subsequentline/area ID’slines/areas withcertain codesTHENuse the hot key/user menu function FUNC Create New Line(Quick)/FUNC Create New Area (Quick). Pressing the hotkey or selecting the function from the user menu creates andimmediately stores the new line/area. For the line/area ID, theline/area ID template as defined in CONFIGURE IDTemplates is used. The code and attributes are taken overfrom the last created line/area.use quick coding. The job codelist must contain quick codesfor lines/areas. By tying the quick code a new line/area iscreated and immediately stored with that line/area code andattributes. For the line/area ID, the line/area ID template asdefined in CONFIGURE ID Templates is used.50 <strong>TPS1200</strong>+ Manage...\Data
8.4 Point Sorting and Filters8.4.1 Sorting and Filters for Points, Lines and AreasDescriptionThe sort settings define the order of the objects in the active job. The filter settingsdefine the objects to be viewed.An active filter for an object is indicated in MANAGE Data: Job Name by locatedon the right hand side of the page name.The sort and filter settings are stored in the job. They are remembered after turningoff the instrument and are copied to a new job.When a job becomes active, then the sort and filter settings of this job are saved inthe <strong>System</strong>RAM. If the CompactFlash card is formatted then these last used sort andfilter settings are used for the job Default.Accessstep-by-stepMANAGESorts & Filters,Points pageStep Description1. Refer to "6 Manage... - Getting Started" to access MANAGE Data: JobName.2. In MANAGE Data: Job Name on the Points, Lines (X) or Areas (X)page, SHIFT FILT (F5) to access MANAGE Sorts & Filters.3. MANAGE Sorts & FiltersThe page for an object is displayed when the equivalent page is displayedin MANAGE Data: Job Name.The functionality on the Lines (X) and Areas (X) page is similar to that on the Pointspage. For simplicity, only the Points page is described.The available fields on this screen depend on the selected setting for .CONT (F1)To close the screen and return to thescreen from where this screen wasaccessed.STAKE (F5)To filter points for the Stakeout applicationprogram.Description of fields<strong>Field</strong> Option DescriptionAscend Point ID, Always available. The method by whichDescend Point ID, points are sorted.Forward Time orBackward TimeManage...\Data <strong>TPS1200</strong>+ 51
<strong>Field</strong> Option DescriptionAlways available. The method the pointsare filtered by.No Filter Shows all points.Highest Class Shows points of highest class.Range of Pt ID's Shows points with point ID’s between theentered start and end ID. The points areleft aligned and sorted by the first digit.Pt IDWildcardTimeClassInstrumentCoordinate TypePoint CodeRadius From PtIndividual LineIndividual AreaShows points with point ID’s matching thewildcard. * and ? are supported. * indicatesan undefined number of unknowncharacters. ? indicates a single unknowncharacter.Shows points which were recorded withina defined time window.Shows points of the selected class.Shows points originating from theselected instrument or software programtype.Shows points of the selected type of coordinates.Shows points with selected codesattached.Shows points within the defined radiusfrom a particular point. The radius is thehorizontal distance.Shows points forming a selected line.This may for example be useful duringstakeout.Shows points forming a selected area.This may for example be useful duringstakeout.Next stepCONT (F1) returns to the screen from where MANAGE Sorts & Filters wasaccessed.52 <strong>TPS1200</strong>+ Manage...\Data
8.4.2 Point, Line and Area Code FilterFor each object, a code filter exists. The point, line and area code filters are independentfrom each other. The functionality is identical. For simplicity, the point codefilter is explained.Accessstep-by-stepStep Description1. Refer to "8.4.1 Sorting and Filters for Points, Lines and Areas" to accessMANAGE Sorts & Filters.2. MANAGE Sorts & Filters.3. CODES (F4) to access MANAGE Point Code Filter.MANAGEPoint Code FilterThis screen shows the point codes from the active job and codes currently used asfilter.CONT (F1)To close the screen and return to thescreen from where this screen wasaccessed.GROUP (F4)To activate and deactivate codegroups. Codes belonging to a deactivatedcode group are not displayed inMANAGE Code Filter.USE (F5)To activate and deactivate the filterfor the highlighted code.NONE (F6) or ALL (F6)To deactivate or activate all pointcodes.SHIFT SORT (F5)To define the order of the codes.Manage...\Data <strong>TPS1200</strong>+ 53
54 <strong>TPS1200</strong>+ Manage...\Data
9 Manage...\Codelists9.1 Creating a New Codelist/Editing a CodelistIt is recommended to create a codelist in LGO. A codelist can be transferred fromLGO to the <strong>System</strong> RAM of the instrument using the CompactFlash card.Accessstep-by-stepStep Description1. Refer to "6 Manage... - Getting Started" to access MANAGE Codelists.2. NEW (F2)/EDIT (F3) to access MANAGE New Codelist/MANAGE EditCodelist.Editing codelists is similar to creating a new codelist. For simplicity, the screens arecalled MANAGE XX Codelist and differences are clearly outlined.MANAGEXX CodelistSTORE (F1)To store the codelist and to return toMANAGE Codelists.CODES (F4)To access MANAGE Codes wherecodes can be created, edited ordeleted and code groups can beaccessed.Description of fields<strong>Field</strong> Option Description User input A unique name for the codelist. The namemay be up to 16 characters long and mayinclude spaces. Input required. User input A detailed description of the codelist. Thiscan be for example, work to beperformed. Input optional. User input The person’s name who is creating thenew codelist. Input optional.Next stepSTORE (F1) stores the codelist and returns to MANAGE Codelists.Manage...\Codelists <strong>TPS1200</strong>+ 55
9.2 Creating a New Code/Editing a CodeAccessstep-by-stepStep Description1. Refer to "6 Manage... - Getting Started" to access MANAGE Codelists.2. In MANAGE Codelists highlight the codelist of which codes are to bemanaged.3. EDIT (F3) to access MANAGE Edit Codelist.4. CODES (F4) to access MANAGE Codes.5. MANAGE CodesCodes from currently active code groups are shown. The indicates codeswhich have attributes attached.MORE (F5) displays information about the code description, the quickcodes if available, the code groups and the code type.SHIFT GROUP (F4) To view, create, delete, activate and deactivate codegroups.SHIFT SORT (F5) sorts codes by code name, code description, quickcode or the last use.6. MANAGE CodesIf a code is to be edited, then highlight the code.7. NEW (F2)/EDIT (F3) to access MANAGE New Code/MANAGE EditCode.Editing codes is similar to creating a new code. For simplicity, the screens are calledMANAGE XX Code and differences are clearly outlined.SmartCodes is basically a quick way for code to be selected and point to be measured.For information on configuring and using SmartCodes refer to <strong>TPS1200</strong>+Technical Reference <strong>Manual</strong>.MANAGEXX CodeSTORE (F1)To add the new code and any associatedattributes to the <strong>System</strong> RAMcodelist and returns to the screenfrom where this screen wasaccessed.56 <strong>TPS1200</strong>+ Manage...\Codelists
NEW-A (F2)To add a new input field for anattribute of attribute type normal andof value type text. Attributes ofattribute type mandatory or fixed andof value type real or integer must becreated in LGO. Up to twentyattributes can be created.NAME (F3) or VALUE (F3)Available for attributes for which anattribute name can be typed in. Tohighlight the field for the attributename or the field for the attributevalue. The attribute name can beedited and the attribute value to beused as the default attribute valuecan be typed in.Description of fields<strong>Field</strong> Option Description User input A unique name for the new code. Thename may be up to 16 characters longand may include spaces. Input required. User input A detailed description of the code. Thiscan be for example the full designation if is an abbreviation. Inputoptional. Choicelist The code group to which the code is to beassigned. Choicelist Defines the use of the code. It can be usedas thematical code for points, lines orareas or as a free code. It makes a codeunique. For example canhave , , and/or within the samecodelist and job. Choicelist Available for only.This field allows a new line or new area tobe opened whenever the point code isnewly selected. This functionality is alsoavailable when creating codelists withLGO Codelist Management.NoneSelect this option to disable the functionality.All other code settings on the instrumentare not affected when this option isset.Manage...\Codelists <strong>TPS1200</strong>+ 57
<strong>Field</strong> Option DescriptionBegin LineWhen a point code is newly selected, anew line is opened and the point beingstored is added to the line. When thesame point code remains selected, a newline is not opened. The point being storedis simply added to the current line.Begin Area The behaviour for opening a new area isthe same as the behaviour for opening anew line, as mentioned above. Choicelist Not available for . Thestyle in which lines and areas are representedin MapView and LGO.Next stepSTORE (F1) adds the code to the codelist/stores the changes and returns toMANAGE Codelists.58 <strong>TPS1200</strong>+ Manage...\Codelists
10 Linework10.1 Performing LineworkThe Survey application program is used here to explain Linework.Requirements • A display mask with a choicelist for Linework must be configured.• The flags for Linework must be defined in CONFIGURE Coding & LineworkSettings, Linework page.Accessstep-by-stepStep Description1. Select Main Menu: Survey to access SURVEY Survey Begin.2. In SURVEY Survey Begin select a job.3. Select a configuration set.4. Select an reflector.5. CONT (F1) to access SURVEY Survey: Job Name.SURVEYSurvey: Job Name,Survey pageThe most important keys are explained.ALL (F1)To measure and store distances andangles.STOP (F1)Available if and DIST (F2) was pressed. Stopsthe distance measurements. (F1)changes back to ALL.DIST (F2)To measure and display distances.Available unless and/or , after the tracking or logging isstarted.REC (F3)To record data. If and/or , records measured point andcontinues tracking.Description of fields<strong>Field</strong> Option Description User input The identifier for manually occupiedpoints. The configured point ID templateis used. The ID can be changed in thefollowing ways:Linework <strong>TPS1200</strong>+ 59
<strong>Field</strong> Option Description• To start a new sequence of point ID’stype over the point ID.• For an individual point ID independentof the ID template SHIFTINDIV (F5). SHIFT RUN (F5)changes back to the next ID from theconfigured ID template.The linework flag to be stored with thepoint.- - - - - No linework flag is stored.Begin LineOpens a new line when the next point isstored. Any line/area which is currentlyopen is closed and the last pointbelonging to that line/area is given theEnd Line/Close Area linework flag. Thepoint may or may not be stored with apoint code.3pt Curve Stores the linework flag for a curvethrough three points and continues aline/area.ReOpen Any Line Opens a line from a list of all lines whichare currently stored in the job when thenext point is stored. The last code usedwith the reopened line is automaticallyselected when the point is stored. Anyline/area which is currently open is closedand the last point belonging to thatline/area is given theEnd Line/Close Area linework flag.ReOpen Last Line Opens the last used line again. The lastcode used with the reopened line is automaticallyselected when the point isstored.End Line Closes all open lines.Cont Line/Area Indicates a line/area is open.Start SplineEnd SplineCont SplineStores the linework flag for beginning aspline and continues any open line/area.Closes a spline and continues any openline/area.Indicates a line/area is open with splineline type.60 <strong>TPS1200</strong>+ Linework
<strong>Field</strong> Option DescriptionBegin Area Opens a new area when the next point isstored. Any line/area which is currentlyopen is closed and the last pointbelonging to that line/area is given theEnd Line/Close Area linework flag. Thepoint may or may not be stored with apoint code.ReOpen Any Area Opens an area from a list of all lines whichare currently stored in the job when thenext point is stored. The last code usedwith the reopened area is automaticallyselected when the point is stored. Anyline/area which is currently open is closedand the last point belonging to thatline/area is given theEnd Line/Close Area linework flag.ReOpen LastAreaClose AreaOpens the last used area again. The lastcode used with the reopened area is automaticallyselected when the point isstored.Closes all open areas.Next stepStep Description1. Go to the point to be occupied.2. Select the linework flag to be stored with the next point.3. ALL (F1)Depending on the option selected for , a line/area is opened,closed or re-opened.4. Repeat steps 1. to 3. until all points are occupied.5. SHIFT QUIT (F6) to exit the Survey application program.6. Use a format file to export the points including the linework flags.Linework <strong>TPS1200</strong>+ 61
10.2 Combining Linework and CodingDescriptionCombining Linework and coding can only be configured if thematical point codes orif thematical point, line and area codes are available for selection. Thematical codingcan be done with or without codelists.Requirements • A display mask must be configured with:• a field for codes.• a choicelist for Linework.• The configuration of a field for code types in a display mask is required forworking with point, line and area codes without choicelist. Else the configurationof a field for code types is optional.• Configure in CONFIGURE Coding & Linework, Coding page• or .• or .• In CONFIGURE Coding & Linework Settings, Linework page define the flagsfor Linework.The Survey application program is used here to explain the combination of Lineworkand coding.Accessstep-by-stepStep Description1. Select Main Menu: Survey to access SURVEY Survey Begin.2. In SURVEY Survey Begin select a job.3. Select a configuration set.4. Select an reflector.5. CONT (F1) to access SURVEY Survey: Job Name.SURVEYSurvey: Job Name,Survey pageThis is what a display mask configured for Linework and coding looks like. The mostimportant keys are explained.ALL (F1)To measure and store distances andangles.STOP (F1)Available if and DIST (F2) was pressed. Stopsthe distance measurements. (F1)changes back to ALL.62 <strong>TPS1200</strong>+ Linework
DIST (F2)To measure and display distances.Available unless and/or , after the tracking or logging isstarted.REC (F3)To record data. If and/or , records measured point andcontinues tracking.Linework andcodingstep-by-stepThese step-by-step instructions refer to the previous screen.For Step <strong>Field</strong> Description for thematical codingWith codelistWithout codelist1. Select a code from thechoicelist. Only point codesare available for selection.Type in a code.2. to store a pointwithout code or to performLinework without coding.----- to store a point withoutcode or to perform Lineworkwithout coding.Point is displayed. This field is an output field. It can not bechanged.3. Select an option for the Linework flag to be stored with thepoint.----- to store a point without Linework flag or to performcoding without Linework.4. - ALL (F1)-• The point is stored with the selected code.- • Depending on the selection for , aline/area is opened/closed.For Step <strong>Field</strong> Description for thematical codingWith codelistWithout codelist1. Select a code from thechoicelist. Point, line andarea codes are available forselection.Type in a code. to store a pointwithout code or to performLinework without coding.----- to store a point withoutcode or to perform Lineworkwithout coding.Linework <strong>TPS1200</strong>+ 63
Step <strong>Field</strong> Description for thematical codingWith codelistWithout codelist2. The type of the selectedcode. This field is an outputfield. It can not be changed.Select the type of theentered code.3. Select an option for the Linework flag to be stored with thepoint.----- to store a point without Linework.4. - ALL (F1)-• If a point code was selected, the point is stored with theselected code.- • If a line/area code was selected, the point is stored aspart of the line/area.- • Depending on the selection for , aline/area is opened/closed.64 <strong>TPS1200</strong>+ Linework
11 Manage...\Coordinate <strong>System</strong>s11.1 OverviewDescriptionElements ofcoordinate systemA coordinate system:• consists of up to five elements.• allows the conversion from WGS 1984 geodetic or cartesian coordinates to localcartesian, geodetic or grid coordinates and back.The five elements which define a coordinate system are:• a transformation• a projection• an ellipsoid• a geoid model• a Country Specific Coordinate <strong>System</strong> modelManage...\Coordinate <strong>System</strong>s <strong>TPS1200</strong>+ 65
11.2 Creating a New Coordinate <strong>System</strong>/Editing a Coordinate <strong>System</strong>Accessstep-by-stepMANAGEXX Coordinate<strong>System</strong>Step Description1. Refer to "6 Manage... - Getting Started" to access MANAGE Coordinate<strong>System</strong>s.2. In MANAGE Coordinate <strong>System</strong>s highlight a coordinate system. Whencreating a new coordinate system, a copy of this coordinate system istaken for further configurations.3. NEW (F2)/EDIT (F3) to access MANAGE New Coordinate<strong>System</strong>/MANAGE Edit Coordinate <strong>System</strong>.Editing a coordinate system is similar to creating a new coordinate system. Forsimplicity, the screens are called MANAGE XX Coordinate <strong>System</strong> and differencesare clearly outlined.When editing a coordinate system the transformation type of the selected coordinatesystem determines the availability and the options of the subsequent fields. Mostfields are identical with those for the creation of a new coordinate system.Description of fields<strong>Field</strong> Option Description User input A unique name for the coordinate system.The name may be up to 16 characterslong and may include spaces.Available for transformations with controlpoints. The method by which residuals aredistributed throughout the transformationarea.NoneNo distribution is made. Residuals remainwith their associated points.1/Distance XX Distributes the residuals according to thedistance between each control point andthe newly transformed point.Multiquadratic Distributes the residuals using a multiquadraticinterpolation approach. Choicelist The type of transformation. Output Available for editing Twostep transformations.The name of a preliminary 3D transformationwhich is used together with theselected projection to obtain preliminarygrid coordinates to be used for a final 2Dtransformation. Choicelist Available unless projection . The local coordinates arebased on this ellipsoid.66 <strong>TPS1200</strong>+ Manage...\Coordinate <strong>System</strong>s
<strong>Field</strong> Option Description Choicelist The map projection. Choicelist The geoid model. Choicelist The Country Specific Coordinate <strong>System</strong>model.Next stepSTORE (F1) stores the coordinate system and returns to MANAGE Coordinate<strong>System</strong>s.Manage...\Coordinate <strong>System</strong>s <strong>TPS1200</strong>+ 67
11.3 Transformations/Ellipsoids/Projections11.3.1 Accessing Transformation/Ellipsoid/Projection ManagementAccessstep-by-stepStep Description1. Refer to "6 Manage... - Getting Started" to access MANAGE Coordinate<strong>System</strong>s.2. In MANAGE Coordinate <strong>System</strong>s highlight a coordinate system to beedited.3. EDIT (F3) to access MANAGE Edit Coordinate <strong>System</strong>.4. In MANAGE Edit Coordinate <strong>System</strong> highlight , or .5. ENTER to access MANAGE XX.The screen is similar to MANAGE Coordinate <strong>System</strong>s. Refer to "6Manage... - Getting Started" for information on the softkeys.In MANAGE Transformations all Classic 3D transformations stored inthe database DB-X are listed.Next stepIFa transformation/ellipsoid/projectionis to beselecteda transformation/ellipsoid/projectionis to becreated or editedTHENhighlight the desired transformation/ellipsoid/projection.CONT (F1) closes the screen and returns to the screenfrom where MANAGE XX was accessed.highlight the transformation/ellipsoid/projection andNEW (F2)/EDIT (F3). Refer to "11.3.2 Creating/Editing aTransformation/Ellipsoid/Projection".68 <strong>TPS1200</strong>+ Manage...\Coordinate <strong>System</strong>s
11.3.2 Creating/Editing a Transformation/Ellipsoid/ProjectionAccessstep-by-stepCreating/editing an ellipsoid/projection is very similar to creating/editing a transformationwhich is explained below. The main difference is that MANAGE XX Ellipsoidand MANAGE XX Projection do not use pages and all the information is input onone screen.Classic 3D transformations can be created.Step Description1. Refer to "11.3.1 Accessing Transformation/Ellipsoid/Projection Management"to access MANAGE Transformations.2. In MANAGE Transformations highlight a transformation. When creatinga new transformation/ellipsoid/projection, a copy of this transformation/ellipsoid/projectionis taken for further configurations.3. NEW (F2)/EDIT (F3) to access MANAGE New Transformation/MANAGEEdit Transformation.Editing a transformation is similar to creating a new transformation. For simplicity,the screens are called MANAGE XX Transformation and differences are clearlyoutlined.MANAGEXX Transformation,General pageDescription of fields<strong>Field</strong> Option Description User input A unique name for the new transformation.The name may be up to 16 characterslong and may include spaces. Output No other transformations than Classic 3Dcan be created.Next stepPAGE (F6) changes to the Parameters page.MANAGEXX Transformation,Parameters pageMANAGEXX Transformation,More pageEnter the known values of the transformation parameters.Next stepPAGE (F6) changes to the More page.Description of fields<strong>Field</strong> Option Description Choicelist orOutputThe type of heights to be computed.When editing a transformation, the optioncannot be changed.Manage...\Coordinate <strong>System</strong>s <strong>TPS1200</strong>+ 69
<strong>Field</strong> Option Description Choicelist The transformation model to be used. For,additional input fields are available.Next stepSTORE (F1) stores the transformation and returns to MANAGE Transformations.70 <strong>TPS1200</strong>+ Manage...\Coordinate <strong>System</strong>s
11.4 Geoid/CSCS ModelsThe creation of CSCS models on the instrument and the functionality of all screensand fields is similar to those of geoid models. For simplicity, geoid models are usedas an example in this chapter.Accessstep-by-stepStep Description1. Refer to "6 Manage... - Getting Started" to access MANAGE Coordinate<strong>System</strong>s.2. In MANAGE Coordinate <strong>System</strong>s highlight a coordinate system to beedited.3. EDIT (F3) to access MANAGE Edit Coordinate <strong>System</strong>.4. In MANAGE Edit Coordinate <strong>System</strong> highlight .5. ENTER to access MANAGE Geoid Models.MANAGEGeoid ModelsAll geoid models stored in the database DB-X are listed. Any unavailable informationis shown as -----, for example, if the geoid field file which was associated to the geoidmodel is not available on the CompactFlash card / internal memory.CONT (F1)To select the highlighted geoid modeland to return to the previous screen.CFCRD (F2)To create a new geoid model. Foreach geoid field file on the Compact-Flash card, one geoid model is automaticallycreated.EDIT (F3)To view the highlighted geoid model.None of the fields can be edited.DEL (F4)To delete the highlighted geoidmodel. The geoid field file which wasassociated with this geoid model isthen also deleted.INTL (F6)To create a new geoid model. Foreach geoid field file in the internalmemory, one geoid model is automaticallycreated.Manage...\Coordinate <strong>System</strong>s <strong>TPS1200</strong>+ 71
72 <strong>TPS1200</strong>+ Manage...\Coordinate <strong>System</strong>s
12 Manage...\Configuration Sets12.1 OverviewDescriptionDefaultconfiguration setsUser definedconfiguration setsThe instrument has numerous user configurable parameters and functions. Thisallows a variety of preferences to be addressed. The configuration of the parametersand functions for an individual measuring technique are combined in a configurationset.Default configuration sets exist on the instrument. They use standard settings for themajority of application programs. Default configuration sets can be edited anddeleted. It is always possible to restore the default configuration sets.New configuration sets can be created. The configuration set wizard assists inediting configuration sets.Manage...\Configuration Sets <strong>TPS1200</strong>+ 73
12.2 Creating a New Configuration SetAccessstep-by-stepStep Description1. Refer to "6 Manage... - Getting Started" to access MANAGE ConfigurationSets.2. In MANAGE Configuration Sets highlight a configuration set. A copy ofthis configuration set is taken for further configurations.3. NEW (F2) to access MANAGE New Configuration Set.MANAGENew ConfigurationSetDescription of fields<strong>Field</strong> Option Description User input A unique name for the new configurationset. User input A detailed description of the configurationset, since the name of a configuration setis usually an abbreviation. Input optional. User input The person’s name who creates the newconfiguration set. Input optional.Next stepSTORE (F1) accesses the next subsequent screen in the configuration wizard.Refer to the chapters "Config...\XX" for information on the screens.74 <strong>TPS1200</strong>+ Manage...\Configuration Sets
12.3 Editing a Configuration SetAccessstep-by-step usingconfiguration setwizardStep Description1. Refer to "6 Manage... - Getting Started" to access MANAGE ConfigurationSets.2. In MANAGE Configuration Sets highlight a configuration set to beedited.3. EDIT (F3) to access CONFIGURE Wizard Mode. This starts the sequentialconfiguration set wizard.4. Refer to "Config...\XX" for information on the screens.Accesswithout usingconfiguration setwizardThe currently active configuration set can be edited. Choose one of the followingoptions and access the required screens to edit the configuration set.Select Main Menu: Config....ORFrom inside an application program press USER and then CONF (F2).ORIn CONFIGURE Wizard Mode, press LIST (F6). Refer to "12.2 Creating a NewConfiguration Set".Manage...\Configuration Sets <strong>TPS1200</strong>+ 75
76 <strong>TPS1200</strong>+ Manage...\Configuration Sets
13 Manage...\Reflectors13.1 OverviewDescription • Each reflector type has an additive constant.• <strong>Leica</strong> Geosystems reflectors are predefined as default and can be selected.• Additional reflectors can be defined.Manage...\Reflectors <strong>TPS1200</strong>+ 77
13.2 Creating a New Reflector/Editing a ReflectorAccessstep-by-stepMANAGEXX ReflectorStep Description1. Refer to "6 Manage... - Getting Started" to access MANAGE Reflectors.2. In MANAGE Reflectors highlight a reflector. When creating a newreflector, the of the new reflector is taken from the previouslyhighlighted reflector except for RL reflectors.3. NEW (F2)/EDIT (F3) to access MANAGE New Reflector/MANAGE EditReflector.Editing reflectors is similar to creating a new reflector. For simplicity, the screens arecalled MANAGE XX Reflector.Description of fields<strong>Field</strong> Option Description User input or A significant name for the new reflector.OutputPrism, Tape orUndefinedThe type of reflector to be defined. User input The additive constant is always in [mm].An additive constant of 0.0 mmhas been defined for the <strong>Leica</strong>Geosystems standard reflectorsGPR1, GPR111, etc. Allentered or selected additiveconstant values are differencesto this 0.0 mm based <strong>Leica</strong>Geosystems TPS prismsystem. User input A name of the creator or other commentscan be entered.Next stepSTORE (F1) stores the new reflector and returns to MANAGE Reflectors.78 <strong>TPS1200</strong>+ Manage...\Reflectors
14 Convert...\Export Data from Job14.1 OverviewDescription • This screen lists all the exporters loaded.• Data can be exported• to a file on the CompactFlash card.• to a file on the internal memory if fitted.• via RS232 to an external device.Export formatThe format file must be composed individually as format file using LGO. Refer to theonline help of LGO for information on creating format files.Convert...\Export Data from Job <strong>TPS1200</strong>+ 79
14.2 Exporting ASCII DataDescriptionRequirementsAccessEXPORTExport ASCII Datafrom JobThe settings on this screen define the data that is converted and exported and whatformat is used.Data is exported from the selected job. Currently active view, filter and sort settingsare applied. The points that are exported are those that are visible in MANAGEData: Job Name.At least one format file was created using LGO and has been transferred to the<strong>System</strong> RAM.Select Main Menu: Convert...\Export Data from Job\Export ASCII.CONT (F1)To export the data.CONF (F2)To define the default extension forthe export file and to select thebehaviour for the setup measurements.FILT (F4)To set the sort and filter settings forexport. The setting for on thePoints page defines the order inwhich points, lines and areas areexported. The setting for oneach page defines which points, linesor areas are exported.IFACE (F5)Available for .To choose the port and device towhich the data should be exported.CSYS (F6)To update the coordinate system inwhich the coordinates are exported.Description of fields<strong>Field</strong> Option Description CF Card,Internal Memory ifDefines to where the exported file shouldbe written.fitted, or RS232 Data, GSI or /Root Available for . Thedata can be exported to the \Data, the\GIS or the root directory. Data must bestored to the \GSI directory in order toread it in a TPS1100. For , the data is alwaysexported to the \Data directory.80 <strong>TPS1200</strong>+ Convert...\Export Data from Job
<strong>Field</strong> Option Description Choicelist If points from a job on the internal memoryare to be exported, open this choicelist.When in this choicelist press CFCRD (F6)or INTL (F6) to select a job from adifferent memory device. OutputThe coordinate system currently attachedto the selected . Choicelist The format files currently available in the<strong>System</strong> RAM. User input Available for and. Thename of the file to which the data shouldbe exported. The name is automaticallysuggested based on the job name to beexported and an extension. Output Available for .Displays the port currently configured tobe used with RS232. Output The device currently configured to beused with .Convert...\Export Data from Job <strong>TPS1200</strong>+ 81
14.3 Exporting DXF DataGeneralAccessData can be exported to a DXF file in the \DATA directory of the CompactFlash cardor the internal memory, if fitted.Select Main Menu: Convert...\Export Data from Job\DXF Export.DXF ExportExport DXF fromJobCONT (F1)To export the data.CONF (F2)To define elements to be exported,how they will be exported and iflabels will be created.Description of fields<strong>Field</strong> Option Description Choicelist If points from a job on the internal memoryare to be exported, open this choicelist.When in this choicelist press CFCRD (F6)or INTL (F6) to select a job from a differentmemory device. OutputThe coordinate system currently attachedto the selected . User input Available for and. Thename of the file to which the data shouldbe exported. The name is automaticallysuggested based on the job name to beexported and extension dxf. Output Progress bar. Displays progress of theexport.82 <strong>TPS1200</strong>+ Convert...\Export Data from Job
14.4 Exporting LandXML DataGeneralAccessData can be exported to a LandXML file in the \DATA directory of the CompactFlashcard or the internal memory, if fitted.Select Main Menu: Convert...\Export Data from Job\Export LandXML.EXPORTExport LandXMLfrom JobCONT (F1)To export the data.CONF (F2)To define elements to be exported,how they will be exported, the dimensionof the file exported and theLandXML version.Description of fields<strong>Field</strong> Option Description Choicelist If points from a job on the internal memory are tobe exported, open this choicelist. When in thischoicelist press CFCRD (F6) or INTL (F6) toselect a job from a different memory device. User inputThe coordinate system currently attached to theselected .The name of the file to which the data should beexported. The name is automatically suggestedbased on the job name to be exported andextension xml. Output Progress bar. Displays progress of the export.Convert...\Export Data from Job <strong>TPS1200</strong>+ 83
84 <strong>TPS1200</strong>+ Convert...\Export Data from Job
15 Convert...\Import Data to Job15.1 OverviewDescription • This screen lists all the importers loaded. The data to import must either bestored on the CompactFlash card or in the internal memory, if fitted.• Data can be imported to a job:• on the CompactFlash card.• on the internal memory, if fitted.Import formatsAccessstep-by-stepData can be imported in ASCII, GSI8, GSI16 or DXF format.Step Description1. Select Main Menu: Convert...\Import Data to Job to access IMPORTImport Data to Job Menu.2. IMPORT Import Data to Job MenuThe Import Data to Job menu lists all the converters for importing data.Highlight the Import Data converter to be started.3. CONT (F1) to access the screen for the Import Data converter.The screens for each Import Data converter can be accessed directly bypressing a configured hot key or USER.Convert...\Import Data to Job <strong>TPS1200</strong>+ 85
15.2 Importing ASCII/GSI DataRequirements • For ASCII files:• At least one ASCII file with any file extension is stored in the \DATA directoryof the CompactFlash card.• For GSI files:• At least one ASCII file in GSI format with the file extension *.gsi is stored inthe \GSI directory of the CompactFlash card.AccessIMPORTImport ASCII/GSIData to JobRefer to "15.1 Overview" to access Import ASCII/GSI Data to Job.CONT (F1)To import the data.CONF (F2)For : To selectthe delimiter, the positions of theparticular variables and, if required,the number of lines used to describeeach point or if the variables aredelimited by one or multi spaces.For : Coordinatescan be switched for "lefthanded" coordinate systems. AllWI 81 data, normally Easting, is thenimported as Northing and all WI 82data, normally Northing, is thenimported as Easting.VIEW (F3)To display the data in .SHIFT HTS (F2)To define the height type for theimported data and if the Eastingshould be multiplied by -1. This isrequired by some coordinatesystems.Description of fields<strong>Field</strong> Option Description Choicelist ASCII/GSI Data can be imported to a job,from the CompactFlash Card or Internalmemory. Choicelist The type of data to be imported. Choicelist For all files in the\DATA directory on the CompactFlashcard can be selected.For all files in the\GSI directory on the CompactFlash cardcan be selected.86 <strong>TPS1200</strong>+ Convert...\Import Data to Job
<strong>Field</strong> Option Description Choicelist Choosing a job as destination for importmakes this job the active job.None andfrom 1 to 10Available for . Thisoption allows up to ten header lines whichmay exist in an ASCII file to be skipped.Select the number of header lines.Convert...\Import Data to Job <strong>TPS1200</strong>+ 87
15.3 Importing DXF DataRequirements • At least one DXF file with the file extension *.dxf has to be stored in the \DATAdirectory of the CompactFlash card.AccessRefer to "15.1 Overview" to access Import DXF Data to Job.DXF IMPORTImport DXF Data toJobDescription of fieldsCONT (F1)To import the data.CONF (F2)To define an optional prefix forblocks, points and/or lines, to selectthe file units, to activate the creationof points at vertices of the importedgeometric elements, to convert whitecolored elements to black coloredelements, if required and to exclude aheight value from conversion.<strong>Field</strong> Option Description Choicelist DXF data can be imported to a job, from eitherthe CompactFlash card or internal memory. Choicelist Choosing a job as destination for import makesthis job the active job. Output Progress bar of the import procedure.88 <strong>TPS1200</strong>+ Convert...\Import Data to Job
16 Convert...\Copy Points Between JobsDescriptionAccessCOPYCopy PointsBetween JobsThis chapter explains the process of copying points from one job to another.Select Main Menu: Convert...\Copy Points Between Jobs.CONT (F1)To copy a selection of points.FILT (F4)To define the point sort and/or pointfilter settings of points from the job.DATA (F5)To view, edit and delete points, linesand areas stored with the job. Points,lines and areas are shown on separatepages. Selected sort and filtersettings apply.CSYS (F6)To select a different coordinatesystem.Description of fields<strong>Field</strong> Option Description Choicelist Describes where the points are to becopied from. OutputThe coordinate system which is currentlyattached to the job . Choicelist Describes where the points are to becopied to.Convert...\Copy Points Between Jobs <strong>TPS1200</strong>+ 89
90 <strong>TPS1200</strong>+ Convert...\Copy Points Between Jobs
17 Config...\Survey Settings...17.1 ID Templates17.1.1 OverviewDescriptionAccessCONFIGUREID TemplatesID templates are predefined templates for point, line or area numbers. ID templatessave having to type in the ID for each object. They are useful when many points arecollected quickly.Select Main Menu: Config...\Survey Settings...\ID Templates.Description of fields<strong>Field</strong> Option Description Choicelist Sets the ID templates for measuredpoints. Choicelist Sets the ID templates for auto points.These points are automatically recordedat a specific rate. Choicelist Sets the ID templates for lines. Choicelist Sets the ID templates for areas.Next stepCONT (F1) closes the screen and returns to the screen from where CONFIGURE IDTemplates was accessed.Config...\Survey Settings... <strong>TPS1200</strong>+ 91
17.1.2 Creating a New ID Template/Editing an ID TemplateAccessstep-by-stepCONFIGUREXX ID TemplateStep Description1. Refer to "17.1.1 Overview" to access CONFIGURE ID Templates.2. In CONFIGURE ID Templates highlight any field.3. ENTER to access CONFIGURE ID Template Library.4. Highlight an ID template. A copy of this ID template is taken for furtherconfigurations.5. NEW (F2)/EDIT (F3) to access CONFIGURE New IDTemplate/CONFIGURE Edit ID Template.DEL (F4) deletes the highlighted template.Editing ID templates is similar to creating a new ID template. For simplicity, thescreens are called MANAGE XX ID Templates and differences are clearly outlined.Description of fields<strong>Field</strong> Option Description User input The name of the ID template. Numeric only The rightmost numeric part is incrementedwithin the point ID.Alphanumeric The rightmost character within the pointID is incremented regardless of whetherthat character is numeric or alphanumeric. User input The amount by which the point ID is incremented. Last Character orfrom 1 to 16The character position at which the cursoris placed when ENTER is pressed in when surveying points.Next stepCONT (F1) stores the ID template and returns to CONFIGURE ID TemplateLibrary.92 <strong>TPS1200</strong>+ Config...\Survey Settings...
17.2 Display SettingsDescriptionDisplay settings define the parameters shown on a page on the SURVEY screen.Four display masks are definable.Mask 1:Mask 2:Mask 3:Mask 4:Always shown on the SURVEY screen.Can be shown or hidden on the SURVEY screen.Can be shown or hidden on the SURVEY screen.Never shown on the SURVEY screen.Reserved for application programs.AccessSelect Main Menu: Config...\Survey Settings...\Display Settings.CONFIGUREDisplay SettingsCONT (F1)To accept changes and return to thescreen from where this screen wasaccessed.DMASK (F3)To configure the selected displaymask.Description of fields<strong>Field</strong> Option Description MaskSelected display mask.1, 2, 3 or 4 Output Indicates if the display mask is shown orhidden as a page in SURVEY.Next stepDMASK (F3) accesses CONFIGURE Define Display Mask n.CONFIGUREDefine DisplayMask nCONT (F1)To accept changes and to return toCONFIGURE Display Settings.CLEAR (F4)To set all fields to .DEFLT (F5)To recall the default settings.Config...\Survey Settings... <strong>TPS1200</strong>+ 93
Description of fields<strong>Field</strong> Option Description User input Name of display mask. Yes or No Shows or hides the display mask as apage in SURVEY. From 0 to 5 Defines how many lines do not scroll inthe survey screen when that display maskis used. Output Fixed to . toChoicelist For each line an option can be selected.Next stepCONT (F1) returns to CONFIGURE Display Settings.94 <strong>TPS1200</strong>+ Config...\Survey Settings...
17.3 Coding & Linework SettingsDescriptionAccessCONFIGURECoding &Linework,Coding pageThe settings on this screen define the method of coding. For information on configuringand using SmartCodes refer to <strong>TPS1200</strong>+ Technical Reference <strong>Manual</strong>.Select Main Menu: Config...\Survey Settings...\Coding & Linework Settings.Description of fields<strong>Field</strong> Option Description Never, On orOffDetermines if quick coding is never available,activated or available but deactivated. 1, 2 or 3 Available unless .Sets the mostly used number of digits for thequick code. After Point orBefore PointDefault Valuesor Last UsedAlwaysPromptOnly If NoValueCode ChangeOnlyWith CodelistWithoutCodelistOnly Pt Codesor All CodesAvailable unless .Determines if a free code measured with aquick code is stored before or after the point.Determines the attribute values displayedunder certain circumstances. This is applicableto both the storing and displaying ofattribute values.The screen XX Enter Mandatory Attributewill always appear when codes, having oneor more attributes of attribute type mandatory,are being stored.The screen XX Enter Mandatory Attributewill only appear when codes, having one ormore attributes of attribute type mandatory,are being stored without an attribute value.The screen XX Enter Mandatory Attributewill only appear when a new code with amandatory attribute was selected.Codes stored within the job codelist can beselected to code points, lines and areas.Codes stored within the job codelist cannotbe selected to code points, lines and areas.Each code must be entered manually.Either only point codes or all codes of the jobcodelist will be available in the choicelist for/ in a display maskof an application program. Selecting aline/area code opens a new line/area. Choicelist Available for .When this field is active, surveyed points thathave the same code attached are strung toone line.Config...\Survey Settings... <strong>TPS1200</strong>+ 95
Next stepPAGE (F6) changes to the Linework page.CONFIGURECoding &Linework,Linework pageThe flags for Linework are defined on this screen.The flags defined on this screen are linked to the options available for in a display mask of an application program. The selection for in adisplay mask determines the flag stored with a point. The availability of in a display mask is configured in CONFIGURE Define Display Mask n.Description of fields<strong>Field</strong> Option Description User input Opens a new line when the next point isstored. Any lines which are currently openare closed. The point may or may not bestored with a point code. User input Stores the linework flag for a curvethrough three points and continues aline/area. User input Opens the last used line again. User input Closes all open lines. User input Indicates a line/area is open. User input Stores the linework flag for beginning aspline and continues any open line/area. User input Stores the linework flag to stop a spline. User input Indicates a line/area is open with splineline type. User input Opens a new area when the next point isstored. Any areas which are currentlyopen are closed. The point may or maynot be stored with a point code. User input Opens the last used area again. User input Closes all open areas.Next stepCONT (F1) returns to the screen from where CONFIGURE Coding & Linework wasaccessed.96 <strong>TPS1200</strong>+ Config...\Survey Settings...
17.4 OffsetsDescriptionOffsets can be configured and entered. The offset values are applied to measuredpoints. The Offset function allows offset points to be determined, for instance whenthe reflector cannot be set up directly on a point. Transverse, longitudinal and/orelevation offsets can be defined from the reflector position to the offset point. All ofthe displayed and recorded measurement data is in relation to the offset point.DiagramP2d6Accessd3d5P3P0TPS12_041d1P1d2P0 StationP1 Current positionP2 Offset pointP3 Offset pointd1 Offset cross -d2 Offset cross +d3 Offset length -d4 Offset length +d5 Offset height -d6 Offset height +If configured in a display mask, the offset values appear also in the display mask inSurvey.Select Main Menu: Config...\Survey Settings...\Offsets.d4CONFIGUREOffsetsCONT (F1)To accept changes and return to thescreen from where this screen wasaccessed.OFS=0 (F5)To set all offsets to 0.000.Description of fields<strong>Field</strong> Option Description Reset after REC The offset values are reset to 0.000 aftera point is measured with REC (F3) or ALL(F1).Permanent The offset values are applied to everymeasured point until reset or changed.Config...\Survey Settings... <strong>TPS1200</strong>+ 97
<strong>Field</strong> Option Description User input Sets cross offset of target point, perpendicularto the line of sight. User input Sets length offset of target point, in thedirection of the line of sight. User input Sets height offset of target point.Next stepCONT (F1) returns to the screen from where CONFIGURE Offsets was accessed.98 <strong>TPS1200</strong>+ Config...\Survey Settings...
18 Config...\Instrument Settings...18.1 EDM & ATR SettingsDescriptionThe settings on this screen define the active EDM Electronic Distance Measurementand ATR Automatic Target Recognition settings.Descriptions apply in general to <strong>TPS1200</strong>+ instruments. Available options dependon the purchased model, for example with or without ATR.AccessCONFIGUREEDM & ATRSettingsSurvey pageSetup pageSelect Main Menu: Config...\Instrument Settings...\EDM & ATR Settings.Description• This screen has two pages - the Survey page and the Setup page.• The Survey page and Setup page contain identical fields.• The settings made in the Survey page are used by all applications and all measurementstaken outside of the Setup application program.• The settings made in the Setup page are only used inside the Setup applicationprogram.• Any changes made to the EDM & ATR Settings (e.g. via Icons, Quick Set,Hotkeys) while the Setup application program is active, only affect the SetupEDM & ATR settings.• Any changes made to the EDM & ATR Settings (e.g. via Icons, Quick Set,Hotkeys) while the Setup application program is not active, only affect theSurvey EDM & ATR settings.• When entering the Setup application program, the Setup EDM & ATR Settingsare active.• When leaving the Setup application program, the Survey EDM & ATR Settingsare active.• Both Survey and Setup EDM & ATR Settings are part of the configuration sets.DiagramCONT (F1)To accept changes and return to<strong>TPS1200</strong>+ Main Menu.TEST (F4)To access the CONFIGURE EDMTest Signal/Frequency screen.Config...\Instrument Settings... <strong>TPS1200</strong>+ 99
Description of fields<strong>Field</strong> Option Description Reflector (IR) • All fields are set to the last usedoptions.• The IR EDM exists for all instrumenttypes and allows to measure thedistance to a prism or a tape. IR is theEDM that can be used with ATR andLOCK. For or is automatically set.Whenever is selected, the last setting for which was used withreflector is set.• When activated, IR is displayed.Reflctrless (RL) • and areselected. The other fields are set tothe last used options.• When activated, RL is displayed.Long Range (LO) • is selected.Last used options are reset for theother fields.• When activated, LO is displayed. Standard • Available for all options. Standard single distancemeasurement.• When activated, STD is displayed.Fast • Available for . Fast single distance measurement.• When activated, FAST is displayed.Tracking • Available unless . Continuous distancemeasurement. The measureddistances can be stored anytime withREC (F3).• When activated, TRK is displayed.SynchroTrack • Available only for .100 <strong>TPS1200</strong>+ Config...\Instrument Settings...
<strong>Field</strong> Option Description• This is the measurement mode for theinterpolation of angle measurementsin IR LOCK Tracking mode. In differenceto normal IR LOCK Trackingmode, where angle measurementsare only assigned to certain distancemeasurements, SynchroTrack willperform a linear interpolationbetween the previous and followingangle measurement, based upon thetimestamp of the EDM measurement.• When activated, SYNC is displayed.Average • Available for all options. Repeats measurements instandard measuring mode. Theaverage distance of and the standard deviationfor the averaged distance are calculated.• When activated, AVG is displayed.•• User input Available if .Input field for the maximum number ofdistances to be averaged from 2 to 999distances. Choicelist Reflector names as configured in MainMenu: Manage...\Reflectors. Output The additive constant stored with thechosen reflector. None Measurements are done without ATR.ATRPositioning to static prisms.LOCKUnavailable for SmartStation. The instrumentlocks onto and follows the movingprism. Choicelist • ATR Settings.Normal • Normal Mode is turned on.Low Vis On • Low Visability Mode is turned on. Toincrease the instrument measuringability during suboptimal weatherconditions. Available only when ATRor LOCK mode is activated.Config...\Instrument Settings... <strong>TPS1200</strong>+ 101
<strong>Field</strong> Option DescriptionLow Vis AlwaysOn• This mode is automatically deactivatedwhen the instrument is turnedoff.• This mode has a considerable influenceon the range (restriction to 100-150 m).• Low Visability Mode is permanentlyturned on.S-Range On • Short Range Mode is turned on.• This mode is designed for surveywork at close range from the instrument(up to 60-80 m). Under theseconditions the instrument LOCKMode is significantly stabilised.• This mode is automatically deactivatedwhen the instrument is turnedoff.S-Range AlwaysOn• Short Range Mode is permanentlyturned on.Next stepCONT (F1) returns to <strong>TPS1200</strong>+ Main Menu.102 <strong>TPS1200</strong>+ Config...\Instrument Settings...
18.2 Search WindowsDescriptionAccessCONFIGURESearch Windows,PS Window pageThe settings on this screen define the size of search windows for prisms to besearched in. The prisms can be searched with ATR in the ATR window or withPowerSearch in the PS window.Select Main Menu: Config...\Instrument Settings...\Search Windows.CONT (F1)To accept changes and return to<strong>TPS1200</strong>+ Main Menu.NEW (F2)To define new PowerSearch window.CENTR (F4)To centre the PowerSearch windowto the current position of the telescope.SHOW (F5)To position the telescope to cornersof PowerSearch window.Description of fields<strong>Field</strong> Option Description On PowerSearch searches in the definedwindow.Off PowerSearch searches from 0° to 360°within ±20 gon from horizon.OutputMin and from25 m to 175 mFrom 25 m to175 m and MaxThe left, right, upper and lower boundariesof the PowerSearch window.Minimum distance of the search range forthe PS window to be defined.Maximum distance of the search range forthe PS window to be defined.Next stepPAGE (F6) changes to the ATR Window page.Config...\Instrument Settings... <strong>TPS1200</strong>+ 103
CONFIGURESearch Windows,ATR Window pageCONT (F1)To accept changes and return to<strong>TPS1200</strong>+ Main Menu.DEFLT (F5)To recall the default ATR windowsettings.PAGE (F6)To change to other page on screen.Description of fields<strong>Field</strong> Option Description User input Horizontal extent of window. User input Vertical extent of window.Next stepCONT (F1) returns to <strong>TPS1200</strong>+ Main Menu.104 <strong>TPS1200</strong>+ Config...\Instrument Settings...
18.3 Automatic Prism SearchDescriptionAccessThe settings on this screen define the behaviour of automatic prism search after thetarget is lost in lock mode.Select Main Menu: Config...\Instrument Settings...\Automatic Prism Search.CONFIGUREAutomatic PrismSearchCONT (F1)To accept changes and return to<strong>TPS1200</strong>+ Main Menu.DEFLT (F5)To recall the default settings.Description of fields<strong>Field</strong> Option Description From 1s to 5s If the target is lost when the path of the reflector ispredicted for the selected amount ofseconds. No Search, ATR,PowerSearch orLast PointPerform no search after prediction, searchwith ATR in a dynamic ATR window,search with PowerSearch or, if the targetis lost when , thenturn back to the last stored point. For search in PS window andfor search in dynamicPS window.Next stepCONT (F1) closes the screen and returns to <strong>TPS1200</strong>+ Main Menu.Config...\Instrument Settings... <strong>TPS1200</strong>+ 105
18.4 TPS CorrectionsDescriptionAccessCONFIGURETPS Corrections,AtmosPPM pageThe settings on this screen define the atmospheric ppm, the geometric ppm and therefraction. The geometric ppm can also be determined by a resection calculation.For standard application programs the distance is corrected on account of atmosphericinfluences. The geometrical correction and the projection distortions are setto 0.00. Heights are reduced with the standard refraction coefficient.Select Main Menu: Config...\Instrument Settings...\TPS Corrections.CONT (F1)To accept changes and return to<strong>TPS1200</strong>+ Main Menu.PE (F3)To change to and back.%T ’ (F4)To change to and back.PPM=0 (F5)To set .Description of fields<strong>Field</strong> Option Description User input Sets the temperature. or orUser inputUser inputUser input orOutputSets the atmospheric pressure or theelevation above mean sea leveldependent on selection.Sets the relative air humidity or the wetbulb temperature dependent on selection.The atmospheric ppm is either set orcalculated from the above values.Next stepPAGE (F6) changes to the GeomPPM page.CONFIGURETPS Corrections,GeomPPM page• The geometric distance correction (geometric ppm) is derived from the mapprojection distortion (map projection ppm), the height above reference datumcorrection (height ppm) and an individual correction (individual ppm).• The calculation of the map projection ppm follows the formula for the TransversalMercator Projection. The individual factors are: the scale factor of the lineof projection central meridian, Gauss-Krüger = 1.0, UTM = 0.9996, etc. and theoffset from the line of projection.• The calculation of the height ppm is derived from the height of the instrumentstation above the reference datum. Normally this is the height above mean sealevel MSL.106 <strong>TPS1200</strong>+ Config...\Instrument Settings...
Description of fields<strong>Field</strong> Option Description Choicelist To manually or automatically calculatethe geometric ppm value.<strong>Manual</strong>ly The geometric ppm value is manuallycalculated.Automatically The geometric ppm value is automaticallycalculated. User input Sets scale at central meridian.Available when . User input Sets offset to central meridian.Available when . Output The ppm for the map projection. User input Sets the height above reference.Available when . OutputThe ppm above reference.Available when . Output The height ppm value calculated from theheight coordinates of the current TPSstation stored in the <strong>System</strong> RAM. If thisvalue cannot be calculated, then ----- isdisplayed and is also ignored in the calculationof the geometric ppm value.Available for Calc Scale: Automatically User input Sets the individual ppm.Available when . OutputThe geometric ppm is the sum of:, and.Next stepPAGE (F6) changes to the Refraction page.CONFIGURETPS Corrections,Refraction pageThe refraction correction is taken into account during the calculation of the heightdifference.Description of fields<strong>Field</strong> Option Description On or Off Refraction correction is applied to measurements. User input Available if . Refractioncoefficient to be used for calculation.Config...\Instrument Settings... <strong>TPS1200</strong>+ 107
Next stepCONT (F1) returns to the screen from where CONFIGURE TPS Corrections wasaccessed.108 <strong>TPS1200</strong>+ Config...\Instrument Settings...
18.5 CompensatorDescriptionAccessThe compensator and the Hz correction can be deactivated if raw data is to bedisplayed and recorded.Select Main Menu: Config...\Instrument Settings...\Compensator.CONFIGURECompensatorCONT (F1)To accept changes and return to<strong>TPS1200</strong>+ Main Menu.Next stepCONT (F1) returns to <strong>TPS1200</strong>+ Main Menu.Config...\Instrument Settings... <strong>TPS1200</strong>+ 109
18.6 Instrument IDDescriptionAccessCONFIGUREInstrument IDThe settings on this screen define the instrument identification number. This numberis used for the generation of the file names. Using format files, the instrument ID canbe output together with data from the instrument. By doing so, it can be identifiedwhich instrument was used for certain measurements.Select Main Menu: Config...\Instrument Settings...\Instrument ID.Description of fields<strong>Field</strong> Option Description User input Sets a four digit number as instrumentidentification number. By default the lastfour numbers of the serial number areused.Next stepCONT (F1) returns to <strong>TPS1200</strong>+ Main Menu.110 <strong>TPS1200</strong>+ Config...\Instrument Settings...
18.7 Telescope AccessoriesDescriptionAccessCONFIGURETelescope Accessories,Hz Limit pageThe settings on this screen offer the possibility to limit the motorization to a certainpart of the horizontal and/or vertical circle as used telescope and lens accessoriesmay obstruct a full rotation of the telescope. General positioning functions are thenrestricted to these boundaries.Select Main Menu: Config...\Instrument Settings...\Telescope Accessories.CONT (F1)To accept changes and return to<strong>TPS1200</strong>+ Main Menu.NEW (F2)To define new horizontal limits forinstrument rotation.SHOW (F5)To position the instrument to the leftand right limit of instrument turning.Description of fields<strong>Field</strong> Option DescriptionOutput/User inputThe left and right boundaries of thewindow within the instrument is allowed toturn. Yes Instrument turning is restricted to thedefined window.NoInstrument rotates without any limitation,from 0 to 400 gon.Next stepPAGE (F6) returns to the V Limit page.CONFIGURETelescope Accessories,V Limit pageCONT (F1)To accept changes and return to<strong>TPS1200</strong>+ Main Menu.NEW (F2)To define new vertical limits for telescoperotation.SHOW (F5)To position the telescope to its rotationlimits.Config...\Instrument Settings... <strong>TPS1200</strong>+ 111
Description of fields<strong>Field</strong> Option DescriptionOutput/User inputVertical extent of the window in which theinstrument is allowed to turn the telescope.The value of the current limit refersto the vertical reading of the present lineof sight direction. None Telescope turns without any limitation,from0 to 400 gon.EyepieceLensEyepce & LensThe movement of the telescope is limitedby the stored Eyepiece AccessoriesLimits.The movement of the telescope is limitedby the stored Lens Accessories Limits.The movement of the telescope is limitedby the combination of both areas with theleast vertical extend.Next stepCONT (F1) returns to <strong>TPS1200</strong>+ Main Menu.112 <strong>TPS1200</strong>+ Config...\Instrument Settings...
19 Config...\General Settings...19.1 Wizard ModeDescriptionAccessThe settings on this screen define the behaviour of the configuration set wizard.Select Main Menu: Config...\General Settings...\Wizard Mode.CONFIGUREWizard ModeCONT (F1)To accept changes and to return to<strong>TPS1200</strong>+ Main Menu.LIST (F6)Lists all screens within a configurationset. Allows to access these individualscreens and change settings.Description of fields<strong>Field</strong> Option Description View All Screens All configuration screens are shown in theconfiguration set wizard. Applicationprogram configuration screens are notincluded. They can be configured withineach application program.Reduced A reduced set of screens are shown in theconfiguration set wizard.Next stepCONT (F1) returns to <strong>TPS1200</strong>+ Main Menu.Config...\General Settings... <strong>TPS1200</strong>+ 113
19.2 Hot Keys & User MenuDescription • The settings on this screen assign a particular function, screen or applicationprogram to each of the first and second level of hot keys and to the USER key.• Refer to "2 Configurable Keys" for further details.AccessConfiguringHot KeysSelect Main Menu: Config...\General Settings...\Hot Keys & User Menu.For <strong>TPS1200</strong>+:CONT (F1)To accept changes and to return to<strong>TPS1200</strong>+ Main Menu.DEFLT (F5)To recall the default settings.Description of fields<strong>Field</strong> Option Description to Choicelist All functions, screens or applicationprograms which can be assigned to theparticular key.ConfiguringShift Hot KeysCONT (F1)To accept changes and to return to<strong>TPS1200</strong>+ Main Menu.DEFLT (F5)To recall the default settings.Description of fields<strong>Field</strong> Option Description to Choicelist All functions, screens or applicationprograms which can be assigned to theparticular key.114 <strong>TPS1200</strong>+ Config...\General Settings...
<strong>Field</strong> Option Description Output The lights, display, beeps and textsettings can be edited. Output The electronic level is displayed.ConfiguringUser MenuCONT (F1)To accept changes and to return to<strong>TPS1200</strong>+ Main Menu.DEFLT (F5)To recall the default settings.Description of fields<strong>Field</strong> Option Description to Choicelist All functions, screens or applicationprograms which can be assigned to theindividual lines in the user defined menu.Config...\General Settings... <strong>TPS1200</strong>+ 115
19.3 Units & FormatsDescriptionAccessCONFIGUREUnits & Formats,Units pageThe settings on this screen define:• the units for all types of measurement data displayed.• information related to some types of measurement data.• the order in which coordinates are displayed.Select Main Menu: Config...\General Settings...\Units & Formats.Description of fields<strong>Field</strong> Option Description Metre (m),Int Ft (fi),Int Ft/Inch (fi),US Ft (ft) orUS Ft/Inch (ft)The units shown for all distance and coordinaterelated fields.From 0 Decimalto 4 Decimals400 gon,360 ° ' ",360° dec or6400 milFrom 2 Decimalsto 4 DecimalsFrom 1 Decimalto 3 DecimalsThe number of decimal places shown forall distance and coordinate related fields.This is for data display and does not applyto data export or storage.The units shown for all angular and coordinaterelated fields. More angle settingscan be defined on the Angle page.The number of decimal places shown forall angular and coordinate related fields.This is for data display and does not applyto data export or storage.Available for or.Available for .4 Decimals Available for .5 Decimals Available for or.0.1’’, 1’’, 5’’, 10’’, Available for .60’’The input and output format for grades.h:vHorizontal by vertical distance.v:hVertical by horizontal distance.% (v/h * 100) Percentage of vertical by horizontaldistance.Elev Angle Elevation angle.116 <strong>TPS1200</strong>+ Config...\General Settings...
<strong>Field</strong> Option Description m 2 ,The units shown for all area related fields.Int Acres (Ai),US Acres (A),Hectares (ha),fi 2 or ft 2 m 3 , fi 3 , ft 3 or yd 3 The units shown for volume related fields. Celsius (°C) orFahrenheit (°F)The units shown for all temperaturerelated fields.mbar, mmHg,Inch Hg (inHg),hPa or psiThe units shown for all pressure relatedfields.psi = pounds per square inch.Next stepPAGE (F6) changes to the Angle page.CONFIGUREUnits & Formats,Angle pageDescription of fields<strong>Field</strong> Option Description North Azimuth,South Azimuth,North Anticlock,or BearingSets the reference direction as well as thedirection from where and how azimuthsare computed.Zenith Angle,Elev Angle orElev Angle %Hold after DIST orRunningHz-Drive Right orHz-Drive LeftSets the vertical angle.The vertical angle is fixed or continuouslyupdated with the telescope movementafter a distance measurement with DIST(F2).Horizontal drive on the right or left side.Next stepPAGE (F6) changes to the Time page.CONFIGUREUnits & Formats,Time pageDescription of fields<strong>Field</strong> Option Description 24 hour or 12 hour(am/pm)How the time is shown in all time relatedfields. User input Time, displayed with format hh:mm:ssConfig...\General Settings... <strong>TPS1200</strong>+ 117
<strong>Field</strong> Option DescriptionDay.Month.Year,Month/Day/YearorYear/Month/DayHow the date is shown in all date relatedfields. User input Date, displayed with format dd:mm:yyNext stepPAGE (F6) changes to the Format page.CONFIGUREUnits & Formats,Format pageDescription of fields<strong>Field</strong> Option Description East,North orNorth,EastThe order in which grid coordinates areshown in all screens. The order in displaymasks depends on the user settings.Lat,Long orLong,LatThe order in which geodetic coordinatesare shown in all screens. The order indisplay masks depends on the usersettings.Next stepPAGE (F6) changes to the first page on this screen.118 <strong>TPS1200</strong>+ Config...\General Settings...
19.4 LanguageDescriptionAccessCONFIGURELanguages onInstrumentThe setting on this screen defines the language used on the instrument. Threelanguages can be stored on the instrument at one time - English and two others.English cannot be deleted.Select Main Menu: Config...\General Settings...\Language.Description of columnsColumnLanguageDescriptionThe languages available on the instrument. The selectedlanguage is used for the system software. If a language is notavailable for the system software, the English language isused instead. Application programs run in the language theywere loaded.Next stepCONT (F1) returns to <strong>TPS1200</strong>+ Main Menu.Config...\General Settings... <strong>TPS1200</strong>+ 119
19.5 Lights, Display, Beeps, TextDescriptionAccessCONFIGURELights, Display,Beeps, Text,Lights pageThe settings on this screen allow the screen appearance to be configured, turn thenotification beeps on and off and define the behaviour of the keys.Select Main Menu: Config...\General Settings..\Lights, Display, Beeps, TextORPress SHIFT F11.Description of fields<strong>Field</strong> Option Description On or Off To turn the redlaser of RL EDM on and off. On or Off To turn the Emitting Guide Light (EGL) on andoff. This field is only available if EGL is fitted On or Off To turn the Laser Guide (GUS74) on and off.This field is only available if GUS74 is fitted From 0 % to100 %To adjust the EGL/Laser Guide intensity usingthe left and right arrow keys. On or Off To turn the reticule illumination on and off.From 0 % to100 %To adjust the reticule illumination intensityusing the left and right arrow keys.Next stepPAGE (F6) changes to the Display page.CONFIGURELights, Display,Beeps, Text,Display pageThis page contains the screen display settings for the <strong>TPS1200</strong>+ instrument.Description of fields<strong>Field</strong> Option Description On or Off Turns touch screen on and off. Off, Soft orLoudControls the beep upon touching the touchscreen.Always On,On for 1 min,On for 2 min orOn for 5 minOff, Same asScreen orAlways OnControls the screen illumination to be on, oron for the specified time after the last keywas pressed, or touch screen event.Controls the keyboard illumination. From 1 to 5 To adjust the screen brightness.Next stepPAGE (F6) changes to the Beeps page.120 <strong>TPS1200</strong>+ Config...\General Settings...
CONFIGURELights, Display,Beeps, Text,Beeps pageDescription of fields<strong>Field</strong> Option Description Off, Soft or Controls the beep for acoustic warningLoud signals for the instrument.Off, Soft orLoudOff, Soft orLoudOff, Soft orLoudControls the beep for acoustic warningsignals for the RX1200 controller.Controls the beep upon key presses forthe <strong>TPS1200</strong>+instrument.Controls the beep upon key presses forthe RX1200 controller. On or Off Turns the Hz-sector beep on and off. Theinstrument beeps when within 5 gon/4°30’of the defined sector, there is a long andconsistent beep within 0.5 gon/27’ and nobeep within 0.005 gon/16’’. User input Input field for sector angle for which a beepshould sound.Next stepPAGE (F6) changes to the Text page.CONFIGURELights, Display,Beeps, Text,Text pageDescription of fields<strong>Field</strong> Option Description User input Key repeat delay is the time between theinitial key press and when the key startsrepeating. For example in numeric modepress and hold 1. Behaviour on screen: 1- delay - 11111111111. Function Keys Alphanumeric input can either be throughor Numeric function or numeric keys.Keys Choicelist Available if . Sets the set of extra charactersavailable through αNUM or on F1-F6whenever an entry is made. The choicesavailable depend on the character setsloaded on the instrument and thelanguage configured to be used on theinstrument.Next stepPAGE (F6) changes to one of the other pages.Config...\General Settings... <strong>TPS1200</strong>+ 121
19.6 Start Up & Power DownDescription • The settings on this screen:• define the behaviour of the instrument for a general start up.• define the behaviour of the instrument when starting up after a power loss.• define a PIN code which needs to be typed in on starting up the instrument. APIN is a Personal Identification Number.AccessCONFIGUREStart Up & PowerDownStart Up & PowerDownpageSelect Main Menu: Config...\General Settings...\Start Up & Power Down.Description of fields<strong>Field</strong> Option DescriptionGeneral settings Choicelist Determines the first screen which isshown after turning on the instrument. WithConfirmation orSets the behaviour of the instrument shutdown.DirectlyAuto Power Down Behaviour settingsTurn Off orRemain OnThe instrument turns off or does notpower down if no events have occurred. User input Available unless isselected. Minutes after which the instrumentshould turn off.SmartAntenna settings Choicelist This option determines when Smart-Antenna is turned off. The selected time isactivated whenever SmartStation leavesGPS mode.This option is directly linked to in CONFIGURE Logging of RawObs. Refer to "23.6 Logging of Raw Obs"for details.Power settings for Device on Port 2 If Device Found Devices attached to port 2 are automaticallypowered up.If ATX Found SmartAntenna attached to port 2 is automaticallypowered up.Next stepCONT (F1) changes to the PIN Code page.122 <strong>TPS1200</strong>+ Config...\General Settings...
CONFIGUREStart Up & PowerDownPIN CodepageWhenever this screen is accessed the appearance of the screen varies, dependingon the setting for Description of fields<strong>Field</strong> Option DescriptionUse PIN Yes or No Activates the PIN code protection. Thissetting is not part of the configuration set.New PIN User input The PIN code must be a number with fourto six digits.PIN Code User input The PIN code as previously defined onthis page. The correct PIN code must betyped in within five attempts or the PUKcode is required.Change PIN Yes or No Activates to type in a newPIN code.Next stepPAGE (F6) changes to the first page on this screen.Config...\General Settings... <strong>TPS1200</strong>+ 123
124 <strong>TPS1200</strong>+ Config...\General Settings...
20 Interfaces, Ports, Devices20.1 Interfaces20.1.1 Overview of InterfacesDescription • The instrument has various interfaces configured to to be used with a port anda device. The configuration varies depending on the individual application.• Additional interfaces are always available when the instrument is fitted withCommunication side cover. Communication side cover is used by RadioHandlewith RCS and by SmartAntenna Adapter with SmartStation.Availableinterfaces<strong>TPS1200</strong>+without Communication side cover<strong>TPS1200</strong>+with Communication side coverInterfaces, Ports, Devices <strong>TPS1200</strong>+ 125
20.2 PortsDescription • The instrument is always fitted with the port located at the instrument base (port1). Additional ports are available when Communication side cover is fitted (port2 and port 3).• The list of available devices always depends on the selected port.Available portsType<strong>TPS1200</strong>+ withoutCommunication side cover5 pin LEMO-0for power and/or communicationPortPort 1<strong>TPS1200</strong>+ withCommunication side coverFor <strong>TPS1200</strong>+: 5 pin LEMO-0for power and/or communicationnot applicable Port 2(Handle)not applicableLocationHotshoe connection forRadioHandle with RCS andSmartAntenna Adapter withSmartStationPort 3 (BT) Bluetooth module forcommunication with onlyBluetooth capable devices.PortPort 1Port 2 (Handle)Port 3 (BT)DescriptionThis port is located at the base of the instrument and is alwaysavailable.This port is located on top of Communication side cover.This port is housed within Communication side cover.Interfaces, Ports, Devices <strong>TPS1200</strong>+ 127
20.3 Devices20.3.1 Overview of DevicesDescription • A device is the hardware which is connected to the chosen port. Devices areused to transmit and receive measurement data in TPS mode and GPS real-timedata in GPS mode. Devices are also used by <strong>TPS1200</strong>+ to communicate withthe RX1200 controller.• Before using any device with <strong>TPS1200</strong>+ it is necessary to configure it and theinterface with which it will be used.• Refer to "20.1.2 Configuring an Interface" for information on how to configureinterfaces.• Refer to "20.3.2 Configuring a Device" for information on how to create, edit,select and delete devices.• Refer to "20.3.3 Controlling a Device" for information on how to configureadditional device parameters.• Some devices may be used with different interfaces for different applications.For example, a radio can be used for remote control with <strong>TPS1200</strong>+ but also tosend GeoCOM commands from a computer to <strong>TPS1200</strong>+.128 <strong>TPS1200</strong>+ Interfaces, Ports, Devices
20.3.2 Configuring a DeviceDescriptionAccessstep-by-stepAllows devices to be created, edited, selected and deleted.Step Description1. Main Menu: Config...\Interfaces... to access CONFIGURE Interfaces.2. Highlight the appropriate interface based on the type of device that needsto be configured. For example, highlight RCS Mode when a radio is to beconfigured.3. EDIT (F3) to access CONFIGURE XX.4. DEVCE (F5) to access CONFIGURE Devices.Interfaces, Ports, Devices <strong>TPS1200</strong>+ 129
20.3.3 Controlling a DeviceDescriptionAccessstep-by-stepAllows additional device parameters to be configured.Step Description1. Main Menu: Config...\Interfaces... to access CONFIGURE Interfaces.2. Highlight the appropriate interface based on the type of device that needsto be configured. For example, highlight RCS Mode when a radio is to beconfigured.3. CTRL (F4) to access CONFIGURE XX.130 <strong>TPS1200</strong>+ Interfaces, Ports, Devices
20.3.4 Creating a New Device/Editing a DeviceAccessstep-by-stepCONFIGUREXX DeviceStep Description1. Refer to "20.3.2 Configuring a Device" to access CONFIGURE Devices.2. Highlight a device of the same type as the device to be created, from thelist.3. NEW (F2)/EDIT (F3) to access CONFIGURE New Device/CONFIGUREEdit Device.Editing a device is similar to creating a new device. For simplicity, the screens arecalled CONFIGURE XX Device and differences are clearly outlined.Description of fields<strong>Field</strong> Option Description User input Available when creating a new device.The name of the device.OutputAvailable when editing a device. Thename of the device. Output The type of deviceYes or NoFrom 2400 to115200None, Odd orEvenCR/LFAvailable for digital cellular phones andmodems. Defines the device as anInternet capable device and adds it to thelist in CONFIGURE GPRS InternetDevices.Frequency of data transfer from instrumentto device in bits per second.Error checksum at the end of a block ofdigital data.To define the terminator.The terminator is a carriage returnfollowed by a line feed.CRNot available for RS232 GeoCOM andTCPS27 device. The terminator is acarriage return. 6, 7 or 8 Number of bits in a block of digital data. 1 or 2 Number of bits at the end of a block ofdigital data. None or RTS/CTS Activates hardware handshake.Interfaces, Ports, Devices <strong>TPS1200</strong>+ 131
Next stepIF the device is aradio or device other thandigital cellular phone or modemTHENSTORE (F1) to close the screen and to return tothe screen from where CONFIGURE XX Devicewas accessed.digital cellular phone or modem ATCMD (F4). Refer to paragraph "CONFIGUREGSM/Modem AT Command Lines".CONFIGUREGSM/Modem ATCommand LinesFor in CONFIGURE XX Device, this screen consists of twopages. The following table lists the fields of both pages.Description of fields<strong>Field</strong> Option Description User input Initilisation sequence to initilise digitalcellular phone/modem. User input Allows the or the string to continue onto a new line. User input Initilisation sequence to initilise digitalcellular phone/modem. User input Dialing string used to dial the phonenumber. User input Hangup sequence used to end thenetwork connection. User input Escape sequence used to switch to thecommand mode before using the hangupsequence. User input Dialing string used to dial into the Internet.When the device is used, between and , a check for the PIN isperformed.Next stepStep Description1. STORE (F1) returns to CONFIGURE XX Device.2. STORE (F1) returns to the screen from where CONFIGURE XX Devicewas accessed.132 <strong>TPS1200</strong>+ Interfaces, Ports, Devices
21 Config...\Interfaces... - Editing the Interface21.1 GSI OutputDescriptionAccessCONFIGUREGSI OutputData is stored directly to the RS232 and to the active job. GSI data is stored if and either ALL (F1) or REC (F3) is pressed. The format dependson the selected option in .Select Main Menu: Config...\Interfaces.... Highlight GSI Output. EDIT (F3).Description of fields<strong>Field</strong> Option Description Yes or No Activates the interface. Choicelist Available if .Port to be used. Output Available if .Device to be used. RS232 GSI orNoneAvailable if .Protocol defines if the system expects ahandshake or not. Choicelist Available if .Next stepCONT (F1) returns to the screen from where CONFIGURE GSI Output wasaccessed.Config...\Interfaces... - Editing theInterface<strong>TPS1200</strong>+ 133
21.2 GeoCOM ModeDescriptionAccessCONFIGUREGeoCOM ModeThe GeoCOM Mode permits communication of the <strong>TPS1200</strong>+ with a 3 rd partydevice.Select Main Menu: Config...\Interfaces.... Highlight GeoCOM Mode. EDIT (F3).Description of fields<strong>Field</strong> Option Description Yes or No Activates the interface. Choicelist Available if .Port to be used. Output Available if .Device to be used. Output Available if .Protocol to be used.Next stepCONT (F1) returns to the screen from where CONFIGURE GeoCOM Mode wasaccessed.134 <strong>TPS1200</strong>+ Config...\Interfaces... - Editing theInterface
21.3 RCS ModeDescriptionAccessCONFIGURERCS ModeRCS stands for Remote Control Surveying. This enables the instrument to beremotely controlled by an RX1200.Select Main Menu: Config...\Interfaces.... Highlight RCS Mode. EDIT (F3).Description of fields<strong>Field</strong> Option Description Yes or No Activates the interface. Choicelist Available if .Port to be used. Output Available if .Device to be used. Output Available if .Protocol to be used.Next stepCONT (F1) returns to the screen from where CONFIGURE RCS Mode wasaccessed.Config...\Interfaces... - Editing theInterface<strong>TPS1200</strong>+ 135
21.4 Export JobDescription • The Export Job interface allows data from a job to be exported from the instrumentto an external device.• The settings on this screen define the port and the device to which the datashould be exported.AccessCONFIGUREExportJob InterfaceSelect Main Menu: Config...\Interfaces.... Highlight Export Job. EDIT (F3).The availability of the fields depend on the setting for .Description of fields<strong>Field</strong> Option Description Yes or No Activates the interface. Choicelist Available if .Port to be used. Output The device currently assigned to theselected port within the active configurationset. The device which is selecteddetermines the availability of the nextfields.Next stepCONT (F1) returns to the screen from where CONFIGURE Export Job Interfacewas accessed.136 <strong>TPS1200</strong>+ Config...\Interfaces... - Editing theInterface
21.5 GPS RTKDescription • The settings on this screen allow real-time related parameters to be configured.This includes defining if SmartStation should work as a rover and the real-timemessages to be used.• Refer to "23.1 Real-Time Mode" for detailed information.Config...\Interfaces... - Editing theInterface<strong>TPS1200</strong>+ 137
21.6 InternetDescriptionAccessCONFIGUREInternet InterfaceThe Internet interface:• allows accessing the Internet using SmartStation and a GMS/Modem device.• can be used together with the GPS RTK interface to receive real-time data froma NTRIPCaster via Internet communication.Select Main Menu: Config...\Interfaces.... Highlight Internet. EDIT (F3).Description of fields<strong>Field</strong> Option Description Yes or No Activates the Internet interface. Choicelist Available if .Port to be used. Output Available if .Device to be used. Dynamic Each time SmartStation wants to access theInternet via the device a new IP address is assignedto the instrument. When using GMS/Modem toconnect to the Internet then the network provideralways dynamically assigns the IP address.Static Each time SmartStation wants to access theInternet via the device the same IP address identifiesthe instrument. Thsis is important if Smart-Station is used as a TCP/IP server. This optionshould only be selected if a static IP address is availablefor SmartStation. User input Available for . To set the IPaddress. User input Some providers ask for a user ID to allowconnecting to the Internet via GMS/Modem. Contactyour provider if a user ID needs to be used.It is possible to show/hide the User ID.Refer to "24.5 Licence Keys" for further details. User input Allows the string to continue onto a newline. User input Some providers ask for a password to allowconnecting to the Internet via GMS/Modem. Contactyour provider if a password is required.Next stepCONT (F1) returns to the screen from where CONFIGURE Internet Interface wasaccessed.138 <strong>TPS1200</strong>+ Config...\Interfaces... - Editing theInterface
22 Config...\Interfaces... - Controlling the Device22.1 Digital Cellular PhonesDescriptionAccessCONFIGUREXX ConnectionFor digital cellular phones, information such as:• the reference stations that can be contacted• the phone numbers of the reference stations and• the type of protocol to be usedcan be defined.Refer to "20.3.3 Controlling a Device" to access CONFIGURE XX Connection.The name of the screen depends on the type of technology of the digital cellularphone chosen in CONFIGURE Interfaces.CONT (F1)To accept the change and tocontinue with the subsequentscreen.NEAR (F2)Available when reference stations todial are already created inCONFIGURE Stations to Dial. Tofind the nearest reference stationwith a digital cellular phone.CODES (F3)Available for digital cellular phones ofGSM technology. To enter thePersonal Identification Number of theSIM card.SRCH (F4)Available for . Tosearch for all available Bluetoothdevices.SHIFT INFO (F2)Available for CDMA digital cellularphones. To find out informationabout the digital cellular phone.SHIFT REG (F3)Available for CDMA digital cellularphones. To register the digitalcellular phone.SHIFT CMND (F4)To send AT commands to the digitalcellular phone.Config...\Interfaces... - Controllingthe Device<strong>TPS1200</strong>+ 139
Description of fields<strong>Field</strong> Option Description Output Available for digital cellular phones of GSM technology.The type of digital cellular phone highlightedwhen CONFIGURE XX Connection wasaccessed. Output Available for digital cellular phones of CDMAtechnology. The type of digital cellular phonehighlighted when CONFIGURE XX Connectionwas accessed. Yes or No SmartStation detects automatically if theattached device is bluetooth capable. Somedevices ask for the identification number of theBluetooth. The identification number of <strong>Leica</strong>’sBluetooth is 0000. User input Available for . The ID addressof the Bluetooth device to be used. Refer to thedevice’s user manual for information about theID address. Choicelist The digital cellular phone reference station to bedialed. Opening the choicelist accessesCONFIGURE Stations to Dial where new referencestations can be created and existing referencestations can be selected or edited. Output The number of the digital cellular phone at theselected as configured inCONFIGURE Stations to Dial. Output Available for digital cellular phones of GSM technology.The configured protocol of the digitalcellular phone at the selected asconfigured in CONFIGURE Stations to Dial. Yes or No Allows for automatic connection between therover and the reference when a point is occupiedduring a survey. Autobauding,2400 bps to56000 bpsAvailable for digital cellular phones of GSM technology.The network baud rate. Select Autobaudingfor an automatic search of the networkbaud rate. For digital cellular phones of GSMtechnology that do not support autobaudingchoose the baud rate from the choicelist.Available for digital cellular phones of GSM technology.Define if the digital cellular phone usesRadio Link Protocol.Transparent For digital cellular phones that do not use RLP.Non-TransparentFor digital cellular phones that use RLP.140 <strong>TPS1200</strong>+ Config...\Interfaces... - Controllingthe Device
Next stepIF the digitalcellular phone isnot of type CDMAor does not need tobe registeredof type CDMA andneeds registeringTHENCONT (F1) to accept the change and to continue with thesubsequent screen.SHIFT REG (F3) to access CONFIGURE CDMA Registration.Refer to paragraph "CONFIGURE CDMA Registration".CONFIGURECDMA RegistrationDescription of fields<strong>Field</strong> Option Description User input The service program coder provided bythe network provider. User input Type in the mobile directory numberprovided by the network provider.Next stepStep Description1. CONT (F1) returns to CONFIGURE Interfaces.2. CONT (F1) returns to the screen from where CONFIGURE Interfaceswas accessed.Config...\Interfaces... - Controllingthe Device<strong>TPS1200</strong>+ 141
22.2 ModemsDescriptionConfigure modemconnectionstep-by-stepFor modems, information such as:• the reference stations that can be contacted and• the phone numbers of the reference stations can be controlled.The following table explains the most common settings. Refer to the stated chapterfor more information on screens.Step Description1. Refer to "20.1.2 Configuring an Interface" to access CONFIGURE Interfaces.2. In CONFIGURE Interfaces highlight an interface which has a modemattached.3. CTRL (F4) to access CONFIGURE Modem Connection.4. CONFIGURE Modem Connection The type of modem highlighted when CONFIGUREModem Connection was accessed. The modem reference station to be dialled. AccessesCONFIGURE Stations to Dial where new reference stations can becreated and existing reference stations can be selected or edited. The number of the modem at the selected asconfigured in CONFIGURE Stations to Dial.Select the modem reference station to be dialled.NEAR (F2) finds the nearest reference station with a modem. Availablewhen reference stations to dial are already created in CONFIGUREStations to Dial. Coordinates of these stations must be known.5. CONT (F1) returns to CONFIGURE Interfaces.142 <strong>TPS1200</strong>+ Config...\Interfaces... - Controllingthe Device
22.3 Radios for GPS Real-TimeDescriptionAccessCONFIGURERadio ChannelFor radios the channels on which the radio broadcasts can be changed. Changingchannels changes the frequency at which the radio operates.Refer to "20.3.3 Controlling a Device" to access CONFIGURE Radio Channel.CONT (F1)To accept the changes and tocontinue with the subsequentscreen.SCAN (F5)Available unless . To find out information suchas the station ID, latency and thedata format of incoming signals fromreference stations.Description of fields<strong>Field</strong> Option Description Output The type of radio highlighted whenCONFIGURE Radio Channel wasaccessed. Output Available for .<strong>Manual</strong>ly The channel must be typed in manually.AutoA reference selects the clearestfrequency of the available channels.A rover searches for the channel wjheredata is transmitted. User input Available unless .The radio channel. The minimum andmaximum allowed input values for a radiodepend on the number of channelssupported by the radio and the spacingbetween the channels. Output Available for Satelline 3AS radios.Displays the actual frequency of the radio.Config...\Interfaces... - Controllingthe Device<strong>TPS1200</strong>+ 143
22.4 Radios for Remote ControlDescriptionConfigureTCPS27/RH1200connectionstep-by-stepFor radios the channels on which the radio broadcasts can be changed. Changingchannels changes the frequency at which the radio operates. This may be necessaryto enable multiple pairs of radios to work simultaneously in the same area withoutinterferring with each other. The following radios for remote control support channelchanging:• TCPS27 • RadioHandleRefer to the stated chapter for more information on screens.Step Description1. Access CONFIGURE Interfaces.2. Highlight the interface RCS Mode with either RadioHandle or TCPS27attached as the device.3. CTRL (F4) to access CONFIGURE TCPS27 / RH1200.4. CONFIGURE TCPS27 / RH1200. The type of protocol, which is fixed as RCS. The assigned channel number (from 0 to 15).The link number for the RX1200 controller and the radio must be thesame. The communication settings for the RX1200 controller and theradio must also be same. The option Remote or Base are available.Remote sets the radio into remote mode.Base sets the radio into base mode.The radio modules inside the RX1200 controller and the radio must be setto opposite settings. It is recommended to set the RX1200 controller toRemote and the radio to Base.144 <strong>TPS1200</strong>+ Config...\Interfaces... - Controllingthe Device
22.5 RS232DescriptionConfigure RS232connectionstep-by-stepRS232 is a standard serial communication method that is able to transfer datawithout the need for predefined time slots. RS232 can be used, with a Bluetoothhousing, to provide a wireless connection to another Bluetooth enabled device, forexample, a computer.The following table explains the most common settings. Refer to the stated chapterfor more information on screens.Step Description1. Refer to "20.1.2 Configuring an Interface" to access CONFIGURE Interfaces.2. In CONFIGURE Interfaces highlight an interface which has an RS232device attached.3. CTRL (F4) to access CONFIGURE RS232 Connection.4. CONFIGURE RS232 Connection The type of device highlighted when CONFIGURE RS232Connection was accessed. SmartStation detects automatically if the attached deviceis bluetooth capable. Some devices ask for the identification number ofthe Bluetooth. The identification number of <strong>Leica</strong>’s Bluetooth is 0000. Available for . The ID address of theBluetooth device to be used. Refer to the device’s user manual for informationabout the ID address.SRCH (F4) available for , to search for all availableBluetooth devices. If more than one Bluetooth device is found a list ofavailable devices is provided.SCAN (F5) provides information such as the station ID, latency and thedata format of incoming signals from reference stations. This informationcan be used to select appropriate reference stations to dial.5. CONT (F1) returns to CONFIGURE Interfaces.Config...\Interfaces... - Controllingthe Device<strong>TPS1200</strong>+ 145
22.6 GPRS / Internet DevicesDescriptionAccessCONFIGUREGPRS/InternetConnectionGPRS / Internet devices can be used to access the Internet from <strong>TPS1200</strong>+ withCommunication side cover.Refer to "20.3.3 Controlling a Device" to access CONFIGURE GPRS/InternetConnection.CONT (F1)To accept the changes and tocontinue with the subsequentscreen.CODES (F3)Available for digital cellular phones ofGSM technology. To enter thePersonal Identification Number of theSIM card. If the PIN is locked for anyreason, input the PersonalUnblocKing code for access to thePIN.SRCH (F4)Available for . Tosearch for all available Bluetoothdevices.SHIFT CMND (F4)To send AT commands to the GPRS/ Internet device.Description of fields<strong>Field</strong> Option Description Output The type of GPRS / Internet device highlightedwhen CONFIGURE GPRS/Internet Connectionwas accessed. Output SmartStation detects automatically if theattached device is bluetooth capable. Somedevices ask for the identification number of theBluetooth. User input Available for . The IDaddress of the Bluetooth device to be used.Refer to the device’s user manual for informationabout the ID address. User input Available for some GPRS / Internet devices.The Access Point Name of a server from thenetwork provider, which allows access to dataservices. Contact your provider to get thecorrect APN. Mandatory for using GPRS.146 <strong>TPS1200</strong>+ Config...\Interfaces... - Controllingthe Device
22.7 InternetDescriptionConfig...\Interfaces... - Controllingthe DeviceThe Internet connection is available for SmartStation.The Internet connection allows SmartStation to be connected to the Internet toreceive real-time data. A GPRS / Internet device must be attached.Requirements • in CONFIGURE Internet Interface.• assigned to an interface in CONFIGURE Interfaces.Configure port NETstep-by-stepStep Description1. Refer to "20.1.2 Configuring an Interface" to access CONFIGURE Interfaces.2. CONFIGURE InterfacesHighlight an interface which has an Internet device attached.3. CTRL (F4) to access CONFIGURE Set NET Port.4. CONFIGURE Set NET Port, General page The name of the port NET that was attached to the interfacethat was highlighted when this page was accessed. How SmartStation will operate in the Internet. must be selected when using NTRIP as Internet application.Inside the Internet NTRIPClients and NTRIPServers are consideredas clients. must be selected when SmartStation is the server.For : Type in the IP address of the server to be accessedin the Internet.For : Output of the IP address associated with the staticIP address as configured in CONFIGURE Internet Interface. A number can be assigned to each of the ports. Type inthe NET port number. Available for .For in CONFIGURE Real-Time ModeAllows for automatic connection between the rover and the Internet whena point is occupied during a survey. Ending the point occupation alsoends the Internet connection.5. PAGE (F6) to access CONFIGURE Set NET Port, Ranges page6. CONFIGURE Set NET Port, Ranges pageFor in CONFIGURE Set NET Port, General page, thefields are input fields. The fields and can be used to prevent a user with an IP address outside the definedranges from accessing the instrument.Enter the IP address ranges.CLEAR (F5) returns the fields back to their default values.<strong>TPS1200</strong>+ 147
Step Description7. CONT (F1) returns to the screen from where CONFIGURE Set NET Portwas accessed.148 <strong>TPS1200</strong>+ Config...\Interfaces... - Controllingthe Device
22.8 Creating a New Station to Dial/Editing a Station to DialDescriptionAccessstep-by-stepCONFIGUREXX Station to DialCONFIGURE Stations to Dial allows new stations to be created, provides a list ofreference stations that can be dialed and allows existing stations to be edited.For digital cellular phones of any technology and for modems, the phone numbersof the device at the reference station must be known. For a reference station to bedialed, a name, the phone number and, if available, the coordinates can be configured.The configuration is possible for rover and reference digital cellular phones andmodems.Step Description1. Refer to "20.3.3 Controlling a Device" to access CONFIGURE XXConnection/CONFIGURE Radio Channel.2. Open the choicelist for to access CONFIGURE Stations toDial.3. CONFIGURE Station to DialIf a station is to be edited, then highlight the station.4. NEW (F2)/EDIT (F3) to access CONFIGURE New Station toDial/CONFIGURE Edit Station to Dial.Editing a station to dial is similar to creating a new station to dial. For simplicity thescreens are called CONFIGURE XX Station to Dial and differences are clearlyoutlined.STORE (F1)To store the changes and to continuewith the subsequent screen.COORD (F2)To view other coordinate types.SHIFT ELL H (F2) or SHIFT ORTH (F2)Available for local coordinates. Tochange between the ellipsoidal andthe orthometric height.Description of fields<strong>Field</strong> Option Description User input A unique name for the new referencestation to be dialed. The name may be upto 16 characters long and may includespaces. Input optional.Config...\Interfaces... - Controllingthe Device<strong>TPS1200</strong>+ 149
<strong>Field</strong> Option Description User input The number of the reference station todial. If the survey is to be undertakenacross country borders it is necessary toinput the phone number using standardinternational dialing codes. For example,+41123456789. Otherwise it can be inputas a standard digital cellular phonenumber.Available for digital cellular phones ofGSM technology. The configured protocolof the digital cellular phone of GSM technology.AnalogFor conventional phone networks.ISDN v. 110 For GSM networks. Yes or No Allows the coordinates of the referencestation to be entered.Coordinates User input The coordinate of the reference station.Next stepStep Description1. STORE (F1) stores the changes and returns to CONFIGURE Stations toDial.2. CONT (F1) returns to the screen from where CONFIGURE Stations toDial was accessed.150 <strong>TPS1200</strong>+ Config...\Interfaces... - Controllingthe Device
22.9 Creating a New Server to Connect/Editing a Server to ConnectDescriptionAccess step-bystepCONFIGURE Server to Connect allows new servers to be created, provides a listof servers to be connect in the internet and allows existing servers to be edited. Forservers to be accessed in the Internet the IP address and the TCP/IP port must beknown. For a server to be accessed in the Internet a name can be configured.Step Description1. Refer to "20.3.3 Controlling a Device" to access CONFIGURE XXConnection/CONFIGURE Radio Channel.2. Open the choicelist for to access CONFIGURE Server toConnect.3. CONFIGURE Server to ConnectIf a server is to be edited, then highlight the server.4. NEW (F2)/EDIT (F3) to access CONFIGURE New Server toConnect/CONFIGURE Edit Server to Connect.Editing a server to connect is similar to creating a new server to connect. Forsimplicity the screens are called CONFIGURE XX Server to Connect and differencesare clearly outlined.CONFIGUREXX Server toConnectSTORE (F1)To store the changes and to continuewith the subsequent screen.Description of fields<strong>Field</strong> Option Description User input A unique name for the new server to beaccessed in the Internet. The name may be upto 16 characters long and may include spaces. User input The IP address of the server to be accessed inthe Internet. User input The port of the Internet server through which thedata is provided. Each server has several portsfor various services.Config...\Interfaces... - Controllingthe Device<strong>TPS1200</strong>+ 151
Next stepStep Description1. STORE (F1) stores the changes and returns to CONFIGURE Server toConnect.2. CONT (F1) returns to the screen from where CONFIGURE Server toConnect was accessed.152 <strong>TPS1200</strong>+ Config...\Interfaces... - Controllingthe Device
23 Config...\SmartStation...23.1 Real-Time ModeDescriptionAccessCONFIGUREReal-Time ModeThe settings on this screen allow GPS real-time related parameters to be configured.This includes defining whether SmartStation should operate as a rover (static, as ona tripod) and the type of GPS real-time messages to be used.Select Main Menu: Config...\SmartStation...\Real-Time Mode.CONT (F1)To accept changes and return to thescreen from where this screen wasaccessed.ROVER (F2)To configure additional settings relevantto rover operations.DEVCE (F5)To create, select, edit or delete adevice.Description of fields<strong>Field</strong> Option Description NoneSmartStation is not to be used as a GPS realtimerover.RoverActivates a rover GPS real-time interface. Choicelist The GPS real-time data format which is to bereceived from the reference station.Port to which the device is attached.Port 1For communication and/or power. This port islocated at the base of the instrument.For <strong>TPS1200</strong>+: 5 pin LEMO-0Port 2 (Handle)Port 3 (BT)NETxHotshoe connection for RadioHandle withRCS and SmartAntenna Adapter with Smart-Station. This port is located on top of Communicationside cover.Bluetooth module for communication withonly Bluetooth capable devices. This port ishoused within Communication side cover.Available for an activated Internet interface. Ifthese ports are not assigned to a specificinterface, then these ports are additionalremote ports.Config...\SmartStation... <strong>TPS1200</strong>+ 153
<strong>Field</strong> Option Description Choicelist The receiver type used at the reference. If theGPS real-time data format does not containthe information of the receiver type certaincorrections based on the information of thereceiver type are applied in order to providecorrect results. The GPS real-time dataformats <strong>Leica</strong>, CMR and CMR+ contain thisinformation. This is mainly important when a<strong>System</strong>300 receiver is used as reference. Choicelist The antenna used at the reference. If theGPS real-time data format does not containthe information of the antenna certain correctionsbased on the information of the antennaare applied in order to provide correct results.The GPS real-time data formats <strong>Leica</strong>,RTCM v2.3, CMR and CMR+ contain thisinformation.If the reference data is corrected by absoluteantenna calibration values and a <strong>Leica</strong>standard antenna is being used on the rover,select ADVNULLANTENNA as referenceantenna.CONFIGUREAdditional RoverOptions,General pageThe available fields depend on the selected in CONFIGURE Real-Time Mode.CONT (F1)To accept changes and return to thescreen from where this screen wasaccessed.GGA (F4)To activate the sending of a GGAmessage for reference network applications.GETID (F5)Available for . To display and select thestation ID of the available referencestations, the latency of the messageand the data format. When usingradios, the radio channel can beswitched and the stations received onthe new frequency are displayed.1st (F6)Available for . To force the system totry to establish a new connection witha different reference station.154 <strong>TPS1200</strong>+ Config...\SmartStation...
CONFIGUREAdditional RoverOptions,NTRIP pageCONT (F1)To accept changes and return to thescreen from where this screen wasaccessed.SRCE (F5)To download the NTRIP source tableif is unknown. To dothis, the GPRS Internet interfacemust already be configured.Description of fields<strong>Field</strong> Option Description Yes or No Activates NTRIP. User input A user ID is required to receive data fromthe NTRIPCaster. Contact the NTRIPadministrator for information. User input Allows the string to continueonto a new line. User input A password is required to receive datafrom the NTRIPCaster. Contact theNTRIP administrator for information. User input The NTRIPSource from where GPS realtimedata is required.Next stepStep Description1. CONT (F1) returns to CONFIGURE Real-Time Mode.2. CONT (F1) returns to <strong>TPS1200</strong>+ Main Menu.156 <strong>TPS1200</strong>+ Config...\SmartStation...
23.2 Point Occupation SettingsDescriptionAccessCONFIGUREPoint OccupationSettingsThe settings on this screen define the way in which points are occupied andrecorded.Select Main Menu: Config...\SmartStation...\Point Occupation Settings.CONT (F1)To accept changes and return to thescreen from where this screen wasaccessed.PARAM (F3)To configure the time interval afterwhich a point occupation can bestopped automatically.Description of fields<strong>Field</strong> Option Description Normal The way in which coordinates for a pointare recorded.This field is fixed to . NoStarts point occupation when pressingOCUPY (F1).YesStarts point occupation automaticallywhen entering SETUP New StationPoint.TimedStarts point occupation automatically at acertain time. The start time is specified inSETUP New Station Point. Yes or No Stops the measurements automaticallywhen the parameter defined for reaches 100 %.Available for . Definesthe method used for .The setting determines the computation ofthe duration of the point occupation.Parameters for the selected method aredefined with PARAM (F3).Accuracy orPositionsAvailable for .Config...\SmartStation... <strong>TPS1200</strong>+ 157
<strong>Field</strong> Option DescriptionTime,Observations orNo. of SatellitesAvailable for . Available for .This is an indicator when to stop the pointoccupation. Parameters for the selectedmethod are defined with PARAM (F3).None orAvailable for .PositionsNone, Time,Observations orNo. of SatellitesAvailable for . Yes or No Activates that a beep is made when thepoint occupation is ended by . Yes or No Stores points automatically after stoppingthe point occupation.Yes or No<strong>Manual</strong>AutomaticallyActivates that a beep is made when thepoint is stored by .Defines the instrument behaviour once apoint is stored.Exits GPS SURVEY when pressing ESC.Exits GPS SURVEY automatically whenpressing STORE (F1) and returns to mainmenu.Next stepIF parameters forare not to beconfiguredare to be configuredare to be configuredANDTHEN- CONT (F1) closes the screen and returnsto the screen from where CONFIGUREPoint Occupation Settings wasaccessed.PARAM (F3) changes to CONFIGUREPost-Process Stop Criteria.PARAM (F3) changes to CONFIGUREReal-Time Stop Criteria. Refer to paragraph"CONFIGURE Real-Time StopCriteria".158 <strong>TPS1200</strong>+ Config...\SmartStation...
CONFIGUREReal-Time StopCriteriaCONT (F1)To accept changes and to return toCONFIGURE Point OccupationSettingsDescription of fieldsThe parameters shown on this screen depend on the setting for in CONFIGURE Point Occupation Settings.<strong>Field</strong> Option Description
23.3 Satellite SettingsDescriptionAccessThe settings on this screen define which satellite system (available for SmartStationwih ATX1230 GG), satellites and satellite signals will be used by the receiver.Select Main Menu: Config...\SmartStation...\Satellite Settings.CONFIGURESatellite SettingsCONT (F1)To accept changes and return to<strong>TPS1200</strong>+ Main Menu.Description of fields<strong>Field</strong> Option DescriptionAvailable for SmartStation/ATX1230 GG.Defines the satellite signals accepted bythe receiver when tracking satellites.GPS Only Only GPS satellites are tracked.GPS & Glonass GPS and GLONASS satellites aretracked. Automatic orAlways TrackAvailable for SmartStation/ATX1230 GG.Defines if the L2C signal will be tracked.The recommended setting is Automatic. User input Sets the elevation in degrees below whichsatellite signals are not recorded and arenot shown to be tracked. Recommendedsettings:For GPS real-time: 10°.For other applications: 15°.Beep & MessageorNoBeep/MessageAutomatic orAlways OnActivates an acoustic warning signal andmessage given by SmartStation whensatellites are lost and therefore no positioncan be computed.Available for SmartStation/ATX1230 GG.Defines if phase multipath mitigationtechniques will be used. The recommendedsetting is Automatic.160 <strong>TPS1200</strong>+ Config...\SmartStation...
Next stepCONT (F1) returns to <strong>TPS1200</strong>+ Main Menu.Config...\SmartStation... <strong>TPS1200</strong>+ 161
23.4 Local Time ZoneDescriptionAccessThe settings on this screen help SmartStation to quickly locate and track satellites.Select Main Menu: Config...\SmartStation...\Local Time Zone.CONFIGURELocal Time ZoneCONT (F1)To accept changes and return to<strong>TPS1200</strong>+ Main Menu.Description of fields<strong>Field</strong> Option Description FromThe time zone for the current location and-13:00 to +13:00 local date.User inputSetting the local time and date supports avery fast satellite acquisition.Next stepCONT (F1) returns to <strong>TPS1200</strong>+ Main Menu.162 <strong>TPS1200</strong>+ Config...\SmartStation...
23.5 Quality Control SettingsDescriptionAccessThe settings on this screen define the limits for coordinate quality and DOP valuesaccepted for point occupations.Select Main Menu: Config...\SmartStation...\Quality Control Settings.CONFIGUREQuality ControlSettingsCONT (F1)To accept changes and return to thescreen from where this screen wasaccessed.Description of fields<strong>Field</strong> Option Description None, Pos Only,Height Only orPos & HeightThe type of coordinate quality to bechecked before storing a point. If activated,the limit defined in is checked before storing a point. Awarning signal is given when the limit isexceeded. User input Available unless .The maximum acceptable coordinatequality.None, GDOP,PDOP, HDOP orVDOP User input YesNoIf activated, the limit defined in is checked. GPSpositions are unavailable when the limit isexceeded.Available unless .The maximum acceptable DOP value.2D positions can be obtained with onlythree satellites available. The height isfixed to that of the last position computedwith height.2D positions cannot be obtained with onlythree satellites available.Next stepCONT (F1) returns to <strong>TPS1200</strong>+ Main Menu.Config...\SmartStation... <strong>TPS1200</strong>+ 163
23.6 Logging of Raw ObsDescription • With SmartStation it is possible to add the ability to log raw GPS data, which isthen post-processed at the office.• The settings on this screen define the logging of raw observations.• This is a protected option and is only activated by the entry of a license key.Access • This menu option is licence protected and is only activated by the entry of alicence key. The licence key can only be loaded from the CompactFlash card.• Select Main Menu: Config...\SmartStation...\Logging of Raw Obs.CONFIGURELogging of RawObsCONT (F1)To accept changes and return to thescreen from where this screen wasaccessed.Description of fields<strong>Field</strong> Option Description Never Available unless .No raw observation loggingduring either static or moving intervals.Static Only Available unless .Raw observation logging duringstatic intervals when occupying a point. From 0.05s to300.0sAvailable unless or . Rate at whichraw observations are logged. Choicelist This option determines when Smart-Antenna is turned off. The selected time isactivated whenever SmartStation leavesGPS mode.This option is directly linked to in CONFIGURE Start Up & PowerDown. Refer to "19.6 Start Up & PowerDown" for details.Next stepCONT (F1) returns to <strong>TPS1200</strong>+ Main Menu.164 <strong>TPS1200</strong>+ Config...\SmartStation...
24 Tools...24.1 Format Memory DeviceDescriptionAccessWay of workingstep-by-stepAllows the CompactFlash card, the internal memory, if fitted, and the <strong>System</strong> RAMto be formatted. All data will be erased.Select Main Menu: Tools...\Format Memory Device.Step Description1. Select the memory device to be formatted.2. Select the type of format to be performed.A quick format means that after formatting, data is not visible anymore but still exists on the memory device and is overwritten asand when required. A complete format fully deletes the data.Next stepIFthe CompactFlash card or internalmemory is to be formattedthe application programs memory is tobe formattedthe <strong>System</strong> RAM is to be formattedTHENCONT (F1) to format the selectedmemory device and return to <strong>TPS1200</strong>+Main Menu.PROGS (F4) to format the applicationprograms memory. All loadable applicationprograms are deleted.SYSTM (F5) to format the <strong>System</strong> RAM.If the <strong>System</strong> RAM is formatted all system data such as user defined configurationsets, codelists, geoid field files and CSCS field files will be lost.Tools... <strong>TPS1200</strong>+ 165
24.2 Transfer Objects...DescriptionAccessWay of workingstep-by-stepThis chapter describes the basic procedure for transferring objects between theCompactFlash card, the <strong>System</strong> RAM and the internal memory, if fitted.Select Main Menu: Tools...\Transfer Objects...\XX.Step DescriptionThe available fields on the screen depend on the option selected in MainMenu: Tools...\Transfer Objects....1. Select the memory device to transfer the object from.2. Select the memory device to transfer the object to.3. Select the object to transfer.Next stepIF all XXare to be transferredare not to be transferredTHENALL (F3) transfers all objects in list.CONT (F1) transfers selected object.166 <strong>TPS1200</strong>+ Tools...
StepDescription2. Insert the CompactFlash card into the instrument and turn on the instrument.When the internal battery is used, ensure that the battery is fullycharged.3. Main Menu: Tools...\Upload <strong>System</strong> Files...\XX.4. Select the necessary file to upload (firmware, language or application).5. CONT (F1) uploads the selected system file.Option 1 - upload from LGOStep Description1. Connect the transfer cable to the computer and to port 1 on the instrument.2. Ensure that the appropriate interface is set:Interface (GeoCOM Mode), Port (1), Device (RS232 GeoCOM).Ensure that corresponding communication settings are set between thecomputer and the instrument.3. Choose Software Upload from the Tools menu in LGO.4. Select the necessary files to upload (firmware, language or application).168 <strong>TPS1200</strong>+ Tools...
24.4 Calculator and File ViewerRefer to <strong>TPS1200</strong>+ Technical Reference <strong>Manual</strong> for information on these functions.Tools... <strong>TPS1200</strong>+ 169
24.5 Licence KeysDescriptionAccessWay of workingstep-by-stepA licence key can be used to activate application programs and protected optionsand can be used to define the expiry date of the software maintenance.A licence key file can be uploaded to the instrument. To upload a licence key file thefile should be located on the \SYSTEM directory of the CompactFlash card. Licencekey files use the naming convention L_123456.key, where 123456 is the instrumentserial number. Licence keys can also be typed in manually.Select Main Menu: Tools...\Licence Keys.Step Description1. Select the method by which the licence key will be input.2. Depending on the method chosen the licence key can be typed in.Showing/Hidingthe User ID for theInternet InterfaceShowing The User ID1) Type "show user id" (not case sensitive)and press CONT (F1) to continue.2) The user id will then always bedisplayed.Hiding The User ID1) Type "hide user id" (not case sensitive)and press CONT (F1) to continue.2) The user id will then always behidden.170 <strong>TPS1200</strong>+ Tools...
24.6 <strong>Field</strong> to OfficeDescriptionSupported filesAccessWay of workingstep-by-stepThis is to transfer jobs, codelists and other <strong>System</strong>1200 related files on theCompactFlash Card with a standard and simple FTP server.FTP protocol is used to transfer between <strong>System</strong>1200, which runs SmartWorx andhas an internet device connected, and the ftp server. The zip/unzip functionality isincluded.The following list shows the support file extensions that will automatically move tothe corresponding directory after downloading.Supported file File extension DirectoryAlmanac file Almanac.sys DATA/GPSAntenna file from GPS1200 List.ant GPSApplication program files *.a* SYSTEMASCII files for import/export to/from job *.txt DATACoordinate system file from GPS1200 Trfset.dat DBXCSCS field files *.csc DATA/GPS/CSCSDXF files for import/export to/from job *.dxf DATAFirmware files *.fw SYSTEMFormat files *.frt CONVERTGeoid field files *.gem DATA/GPS/GEOIDGSI files *.gsi GSIGSM/Modem station list from GPS1200 *.fil GPSLanguage files *.s* SYSTEMLicence file *.key SYSTEMLogfiles created from applicationprograms*.logDATATPS configuration files *.xfg CONFIG<strong>System</strong> files <strong>System</strong>.ram SYSTEMCustom ASCII file(LEICA Geo Office Export)*.cstDATAComma seperated variables,text file format (ASCII)Internet interface should be configured and connected prior using this function.Refer to "22.6 GPRS / Internet Devices".Select Main Menu: Tools...\<strong>Field</strong> to Office.*.csvDATAStep Description1. Type in the IP address. IP address format IPv6, for example2001:0db8:85a3:08d3:1319:8a2e:0370:7334, is NOT supported.Tools... <strong>TPS1200</strong>+ 171
25.2 STATUS: Battery & MemoryAccessstep-by-stepStep Description1. Press USER to access <strong>TPS1200</strong>+ User Menu.2. Press STAT (F3) to access STATUS Status Menu.3. Select Battery & Memory.STATUSBattery & Memory,Battery pageDescription of fields<strong>Field</strong>Any fieldDescriptionThe percentage of remaining power capacity for all batteriesare displayed numerically. Batteries not in use are shown ingrey. For internal and external battery being attached at thesame time the internal battery is used until it is empty and thenthe external battery is used.Next stepPAGE (F6) changes to the Memory page.STATUSBattery & Memory,Memory pageIf no information for a field is available, for example no CompactFlash card isinserted, then ----- is displayed.Description of fields<strong>Field</strong>DescriptionThe memory device in use.The total/free memory for data storage on the CompactFlashcard. The total/free memory for data storage on the internalmemory. A grey field and grey ----- indicate an unavailableinternal memory. The total/free system memory used for application programs.The total/free system memory. The system memory stores• instrument related files such as system settings.• survey related files such as codelists and configurationsets.Next stepCONT (F1) to exit STATUS Battery & Memory.174 <strong>TPS1200</strong>+ STATUS
25.3 STATUS: <strong>System</strong> InformationAccessstep-by-stepStep Description1. Press USER to access <strong>TPS1200</strong>+ User Menu.2. Press STAT (F3) to access STATUS Status Menu.3. Select <strong>System</strong> Information.STATUS<strong>System</strong>Information,Instrument pageShows the type of instrument, the serial number, the currently active systemlanguage and displays available instrument hardware options such as ATR orPowerSearch.Description of fields<strong>Field</strong>Description Type of instrument. Serial number of instrument, which is written on the type plate. Unique instrument number. User defined instrument identification. Currently selected system language The reflectorless EDM to be PinPoint R400, R1000 or none.Instrument equipped with automated target recognition or not. Instrument equipped with PowerSearch or not. Instrument equipped with GUS74 or not. Instrument equipped with extended GeoCOM or not. SmartStation option. The ability to track the L2C signal.SmartStation option. The availability of multipath mitigation.SmartStation option. The permanent availability of GLONASS.Next stepPAGE (F6) changes to the Firmware page.STATUS<strong>System</strong>Information,Firmware pageShows the versions of all system firmware.Description of fields<strong>Field</strong>Description Firmware version of the onboard software. Expiry date of the software maintenance.STATUS <strong>TPS1200</strong>+ 175
<strong>Field</strong>Description Build version of the onboard software. Build version of the processor board. Firmware version of the telescope.Firmware version of the boot software.Firmware version for the application program interface. Firmware version for the electric front interface. Firmware version for the graphical user interface.Next stepPAGE (F6) changes to the Application page.STATUS<strong>System</strong>Information,Application pageShows the versions of all uploaded application programs.Next stepCONT (F1) exits STATUS <strong>System</strong> Information.176 <strong>TPS1200</strong>+ STATUS
25.4 STATUS: Interfaces...DescriptionThe STATUS Interfaces screen gives an overview of all interfaces with the currentlyassigned port and the device.This screen shows information about incoming data from the following interfaces/devices:• Real-Time Input • ASCII Input • Tilt• Meteo • Event Input • Internet• Remote Interfaces • BluetoothAccessstep-by-stepStep Description1. Press USER to access <strong>TPS1200</strong>+ User Menu.2. Press STAT (F3) to access STATUS Status Menu.3. Select Interfaces....STATUS InterfacesSTATUSInterfacesCONT (F1)To exit STATUS Interfaces.IFACE (F3)Available only when GPS RTK orInternet, with an assigned port anddevice, is highlighted.To display status information aboutthe data being transmitted throughthe selected interface.DEVCE (F5)Available only when GPS RTK orInternet, with an assigned port anddevice, is highlighted.To display status information aboutthe attached device.STATUS <strong>TPS1200</strong>+ 177
25.5 STATUS: BluetoothSTATUSBluetoothThe way information is displayed indicates the configuration status of the Bluetoothport and the connection status of the device.Information displayedBluetooth portconfiguredin black in grey -as ----- - -Deviceconnected178 <strong>TPS1200</strong>+ STATUS
25.6 STATUS: Level & Laser PlummetDescriptionAccessstep-by-stepSTATUSLevel & LaserPlummet,Level pageThe electronic level is shown and can be centred.Step Description1. Press USER to access <strong>TPS1200</strong>+ User Menu.2. Press STAT (F3) to access STATUS Status Menu.3. Select Level & Laser Plummet.The level moves linear with the inclination values and . On thescreen closest to the circular level, the electronic level moves down if the value in gets bigger and vice versa. If the value for gets bigger the levelmoves left and vice versa.Description of fields<strong>Field</strong>DescriptionLongitudinal tilt of the vertical axis.Transversal tilt of the vertical axis.Next stepPAGE (F6) changes to the Laser Plummet page.STATUSLevel & LaserPlummet,Laser PlummetpageDescription of fields<strong>Field</strong> Option Description On or Off To turn the laser plummet on or off. Isalways set on when accessing thisscreen. Changing this setting turns thelaser plummet on or off immediately. From 0 % to100 %The percentage of the intensity of thelaser plummet is displayed numericallyand graphically.Next stepCONT (F1) exits STATUS Level & Laser Plummet.STATUS <strong>TPS1200</strong>+ 179
25.7 STATUS SmartStation...25.7.1 Satellite StatusDescriptionAccessThis screen shows information related to the satellites ordered by the elevationangle.Step Description1. Press USER to access <strong>TPS1200</strong>+ Main Menu.2. Press STAT (F3) to access STATUS Status Menu.3. Select SmartStation...4. Select Satellite Status.STATUSSatellites,Rover page• The information about the satellites at the reference shown on the Referencepage is identical with the information shown on STATUS Satellites, Rover page• Satellites below the configured in CONFIGURE SatelliteSettings are shown in grey.CONT (F1)To exit STATUS Satellites.GPS X / GPS (F2)To hide or show the GPS satellites(shown by the prefix G). Available forGX1230 GG/ATX1230 GG when isconfigured in CONFIGURE SatelliteSettings.GLO X / GLO (F3)To hide or show the GLONASS satellites(shown by the prefix R).Available for GX1230 GG/ATX1230 GG when is configured inCONFIGURE Satellite Settings.HELTH (F4)To view the numbers of satellitescategorised in good, bad and unavailable.Description of columnsColumnSatElevDescriptionThe Pseudo Random Noise number (GPS) or the slot number(GLONASS) of the satellites.The elevation angle in degrees. The arrow indicates if a satelliteis rising or falling.180 <strong>TPS1200</strong>+ STATUS
ColumnAzmthS/N 1 and S/N 2DescriptionThe azimuth of the satellite.The signal to noise ratio on L1 and L2. The number is shownin brackets if the signal is currently not being used in the positioncalculations.Next stepPAGE (F6) changes to the Skyplot page.STATUSSatellites,Skyplot pageThe skyplot shows satellite information in a graphical way. Satellites below the configured in CONFIGURE Satellite Settings are marked grey.The part of the skyplot between the 0° elevation and the cut-off angle is marked grey.Description of symbolsSymbolDescriptionSatellites above the configured inCONFIGURE Satellite Settings.Satellites below the configured inCONFIGURE Satellite Settings.Next stepCONT (F1) exits STATUS Satellites.STATUS <strong>TPS1200</strong>+ 181
25.7.2 Real-Time StatusDescriptionAccessThis screen shows information related to real-time data. The name of the screenchanges depending on the configuration:Real-time rover configuration:STATUS Real-Time InputReal-time reference configuration with onereal-time device:STATUS Real-Time OutputReal-time reference configuration with tworeal-time devices: STATUS Real-Time Output 1and STATUS Real-Time Output 2For simplicity, the screen is named here as STATUS Real-Time. Differencesdepending on the configurations are outlined.Step Description1. Press USER to access <strong>TPS1200</strong>+ User Menu.2. Press STAT (F3) to access STATUS Status Menu.3. Select SmartStation...4. Select Real-Time Status.STATUSReal-Time,General pageCONT (F1)To exit STATUS Real-Time.DATA (F4)To view the data being received.Depending on , theshown data differ.REF2 (F5) and REF1 (F5)Available for with two real-time devicesconfigured. To change between thestatus information for both real-timedevices.Description of fields<strong>Field</strong>Description The received real-time data format message type. The number of satellites on L1 and L2 being used in thecurrent position solution. Available for SmartStation/ATX1230 GG when is configured in CONFIGURESatellite settings. The number of satellites on L1 and L2being used in the current position solution. The number of satellites on L1 and L2 being used in thecurrent position solution.182 <strong>TPS1200</strong>+ STATUS
<strong>Field</strong>DescriptionAvailable for .Seconds since the last message from the reference wasreceived.Available for .The percentage of real-time data received from the referencecompared with the data received from the GPSantenna within the last minute. This indicates how well thedatalink is working.Available for .The type of reference network in use.Available for unless . The type of NMEA message send to the referencenetwork. If more than one message is send at a time, then alltypes are shown separated by comma.Next stepPAGE (F6) changes to the Device page.STATUSReal-Time,Device pageThe content of this page differs for each type of device in use.CONT (F1)To exit STATUS Real-Time.ACCNT (F3)Available for Smartgate device. Toview Smartgate account information.VERS (F4)Available for Smartgate device. Toview Smartgate version information.For all devices availableDescription of fields<strong>Field</strong>DescriptionThe name of the device.For digital cellular phones and modemsDescription of fields<strong>Field</strong>DescriptionThe type of device.The port to which the device is connected.The software version of the attached digital cellular phone.STATUS <strong>TPS1200</strong>+ 183
<strong>Field</strong>DescriptionThe name of the network operator in which the digital cellularphone is operating.The actual mode of the digital cellular phone. The options areUnknown, Searching and Registered.Available if device is connected via bluetooth. Indicates thestate of the connection.Indication of received signal strength of the digital cellularphone network.For radiosDescription of fieldsThe available fields depends on the radio type.<strong>Field</strong>DescriptionThe port to which the device is connected.The type of device.The radio channel.The actual set frequency of the radio.The defined central frequency of the radio.The software version of the attached radio.Next stepPAGE (F6) changes to the Reference page.STATUSReal-Time,Reference page;STATUSReal-Time,Ref (VRS) pageThe name of the page changes depending on the type of reference being used.Description of fields<strong>Field</strong>DescriptionAn identification for a reference station. The ID can beconverted into a compact format to be send out with real-timedata in all real-time data formats. It is different from the pointID of the reference station.184 <strong>TPS1200</strong>+ STATUS
<strong>Field</strong> • For , or with :The antenna height at the reference from the marker to theMRP.• For and or with The antenna height at the reference from the marker to thephase center.• For all other :----- is displayed because the data format does not includeinformation about the antenna height.DescriptionThe coordinates for the reference station which are transferreddepend on the active real-time data format.• For real-time messages which include antenna height andantenna type: Marker.• For real-time messages which do not include antennaInformation: Phase Centre of L1.Next stepCONT (F1) exits STATUS Real-Time.STATUSReal-Time InputDataThe following provides additional information on the satellite data received via realtimemessage. Information of those satellites is displayed, which are used on bothreference and rover.AccessDATA (F4) on STATUS Real-Time, General page.CONT (F1)To return to STATUS Real-Time.SAT- (F2)To display information about thesatellite with the next smaller PRN.SAT+ (F3)To display information about thesatellite with the next larger PRN.Description of fieldsThe data being received from the satellites and the layout of the screen depend onthe active real-time data format.STATUS <strong>TPS1200</strong>+ 185
<strong>Field</strong>,,,,,,DescriptionThe PRN number (GPS) or the slot number (GLONASS) of thesatellites shown with the prefix G (GPS) or R (GLONASS).The GPS time of the satellite.The number of phase cycles from the antenna to the satelliteon L1 and L2.The uncorrected carrier phases for L1 and L2.The carrier phase corrections for L1 and L2.The pseudorange between the antenna to the satellite for L1and L2.The uncorrected pseudoranges for L1 and L2.The pseudorange corrections for L1 and L2.Pseudorange corrections.Rate of change of the corrections.Issue Of Data Ephemeris. The identification number of theephemeris for a satellite.Next stepCONT (F1) returns to the screen from where STATUS Real-Time Input Data wasaccessed.186 <strong>TPS1200</strong>+ STATUS
25.7.3 Current PositionDescriptionAccessThis screen shows information related to the current antenna position and the speedof the antenna. For real-time rover configurations the baseline vector is also shown.MapView shows the current position in a graphical way.Step Description1. Press USER to access <strong>TPS1200</strong>+ User Menu.2. Press STAT (F3) to access STATUS Status Menu.3. Select SmartStation...4. Select Current Position.STATUSPosition,Position pageCONT (F1)To exit STATUS Position.COORD (F2)To see other coordinate types. Localcoordinates are available when alocal coordinate system is active.SHIFT ELL H (F2) and SHIFT ORTH (F2)Available for local coordinates. Tochange between the ellipsoidal andthe orthometric height.Description of fields<strong>Field</strong>Pos Quality andHt QualityHDOP and VDOPDescriptionThe latency of the computed position. Latency is mainly due totime required for data transfer and computation of position.Depends on the use of the prediction mode.Available for phase fixed and code only solutions. The 2Dcoordinate and height quality of the computed position.Available for navigated solutions.Next stepPAGE (F6) changes to the Baseline or Speed page.STATUSPosition,Baseline pageInformation on the baseline vector is displayed.Next stepPAGE (F6) changes to the Speed page.STATUS <strong>TPS1200</strong>+ 187
STATUSPosition,Speed pageDescription of fields<strong>Field</strong>DescriptionThe speed over ground in the horizontal direction.Available for local coordinate systems.The bearing for the horizontal direction related to the Northdirection of the active coordinate system.The vertical component of the actual velocity.Next stepPAGE (F6) changes to the Map page.STATUSPosition,Map pageThe Map page provides an interactive display of the data.Next stepCONT (F1) exits STATUS Position.188 <strong>TPS1200</strong>+ STATUS
25.7.4 Logging StatusDescriptionAccessThis screen shows information related to logging of raw observations.Step Description1. Press USER to <strong>TPS1200</strong>+ User Menu.2. Press STAT (F3) to access STATUS Status Menu.3. Select SmartStation...4. Select Logging StatusSTATUSLogging,General pageCONT (F1)To exit STATUS Logging.Description of fields<strong>Field</strong>Description YES or NO. The number of static epochs recorded in the current job. The number of manually occupied points and auto pointsstored in the job.Next stepPAGE (F6) changes to the Reference page.STATUSLogging,Reference pageDescription of fields<strong>Field</strong> Option Description A time in sec The logging rate at the reference. Thisinformation is shown if the real-timemessage format supports this informationand raw observations are being logged atthe reference.Not known The real-time message format does notsupport this information or the informationis not yet received by the rover.STATUS <strong>TPS1200</strong>+ 189
<strong>Field</strong> Option DescriptionNoneRaw observations are not being logged atthe reference.Next stepCONT (F1) exits STATUS Logging.190 <strong>TPS1200</strong>+ STATUS
25.7.5 SmartAntenna <strong>System</strong> InfoAccessStep Description1. Press USER to access <strong>TPS1200</strong>+ User Menu.2. Press STAT (F3) to access STATUS Status Menu.3. Select SmartStation...4. Select SmartAntenna <strong>System</strong> Info.STATUSSmartAntennaInformationShows the versions of all system firmware.Description of fields<strong>Field</strong>DescriptionThe type of antenna. The firmware version for the measurement engine. The firmware version of the boot software for the measurementengine.Next stepCONT (F1) exits STATUS SmartAntenna Information.STATUS <strong>TPS1200</strong>+ 191
192 <strong>TPS1200</strong>+ STATUS
26 NTRIP via Internet26.1 OverviewDescription<strong>System</strong>componentsNetworked Transport of RTCM via Internet Protocol• is a protocol streaming real-time corrections over the Internet.• is a generic protocol based on the Hypertext Transfer Protocol HTTP/1.1.• is used to send differential correction data or other kinds of streaming data tostationary or mobile users over the Internet, allowing simultaneous PC, laptop,PDA, or receiver connections to a broadcasting host.• supports wireless Internet access through mobile IP networks like digital cellularphones or modems.NTRIP consists of three system components:• NTRIPClients • NTRIPServers • NTRIPCasterRefer to the <strong>TPS1200</strong>+ Technical Reference <strong>Manual</strong> for more information aboutNTRIP.NTRIP via Internet <strong>TPS1200</strong>+ 193
26.2 Configuring SmartStation for Using NTRIP Service26.2.1 Configuring an Access to the InternetRequirements • SmartStation must be used.• Firmware v2 or higher must be loaded on the <strong>TPS1200</strong>+ instrument.• Firmware v1.42 or higher must be loaded on the RX1200.To access to the Internet with SmartStation, General Packed Radio <strong>System</strong> deviceswill normally be used. GPRS is a telecommunication standard for transmitting datapackages using the Internet Protocol (IP).Configure accessto Internetstep-by-stepThe following table explains the most common settings. Refer to the stated chapterfor more information on screens.Step Description1. Select Main Menu: Config...\Interfaces....2. In CONFIGURE Interfaces highlight Internet.3. EDIT (F3) to access CONFIGURE Internet Interface.4. CONFIGURE Internet Interface Some providers ask for a user ID to allow connecting to theInternet via GPRS. Contact your provider if a user ID needs to be used. Some providers ask for a password to allow connecting tothe Internet via GPRS. Contact your provider if a password needs to beused.5. DEVCE (F5) to access CONFIGURE GSM/Modem Devices.6. CONFIGURE GSM/Modem DevicesHighlight the GPRS device to be used.NEW (F2) to create a new device.7. CONT (F1) to return to CONFIGURE Internet Interface.8. CONT (F1) to return to CONFIGURE Interfaces.9. CTRL (F4) to access CONFIGURE XX Connection.10. CONFIGURE XX ConnectionType in relevant information.CODES (F3) Available for digital cellular phones of GSM technology. Toenter the Personal Identification Number of the SIM card. If the PIN islocked for any reason, for example the wrong PIN was entered, input thePersonal UnblocKing code for access to the PIN.11. CONT (F1) to return to <strong>TPS1200</strong>+ Main Menu.The instrument is now online to the Internet. The Internet online statusicon is displayed. But because GPRS is being used, no charges are yetmade since no data transfer from the Internet has yet taken place.194 <strong>TPS1200</strong>+ NTRIP via Internet
Step Description12. USER13. STAT (F3) to access STATUS Status Menu.14. Highlight Interfaces....15. ENTER to access STATUS Interfaces.16. STATUS InterfacesHighlight Internet.17. IFACE (F3) to access STATUS Internet.18. STATUS InternetThis screen shows• if SmartStation is online on the Internet.• for how long SmartStation is online.• the technology of data transfer.• the amount of data received or sent since SmartStation is online.19. CONT (F1) to return to STATUS Interfaces.20. CONT (F1) to return to <strong>TPS1200</strong>+ Main Menu.NTRIP via Internet <strong>TPS1200</strong>+ 195
26.2.2 Configuring to Connect to a ServerRequirementsConfigure connectto a serverstep-by-stepThe configurations from the previous chapter must have been completed. Refer to"26.2.1 Configuring an Access to the Internet".Step Description1. Select Main Menu: Config...\Interfaces....2. In CONFIGURE Interfaces highlight GPS RTK.3. EDIT (F3) to access CONFIGURE Real-Time Mode.4. CONFIGURE Real-Time Mode Select the type of data to be received from the Internet.5. CONT (F1) to return to CONFIGURE Interfaces.6. Highlight GPS RTK.7. CTRL (F4) to access CONFIGURE Set NET Port.8. CONFIGURE Set NET Port The server to be accessed in the Internet. Opening thechoicelist accesses CONFIGURE Server to Connect where new serverscan be created or existing servers can be selected or edited. The IP address of the server to be accessed in theInternet. The port of the Internet server through which the data isprovided. Each server has several ports for various services. Allows for automatic connection between theSmartStation and the Internet when a point is occupied during a survey.Ending the point occupation also ends the Internet connection.9. CONT (F1) to return to CONFIGURE Interfaces.Once SmartStation is connected to the server a message is displayed inthe message line.10. CONT (F1) to return to <strong>TPS1200</strong>+Main Menu.11. USER12. STAT (F3) to access STATUS Status Menu.13. Highlight Interfaces....14. ENTER to access STATUS Interfaces.15. STATUS InterfacesHighlight GPS RTK.16. DEVCE (F5) to access STATUS Device: Ethernet.17. STATUS Device: Ethernet196 <strong>TPS1200</strong>+ NTRIP via Internet
Step DescriptionCheck the Internet online status.18. CONT (F1) to return to STATUS Interfaces.19. CONT (F1) to return to <strong>TPS1200</strong>+ Main Menu.NTRIP via Internet <strong>TPS1200</strong>+ 197
26.2.3 Using the NTRIP Service with SmartStationRequirementsUse NTRIP servicestep-by-stepThe configurations from the previous chapter must have been completed. Refer to"26.2.2 Configuring to Connect to a Server".Step Description1. Select Main Menu: Config...\Interfaces....2. In CONFIGURE Interfaces highlight GPS RTK.3. EDIT (F3) to access CONFIGURE Real-Time Mode.4. CONFIGURE Real-Time Mode must be selected.5. ROVER (F2) to access CONFIGURE Additional Rover Options.6. PAGE (F6) to access CONFIGURE Additional Rover Options, NTRIPpage.7. CONFIGURE Additional Rover Options, NTRIP page8. A user ID is required to receive data from to the NTRIPCaster.Contact the NTRIP administrator for information. A password is required to receive data from the NTRIP-Caster. Contact the NTRIP administrator for information.9. SRCE (F5) to access CONFIGURE NTRIP Source-Table.10. CONFIGURE NTRIP Source-TableAll MountPoints are listed. MountPoints are the NTRIP servers sending outreal-time data. This screen consists of two columns:First column MountPoint:The abbreviations for the MountPoints.Second column Identifier:The city where the MountPoint is located.Highlight a MountPoint about which more information is required. Thisinformation helps to configure SmartStation to use the selected Mount-Point as a reference.11. INFO (F3) to access CONFIGURE MountPoint: XX.12. CONFIGURE MountPoint: XX, General page The real-time data format sent out by the MountPoint. Details about , for example the RTCM messagetypes including update rates in seconds displayed in brackets. The type of password protection required for the authorisationto the NTRIPServer. if no password is required. if the password need not be encrypted. if the password must be encrypted. Indicates if the MountPoint must receive GGA NMEA data fromthe rover in order to compute VRS information.198 <strong>TPS1200</strong>+ NTRIP via Internet
StepDescription Indicates if charges are currently made for the connection. The type of carrier message sent out. The type of satellite system supported by the MountPoint.13. PAGE (F6) to access CONFIGURE MountPoint: XX, Location page.14. CONFIGURE MountPoint: XX, Location pageDetailed information about the location of the MountPoint is displayed.15. PAGE (F6) to access CONFIGURE MountPoint: XX, Miscell page.16. CONFIGURE MountPoint: XX, Miscell page The hard- or software generating the data stream. The name of the compression / encryption algorithm. Miscellaneous information if available.PREV (F2) to display information about the previous MountPoint in the list.NEXT (F3) to display information about the next MountPoint in the list.17. CONT (F1) to return to CONFIGURE NTRIP Source-Table.18. CONT (F1) to return to CONFIGURE Additional Rover Options.SHIFT CONEC (F3) and SHIFT DISCO (F3) are now available in GPSmode to connect to and disconnect from the NTRIPServer.NTRIP via Internet <strong>TPS1200</strong>+ 199
200 <strong>TPS1200</strong>+ NTRIP via Internet
27 Menu TreeMenu treeMAIN MENU||—— SURVEY||—— PROGRAMS...||—— MANAGE...||—— JOBS||—— DATA||—— CODELISTS||—— COORDINATE SYSTEMS||—— CONFIGURATION SETS||—— REFLECTORS||—— CONVERT...||—— EXPORT DATA FROM JOB||—— EXPORT ASCII||—— EXPORT LandXML||—— EXPORT DXF||—— IMPORT DATA TO JOB||—— IMPORT ASCII/GSI||—— IMPORT DXF||—— COPY POINTS BETWEEN JOBS||—— CONFIG...||—— SURVEY SETTINGS...||—— ID TEMPLATES||—— DISPLAY SETTINGS||—— CODING & LINEWORK SETTINGS||—— OFFSETS||—— TARGET CHECK||—— INSTRUMENT SETTINGS...||—— EDM & ATR SETTINGS||—— SEARCH WINDOWS||—— AUTOMATIC PRISM SEARCH||—— TPS CORRECTIONS||—— COMPENSATOR||—— INSTRUMENT ID||—— GENERAL SETTINGS...||—— WIZARD MODE||—— HOT KEYS & USER MENU||—— UNITS & FORMATS||—— LANGUAGE||—— LIGHTS, DISPLAY, BEEPS, TEXT||—— START UP & POWER DOWN||—— TELESCOPE ACCESSORIES| |Menu Tree <strong>TPS1200</strong>+ 201
||—— INTERFACES...||—— GSI OUTPUT||—— GEOCOM MODE||—— RCS MODE||—— EXPORT JOB||—— GPS RTK, for SmartStation||—— INTERNET, for SmartStation||—— SMARTSTATION..., for SmartStation||—— REAL-TIME MODE, for SmartStation||—— POINT OCCUPATION SETTINGS, for SmartStation||—— SATELLITE SETTINGS, for SmartStation||—— LOCAL TIME ZONE, for SmartStation||—— QUALITY CONTROL SETTINGS, for SmartStation||—— LOGGING OF RAW OBS, for SmartStation||—— TOOLS...||—— FORMAT MEMORY DEVICE||—— TRANSFER OBJECTS...||—— CODELISTS||—— CONFIGURATION SETS||—— COORDINATE SYSTEMS||—— GEOID FIELD FILES||—— CSCS FIELD FILES||—— FORMAT FILES||—— JOBS, if internal memory is fitted||—— SYSTEM RAM CONTENTS||—— MODEM/GSM STATIONS, for SmartStation||—— IP HOSTS, for SmartStation||—— ANTENNA RECORDS, for SmartStation||—— UPLOAD SYSTEM FILES...||—— APPLICATION PROGRAMS||—— SYSTEM LANGUAGES||—— INSTRUMENT FIRMWARE||—— CALCULATOR||—— FILE VIEWER||—— LICENCE KEYS||—— CHECK & ADJUST...||—— COMBINED (l, t, i, c, ATR)||—— TILTING AXIS (a)||—— COMPENSATOR (l, t)||—— CURRENT VALUES||—— END CHECK & ADJUST||—— FIELD TO OFFICE202 <strong>TPS1200</strong>+ Menu Tree
IndexAAbsolute coordinate differenceDisplay ........................................................... 45Limit exceeded ............................................... 45Absolute difference ............................................. 44AccessQuick settings ................................................ 21Transformation management ......................... 68Access, MANAGE XX ......................................... 31ACCNT .............................................................. 183ActivateCode filter ...................................................... 53Code group .................................................... 53Activate, application programs .......................... 170Add point to line .................................................. 50Additive constant ................................................. 78ALL ...................................................................... 30Angle, display format ........................................ 116aNUM ................................................................ 121Application programActivate ........................................................ 170Area .................................................................... 10Close .............................................................. 32Create ............................................................ 48Edit ................................................................. 48Icon ................................................................ 13Open .............................................................. 32Area codeFilter ............................................................... 53Area management .............................................. 47Area, display format .......................................... 117AreasSorting and filter ............................................. 51ASCII ................................................................... 85Atmospheric ppm .............................................. 106ATR ................................................................... 101Icon ................................................................ 10Quick set ........................................................ 21Window settings, recall default .................... 104ATR/LOCK/PS .................................................... 10AttributeType in new ................................................... 57AttributesSymbol ........................................................... 17Automatic Prism Search ................................... 105Average ...............................................................44Averaging ............................................................44Include/exclude coordinate triplet ...................45Limit, exceeded ..............................................46Mode ..............................................................44Define ........................................................44BBattery .................................................................10Icon .................................................................14Battery, status ....................................................174Beep ..................................................................120Hz-Sector .....................................................121Key ...............................................................121Warning ........................................................121BluetoothIcon .................................................................13Bluetooth, identification number ........................140CCalculator ..........................................................169CE ..........................................................................7Change Face, quick set .......................................22CHKPT ................................................................21CloseArea ................................................................32Line .................................................................32CMND ................................................................139CodeCreate .............................................................56Edit .................................................................56Code filter for lines and areas ..............................53Code groupActivate/deactivate .........................................53Code type ............................................................57Codelists ..............................................................55CodesSortCodelist management ...............................56Data management .....................................53Coding Settings ...................................................95CompactFlash card .............................................10Icon .................................................................13Compensator ...............................................10, 109Configuration ................................................109Icon .................................................................12Index <strong>TPS1200</strong>+ 203
COMPS ...............................................................21Config...Survey settings ...............................................91ConfigurationCompensator ................................................109General settings ...........................................113Instrument settings .........................................99Interfaces ..............................................133, 139Offsets ............................................................97SmartStation .................................................153Configuration setDefault ............................................................73Description ......................................................73Management ...................................................73Recall deleted default .....................................33User defined ...................................................73Configuration setsReset default settings .....................................33Contrast, screen ................................................120Coordinate system ...............................................65Create .............................................................66EditManagement .............................................66Turn into user defined default .........................32Coordinate systemsRecall deleted default .....................................33Copy points between jobs ...................................89CreateArea ................................................................48Code ...............................................................56Codelist ...........................................................55Coordinate system ..........................................66CSCS model ...................................................71Device ...........................................................131Ellipsoid ..........................................................69Geoid model ...................................................71ID template .....................................................92Line .................................................................48Point ...............................................................40Projection ........................................................69Reflector .........................................................78Transformation ...............................................69CSCS model ........................................................71Create from internal memory ..........................71CTRLModem ..........................................................142NET port .......................................................147RCS Mode .................................................... 144RS232 .......................................................... 145CTS ................................................................... 131Current position, status ..................................... 187Cut off angle ...................................................... 160DData ..................................................................... 39Export ............................................................. 79Directory .................................................... 80Import ............................................................. 85Logged, view .................................................. 32Data format, real-time ....................................... 153Data log ............................................................... 32Data management ............................................... 39DeactivateCode filter ....................................................... 53Code group .................................................... 53DefaultRecall deletedConfiguration set ....................................... 33Coordinate system .................................... 33Default, recallATR window settings .................................... 104Display mask .................................................. 93Define display mask ............................................ 93DeleteArea ................................................................ 32Coordinate triplet ............................................ 45Geoid/CSCS model ........................................ 71Line ................................................................ 32Option in MANAGE ........................................ 31DEVCE .............................................................. 129Device ............................................................... 128Create .......................................................... 131Edit ............................................................... 131DevicesConfiguring devices .............................. 129, 130Display .............................................................. 120Settings .......................................................... 93Display mask ....................................................... 93Elements ........................................................ 94DIST .................................................................... 30DistanceDisplay format .............................................. 116DMASKGeneral .......................................................... 93DXF ..................................................................... 85204 <strong>TPS1200</strong>+ Index
Dynamic ATR window ....................................... 105Dynamic PS window ......................................... 105EEditArea ............................................................... 48Code .............................................................. 56Codelist .......................................................... 55Coordinate systemManagement ............................................. 66Device .......................................................... 131Ellipsoid ......................................................... 69ID template .................................................... 92Interfaces ..................................................... 126Job ................................................................. 36Line ................................................................ 48Option ............................................................ 31Point ............................................................... 40Projection ....................................................... 69Transformation ............................................... 69EDM .................................................................... 10Icon ................................................................ 11Quick setMode ......................................................... 21Type .......................................................... 21Type ............................................................. 100EDM & ATR settings ........................................... 99EDM ModeAverage ....................................................... 101Fast .............................................................. 100Standard ...................................................... 100SynchroTrack ............................................... 100Tracking ....................................................... 100Electronic Level ................................................... 25Elevation mask .................................................. 160Ellipsoid, create/edit ............................................ 69Ellipsoids ............................................................. 68End date .............................................................. 49End time .............................................................. 49ENTER .................................................................. 7ESC ....................................................................... 7Exceeded limitAbsolute coordinate difference ...................... 45Average ......................................................... 46Coordinate quality ........................................ 163DOP ............................................................. 163ExcludeCoordinate triplet from averaging ................... 45Expiry DateSoftware maintenance ..................................175ExportData ................................................................79Format ............................................................79LandXML Data ...............................................83EXPRT .................................................................37FFace I&II ..............................................................10Icon .................................................................12<strong>Field</strong> to Office transfer .......................................171File Viewer .........................................................169FILES .................................................................164FILT .....................................................................32Export .............................................................80FilterActivate/deactivate for codes .........................53Point, line and area codes ..............................53Points, lines and areas ...................................51Symbol ...........................................................17Filter settings, define ...........................................32Filter symbol ........................................................51Firmware, version ......................................175, 191FormatExport .............................................................79Import .............................................................85Memory device .............................................165<strong>System</strong> RAM ................................................165Format file, export ASCII .....................................79Formats .............................................................116Frequency, change for radio ..............................143GGeneral settings... .............................................113GeoCOM mode .................................................134Geoid model ........................................................71Create from internal memory ..........................71View ................................................................71Geometric ppm ..................................................106Grade, display format ........................................116Graph, showing satellites ..................................181GROUPCodes .............................................................56GSIData ..............................................................133Format ..........................................................133Output ...........................................................133Index <strong>TPS1200</strong>+ 205
GSI16 ..................................................................85GSI8 ....................................................................85HHeight mode ........................................................69Hot keys .............................................................114Configure ......................................................114HTS .....................................................................86IIcons ....................................................................10ID .........................................................................39ID templateCreate .............................................................92Edit .................................................................92ID templates ........................................................91Identification number .........................................110Identification number, Bluetooth ........................140IFACEData export .....................................................80IlluminationKeyboard ......................................................120Screen ..........................................................120ImportData ................................................................85Format ............................................................85IMPRT .................................................................37Include coordinate triplet in averaging .................45Increase point ID .................................................92Increasing NE, SE, SW, NW .............................117Increment point ID ...............................................92InstrumentSettings, configuration ....................................99Turn on and turn off ..........................................9Instrument ID .....................................................110Instrument Setup .................................................23For remote control ..........................................28InterfaceUser ..................................................................7Interfaces ...................................................133, 139Internal memory ...................................................10Icon .................................................................13Internet online status ...........................................10Icon .................................................................16INTL .....................................................................32JJobCreate .............................................................36Edit ................................................................. 36Management .................................................. 35JSTCK ................................................................. 21KKeyboard ........................................................... 7, 9Locking and unlocking ...................................... 9Keyboard, illumination ....................................... 120Keys ...................................................................... 7Keys, Alphanumeric .............................................. 7Keys, Arrow ........................................................... 7Keys, Combinations .............................................. 7Keys, Function ...................................................... 7Keys, Hot ............................................................... 7LLanguageSelect ........................................................... 119Laser plummetStatus ........................................................... 179Turn on or off ................................................ 179<strong>Leica</strong> Geosystems TPS prism system ................ 78Level ...................................................................... 7Electronic ....................................................... 25Level, status ...................................................... 179LGODownloadJobs .......................................................... 35UploadJobs .......................................................... 35Licence key ....................................................... 170Upload .......................................................... 170Lights ................................................................. 120Limit exceededAbsolute coordinate difference ....................... 45Limit, exceededAverage .......................................................... 46Limits, exceededSymbol ........................................................... 17Line ..................................................................... 10Close .............................................................. 32Create ............................................................ 48Edit ................................................................. 48Icon ................................................................ 13Length ............................................................ 49Management .................................................. 47Open .............................................................. 32206 <strong>TPS1200</strong>+ Index
Line codeFilter ............................................................... 53Line styleCoding ........................................................... 58New line ......................................................... 49LinesSorting and filter ............................................. 51Linework .............................................................. 59LIST .................................................................. 113LocalDate ............................................................. 162Time ............................................................. 162LOCK ................................................................ 101Icon ................................................................ 10Lock, keyboard ...................................................... 9LOCK, Quick Set ................................................. 21Logged dataView ............................................................... 32MMANAGE XX, access ......................................... 31Manage...Configuration set ............................................ 73Coordinate systems ....................................... 65Data ............................................................... 39ManagementAreas ............................................................. 47Getting started ............................................... 31Jobs ............................................................... 35Lines .............................................................. 47Points ............................................................. 40Reflectors ....................................................... 77Mean page .......................................................... 44Access ........................................................... 44Measure and record ............................................ 29Memory ............................................................... 13Status ........................................................... 174Menu tree .......................................................... 201ModemConfigure connection ................................... 142Molodensky-Badekas .......................................... 70MORE ................................................................. 32MountPoint ........................................................ 198NNew version, upload ......................................... 167New, create option .............................................. 31NTRIP ............................................................... 193Number of satellites, used in solution ............... 182OObjectDescription .....................................................39Offsets .................................................................97ON .........................................................................7OpenArea ................................................................32Line .................................................................32PPages down ...........................................................7Pages up ...............................................................7Personal Identification Number .........................139Instrument ....................................................122PIN .....................................................................139PointAdd to line ......................................................50Create .............................................................40Delete from line ..............................................50Edit .................................................................40Management ..................................................40Sorting and filter .............................................51Point codeFilter ...............................................................53Point sorting .........................................................51PointsCopy between jobs .........................................89Position mode ......................................................10Icon .................................................................16Position status, icon .............................................15Power down .......................................................122PPMAtmospheric .................................................106Geometric .....................................................106Prediction ...........................................................105PREV .................................................................199Prism system<strong>Leica</strong> Geosystems TPS ..................................78PRN ...................................................................180PROG ....................................................................7Projection distortion ...........................................106Projection, create/edit ..........................................69Projections ...........................................................68PSIcon .................................................................10Quick set window ...........................................22Pseudo Random Noise ......................................180Index <strong>TPS1200</strong>+ 207
QQuick access to screensConfigure ......................................................114Quick coding ........................................................10Icon .................................................................14Quick SettingsAccess ............................................................21SHIFT USER ..................................................21Quick settings ........................................................7RRadio Link Protocol ...........................................140Radio, change channels ....................................143RadioHandleSetup for remote control .................................28Raw observations, log .......................................164RCS .....................................................................10Icon .................................................................13Mode .............................................................135Mode, quick set ..............................................22Window .........................................................104Real-timeStatus ...........................................................182Real-time device ..................................................10Icon .................................................................16Real-time status ...................................................10Icon .................................................................16REC .....................................................................30RecallDefaultATR window settings ...............................104Attribute values ..........................................42Display mask .............................................93Deleted defaultConfiguration set .......................................33Deleted default coordinate system .................33Last used attribute values ...............................42Redlaser ............................................................120Reference datum ...............................................106ReflectorCreate .............................................................78Icon .................................................................11Management ...................................................77Type ................................................................78RefractionCoefficient .....................................................107Correction .....................................................107ResidualSymbol, largest .............................................. 17Reticule ............................................................. 120Reticule illumination .......................................... 120RLP ................................................................... 140RTS ................................................................... 131SS/N .................................................................... 181Satellite status ................................................... 180SatellitesContributing .................................................... 10Icon ................................................................ 15Number used in solution .............................. 182Visible ............................................................. 10Screen ................................................................... 8Contrast ........................................................ 120Illumination ................................................... 120Scroll bar, description ............................................ 8Search Windows ............................................... 103Serial number .................................................... 175SET-D ................................................................. 32SetupFor remote control .......................................... 28Setup of InstrumentMechanic ........................................................ 23Setup of instrumentOrientation ...................................................... 29SHIFT .............................................................. 7, 10Icon ................................................................ 14SHIFT USER ....................................................... 21Signal to noise ratio ........................................... 181Skyplot .............................................................. 181SmartCodes .................................................. 56, 95SmartStation, configuration ............................... 153Software upload ................................................ 167SortCodesCodelist management ............................... 56Data management .................................... 53Sort settings, define ............................................ 32SortingPoints ............................................................. 51Points, lines and areas ................................... 51SRCE ................................................................ 156Staked outSymbol ........................................................... 17Start date ............................................................. 49208 <strong>TPS1200</strong>+ Index
Start time ............................................................. 49Start up ............................................................. 122STAT ................. 173, 174, 175, 177, 179, 180, 191Status ................................................................ 173Reflector ........................................................ 10Status, position ................................................... 10Survey Settings... ................................................ 91Symbols .............................................................. 17<strong>System</strong> information, status ................................ 175<strong>System</strong> languageSelect ........................................................... 119ViewGeoid model ...................................................71Logged data ...................................................32Points, lines, areas, free codeStored in job ..............................................32Points, lines, areas, free code stored in job ....32WWizard ...............................................................113Wizard mode .....................................................113TTelescope Accessories ..................................... 111Text ................................................................... 120TiltLongitudinal (l) ............................................. 179Transversal (t) .............................................. 179Touch screen ........................................................ 9Touch screen, on, off ........................................ 120TPS Corrections ................................................ 106TransferObjects ......................................................... 166Objects, basic procedure ............................. 166transferring data, field to office .......................... 171Transformation management, access ................. 68Transformation model ......................................... 70Transformation, create/edit ................................. 69Transformations .................................................. 68Trigger key ............................................................ 7UUnits .................................................................. 116Unlock, keyboard .................................................. 9UploadLicence key file ............................................ 170<strong>System</strong> files ................................................. 167USER .................................................................... 7User interface ........................................................ 7User menu, configuration .................................. 114VV-Angle, Quick set .............................................. 22VERS ................................................................ 183Versions of SmartAntenna firmware ................. 191Versions of system firmware ............................. 175Index <strong>TPS1200</strong>+ 209
Total Quality Management: Our commitment to total customer satisfaction.<strong>Leica</strong> Geosystems AG, Heerbrugg, Switzerland, has beencertified as being equipped with a quality system whichmeets the International Standards of Quality Managementand Quality <strong>System</strong>s (ISO standard 9001) and EnvironmentalManagement <strong>System</strong>s (ISO standard 14001).Ask your local <strong>Leica</strong> Geosystems dealer for more information about our TQMprogram.761387-6.0.0enOriginal textPrinted in Switzerland © 2008 <strong>Leica</strong> Geosystems AG, Heerbrugg, Switzerland<strong>Leica</strong> Geosystems AGHeinrich-Wild-StrasseCH-9435 HeerbruggSwitzerlandPhone +41 71 727 31 31www.leica-geosystems.com