RCS1100 Series - Engineering Surveyor
RCS1100 Series - Engineering Surveyor
RCS1100 Series - Engineering Surveyor
Create successful ePaper yourself
Turn your PDF publications into a flip-book with our unique Google optimized e-Paper software.
Product identificationThe instrument model and the serial number of your product are indicated onthe type plate underneath.Enter the model and serial number of your instrument in your user manual,and always refer to this information when you need to contact your agencyor service workshop.Model:Serial no.:Software version:<strong>RCS1100</strong>-1.2.0en3Product identification
Symbols used in this ManualThe symbols used in this User Manual have the following meanings:DANGER :Indicates an imminently hazardous situation which, if not avoided, willresult in death or serious injury.WARNING:Indicates a potentially hazardous situation or an unintended usewhich, if not avoided, could result in death or serious injury.CAUTION:Indicates a potentially hazardous situation or an unintended usewhich, if not avoided, may result in minor injury and/or in appreciablematerial, financial and environmental damage.Important paragraphs which must be adhered to in practice as theyenable the product to be used in a technically correct and efficientmanner.Symbols used in this Manual4 <strong>RCS1100</strong>-1.2.0en
ContentsIntroduction ....................................................... 7Preparation, Setting up..................................... 8Unpacking ................................................................... 8Fitting the <strong>RCS1100</strong> to the reflector pole ...................... 9Installing the TCPS26 on the tripod of the instrument . 10TPS1100/TPS1000 interface parameters .............11TPS1100/TPS1000 interface parameters .............11Switching on ............................................................. 12Trouble-shooting ....................................................... 12Packaging and transport ........................................... 13Batteries and chargers .............................................. 13Charging batteries ..................................................... 14Inserting and removing batteries ................................ 14Description of the system .............................. 15Description of the instrument ..................................... 15Software concept ...................................................... 16Operation ......................................................... 17Allocation of keys ...................................................... 17Working procedure .................................................... 18RCS Searching Window ...................................... 19Definition of a Working Area (WORKA) ............... 19Compass .............................................................. 20PowerSearch ....................................................... 21Hz / V ................................................................... 21Joystick ................................................................ 22Activate/Deactivate Work Area(WORK+/WORK-) ................................................ 23Last point stored .................................................. 23Switching the RCS mode ..................................... 23Lock interruption / Lock go................................... 23Complete display ................................................. 24Working with the TPS1000 series .............................. 24Local functions .......................................................... 25Power Off .................................................................. 29Care and Storage ............................................ 30Transport and Storage .............................................. 30Cleaning ................................................................... 30Battery charging ........................................................ 31Safety directions ............................................. 32Intended use of instrument ........................................ 32Permitted uses ..................................................... 32Prohibited uses .................................................... 32Limits of use .............................................................. 33Responsibilities ......................................................... 33Hazards in use .......................................................... 34Electromagnetic acceptability .................................... 38FCC statement (applicable in U.S.)............................ 40Technical data ................................................. 41Radio modem ........................................................... 42Index ................................................................. 43Contents6 <strong>RCS1100</strong>-1.2.0en
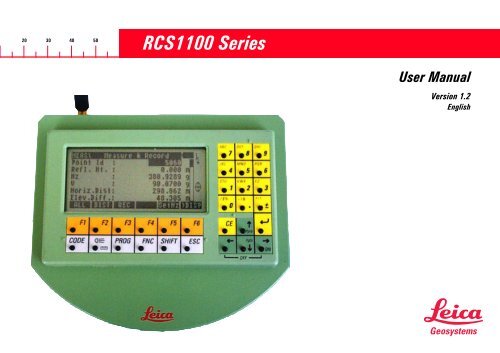
IntroductionThe control unit, the radio modemand the power supply are allcontained in a compact,ergonomically-designed housing.The incorporated radio modem isused together with the TCPS26 radiomodem as a basic station in theTPS1100.Instruments in locations which areexposed, difficult to reach, orcramped, can be convenientlyoperated with the <strong>RCS1100</strong> controlunit.Validity of the user manualThis user manual is valid for all<strong>RCS1100</strong> units having a built-in radiomodem.Exceptions relating to the <strong>RCS1100</strong>without built-in radio modem areindicated. The present manueldescribes the software version 1.22.6<strong>RCS1100</strong> stands for Remote ControlSurveying. The <strong>RCS1100</strong> enablessurvey instruments of the TPS1100and TPS1000 series to be remotecontrolled.<strong>RCS1100</strong>-1.2.0en7Preparation,Setting Introduction up
Preparation, Setting upUnpackingThe <strong>RCS1100</strong> is supplied completewith the User Manual and with asoftware diskette / CD in a paddednylon bag. The outfit also includesan adapter which enables the<strong>RCS1100</strong> to be connected to aGLS11 reflector pole. The bag hasspace for a spare GEB111/121battery and for a TCPS26 radiomodem.The complete equipment and theaccessories for Remote ControlSurveying can be reliablytransported in the container 667 337(option), in which all of thecomponents are clearly laid out forrapid installation.Preparation, Setting upThe entire equipment has beendesigned for rough field conditionsbut we nevertheless recommend thatyou use the bags and containersprovided when you transport it overlong distances. Protect cables,plugs, batteries and antennaeagainst the weather.9 8 7 612 3 48587/92110111 <strong>RCS1100</strong>2 Holder for reflector pole3 Battery GEB714 360° Reflector5 Y-cable, Antenna extension6 Battery GEB707 Battery GEB1118 TCPS26 radio modem9 Battery GEB12110 User Manual, installation diskette11 Antenna<strong>RCS1100</strong>-1.2.0en
Fitting the <strong>RCS1100</strong> to the reflector poleUsing the clamping screw provided,secure the reflector-pole adapter atthe appropriate height on a GLS11reflector pole. The adapter canremain on the reflector pole duringtransport.WARNING:If the radio modem isswitched on, do not carry theantenna closer than 15 cm to yourbody.6Screw the antenna to the end of theantenna extension and connect theantenna extension to the reflectoradapter.Now connect the <strong>RCS1100</strong> to thereflector-pole adapter by lining upthe marks and tightening the screw.Connect the antenna extension tothe <strong>RCS1100</strong>.At short distances, or underfavourable radio transmissionconditions, you can leave out theantenna extension and connect theantenna directly to the <strong>RCS1100</strong>.Connecting the <strong>RCS1100</strong> (lining upthe marks on housing and adapter)The angle bracket and the position ofthe antenna socket together ensurethat the antenna is vertical.<strong>RCS1100</strong>-1.2.0en9Preparation,Setting up
Installing the TCPS26 on the tripod of the instrumentIf the <strong>RCS1100</strong> is secured in anothermanner, make sure that the antennais vertical, otherwise thetransmission range will be restricted.1212Reflctor pole, completely set upPreparation, Setting upConnect the following to the tripod ofthe instrument: The TCPS26 radiomodem, the antenna extension withantenna, and the GEB70 or GEB71external battery. Make sure that theantenna can transmit freely in thedirection of work. The TCPS26 radiomodem must be configured as theBASE modem.Using the Y-cable, connect thesurvey instrument, the battery andthe TCPS26 radio modem. Connectthe antenna extension to theTCPS26.1031 Antenna extension2 TCPS26 radio modem3 GEB70 external battery<strong>RCS1100</strong>-1.2.0en
TPS1100/TPS1000 interface parametersSwitch on the RCS Mode on TPS1100/ TPS1000The interface parameters on the TPS1100 / TPS1000 must be inspected andif necessary adjusted to the those for the TCPS26, which were set in thefactory to the following values:19200 baud8 data bitsNo paritySetting the interface on theTPS1100:MAIN\Main menuMAIN\ ConfigurationMAIN\ Communication modeMAIN\ RCS modeMCMC6Setting the interface on theTPS1100:Setting the interface on theTPS1000:Switches to Remote Controlmode.Do you want to switch ?MAIN\ Main menuMAIN\ ConfigurationMAIN\ Communication modeMAIN\ RCS parametersMCMCMAIN MENU: PROGRAMSCONF\ SYSTEM CONFIG.CONF\ GSI-COMMUNICATIONMCMCConfirm with "YES".Setting the interface on theTPS1000:Set the following valuesSet the following values:MAIN MENU: PROGRAMSEXTRA\ EXTRA FUNCTIONSMCMC19200 baud8 data bitsNo parityThe remaining values are not relevant.19200 baud8 data bitsNo parityFor details, refer to the TPS1000Systems Handbook.EXTRA\ EXTRA FUNCTIONSSwitches to Remote Controlmode.Do you want to switch ?Confirm with "YES".<strong>RCS1100</strong>-1.2.0en11Preparation,Setting up
Switching onAfter all connections and settingshave been inspected, the <strong>RCS1100</strong>can be switched on. Thisautomatically brings the TPS1100into the RCS mode. After a fewseconds, the display of the TPS1100appears on the <strong>RCS1100</strong>.Trouble-shootingErrorNo data transfer whenstarting up (shortdistance betweenTCPS26 and <strong>RCS1100</strong>)Data transfer possible,but transmission faultData transfer is veryslowInterruption during datatransferCause / remedyCase 1 - Green LED on TCPS26 does not shine:Inspect battery charge, and cables for TCPS26Case 2 - Message "No signal" on <strong>RCS1100</strong>:Inspect battery charge in <strong>RCS1100</strong>or possible link numbers for <strong>RCS1100</strong> andTCPS26 are not the same.Case 3 - Green LED shines and message appearson <strong>RCS1100</strong>: Set interface paarmeters correctly onTPS and TCPS26.Case 1 - Red LED on TCPS26 flashes: Inspectinterface parameters.Case 2 - Red LED on TCPS26 does not flash:Connecting cable is defectiveDisturbance from other transmitters in the 2.4 Ghzfrequency band: Change link number in RSC1100and TCPS26.Message "No signal" on <strong>RCS1100</strong>:Operation is atthe limit of the range, or there is no visualcommunication between <strong>RCS1100</strong> and TCPS26.Establish visual communication, reduce distance,use antenna extension.Preparation, Setting up12<strong>RCS1100</strong>-1.2.0en
Packaging and transportBatteries and chargers6GEB111T100Z72GEB1211100z06Before packing up the <strong>RCS1100</strong> andthe TCPS26 in the bag, unscrew theantennae and remove the batteryfrom the <strong>RCS1100</strong>. For maximumprotection during transport, pack theunits as shown in the diagram.<strong>RCS1100</strong>-1.2.0enYour Leica Geosystems instrument isoperated with rechargable plug-inbatteries. The GEB111 is thepreferred battery for use with the<strong>RCS1100</strong>, but the GEB121 may alsobe used.Only use batteries, chargingsets and accessoriesrecommended by LeicaGeosystems.In order to fully exhaustbattery capacity it isabsolutely necessary with newbatteries to carry out 3 to 5 completecharging/discharging cycles.13After first charging ofbatteries you can startimmediately with your job. As aresult, the batteries will bedischarged. Because the operatingtime of the battery can be very shortuntil full capacity is reached it isrecommended to have ready a secondbattery and the GKL122 batterycharger. Using the charger, thebattery can be charged/dischargedseveral times before use.Preparation,Setting up
Charging batteriesInserting and removing batteriesT100Z74Tcs11z01Tcs11z02To charge the battery, use theGKL111 or GKL122 charger asdescribed in the instructionsprovided with that charger.The chargers are notintended for outdoor use.Adhere to the safety directions.The battery for the <strong>RCS1100</strong> fits intoa compartment on the underside ofthe instrument. Push it fully againstthe side opposite to the catch andthen click it into position on the sameside as the catch.To remove the battery, hold it toprevent it from falling and pull out thelever of the catch by about 2mm.Preparation, Setting up14<strong>RCS1100</strong>-1.2.0en
Description of the systemDescription of the instrument6The <strong>RCS1100</strong> can remotely controlalmost all of the functions andapplications of TPS1100 andTPS1000 series instruments.The <strong>RCS1100</strong> consists of thekeyboard and LCD display from theTPS1100, the radio module of theTCPS26, and the power unit.Because its keyboard and LCD arethe same as those in the TPS1100,the <strong>RCS1100</strong> is operated in exactlythe same way. If the TPS1000 isused, the keyboard template forassigning the keys is applied.The functions and settings of the<strong>RCS1100</strong> are called by keeping theillumination key or function keypressed for at least two seconds:1. Brightness of LCD display2. Contrast of LCD display3. Configuration of beep4. Heating for LCD display5. Sleep mode6. Configuration of internal radiomodule and of TCPS267. Configuration of serial interface8. Language9. Operating mode of TPS1100The status of the battery, and theradio contact, are monitored and canbe displayed. If the radio contact isinterrupted for a long period, or if thebattery charge sinks below a certainlevel, a warning is displayed.78<strong>RCS1100</strong>-1.2.0en15Description of the system
Software conceptThe <strong>RCS1100</strong> has loadable softwarecovering the requirements forcontrolling the TPS1100/TPS1000and the local functions. The softwarealso includes all available languageelements for the local functions. Thesoftware is loaded with the up-loadfunction of the SurveyOffice in thesame way as for the TPS1100. Thecharging procedure is controlledentirely by the SurveyOffice.New languages arecontinually being added forthe local functions of the <strong>RCS1100</strong>. Ifyou cannot find the language whichyou want, contact your Leica Geosystemsagency.Description of the system16<strong>RCS1100</strong>-1.2.0en
OperationAllocation of keys6The allocation of the keys on the<strong>RCS1100</strong> is the same as on theTPS1100.When the <strong>RCS1100</strong> is switched on,the TPS1100 automatically changesto LOCK mode (prism tracking).The key activates specialfunctions for aligning the TPS1100with the prism.The shape of the search window isrectangular (default size: Hz = 30gon, V = 15 gon). The dimension ofthe search window in RCS mode canbe defined in the "RCS SearchingWindow" function.The target functions are required :• to achieve the first LOCK• for LOCK replacement in theevent of LOCK loss (throughlonger viewing interruptions).Program selection01 Free Station02 Resection03 Orientation & Ht.Transfer04 Stakeout05 Tie Distance06 Remote HeightCOMPS PS JSTCK WORK+ LAST RCS+Hz/VWORKASets the TPS1100 tocompass mode, enabling theTPS1100 to be targeted on the prismwith the help of a compass.Starts PowerSearch.QUITMCIn the joystick mode, theTPS1100 can be turnedhorizontally or vertically with the aidof the cursor keys.Activate/deactivate workingarea.Turns the TPS1100 to thelast point stored.Switches on/off the RCSoperating mode.By entering relativeor absolute anglevalues, the TPS1100 can be turnedby the corresponding amount or setto the angle value required.Define a working area.7815<strong>RCS1100</strong>-1.2.0en17Operation
Working procedureWorking in RCS mode is hardly differentfrom working in the normalmeasuring mode. A switchover ispossible on the TPS1100 at anytime. The great advantages of theRCS are:• one-person operation is possible• when surveying you are at the siteof the action, i.e. where the pointsare being recorded or set out• you do not have to assess thesituation from the instrumentlocation.It is essential to protect themeasurement location. Theactions and effects of personnel,machines and the weather candamage the instruments.After the TPS1100 has been set upand the RCS mode activated, theTPS1100 must be approximatelylined up with the reflector in orderthat a LOCK operation can becarried out on the reflector. TPS1100instruments equipped with the optionPowerSearch are already in LOCKmode after the PowerSearch routineis completed - no lining up isrequired. After the TPS1100 haslocked on the reflector, it follows allmovements of the reflector and is setcentrically on it. It is thereforeadvisable to work with the 360°reflector (GRZ4) since this does notrequire aligning towards theinstrument.360°reflector(GRZ4)The approximate alignment of theTPS1100 to the reflector can also beperformed manually from theinstrument.In the measurement display screenthe search process can be started atany time. As in normal operation, thishappens when you initiate a distancemeasurement ("DIST" or "ALL"). TheTPS1100 now locks on to thereflector.Starting from the RCS 1100, anapproximate alignment of theTPS1100 to the reflector can takeplace with the functions availableunder . The search process canthen be started with .These functions will be laterdescribed in more detail.1000Z25Operation18<strong>RCS1100</strong>-1.2.0en
RCS Searching WindowDefinition of a Working Area (WORKA)With this function the dimensions ofthe RCS Searching Window can bedefined. If an automatic reflectorsearch is started by pressing ALL orDIST in RCS mode, a search windowwith the predetermined dimensionsis scanned at the current position ofthe telescope.Hz SearchV Searchextent of search windowin Hz-directionextent of search windowin V-directionTo confirm the displayedvalues and leave the dialog.With this function a Working Areacan be defined in which theinstrument automatically searchesfor the reflector when working inRCS mode.Activates thefunction Definitionof a Working Area.678/ / Activates thefunction RCSSearching window.Returns all values to defaultvalues....\ Def. Working AreacurrentHz left : 171 gHz right : 243 gV upper : 90 gV lower : 114 gMC15...\ RCS Searching WindowDefine size of searchingwindowMCCONT DEF SHOWQUITHz Search: 40 gV Search : 20 gCONTDEFLTQUITHz leftHz rightV upperV lowerleft boundary of workingarearight boundary ofworking areaupper boundary ofworking arealower boundary ofworking area<strong>RCS1100</strong>-1.2.0en19Operation
Definition of a Working Area (WORKA), cont.To confirm the displayedvalues and return to theprevious dialog.To define a new working areaby pointing the telescope totwo opposite corners of the workingarea (left corner - opposite rightcorner).To position the telescope tothe upper left / lower rightcorner of the defined Working Area.CompassActivates the compassmode.RCS\ Orient. with comp.Enter compass readingsHz-Compass: 55 °V-KCompass: -15 °CONTQUITIn order to use the compass modewe recommend you to use a handheldcompass with 360° rotatable Hzcircle and incorporated V circle, e.g.RECTA DP6 or SILVA Ranger 15 /25.Compass mode is suitable foraligning the TPS1100 over longerdistances.To establish the link betweenTPS1100 and compass, proceed asfollows:Step 1:Perform the Hz orientation on theTPS1100.Step 2:Turn the TPS1100 until Hz shows0.000 (irrespective of the angle unitsbeing used).Step 3:Look into the telescope of theTPS1100 and select a prominenttarget.Step 4:Aim the compass at the same prominenttarget and turn the Hz circle ofthe compass until the compassneedle is at 0° or at N (north). Donot turn the Hz circle again.Operation20<strong>RCS1100</strong>-1.2.0en
Compass, continuedPowerSearchHz / VAim towards the TPS1100 with thecompass from the prism:• To lock the prism for the first time• if you lose the LOCK setting.Read off from the compass:• the Hz angle indicated by thecompass needle (0° to 360°)• the V angle (+90° to -90°, horizontal= 0°)and enter these values in the <strong>RCS1100</strong>.Quits the compass mode andstarts the search mode.Starts the quick prismsearch usingPowerSearch. This function is onlyavailable on instruments equippedwith the optional PowerSearchsensor.Two different search modes areavailable. If no working area hasbeen defined the instrument rotates360º around its standing axis. In thisway, PowerSearch scans the entirehorizon.If a working area has been defined,then PowerSearch is only activewithin the defined limits.RCS\HZ/VActivates theHz/V mode.Set relative Hz- and V-anglesHz/∆Hz : 0°00'00"V/∆V : 0°00'00"CONTABSQUITIn Hz/V mode, the TPS1100 can beturned by set angle values.67815<strong>RCS1100</strong>-1.2.0en21Operation
The input options are:• absolute angle values which relateto the orientation of the TPS1100.• relative angle values which causethe TPS1100 to turn away from itspresent position by the amountentered.Quits the Hz/V mode andstarts the search mode.Switches between absolute(ABS) and relative (REL).JoystickActivates the joystickmode.RCS\ Joystick mevementUser cursor keysHz/∆Hz : 12°15'30"V/∆V : 91°30'25"CONTQUITIn the joystick mode, the cursor keyson the RCS 1100 can be used to turnthe TPS1100. The EGL guide light, ifavailable, is switched onautomatically.Turns telescope slowly to theright ( left).Turns telescope rapidly to theright ( left).Turns telescope slowlyupwards ( downwards).Turns telescope rapidlyupwards (downwards).To stop the rotary movement, pressany cursor key.Quits joystick mode andstarts search mode.Operation22<strong>RCS1100</strong>-1.2.0en
Activate/Deactivate Work Area (WORK+/WORK-)Lock interruption / Lock goActivates the functionactivate/deactivateworking area.If the instrument is in RCS mode andthe determined working area isactivated then the entire workingarea is scanned for the reflector ifthe target was not found by thestandard search method at thecurrent position of the telescope.If the working area is deactivatedonly the standard search methods atthe current position of the telescopeare performed.The instrument follows the reflectoreven if the reflector is outside theWorking Area.On instruments with the optionalPowerSearch, the working area canbe used to limit PowerSearch to acertain area and when activated,PowerSearch only scans within thedefined limits.Last point storedActivates the LASTfunction.If the LOCK mode is lost, thisfunction can be used to turn theTPS1100 back to the last pointstored. When the movement iscomplete, the TPS1100 automaticallystarts to search for the prism.Activates the lockinterruption/relock.This function serves to interrupt theLOCK mode and later to reinstate it,e.g. if the prism is placed on theground during stakeout or if theTPS1100 is also to be targeted on asecond prism.If this function is called up inthe RCS-mode the Joystickdialog is automatically started. TheATR remains active, i.e. if thereflector reappears in the field ofview it is immediately relocked.67815If the target is lost outsidethe Working Area a localsearch will be started. If the reflectorwas not found the predefinedWorking Area is scanned.Switching the RCS modeSwitches on/off theRCS mode.For using the remote control theRCS mode must be switched on.<strong>RCS1100</strong>-1.2.0en23Operation
Complete displayHold for min. 2 seconds.The complete contents of therespective display is transfered if thedisplay is incomplete due todisturbances to the radio link. Thefunction is only available on theRCS.Working with the TPS1000 seriesThe instrumentation is set up andprepared in the same way as theTPS1100. The keyboard and displaydiffer somewhat from those in theother series and so a keyboardtemplate must be used with the<strong>RCS1100</strong>. The presentation in the<strong>RCS1100</strong> of the dialogues from theTPS1000 differs slightly, but thisdoes not in any way restrict theoperation.The functions specific to the RCSare described in detail in theappropriate section of the usermanual for the TPS1000.The greatest differences are in thedisplay of the icons; this is due to thedifferent dimensions of the display.The time, and the battery status ofthe TPS1000, are displayedalternately in the title line.Instead of two lines of three statusfields, one line of four status fields isdisplayed on the right-hand margin.1. The first position normally showsthe status for the memory card.The operating mode is not shown,because remote control is onlypossible in RCS mode.2. The second position normallyshows the telescope face. If thecompensator cannot be read outat this time, the current display ofthe telescope face issuperimposed. If the compensatorhas been switched off, thesymbols for the compensator andfor the telescope face aredisplayed alternately.3. The third position shows thestatus symbol for the automatictarget recognition (LOCK).4. The last position shows the keymode.Operation24<strong>RCS1100</strong>-1.2.0en
Local functionsRCS\ COMPASSEnter compass readingsHz-Compass: 55 °V-Compass : -15 °CONTMCIQUITThe operating concept for the localfunctions is the same as in theTPS1100 and is therefore notexplained at this point.Illumination, battery andmonitoring of functionsKeep the key pressed down formore than two seconds. The batterystatus and the quality of the radiolink are displayed.678\ Illumination,...Battery : Radio: OKDisplay : XContrast : 70%Heating : XSleep : 5 MinutesBeep : LoudCONT DISP+ HEAT+ DEFLT15The contrast of the display can bealtered. The display illumination andthe heating at temperatures below -10°C (high power consumption!) canbe switched on and off.The key beep and the automaticswitchoff of the <strong>RCS1100</strong> can bealtered.<strong>RCS1100</strong>-1.2.0en25Operation
Local functions, continuedConfigurations and settingsKeep the key pressed down formore than two seconds. Theavailable functions are displayed.RCS\ Configuration1 Select Language2 Select TPS1100 Mode3 Serial Interface4 Configure Modem /TCPS265 Modem internal/external6 GeoCOM RCSCONTINFOSelect LanguageSelect the required language fromthe list field.RCS\ Set LanguageLanguage : ENGLISHCONTThe choice of language isvalid only for the localfunctions.MCSelect TPS1100 ModeRCS\ Select TPS1100 ModeSwitch TPS1100:CONTRCS ModeSelect the mode for the TPS1100RCS Mode: The TPS1100 can beoperated in RCS mode.GeoCOM: The TPS1100 can beoperated in GeoCOMmode (transparentmode).OFF: Switches off theTPS1100.Data may be lost if theTPS1100 is switched offduring an application.Operation26<strong>RCS1100</strong>-1.2.0en
Local functions, continuedSleep:Switches the TPS1000to the sleep mode.Applications which involvethe automatic repetition ofmeasurements may be interrupted ifthe instrument is switched to thesleep mode.If a TPS1000 instrument isconnected, these functionsare not available.Serial InterfaceSERIAL INTERFACESet parameters:Baud rate : 19200Parity : NONETerminator : CR/LFData bits : 8Stop bit : 1CONTSet the parameters in accordancewith requirements.The standard parameters for theTCPS26 are:Baud 19200Data bits 8Parity noneMCConfigure Modem / TCPS26Disturbances to the radio link can beimproved by changing the linknumber, which must then be alteredin the internal radio module and atthe same time in the TCPS26.1. Connect the TCPS26 with aY-cable to the serial interface ofthe <strong>RCS1100</strong> and to the externalbattery.2. Switch on the <strong>RCS1100</strong>.3. Press the key for more thantwo seconds to display theconfiguration dialogue.4. Pull out the plug of the TCPS26and plug it back in to switch on theTCPS26.67815To ensure the correcttransfer of data, the settingson the TPS1100 and on the<strong>RCS1100</strong> must be the same.<strong>RCS1100</strong>-1.2.0en27Operation
Local functions, continued5. Call up the function "Radio/ConfigureTCPS26".6. Select a link number between 0and 15.7. Press the key. The linknumber is now set correctly in theinternal radio module and in theTCPS26.RCS\ Radio modemSelect link number for modemand TCPS26 connected.Link number: 0CONTMCModem internal / externalIt can be ascertained whether theradio modem being used is internalor external.RCS\ Modem SelectionRadio Modem:internalMCIf the baud rate of the <strong>RCS1100</strong>differs from that of the TCPS26, keeprepeating step 4 above until theyagree, when the interfaceparameters of the <strong>RCS1100</strong> will bematched automatically.If two external TCPS radiomodems are used, thesemust be set in turn to the same linknumber.CONTIf an external radio modem is used,the interface parameters must be setcorrectly.This change will only take effect afterswitching on/off the <strong>RCS1100</strong>.Operation28<strong>RCS1100</strong>-1.2.0en
Local functions, continuedPower OffGeoCOM RCSIn order to load a new softwareversion the <strong>RCS1100</strong> must be setinto the GeoCOM mode. In mostcases this happens automatically ifthe Software Upload of the LeicaSurveyOffice is used.Software InfoActivates the function SoftwareInfo.RCS\ Software InfoInstr.Name : <strong>RCS1100</strong>Serial no. : 10004System vers: 1.22MCThere are different Power Off optionsavailable.Activates the functionPower Off.Power OffOFF RCS switches offOFF+ RCS & TPS offSLEEP RCS sleep modeSLP+ RCS & TPS sleep modeCONT Continue operationMC67815CONTCONT SLP+ SLEEP OFF+ OFFDisplays instrument name, serial no.,and the current system version.Exits Power Off display andreturns to the program.Sleep mode RCS & TPS.Sleep mode RCS.RCS & TPS off.Only RCS switches off.<strong>RCS1100</strong>-1.2.0en29Operation
Care and StorageTransport and StorageCleaningWhen transporting orshipping the equipmentalways use the original Leica Geosystemspackaging (transport case andshipping cardboard).Never carry the instrument loose in aroad vehicle. It can be affected byshock and vibration. Always carry itin its in its transport case or bag andsecure it.When transporting the instrument byby rail, aircraft or ship use the LeicaGeosystems original packaging(transport case or shippingcardboard) or another suitablepackaging securing the instrumentagainst shock and vibrations.Always remove the batterybefore transporting theinstrument. Pack the battery so thatno short-circuiting can occur.When storing theequipment, particularly insummer and inside a vehicle, takethe storage temperature limits (-40°C to + 70°C / -40°F to +158°F)into account.If the instrument becomeswet, leave it unpacked.Wipe down, clean, and dry theinstrument (at not more than 40 °C/108°F), transport case, foam inserts,and accessories. Pack up the equipmentonly when it is perfectly dry.• Blow away any dust beforecleaning.• Use only a clean, soft and lint-freecloth for cleaning. If necessary,moisten the cloth with purealcohol.Use no other liquids; these mayattack polymercomponents.Cables and plugsKeep plugs clean and dry.Blow out any dirt lodged in the plugsof the connecting cables.If you unplug connecting cablesduring the measurement, you maylose data.Always switch off the instrumentbefore removing the connectingcables.Care and Storage30<strong>RCS1100</strong>-1.2.0en
Battery chargingWARNING:Use a battery charger in adry room only, neveroutdoors. Charge batteries only at anambient temperature between +10°Cand +30°C ( 50°F to 86°F ). Werecommend a temperature of 0°C to+20°C (32°F to 68°F) for storing thebatteries.GEB111T100Z72For further information, please referto the section "Inserting andremoving batteries", or to theinstructions provided with the battery.67815Only use batteries, chargingsets and accessoriesrecommended by LeicaGeosystems.In order to reach fullcapacity with the newbatteries it is essential to carry outthree to five complete charging/discharging cycles.Your Leica Geosystems instrument isoperated with rechargable plug-inbatteries. The GEB111, an NiMHbattery, is the preferred one for usewith the <strong>RCS1100</strong>, but the GEB121may also be used.17<strong>RCS1100</strong>-1.2.0en31Care and Storage
Safety directionsThe following directions shouldenable the person responsible forthe <strong>RCS1100</strong>, and the person whoactually uses the instrument, toanticipate and avoid operationalhazards.The person responsible for theinstrument must ensure that all usersunderstand these directions andadhere to them.Safety directionsIntended use of instrumentPermitted usesThe <strong>RCS1100</strong> is intended for thefollowing applications:• Starting of the <strong>RCS1100</strong>• Remote control of TPS models• Recording, editing and managingof measurements• Data transmission to externalappliances (transparent mode)• Running of applications programs• Transmitting and receivingmeasurements32Prohibited uses• Activation of the <strong>RCS1100</strong> withoutprevious instruction• Use outside of the intended limits• Disabling safety systems and removalof hazard notices• Opening the instrument usingtools (screwdriver, etc.), unlessthis is specifically permitted forcertain functions• Modification or conversion of theinstrument• Activation after misappropriation• Use with accessories from othermanufacturers without the priorexpress approval of Leica Geosystems(only the antennae providedby Leica may be used)• Inadequate protection at themeasurement location (e.g. whencarrying out measurements onroads)• Control of machines, objects inmotion or similar with the<strong>RCS1100</strong> Remote Control System<strong>RCS1100</strong>-1.2.0en
Prohibited uses, continuedLimits of useResponsibilitiesWARNING :Adverse use can lead toinjury, malfunction, anddamage.It is the task of the personresponsible for the instrument toinform the user about hazards andhow to counteract them. The<strong>RCS1100</strong> is not to be used until theuser has been properly instructedhow to use it.Environment:Suitable for use in an atmosphereappropriate for permanent humanhabitation: not suitable for use in aggressiveor explosive environments.Use in rain is permissible for limitedperiods.Refer to section "Technical data".Area of responsibility for themanufacturer of the originalequipment Leica Geosystems AG,CH-9435 Heerbrugg (hereinafterreferred to as Leica Geosystems):Leica Geosystems is responsible forsupplying the product, including theuser manual and originalaccessories, in a completely-safecondition.67815Responsibilities of themanufacturers of non-Leica Geosystemsaccessories:1726The manufacturers of non-Leica Geosystemsaccessories for the <strong>RCS1100</strong> areresponsible for developing,implementing and communicatingsafety concepts for their products,and are also responsible for theeffectiveness of those safetyconcepts in combination with theLeica product.<strong>RCS1100</strong>-1.2.0en33Safety directions
Responsibilities (continued)Responsibilities of the person incharge of the instrument:WARNING:The person responsible forthe instrument must ensurethat it is used in accordance with theinstructions. This person is alsoaccountable for the training anddeployment of personnel who usethe instrument and for the safety ofthe equipment when in use.The person in charge of theinstrument has the following duties:• To understand the safetyinstructions on the product and theinstructions in the user manual.• To be familiar with localregulations relating to accidentprevention.• To inform Leica Geosystemsimmediately if the equipmentbecomes unsafe.• To ensure that the national laws,regulations and conditions for theoperation of radio transmitters arerespected.Safety directionsHazards in useWARNING:The absence of instruction,or the inadequate impartingof instruction, can lead to incorrect oradverse use, and can give rise toaccidents with far-reaching human,material, financial and environmentalconsequences.Precautions:All users must follow the safetydirections given by the manufacturerand the directions of the personresponsible for the instrument.34WARNING:The charger must not beused in damp or inclementconditions. If moisture penetrates thecharger, the user may receive anelectric shock.Precautions:Use the charger only indoors, in dryrooms. Protect it from damp. If thecharger is damp, do not use it.<strong>RCS1100</strong>-1.2.0en
Hazards in use, continuedWARNING:If you open the charger,either of the following actionsmay cause you to receive an electricshock:• Touching live components• Using the charger after incorrectattempts to carry out repairs.Precautions:Do not open the charger yourself.Only a Leica Geosystems-approvedservice technician is entitled to repairit.DANGER:Because of the risk ofelectrocution, it is verydangerous to use reflector poles inthe vicinity of electrical installationssuch as power cables or electricalrailways.Precautions:Keep at a safe distance fromelectrical installations. If it is essentialto work in this environment, firstcontact the safety authoritiesresponsible for the electricalinstallations and follow theirinstructions.WARNING:By surveying during athunderstorm you are at riskfrom lightning.Precautions:Do not carry out field surveys duringthunderstorms.WARNING:During target recognition orstakeout procedures there isa danger of accidents occurring if theuser does not pay attention to theenvironmental conditions around orbetween the instrument and thetarget (e.g.: obstacles, excavationsor traffic).Precautions:The person responsible for theinstrument must make all users fullyaware of the potential dangers.678151726<strong>RCS1100</strong>-1.2.0en35Safety directions
Hazards in use, continuedWARNING:Inadequate securing of thesurveying site can lead todangerous situations, for example intraffic, on building sites, and atindustrial installations.Precautions:Always ensure that the survey site isadequately secured. Adhere to theregulations governing accidentprevention and road traffic.CAUTION:With the remote control onTPS models, it is possiblethat extraneous targets will be pickedout and measured.Precautions:When measuring in remote controlmode, always check your results forplausibility.WARNING:If computers intended foruse indoors are used in thefield, there is a danger of electricshock.Precautions:Adhere to the instructions given bythe computer manufacturer withregard to field use in conjunction withLeica Geosystems instruments.CAUTION:If the accessories used withthe instrument are notproperly secured, and the equipmentis subjected to mechanical influences(e.g. shocks, falling), the equipmentmay be damaged or people maysustain injury.Precautions:When setting-up the instrument,make sure that the accessories(connecting cables etc.) are correctlyadapted, fitted, secured and lockedin position. Avoid subjecting theequipment to mechanical shock.Safety directions36<strong>RCS1100</strong>-1.2.0en
Hazards in use, continuedCAUTION:During the shipping ordisposal of charged batteriesit is possible for inappropriatemechanical influences to constitute afire hazard.Precautions:Before shipping or disposing ofequipment, discharge the battery (byrunning the instrument until thebatteries are exhausted).WARNING:If the equipment isimproperly disposed of, thefollowing can happen:• If polymer parts are burnt,poisonous gases are producedwhich may impair health.• If batteries are damaged or areexposed to a high heat source,they can explode and causepoisoning, burning, corrosion orenvironmental contamination.Precautions:Dispose of the equipmentappropriately in accordance with theregulations in force in your country.Always prevent access to theequipment by unauthorizedpersonnel.6781517• By disposing of the equipmentirresponsibly you may enableunauthorized persons to use it incontravention of the regulations,exposing themselves and thirdparties to the risk of severe injuryand rendering the environmentliable to contamination.26<strong>RCS1100</strong>-1.2.0en37Safety directions
Electromagnetic acceptabilityThe term "electromagneticacceptability" is taken to mean thecapability of the <strong>RCS1100</strong> to functioncorrectly in an environment whereelectromagnetic radiation andelectrostatic discharges are present,and without causing electromagneticdisturbances in other equipment orbiological damage to humans oranimals.WARNING:Electromagnetic radiationcan cause disturbances inother equipment.Although the <strong>RCS1100</strong> meets thestrict regulations and standardswhich are in force in this respect,Leica Geosystems cannotcompletely exclude the possibilitythat other equipment may bedisturbed.Safety directionsOnly for <strong>RCS1100</strong> withintegrated radio modem:WARNING:Electromagnetic radiationcan cause disturbances inother equipment, in installations (e.g.medical ones such as pacemakersor hearing aids) and in aircraft. It canalso affect humans and animals.Although the <strong>RCS1100</strong> meets thestrict regulations and standardswhich are in force in this respect,Leica Geosystems cannotcompletely exclude the possibilitythat other equipment may bedisturbed or that humans or animalsmay be affected.• Do not operate the <strong>RCS1100</strong> inthe vicinity of filling stations orchemical installations, or in otherareas where an explosion hazardexists.• Do not operate the <strong>RCS1100</strong> nearto medical equipment.38• Do not operate the <strong>RCS1100</strong> inaircraft.• Do not operate the <strong>RCS1100</strong> forlong periods with it immediatelynext to your body.• Only use original LeicaGeosystems accessories.<strong>RCS1100</strong>-1.2.0en
Electromagnetic acceptability, continuedCAUTION:There is a risk thatdisturbances may be causedin other equipment if the <strong>RCS1100</strong> isused in conjunction with accessoriesfrom other manufacturers (e.g. fieldcomputers, personal computers, portableradios, non-standard cables,external batteries).Precautions:Use the equipment only withaccessories from Leica Geosystems.When combined with the <strong>RCS1100</strong>,the strict requirements stipulated bythe guidelines and standards areassured. When using computers and2 way radios, pay attention to theinformation provided by themanufacturer regardingelectromagnetic acceptability.CAUTION:Disturbances caused byelectromagnetic radiationcan cause faults in the transmissionof data.Although the <strong>RCS1100</strong> meets thestrict regulations and standardswhich are in force in this connection,Leica Geosystems cannotcompletely exclude the possibilitythat the <strong>RCS1100</strong> may be disturbedby very intense electromagneticradiation, for instance near radiotransmitters, 2 way radios, dieselgenerators.Precautions:Check the plausibility of resultsobtained under these conditions.WARNING:If the <strong>RCS1100</strong> is operatedwith cables attached at onlyone of their two ends (e.g. externalpower supply cables, interfacecables, etc.), the permitted level ofelectromagnetic radiation may beexceeded and the correct functioningof other instruments may beimpaired.Precautions:While the <strong>RCS1100</strong> is in use, cables(e.g. instrument to external battery,instrument to computer) must beconnected at both ends.678151726<strong>RCS1100</strong>-1.2.0en39Safety directions
FCC statement (applicable in U.S.)Only for <strong>RCS1100</strong> without integrated radiomodem:WARNING:This equipment has been tested and found tocomply with the limits for a Class B digitaldevice, pursuant to part 15 of the FCC Rules.These limits are designed to provide reasonableprotection against harmful interference in a residentialinstallation.This equipment generates, uses and can radiatefrequency energy and, if not installed and used inaccordance with the instructions, may cause harmfulinterference to radio communications.However, there is no guarantee that interference will notoccur in a particular installation.If this equipment does cause harmful interference toradio or television reception, which can be determined byturning the equipment off and on, the user is encouragedto try to correct the interference by one or more of thefollowing measures:• Reorient or relocate the receiving antenna.• Increase the separation between the equipment andreceiver.• Connect the equipment into an outlet on a circuit differentfrom that to which the receiver is connected.• Consult the dealer or an experienced radio/TVtechnician for help.WARNING:Changes or modifications not expresslyapproved by Leica Geosystems for compliancecould void the user's authority to operate the equipment.Product labelling:This device complies with part 15 of the FCC Rules.Operation is subject to the following two conditions:(1) This device may not cause harmful interference, and(2) this device must accept any interference received,including interference that may cause undesired operation.Type: <strong>RCS1100</strong>Art.No.: .667173Power: 12V/6V ---,This devicecontains atransmitter:FCC ID:HSW-2400MSSDL-10.4Amax; EPR:100mWLeica Geosystems AGCH-9435 HeerbruggManufactured: 2002Made in Switzerland S.No.: #$1#!This device complies withpart 15 of the FCC Rules.Operation is subject tothe following twoconditions: (1) Thisdevice may not causeharmful interference, and(2) this device mustaccept any interferencereceived, includinginterference that maycause undesiredoperation.Tcs11z03Safety directions40<strong>RCS1100</strong>-1.2.0en
Technical dataDesign• Aluminium housing with integratedNiMH battery and with optionalradio modem.Battery GEB111• Type Nickel metal hydride(NiMH)• Capacitance 1.8AhPower supplyThe voltage when using anexternal cable must be within therange 11.5V to 14V (DC)Current consumption• 12/6V=• 0.4 AmaxEnvironment• Splashproof and dustproof(IP53 in accordance with IEC 529)TemperatureOperation:Storage:-20°C to +50°C(-4°F to +122°F)-40°C to +70°C(-40°F to +158°F)Dimensions• 160 mm x 135 mm x 50 mmWeight• <strong>RCS1100</strong> including modem 770g• Battery GEB111 200g• Reflector pole adapter 180gInterface• Conformable with RS232• TxD, RxD, GND• No hardware handshakeBaud rate• 2400/4800/9600/19200/34800 bps• Serial, asynchronousData format• 7/8 data bits• 1/2 stop bits• Parity none/even/oddKeyboard and displayAlphanumericcharactersCharacter setType of displaySize of displayGraphicscapabilityMaximum 256Expandet ASCIIset as standard.An optionalcharacter set canbe loaded inadditionLCD8 rows of 32charactersYes,64 x 256 pixelsPlugs• One five-pole Lemo-0 plug forexternal battery connection anddata transfer67815172628<strong>RCS1100</strong>-1.2.0de41Technische Daten
Radio modemConformity to national regulations• FCC part 15 (applicable in U.S.)• European directive 1999/5/EC onradio equipment andtelecommunications terminalequipment (see CE ConformityDeclaration).Frequency rangeLimited to 2446.5 - 2483.5MHzTransmission power< 100 mW (e.r.p.)Antenna• λ/2 -360° with SMA connector.• The conformity for countries withother national regulations notcovered by FCC part 15 orEuropean directives 1999/5/EChas to be approved prior to useand operation.Technische Daten42 <strong>RCS1100</strong>-1.2.0de
IndexA Absolute angle values 22Alignment of the TPS1100 18Allocation of keys 17Antenna extensionB Battery 13, 31Battery status 25C Chargers 14Compass 17, 20D Dust 30E External modem 28I Illumination 25J Joystick 22Joystick mode 17L Language 26P Packaging 13Plugs 30PowerSearch 21R Radio link 25Reflector-pole adapter 9Relative angle values 22S Serial interface 27Software 16Software Info 29T Temperature 30Transport 13, 30Trouble 12W Working area 1967815172628<strong>RCS1100</strong>-1.2.0de43Stichwortverzeichnis
Leica Geosystems AG, Heerbrugg, Switzerland,has been certified as being equippedwith a quality system which meets theInternational Standards of Quality Managementand Quality Systems (ISO standard9001) and Environmental ManagementSystems (ISO standard 14001).Total Quality Management-Our commitment to total customersatisfactionAsk your local Leica Geosystems agent for moreinformation about our TQM program.710526-1.2.0enPrinted in Switzerland - Copyright LeicaGeosystems AG, Heerbrugg, Switzerland 2002Translation of original text (710525-1.2.0de)Leica Geosystems AGCH-9435 Heerbrugg(Switzerland)Phone +41 71 727 31 31Fax +41 71 727 46 73www.leica-geosystems.comStichwortverzeichnis


