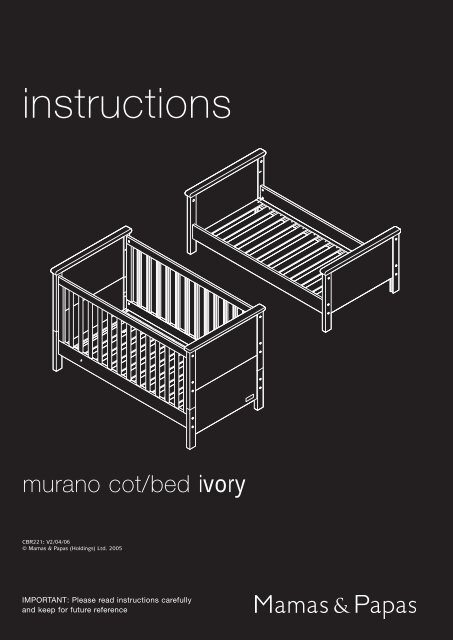
Murano Cot-Bed - Ivory instructions - Mamas & Papas
Murano Cot-Bed - Ivory instructions - Mamas & Papas
Murano Cot-Bed - Ivory instructions - Mamas & Papas
- No tags were found...

You also want an ePaper? Increase the reach of your titles
YUMPU automatically turns print PDFs into web optimized ePapers that Google loves.
<strong>instructions</strong>murano cot/bed ivoryCBR221: V2/04/06© <strong>Mamas</strong> & <strong>Papas</strong> (Holdings) Ltd. 2005IMPORTANT: Please read <strong>instructions</strong> carefullyand keep for future reference– 1 –
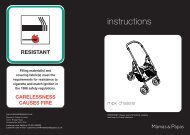
MURANO COT/BEDTHESE INSTRUCTIONS ARE IMPORTANT. PLEASE READ THEM CAREFULLYAND RETAIN FOR FUTURE REFERENCE.The correct use and maintenance of your cot/bed will ensure it gives long and trouble-free use. When somebodyelse is using your cot/bed, ensure they also know how to use it. The safety of your child is your responsibility.AFTER SALES SERVICE: If you need assistance, spare parts or you are unhappy with any of thegoods please contact Customer Services on: 0870 8307700,or e-mail us at: customer.services@mamasandpapas.comVisit our website at www.mamasandpapas.com for the latest product information.BEFORE ASSEMBLY• Unpack all the parts and identify them against the fittings and components lists.• Do not discard any packaging until you are sure you have all the components and the pack of fittings.• Read the <strong>instructions</strong> thoroughly before attempting to construct the cot/bed.• You may find the construction of your cot/bed easier if you have the help of another person.• Follow each stage of the construction step-by-step.Item Description Qty.A Screws 24FITTINGS LISTItem Description Qty.B Metal studs - coarse thread 4Item Description Qty.C Dowels 8Item Description Qty.D Small barrel nuts 8Item Description Qty.E Blanking nuts 8Item Description Qty.F Blanking nut bolts 8Item Description Qty.G Large barrel nuts 12Item Description Qty.H Assembly bolts 12Item Description Qty.I Base brackets 4Item Description Qty.J Base bracket nuts 4Item Description Qty.K Spacer blocks 2Item Description Qty.L Plastic feet 4Item Description Qty.M Metal studs - fine thread 4TOOL LISTFittings pack part no. 3602-----101Cross-head screwdriverTo fit: A & D.Hammer To fit: C & L.– 2 –Flat-head screwdriverTo fit: B, E, F, G, H & J.
MAIN COMPONENTS5371 463556212845Item Description Part no. Qty.1 Base slats 360203300103 122 Base rails 360203300104 23 Top rails 360203300105 24 Bottom rails 360203300107 2Item Description Part no. Qty.5 Side rails 360203300106 46 Side slats 360203300108 247 Head end 360203300101 18 Foot end 360203300102 1INFORMATION FOR FITTING THE COT ENDS AND SIDES78Base fitting holesThe three holes for theheight positions of thebase are in the insideface of the cot endslegs. These holes mustface into the cot whenthe cot ends are fitted.Metal badgeThe metal badge mustface out from the cotwhen fitted.– 3 –
FITTINGS1A / Screws x 24Step 1BaseinformationlabelFix two base slats (1) to theends of the base rails (2).Ensure they are flush with theends of the base rails. Screwin two screws (A) for eachbase slat using a cross-headscrewdriver. Position the twospacer blocks lengthways inthe rebate in the base railsflush with one of the attachedbase slats. Position the nextbase slate on the base railsagainst the spacer blocks andfix in place. Repeat at theopposite end of the bed base.Continue until all twelve baseslats are attached.SpacerblockA2Note: Ensure that the baseslat with the information labelis fitted with the label facingupwards, see diagram.FITTINGSB / Metal studs-coarse thread x 4M / Metal studs-fine thread x 4Step 2Screw in four metal studswith the coarse thread (B),into the holes in the ends ofthe top rails (3). Screw themin using a flat-headscrewdriver.Screw in four metal studswith the fine thread (M), intothe holes in the ends of thebottom rails (4). Screw themin until they are finger tightand fully inserted.Ensure the holes in all themetal studs face towards theends of the rails, seediagram.34BM– 4 –
FITTINGSC / Dowels x 8Step 3Slot two dowels (C) into theholes in the ends of the fourside rails (5).You may need to gentlyknock the dowels into theholes with a light hammer.C5FITTINGSDD / Small barrel nuts x 8Step 4Screw the eight small boltsinto the casings of the smallbarrel nuts, but do not fullytighten. Ensure that the holein each of the small barrelnuts is open.5Insert two small barrel nuts(D) into the the holes in theends of the side rails, seediagram.Ensure that the holes in thesmall barrel nuts are facingtowards the connecting holesin the side rails.– 5 –
FITTINGSNONEDStep 5Align the dowels in the endsof the side rails (5) and themetal studs in the bottomrails (4) with the relevantholes and slot them together.Ensure that the metal studsin the the bottom rails slotinto the holes in the smallbarrel nuts.Tighten the bolt in the foursmall barrel nuts using across-head screwdriver tofasten the side rails to thebottom rail, see diagram.554FITTINGSNONE6Step 6Slot the twenty four sideslats (6) into the holes in thebottom rails (4).Note: When the cot is fullyconstructed the detail on theside slats will face towardsthe inside of the cot.644– 6 –
FITTINGSNONEStep 753Align the dowels in the endsof the side rails (5) and themetal studs in the top rails(3) with the relevant holesand slot them together.Ensure that the metal studsin the the bottom rails slotinto the holes in the smallbarrel nuts.Tighten the bolt in the foursmall barrel nuts using across-head screwdriver tofasten the side rails to thetop rail, see diagram.3D5FITTINGS7L / Plastic feet x 4Step 8Select the head end (7) andthe foot end (8) and insertthe four plastic feet (L) intothe holes in the bottom ofthe legs, see diagram.You may need to use a lighthammer to fully insert theplastic feet.L8– 7 –
FITTINGSE / Blankingnuts x 8F / Blanking nut bolts x 8Step 9FInsert eight blanking nuts (E)into the holes in the inside ofthe head end (7) and the footend (8), see diagram.Ensure that the heads of theblanking nuts are fullyinserted into the holes in thelegs of the cot ends.Insert eight blanking nutbolts (F) into the holes in theoutside of the cot ends andscrew them into the blankingnuts using a flat-headscrewdriver.78EFITTINGSG / Large barrel nuts x 23H / Assembly bolts x 2Step 10Select one of the cot sides andposition it between the cotends with the detail on theside slats facing towards theoutside of the cot. Insert twobarrel nuts (G) into the holesin the underside of the top rail(3). Ensure the slot in thebarrel nut heads face theconnecting holes.Fasten the side in position byinserting two assembly bolts(H) in the top holes of the cotends. Tighten them into thelarge barrel nuts using a flatheadscrewdriver.Note: You may need to rotatethe large barrel nuts to alignthe hole with the bolt.GH– 8 –
FITTINGSG / Large barrel nuts x 4HH / Assembly bolts x 4Step 11Insert four large barrel nuts(G) into the holes in theinside face of the bottom rail(4).Ensure that the slot in theheads of the large barrel nutsare facing towards theconnecting holes.Insert four assembly bolts (H)into the bottom holes in thecot ends.Push the screws into thebarrel nuts in the cot sideand tighten them using a flatheadscrewdriver.4GFITTINGSI / Base brackets x 4Step 12Slot the unthreaded ends ofthe four base brackets (I) intothe holes in the cot ends, seediagram. Select one of thethree base heights that yourequire. Ensure they are all atthe same height.See the ‘Instructions For SafeUse and Maintenance’ onpage 16 for more informationon base heights.Note: After fitting, thethreaded ends must faceupwards.I– 9 –
FITTINGSJ / Base Bracket Nuts x 4Step 13Attach the base (with theinformation label facingupwards) by lowering it ontothe base brackets so that thethreaded ends of the basebrackets fit into the holes inthe corners of the base.Push the base bracket nuts(J) into the holes in thecorners of the base andscrew them onto thethreaded ends of the basebrackets using a flat-headscrewdriver.JFITTINGSG / Large barrel nuts x 2HGH / Assembly bolts x 2Step 14Select one of the cot sidesand position it between thecot ends with the detail onthe side slats facing towardsthe inside of the cot. Inserttwo barrel nuts (G) into theholes in the underside of thetop rail (3). Ensure the slot inthe barrel nut heads arefacing the connecting holes.Fasten the side in position byinserting two assembly bolts(H) in the top holes of the cotends. Tighten them into thelarge barrel nuts using a flatheadscrewdriver.Note: You may need to rotatethe large barrel nuts to alignthe hole with the bolt.3– 10 –
FITTINGSG / Barrel nuts x 4H / Assembly bolts x 4Step 15Insert four large barrel nuts(G) into the holes in theinside face of the bottom rail(4).Ensure that the slot in theheads of the large barrel nutsare facing towards theconnecting holes.Insert four assembly bolts (H)into the bottom holes in thecot ends.Push the screws into thebarrel nuts in the cot sideand tighten them using a flatheadscrewdriver.FITTINGSNONEStep 16Now that you have fullyassembled your cot, youmust check that all of thescrews and fittings are fullytightened before placing yourchild in the cot.– 11 –
FITTINGSCONVERTING THE COT INTO THE BEDNONEStep 17Completely dismantle the cot.Remove all of the blankingnuts, plastic feet and screws.Place all of the fittings in asafe place.Dismantle the cot sides andretain the two bottom rails(4).44FITTINGSNONEStep 18Grip the top of the head end(7) and separate the twosections. Repeat for the footend (8) Take care not to useexcessive force or twist thetwo sections whilst pullingthem apart as this maydamage the legs.Ensure that no metal pinsremain in bottom of the bedend legs. Use a pair of pliersto remove any that remain.Store the bottom sections ofthe cot ends in a safe place.7 8– 12 –
FITTINGSL / Plastic feet x 4Step 19Select the bed ends andinsert the four plastic feet (L)into the holes in the bottomof the legs, see diagram.You may need to use a lighthammer to fully insert theplastic feet.LFITTINGSE / Blankingnuts x 4FF / Blanking nut bolts x 4Step 20Insert four blanking nuts (E)into the holes in the inside ofthe head end (7) and the footend (8), see diagram.Ensure that the heads of theblanking nuts are fullyinserted into the holes in thelegs.Insert four blanking nut bolts(F) into the holes in theoutside of the cot ends andscrew them into the blankingnuts using a flat-headscrewdriver.E78– 13 –
FITTINGSHG / Large barrel nuts x 8H / Assembly bolts x 8Step 21Position the bottom rails (4)between the bed ends withthe slots for the side railsfacing down. Insert eight largebarrel nuts (G) into the holesin the inside face of thebottom rails. Ensure the slotin the barrel nut heads facethe connecting holes.Align the holes in the ends ofthe bottom rails with theholes in the legs of the bedends, see diagram.Insert eight assembly bolts(H) into the holes and screwthem into the barrel nuts inthe bottom rails using a flatheadscrewdriver.44GFITTINGSI / Base Brackets x 4Step 22Slot the unthreaded ends ofthe four base brackets (I) intothe top base height positionon the inside of the bed endlegs.I– 14 –
FITTINGSJ / Base Bracket Nuts x 4Step 23Lower the base onto the basebrackets (with the labelupwards) so that thethreaded ends of the basebrackets fit into the holes inthe ends of the bases rails.Screw the base bracket nuts(J) onto the protrudingthreaded ends of the basebrackets.JFITTINGSNONEStep 24Now that you have fullyassembled your bed youmust check that all of thescrews and fittings are fullytightened before placing yourchild in the bed.– 15 –
INSTRUCTIONS FOR SAFE USE & MAINTENANCE• The bottom position of the base is the safest. You should use the cot/bed in this position as soon as your baby isold enough to sit up.• Never leave anything in the cot/bed which could provide a foothold for your child to climb out or would presenta danger of suffocation or strangulation.• All assembly fittings should be tightened properly and care should be taken to ensure that no screws are loose, achild could trap parts of the body, or clothing (e.g. ribbons, drawstrings, necklaces ) this could pose a risk ofstrangulation.• Regularly check that all fittings and components of the cot/bed are fully tightened and in working order. If anyparts have become worn or damaged then do not use the cot/bed, seek advice from your retailer or by callingour Customer Services Helpline on: 0870 8307700.• Do not use replacement parts that are not recommended or supplied by <strong>Mamas</strong> & <strong>Papas</strong>. Non-approved partsmay render the repair or cot/bed unsafe.• Do not place your cot/bed in the close proximity of an open fire and other sources of heat, such as radiators,electric or gas fires.• For reasons of safety we only recommend the use of the <strong>Mamas</strong> & <strong>Papas</strong> size 400 mattress for this cot/bed.• The mattress should be no more than 40mm shorter or narrower than the internal length or width of thecot/bed.• The thickness of the mattress chosen should be such that the internal height (the distance between the surfaceof the mattress to the upper edge of the cot side) is a minimum of 500mm when the base is set in the lowestposition and a minimum of 200mm when the cot base is set in the highest position.• Your cot/bed may be cleaned with a damp cloth. Never use bleach or harsh abrasives.The maximum height (i.e. upper surface) of any mattress fitted must not exceed the line engraved on theinside of the cot ends. We recommend the use of the <strong>Mamas</strong> & <strong>Papas</strong> size: 400 mattress.AFTER SALES SERVICE: If you need assistance, spare parts or you are unhappy with any of thegoods please contact Customer Services on: 0870 8307700,or e-mail us at: customer.services@mamasandpapas.comVisit our website at www.mamasandpapas.com for the latest product information.Due to constant updating and improvements, some components may occasionally differ slightly from the diagrams shown in these <strong>instructions</strong>.Any spare components should only be thrown away after you have fully constructed your product.We reserve the right to change the specifications of any piece of product without prior notice.ALL OUR PRODUCTS ARE MADE FROM THE FINEST QUALITY MATERIALSAND ARE MANUFACTURED UNDER THE STRICTEST QUALITY CONTROLSWe guarantee all our products or part thereof, for a period of six months from the date of delivery to the consumeragainst faulty manufacture. This guarantee is not effective against damage caused as a resultof incorrect usage of the product or accidental damage. This in no way affects your statutory rights.GUARANTEETo validate this guarantee, fill in this coupon and return to: <strong>Mamas</strong> & <strong>Papas</strong>, Colne Bridge Rd, Huddersfield, HD5 0RHAlternatively, call our Guarantee Registration Line on: 0870 8307700 or visit our website: www.mamasandpapas.comTitle (Mr/Mrs/Miss/Ms) ................ First name ....................................................................... Surname ..............................................................Address ......................................................................................................................................................................................................................................................................................................................................................... Postcode ..............................................................Daytime Tel. No. .................................................................. Email....................................................................................................................Baby’s due date/date of birth ............................................................................................................................................................................Product purchased <strong>Murano</strong> <strong>Cot</strong>/<strong>Bed</strong> <strong>Ivory</strong> ............................... Purchase date................................ Price ............................................................If you would like to receive further information regarding new products, promotions and special offers from <strong>Mamas</strong> & <strong>Papas</strong> please tick the boxes indicating yourpreferred method(s) of contact. Post ; Email .If you would like to receive information from carefully selected 3rd parties please tick the boxes indicating your preferred method(s) of contact. Post ; Email .– 16 –