May/June 2010 - O Scale Trains Magazine Online
May/June 2010 - O Scale Trains Magazine Online
May/June 2010 - O Scale Trains Magazine Online
- No tags were found...
Create successful ePaper yourself
Turn your PDF publications into a flip-book with our unique Google optimized e-Paper software.
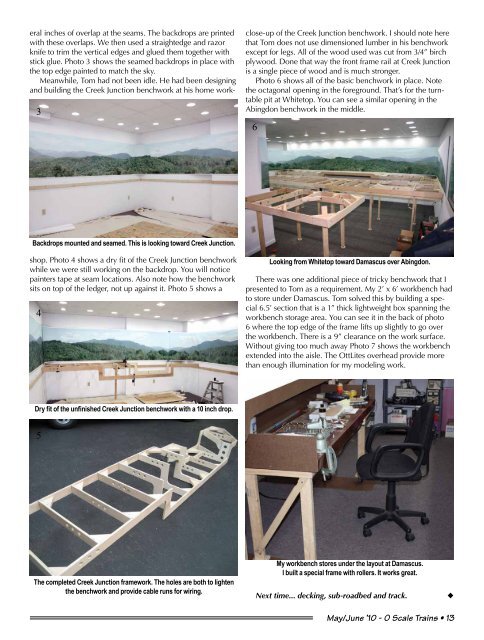
3close-up of the Creek Junction benchwork. I should note herethat Tom does not use dimensioned lumber in his benchworkexcept for legs. All of the wood used was cut from 3/4” birchplywood. Done that way the front frame rail at Creek Junctionis a single piece of wood and is much stronger.Photo 6 shows all of the basic benchwork in place. Notethe octagonal opening in the foreground. That’s for the turntablepit at Whitetop. You can see a similar opening in theAbingdon benchwork in the middle.6Backdrops mounted and seamed. This is looking toward Creek Junction.eral inches of overlap at the seams. The backdrops are printedwith these overlaps. We then used a straightedge and razorknife to trim the vertical edges and glued them together withstick glue. Photo 3 shows the seamed backdrops in place withthe top edge painted to match the sky.Meanwhile, Tom had not been idle. He had been designingand building the Creek Junction benchwork at his home workshop.Photo 4 shows a dry fit of the Creek Junction benchworkwhile we were still working on the backdrop. You will noticepainters tape at seam locations. Also note how the benchworksits on top of the ledger, not up against it. Photo 5 shows a4Looking from Whitetop toward Damascus over Abingdon.There was one additional piece of tricky benchwork that Ipresented to Tom as a requirement. My 2’ x 6’ workbench hadto store under Damascus. Tom solved this by building a special6.5’ section that is a 1” thick lightweight box spanning theworkbench storage area. You can see it in the back of photo6 where the top edge of the frame lifts up slightly to go overthe workbench. There is a 9” clearance on the work surface.Without giving too much away Photo 7 shows the workbenchextended into the aisle. The OttLites overhead provide morethan enough illumination for my modeling work.Dry fit of the unfinished Creek Junction benchwork with a 10 inch drop.5The completed Creek Junction framework. The holes are both to lightenthe benchwork and provide cable runs for wiring.My workbench stores under the layout at Damascus.I built a special frame with rollers. It works great.Next time... decking, sub-roadbed and track.u<strong>May</strong>/<strong>June</strong> ’10 - O <strong>Scale</strong> <strong>Trains</strong> • 13


