

May/June 2010 - O Scale Trains Magazine Online
May/June 2010 - O Scale Trains Magazine Online
May/June 2010 - O Scale Trains Magazine Online
- No tags were found...

You also want an ePaper? Increase the reach of your titles
YUMPU automatically turns print PDFs into web optimized ePapers that Google loves.
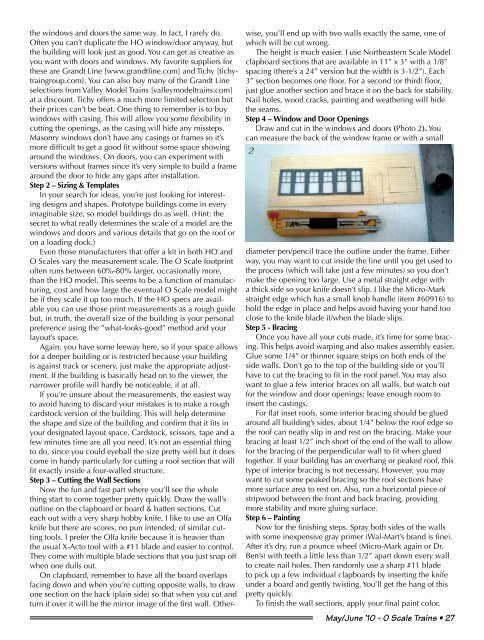
the windows and doors the same way. In fact, I rarely do.Often you can’t duplicate the HO window/door anyway, butthe building will look just as good. You can get as creative asyou want with doors and windows. My favorite suppliers forthese are Grandt Line [www.grandtline.com] and Tichy [tichytraingroup.com].You can also buy many of the Grandt Lineselections from Valley Model <strong>Trains</strong> [valleymodeltrains.com]at a discount. Tichy offers a much more limited selection buttheir prices can’t be beat. One thing to remember is to buywindows with casing. This will allow you some flexibility incutting the openings, as the casing will hide any missteps.Masonry windows don’t have any casings or frames so it’smore difficult to get a good fit without some space showingaround the windows. On doors, you can experiment withversions without frames since it’s very simple to build a framearound the door to hide any gaps after installation.Step 2 – Sizing & TemplatesIn your search for ideas, you’re just looking for interestingdesigns and shapes. Prototype buildings come in everyimaginable size, so model buildings do as well. (Hint: thesecret to what really determines the scale of a model are thewindows and doors and various details that go on the roof oron a loading dock.)Even those manufacturers that offer a kit in both HO andO <strong>Scale</strong>s vary the measurement scale. The O <strong>Scale</strong> footprintoften runs between 60%-80% larger, occasionally more,than the HO model. This seems to be a function of manufacturing,cost and how large the eventual O <strong>Scale</strong> model mightbe if they scale it up too much. If the HO specs are availableyou can use those print measurements as a rough guidebut, in truth, the overall size of the building is your personalpreference using the ”what-looks-good” method and yourlayout’s space.Again, you have some leeway here, so if your space allowsfor a deeper building or is restricted because your buildingis against track or scenery, just make the appropriate adjustment.If the building is basically head on to the viewer, thenarrower profile will hardly be noticeable, if at all.If you’re unsure about the measurements, the easiest wayto avoid having to discard your mistakes is to make a roughcardstock version of the building. This will help determinethe shape and size of the building and confirm that it fits inyour designated layout space. Cardstock, scissors, tape and afew minutes time are all you need. It’s not an essential thingto do, since you could eyeball the size pretty well but it doescome in handy particularly for cutting a roof section that willfit exactly inside a four-walled structure.Step 3 – Cutting the Wall SectionsNow the fun and fast part where you’ll see the wholething start to come together pretty quickly. Draw the wall’soutline on the clapboard or board & batten sections. Cuteach out with a very sharp hobby knife. I like to use an Olfaknife but there are scores, no pun intended, of similar cuttingtools. I prefer the Olfa knife because it is heavier thanthe usual X-Acto tool with a #11 blade and easier to control.They come with multiple blade sections that you just snap offwhen one dulls out.On clapboard, remember to have all the board overlapsfacing down and when you’re cutting opposite walls, to drawone section on the back (plain side) so that when you cut andturn it over it will be the mirror image of the first wall. Otherwise,you’ll end up with two walls exactly the same, one ofwhich will be cut wrong.The height is much easier. I use Northeastern <strong>Scale</strong> Modelclapboard sections that are available in 11” x 3” with a 1/8”spacing (there’s a 24” version but the width is 3-1/2”). Each3” section becomes one floor. For a second (or third) floor,just glue another section and brace it on the back for stability.Nail holes, wood cracks, painting and weathering will hidethe seams.Step 4 – Window and Door OpeningsDraw and cut in the windows and doors (Photo 2). Youcan measure the back of the window frame or with a small2diameter pen/pencil trace the outline under the frame. Eitherway, you may want to cut inside the line until you get used tothe process (which will take just a few minutes) so you don’tmake the opening too large. Use a metal straight edge witha thick side so your knife doesn’t slip. I like the Micro-Markstraight edge which has a small knob handle (item #60916) tohold the edge in place and helps avoid having your hand tooclose to the knife blade if/when the blade slips.Step 5 - BracingOnce you have all your cuts made, it’s time for some bracing.This helps avoid warping and also makes assembly easier.Glue some 1/4” or thinner square strips on both ends of theside walls. Don’t go to the top of the building side or you’llhave to cut the bracing to fit in the roof panel. You may alsowant to glue a few interior braces on all walls, but watch outfor the window and door openings; leave enough room toinsert the castings.For flat inset roofs, some interior bracing should be gluedaround all building’s sides, about 1/4” below the roof edge sothe roof can neatly slip in and rest on the bracing. Make yourbracing at least 1/2” inch short of the end of the wall to allowfor the bracing of the perpendicular wall to fit when gluedtogether. If your building has an overhang or peaked roof, thistype of interior bracing is not necessary. However, you maywant to cut some peaked bracing so the roof sections havemore surface area to rest on. Also, run a horizontal piece ofstripwood between the front and back bracing, providingmore stability and more gluing surface.Step 6 – PaintingNow for the finishing steps. Spray both sides of the wallswith some inexpensive gray primer (Wal-Mart’s brand is fine).After it’s dry, run a pounce wheel (Micro-Mark again or Dr.Ben’s) with teeth a little less than 1/2” apart down every wallto create nail holes. Then randomly use a sharp #11 bladeto pick up a few individual clapboards by inserting the knifeunder a board and gently twisting. You’ll get the hang of thispretty quickly.To finish the wall sections, apply your final paint color.<strong>May</strong>/<strong>June</strong> ’10 - O <strong>Scale</strong> <strong>Trains</strong> • 27


