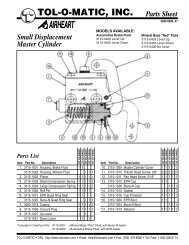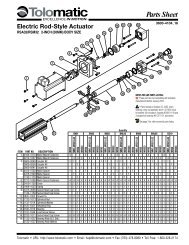
TOL-O-MATIC, INC. Parts Sheet - You are now at the Down-Load ...
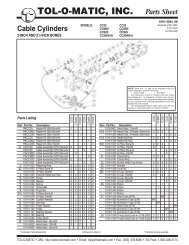
TOL-O-MATIC, INC. Parts Sheet - You are now at the Down-Load ...
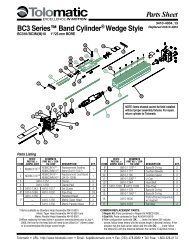
TOL-O-MATIC, INC. Parts Sheet - You are now at the Down-Load ...
- No tags were found...

Create successful ePaper yourself
Turn your PDF publications into a flip-book with our unique Google optimized e-Paper software.
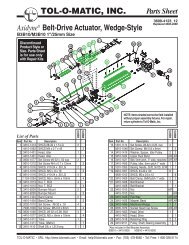
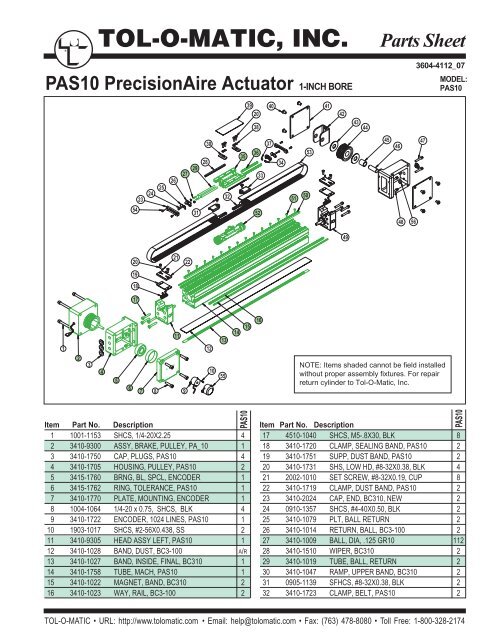
®<strong>TOL</strong>-O-<strong>MATIC</strong>, <strong>INC</strong>.<strong>Parts</strong> <strong>Sheet</strong>PAS10 PrecisionAire Actu<strong>at</strong>or 1-<strong>INC</strong>H BORE3604-4112_07MODEL:PAS1039203840 41424344232425262729283032353633373451505345464754315248 56492019181721221234567811912101355141516NOTE: Items shaded cannot be field installedwithout proper assembly fixtures. For repairreturn cylinder to Tol-O-M<strong>at</strong>ic, Inc.PAS10Item Part No. Description Item Part No. Description1 1001-1153 SHCS, 1/4-20X2.25 4 17 4510-1040 SHCS, M5-.8X30, BLK 82 3410-9300 ASSY, BRAKE, PULLEY, PA_10 1 18 3410-1720 CLAMP, SEALING BAND, PAS10 23 3410-1750 CAP, PLUGS, PAS10 4 19 3410-1751 SUPP, DUST BAND, PAS10 24 3410-1705 HOUSING, PULLEY, PAS10 2 20 3410-1731 SHS, LOW HD, #8-32X0.38, BLK 45 3415-1760 BRNG, BL, SPCL, ENCODER 1 21 2002-1010 SET SCREW, #8-32X0.19, CUP 86 3415-1762 RING, <strong>TOL</strong>ERANCE, PAS10 1 22 3410-1719 CLAMP, DUST BAND, PAS10 27 3410-1770 PLATE, MOUNTING, ENCODER 1 23 3410-2024 CAP, END, BC310, NEW 28 1004-1064 1/4-20 x 0.75, SHCS, BLK 4 24 0910-1357 SHCS, #4-40X0.50, BLK 29 3410-1722 ENCODER, 1024 LINES, PAS10 1 25 3410-1079 PLT, BALL RETURN 210 1903-1017 SHCS, #2-56X0.438, SS 2 26 3410-1014 RETURN, BALL, BC3-100 211 3410-9305 HEAD ASSY LEFT, PAS10 1 27 3410-1009 BALL, DIA, .125 GR10 11212 3410-1028 BAND, DUST, BC3-100 A/R 28 3410-1510 WIPER, BC310 213 3410-1027 BAND, INSIDE, FINAL, BC310 1 29 3410-1019 TUBE, BALL, RETURN 214 3410-1758 TUBE, MACH, PAS10 1 30 3410-1047 RAMP, UPPER BAND, BC310 215 3410-1022 MAGNET, BAND, BC310 2 31 0905-1139 SFHCS, #8-32X0.38, BLK 216 3410-1023 WAY, RAIL, BC3-100 2 32 3410-1723 CLAMP, BELT, PAS10 2PAS10<strong>TOL</strong>-O-<strong>MATIC</strong> • URL: http://www.tolom<strong>at</strong>ic.com • Email: help@tolom<strong>at</strong>ic.com • Fax: (763) 478-8080 • Toll Free: 1-800-328-2174
2 – <strong>Parts</strong> Listing PAS10 <strong>Parts</strong> <strong>Sheet</strong> #3604-4112_07Drawing isrepe<strong>at</strong>ed forreference39203840 41424344232425262729302832353633373451505345464754315248 56492021221918171234567811912101355141516NOTE: Items shaded cannotbe field installed withoutproper assembly fixtures.For repair return cylinder toTol-O-M<strong>at</strong>ic, Inc.PAS10Item Part No. Description33 3410-1724 CLAMP, BELT, TOP CAP, PAS10 234 3410-1015 RACE, BALL, RIGHT, BC310 235 3410-2021 CARRIER, MACH, PAS10 136 3410-1024 WAY, CARR, BC310 237 3410-1032 RACE, BALL, LEFT, BC310 238 3410-1056 WASHER, .170X.277X.030 839 3410-2022 COVER, CARRIER, BC310, NEW 140 1820-1001 SHS, BTN, 1/4-20X0.38 841 3410-1715 COVER, TENSIONER, PAS10 242 3410-1718 YOKE, BELT, TENSIONER, PAS10 143 3410-1730 SPACER, PL, PULLEY, .081 244 3410-9302 PULLEY, BELT TENSIONING 1PAS10Item Part No. Description45 0515-1024 BRNG, BL, .503 X .688 X .75 146 3410-1717 SHAFT, STEEL, 4.995X1.36 147 3025-1028 SHCS, #10-32X1.06, BLK 248 0910-1314 SHCS, #10-24X0.75, BLK 849 3410-9306 HEAD, ASSY, RIGHT, PAS10 150 3410-1496 WEDGE, MACHINED, BC310 A/R51 0605-1079 SHCS, #4-40X0.25, BLK A/R52 3410-9308 PISTON, ASSY, PAS10 153 3410-1744 BELT, MACH, PAS10 154 0605-1079 SHCS, #4-40X0.25, BLK 455 3415-1778 ENCODER COVER 156 2307-1007 JAM NUT 2Disassembly / Assembly Instructions1. Remove cylinder from machinery. Remove any mountinghardw<strong>are</strong> such as tube supports or mounting pl<strong>at</strong>es.DUST BAND REPLACEMENT:2. Remove dust band clamp (22) by first loosening <strong>the</strong> 2 setscrews (21). Remove <strong>the</strong> 2 SHCS (20) th<strong>at</strong> hold <strong>the</strong> clampto <strong>the</strong> head. Repe<strong>at</strong> for o<strong>the</strong>r side of cylinder.3. Remove carrier end caps(23) by taking out <strong>the</strong> 2SHCS(54) th<strong>at</strong> hold <strong>the</strong>m onto <strong>the</strong> carrier (35). Remove<strong>the</strong> carrier cover (39).4. Remove <strong>the</strong> dust band (12).5. Install new dust band by laying it on <strong>the</strong> carrier and centeringit along <strong>the</strong> cylinder. Replace <strong>the</strong> end caps and carriercover, and install <strong>the</strong> dust band clamps and tighten down.Tighten down <strong>the</strong> set screws on <strong>the</strong> clamp.6. LUBRICATE BALLWAYSBefore installing <strong>the</strong> top Dust Band (12) lubric<strong>at</strong>e <strong>the</strong> ballwayswith Mobil HP Grease.BELT REPLACEMENT:1. See instructions on dust band replacement on how toremove <strong>the</strong> dust band. This must be done before proceeding.2. Remove tensioner cover (41) from both sides of pulleyhousing (4) by taking out <strong>the</strong> screws (40) th<strong>at</strong> hold <strong>the</strong>m on.<strong>TOL</strong>-O-<strong>MATIC</strong> • URL: http://www.tolom<strong>at</strong>ic.com • Email: help@tolom<strong>at</strong>ic.com • Fax: (763) 478-8080 • Toll Free: 1-800-328-2174
<strong>Parts</strong> <strong>Sheet</strong> #3604-4112_07 PAS10 Options/Instructions – 3ShockMount Kit8685848382Shock StopPl<strong>at</strong>e Kit908988878079 SwitchesTube Support737270OPTIONAL ACCESSORIES PART LISTING76777881747175MountingPl<strong>at</strong>ePAS10Item Part No. Description Qty.70 3410-9309 Tube Supports Kit A/R71 3410-1013 T-Nut 472 3410-1774 Tube Support 273 3410-1012 SHCS 474 6000-1730 SFHCS 481 3410-1775 T-Nut (Golden) 475 3410-9312 Mounting Pl<strong>at</strong>e Kit A/R76 3410-1775 T-Nut (Golden) 277 3410-1777 Mounting Pl<strong>at</strong>e 178 0707-1010 SHCS 23410-9013 Shock Mount Kit (heavy duty) A/R3410-9003 Shock Mount Kit (hardw<strong>are</strong> only) A/R82 2406-1062 Shock, Heavy Duty 183 2406-1015 Shock Stop Spacer 184 3410-1038 Clamping Hook 285 3410-1037 Shock Mount 186 0910-1314 SHCS, 10-24 x .75/M5 x20 43410-9004 Shock Stop Pl<strong>at</strong>e Kit A/R87 3410-1041 Impact Bolt, 1/4-20x.38/M6 x12 288 3410-1039 Shock Pl<strong>at</strong>e 189 0610-1044 Dowel Pin, .250Dia x .50/6 x 12 290 1004-1064 SHCS, 1/4-20x.75/M6x20 4Item79. SWITCH Switch Kit number (Hardw<strong>are</strong> & switch)DescriptionPart Number (SWPAS10_ _) DescriptionSwitch Only, Reed, Form C, 5m 3600-9084 BT Form C, 5m leadSwitch Only, Reed, Form C, Male Conn. 3600-9085 BM Form C, 5m QD leadSwitch Only, Reed, Form A, 5m 3600-9082 RT Form A, 5m leadSwitch Only, Reed, Form A, Male Conn. 3600-9083 RM Form A, 5m QD leadSwitch Only, Hall-effect, Sinking, 5m 3600-9090 KT Hall-effect, Sinking switch, 5m leadSwitch Only, Hall-effect, Sinking, Male Conn. 3600-9091 KM Hall-effect, Sinking switch, 5m QD leadSwitch Only, Hall-effect, Sourcing, 5m 3600-9088 TT Hall-effect, Sourcing switch, 5m leadSwitch Only, Hall-effect, Sourcing, Male Conn. 3600-9089 TM Hall-effect, Sourcing switch, 5m QD leadConnector (Female) 5 meter lead 2503-10253. Loosen jam nuts (56) th<strong>at</strong> <strong>are</strong> on screws(47) tightened against <strong>the</strong> tensioningyoke. Remove screws (47) and <strong>the</strong> jamnuts th<strong>at</strong> <strong>are</strong> on those screws from <strong>the</strong>yoke pulley housing. These screws providetension for <strong>the</strong> belt.4. Remove screws (31) from both of <strong>the</strong> topbelt clamps (33). Remove belt clamp (32)from carrier (35) by taking out <strong>the</strong> 4SHCS (20) and <strong>the</strong> washers (38) underne<strong>at</strong>h<strong>the</strong>m.5. Remove belt tensioner yoke (42) and pullout belt from <strong>the</strong> cylinder.6. Take <strong>the</strong> new belt and feed it in through<strong>the</strong> tensioning yoke, and <strong>the</strong> pulley housing.Feed it through <strong>the</strong> tube and around<strong>the</strong> brake pulley on <strong>the</strong> o<strong>the</strong>r side. Slide<strong>the</strong> yoke back in <strong>the</strong> pulley housing.7. Attach <strong>the</strong> belt to <strong>the</strong> belt clamps (32) andinstall <strong>the</strong> top belt clamp (33) with <strong>the</strong> fl<strong>at</strong>head screws.8. Install 2 screws (47) through <strong>the</strong> pulleyhousing. Start <strong>the</strong> 2 jam nuts (56) onto each screw. Screw<strong>the</strong>m on far enough th<strong>at</strong> <strong>the</strong>y will be out of <strong>the</strong> way for tensioning<strong>the</strong> yoke. Install <strong>the</strong> 2 screws into <strong>the</strong> tensioningyoke and tighten <strong>the</strong>m down to apply tension to <strong>the</strong> belt.Tension <strong>the</strong> belt evenly with both of <strong>the</strong> screws. The yokeshould be sitting straight, not crooked.9. Tighten down each jam nut against <strong>the</strong> pulley yoke. Thiswill keep <strong>the</strong> screws from backing out over time.ENCODER REPLACEMENT:1. Remove 2 screws (10) th<strong>at</strong> hold <strong>the</strong> protective aluminumhousing (55). Remove protective plastic cap. Pull out slidemechanism on encoder. Loosen set screw on encoderhub. Remove <strong>the</strong> 2 SHCS (9) th<strong>at</strong> hold <strong>the</strong> encoder to <strong>the</strong>mounting pl<strong>at</strong>e (7) and slide it off <strong>the</strong> brake shaft.2. To install <strong>the</strong> encoder, pull out <strong>the</strong> slide. Take <strong>the</strong> encoderand slide it on <strong>the</strong> brake shaft by pressing gently against<strong>the</strong> aluminum hub. Press it down all <strong>the</strong> way to <strong>the</strong>encoder pl<strong>at</strong>e.3. Tighten <strong>the</strong> set screw on <strong>the</strong> hub against <strong>the</strong> brake shaft.4. Install and tighten down <strong>the</strong> 2 SHCS (9) th<strong>at</strong> hold <strong>the</strong>encoder to <strong>the</strong> mounting pl<strong>at</strong>e. Press in <strong>the</strong> slide on <strong>the</strong>side of <strong>the</strong> encoder.5. Install <strong>the</strong> plastic cap over <strong>the</strong> encoder. Note: There is acut out for <strong>the</strong> wire on <strong>the</strong> cap.SWITCHItem Part No. Description80. 3410-9999 Switch Hardw<strong>are</strong><strong>TOL</strong>-O-<strong>MATIC</strong> • URL: http://www.tolom<strong>at</strong>ic.com • Email: help@tolom<strong>at</strong>ic.com • Fax: (763) 478-8080 • Toll Free: 1-800-328-2174
4 – Options/Instructions PAS10 <strong>Parts</strong> <strong>Sheet</strong> #3604-4112_07UNIVERSAL SWITCH WIRING DIAGRAMS ANDLABEL COLOR CODING(+)(-)OR(+)(-)LOADLOADBROWN(+)BLUE(-)BROWN(+)BLUE(-)REEDSWITCHREEDSWITCHREED SWITCH FORM ALABEL COLOR: RED10VA MAX.200 Vdc500mA Max. CurrentHALL-EFFECTSOURCINGSWITCHBROWN(+)BLACKBLUE (-)LOADHALL-EFFECT SWITCH(SOURCING)LABEL COLOR: WHITEInput Voltage:5-25 VDC onlyOutput Current: 200 mA Max.NOTE: The side of <strong>the</strong> switch with<strong>the</strong> groove indic<strong>at</strong>es <strong>the</strong> sensingsurface. This must face toward <strong>the</strong>magnet.For complete Switch PerformanceD<strong>at</strong>a, refer to <strong>the</strong> Tol-O-M<strong>at</strong>icPrecisionAire C<strong>at</strong>alog 3604-4134(+)(-)COMMONNORMALLY CLOSEDNORMALLY OPENBROWNBLACKBLUEREEDSWITCHREED SWITCH FORM CLABEL COLOR: YELLOW120 Vdc/120 Vac MAX.250mA Max. CurrentBROWN(+)HALL-EFFECTSINKINGBLACKSWITCHBLUE (-)(+)(-)LOADHALL-EFFECT SWITCH(SINKING)LABEL COLOR: GREENInput Voltage:5-25 VDC onlyOutput Current: 200 mA Max.BLUEBLACKBROWNQUICK-DISCONNECT(Applies to all switch types)An Important Note RegardingField Retrofit of Quick-DisconnectCouplers:If replacing a Quick-Disconnectswitch manufactured before 7-1-97it will also be necessary to replaceor rewire <strong>the</strong> female-end couplerwith <strong>the</strong> in-line splice2503-1025 Female Connector 5M6. Install <strong>the</strong> protective aluminum housing (55) with 2 screws(10).7. Look <strong>at</strong> connector on <strong>the</strong> old encoder, and strip and installwires on <strong>the</strong> new one in <strong>the</strong> same loc<strong>at</strong>ions on <strong>the</strong> connector.MAINTENANCEThe PrecisionAire actu<strong>at</strong>or should be kept as clean as possiblearound <strong>the</strong> bands and Carrier Bracket.LUBRICATIONAll Tol-O-M<strong>at</strong>ic actu<strong>at</strong>ors <strong>are</strong> prelubric<strong>at</strong>ed <strong>at</strong> <strong>the</strong> factory. Toensure maximum cylinder life, <strong>the</strong> following guidelines shouldbe followed.1.Filtr<strong>at</strong>ion– We recommend <strong>the</strong> use of dry, filtered air in ourproducts. ‘Filtered air’ means a level of 10 Micron or less.‘Dry’ means air should be free of appreciable amounts ofmoisture. Regular maintenance of installed filters will generallykeep excess moisture in check.2. External Lubric<strong>at</strong>ors (optional)– The factory prelubric<strong>at</strong>ionof Tol-O-M<strong>at</strong>ic Band Cylinders will provide optimal performancewithout <strong>the</strong> use of external lubric<strong>at</strong>ion. However,external lubric<strong>at</strong>ors can fur<strong>the</strong>r extend service life of pneum<strong>at</strong>icactu<strong>at</strong>ors if <strong>the</strong> supply is kept constant.Oil lubric<strong>at</strong>ors, (mist or drop) should supply a minimum of1 drop per 20 standard cubic feet per minute to <strong>the</strong> cylinder.As a rule of thumb, double th<strong>at</strong> r<strong>at</strong>e if w<strong>at</strong>er in <strong>the</strong> systemis suspected. Demanding conditions may requiremore lubricant.If lubric<strong>at</strong>ors <strong>are</strong> used, we recommend a non-detergent,20cP @ 140˚F 10-weight lubricant. Optimum conditionsfor standard cylinder oper<strong>at</strong>ion is +32˚ to +125˚F (+0˚ to51.6˚C).NOTE: Use of external lubric<strong>at</strong>ors will wash away <strong>the</strong> factoryinstalled lubric<strong>at</strong>ion. External lubricants must be maintainedin a constant supply or <strong>the</strong> results will be a dry actu<strong>at</strong>orprone to failure.3. Sanitary environments– Oil mist lubric<strong>at</strong>ors must dispense‘Food Grade’ lubricants to <strong>the</strong> air supply. Use fluids withORAL LD50 toxicity r<strong>at</strong>ings of 35 or higher such asMulti<strong>the</strong>rm® PG-1 or equivalent. Demanding conditionscan require a review of <strong>the</strong> applic<strong>at</strong>ion.CUSHION NEEDLE ADJUSTMENTAdjust <strong>the</strong> cushion needles in <strong>the</strong> cylinder heads c<strong>are</strong>fully toobtain a smooth, hesit<strong>at</strong>ion free deceler<strong>at</strong>ion for your particularapplic<strong>at</strong>ion. If <strong>the</strong>re <strong>are</strong> questions on proper adjustment, pleaseconsult Tol-O-M<strong>at</strong>ic, Inc.PrecisionAire is a trademark of Tol-O-M<strong>at</strong>ic, Inc.Loctite® is a registered trademark of <strong>the</strong> Loctite Corpor<strong>at</strong>ion, www.loctite.comMagnalube®-G is a registered trademark of <strong>the</strong> Carleton-Stuart Corpor<strong>at</strong>ion, www.magnalube-g.com<strong>TOL</strong>-O-<strong>MATIC</strong>, <strong>INC</strong>.3800 County Road 116, Hamel, MN 55340http://www.Tolom<strong>at</strong>ic.com • Email: Help@Tolom<strong>at</strong>ic.comPhone: (763) 478-8000 • Fax: (763) 478-8080 • Toll Free: 1-800-328-2174Inform<strong>at</strong>ion furnished is believed to be accur<strong>at</strong>eand reliable. However, Tol-O-M<strong>at</strong>ic assumes noresponsibility for its use or for any errors th<strong>at</strong> mayappear in this document. Tol-O-M<strong>at</strong>ic reserves <strong>the</strong>right to change <strong>the</strong> design or oper<strong>at</strong>ion of <strong>the</strong>equipment described herein and any associ<strong>at</strong>edmotion products without notice. Inform<strong>at</strong>ion inthis document is subject to change without notice.© 2004 <strong>TOL</strong>-O-<strong>MATIC</strong>, <strong>INC</strong>.