Modena HE 18s, 25s & 32s - Ferroli
Modena HE 18s, 25s & 32s - Ferroli
Modena HE 18s, 25s & 32s - Ferroli
- No tags were found...

Create successful ePaper yourself
Turn your PDF publications into a flip-book with our unique Google optimized e-Paper software.
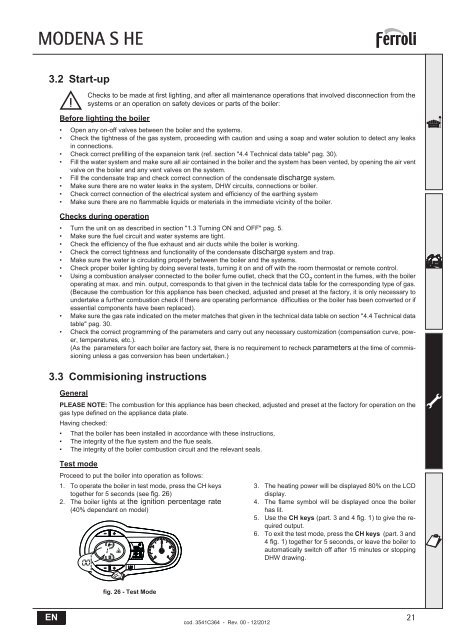
MODENA S <strong>HE</strong>3.2 Start-upBChecks to be made at first lighting, and after all maintenance operations that involved disconnection from thesystems or an operation on safety devices or parts of the boiler:Before lighting the boiler• Open any on-off valves between the boiler and the systems.• Check the tightness of the gas system, proceeding with caution and using a soap and water solution to detect any leaksin connections.• Check correct prefilling of the expansion tank (ref. section "4.4 Technical data table" pag. 30).• Fill the water system and make sure all air contained in the boiler and the system has been vented, by opening the air ventvalve on the boiler and any vent valves on the system.• Fill the condensate trap and check correct connection of the condensate discharge system.• Make sure there are no water leaks in the system, DHW circuits, connections or boiler.• Check correct connection of the electrical system and efficiency of the earthing system• Make sure there are no flammable liquids or materials in the immediate vicinity of the boiler.Checks during operation• Turn the unit on as described in section "1.3 Turning ON and OFF" pag. 5.• Make sure the fuel circuit and water systems are tight.• Check the efficiency of the flue exhaust and air ducts while the boiler is working.• Check the correct tightness and functionality of the condensate discharge system and trap.• Make sure the water is circulating properly between the boiler and the systems.• Check proper boiler lighting by doing several tests, turning it on and off with the room thermostat or remote control.• Using a combustion analyser connected to the boiler fume outlet, check that the CO 2content in the fumes, with the boileroperating at max. and min. output, corresponds to that given in the technical data table for the corresponding type of gas.(Because the combustion for this appliance has been checked, adjusted and preset at the factory, it is only necessary toundertake a further combustion check if there are operating performance difficulties or the boiler has been converted or ifessential components have been replaced).• Make sure the gas rate indicated on the meter matches that given in the technical data table on section "4.4 Technical datatable" pag. 30.• Check the correct programming of the parameters and carry out any necessary customization (compensation curve, power,temperatures, etc.).(As the parameters for each boiler are factory set, there is no requirement to recheck parameters at the time of commissioningunless a gas conversion has been undertaken.)3.3 Commisioning instructionsGeneralPLEASE NOTE: The combustion for this appliance has been checked, adjusted and preset at the factory for operation on thegas type defined on the appliance data plate.Having checked:• That the boiler has been installed in accordance with these instructions,• The integrity of the flue system and the flue seals.• The integrity of the boiler combustion circuit and the relevant seals.Test modeProceed to put the boiler into operation as follows:1. To operate the boiler in test mode, press the CH keystogether for 5 seconds (see fig. 26)2. The boiler lights at the ignition percentage rate(40% dependant on model)3. The heating power will be displayed 80% on the LCDdisplay.4. The flame symbol will be displayed once the boilerhas lit.5. Use the CH keys (part. 3 and 4 fig. 1) to give the requiredoutput.6. To exit the test mode, press the CH keys (part. 3 and4 fig. 1) together for 5 seconds, or leave the boiler toautomatically switch off after 15 minutes or stoppingDHW drawing.fig. 26 - Test ModeENcod. 3541C364 - Rev. 00 - 12/201221