Mitsubishi DX-TL5000E User Manual - SLD Security ...
Mitsubishi DX-TL5000E User Manual - SLD Security ...
Mitsubishi DX-TL5000E User Manual - SLD Security ...
You also want an ePaper? Increase the reach of your titles
YUMPU automatically turns print PDFs into web optimized ePapers that Google loves.
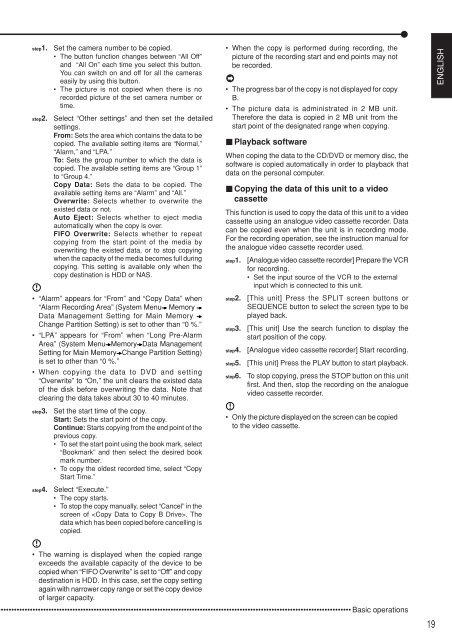
step1.step2.Set the camera number to be copied.• The button function changes between “All Off”and “All On” each time you select this button.You can switch on and off for all the cameraseasily by using this button.• The picture is not copied when there is norecorded picture of the set camera number ortime.Select “Other settings” and then set the detailedsettings.From: Sets the area which contains the data to becopied. The available setting items are “Normal,”“Alarm,” and “LPA.”To: Sets the group number to which the data iscopied. The available setting items are “Group 1”to “Group 4.”Copy Data: Sets the data to be copied. Theavailable setting items are “Alarm” and “All.”Overwrite: Selects whether to overwrite theexisted data or not.Auto Eject: Selects whether to eject mediaautomatically when the copy is over.FIFO Overwrite: Selects whether to repeatcopying from the start point of the media byoverwriting the existed data, or to stop copyingwhen the capacity of the media becomes full duringcopying. This setting is available only when thecopy destination is HDD or NAS.• “Alarm” appears for “From” and “Copy Data” when“Alarm Recording Area” (System Menu MemoryData Management Setting for Main MemoryChange Partition Setting) is set to other than “0 %.”• “LPA” appears for “From” when “Long Pre-AlarmArea” (System Menu Memory Data ManagementSetting for Main Memory Change Partition Setting)is set to other than “0 %.”• When copying the data to DVD and setting“Overwrite” to “On,” the unit clears the existed dataof the disk before overwriting the data. Note thatclearing the data takes about 30 to 40 minutes.step3.step4.Set the start time of the copy.Start: Sets the start point of the copy.Continue: Starts copying from the end point of theprevious copy.• To set the start point using the book mark, select“Bookmark” and then select the desired bookmark number.• To copy the oldest recorded time, select “CopyStart Time.”Select “Execute.”• The copy starts.• To stop the copy manually, select “Cancel” in thescreen of . Thedata which has been copied before cancelling iscopied.• When the copy is performed during recording, thepicture of the recording start and end points may notbe recorded.• The progress bar of the copy is not displayed for copyB.• The picture data is administrated in 2 MB unit.Therefore the data is copied in 2 MB unit from thestart point of the designated range when copying.Playback softwareWhen coping the data to the CD/DVD or memory disc, thesoftware is copied automatically in order to playback thatdata on the personal computer.Copying the data of this unit to a videocassetteThis function is used to copy the data of this unit to a videocassette using an analogue video cassette recorder. Datacan be copied even when the unit is in recording mode.For the recording operation, see the instruction manual forthe analogue video cassette recorder used.step1.step2.step3.step4.step5.step6.[Analogue video cassette recorder] Prepare the VCRfor recording.• Set the input source of the VCR to the externalinput which is connected to this unit.[This unit] Press the SPLIT screen buttons orSEQUENCE button to select the screen type to beplayed back.[This unit] Use the search function to display thestart position of the copy.[Analogue video cassette recorder] Start recording.[This unit] Press the PLAY button to start playback.To stop copying, press the STOP button on this unitfirst. And then, stop the recording on the analoguevideo cassette recorder.• Only the picture displayed on the screen can be copiedto the video cassette.ENGLISH• The warning is displayed when the copied rangeexceeds the available capacity of the device to becopied when “FIFO Overwrite” is set to “Off” and copydestination is HDD. In this case, set the copy settingagain with narrower copy range or set the copy deviceof larger capacity.•••••••••••••••••••••••••••••••••••••••••••••••••••••••••••••••••••••••••••••••••••••••••••••••••••••••••••••••••••••••••••••••••••• Basic operations19


