How to setup EW-7416APn in AP mode to use a fix IP ... - Edimax
How to setup EW-7416APn in AP mode to use a fix IP ... - Edimax
How to setup EW-7416APn in AP mode to use a fix IP ... - Edimax
- No tags were found...

Create successful ePaper yourself
Turn your PDF publications into a flip-book with our unique Google optimized e-Paper software.
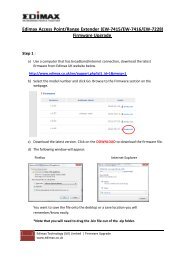
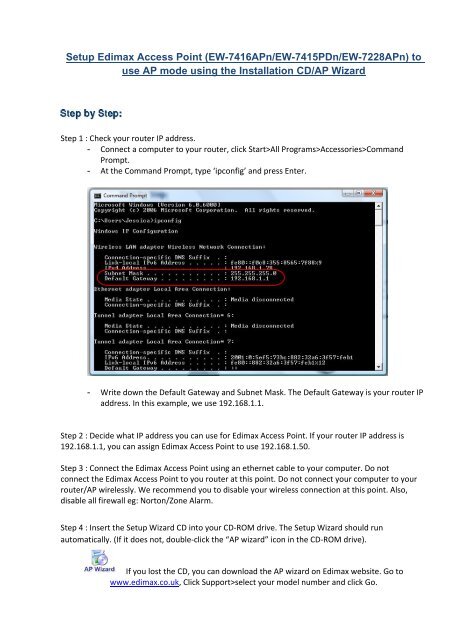
Setup <strong>Edimax</strong> Access Po<strong>in</strong>t (<strong>EW</strong>-<strong>7416<strong>AP</strong>n</strong>/<strong>EW</strong>-7415PDn/<strong>EW</strong>-7228<strong>AP</strong>n) <strong>to</strong><strong>use</strong> <strong>AP</strong> <strong>mode</strong> us<strong>in</strong>g the Installation CD/<strong>AP</strong> WizardStep 1 : Check your router <strong>IP</strong> address.- Connect a computer <strong>to</strong> your router, click Start>All Programs>Accessories>CommandPrompt.- At the Command Prompt, type ‘ipconfig’ and press Enter.- Write down the Default Gateway and Subnet Mask. The Default Gateway is your router <strong>IP</strong>address. In this example, we <strong>use</strong> 192.168.1.1.Step 2 : Decide what <strong>IP</strong> address you can <strong>use</strong> for <strong>Edimax</strong> Access Po<strong>in</strong>t. If your router <strong>IP</strong> address is192.168.1.1, you can assign <strong>Edimax</strong> Access Po<strong>in</strong>t <strong>to</strong> <strong>use</strong> 192.168.1.50.Step 3 : Connect the <strong>Edimax</strong> Access Po<strong>in</strong>t us<strong>in</strong>g an ethernet cable <strong>to</strong> your computer. Do notconnect the <strong>Edimax</strong> Access Po<strong>in</strong>t <strong>to</strong> you router at this po<strong>in</strong>t. Do not connect your computer <strong>to</strong> yourrouter/<strong>AP</strong> wirelessly. We recommend you <strong>to</strong> disable your wireless connection at this po<strong>in</strong>t. Also,disable all firewall eg: Nor<strong>to</strong>n/Zone Alarm.Step 4 : Insert the Setup Wizard CD <strong>in</strong><strong>to</strong> your CD‐ROM drive. The Setup Wizard should runau<strong>to</strong>matically. (If it does not, double‐click the “<strong>AP</strong> wizard” icon <strong>in</strong> the CD‐ROM drive).If you lost the CD, you can download the <strong>AP</strong> wizard on <strong>Edimax</strong> website. Go <strong>to</strong>www.edimax.co.uk, Click Support>select your <strong>mode</strong>l number and click Go.
Step 5 : Now, just follow the wizard.5.1 The Wizard will f<strong>in</strong>d the <strong>Edimax</strong> Access Po<strong>in</strong>t.5.2 Enter the default password (1234) of the <strong>Edimax</strong> Access Po<strong>in</strong>t.5.3 Select Manually Assign an Address. Change the <strong>IP</strong> address <strong>to</strong> your network range as you havewritten down <strong>in</strong> Step 2.
5.4 Select the “<strong>AP</strong> Mode”. Click Next.5.5 The SSID (The wireless name of the <strong>Edimax</strong> Access Po<strong>in</strong>t) is <strong>Edimax</strong> <strong>AP</strong>. Click Next.5.6 Select the Encryption you want, eg: WPA pre‐shared key and enter your key <strong>in</strong><strong>to</strong> Pre‐Shared key.Click Next. This is the wireless security key <strong>to</strong> secure the wireless connection. You will need thissecurity key when you connect a new wireless device <strong>to</strong> <strong>Edimax</strong> Access Po<strong>in</strong>t.
These are your network sett<strong>in</strong>gs.5.7 Click Set <strong>to</strong> save the sett<strong>in</strong>gs.5.8 Click “F<strong>in</strong>ish”.Step 6 : Once <strong>setup</strong>, you can connect the <strong>Edimax</strong> Access Po<strong>in</strong>t us<strong>in</strong>g an ethernet cable <strong>to</strong> your routerand <strong>use</strong> it as the wireless <strong>AP</strong>. Use the wireless security key you have <strong>setup</strong> <strong>in</strong> Step 5.6 <strong>to</strong> connect <strong>to</strong><strong>Edimax</strong> Access Po<strong>in</strong>t wirelessly.