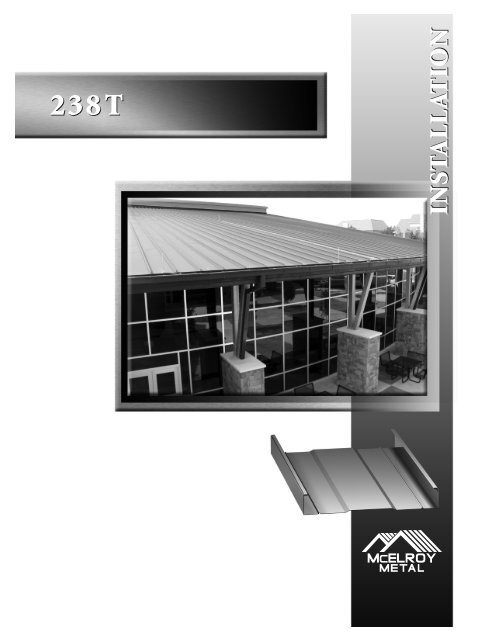
238T Installation Manual
238T Installation Manual
238T Installation Manual
- No tags were found...
Create successful ePaper yourself
Turn your PDF publications into a flip-book with our unique Google optimized e-Paper software.
TABLE OF CONTENTSPAGE NUMBER:DETAIL DESCRIPTIONA-1........................................TABLE OF CONTENTSA-2........................................GENERAL NOTESB-1........................................GENERAL INFORMATIONC-1........................................EAVE DRIP DETAILC-2........................................EAVE DRIP with GUTTER DETAILC-3 & C-4.............................FIXED RIDGE DETAILC-5 & C-6.............................FIXED HIGH EAVE DETAILC-7 & C-8.............................FIXED HIGH-SIDE TIE-IN DETAILC-9........................................FLOATING RAKE DETAILC-10......................................FLOATING RAKE DETAIL (ALTERNATE)C-11......................................FLOATING SIDE-WALL TIE-IN DETAILC-12 & C-13.........................VALLEY DETAILC-14 & C-15.........................VALLEY DETAIL (ALTERNATE)C-16 & C-17.........................HIP DETAILC-18......................................DEKTITE DETAILC-19 thru C-23......................CURB INSTALLATION DETAILSC-24 & C-25.........................TRIM LAP DETAILSA-1
GENERAL NOTESThe details shown on the following pages are suggestions or guidelines for installing the<strong>238T</strong> roof panel system. The installation details shown here are proven methods of construction,but they are not intended to cover all building requirements, designs or codes. The details mayrequire changes or revisions due to individual project conditions. In addition, other details maybe perfectly acceptable for use. Please contact McElroy Metal for assistance in determining if adetail is acceptable.<strong>Installation</strong> procedures shall be in accordance with the manufacturer's printed instructions, detailsor approved shop drawings. Installers should thoroughly familiarize themselves with allinstructions prior to beginning the installation process.The designer/installer is responsible to ensure the following:That the details here meet the particular building requirements.Awareness of and allowance for expansion/contraction of the roof panels.That adequate water tightness is maintained.That a proper uniform substructure is used to avoid panel distortion and that thesubstructure meets necessary code requirements.That all supporting members have been examined and are straight, level and plumb.McElroy Metal can provide all flashings and accessories shown in the installation drawingsunless noted otherwise. Panels, flashing and trim shall be installed true and in proper alignmentwith any exposed fasteners equally spaced for the best appearance. Sealant shall be field appliedon a clean, dry surface.Some field cutting and fitting of panels and flashings is to be expected and to be considered apart of normal installation work. Workmanship shall be of the best industry standards and withinstallation performed by experienced metal craftsmen.Oil canning of metal panels is inherent in the product and is not a cause for rejection. Plank orStriated panels are recommended as to reduce the appearance of oil canning.Contents of this manual are subject to change without notice. To confirm this book is the mostcurrent copy, please visit McElroy Metal's website at www.mcelroymetal.com.Optional details can also be found on our website.A-2
GENERAL INFORMATIONSEAM ENGAGEMENTBEFORE SEAMINGSEAM CAP WITHCONTINUOUS FACTORYSEALANT (2) BEADS<strong>238T</strong> CLIP<strong>238T</strong> PANELATTENTIONREAD THE SEAMER INFORMATION THOROUGHLYBEFORE STARTING THE SEAMING OPERATION.FAILURE TO ADHERE TO THESE INSTRUCTIONSMAY RESULT IN PERSONAL INJURY ANDDAMAGE TO THE SEAMER AND/OR PANELS.THE ERECTOR WILL BE HELD LIABLE FOR ANYCOSTS INCURRED FOR REPLACEMENT ORREPAIR.PRE-SEAMING INFORMATION1. Locate seamer box. Check to make sure youreceived an electric seamer, parts box, returnshipping label and an information booklet. Ifnot, please call our Technical ServicesDepartment. (Hand Seamers must be rented.)2. Locate power source and check againstpower requirements in the informationbooklet.3. Check seams for proper engagement.4. Clean dirt, debris and excess sealant fromseams and panel surfaces to avoid interferingwith the seaming operation.HAND SEAMING OPERATION!!!ATTENTION!!!It is critical that the panel seams are crimpedand folded before using the electric seamer.Failure to follow these guidelines will result indamaged seams.To begin seaming, set the hand seamer on theseam. Align the edge of the hand seamer aboutone to two inches pass the edge of the panel.Crimp the panel 3 to 4 times along the seamfor a total of 12" at the eave and 5 or 6 timesalong the seam for a total of 18" at the ridgeand then at every clip.AFTER SEAMINGNOTE:Mechanical seamers and hand seamers areavailable for rental through McElroy's approvedseamer supplier at the following website.Go to: http://www.mcelroyseamers.com!!!ATTENTION!!!If a panel or seam becomes damaged, the installercan rent a "de-seamer" through the same websitelisted above.CAUTION: The use of any seaming machine or tools other than that recommended by themanufacturer, may damage the panels, void all warranties and will void all engineering data.B-1
EAVE DRIP DETAIL#14-10 X 1 1/2" HWH TYPE AFASTENER (@ 1'-0" O.C.)<strong>238T</strong> CLIP#14-10 X 1 1/2" HWH TYPE AFASTENERS (2 PER CLIP)<strong>238T</strong> ROOF PANEL3/16" DIA. BEAD OFBUTYL TUBE SEALANTFIELD NOTCH PANEL SEAMAND FOLD OVER END TABSMT-157: STANDARD EAVE/RAKEOFFSET FLASHING#9-15 X 1" HWH TYPE AFASTENER w/ WASHER(@ 2'-0" O.C.)(OPTIONAL DETAILS WITH NON-EXPOSED FASTENER CAN BEFOUND ON THE WEBSITE)HIGH TEMP. PEEL & STICKUNDERLAYMENT(NOT BY MCELROY)PLYWOOD DECK(NOT BY MCELROY)WOOD FASCIA(NOT BY MCELROY)MT-157: STANDARD EAVE/RAKEOFFSET FLASHINGNOTES: 1. MT-157 (Standard Eave/Rake Offset Flashing) to run from out of wall to out of wall.2. Attach MT-157 (Standard Eave/Rake Offset Flashing) to decking with #14-10 x 1 1/2" HWH Type AFastener @ 1'-0" O.C.3. Attach MT-157 (Standard Eave/Rake Offset Flashing) to the Wood Fascia with #9-15 x 1" HWH Type AFastener with Washer @ 2'-0" O.C.4. Trim pieces lap 2". Apply 3/32" x 3/8" Butyl Tape or Butyl Tube Sealant in trim laps.5. Place a 3/16" Dia. Bead of Butyl Tube Sealant to leading edge of <strong>238T</strong> panel.6. Field Notch panel seam and fold over end tabs of panels.<strong>238T</strong> SEAM CAPFIELD NOTCH PANEL SEAMAND FOLD OVER END TABS<strong>238T</strong> ROOF PANEL<strong>238T</strong> CLIP#14-10 X 1 1/2" HWH TYPE AFASTENERS (2 PER CLIP)MT-157: STANDARD EAVE/RAKEOFFSET FLASHING3/16" DIA. BEAD OFBUTYL TUBE SEALANT#14-10 X 1 1/2" HWH TYPE AFASTENER (@ 1'-0" O.C.)#9-15 X 1" HWH TYPE AFASTENER w/ WASHER(@ 2'-0" O.C.)(OPTIONAL DETAILS WITH NON-EXPOSED FASTENER CAN BEFOUND ON THE WEBSITE)HIGH TEMP. PEEL & STICKUNDERLAYMENT(NOT BY MCELROY)PLYWOOD DECK(NOT BY MCELROY)WOOD FASCIA(NOT BY MCELROY)C-1
EAVE DRIP w/ GUTTER DETAIL#14-10 X 1 1/2" HHA TYPE AFASTENER (@ 1'-0" O.C.)3/16" DIA. BEAD OFBUTYL TUBE SEALANTFIELD NOTCH PANEL SEAMAND FOLD OVER END TABSMT-157: STANDARD EAVE/RAKEOFFSET FLASHING#9-15 X 1" HWH TYPE AFASTENER (1 PER STRAP)POP RIVET(2 PER STRAP)<strong>238T</strong> CLIP#14-10 X 1 1/2" HWH TYPE AFASTENERS (2 PER CLIP)<strong>238T</strong> ROOF PANELHIGH TEMP PEEL & STICKUNDERLAYMENT(NOT BY MCELROY)PLYWOOD DECK(NOT BY MCELROY)MT-67: GUTTER STRAP3/32" X 1" ROLL TAPESEALANT(CONT. ALONG EAVE)MT-61: BOX GUTTERDOWNSPOUTWOOD FASCIA(NOT BY MCELROY)MT-61: GUTTERMT-157: STANDARD EAVE/RAKEOFFSET FLASHINGNOTES: 1. MT-157 (Standard Eave/Rake Offset Flashing) and MT-61 (Box Gutter) to run from out of wall to out of wall.2. Apply a continuous bead of 3/32" x 1" Roll Tape Sealant to the inside vertical leg of theMT-61 (Gutter). Attach MT-67 (Gutter Straps) to Gutter with (2) Pop Rivets as shown in detail.3. Attach MT-157 (Standard Eave/Rake Offset Flashing) to decking with #14-10 x 1 1/2" HWH Type AFastener @ 1'-0" O.C. Slide vertical leg of Gutter behind MT-157 (Standard Offset Eave Flashing) andfasten through MT-67 (Gutter Strap), MT-157 (Standard Eave/Rake Offset Flashing), Tape Sealant andGutter with #9-15 x 1" HWH Type A Fastener into Fascia Board required Gutter Strap Spacing.4. Trim pieces lap 2". Apply 3/32" x 3/8" Butyl Tape or Butyl Tube Sealant in trim laps.5. Place a 3/16" Dia. Bead of Butyl Tube Sealant to leading edge of <strong>238T</strong> panel.6. Field Notch panel seam and fold over end tabs of panels.SEAM CAP<strong>238T</strong> ROOF PANEL3/16" DIA. BEAD OFBUTYL TUBE SEALANTMT-61: GUTTERMT-67: GUTTER STRAP(@ 2'-0" O.C.)POP RIVET(2 PER STRAP)#9-15 X 1" HWH TYPE AFASTENER (1 PERGUTTER STRAP)<strong>238T</strong> CLIPHIGH TEMP. PEEL & STICKUNDERLAYMENT(NOT BY MCELROY)PLYWOOD DECK(NOT BY MCELROY)#14-10 X 1 1/2" TYPE AFASTENER (2 PER CLIP)#14-10 X 1 1/2" HHA TYPE AFASTENER (@1'-0" O.C.)MT-157: STANDARD EAVE/RAKEOFFSET FLASHING3/32" X 1" ROLL TAPE SEALANT(CONT. ALONG EAVE)FASCIA BOARD(NOT BY MCELROY)C-2
FIXED RIDGE DETAILMT-2: RIDGE CAP1/4-14 X 1 1/4" HWH TEK2 ORZAC FASTENERS (2 PER TABAT EACH CLIP. WASHER OR ZACFASTENERS ARE ACCEPTABLE)1/4-14 X 7/8" LAP TEKFASTENERS (@ 0'-6" O.C.)<strong>238T</strong> CLIPFIELD FOLD PAN OF PANEL3/32" X 1" ROLL TAPE SEALANT(FILL ANY VOIDS WITH BUTYLTUBE SEALANT)MT-38: STANDARD OFFSET CLEAT#30 PAPER FELT(NOT BY MCELROY)<strong>238T</strong> ROOF PANELPLYWOOD DECK(NOT BY MCELROY)#14-10 X 1 1/2" TYPE AFASTENERS (2 PER CLIP)OUTSIDE CLOSURE W/3/16" DIA. BEAD OF URETHANESEALANT (BOTTOM AND SIDES)MT-38: STANDARDOFFSET CLEATMT-2: RIDGE CAPNOTES: 1. MT-2 (Ridge Cap) and MT-38 (Standard Offset Cleat) to run from out of wall to out of wall.2. Using a panning tool, fold up the pan of the panel at the ridge.3. Install <strong>238T</strong> panels and apply a 3/16" Dia. bead of Urethane Tube Sealant in the pan of the panel andup the the vertical legs where the foam closure will be placed.4. Install Metal Closure Cover over the Foam Closure and secure to panel with (2) 1/4-14 x 1 1/14" HWHTek2 or ZAC Fasteners, making sure to fasten through the clip to provide fixed point.5. MT-2 (Ridge Cap) laps 2". Apply 3/32" x 1" Butyl Tape and Pop Rivet trims to MT-38 (Standard OffsetCleat with Pop Rivets at Laps.C-3
FIXED RIDGE DETAILMT-2: RIDGE CAP1/4-14 X 7/8" LAP TEKFASTENER (@ 0'-6" O.C.)<strong>238T</strong> ROOF PANELMT-38: STANDARD OFFSET CLEAT3/32" X 1" ROLL TAPE SEALANT(FILL ANY VOIDS WITH BUTYLTUBE SEALANT)OUTSIDE CLOSURE W/3/16" DIA. BEAD OF URETHANESEALANT (BOTTOM AND SIDES)FIELD PAN PANELS<strong>238T</strong> CLIP#14-10 X 1 1/2" TYPE AFASTENERS (2 PER CLIP)#30 PAPER FELT(NOT BY MCELROY)PLYWOOD DECK(NOT BY MCELROY)MT-38: STANDARDOFFSET CLEATMT-2: RIDGE CAPNOTES: 1. MT-2 (Ridge Cap) and MT-38 (Standard Offset Cleat) to run from out of wall to out of wall.2. Using a panning tool, fold up the pan of the panel at the ridge.3. Install <strong>238T</strong> panels and apply a 3/16" Dia. bead of Urethane Tube Sealant in the pan of the panel andup the the vertical legs where the foam closure will be placed.4. Install Metal Closure Cover over the Foam Closure and secure to panel with (2) 1/4-14 x 1 1/14" HWHTek2 or ZAC Fasteners, making sure to fasten through the clip to provide fixed point.5. MT-2 (Ridge Cap) laps 2". Apply 3/32" x 1" Butyl Tape and Pop Rivet trims to MT-38 (Standard OffsetCleat with Pop Rivets at Laps.C-4
FIXED HIGH EAVE DETAIL3/32" X 1" ROLL TAPE SEALANT(FILL ANY VOIDS WITH BUTYLTUBE SEALANT)1/4-14 X 7/8" LAP TEKFASTENERS (@ 1'-0" O.C.)43D POP RIVETS(@ 0'-6" O.C.)3/32" X 1" ROLL TAPESEALANT (CONT. ALONG TOPOF STANDARD OFFSET CLEAT)<strong>238T</strong> CLIP<strong>238T</strong> ROOF PANEL#30 PAPER FELT(NOT BY MCELROY)OUTSIDE CLOSURE W/3/16" DIA. BEAD OF URETHANESEALANT (BOTTOM AND SIDES)MT-38: STANDARDOFFSET CLEATMT-25: HIGH EAVETRIM1/4-14 X 1 1/4" HWH TEK2 OR ZACFASTENERS (2 PER TABAT EACH CLIP. WASHER OR ZACFASTENERS ARE ACCEPTABLE)FIELD FOLD PAN OFPANELMT-156: RAKE SUPPORTCLEAT#10-12 X 1" TYPE A PANCAKEHEAD FASTENER (@ 1'-0" O.C.)FASCIA BOARD(NOT BY MCELROY)PLYWOOD DECK(NOT BY MCELROY)#14-10 X 1 1/2" TYPE AFASTENERS (2 PER CLIP)MT-156: RAKESUPPORT CLEATMT-38: STANDARDOFFSET CLEATMT-25: HIGH EAVE TRIMNOTES: 1. MT-25 (High Eave Trim), MT-156 (Rake Support Cleat) and MT-38 (Standard Offset Cleat) to runfrom out to out of building.2. Attach MT-156 (Rake Support Cleat) to fascia board with #10-12 x 1" Type A Pancake Head Fastenersat 1'-0" O.C.3. Apply a 3/16" Dia. bead of Urethane Sealant to the pan and up the vertical legs of the panel wherethe Foam Outside Closure will be placed. Install Metal Closure Cover over Foam Outside Closure andattach to panels and clip with (2) 1/4-14 x 1 1/4" HWH Tek2 or ZAC Fasteners to provide a fixed point.Attach 1/4" Offset Cleat to Outside Closures with 1/4-14 x 7/8" Lap Tek fasteners at 1'-0" O.C.4. Apply a continuous line of 3/32" x 1" Roll Tape Sealant to the top flange of the MT-38 (Standard OffsetCleat).5. High Eave Trim to lap 2". Apply 3/32" x 3/8" Butyl Tape or Butyl Tube Sealant in trim laps andPop Rivet flashing. Offset Cleat will butt joint.C-5
FIXED HIGH EAVE DETAILMT-25: HIGH EAVETRIM43D POP RIVETS(@ 0'-6" O.C.)3/32" X 1" ROLL TAPESEALANT (CONT. ALONG TOPOF STANDARD OFFSET CLEAT)1/4-14 X 7/8" LAP TEKFASTENERS (@ 1'-0" O.C.)MT-156: RAKE SUPPORT CLEATMT-38: STANDARD OFFSET CLEAT3/32" X 1" ROLL TAPE SEALANT(FILL ANY VOIDS WITH BUTYL TUBESEALANT)OUTSIDE CLOSURE W/3/16" DIA. BEAD OF URETHANESEALANT (BOTTOM AND SIDES)FIELD FOLD PAN OFPANELFASCIA BOARD(NOT BY MCELROY)<strong>238T</strong> ROOF PANEL<strong>238T</strong> CLIP#14-10 X 1 1/2" TYPE AFASTENERS (2 PER CLIP)#30 PAPER FELT(NOT BY MCELROY)PLYWOOD DECK(NOT BY MCELROY)MT-156: RAKESUPPORT CLEATMT-38: STANDARDOFFSET CLEATMT-25: HIGH EAVE TRIMNOTES: 1. MT-25 (High Eave Trim), MT-156 (Rake Support Cleat) and MT-38 (Standard Offset Cleat) to runfrom out to out of building.2. Attach MT-156 (Rake Support Cleat) to fascia board with #10-12 x 1" Type A Pancake Head Fastenersat 1'-0" O.C.3. Apply a 3/16" Dia. bead of Urethane Sealant to the pan and up the vertical legs of the panel wherethe Foam Outside Closure will be placed. Install Metal Closure Cover over Foam Outside Closure andattach to panels and clip with (2) 1/4-14 x 1 1/4" HWH Tek2 or ZAC Fasteners to provide a fixed point.Attach 1/4" Offset Cleat to Outside Closures with 1/4-14 x 7/8" Lap Tek fasteners at 1'-0" O.C.4. Apply a continuous line of 3/32" x 1" Roll Tape Sealant to the top flange of the MT-38 (Standard OffsetCleat).5. High Eave Flashing to lap 2". Apply 3/32" x 3/8" Butyl Tape or Butyl Tube Sealant in trim laps andPop Rivet flashing. Offset Cleat will butt joint.C-6
FIXED HEADWALL DETAILREGLET(NOT BY MCELROY)MT-35: STANDARDHEAD-WALL TRIM1/4-14 X 7/8" LAP TEKFASTENER (@ 0'-6" O.C.)MT-38: STANDARDOFFSET CLEATPOP RIVET(@ 0'-6" O.C.)3/32" X 1" ROLL TAPESEALANT (CONT. ALONGTOP OF STANDARDOFFSET CLEAT)OUTSIDE CLOSURE W/3/16" DIA. BEAD OFURETHANE SEALANT(BOTTOM AND SIDES)<strong>238T</strong> CLIP<strong>238T</strong> ROOF PANEL#30 PAPER FELT(NOT BY MCELROY)PLYWOOD DECK(NOT BY MCELROY)BUILDING LINE(NOT BY MCELROY)CAULKING(NOT BY MCELROY)FASTENER(NOT BY MCELROY)3/32" X 1" ROLL TAPE SEALANT(FILL ANY VOIDS WITH BUTYLTUBE SEALANT)FIELD FOLD PAN OF PANEL1/4-14 X 1 1/4" HWH TEK2 OR ZACFASTENERS (2 PER TABAT EACH CLIP. WASHER OR ZACFASTENERS ARE ACCEPTABLE)#14-10 X 1 1/2" TYPE AFASTENERS (2 PER CLIP)MT-38: STANDARDOFFSET CLEATMT-35: STANDARDHEADWALL TRIMNOTES: 1. MT-35 (Standard Headwall Trim) and MT-38 (Standard Offset Cleat) to run from out to out of building.2. Apply a 3/16" Dia. bead of Urethane Sealant to the pan and up the vertical legs of the panel wherethe Foam Outside Closure will be placed. Install Metal Closure Cover over Foam Outside Closure andattach to panels and clip with (2) 1/4-14 x 1 1/4" HWH Tek2 or ZAC Fasteners to provide a fixed point.3. Apply a continuous line of 3/32" x 1" Roll Tape Sealant to the top flange of the Metal OutsideClosure. Attach 1/4" Offset Cleat to Outside Closure with 1/4-14 x 7/8" Lap Tek Fasteners at 0'-6" O.C.4. Apply a continuous line of 3/32" x 1" Roll Tape Sealant to the top flange of the Offset Cleat.5. MT-35 (Standard Headwall Trim) to lap 2". Apply 3/32" x 3/8" Butyl Tape or Butyl Tube Sealant intrim laps and Pop Rivet flashing. MT-38 (Standard Offset Cleat) will butt joint.C-7
FIXED HEADWALL DETAILCAULKING(NOT BY MCELROY)MT-35: STANDARDHEADWALL TRIM1/4-14 X 7/8" LAP TEKFASTENER (@ 0'-6" O.C.)43D POP RIVET(@ 0'-6" O.C.)REGLET(NOT BY MCELROY)FASTENER(NOT BY MCELROY)3/32" X 1" ROLL TAPE SEALANT(FILL ANY VOIDS WITH BUTYLTUBE SEALANT)3/32" X 1" ROLL TAPESEALANT (CONT. ALONGTOP OF OFFSET CLEAT)MT-38: STANDARDOFFSET CLEAT<strong>238T</strong> CLIPOUTSIDE CLOSURE W/3/16" DIA. BEAD OFURETHANE SEALANT(BOTTOM AND SIDES)<strong>238T</strong> ROOF PANEL#30 PAPER FELT(NOT BY MCELROY)BULIDNG LINE(NOT BY MCELROY)#14-10 X 1 1/2" TYPE AFASTENERS (2 PER CLIP)WOOD BLOCKING(NOT BY MCELROY)PLYWOOD DECK(NOT BY MCELROY)MT-38: STANDARDOFFSET CLEATMT-35: STANDARDHEADWALL TRIMNOTES: 1. MT-35 (Standard Headwall Trim) and MT-38 (Standard Offset Cleat) to run from out to out of building.2. Apply a 3/16" Dia. bead of Urethane Sealant to the pan and up the vertical legs of the panel wherethe Foam Outside Closure will be placed. Install Metal Closure Cover over Foam Outside Closure andattach to panels and clip with (2) 1/4-14 x 1 1/4" HWH Tek2 or ZAC Fasteners to provide a fixed point.3. Apply a continuous line of 3/32" x 1" Roll Tape Sealant to the top flange of the Metal OutsideClosure. Attach 1/4" Offset Cleat to Outside Closure with 1/4-14 x 7/8" Lap Tek Fasteners at 0'-6" O.C.4. Apply a continuous line of 3/32" x 1" Roll Tape Sealant to the top flange of the Offset Cleat.5. MT-35 (Standard Headwall Trim) to lap 2". Apply 3/32" x 3/8" Butyl Tape or Butyl Tube Sealant intrim laps and Pop Rivet flashing. MT-38 (Standard Offset Cleat) will butt joint.C-8
FLOATING RAKE DETAIL1/4-14 X 1 1/4" TEK2 ZACFASTENER (@ 1'-0" O.C.)3/32" X 1" TAPE SEALANT(CONT. ALONG LENGTH OFRAKE)<strong>238T</strong> ROOF PANELPLYWOOD DECKING(NOT BY MCELROY)3/16" X 7/8" DOUBLE BEADTAPE SEALANT (CONT. ALONGLENGTH OF RAKE)MT-183: RAKE TRIM1/4-14 X 1 1/4" TEK2 ZACFASTENER (@ 1'-0" O.C.)MT-SLOT-Z238: SPECIAL 16GA.SLOTTED ZEE#30 PAPER FELT(NOT BY MCELROY)#10-12 X 1" TYPE A PANCAKEHEAD FASTENER (@ 1'-0" O.C.)MT-156: RAKE SUPPORT CLEAT#14-10 X 1 1/2" TYPE AFASTENER (@ 1'-0" O.C.)WOOD FASCIA(NOT BY MCELROY)MT-183: RAKE TRIMMT-156: RAKESUPPORT CLEATNOTES: 1. MT-183 (Rake Trim), MT-156 (Rake Support Cleat) and MT-SLOT-Z238 (Special 16ga. Slotted Zee)to run from eave to ridge.2. Attach MT-SLOT-Z238 (Special 16ga. Slotted Zee) to decking with #14-10 x 1 1/2" HWH Type A Fastenersat 1'-0" O.C.3. Apply a continuous bead of 3/16" x 7/8" Double Bead Tape Sealant to the vertical leg of the <strong>238T</strong>panel. Install <strong>238T</strong> panel and hold in place on the Slotted Zee with clamps. Fasten panel to SlottedZee with 1/4-14 x 1 1/4" Tek2 ZAC Fasteners at 1'-0" O.C.4. Apply a continuous bead of 3/32" x 1" Roll Tape Sealant to the top of the Slotted Zee and attachMT-183 (Rake Trim) with 1/4-14 x 1 1/4" Tek2 ZAC Fasteners at 1'-0" O.C.5. Trim pieces lap 2". Apply 3/32" x 3/8" Butyl Tape or Butyl Tube Sealant in trim laps and Fasten totrims.3/32" X 1" TAPE SEALANT(CONT. ALONG LENGTH OFRAKE)MT-SLOT-Z238: SPECIAL16GA. SLOTTED ZEE3/16" X 7/8" DOUBLE BEADTAPE SEALANT (CONT.ALONG LENGTH OF RAKE)PLYWOOD DECKING(NOT BY MCELROY)1/4-14 X 1 1/4" TEK2 ZACFASTENER (@ 1'-0" O.C.)#30 PAPER FELT(NOT BY MCELROY)WOOD FASCIA(NOT BY MCELROY)1/4-14 X 1 1/4" TEK2 ZACFASTENER (@ 1'-0" O.C.)#10-12 X 1" TYPE A PANCAKEHEAD FASTENER (@ 1'-0" O.C.)MT-156: RAKE SUPPORTCLEAT#14-10 X 1 1/2" TYPE AFASTENER (@ 1'-0" O.C.)<strong>238T</strong> ROOF PANELMT-183: RAKE TRIMC-9
FLOATING RAKE DETAIL (ALT.)<strong>238T</strong> SEAM CAP<strong>238T</strong> CLIP<strong>238T</strong> ROOF PANEL#30 PAPER FELT(NOT BY MCELROY)PLYWOOD DECKING(NOT BY MCELROY)#14-10 X 1 1/2" TYPE AFASTENERS (2 PER CLIP)#10-12 X 1" TYPE A PANCAKEHEAD FASTENER (@ 1'-0" O.C.)MT-31: STANDARD RAKE TRIM#10-12 X 1" TYPE A PANCAKEHEAD FASTENER (@ 1'-0" O.C.)MT-37 STANDARD CLEATFASCIA BOARD(NOT BY MCELROY)MT-31: STANDARDRAKE TRIMMT-37: STANDARDCLEATNOTES: 1. MT-31 (Rake Trim) and MT-37 (Standard Cleat) to run from eave to ridge.2. Attach MT-37 (Standard Cleat) to Fascia Board with #10-12 x 1" Type A Pancake Head Fastenersat 1'-0" O.C.3. Attach MT-31 (Rake Trim) to MT-37 (Standard Cleat) and fasten to Plywood Decking with #10-12 x 1"Type A Pancake Head Fasteners at 1'-0" O.C.4. Field cut leading edge of panel and fold panel down 180°.<strong>238T</strong> SEAM CAP<strong>238T</strong> ROOF PANEL#30 PAPER FELT(NOT BY MCELROY)PLYWOOD DECKING(NOT BY MCELROY)#10-12 X 1" TYPE A PANCAKEHEAD FASTENER (@ 1'-0" O.C.)MT-31: STANDARD RAKE TRIM#10-12 X 1" TYPE A PANCAKEHEAD FASTENER (@ 1'-0" O.C.)MT-37: STANDARD CLEATFASCIA BOARD(NOT BY MCELROY)C-10
FLOATING SIDE-WALL TIE-IN DETAILCAULKING(NOT BY MCELROY)REGLET(NOT BY MCELROY)1/4-14 X 1 1/4" TEK2 ZACFASTENER (@ 1'-0" O.C.)<strong>238T</strong> ROOF PANEL#30 PAPER FELT(NOT BY MCELROY)PLYWOOD DECKING(NOT BY MCELROY)BUILDING LINE(NOT BY MCELROY)FASTENER(NOT BY MCELROY)MT-34: STANDARDSIDE-WALL TRIMFLEXIBLE MEMBRANE(NOT BY MCELROY)3/16" X 7/8" DOUBLE BEADTAPE SEALANT (CONT. ALONGLENGTH OF RAKE)1/4-14 X 1 1/4" TEK2 ZACFASTENER (@ 1'-0" O.C.)MT-SLOT-Z238: SPECIAL 16GA.SLOTTED ZEE#14-10 X 1 1/2" HHAFASTENER (@ 1'-0" O.C.)FASCIA BOARD(NOT BY MCELROY)MT-34: STANDARDSIDE-WALL TRIMNOTES: 1. MT-34 (Standard Side-Wall Trim) to run from Eave to Ridge.2. Attach MT-SLOT-Z238 (Special 16ga. Slotted Zee) to decking with #14-10 x 1 1/2" HWH Type A Fastenersat 1'-0" O.C.3. Apply a continuous run of 3/16" x 7/8" Double Bead Tape Sealant to the vertical leg of the <strong>238T</strong>panel. Install <strong>238T</strong> panel and hold in place on the Slotted Zee with clamps. Fasten panel to SlottedZee with 1/4-14 x 1 1/4" Tek2 Zac Fasteners at 1'-0" O.C.4. Apply a continuous run of 3/32" x 1" Roll Tape Sealant to the top of the Slotted Zee and attchMT-34 (Standard Side-Wall Trim) with 1/4-14 x 1 1/4" Tek2 ZAC Fasteners at 1'-0" O.C.5. Trim pieces lap 2". Apply 3/32" x 3/8" Butyl Tape or Butyl Tube Sealant in trim laps and Fasten totrims.BUILDING LINE(NOT BY MCELROY)CAULKING(NOT BY MCELROY)REGLET(NOT BY MCELROY)MT-34: STANDARDSIDE-WALL TRIM<strong>238T</strong> ROOF PANELPLYWOOD DECKING(NOT BY MCELROY)1/4-14 X 1 1/4" TEK2 ZACFASTENER (@1'-0" O.C.)FASTENER(NOT BY MCELROY)1/4-14 X 1 1/4" TEK2 ZACFASTENER (@ 1'-0" O.C.)FLEXIBLE MEMBRANE(NOT BY MCELROY)3/32" X 1" TAPE SEALANT(CONT. ALONG LENGTH OFRAKE)MT-SLOT-Z238: SPECIAL 16GA.SLOTTED ZEE3/16" X 7/8" DOUBLE BEADTAPE SEALANT (CONT. TOP OFSLOTTED ZEE)WOOD BLOCKING(NOT BY MCELROY)#30 PAPER FELT(NOT BY MCELROY)C-11
VALLEY DETAILMT-10: VALLEY TRIM3/16" DIA. BEAD OFBUTYL TUBE SEALANTMT-11: VALLEY / WAVE CLIP<strong>238T</strong> CLIPHIGH TEMP. PEEL & STICKUNDERLAYMENT(NOT BY MCELROY)<strong>238T</strong> ROOF PANEL#14-10 X 1 1/2" TYPE AFASTENERS (2 PER CLIP)PLYWOOD DECKING(NOT BY MCELROY)#10-12 X 1" TYPE A PANCAKEHEAD FASTENERS (@ 1'-0" O.C.)FIELD NOTCH PANEL SEAMAND FOLD OVER END TABSHIGH TEMP. PEEL & STICKUNDERLAYMENT(NOT BY MCELROY)MT-10: VALLEY TRIMMT-11: VALLEY / WAVECLIPNOTES: 1. Install MT-10 (Valley Trim) from eave to ridge. MT-10 (Valley Trim) pieces lap 6". Place 3/32" x 1" ButylTape or a 3/16" Dia. bead of Butyl Tube Sealant in laps.2. Cut panels at required bevel for valley condition.3. Attach MT-11 (Valley / Wave Clip) with #10-12 x 1" Type A Pancake Head fasteners at 1'-0" O.C.C-12
VALLEY DETAIL<strong>238T</strong> SEAM CAP<strong>238T</strong> ROOF PANELMT-11: VALLEY / WAVE CLIPSHIGH TEMP. PEEL & STICKUNDERLAYMENT(NOT BY MCELROY)#10-12 X 1" TYPE APANCAKE HEADFASTENERS (@ 1'-0" O.C.)PLYWOOD DECKING(NOT BY MCELROY)MT-10: VALLEY TRIMMT-10: VALLEY TRIMMT-11: VALLEY / WAVECLIPNOTES: 1. Install MT-10 (Valley Trim) from eave to ridge. MT-10 (Valley Trim) pieces lap 6". Place 3/32" x 1" ButylTape or a 3/16" Dia. bead of Butyl Tube Sealant in laps.2. Cut panels at required bevel for valley condition.3. Attach MT-11 (Valley / Wave Clip) with #10-12 x 1" Type A Pancake Head fasteners at 1'-0" O.C.C-13
VALLEY DETAIL (ALT.)MT-8: VALLEY TRIM3/16" DIA. BEAD OFBUTYL TUBE SEALANT3/32" X 1" ROLL TAPESEALANT (CONT. ALONGLENGTH OF VALLEY)<strong>238T</strong> CLIPMT-38: STANDARDOFFSET CLEATHIGH TEMP. PEEL & STICKUNDERLAYMENT(NOT BY MCELROY)<strong>238T</strong> ROOF PANEL#14-10 X 1 1/2" TYPE AFASTENERS (2 PER CLIP)PLYWOOD DECKING(NOT BY MCELROY)#10-12 X 1" TYPE A PANCAKEHEAD FASTENERS (@ 1'-0" O.C.)FIELD NOTCH PANEL SEAMAND FOLD OVER END TABSMT-8: VALLEY TRIMMT-38: STANDARDOFFSET CLEATNOTES: 1. Install MT-8 (Valley Trim) from eave to ridge. MT-8 (Valley Trim) pieces lap 6". Place 3/32" x 1" ButylTape or a 3/16" Dia. bead of Butyl Tube Sealant in laps.2. Cut panels at required bevel for valley condition.3. Apply a continuous line of 3/32" x 1" Roll Tape Sealant up both sides of MT-8 (Valley Trim).4. Install MT-38 (Standard Offset Cleat) with #10-12 x 1" Type A Pancake Head fasteners at 1'-0" O.C.C-14
VALLEY DETAIL<strong>238T</strong> SEAM CAP<strong>238T</strong> ROOF PANELMT-38: OFFSET CLEATHIGH TEMP. PEEL & STICKUNDERLAYMENT(NOT BY MCELROY)#10-12 X 1" TYPE APANCAKE HEADFASTENERS (@ 1'-0" O.C.)3/32" X 1" ROLL TAPESEALANT (CONT. ALONGLENGTH OF VALLEY)PLYWOOD DECKING(NOT BY MCELROY)MT-8: VALLEY TRIMMT-8: VALLEY TRIMMT-38: STANDARDOFFSET CLEATNOTES: 1. Install MT-8 (Valley Trim) from eave to ridge. MT-8 (Valley Trim) pieces lap 6". Place 3/32" x 1" ButylTape or a 3/16" Dia. bead of Butyl Tube Sealant in laps.2. Cut panels at required bevel for valley condition.3. Apply a continuous line of 3/32" x 1" Roll Tape Sealant up both sides of MT-8 (Valley Trim).4. Attach MT-38 (Standard Offset Cleat) with #10-12 x 1" Type A Pancake Head fasteners at 1'-0" O.C.C-15
HIP DETAILFIELD FOLD PAN OF PANEL3/32" X 1" ROLL TAPESEALANT (CONT. ALONGTOP OF ZEE CLOSURES)MT-5: HIP CAP1/4-14 X 7/8" LAP TEKFASTENERS (@ 0'-6" O.C.)<strong>238T</strong> CLIPMT-38: STANDARD OFFSET CLEAT<strong>238T</strong> ROOF PANEL#30 PAPER FELT(NOT BY MCELROY)#14-10 X 1 1/2" TYPE AFASTENERS (2 PER CLIP)#14-10 X 1 1/2" TYPE AFASTENERS (@ 1'-0" O.C.)1/4-14 X 1 1/4" TEK2 ZACFASTENERS (@ 0'-4" O.C.)MT-17: ZEE CLOSURE(CUT AND FOLD 1" TABS ON SIDES)(3/16" X 7/8" DOUBLE BEAD TAPESEALANT ON SIDES AND BOTTOM)LOW EAVE PLATE(PRE-DRILL 5/16" DIA. HOLES@ 1'-0" O.C. MAX.)PLYWOOD DECKING(NOT BY MCELROY)MT-17: ZEECLOSUREMT-38: STANDARDOFFSET CLEATMT-5: HIP CAPNOTES: 1. MT-5 (Hip Cap) to run from Eave to Ridge. MT-38 (Standard Offset Cleat) to run from Ridge to Eave.2. Using a panning tool, fold up the pan of the panel at the Hip.3. Install <strong>238T</strong> panels as directed in this manual.4. Cut individual Zee Closures with 1" Side Tabs from the MT-17 (Zee Closure). Apply a 3/16" x 7/8" DoubleBead Tape Sealant to the bottom and sides of Zee Closures and install 2" down from end of panel.Fasten with 1/4-14 x 1 1/4" Tek2 ZAC fasteners at 0'-4" (Max.).5. MT-5 (Hip Cap) laps 2". Apply 3/32" x 1" Butyl Tape and Pop Rivet trims to MT-38 (Standard OffsetCleat with Pop Rivets at Laps.C-16
HIP DETAILMT-5: HIP CAP1/4-14 X 7/8" LAP TEKFASTENER (@ 1'-0" O.C.)<strong>238T</strong> ROOF PANEL<strong>238T</strong> SEAM CAPMT-38: STANDARDOFFSET CLEAT3/32" X 1" ROLL TAPESEALANT (CONT. ALONGTOP OFFSET CLEAT)1/4-14 X 1 1/4" TEK2 ZACFASTENERS (@ 0'-4" O.C.)#14-10 X 1 1/2" HWH TYPE AFASTENERS (@ 1'-0" O.C.)<strong>238T</strong> CLIP#14-10 X 1 1/2" TYPE AFASTENERS (2 PER CLIP)MT-17: ZEE CLOSURE(CUT AND FOLD 1" TABS ONSIDES. 3/16" X 7/8" DOUBLEBEAD TAPE SEALANT ONSIDES AND BOTTOM)3/16" X 7/8" DOUBLE BEADTAPE SEALANT (CONT. ALONGTOP OF CLOSURES)LOW EAVE PLATE(PRE-DRILL 5/16" DIA. HOLES@ 1'-0" O.C. MAX.)#30 PAPER FELT(NOT BY MCELROY)PLYWOOD DECK(NOT BY MCELROY)MT-17: ZEECLOSUREMT-38: STANDARDOFFSET CLEATMT-5: HIP CAPNOTES: 1. MT-5 (Hip Cap) to run from Eave to Ridge. MT-38 (Standard Offset Cleat) to run from Ridge to Eave.2. Using a panning tool, fold up the pan of the panel at the Hip.3. Install <strong>238T</strong> panels as directed in this manual.4. Cut individual Zee Closures with 1" Side Tabs from the MT-17 (Zee Closure). Apply a 3/16" x 7/8" DoubleBead Tape Sealant to the bottom and sides of Zee Closures and install 2" down from end of panel.Fasten with 1/4-14 x 1 1/4" Tek2 ZAC fasteners at 0'-4" (Max.).5. MT-5 (Hip Cap) laps 2". Apply 3/32" x 1" Butyl Tape and Pop Rivet trims to MT-38 (Standard OffsetCleat with Pop Rivets at Laps.C-17
DEKTITE DETAILDEKTITE PIPEBOOT<strong>238T</strong> ROOF PANELVENT PIPE(NOT BY MCELROY)STAINLESS STEELHOSE CLAMP(NOT BY MCELROY)1/4-14 X 7/8" LAP TEK ZACFASTENERS (@ 0'-2" O.C.)#30 PAPER FELT(NOT BY MCELROY)BUTYL TUBE SEALANT(CONT. 3/16" DIA. BEADAROUND DEKTITE)PLYWOOD DECKING(NOT BY MCELROY)NOTES: 1. Cut hole in panel 1" larger than pipe diameter. If installing over a solid substrate, over-cut hole insubstrate so fastener do not pin system from thermal movement.2. Cut hole in top of Dektite Boot so that it fits snuggly around pipe. Apply a 3/16" Dia. bead of Tube Butylsealant around the base flange of boot. Secure to panel with 1/4-14 x 7/8" Lap Tek ZAC fasteners 2" O.C.3. Dektite boot MUST fit in pan of panel. Do not fasten to standing seams.DEKTITE PIPEBOOT1/4-14 X 7/8" LAP TEK ZACFASTENERS (@ 0'-2" O.C.)VENT PIPE(NOT BY MCELROY)STAINLESS STEELHOSE CLAMP(NOT BY MCELROY)BUTYL TUBE SEALANT(CONT. 3/16" DIA. BEADAROUND DEKTITE)<strong>238T</strong> ROOF PANEL<strong>238T</strong> SEAM CAPC-18
ROOF CURB DETAIL<strong>238T</strong> ROOF PANEL<strong>238T</strong> CLIP#30 PAPER FELT(NOT BY MCELROY)PLYWOOD DECKING(NOT BY MCELROY)STEP #1C-19
ROOF CURB DETAIL<strong>238T</strong> ROOF PANEL0.080 ALL-WELDEDALUMINUM CURB(NOT BY MCELROY)#30 PAPER FELT(NOT BY MCELROY)3/16" X 7/8" DOUBLEBEAD TAPE SEALANTBACK-UP CHANNELPLYWOOD DECKING(NOT BY MCELROY)<strong>238T</strong> CLIPSTEP #2#14-10 X 1 1/2" TYPE AFASTENER (2 PER CLIP)C-20
ROOF CURB DETAIL3/16" X 7/8" DOUBLEBEAD TAPE SEALANT<strong>238T</strong> ROOF PANEL0.080 ALL-WELDEDALUMINUM CURB(NOT BY MCELROY)CLAMPS(NOT BY MCELROY)#30 PAPER FELT(NOT BY MCELROY)PLYWOOD DECKING(NOT BY MCELROY)BACK-UP CHANNEL<strong>238T</strong> CLIPSTEP #3#14-10 X 1 1/2" TYPE AFASTENER (2 PER CLIP)C-21
ROOF CURB DETAIL0.080 ALL-WELDEDALUMINUM CURB(NOT BY MCELROY)1/4-14 X 1 1/4" TEK2 ZACFASTENERS (@ 0'-4" O.C.)<strong>238T</strong> ROOF PANEL3/32" X 1" X 2" LONGPIECE OF ROLL TAPESEALANT3/16" X 7/8" DOUBLEBEAD TAPE SEALANT3/16" DIA. BEAD OFBUTYL TUBE SEALANT#30 PAPER FELT(NOT BY MCELROY)PLYWOOD DECKING(NOT BY MCELROY)3/16" X 7/8" DOUBLE BEADROLL TAPE SEALANTBACK-UP CHANNEL<strong>238T</strong> CLIP#14-10 X 1 1/2" TYPE AFASTENER (2 PER CLIP)STEP #4C-22
ROOF CURB DETAIL0.080 ALL-WELDEDALUMINUM CURB(NOT BY MCELROY)<strong>238T</strong> ROOF PANELSEAM CAP1/4-14 X 1 1/4" TEK2 ZACFASTENERS (@ 0'-4" O.C.)#30 PAPER FELT(NOT BY MCELROY)0.080 ALL-WELDEDALUMINUM RIB CAP(NOT BY MCELROY)(FILL CAP 2/3's FULL WITHBUTYL TUBE SEALANT)BACK-UP CHANNEL<strong>238T</strong> CLIPPLYWOOD DECKING(NOT BY MCELROY)#14-10 X 1 1/2" TYPE AFASTENER (2 PER CLIP)STEP #5C-23
TYPICAL TRIM LAP DETAILRAKE TRIM3/32" X 3/8" ROLL TAPESEALANT OR 3/16" DIA. BEADOF TUBE BUTYLRAKE TRIMRAKE TRIM43D POP RIVETS3/8" OFFSETEAVE FLASHING3/32" X 3/8" ROLL TAPESEALANT OR 3/16" DIA. BEADOF TUBE BUTYLSTANDARD EAVE/RAKEOFFSET FLASHINGZEE CLOSURESTANDARD EAVE/RAKEOFFSET FLASHING3/32" X 3/8" ROLL TAPESEALANT OR 3/16" DIA. BEADOF TUBE BUTYLSLOPEZEE CLOSUREZEE CLOSURESLOPEZEE CLOSURENOTE: 1. Apply 3/32" x 3/8" Roll Tape Sealant or a 3/16" Dia. bead of Tube Butyl 1 1/2" back from the edge of thetrim. Also, apply a piece of tape sealant or bead of Tube Butyl as a Pigtail to completely seal joint.2. Notch the hems on the upper trim piece 2" so that the trim will fit flat in the lap joint.3. Secure trim laps with Pop Rivets as shown above.C-24
TYPICAL TRIM LAP DETAIL3/32" X 1" ROLL TAPESEALANT OR 3/16" DIA. BEADOF TUBE BUTYLRIDGE OR HIPFLASHINGRIDGE OR HIPFLASHINGRIDGE OR HIPFLASHINGRIDGE OR HIPFLASHINGPOP RIVET(2 PER LAP ANDFASTEN TO CLOSURE)VALLEY TRIMw/o CLEAT3/32" X 1" ROLL TAPESEALANT OR 3/16" DIA. BEADOF TUBE BUTYLVALLEY TRIMw/o CLEATSLOPEVALLEY TRIMw/o CLEATSLOPEVALLEY TRIMw/o CLEATNOTE: 1. Apply 3/32" x 1" Roll Tape Sealant or a 3/16" Dia. bead of Tube Butyl 1 1/2" back from the edge of thetrim.2. Notch the hems on the upper trim piece 2" so that the trim will fit flat in the lap joint.3. Secure trim laps with Pop Rivets as shown above.C-25


