Installation Guide - Thermostat Shop
Installation Guide - Thermostat Shop
Installation Guide - Thermostat Shop

Create successful ePaper yourself
Turn your PDF publications into a flip-book with our unique Google optimized e-Paper software.
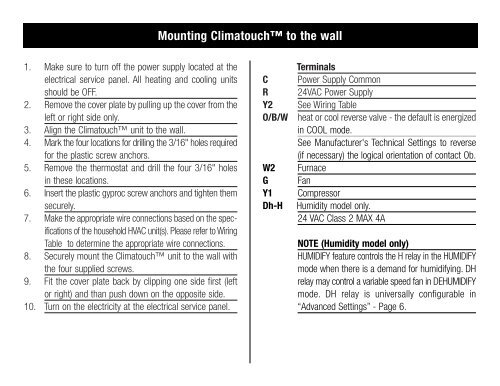
Mounting Climatouch to the wall1. Make sure to turn off the power supply located at theelectrical service panel. All heating and cooling unitsshould be OFF.2. Remove the cover plate by pulling up the cover from theleft or right side only.3. Align the Climatouch unit to the wall.4. Mark the four locations for drilling the 3/16" holes requiredfor the plastic screw anchors.5. Remove the thermostat and drill the four 3/16" holesin these locations.6. Insert the plastic gyproc screw anchors and tighten themsecurely.7. Make the appropriate wire connections based on the specificationsof the household HVAC unit(s). Please refer to WiringTable to determine the appropriate wire connections.8. Securely mount the Climatouch unit to the wall withthe four supplied screws.9. Fit the cover plate back by clipping one side first (leftor right) and than push down on the opposite side.10. Turn on the electricity at the electrical service panel.CRY2O/B/WW2GY1Dh-HTerminalsPower Supply Common24VAC Power SupplySee Wiring Tableheat or cool reverse valve - the default is energizedin COOL mode.See Manufacturer's Technical Settings to reverse(if necessary) the logical orientation of contact Ob.FurnaceFanCompressorHumidity model only.24 VAC Class 2 MAX 4ANOTE (Humidity model only)HUMIDIFY feature controls the H relay in the HUMIDIFYmode when there is a demand for humidifying. DHrelay may control a variable speed fan in DEHUMIDIFYmode. DH relay is universally configurable in“Advanced Settings” - Page 6.