

ProCal Manual - Whip Mix
ProCal Manual - Whip Mix
ProCal Manual - Whip Mix
- No tags were found...

You also want an ePaper? Increase the reach of your titles
YUMPU automatically turns print PDFs into web optimized ePapers that Google loves.
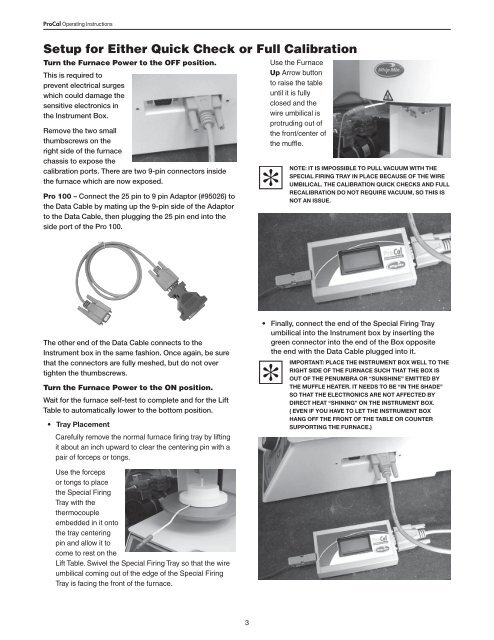
<strong>ProCal</strong> Operating InstructionsSetup for Either Quick Check or Full CalibrationTurn the Furnace Power to the OFF position.This is required toprevent electrical surgeswhich could damage thesensitive electronics inthe Instrument Box.Remove the two smallthumbscrews on theright side of the furnacechassis to expose thecalibration ports. There are two 9-pin connectors insidethe furnace which are now exposed.Pro 100 – Connect the 25 pin to 9 pin Adaptor (#95026) tothe Data Cable by mating up the 9-pin side of the Adaptorto the Data Cable, then plugging the 25 pin end into theside port of the Pro 100.Use the FurnaceUp Arrow buttonto raise the tableuntil it is fullyclosed and thewire umbilical isprotruding out ofthe front/center ofthe muffle.Note: It is impossible to pull vacuum with theSpecial Firing Tray in place because of the wireumbilical. The calibration Quick Checks and FullRecalibration do not require vacuum, so this isnot an issue.The other end of the Data Cable connects to theInstrument box in the same fashion. Once again, be surethat the connectors are fully meshed, but do not overtighten the thumbscrews.Turn the Furnace Power to the ON position.Wait for the furnace self-test to complete and for the LiftTable to automatically lower to the bottom position.• Tray PlacementCarefully remove the normal furnace firing tray by liftingit about an inch upward to clear the centering pin with apair of forceps or tongs.• Finally, connect the end of the Special Firing Trayumbilical into the Instrument box by inserting thegreen connector into the end of the Box oppositethe end with the Data Cable plugged into it.IMPORTANT: Place the Instrument box well to theright side of the furnace such THAT the box isout of the penumbra or “sunshine” emitted bythe muffle heater. It needs to be “in the shade”so THAT the electronics are not affected bydirect heat “shining” on the Instrument box.( Even if you have to let the Instrument boxhang off the front of the TAble or countersupporting the furnace.)Use the forcepsor tongs to placethe Special FiringTray with thethermocoupleembedded in it ontothe tray centeringpin and allow it tocome to rest on theLift Table. Swivel the Special Firing Tray so that the wireumbilical coming out of the edge of the Special FiringTray is facing the front of the furnace.3


