ProCal Manual - Whip Mix
ProCal Manual - Whip Mix
ProCal Manual - Whip Mix
- No tags were found...
You also want an ePaper? Increase the reach of your titles
YUMPU automatically turns print PDFs into web optimized ePapers that Google loves.
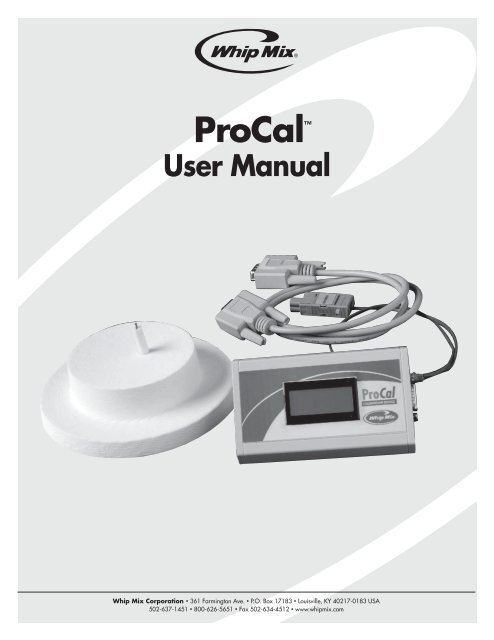
<strong>ProCal</strong> Operating InstructionsProduct OverviewThe Pro Cal Calibration Kit is a professional gradeinstrumentation system designed to rapidly monitor thecalibration status of your furnace, and automaticallyrecalibrate the furnace to factory specifications.It is recommended that you read this manual thoroughlybefore using the kit as there are valuable examples ofprocedures and decisions you will want to be acquaintedwith in order to maximize the benefits you’ve invested in.What You Can Do With ItQC = Quick Check (Pro 200 Series & Pro 100 Series withAdaptor #96026, Sold SeparatelyThe Quick Check feature allows you to rapidly spot checkthe need for calibration. Simply place the Special FiringTray on the Lift Table, connect the Tray to the InstrumentBox and the Instrument Box to the furnace calibrationport, and dial in the desired temperature you want toverify. The LCD readout on the <strong>ProCal</strong> box should agreewith the furnace display to within three degrees Celsius. Ifnot, you can choose one of several options:1. If you check several temperatures and only oneseems to be different, you can go into the firingprograms which have hold temperatures at thatvalue and use the Program Level Fusing Adjust tofine tune just those programs.2. If you check several temperatures and they all eitheroverfire or underfire, you can go into the SpecialFunctions menu and select High Fusing Adjust fortemperatures over 800°C or Low Fusing Adjust fortemperatures under 800°C and enter the averagecorrection value needed.3. You can do a fully automated calibration.Full Recalibration (Pro 200 Series Only)The full recalibration mode requires several hours tocomplete, so you’ll want to reserve it for times when thetemperature is more than three degrees from nominal.Why does it take so long? To get a valid calibrationwhich will most closely match the conditions in which itis used every day the furnace must be fully heat soaked.Secondly, the automatic calibration program requiresone pass at three separate temperatures to build thecalibration file. Thirdly, a second complete pass isnecessary to confirm that the calibration pass is valid.This is exactly the same rigorous process that yourfurnace went through before it left the factory originally.Why Do Furnaces Require PeriodicTemperature Recalibration?There are several reasons why furnaces require periodicQC checking and recalibration:Effluents given off by the materials fired in the furnacecan deposit on the platinum/palladium thermocouple andin some cases, chemically react with the noble metals,thereby affecting the temperature sensed.Oxide layers can build up on the thermocouplethrough many cycles of vacuum, then exposure toair and chemically react with the noble metals in thethermocouple.Prolonged high heat exposure can eventually crystallizethe noble metals making them brittle and inhibiting thebuildup of charge on each leg. The millivolts given off bya thermocouple to register temperature accumulate allalong the heat exposed legs of the thermocouple, not justat the tip.The heater wire also becomes brittle and scaly along itssurface after extended usage. This can affect the infraredspectrum irradiated by the heater and redirect the anglewhich the photons emitted by the heater such that theones striking the thermocouple are more diffused andtherefore create less charge buildup in the thermocouple,affecting the calibration.How It Works -What’s it doing in there?The thermocouple in the Special Firing Tray monitors thefurnace activity and reports its accumulated charge back tothe Instrument Box. The Instrument Box filters the electricalnoise inherent with very low level signals in the microvolt tomillivolt range. The cleaned-up signal is then sent to a preamplifierwith a built in digital filter to further boost the signaland clean it up some more. Finally, the signal is presentedto a 24 bit Analog to Digital Converter (ADC) for conversioninto digital ones and zeros to be transmitted to the furnacecomputer. There is also a local “ambient” temperaturesensor inside the Instrument Box which monitors the “coldjunction” temperature at the point where the thermocouplealloys transition into the electronics. This cold junctiontemperature sensor output is automatically used by thecomputer inside the Instrument Box to correct anymeasurement errors as the reference signal from theSpecial Firing Tray makes its way back to the furnace.Once the digital reference value from the Special FiringTray is received back in the furnace computer its value iscompared to the internal furnace thermocouple and thesign (relative over-firing or under-firing) and the magnitudeof the difference are stored permanently in the furnacecomputer.After the calibration process is complete, every timethe furnace temperature is commanded to a specifictemperature, the furnace computer looks at the targettemperature, determines which calibration value isappropriate for that target value, and either adds orsubtracts the stored calibration correction value in order toproduce the accurate temperature desired, all in real-time.1
<strong>ProCal</strong> Operating InstructionsKit Contents• Instrument Case• Special Firing Tray• Data Cable• Operator <strong>Manual</strong>Important Notes / RemindersThe Special Firing Tray and the Instrument box form aMATCHED SET. These two components are calibratedtogether at the factory and the overall system accuracydepends upon these two components always being usedtogether. If more than one Kit is on site, never use theSpecial Firing Tray from one Kit with the Instrumentbox of another Kit or inaccurate calibrations willresult.Since High Temperatures are present in the Furnace forextended periods of time, it is NOT RECOMMENDEDthat Full Calibrations be attempted unless someoneis present in the vicinity of the furnace at all times.Component FamiliarizationSpecial Firing Tray Instrument BoxInstrument BoxData CablePro 100 Series Adapter (optional)2
<strong>ProCal</strong> Operating InstructionsSetup for Either Quick Check or Full CalibrationTurn the Furnace Power to the OFF position.This is required toprevent electrical surgeswhich could damage thesensitive electronics inthe Instrument Box.Remove the two smallthumbscrews on theright side of the furnacechassis to expose thecalibration ports. There are two 9-pin connectors insidethe furnace which are now exposed.Pro 100 – Connect the 25 pin to 9 pin Adaptor (#95026) tothe Data Cable by mating up the 9-pin side of the Adaptorto the Data Cable, then plugging the 25 pin end into theside port of the Pro 100.Use the FurnaceUp Arrow buttonto raise the tableuntil it is fullyclosed and thewire umbilical isprotruding out ofthe front/center ofthe muffle.Note: It is impossible to pull vacuum with theSpecial Firing Tray in place because of the wireumbilical. The calibration Quick Checks and FullRecalibration do not require vacuum, so this isnot an issue.The other end of the Data Cable connects to theInstrument box in the same fashion. Once again, be surethat the connectors are fully meshed, but do not overtighten the thumbscrews.Turn the Furnace Power to the ON position.Wait for the furnace self-test to complete and for the LiftTable to automatically lower to the bottom position.• Tray PlacementCarefully remove the normal furnace firing tray by liftingit about an inch upward to clear the centering pin with apair of forceps or tongs.• Finally, connect the end of the Special Firing Trayumbilical into the Instrument box by inserting thegreen connector into the end of the Box oppositethe end with the Data Cable plugged into it.IMPORTANT: Place the Instrument box well to theright side of the furnace such THAT the box isout of the penumbra or “sunshine” emitted bythe muffle heater. It needs to be “in the shade”so THAT the electronics are not affected bydirect heat “shining” on the Instrument box.( Even if you have to let the Instrument boxhang off the front of the TAble or countersupporting the furnace.)Use the forcepsor tongs to placethe Special FiringTray with thethermocoupleembedded in it ontothe tray centeringpin and allow it tocome to rest on theLift Table. Swivel the Special Firing Tray so that the wireumbilical coming out of the edge of the Special FiringTray is facing the front of the furnace.3
<strong>ProCal</strong> Operating InstructionsFurnace Display Instrument Box Display850°C 849°C1000°C 1000°C1150°C 1149°CYou can still address a deviation from nominal in asingle range by going into each program that has aHold Temperature in that range and use the ProgramLevel Fusing Adjustment.As you can see from the table above, using the HighFusing Adjustment in this instance would fix the 1000°COverfire concern, but it would also produce an undesiredUnder-firing situation in the ranges above (1150°C) andbelow (850°C).How To Enter An Overfire Correction Using TheSpecial Functions High Fusing Adjust(Affects all User Firing Programs with a HoldTemperature Above 800°C)1. Main MenuRun ProgramChange Program>Special Functions2.3.Special FunctionsSelect LanguageCal Low Fusing> Cal High FusingHigh OverFire?>YesEnter the difference between what the Furnace Displaysaid during the Quick Check and what the Instrument boxDisplay said at the same time. Then press the SelectorKnob OR press the Next button to record the correction.Example: Lets say the furnace Target Temperature wasset to 1000°C. When stabilized, the furnace Displayed1000°C, and the Instrument Box Display shows 998°C.The Instrument Box is always the reference point, notthe furnace. So, the furnace is running two degreesHIGHer than the Instrument Box, in other words, thefurnace is overFIRING by two degrees. You wouldanswer “Yes” to the “High Overfire?” question in screen#3 above (Yes is the default already displayed) by pressingthe Selector Knob OR pressing the Next button, andthen in screen #4 above you would roll the Selector Knobuntil the adjustment value “2C” displays, then press theSelector Knob OR press the Next button to record thecorrection.4.High Temp Adjustment>0CRemember, this correction will affect all programs withHold Temperatures above 800°C.(0C – 50C)Navigate to screen #3 above. If you want to register anOver-firing correction, simply press the Selector KnobOR press the Next button. If you want to register anUnder-firing correction, first roll the Selector Knob untilthe answer to the question “High Overfire?” displays “No”(meaning its not Over-firing, its Under-firing), then pressthe Selector Knob OR press the Next button to get toscreen #4 above.5
<strong>ProCal</strong> Operating InstructionsHow to Enter An Overfire Correction UsingThe Program Level Fusing AdjustAffects This One User Firing Program ONLY)1. Main MenuRun ProgramChange Program>Special FunctionsRoll Selector Knobto item, push Knobto select8. High Temp Adjustment>0C(0C – 50C)Press Knob to Skip2. Special FunctionsSelect LanguageCal Low Fusing> Cal High FusingRoll Knob to item,push Knob toselect9. Main MenuRun ProgramChange Program>Special FunctionsPress Knob to Skip3.High OverFire?>YesRoll Knob toProgram #, pushKnob to select10. Special FunctionsSelect LanguageCal Low Fusing> Cal High FusingPress Knob to Skip4. High Temp Adjustment>0C(0C – 50C)Press Knob to Skip11.High OverFire?>YesRoll Knob to “Yes”,then press Knob toSelect.5. Main MenuRun ProgramChange Program>Special FunctionsPress Knob to Skip12. High Temp Adjustment>0C(0C – 50C)Roll Knob to“Under-fires” ifdesired, then pressKnob to Select.6. Special FunctionsSelect LanguageCal Low Fusing> Cal High FusingPress Knob to Skip13. Main MenuRun ProgramChange Program>Special FunctionsRoll Knob to setcorrection, thenpress Knob torecord value7.High OverFire?>YesPress Knob to SkipYou will be returned to Main Menu.6
<strong>ProCal</strong> Operating InstructionsFull Calibration RunIMPORTANT NOTE: When the Full Calibration Runfinishes successfully, the Pro Cal softwarewill automatically zero out any previouslyentered High Fusing Adjustments and LowFusing Adjustments as the newly minted FullCalibration cancels the need for such entries.The Program Level Fusing edits will, howeverremain in effect until User modifies them again.When to RunIt is recommended that a Full Calibration Run beperformed ONLY when the QC Quick Check surveyindicates a deviation of over 3 degrees C between thedisplayed value on the furnace display and the displayedvalue on the Instrument Box display.To Preheat or NotIt is recommended that the Preheat version of the FullCalibration Run be used for best accuracy. The differencein Run Time is 27% but even the shorter version requires2:15 hours versus the cool muffle version Run Time of4:25 hours.How to Launch the Calibration RunSee the Physical Setup Section Described Previously toconfigure the Kit for a Run, then:From the Pro 200 Main Menu Select Special Functions.Main MenuHow to Keep Tabs on theCalibration RunThe sample displays below will keep you informed of therun’s progressPro Cal FurnaceQuick QC Check>Pro Cal – Cool MufflePro Cal – Soaked MufflePro Cal FurnaceConnectInstrument BoxPro Cal FurnaceInitial Check4:25:00Pro Cal FurnacePreheat 400 C4:15:00COOL MUFFLE TIMELINEPro Cal FurnaceCalibration 850 C1:35:00Pro Cal FurnaceCalibration 1000 C1:20:00Pro Cal FurnaceCalibration 1150 C1:05:00Pro Cal FurnaceOpen Cool0:50:00>Special FunctionsScroll Through the Special Functions Menu Items untilyou reach “Calibrate Furnace” and select it.Pro Cal FurnacePreheat 600 C3:15:00Pro Cal FurnaceProfile 850 C0:45:00>Calibrate FurnaceWhen prompted for a password , enter “291” which willBring up the Pro Cal Menu as below.Password = 291Pro Cal FurnacePreheat 975 C2:15:00Pro Cal FurnaceOpen Cool2:05:00Pro Cal FurnaceProfile 1000 C0:30:00Pro Cal FurnaceProfile 1150 C0:15:00Scroll down to the Pro Cal with Cool Muffle Selection asshown below and press the Selector Knob.Pro Cal FurnaceQuick QC Check>Pro Cal – Cool MufflePro Cal – Soaked MufflePro Cal FurnaceHeat 600 C1:50:00Pro Cal FurnaceDone Successfully!850C 1001C 1149 CIdle234 C7
<strong>ProCal</strong> Operating InstructionsPro Cal FurnaceQuick QC CheckPro Cal – Cool Muffle>Pro Cal – Soaked MuffleSOAKED MUFFLE TIMELINEPro Cal FurnaceCalibration 1150 C1:05:00Inspecting the Results• Within 40 Minutes of CompletionThe three calibration results for 850°C, 1000°C, and1150°C are on the confirmation screen shown above.• Anytime Thereafter you can retrieve the informationby doing the following:Pro Cal FurnaceConnectInstrument BoxPro Cal FurnaceOpen Cool0:50:00Main Menu>Special FunctionsPro Cal FurnaceInitial Check2:15:00Pro Cal FurnaceProfile 850 C0:45:00>Calibrate FurnacePro Cal FurnaceHeat 600 C2:05:00Pro Cal FurnaceProfile 1000 C0:30:00Password = 292Pro Cal FurnaceCalibration 850 C1:35:00Pro Cal FurnaceProfile 1150 C0:15:00Profile Results850 C: 849 C1000 C: 999 C1150 C: 1151 CPro Cal FurnaceCalibration 1000 C1:20:00Pro Cal FurnaceDone Successfully!850C 1001C 1149 CIdle234 C8
<strong>ProCal</strong> Operating InstructionsDetailed Directions for Use with the Pro 100 Series FurnacesIMPORTANT: THE FURNACE AND THE PROCAL KIT FIRINGTRAY MUST BE HEAT SOAKED AT >=600ºC FOR AT LEASTAN HOUR TO GET CONSISTENT, REPEATABLE RESULTS.6. Press SPECIAL FUNCTIONS button on Pro 100Furnace.Section A — Routine QualityControl Checking1. Remove the two thumbscrews on the right side of thefurnace chassis, exposing the 25 pin connector.2. Turn off the AC Line power to the furnace beforeinserting the 25 pin adaptor then plug the 9 pin<strong>ProCal</strong> cable into the adaptor. After the connector isseated, turn the AC Line power back on the furnace.7. Rotate counter clockwise to CALIBRATE OVEN.3. The table will drop automatically after the Power OnSelf Test has completed. Place firing tray on tableafter using centering pin to locate its position.8. Enter PASSWORD = 250, then press NEXT button.9. Enter the same IDLE TEMPERATURE as theTARGET QC temperature, don’t forget to pressthe NEXT button on the furnace to enter your idletemp selection.4. Raise table to close muffle. Allow the white cable toexit out the front of the muffle.5. Connect instrument box to the green thermocoupleconnector, noting it will only plug in one way.10. Important, wait for furnace to stabilize at selectedvalue for 15-20 minutes before passing judgementon furnace calibration.9
<strong>ProCal</strong> Operating Instructions11. After the stabilization time record the “actual temp”on the furnace display and the temperature on the<strong>ProCal</strong> display on a piece of paper.*** The <strong>ProCal</strong> is more stable than virtually any furnaceit is present in. All furnaces turn the heater on untilthe target temperature is reached then switches it offand coasts downward until the thermocouple sensesthe temperature is just below the target, then repeatsthe cycle. This means there will be a slight oscillationof temperature a degree or two above the target anda degree or two below the target;12. If the <strong>ProCal</strong> display value is higher than the furnacedisplay the furnace is overfiring.EXAMPLE: Idle temp 850°CFurnace actual temp=850°C<strong>ProCal</strong> display remp=855°CThe furnace is overfiring by 5°C at this temperature.13. Repeat above procedure at 1000°C idle and again at1150°C idle setting.Example of results:Furnace<strong>ProCal</strong>850°C 850°C 855°C1000°C 1000°C 1003°C1150°C 1150°C 1152°C14. Since all 3 QC checks show readings higher on the<strong>ProCal</strong> than on the furnace the furnace is overfiring.Use the ‘high fusing’ adjust feature to dial incompensation.Since the high fusing adjust affects all programs over800°C equally you may want to use a high fusingAdjustment valve of 3 degrees. (See section B to findprocedure on entering high fusing adjustments.)Important NoteThe Fusing Adjustment function will render correction inthe normal User Program firing mode ONLY. If you’vegot active Fusing Adjustments from previous QC Checksthey will not correct the Special Functions \ CalibrateOven \ Password = 250 \ Idle temperatures. You ALWAysget the temperature based on the most recent factorycalibration in the Password = 250 mode.THE ANswer IS deFINITELY NO! If the neededcorrection in the current QC check indicates a 3 degreeOverfire, just enter the 3 degrees and press the Nextbutton. The corrections are not cumulative. Every timeyou press the Next button the furnace first erasesall previously stored correction values, it effectivelyrestores the factory calibration for that temperature.In other words it always wipes the slate clean, so anycorrection value you determine is needed during QCChecks in the Password = 250 mode is exactly the valueyou should enter in the Calibration - High Fusing mode.Interpretation of ResultsConsistency is more important than absolute accuracyfor pure porcelain work. Notable exceptions to this arethe CapTek process which depends on absolute accuracyfor optimum infiltration. Once you have a furnace setupand programmed to your liking, this is the besT TImeto run a QC check as described in Section A to serve asa benchmark reference in case something goes astrayin the future.The primary advantage of the <strong>ProCal</strong> is the ability toregister temperature calibration data AFTER a problemhas crept into the overall build-up and firing process,and immediately tell you whether the problem is with theporcelain mixture itself, the furnace, or a combinationof both. You can only have confidence in the dataobtained from the <strong>ProCal</strong> if you routinely and regularlyget consistent indications to base that confidence on.Another way the <strong>ProCal</strong> can benefit you is by providingcomparison data on all your Pro Series furnaces to ensurethat every Pro Series furnace matches the results from allothers with matched program parameters.OK, what does that mean?Here is an example:You noted a 2 degree Overfire on a previous QC checkand entered a 2 degree Overfire into the High FusingAdjustment and all has been well for the last few months.Today you ran your next QC Check and this time you notea 3 degree Overfire situation in the Password = 250 mode.[Remember, the Password = 250 mode always referencesback to the factory calibration] You go to the Calibration –High Fusing adjustment, answer YES for overfire, butdo you enter 2 degrees from the first correction plus3 degrees from today’s QC check?10
<strong>ProCal</strong> Operating InstructionsSection B — High Fusing AdjustmentsCalibration – High Fusing AdjustmentBoth the Password = 250 Idle temperature AND the Highand Low Fusing Adjustments always reference back tothe stored Factory Calibration point, not the previouslystored adjustment.If we answer yes, we can input an Overfire value, ifwe answer No, we're actually saying that the furnacewas Underfiring, not Overfiring.What this means is that when you set the IdleTemperature in the Password = 250 mode to an Idletemperature of 850ºC the furnace takes the muffle to thetemperature corresponding to the value it saw when itwas calibrated at 850ºC at the factory.Lets say that the <strong>ProCal</strong> reads 855ºC when furnacereads 850, a 5 degree overfire (relative to the last factorycalibration point).2. In this example we were Overfiring by 5 degrees, sowe answer Yes and press Next button.You need to go into the Special Functions \ Calibration -High Fusing Temperature Fusing adjustment and dialin an offset which will result in User Programs firing5 degrees lower at 850ºC.1. You would press Special Functions, rotate the knobto Calibration–High Fusing, and press the Nextbutton.Press Special Functions ButtonRotate Knob to “Cal – High Fusing”, Press Next Thefurnace would display “High Fusing – Overfires?” onthe top line and Yes or No on the second line.3. The furnace will now display the last knownOverfiring fusing adjust entry value; it might be 0, itmight be 50, IT DOES NOT MATTER WHAT IT SAYS.THE ONLY THING THAT IS IMPORTANT IS THEAMOUNT OF OVERFIRING YOU HAVE RIGHT NOW.Spin the dial to the desired value of 5 degrees ofOverfire adjustment and press Next button. Assoon as you press the Next button the CURRENTfusing offset value is stored to non-volatile memory(after erasing all previous values, either Overfire orUnderfire).If you are curious about what was previously storedyou can go into the Fusing Adjust mode, inspect thestored value and back out without altering the valueby pressing the Special Functions button [not theNext button].4. The next time you run a normal firing programwith a hold temperature above 800ºC the furnacewill automatically deduct 5 degrees from theprogrammed hold temperature and the actualtemperature will be accurate.11
<strong>ProCal</strong> Operating InstructionsAppendix – Special Functions Mode Menu SelectionsWhen you press the Special Functions button the firstmenu selections appear at the top below. As you rotatethe knob Clockwise, the sequence of selections is shownbelow, from top to bottom:Special Functions Menu1. Night Mode2. Change Idle Temp3. Set Vacuum Level4. Temp in C or F?5. Prog Start Delay6. Night Mode Temperature7. Constant vc Pump8. Sp Cool Position9. Capital Letters?10. Porcelain Names:11. Cal Low Fusing12. Cal High FusingHigh Overfires (Yes/No)?Overfires – confirm Yes with Next button, enteramount, press Next button.Underfires – rotate knob to No, confirm withNext button, enter amount, press Next button.13. Print Form14. Set Time & Date15. Programs > Box16. Programs > Box17. Test Furnace18. Calibrate OvenPassword – [rotate knob to 250], press Next buttonChange Idle TempNew Idle - xxx [enter temperature, press Next button]Last button gives chance to change temperatureagain, press Next after.12
<strong>ProCal</strong> Operating InstructionsTroubleshooting• Possible Error Conditions & What to DoError NumberDisplayed Problem What to Do About It100 Pro Cal reading exceeds upper limit This could be a bad furnace thermocouple, causing the furnacetemperature to go very high. Remove the Pro Cal Kit and verifythe furnace Actual Temperature is tracking the furnace TargetTemperature. If the furnace itself is not the issue, contact <strong>Whip</strong> <strong>Mix</strong>Customer Service.102 The difference between the furnacetemperature reading and the Pro Caltemperature reading is too great.103 Cannot read temperature from DeviceBox.104 Cannot sense temperature rising on <strong>ProCal</strong> Tray (but electronic communicationsare good)Make sure the Pro Cal tray is inside the furnace, and check the cableconnections between the tray and the Device Box and the DeviceBox to the furnace connectors are seated tightly. Restart the Pro Calcycle, if error persists, contact <strong>Whip</strong> <strong>Mix</strong> Customer Service.Make sure the Pro Cal tray is inside the furnace, and check the cableconnections between the tray and the Device Box and the Device Boxto the furnace connectors are seated tightly.Turn the furnace main power off, leave it off for ten seconds then turnit back on and restart the Pro Cal cycle, if error persists, contact <strong>Whip</strong><strong>Mix</strong> Customer Service.This most likely means the Pro Cal Kit is connected correctly, butthe Pro Cal tray is not physically on the furnace lfit table. Verify <strong>ProCal</strong> Tray is inside furnace muffle. If error persists, contact <strong>Whip</strong> <strong>Mix</strong>Customer Service.105 High Ambient Temperature Reading The Pro Cal Device Box contains an “ambient temperature sensor”which monitors the internal temperature of the Device Box itself. Ifthe reading is too high it can affect the accuracy of the Calibration.Move the Device Box away from the furnace so that it is not exposedto elevated heat from either the furnace being calibrated or anothernearby furnace.106 Unstable temperature readings. The primary cause would be an intermittent electrical connectionbetween the Tray and the Device Box or between the Device Box andthe furnace. Re-seat all connections and re-launch the calibration.Turn the furnace main power off, leave it off for ten seconds then turnit back on and restart the Pro Cal cycle, if error persists, contact <strong>Whip</strong><strong>Mix</strong> Customer Service.107 No Ambient Temperature Reading (See also Error 105 above) This is most probably an electronic faultinside the Device Box and would render inaccurate calibrations if notaddressed.Turn the furnace main power off, leave it off for ten seconds then turnit back on and restart the Pro Cal cycle, if error persists, contact <strong>Whip</strong><strong>Mix</strong> Customer Service.13
<strong>ProCal</strong> Operating InstructionsTroubleshootingThe following three Error Codes 108, 109 and 110 have multiple possibilities.First, verify all the Pro Cal Kit electrical connections are tightly connected, especially if Error 108 is displayed (the firsttemperature to be checked). Re-start the Pro Cal cycle afterwards.Second, if the furnace has been idle for a while or at low heat with the Lift Table open, moisture may have accumulatedin the white muffle insulation. Pre-soak the muffle at high heat for 30 minutes to an hour (you can use the Quick CheckSelection on the Pro Cal Menu and enter 850 – 1000°C as a target temperature), then re-start the Pro Cal cycle afterwords.Third, use the Quick Check mode and set an 850°C Target Temperature and wait for the furnace Actual Temperature torise to 850°C. Observe the Actual Temperature for a couple of minutes and if the Actual Temperature on the furnace displayis not stable at 850°C, there is a significant problem in the furnace itself which will require attention. Consult <strong>Whip</strong> <strong>Mix</strong>Customer Service in this instance.Error NumberDisplayed Problem What to Do About It108 Pro Cal Temperature Check failed at 850°C See above.109 Pro Cal Temperature Check failed at 1000°C. See above110 Pro Cal Temperature Check failed at 1150°C. See aboveThese are two additional Error Codes.Error NumberDisplayed Problem What to Do About It111 Communication Error The furnace cannot communicate with the Pro Cal Device Boxelectronically. Check the connections at both the furnace andthe Device Box. (Possible defective cable.)Turn the furnace main power off, leave it off for ten secondsthen turn it back on and restart the Pro Cal cycle, if errorpersists, contact <strong>Whip</strong> <strong>Mix</strong> Customer Service.112 Unreliable temperature data readings. Basically the same as Error 106.Turn the furnace main power off, leave it off for ten secondsthen turn it back on and restart the Pro Cal cycle, if errorpersists, contact <strong>Whip</strong> <strong>Mix</strong> Customer Service.14
<strong>ProCal</strong> Operating InstructionsTechnical SupportFor additional support please contact us at (800)626-5651.Specifications• Special Firing Tray – Type K Thermocouple withceramic support, ceramic fiber sheath in hot zone.Maximum Temperature: 1200 Degrees Celcius.• Instrument Box – ABS plastic enclosure with 2 line by8 character LCD Display.Maximum Temperature: 125 Degrees FPower: +5 VDC +/- .1% @ .030 Amps, furnished byFurnace under test via Data Cable.Fuse: None (draws power from furnace under test)• Data Cable – 9 pin DSub Male/ 9 Pin DSub Female,shielded. Standard RS232 Computer Cable.Maximum Temperature: 125 Degrees F.• System Accuracy: +/- 0.125% of measuredtemperature.• Calibration Results Accuracy: +/- 3 degrees Celsiusfrom 700°C to 1200°C.• Pollution Category: 1• For Indoor Use Only• Environmental Ratings:Altitude: Up to 2,000 metersAmbient Temperature: 5°C – 40°CRelative Humidity: 80% @ 31°Clinearly decreasing to 50% @ 40°C• Duty Cycle: 100%• Dimensions: Case – 14.0", (355 mm) Width14.5", (369 mm) Length5.0", (127 mm) Depth• Shipping Weight: 3.86 LB, (1.75 Kg)IT11594 07/10


