SB5100 Series Cable Modem User Guide Introduction ... - Optimum
SB5100 Series Cable Modem User Guide Introduction ... - Optimum
SB5100 Series Cable Modem User Guide Introduction ... - Optimum
- No tags were found...

Create successful ePaper yourself
Turn your PDF publications into a flip-book with our unique Google optimized e-Paper software.
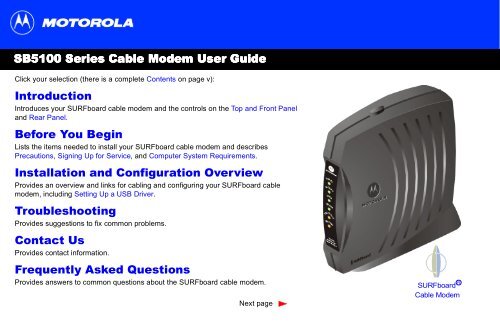
<strong>SB5100</strong> Title<strong>Series</strong> <strong>Cable</strong> <strong>Modem</strong> <strong>User</strong> <strong>Guide</strong>Click your selection (there is a complete Contents on page v):<strong>Introduction</strong>Introduces your SURFboard cable modem and the controls on the Top and Front Paneland Rear Panel.Before You BeginLists the items needed to install your SURFboard cable modem and describesPrecautions, Signing Up for Service, and Computer System Requirements.Installation and Configuration OverviewProvides an overview and links for cabling and configuring your SURFboard cablemodem, including Setting Up a USB Driver.TroubleshootingProvides suggestions to fix common problems.Contact UsProvides contact information.Frequently Asked QuestionsProvides answers to common questions about the SURFboard cable modem.Next pageSURFboard R<strong>Cable</strong> <strong>Modem</strong>
WARNING: TO PREVENT FIRE OR SHOCK HAZARD, DO NOT EXPOSE THIS DEVICE TO RAIN OR MOISTURE. THE DEVICE SHALL NOT BEEXPOSED TO DRIPPING OR SPLASHING AND NO OBJECTS FILLED WITH LIQUIDS, SUCH AS VASES, SHALL BE PLACED ON THE DEVICE.CAUTION: TO ENSURE REGULATORY AND SAFETY COMPLIANCE, USE ONLY THE PROVIDED POWER AND INTERFACE CABLES. TOPREVENT ELECTRICAL SHOCK, DO NOT USE THIS PLUG WITH AN EXTENSION CORD, RECEPTACLE, OR OTHER OUTLET UNLESS THEBLADES CAN BE FULLY INSERTED TO PREVENT BLADE EXPOSURE.CAUTION: DO NOT OPEN THE UNIT. DO NOT PERFORM ANY SERVICING OTHER THAN THAT CONTAINED IN THE INSTALLATION ANDTROUBLESHOOTING INSTRUCTIONS UNLESS YOU ARE QUALIFIED TO DO SO. REFER ALL SERVICING TO QUALIFIED SERVICE PERSONNEL.Caution: Changes Or Modifications Not Expressly Approved By The Party Responsible For Compliance Could Void The <strong>User</strong>’s Authority ToOperate The Equipment.It is recommended that the customer install an AC surge arrestor in the AC outlet to which this device is connected. This is to avoid damaging theequipment by local lightning strikes and other electrical surges.This product was qualified under test conditions that included the use of the supplied cable between system components. To be incompliance with regulations, the user must use this cable and install it properly.Different types of cord sets may be used for connections to the main supply circuit. Use only a main line cord that complies with allapplicable product safety requirements of the country of use.Installation of this product must be in accordance with national wiring codes.To prevent overheating, do not block the ventilation holes on the sides of the cable modem.Wipe the cable modem with a clean, dry cloth. Never use cleaning fluid or similar chemicals. Do not spray cleaners directly on the unit or use forcedair to remove dust.XHome Print Exitii <strong>SB5100</strong> <strong>Series</strong> <strong>Cable</strong> <strong>Modem</strong> <strong>User</strong> <strong>Guide</strong>
This device complies with part 15 of the FCC Rules. Operation is subject to the following two conditions: (1) This device may not cause harmfulinterference, and (2) this device must accept any interference received, including interference that may cause undesired operation.Note: This equipment has been tested and found to comply with the limits for a Class B digital device, pursuant to part 15 of the FCC.Rules. These limits are designed to provide reasonable protection against harmful interference in a residential installation. This equipmentgenerates, uses and can radiate radio frequency energy and, if not installed and used in accordance with the instructions, may cause harmfulinterference to radio communications. However, there is no guarantee that interference will not occur in a particular installation. If this equipmentdoes cause harmful interference to radio or television reception, which can be determined by turning the equipment off and on, the user isencouraged to try to correct the interference by one or more of the following measures:• Reorient or relocate the receiving antenna.• Increase the separation between the equipment and receiver.• Connect the equipment into an outlet on a circuit different from that to which the receiver is connected.• Consult the dealer or an experienced radio/TV technician for help.This Class B digital apparatus meets all requirements of the Canadian Interference Causing Equipment Regulations.Cet appareil numérique de la classe B respects toutes les exigences du Règlement sur le matériel brouilleur du Canada.XHome Print Exitiii <strong>SB5100</strong> <strong>Series</strong> <strong>Cable</strong> <strong>Modem</strong> <strong>User</strong> <strong>Guide</strong>
Contents<strong>Introduction</strong> ............................................................................................................................................ 1Top and Front Panel .............................................................................................................................. 2Rear Panel .............................................................................................................................................. 3Before You Begin ................................................................................................................................... 4Precautions ............................................................................................................................................ 5Signing Up for Service .......................................................................................................................... 6Computer System Requirements ......................................................................................................... 7Ethernet Card ..................................................................................................................................... 7USB Connection ................................................................................................................................ 7Installation and Configuration Overview ............................................................................................. 8Cabling and Startup for a Single <strong>User</strong> ................................................................................................. 9Setting Up a USB Driver ...................................................................................................................... 11Setting Up a USB Driver in Windows ® 98 .......................................................................................... 12Setting Up a USB Driver in Windows ® 2000 ...................................................................................... 16Setting Up a USB Driver in Windows Me ® ......................................................................................... 20Setting Up a USB Driver in Windows XP ........................................................................................ 21Configuring TCP/IP .............................................................................................................................. 22Configuring TCP/IP in Windows ® 95, 98, or Windows Me ® ............................................................. 23Configuring TCP/IP in Windows ® 2000 .............................................................................................. 26XHome Print Exitv <strong>SB5100</strong> <strong>Series</strong> <strong>Cable</strong> <strong>Modem</strong> <strong>User</strong> <strong>Guide</strong>
Configuring TCP/IP in Windows XP ................................................................................................ 30Verifying the IP Address ..................................................................................................................... 36Verifying the IP Address in Windows ® 95, 98, or Windows Me ® ..................................................... 37Verifying the IP Address in Windows ® 2000 or Windows XP ....................................................... 38Renewing your IP Address ................................................................................................................. 39Cabling for Multiple <strong>User</strong>s .................................................................................................................. 40Ethernet and USB ............................................................................................................................ 40Ethernet ........................................................................................................................................... 41Troubleshooting .................................................................................................................................. 42Front-Panel Lights and Error Conditions .......................................................................................... 44Removing the USB Driver from Windows ® 98 or Windows Me ® ..................................................... 45Removing the USB Driver from Windows ® 2000 .............................................................................. 49Removing the USB Driver from Windows XP ................................................................................. 54Contact Us ............................................................................................................................................ 61Frequently Asked Questions .............................................................................................................. 62Glossary ............................................................................................................................................... 64Software License ................................................................................................................................. 66XHome Print Exitvi <strong>SB5100</strong> <strong>Series</strong> <strong>Cable</strong> <strong>Modem</strong> <strong>User</strong> <strong>Guide</strong>
<strong>Introduction</strong> Before You Begin Installation & Configuration Troubleshooting FAQ<strong>Introduction</strong>GlossaryLicenseEasier!Unlike dial-up modems or ISDN, you’re always on,always connected. For easiest set-up, use theInstallation Assistant on the SURFboard <strong>Cable</strong><strong>Modem</strong> CD-ROM.Faster!Your cable modem is up to 100 times faster than adial-up modem. It lets you enjoy surfing the webwithout the long wait. Because many network andother factors can affect performance, the actualspeed will vary.Better!Your cable modem is made by the company withover 50 years of cable TV expertise.Congratulations, you have a new Motorola ® SURFboard ® cable modem. It provideshigh-speed access to the Internet and other online services. This cable modem transmitsand receives data much faster than traditional dial-up or ISDN modems. Unlike a dial-upmodem, your SURFboard cable modem is always online. Just open your browser andsurf!You can use your high-speed, upgradeable cable modem to connect one or morecomputers in your home or business to the Internet. You can connect:• A single computer equipped with a Universal Serial Bus (USB) port directly to theUSB port on the SURFboard cable modem• A single computer equipped with an Ethernet adapter directly to the Ethernet port onthe SURFboard cable modem• Two computers; one to the USB port and one to the Ethernet port• Up to 32 computers to a single SURFboard cable modem using an Ethernet hub, asshown in “Cabling for Multiple <strong>User</strong>s” on page 40XHome Print Exit1 <strong>SB5100</strong> <strong>Series</strong> <strong>Cable</strong> <strong>Modem</strong> <strong>User</strong> <strong>Guide</strong>
PC/ACTIVITY<strong>Introduction</strong> Before You Begin Installation & Configuration Troubleshooting FAQGlossaryLicenseThe model number on your cable modem maybe different than in the illustrations and screenimages in this guide.POWERRECEIVESENDONLINESTANDBY<strong>SB5100</strong>SURFboard®Ca ble Mo dem1234567XHome Print ExitTop and Front PanelFor added security, you can press the Standby button (1) to suspend your Internetconnection. No data is transmitted or received from the Internet when the Standby light ison. All other front-panel lights turn off until you press the Standby button again.The lights provide information about power, communications, and errors:Key Light Flashing On2 Power Startup diagnostics in progress The cable modem is powered on3 Receive Scanning for a receive(downstream) channel connection4 Send Scanning for a send (upstream)channel connection5 Online Scanning for a networkconnectionThe downstream channel isconnectedThe upstream channel is connectedThe startup process is complete6 PC/Activity Transmitting or receiving data A device, such as a computer orhub, is connected to the USB orEthernet connectors on the backpanel.7 Standby This light does not flash Internet service is blocked becausethe Standby button was pressed. Ifthis light is on, all other lights are off.During normal operation, the Power, Receive, Send, and Online lights are on and thePC/Activity light flashes when the cable modem is transferring data.2 <strong>SB5100</strong> <strong>Series</strong> <strong>Cable</strong> <strong>Modem</strong> <strong>User</strong> <strong>Guide</strong>
<strong>Introduction</strong> Before You Begin Installation & Configuration Troubleshooting FAQRear PanelGlossaryLicenseThe rear panel provides cabling connectors and the power receptacle.4Key ItemDescriptionETHERNET USB CABLE1231 ETHERNET The Ethernet port provides a connection to Ethernet equipped computersusing a cable terminated with an RJ-45 connector.2 USB The USB port provides a connection to USB equipped computers.3 CABLE The CABLE port provides a connection to the coaxial cable (coax) outlet.4 POWER The POWER connector provides power to the cable modem.CUSTOMER S/N:BCDFGHJKLMNPS/N: PPPPMMYJJJSSSSSCAABBCCCCHFC M AC ID: ABCDEF 012 345USB CPE MAC ID: ABDCEF0 12345+12VDC4XHome Print Exit3 <strong>SB5100</strong> <strong>Series</strong> <strong>Cable</strong> <strong>Modem</strong> <strong>User</strong> <strong>Guide</strong>
<strong>Introduction</strong> Before You Begin Installation & Configuration Troubleshooting FAQBefore You BeginGlossaryLicenseBefore you begin the installation, check that you received the following items with yourSURFboard cable modem:ItemPower adapter10/100Base-TEthernet cableUSB cableSURFboard <strong>Cable</strong><strong>Modem</strong> CD-ROMDescriptionConnects the SURFboard cable modem to a poweradapter to connect to the AC electrical outletConnects to the Ethernet portConnects to the USB portContains the <strong>User</strong> <strong>Guide</strong> and USB driversYou will need 75-ohm coaxial cable with F-type connectors to connect your cablemodem to the nearest cable outlet. If a TV is connected to the cable outlet, you mayneed a 5-900 MHz RF splitter and a total of three coaxial cables to connect both the TVand the cable modem. The coaxial cable and RF splitter are available at consumerelectronic stores.XHome Print Exit4 <strong>SB5100</strong> <strong>Series</strong> <strong>Cable</strong> <strong>Modem</strong> <strong>User</strong> <strong>Guide</strong>
<strong>Introduction</strong> Before You Begin Installation & Configuration Troubleshooting FAQPrecautionsGlossaryLicenseTo avoid damaging your cablemodem or PC with static electricity:Postpone cable modem installation until there is no risk of thunderstorm or lightningactivity in the area.To avoid damaging the cable modem with static electricity:ETHERNET USB CABLEU SB CPE MAC ID: ABDCEF012345S/ N: PPPPMMYJJJSSSSSCAABBCCCCH FC MAC ID: ABCDEF012345+12VDCC USTOMER S/N:BCDFGHJKLMNPAlways make the wallconnection first.• Always first connect the coaxial cable to the grounded cable TV wall outlet.• Before you connect or disconnect the USB or Ethernet cable from your cablemodem or PC, always touch the coaxial cable connector on the cable modem torelease any static charges.To prevent overheating the cable modem, do not block the ventilation holes on its sides.Do not open the cable modem. Refer all service to your cable service provider.Wipe the cable modem with a clean, dry cloth. Never use cleaning fluid or similarchemicals. Do not spray cleaners directly on the unit or use forced air to remove dust.Before you connect or disconnect the USB orEthernet cable, always touch the coaxialcable connector on the cable modem.XHome Print Exit5 <strong>SB5100</strong> <strong>Series</strong> <strong>Cable</strong> <strong>Modem</strong> <strong>User</strong> <strong>Guide</strong>
<strong>Introduction</strong> Before You Begin Installation & Configuration Troubleshooting FAQSigning Up for ServiceGlossaryLicenseYou must sign up with a cable service provider to access the Internet and other onlineservices.To activate your service, call your local cable service provider.To receive data service, you need to provide the MAC address printed on the bar codelabel marked CM HFC MAC ID on the rear panel. You can record it here:00 : ______ : ______ : ______ : ______ : ______You should ask your cable service provider the following questions:• Do you have any special system requirements?• When can I begin to use my cable modem?• Are there any files I need to download after I am connected?• Do I need a user name or password to access the Internet or use e-mail?XHome Print Exit6 <strong>SB5100</strong> <strong>Series</strong> <strong>Cable</strong> <strong>Modem</strong> <strong>User</strong> <strong>Guide</strong>
<strong>Introduction</strong> Before You Begin Installation & Configuration Troubleshooting FAQGlossaryLicenseComputer System RequirementsYou can use any web browser such as Microsoft ®Internet Explorer or Netscape Navigator ® withyour SURFboard cable modem.For Microsoft Windows ® computers, theInstallation Assistant application automaticallychecks your system configuration. You can startthe Installation Assistant from the Main Menu onthe SURFboard <strong>Cable</strong> <strong>Modem</strong> CD-ROM.Your SURFboard cable modem is compatible with Microsoft Windows ® , Macintosh ® , andUNIX ® computers.Ethernet CardYou can use the Ethernet connection with any Windows, Macintosh, or UNIX computerequipped with a 10Base-T or 10/100Base-T Ethernet card.Windows ® 95, UNIX, or Macintosh computers must use the Ethernet connection.If you use an Ethernet card, it must be installed in your computer before you install thecable modem. If it is not installed, follow the installation instructions provided with yourEthernet card.USB ConnectionYou can use the USB connection with any PC running Windows ® 98, Windows ® 2000,Windows Me ® , or Windows XP that has a USB interface. The USB connection requiresspecial USB driver software that is supplied on the SURFboard <strong>Cable</strong> <strong>Modem</strong> CD-ROM.You can upgrade the USB drivers from the Internet. For information, check our websitehttp://www.motorola.com/broadband.XHome Print Exit7 <strong>SB5100</strong> <strong>Series</strong> <strong>Cable</strong> <strong>Modem</strong> <strong>User</strong> <strong>Guide</strong>
<strong>Introduction</strong> Before You Begin Installation & Configuration Troubleshooting FAQGlossaryLicenseInstallation and Configuration OverviewTo connect a single PC running Microsoft Windowsto a SURFboard cable modem, we recommendusing the Installation Assistant application.You can start the Installation Assistant from theMain Menu on the SURFboard <strong>Cable</strong> <strong>Modem</strong>CD-ROM. In most cases, the Installation Assistantautomatically configures your cable modem.To install and configure your cable modem for a single PC running Microsoft Windows,you can use the Installation Assistant.Otherwise, to install and configure your cable modem:1 Install the cables as described in one of:• “Cabling and Startup for a Single <strong>User</strong>” on page 9• “Cabling for Multiple <strong>User</strong>s” on page 402 If you are using the USB port only, go to “Setting Up a USB Driver” on page 11.Ethernet users can skip this step.3 Configure TCP/IP and verify the IP address for your computer following one of:• “Configuring TCP/IP” on page 22• Your Macintosh or UNIX user manualXHome Print Exit8 <strong>SB5100</strong> <strong>Series</strong> <strong>Cable</strong> <strong>Modem</strong> <strong>User</strong> <strong>Guide</strong>
<strong>Introduction</strong> Before You Begin Installation & Configuration Troubleshooting FAQGlossaryLicenseCabling and Startup for a Single <strong>User</strong>ETHERNET USB CABLEUSB CPE MAC ID: ABDCEF0 12345S/N: PPPPMMYJJJSSSSSCAABBCCCCHFC M AC ID: ABCDEF 012 345+12VDCCUSTOMER S/N:BCDFGHJKLMNPSURFboard cable modemTo cableoutlet(step 2)To electricaloutlet (step 4)Always connect coaxial cable to the wall outlet first.Allow 5 to 30 minutes to power up the first time because the SURFboard cable modemmust find and lock on the appropriate channels for communications.1 Be sure your computer is on and the cable modem is unplugged.2 Connect one end of the coaxial cable to the cable outlet or splitter. Connect theother end of the coaxial cable to the COAX connector on the cable modem.Hand-tighten the connectors to avoid damaging them.3 Insert the SURFboard <strong>Cable</strong> <strong>Modem</strong> CD-ROM into your CD-ROM drive.4 Plug the power cord into the POWER connector on the cable modem and theelectrical outlet. This turns the SURFboard cable modem on. You do not need tounplug it when not in use.5 Check that the lights on the cable modem front cycle through this sequence:• Power flashes during the self-test and changes to solid green when the self-testis successfully complete.• Receive flashes while scanning for the receive (downstream) channel andchanges to solid green when it is connected.• Send flashes while scanning for the send (upstream) channel and changes tosolid green when it is connected.• Online flashes while the cable modem downloads configuration data andchanges to solid green when the download is complete.XHome Print Exit9 <strong>SB5100</strong> <strong>Series</strong> <strong>Cable</strong> <strong>Modem</strong> <strong>User</strong> <strong>Guide</strong>
<strong>Introduction</strong> Before You Begin Installation & Configuration Troubleshooting FAQ Glossary LicenseCabling and Startup for a Single <strong>User</strong>, continuedCautionDo not connect both the Ethernetand USB cables to the samecomputer.Connect to eitherEthernet or USB6 Connect your computer to the cable modem using USB or Ethernet:USB: Be sure the SURFboard <strong>Cable</strong> <strong>Modem</strong> CD-ROM is inserted in your CD-ROMdrive. Connect the USB cable to the USB port on the cable modem. Connect theother end to the USB port on your computer. Then perform “Setting Up a USBDriver” on page 11.Ethernet: Connect the provided straight-through Ethernet cable to the Ethernetconnector on the cable modem. Connect the other end to the Ethernet port on yourcomputer. Ethernet users do not need to set up USB.7 Perform the procedures for “Configuring TCP/IP” on page 22.ComputerSURFboard cable modemXHome Print Exit10 <strong>SB5100</strong> <strong>Series</strong> <strong>Cable</strong> <strong>Modem</strong> <strong>User</strong> <strong>Guide</strong>
<strong>Introduction</strong> Before You Begin Installation & Configuration Troubleshooting FAQSetting Up a USB DriverGlossaryLicenseBe sure the SURFboard <strong>Cable</strong> <strong>Modem</strong>CD-ROM is inserted in your CD-ROM drivebefore you plug in the USB cable.The following subsections describe setting up a USB driver. Perform the appropriateprocedure for your Windows version:• “Setting Up a USB Driver in Windows® 98” on page 12• “Setting Up a USB Driver in Windows ® 2000” on page 16• “Setting Up a USB Driver in Windows Me ® ” on page 20• “Setting Up a USB Driver in Windows XP ” on page 21When you finish setting up the USB driver, you can continue with “Configuring TCP/IP”on page 22.The SURFboard cable modem USB driver does not support Macintosh or UNIXcomputers. For those systems, you can connect through Ethernet only.XHome Print Exit11 <strong>SB5100</strong> <strong>Series</strong> <strong>Cable</strong> <strong>Modem</strong> <strong>User</strong> <strong>Guide</strong>
<strong>Introduction</strong> Before You Begin Installation & Configuration Troubleshooting FAQGlossaryLicenseSetting Up a USB Driver in Windows ® 98Be sure the SURFboard <strong>Cable</strong> <strong>Modem</strong> CD-ROM is inserted in your CD-ROM drivebefore you plug in the USB cable. This CD contains the USB drivers and must beinserted and read by the PC before you connect the cable modem to the PC.A few seconds after you complete the USB connection, the Add New Hardware Wizardwindow is displayed.1 Click Next.2 Be sure “Search for the best driver for your device” is selected.3 Click Next.XHome Print Exit12 <strong>SB5100</strong> <strong>Series</strong> <strong>Cable</strong> <strong>Modem</strong> <strong>User</strong> <strong>Guide</strong>
<strong>Introduction</strong> Before You Begin Installation & Configuration Troubleshooting FAQ Glossary LicenseSetting Up a USB Driver in Windows® 98, continued4 Be sure “CD-ROM drive” is the only box checked.5 Click Next.The message “Please wait while Windows searches for a new driver for this device”is displayed.6 If your computer successfully locates the driver, skip to step 8.If your computer does not locate the driver, the previous window is displayed again.Select Specify a location and type the location of your CD-ROM drive.To load the driver successfully, you may need to click Browse to manually select theNetMotCM.sys file on the CD-ROM.7 Click Next.XHome Print Exit13 <strong>SB5100</strong> <strong>Series</strong> <strong>Cable</strong> <strong>Modem</strong> <strong>User</strong> <strong>Guide</strong>
<strong>Introduction</strong> Before You Begin Installation & Configuration Troubleshooting FAQ Glossary LicenseSetting Up a USB Driver in Windows® 98, continued8 Select The updated driver... and click Next.If this window is not displayed, verify that the SURFboard <strong>Cable</strong> <strong>Modem</strong> CD-ROM isproperly inserted in the CD-ROM drive. If you still cannot find the correct driver file,click Cancel to cancel the installation and perform the procedure for “Removing theUSB Driver from Windows ® 98 or Windows Me ® ” on page 45. Then repeat thisprocedure.9 After the window at bottom left is displayed, click Next.If a window with the message Copying Files... displays and asks for your CD-ROMdrive, type your CD-ROM drive letter (for example, “D:”) and click OK.If an Insert Disk window similar to the one below is displayed, Windows 98 systemfiles are needed to complete the installation. To install the files, insert yourWindows 98 CD-ROM is in the CD-ROM drive and click OK.Although your SURFboard cable modem model number maybe different than in the images in this guide, the procedure isthe same.XHome Print Exit14 <strong>SB5100</strong> <strong>Series</strong> <strong>Cable</strong> <strong>Modem</strong> <strong>User</strong> <strong>Guide</strong>
<strong>Introduction</strong> Before You Begin Installation & Configuration Troubleshooting FAQ Glossary LicenseSetting Up a USB Driver in Windows® 98, continuedAfter all the necessary files are loaded, the window at upper left is displayedconfirming a successful installation.10 Click Finish. The window at bottom left is displayed.11 Click Yes to restart your computer.When you finish setting up the USB driver, you can continue with “Configuring TCP/IP inWindows ® 95, 98, or Windows Me ® ” on page 23.If you have difficulties setting up the USB driver, perform “Removing the USB Driver fromWindows ® 98 or Windows Me ® ” on page 45 and repeat this procedure. If that does notcorrect your problem, see the Regulatory, Safety, Software License, and WarrantyInformation card provided with your SURFboard cable modem for information aboutobtaining warranty service.XHome Print Exit15 <strong>SB5100</strong> <strong>Series</strong> <strong>Cable</strong> <strong>Modem</strong> <strong>User</strong> <strong>Guide</strong>
<strong>Introduction</strong> Before You Begin Installation & Configuration Troubleshooting FAQGlossaryLicenseSetting Up a USB Driver in Windows ® 2000Be sure the SURFboard <strong>Cable</strong> <strong>Modem</strong> CD-ROM is inserted into the CD-ROM drivebefore you plug in the USB cable. A few seconds after you complete the USBconnection, the Found New Hardware window is displayed.1 Click Next.2 Be sure “Search for a suitable driver for my device” is selected.3 Click Next.Although your SURFboard cable modem model number maybe different than in the images in this guide, the procedure isthe same.XHome Print Exit16 <strong>SB5100</strong> <strong>Series</strong> <strong>Cable</strong> <strong>Modem</strong> <strong>User</strong> <strong>Guide</strong>
<strong>Introduction</strong> Before You Begin Installation & Configuration Troubleshooting FAQ Glossary LicenseSetting Up a USB Driver in Windows ® 2000, continued4 Be sure “CD-ROM drives” is the only box checked.5 Click Next.6 Click Next.If the Insert Disk window is displayed, be sure the SURFboard <strong>Cable</strong> <strong>Modem</strong>CD-ROM is in the CD-ROM drive and follow steps 7 to 12. Otherwise, you can skipto step 13.XHome Print Exit17 <strong>SB5100</strong> <strong>Series</strong> <strong>Cable</strong> <strong>Modem</strong> <strong>User</strong> <strong>Guide</strong>
<strong>Introduction</strong> Before You Begin Installation & Configuration Troubleshooting FAQ Glossary LicenseSetting Up a USB Driver in Windows ® 2000, continued7 On the Insert Disk window, click OK. The Files Needed window is displayed.8 If necessary, select your CD-ROM drive in the Copy files from list.9 Click Browse.10 Locate the NetMotCM.sys file in the CD-ROM root directory.11 Double-click the NetMotCM.sys file. The Files Needed window is displayed.12 Click OK. The Found New Hardware Wizard window is displayed.XHome Print Exit18 <strong>SB5100</strong> <strong>Series</strong> <strong>Cable</strong> <strong>Modem</strong> <strong>User</strong> <strong>Guide</strong>
<strong>Introduction</strong> Before You Begin Installation & Configuration Troubleshooting FAQ Glossary LicenseSetting Up a USB Driver in Windows ® 2000, continued13 Click Finish to complete the installation.When you finish setting up the USB driver, you can continue with “Configuring TCP/IP inWindows ® 2000” on page 26.If you have any difficulties setting up the USB driver, perform “Removing the USB Driverfrom Windows ® 2000” on page 49 and repeat this procedure.XHome Print Exit19 <strong>SB5100</strong> <strong>Series</strong> <strong>Cable</strong> <strong>Modem</strong> <strong>User</strong> <strong>Guide</strong>
<strong>Introduction</strong> Before You Begin Installation & Configuration Troubleshooting FAQGlossaryLicenseSetting Up a USB Driver in Windows Me ®Be sure the SURFboard <strong>Cable</strong> <strong>Modem</strong> CD-ROM is inserted into the CD-ROM drivebefore you plug in the USB cable. A few seconds after you complete the USBconnection, the Add New Hardware Wizard window is displayed.1 Click Next. Windows automatically searches for the correct USB drivers and installsthem. If the installation is successful, the window at bottom left is displayed.2 Click Finish to complete the installation. Otherwise, be sure the SURFboard <strong>Cable</strong><strong>Modem</strong> CD-ROM is correctly inserted in your CD-ROM drive.When you finish setting up the USB driver, you can continue with “Configuring TCP/IP inWindows ® 95, 98, or Windows Me ® ” on page 23.Although your SURFboard cable modem model number maybe different than in the images in this guide, the procedure isthe same.XHome Print Exit20 <strong>SB5100</strong> <strong>Series</strong> <strong>Cable</strong> <strong>Modem</strong> <strong>User</strong> <strong>Guide</strong>
<strong>Introduction</strong> Before You Begin Installation & Configuration Troubleshooting FAQGlossaryLicenseSetting Up a USB Driver in Windows XP Be sure the SURFboard <strong>Cable</strong> <strong>Modem</strong> CD-ROM is inserted into the CD-ROM drivebefore you plug in the USB cable. A few seconds after you complete the USBconnection, the Found New Hardware Wizard window is displayed.1 Be sure “Install the software automatically” is selected.2 Click Next. Windows automatically searches for the correct USB drivers and installsthem. If the installation is successful, the window at bottom left is displayed.3 Click Finish to complete the installation. Otherwise, be sure the SURFboard <strong>Cable</strong><strong>Modem</strong> CD-ROM is correctly inserted in your CD-ROM drive.When you finish setting up the USB driver, you can continue with “Configuring TCP/IP inWindows XP” on page 30..Although your SURFboard cable modem model number maybe different than in the images in this guide, the procedure isthe same.XHome Print Exit21 <strong>SB5100</strong> <strong>Series</strong> <strong>Cable</strong> <strong>Modem</strong> <strong>User</strong> <strong>Guide</strong>
<strong>Introduction</strong> Before You Begin Installation & Configuration Troubleshooting FAQConfiguring TCP/IPGlossaryLicenseThe SURFboard cable modem contains all required software. You do not need toconfigure the cable modem, but you must be sure that your computer is configured forTCP/IP (a protocol for communication between computers). Perform one of:• “Configuring TCP/IP in Windows ® 95, 98, or Windows Me ® ” on page 23• “Configuring TCP/IP in Windows ® 2000” on page 26• “Configuring TCP/IP in Windows XP” on page 30• Follow the instructions in your Macintosh or UNIX user manualAfter configuring TCP/IP, perform one of the following to verify the IP address:• “Verifying the IP Address in Windows ® 95, Windows 98, or Windows Me ® ” onpage 37• “Verifying the IP Address in Windows ® 2000 or Windows XP” on page 38• Follow the instructions in your Macintosh or UNIX user manualYour cable service provider may provide additional instructions to set up your computer.XHome Print Exit22 <strong>SB5100</strong> <strong>Series</strong> <strong>Cable</strong> <strong>Modem</strong> <strong>User</strong> <strong>Guide</strong>
<strong>Introduction</strong> Before You Begin Installation & Configuration Troubleshooting FAQGlossaryLicenseConfiguring TCP/IP in Windows ® 95, 98,or Windows Me ®1 On the Windows Desktop, click Start.2 Select Settings and then Control Panel from the pop-up menus.3 Double-click the Network icon on the Control Panel window.4 Select the Configuration tab on the Network window.5 Verify that TCP/IP is installed for the adapter that will be used to connect to theSURFboard cable modem. If TCP/IP is installed, then skip to step 10. If TCP/IP isnot installed for the adapter, continue with step 6.Although your SURFboard cable modem model number maybe different than in the images in this guide, the procedure isthe same.XHome Print Exit23 <strong>SB5100</strong> <strong>Series</strong> <strong>Cable</strong> <strong>Modem</strong> <strong>User</strong> <strong>Guide</strong>
<strong>Introduction</strong> Before You Begin Installation & Configuration Troubleshooting FAQ Glossary LicenseConfiguring TCP/IP in Windows ® 95, 98, or Windows Me ® ,continued6 Select the adapter to be used for the SURFboard cable modem connection and thenclick Add.7 Double-click the Protocol option on Select Network Component Type window.8 Click Microsoft in the Manufacturers section and click TCP/IP in the NetworkProtocol section of Select Network Protocol window.9 Click OK.XHome Print Exit24 <strong>SB5100</strong> <strong>Series</strong> <strong>Cable</strong> <strong>Modem</strong> <strong>User</strong> <strong>Guide</strong>
<strong>Introduction</strong> Before You Begin Installation & Configuration Troubleshooting FAQ Glossary LicenseConfiguring TCP/IP in Windows ® 95, 98, or Windows Me ® ,continued10 Click TCP/IP on the Network window. If there is more than one TCP/IP entry, choosethe one for the Ethernet card or USB port connected to the cable modem.11 Click Properties. The TCP/IP window is displayed.12 Click the IP Address tab.13 Click Obtain an IP address automatically.14 Click OK to accept the TCP/IP settings.15 Click OK to close the Network window.16 Click OK when prompted to restart your computer and click OK again.When you complete TCP/IP configuration, go to “Verifying the IP Address in Windows ®95, Windows 98, or Windows Me ® ” on page 37.XHome Print Exit25 <strong>SB5100</strong> <strong>Series</strong> <strong>Cable</strong> <strong>Modem</strong> <strong>User</strong> <strong>Guide</strong>
<strong>Introduction</strong> Before You Begin Installation & Configuration Troubleshooting FAQGlossaryLicenseConfiguring TCP/IP in Windows ® 20001 On the Windows Desktop, click Start.2 Select Settings and then Control Panel from the pop-up menus.3 Double-click the Network and Dial-up Connections icon on the Control Panelwindow.4 On the Network and Dial-up Connections window, double-click Local AreaConnection number. The value of number varies from system to system. The LocalArea Connection number Status window is displayed.XHome Print Exit26 <strong>SB5100</strong> <strong>Series</strong> <strong>Cable</strong> <strong>Modem</strong> <strong>User</strong> <strong>Guide</strong>
<strong>Introduction</strong> Before You Begin Installation & Configuration Troubleshooting FAQ Glossary LicenseConfiguring TCP/IP in Windows ® 2000, continued5 Click Properties. Information similar to the lower window is displayed.6 If Internet Protocol (TCP/IP) is in the list of components, TCP/IP is installed. You canskip to step 10.If Internet Protocol (TCP/IP) is not in the list, click Install. The Select NetworkComponent Type window is displayed. Continue with step 7.XHome Print Exit27 <strong>SB5100</strong> <strong>Series</strong> <strong>Cable</strong> <strong>Modem</strong> <strong>User</strong> <strong>Guide</strong>
<strong>Introduction</strong> Before You Begin Installation & Configuration Troubleshooting FAQ Glossary LicenseConfiguring TCP/IP in Windows ® 2000, continued7 Click Protocol on the Select Network Component Type window and click Add. TheSelect Network Protocol window is displayed.8 Click Internet Protocol (TCP/IP) in the Network Protocol section on the SelectNetwork Protocol window.9 Click OK. The Local Area Connection number Properties window is re-displayed.XHome Print Exit28 <strong>SB5100</strong> <strong>Series</strong> <strong>Cable</strong> <strong>Modem</strong> <strong>User</strong> <strong>Guide</strong>
<strong>Introduction</strong> Before You Begin Installation & Configuration Troubleshooting FAQ Glossary LicenseConfiguring TCP/IP in Windows ® 2000, continued10 On the Local Area Connection number Properties window, be sure the box next toInternet Protocol (TCP/IP) is checked.11 Click Properties. The Internet Protocol (TCP/IP) Properties window is displayed asshown at bottom left.12 Be sure Obtain IP address automatically and Obtain DNS server addressautomatically are selected.13 Click OK to accept the TCP/IP settings.14 Click OK to close the Local Area Connection number Properties window.15 Click OK when prompted to restart your computer and click OK again.When you complete the TCP/IP configuration, go to “Verifying the IP Address inWindows ® 2000 or Windows XP” on page 38.XHome Print Exit29 <strong>SB5100</strong> <strong>Series</strong> <strong>Cable</strong> <strong>Modem</strong> <strong>User</strong> <strong>Guide</strong>
<strong>Introduction</strong> Before You Begin Installation & Configuration Troubleshooting FAQGlossaryConfiguring TCP/IP in Windows XP License1 On the Windows desktop, click Start to display the Start window shown at left.2 Click Control Panel to display the Control Panel window. The display varies,depending on your Windows XP view options. If the display is a Category view asshown below, continue with step 3. Otherwise, skip to step 5.XHome Print Exit3 Click Network and Internet Connections to display the Network and InternetConnections window.30 <strong>SB5100</strong> <strong>Series</strong> <strong>Cable</strong> <strong>Modem</strong> <strong>User</strong> <strong>Guide</strong>
<strong>Introduction</strong> Before You Begin Installation & Configuration Troubleshooting FAQ Glossary LicenseConfiguring TCP/IP in Windows XP, continued4 On the Network and Internet Connections Pick a task window, click NetworkConnections to display the LAN or High-speed Internet connections. Skip to step 6.XHome Print Exit31 <strong>SB5100</strong> <strong>Series</strong> <strong>Cable</strong> <strong>Modem</strong> <strong>User</strong> <strong>Guide</strong>
<strong>Introduction</strong> Before You Begin Installation & Configuration Troubleshooting FAQ Glossary LicenseConfiguring TCP/IP in Windows XP, continued5 If a classic view similar to at left is displayed, click Network Connections to displaythe LAN or High-speed Internet connections.XHome Print Exit32 <strong>SB5100</strong> <strong>Series</strong> <strong>Cable</strong> <strong>Modem</strong> <strong>User</strong> <strong>Guide</strong>
<strong>Introduction</strong> Before You Begin Installation & Configuration Troubleshooting FAQ Glossary LicenseConfiguring TCP/IP in Windows XP, continued6 Right-click on your network connection. If more than one connection is displayed, besure to select the one for your network interface.7 Select Properties from the pop-up menu to display the Local Area ConnectionProperties window.XHome Print Exit33 <strong>SB5100</strong> <strong>Series</strong> <strong>Cable</strong> <strong>Modem</strong> <strong>User</strong> <strong>Guide</strong>
<strong>Introduction</strong> Before You Begin Installation & Configuration Troubleshooting FAQ Glossary LicenseConfiguring TCP/IP in Windows XP, continued8 On the Local Area Connection Properties window, be sure Internet Protocol (TCP/IP)is checked. If it is not checked, check it.9 Select Internet Protocol (TCP/IP) and click Properties to display the InternetProtocol (TCP/IP) Properties window.XHome Print Exit34 <strong>SB5100</strong> <strong>Series</strong> <strong>Cable</strong> <strong>Modem</strong> <strong>User</strong> <strong>Guide</strong>
<strong>Introduction</strong> Before You Begin Installation & Configuration Troubleshooting FAQ Glossary LicenseConfiguring TCP/IP in Windows XP, continued10 On the Internet Protocol (TCP/IP) Properties window, verify that the settings arecorrect, as shown at left.11 Click OK to close the TCP/IP Properties window.12 Click OK to close the Local Area Connection Properties window.When you complete the TCP/IP configuration, go to “Verifying the IP Address inWindows ® 2000 or Windows XP” on page 38.XHome Print Exit35 <strong>SB5100</strong> <strong>Series</strong> <strong>Cable</strong> <strong>Modem</strong> <strong>User</strong> <strong>Guide</strong>
<strong>Introduction</strong> Before You Begin Installation & Configuration Troubleshooting FAQVerifying the IP AddressGlossaryLicenseThe following subsections describe verifying an IP Address. Perform the appropriateprocedure for you Windows version:• “Verifying the IP Address in Windows ® 95, Windows 98, or Windows Me ® ” onpage 37• “Verifying the IP Address in Windows ® 2000 or Windows XP” on page 38For a Macintosh or UNIX system, refer to your user guide.XHome Print Exit36 <strong>SB5100</strong> <strong>Series</strong> <strong>Cable</strong> <strong>Modem</strong> <strong>User</strong> <strong>Guide</strong>
<strong>Introduction</strong> Before You Begin Installation & Configuration Troubleshooting FAQGlossaryLicenseVerifying the IP Address in Windows ® 95,Windows 98, or Windows Me ®To check the IP address:1 On the Windows Desktop, click Start.2 Select Run. The Run window is displayed.3 Type winipcfg.exe and click OK. A window similar to the example at top left isdisplayed.4 Select your adapter name — the Ethernet card or USB device.The values for Adapter Address, IP Address,Subnet Mask, and Default Gateway on your PCwill be different than in the image above.5 Click Renew.6 Click OK after the system displays an IP address.If after performing this procedure your computer cannot access the Internet, call yourcable service provider for help.In Windows 98, if autoconfiguration is displayedbefore the IP Address, call your service provider.XHome Print Exit37 <strong>SB5100</strong> <strong>Series</strong> <strong>Cable</strong> <strong>Modem</strong> <strong>User</strong> <strong>Guide</strong>
<strong>Introduction</strong> Before You Begin Installation & Configuration Troubleshooting FAQGlossaryLicenseVerifying the IP Address in Windows ® 2000or Windows XP To check the IP address:1 On the Windows Desktop, click Start.2 Select Run. The Run window is displayed.3 Type cmd and click OK. A window like the one at upper left is displayed.4 Type ipconfig and press ENTER to display your IP configuration. A display, like thewindow at upper left, indicates a normal configuration.If an Autoconfiguration IP Address is displayed as in the window at bottom left, thereis an incorrect connection between your PC and the cable modem or there are cablenetwork problems. Check:• Your cable connections• Whether you can see cable-TV channels on your televisionAfter verifying your cable connections and proper cable-TV operation, you can renewyour IP address.XHome Print Exit38 <strong>SB5100</strong> <strong>Series</strong> <strong>Cable</strong> <strong>Modem</strong> <strong>User</strong> <strong>Guide</strong>
<strong>Introduction</strong> Before You Begin Installation & Configuration Troubleshooting FAQRenewing Your IP AddressTo renew your IP address:GlossaryLicense1 Type ipconfig /renew and press ENTER. If a valid IP address is displayed as shownat left, Internet access should be available.2 Type exit and press ENTER to return to Windows.If after performing this procedure your computer cannot access the Internet, call yourcable service provider for help.XHome Print Exit39 <strong>SB5100</strong> <strong>Series</strong> <strong>Cable</strong> <strong>Modem</strong> <strong>User</strong> <strong>Guide</strong>
<strong>Introduction</strong> Before You Begin Installation & Configuration Troubleshooting FAQ Glossary LicenseEthernet<strong>Cable</strong> outletCoaxial cableSURFboardcable modemEthernet crossover cableYou can connect up to 32 computers to an Ethernet hub connected to a SURFboardcable modem, as shown at left.Ethernet hubor switchEthernet cableComputerComputerComputerXHome Print Exit41 <strong>SB5100</strong> <strong>Series</strong> <strong>Cable</strong> <strong>Modem</strong> <strong>User</strong> <strong>Guide</strong>
<strong>Introduction</strong> Before You Begin Installation & Configuration Troubleshooting FAQ Glossary LicenseFront-Panel Lights and Error ConditionsLight Turns Off During Startup If Turns Off During Normal Operation IfReceive The receive channel cannot be acquired The receive channel is lostSend The send channel cannot be acquired The send channel is lostOnline IP registration is unsuccessful The IP registration is lostPowerThe cable modem is not properly plugged intothe power outletThe cable modem is unplugged or is in standbymode. Press the Standby buttonFor more information about the lights, see “Top and Front Panel” on page 2.XHome Print Exit44 <strong>SB5100</strong> <strong>Series</strong> <strong>Cable</strong> <strong>Modem</strong> <strong>User</strong> <strong>Guide</strong>
<strong>Introduction</strong> Before You Begin Installation & Configuration Troubleshooting FAQGlossaryLicenseRemoving the USB Driver fromWindows ® 98 or Windows Me ®1 On your Windows Desktop, right-click the Network Neighborhood icon forWindows 98 or My Network Places for Windows Me and then select Properties.The Network window is displayed.2 Click the Motorola SurfBoard USB <strong>Cable</strong> <strong>Modem</strong>.Although your SURFboard cable modem model number maybe different than in the images in this guide, the procedure isthe same.XHome Print Exit45 <strong>SB5100</strong> <strong>Series</strong> <strong>Cable</strong> <strong>Modem</strong> <strong>User</strong> <strong>Guide</strong>
<strong>Introduction</strong> Before You Begin Installation & Configuration Troubleshooting FAQ Glossary LicenseRemoving the USB Driver from Windows ® 98 or Windows Me ® ,continued3 Click Remove. The Network window no longer displays Motorola SurfBoard USB<strong>Cable</strong> <strong>Modem</strong> in the list.4 Click OK. The System Settings Change window is displayed.5 Disconnect the USB cable from your PC or cable modem.6 Click Yes to restart your computer.XHome Print Exit46 <strong>SB5100</strong> <strong>Series</strong> <strong>Cable</strong> <strong>Modem</strong> <strong>User</strong> <strong>Guide</strong>
<strong>Introduction</strong> Before You Begin Installation & Configuration Troubleshooting FAQ Glossary LicenseRemoving the USB Driver from Windows ® 98 or Windows Me ® ,continued7 Insert the SURFboard <strong>Cable</strong> <strong>Modem</strong> CD-ROM in the CD-ROM drive. After a shorttime, a window with language choices is displayed.8 Press the Esc key on the keyboard to exit the start-up screens.9 To start Windows Explorer, click Start and select Run.10 In the Run window, type explorer and click OK. The Exploring window is displayed.11 Select your CD-ROM drive (D: in the image at left).12 Double-click remove or remove.exe to run the Remove utility from the SURFboard<strong>Cable</strong> <strong>Modem</strong> CD-ROM. The SURFboard <strong>Cable</strong> <strong>Modem</strong> USB Driver Removalwindow is displayed.Your Windows Explorer may appear slightly different than in the imageon this page. There are slight variations between Windows versionsand you can configure Windows Explorer as you like.XHome Print Exit47 <strong>SB5100</strong> <strong>Series</strong> <strong>Cable</strong> <strong>Modem</strong> <strong>User</strong> <strong>Guide</strong>
<strong>Introduction</strong> Before You Begin Installation & Configuration Troubleshooting FAQ Glossary LicenseRemoving the USB Driver from Windows ® 98 or Windows Me ® ,continued13 Click Remove Driver to remove the USB driver.After you remove the USB driver, re-install the USB driver on your computer:• “Setting Up a USB Driver in Windows® 98” on page 12• “Setting Up a USB Driver in Windows Me ® ” on page 20If you continue to have problems, contact your cable service provider.XHome Print Exit48 <strong>SB5100</strong> <strong>Series</strong> <strong>Cable</strong> <strong>Modem</strong> <strong>User</strong> <strong>Guide</strong>
<strong>Introduction</strong> Before You Begin Installation & Configuration Troubleshooting FAQRemoving the USB Driver fromWindows ® 20001 On your Windows desktop, click Start.2 Click Settings.3 Click Control Panel to display the Control Panel window.GlossaryLicense4 Double-click System to display the System Properties window.XHome Print Exit49 <strong>SB5100</strong> <strong>Series</strong> <strong>Cable</strong> <strong>Modem</strong> <strong>User</strong> <strong>Guide</strong>
<strong>Introduction</strong> Before You Begin Installation & Configuration Troubleshooting FAQ Glossary LicenseRemoving the USB Driver from Windows ® 2000, continued5 On the System Properties window, click the Hardware tab.6 Click the Device Manager button to display the Device Manager window:XHome Print Exit50 <strong>SB5100</strong> <strong>Series</strong> <strong>Cable</strong> <strong>Modem</strong> <strong>User</strong> <strong>Guide</strong>
<strong>Introduction</strong> Before You Begin Installation & Configuration Troubleshooting FAQ Glossary LicenseRemoving the USB Driver from Windows ® 2000, continued7 On the Device Manager window, double-click Network Adapters.8 Click the Motorola SurfBoard USB <strong>Cable</strong> <strong>Modem</strong>. The Uninstall icon is displayedon the window near the top.9 Click the Uninstall icon.10 Close the Device Manager window.11 Close the Control Panel window.Although your SURFboard cable modem model number maybe different than in the images in this guide, the procedure isthe same.XHome Print Exit51 <strong>SB5100</strong> <strong>Series</strong> <strong>Cable</strong> <strong>Modem</strong> <strong>User</strong> <strong>Guide</strong>
<strong>Introduction</strong> Before You Begin Installation & Configuration Troubleshooting FAQ Glossary LicenseRemoving the USB Driver from Windows ® 2000, continued12 Insert the SURFboard <strong>Cable</strong> <strong>Modem</strong> CD-ROM in the CD-ROM drive. After a shorttime, a window with language choices is displayed.13 Press the Esc key on the keyboard to exit the start-up screens.14 To start Windows Explorer, click Start and select Run.15 In the Run window, type explorer and click OK.16 Double-click My Computer.17 Double-click the Motorola CD icon (D: in the image).18 Double-click remove or remove.exe to run the Remove utility from the SURFboard<strong>Cable</strong> <strong>Modem</strong> CD-ROM. The SURFboard <strong>Cable</strong> <strong>Modem</strong> USB Driver Removalwindow is displayed.Your Windows Explorer may appear slightly different than in the imageon this page. There are slight variations between Windows versionsand you can configure Windows Explorer as you like.XHome Print Exit52 <strong>SB5100</strong> <strong>Series</strong> <strong>Cable</strong> <strong>Modem</strong> <strong>User</strong> <strong>Guide</strong>
<strong>Introduction</strong> Before You Begin Installation & Configuration Troubleshooting FAQ Glossary LicenseRemoving the USB Driver from Windows ® 2000, continued19 The window on the left is displayed. Be sure the USB cable is disconnected.20 Click Remove Driver.Informational messages similar to the ones shown at left are displayed on theSURFboard <strong>Cable</strong> <strong>Modem</strong> USB Driver Removal window.After you remove the USB driver, re-install the USB driver following “Setting Up a USBDriver in Windows ® 2000” on page 16. If you continue to have problems, contact yourcable service provider.XHome Print Exit53 <strong>SB5100</strong> <strong>Series</strong> <strong>Cable</strong> <strong>Modem</strong> <strong>User</strong> <strong>Guide</strong>
<strong>Introduction</strong> Before You Begin Installation & Configuration Troubleshooting FAQRemoving the USB Driver fromWindows XP GlossaryLicense1 On the Windows desktop, click Start to display the Start window shown at left.2 Click Control Panel to display the Control Panel window. The display varies,depending on your Windows XP view options.3 If a Category view similar to below is displayed, click Performance andMaintenance. Otherwise, skip to step 5.XHome Print Exit54 <strong>SB5100</strong> <strong>Series</strong> <strong>Cable</strong> <strong>Modem</strong> <strong>User</strong> <strong>Guide</strong>
<strong>Introduction</strong> Before You Begin Installation & Configuration Troubleshooting FAQ Glossary LicenseRemoving the USB Driver from Windows XP, continued4 On the Performance and Maintenance window, click System to display the SystemProperties window. Skip to step 6.XHome Print Exit55 <strong>SB5100</strong> <strong>Series</strong> <strong>Cable</strong> <strong>Modem</strong> <strong>User</strong> <strong>Guide</strong>
<strong>Introduction</strong> Before You Begin Installation & Configuration Troubleshooting FAQ Glossary LicenseRemoving the USB Driver from Windows XP, continued5 If a classic view similar to at left is displayed, click System to display the SystemProperties window.XHome Print Exit56 <strong>SB5100</strong> <strong>Series</strong> <strong>Cable</strong> <strong>Modem</strong> <strong>User</strong> <strong>Guide</strong>
<strong>Introduction</strong> Before You Begin Installation & Configuration Troubleshooting FAQ Glossary LicenseRemoving the USB Driver from Windows XP, continued6 On the System Properties window, click the Hardware tab.7 Double-click the Device Manager button to display the Device Manager window.XHome Print Exit57 <strong>SB5100</strong> <strong>Series</strong> <strong>Cable</strong> <strong>Modem</strong> <strong>User</strong> <strong>Guide</strong>
<strong>Introduction</strong> Before You Begin Installation & Configuration Troubleshooting FAQ Glossary LicenseRemoving the USB Driver from Windows XP, continued8 On the Device Manager window, double-click Network adapters.9 Click the Motorola SurfBoard USB <strong>Cable</strong> <strong>Modem</strong>. The Uninstall icon is displayedon the window near the top.10 Click the Uninstall icon.11 Close the Device Manager window.12 Close the Control Panel window.Although your SURFboard cable modem model number maybe different than in the images in this guide, the procedure isthe same.XHome Print Exit58 <strong>SB5100</strong> <strong>Series</strong> <strong>Cable</strong> <strong>Modem</strong> <strong>User</strong> <strong>Guide</strong>
<strong>Introduction</strong> Before You Begin Installation & Configuration Troubleshooting FAQ Glossary LicenseRemoving the USB Driver from Windows XP, continued13 Insert the SURFboard <strong>Cable</strong> <strong>Modem</strong> CD-ROM in the CD-ROM drive. After a shorttime, a window with language choices is displayed.14 Press the Esc key on the keyboard to exit the start-up screens.15 To start Windows Explorer, click Start and select Run.16 In the Run window, type explorer and click OK.17 Double-click My Computer.18 Double-click the Motorola CD icon (D: in the image).19 Double-click remove or remove.exe to run the Remove utility from the SURFboard<strong>Cable</strong> <strong>Modem</strong> CD-ROM. The SURFboard <strong>Cable</strong> <strong>Modem</strong> USB Driver Removalwindow is displayed.Your Windows Explorer may appear slightly different than in the imageon this page. There are slight variations between Windows versionsand you can configure Windows Explorer as you like.XHome Print Exit59 <strong>SB5100</strong> <strong>Series</strong> <strong>Cable</strong> <strong>Modem</strong> <strong>User</strong> <strong>Guide</strong>
<strong>Introduction</strong> Before You Begin Installation & Configuration Troubleshooting FAQ Glossary LicenseRemoving the USB Driver from Windows XP, continued20 The window on the left is displayed. Be sure the USB cable is disconnected.21 Click Remove Driver.Informational messages similar to the ones shown at left are displayed on theSURFboard <strong>Cable</strong> <strong>Modem</strong> USB Driver Removal window.After you remove the USB driver, re-install the USB driver following “Setting Up a USBDriver in Windows XP ” on page 21. If you continue to have problems, contact yourcable service provider.XHome Print Exit60 <strong>SB5100</strong> <strong>Series</strong> <strong>Cable</strong> <strong>Modem</strong> <strong>User</strong> <strong>Guide</strong>
<strong>Introduction</strong> Before You Begin Installation & Configuration Troubleshooting FAQContact UsGlossaryLicenseFor information about customer service, technical support, or warranty claims, see theRegulatory, Safety, Software License, and Warranty Information card provided with yourSURFboard cable modem.For answers to typical questions, see “Frequently Asked Questions” on page 62.For information about Motorola consumer cable products, education, and support, visithttp://www.motorola.com/broadband.XHome Print Exit61 <strong>SB5100</strong> <strong>Series</strong> <strong>Cable</strong> <strong>Modem</strong> <strong>User</strong> <strong>Guide</strong>
<strong>Introduction</strong> Before You Begin Installation & Configuration Troubleshooting FAQ Glossary LicenseFrequently Asked QuestionsHere are answers to questions our customers frequently ask.QAQAQAQAWhat is high-speed cable Internet access?<strong>Cable</strong> Internet access uses cable television wires instead of telephone lines to connect to the Internet. It is extremely fast and affordable anddoes not tie up telephone lines for incoming or outgoing calls and faxes.How fast are cable modems?<strong>Cable</strong> modems offer Internet access at speeds up to 100 times faster than a traditional phone modem. You can experience speeds of over1,000 Kbps. Due to network condition such as traffic volume and the speed of the sites you visit, actual speed may vary. Many network andother factors can affect download speeds.Can I still watch cable TV while using my cable modem?Yes, your cable TV line can carry the TV signal while you send and receive information on the Internet.What are <strong>Cable</strong>Labs Certified, DOCSIS and Euro-DOCSIS?<strong>Cable</strong>Labs ® Certified, DOCSIS, and Euro-DOCSIS are the industry standards for high-speed data distribution over cable television systemnetworks. They are intended to ensure that all compliant cable modems interface with all compliant cable systems. Your Motorola SURFboardcable modem is DOCSIS or Euro-DOCSIS certified.XHome Print Exit62 <strong>SB5100</strong> <strong>Series</strong> <strong>Cable</strong> <strong>Modem</strong> <strong>User</strong> <strong>Guide</strong>
<strong>Introduction</strong> Before You Begin Installation & Configuration Troubleshooting FAQ Glossary LicenseQAQAQAQAQAQAIf I have a cable modem, can I still use my old 28.8 Kbps or 56 Kbps modem?Yes! Although once you’ve experienced the speed of cable Internet access, you’ll never again want to wait for traditional dial-up services.I have more than one computer. Do I need more than one SURFboard cable modem?No, not if your computers are connected on a network. The SURFboard cable modem supports current Internet connection sharingtechnologies to enable you to connect up to 32 PCs to the Internet using a single cable modem.Do I need to change my Internet service provider (ISP)?Currently, most Internet service providers do not provide cable Internet access. Contact your cable company for your specific information.Do I need to subscribe to cable TV to get cable Internet access?No, but you will need to subscribe to cable Internet service. Some systems require that you subscribe to basic service before you can getInternet access and/or offer a discount when you use your own cable modem. Check with your local cable company for specific information.What type of technical support is available?For questions about your Internet service, connection, or cable modem, call your cable service provider.What do I do if my SURFboard cable modem stops working?“Troubleshooting” on page 42 provides tips to diagnose problems and simple solutions. If you continue to have problems, call your cableservice provider.XHome Print Exit63 <strong>SB5100</strong> <strong>Series</strong> <strong>Cable</strong> <strong>Modem</strong> <strong>User</strong> <strong>Guide</strong>
<strong>Introduction</strong> Before You Begin Installation & Configuration Troubleshooting FAQ Glossary LicenseGlossarycoaxial cable(coax)DOCSISdownloaddownstreamEthernetexpansion slotF-type connectorIP addressA type of wire consisting of a center wire surrounded by insulation and a grounded shield of braided wire. The shield minimizeselectrical and radio frequency interference.The <strong>Cable</strong>Labs Data-Over-<strong>Cable</strong> Service Interface Specification defines interface standards for cable modems and supportingequipment.To copy a file from one computer to another. You can use the Internet to download files from a server to your home PC. A DOCSIScable modem downloads its configuration from a server during start-up.In a cable data network, downstream describes the direction of data received by your computer from the Internet.The most widely used type of local area network (LAN). The most commonly installed Ethernet networks are called 10Base-T.10Base-T provides transmission speeds up to 10 megabits per second (Mbps), usually over twisted-pair wire. Fast Ethernet(100Base-T) provides transmission speeds up to 100 Mbps.An opening in a computer where a circuit board can be inserted to add new capabilities.A connector used to connect coaxial cable to equipment.An Internet Protocol address is an identifier for a computer or device on a TCP/IP network. Networks using the TCP/IP protocol routemessages based on the destination IP address. Your cable service provider assigns your cable modem an IP address to provide acontinuous Internet connection.XHome Print Exit64 <strong>SB5100</strong> <strong>Series</strong> <strong>Cable</strong> <strong>Modem</strong> <strong>User</strong> <strong>Guide</strong>
<strong>Introduction</strong> Before You Begin Installation & Configuration Troubleshooting FAQ Glossary LicenseMAC addressMHzRJ-45splitterTCP/IPupstreamUSBThe Media Access Control Address uniquely identifies each device that can be connected to an Ethernet network. It is permanentlywritten to read-only memory (ROM) at the factory and printed on the rear panel of your SURFboard cable modem. You need toprovide the MAC address to your cable service provider.Mega Hertz. A measure of radio frequency - millions of cycles per second. One MHz means one million cycles per second.The most common type of connector for Ethernet networks.A splitter is a device that divides the signal power from an input cable equally between two or more signals, each carrying a selectedfrequency range.Transmission Control Protocol/Internet Protocol is a set of protocols that provides standards and rules for communication betweennetworks.In a cable data network, upstream describes the direction of data sent from your computer to the Internet.Universal Serial Bus is a computer interface for add-on devices such as printers, scanners, and cable modems. When you connectyour SURFboard cable modem to the USB port, Windows 98 and later versions automatically recognize the cable modem.XHome Print Exit65 <strong>SB5100</strong> <strong>Series</strong> <strong>Cable</strong> <strong>Modem</strong> <strong>User</strong> <strong>Guide</strong>
Software LicenseSURFboard <strong>Cable</strong> <strong>Modem</strong>sMotorola, Inc., Broadband Communications Sector (“Motorola”)101 Tournament DriveHorsham, PA 19044IMPORTANT: PLEASE READ THIS SOFTWARE LICENSE (“LICENSE”) CAREFULLY BEFORE YOU INSTALL, DOWNLOAD OR USE ANYAPPLICATION SOFTWARE, USB DRIVER SOFTWARE, FIRMWARE AND RELATED DOCUMENTATION (“SOFTWARE”) PROVIDED WITHMOTOROLA’S CABLE DATA PRODUCT (THE “CABLE DATA PRODUCT”). BY USING THE CABLE DATA PRODUCT AND/OR INSTALLING,DOWNLOADING OR USING ANY OF THE SOFTWARE, YOU INDICATE YOUR ACCEPTANCE OF EACH OF THE TERMS OF THIS LICENSE. UPONACCEPTANCE, THIS LICENSE WILL BE A LEGALLY BINDING AGREEMENT BETWEEN YOU AND MOTOROLA. THE TERMS OF THIS LICENSEAPPLY TO YOU AND TO ANY SUBSEQUENT USER OF THIS SOFTWARE.IF YOU DO NOT AGREE TO ALL OF THE TERMS OF THIS LICENSE (I) DO NOT INSTALL OR USE THE SOFTWARE AND (II) RETURN THE CABLEDATA PRODUCT AND THE SOFTWARE (COLLECTIVELY, “PRODUCT”), INCLUDING ALL COMPONENTS, DOCUMENTATION AND ANY OTHERMATERIALS PROVIDED WITH THE PRODUCT, TO YOUR POINT OF PURCHASE OR SERVICE PROVIDER, AS THE CASE MAY BE, FOR A FULLREFUND. BY INSTALLING OR USING THE SOFTWARE, YOU AGREE TO BE BOUND BY THE PROVISIONS OF THIS LICENSE AGREEMENT.The Software includes associated media, any printed materials, and any “on-line” or electronic documentation. Software provided by third parties may besubject to separate end-user license agreements from the manufacturers of such Software.The Software is never sold. Motorola licenses the Software to the original customer and to any subsequent licensee for personal use only on the terms ofthis License. Motorola and its 3 rd party licensors retain the ownership of the Software.You may:USE the Software only in connection with the operation of the Product.TRANSFER the Software (including all component parts and printed materials) permanently to another person, but only if the person agrees to accept allof the terms of this License. If you transfer the Software, you must at the same time transfer the Product and all copies of the Software (if applicable) to thesame person or destroy any copies not transferred.TERMINATE this License by destroying the original and all copies of the Software (if applicable) in whatever form.You may not:XHome Print Exit66 <strong>SB5100</strong> <strong>Series</strong> <strong>Cable</strong> <strong>Modem</strong> <strong>User</strong> <strong>Guide</strong>
(1) Loan, distribute, rent, lease, give, sublicense or otherwise transfer the Software, in whole or in part, to any other person, except as permitted under theTRANSFER paragraph above. (2) Copy or translate the <strong>User</strong> <strong>Guide</strong> included with the Software, other than for personal use. (3) Copy, alter, translate,decompile, disassemble or reverse engineer the Software, including but not limited to, modifying the Software to make it operate on non-compatiblehardware. (4) Remove, alter or cause not to be displayed, any copyright notices or startup message contained in the Software programs or documentation.(5) Export the Software or the Product components in violation of any United States export laws.The Product is not designed or intended for use in on-line control of aircraft, air traffic, aircraft navigation or aircraft communications; or in design,construction, operation or maintenance of any nuclear facility. MOTOROLA AND ITS 3 RD PARTY LICENSORS DISCLAIM ANY EXPRESS OR IMPLIEDWARRANTY OF FITNESS FOR SUCH USES. YOU REPRESENT AND WARRANT THAT YOU SHALL NOT USE THE PRODUCT FOR SUCHPURPOSES.Title to this Software, including the ownership of all copyrights, mask work rights, patents, trademarks and all other intellectual property rights subsisting inthe foregoing, and all adaptations to and modifications of the foregoing shall at all times remain with Motorola and its 3 rd party licensors. Motorola retainsall rights not expressly licensed under this License. The Software, including any images, graphics, photographs, animation, video, audio, music and textincorporated therein is owned by Motorola or its 3 rd party licensors and is protected by United States copyright laws and international treaty provisions.Except as otherwise expressly provided in this License, the copying, reproduction, distribution or preparation of derivative works of the Software, anyportion of the Product or the documentation is strictly prohibited by such laws and treaty provisions. Nothing in this License constitutes a waiver ofMotorola’s rights under United States copyright law.This License and your rights regarding any matter it addresses are governed by the laws of the Commonwealth of Pennsylvania, without reference toconflict of laws principles. THIS LICENSE SHALL TERMINATE AUTOMATICALLY if you fail to comply with the terms of this License.Motorola is not responsible for any third party software provided as a bundled application, or otherwise, with the Software.U.S. GOVERNMENT RESTRICTED RIGHTSThe Product and documentation is provided with RESTRICTED RIGHTS. The use, duplication or disclosure by the Government is subject to restrictions asset forth in subdivision (c)(1)(ii) of The Rights in Technical Data and Computer Software clause at 52.227-7013. The contractor/manufacturer is Motorola,Inc., Broadband Communications Sector, 101 Tournament Drive, Horsham, PA 19044.XHome Print Exit67 <strong>SB5100</strong> <strong>Series</strong> <strong>Cable</strong> <strong>Modem</strong> <strong>User</strong> <strong>Guide</strong>
501650-00111/02EnglishMGBI