Multicom 2000 Operating Instructions - Bogen Engineered Systems
Multicom 2000 Operating Instructions - Bogen Engineered Systems
Multicom 2000 Operating Instructions - Bogen Engineered Systems
- No tags were found...

Create successful ePaper yourself
Turn your PDF publications into a flip-book with our unique Google optimized e-Paper software.
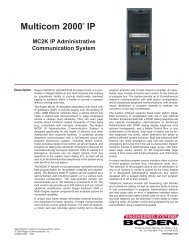
MULTICOM <strong>2000</strong> ®Administrative Communications System<strong>Operating</strong> <strong>Instructions</strong>Specifications subject to change without notice.© 2005 <strong>Bogen</strong> Communications, Inc.All rights reserved.54-5912-06D 1002
ComplianceWarning: Changes or modifications to this unit not expressly approved by the party responsible for compliance couldvoid the user’s authority to operate the equipment.This equipment has been tested and found to comply with the limits for a Class A digital device, pursuant to Part 15of the FCC Rules. These limits are designed to provide reasonable protection against harmful interference when theequipment is operated in a commercial environment. This equipment generates, uses, and can radiate radio frequencyenergy and, if not installed and used in accordance with the instruction manual, may cause harmful interference toradio communications. Operation of this equipment in a residential area is likely to cause harmful interference in whichcase the user will be required to correct the interference at his or her own expense.This digital apparatus does not exceed the Class A limits for radio noise emissions from digital apparatus set out in theRadio Interference Regulations of the Canadian Department of Communications.Le present appareil numerique n’emet pas de bruits radioelectriques depassant les limites applicables aux appareilsnumeriques del la class A prescrites dans le Reglement sur le brouillage radioelectrique edicte par le ministere desCommunications du Canada.Software ReleaseThe information supplied in these instructions is applicable to systems with at least the following software revision levels:System Software Level — 5.0Administrative Telephone Software Level — 5.12<strong>Bogen</strong> Communications, Inc. makes no representation or warranties with respect to these instructions. <strong>Bogen</strong>Communications, Inc. reserves the right to make changes in the specifications of the product described in theseinstructions without notice and without obligation of <strong>Bogen</strong> Communications, Inc. to notify any person of such revisionor change.
Table of ContentsIntroduction ................................................................................................4Telephonic Features ................................................................................4Sound System Features .........................................................................4Additional Features Available ..................................................................4Station Types and Access Levels ...........................................................5Staff Station..............................................................................................5Enhanced Staff Station ............................................................................5Administrative Station ..............................................................................6Outside Line Stations...............................................................................7Operation of Staff Stations ......................................................................8Loudspeaker with Call Switch..................................................................8Loudspeaker with Telephone Handset.....................................................8Operation of Enhanced Staff Stations ....................................................9System Functions for Enhanced Staff Stations .......................................9Operation of Administrative Stations .....................................................10Queue Operation for Incoming Calls .......................................................10911 Emergency Outside Line Calls..........................................................11System with One Administrative Telephone......................................11System with More Than One Administrative Telephone ...................11Using Auto-Dial and Scroll to Return Calls ..............................................12Clearing the Call-Waiting Queue .............................................................12Single-Zone and All-Station Paging .........................................................12Using the Main Menu System..................................................................13Alarms...............................................................................................13Audio Program ..................................................................................14Media Assign.....................................................................................15External.............................................................................................15Setup.................................................................................................16Manual Tone .....................................................................................17Call Forward......................................................................................17Outside Line......................................................................................18Media Control....................................................................................18Emergency 911 Outside Line Call ....................................................19Select 3, 4, 5, or 6 Digit Dialing ........................................................19911 Prefix ..........................................................................................19Factory Reset....................................................................................19System Functions for Administrative Stations ......................................20Other Sequences ....................................................................................20Summary of Main Menu System ..............................................................21
Introduction<strong>Bogen</strong>'s <strong>Multicom</strong> <strong>2000</strong> is a microprocessor-based communications systems. The system combines the features ofan electronic telephone network with the capabilities of a sound and program distribution system. Optional functionsfurther increase the versatility of the system.Telephonic Features:• Two-way communication between stations.• Normal/Urgent/Emergency calling from staff stations.• Call transfer/call forward/call conference capabilities.• Remote answer.• DTMF push-button dialing telephones. Standard dial and busy tones. Special ring signals on administrative phonesannunciate emergency, urgent and normal, outside line calls, and calls waiting.Sound System Features:• Emergency All-Call and Emergency Alarms capture complete system priority. Four alarm tones are available.• Built-in audio program interface. Choose from three program sources and distribute program to any speaker,zones, or all speakers.• 8 paging zones. Single-zone paging.• 8 time signaling zones.• 8 separate time signalling schedules.• 1024 programmable events.• Manual tone activation; 8 tones available plus external audio.Additional Features Available:• Integration with <strong>Bogen</strong> Multi-Graphic equipment.• Emergency announce link.• Selective outside line access and ability to receive outside calls.• Direct Inward Station Access (DISA) permits control of system functions from off-site telephone.• Media control function.• Relay control function to activate external equipment.• Program clock control.• Computer interface for remote diagnostics/programming.• Select 3, 4, 5, or 6 Digit Dialing• 911 Dial Prefix• Factory ResetNote: The Emergency Announce Link requires a loudspeaker at the calling location and at the emergencyannounce station.4
Station Types and Access LevelsEach station port in the <strong>Multicom</strong> <strong>2000</strong> system is assigned an access level. The access level determines the type ofequipment that can be connected to the port, as well as the ability to control different system functions.Staff StationA staff station consists of a loudspeaker and call switch, or a loudspeaker and telephone handset. Staff stations canreceive calls from enhanced staff, administrative and outside line stations. Each staff station is programmed to ringone administrative station during "day" hours and one administrative station during "night" hours. The station'saccess level determines its call-in ability as follows:Level 1 - Can make a normal or emergency call.Level 2 - Can make an urgent or emergency call.Level 3 - Can make an emergency call.Enhanced Staff StationAn enhanced staff station consists of a DTMF dialing telephone and loudspeaker. System functions are initiated bypressing designated keys of the telephone dial pad. The access level of the station determines the ability to initiatesystem functions as follows:Level 4• Dial an administrative station.• Make an emergency call to a designated administrative station (requires loudspeaker at calling location).• Direct outside line call to Emergency 911.• Turn program material on/off at that location.• Remote answer.• Ring for incoming outside line calls. (If the station is in use, an outside line calling in results in a call-waiting toneover the handset of the called party. The outside line will ring in when the station hangs up.)• Access outside line (must be programmed).• Call forward (Enhanced to Enhanced or Enhanced to Administrative).Level 5 – Level 4 capabilities, plus:• Call any staff or enhanced staff station.• Conference call. (The third party in a conference call or call transfer can be any staff, enhanced staff, administrativeor DISA station programmed for outgoing calls.)• Transfer call.Level 6 – Level 5 capabilities, plus:• All-station page (all-call).• Single-zone page.5
Administrative StationAn administrative station consists of a Model MCDS4 administrative telephone and optional loudspeaker.The administrative telephone is equipped with an alphanumeric display panel. The display panel normally showsthe numbers and calling status of the first four stations calling in to that particular station (the display can bescrolled to show the numbers of other calling stations). The display also shows the time, day of the week, thecurrent time-signalling schedule, and the call-forward status (if active).System functions are initiated by pressing designated keys of the telephone dial pad. Operation of system functionsis assisted by the use of menus which appear on the display panel. The access level of the station determines theability to initiate system functions as follows:Level 7• Dial any station.• Direct outside line call to Emergency 911.• Turn program material on/off at that location.• Scroll/Clear/Auto-Dial call-waiting queue.• Conference call.• Transfer call.• Call forward (Administrative to Administrative only).• Assign media functions (optional).• All-station page (all-call).• Emergency all-call page.• Remote answer.• Ring for incoming outside line calls. (If the station is in use, an outside line calling in results in a call-waiting toneover the handset of the called party. The outside line will ring in when the station hangs up.)• Access outside line (must be programmed).Level 8 – Level 7 capabilities, plus:• Select program source.• Distribute/cancel program.• Activate alarm signals.• Activate/reset external relay drivers.• Single-zone page.Level 9 - Level 8 capabilities, plus:• Manually activate tone signals.• Bump/join conversation in progress.• Access the system's Setup and Initialization menu systems and change system parameters.6
Outside Line StationsAn optional feature of the <strong>Multicom</strong> <strong>2000</strong> system permits connection to outside telephone lines. This feature uses anoptional circuit card which provides up to eight outside line station ports. Up to 2 telco cards can be installed in asystem for a maximum of 15 outside lines on a fully expanded system.The ability to access the outside lines for the purpose of placing outside calls can be assigned to any enhanced staffor administrative station in the system. This ability can be restricted to making local calls only or unrestricted, permittinglocal or long-distance calls.There are two programmable levels for outside line stations:Level 10 – The station port will ring a designated "day" or "night" staff, enhanced staff or administrative telephonefor outside line calls. Administrative telephones annunciate outside line calls with a special ringing tone.Level 11 – The station port will provide <strong>Multicom</strong> <strong>2000</strong> system dial tone when accessed from an outside telephone(DISA). This feature can be restricted by a password.• If a password is required, functions available are: Call a station loudspeaker (no preannounce/privacy tone) orstation telephone; make all-station & single-zone page (no preannounce/privacy tone); access the Setup menu.• If a password is not required, functions available are: Call a station loudspeaker (preannounce/privacy tone) orstation telephone; make all-station & single-zone page (preannounce/privacy tone); remote answer; access theAudio Program menu, Media Assign menu, External Driver menu, and Manual Tone menu.Notes: When an outside line is requested, the system will check to see if the station has any private lines. If noprivate lines exist, or if none are available, the system will check to see if any outside lines are assigned to ringthe calling station. If a line is found and not in use, it will be assigned to the calling station. If no line is found,the system will hunt all outside lines (Outside lines and DISA lines can be both incoming and outgoing orrestricted to incoming calls).7
Operation of Staff StationsLoudspeaker with Call SwitchTo make a normal call (or urgent call if the station is programmed for Level 2 access), press the call switch.You will hear a tone over the loudspeaker when the call is answered. Speak into the loudspeaker.To make an emergency call, quickly press and release the call switch at least four times. You will hear a toneover the loudspeaker when the call is answered or when the call is transferred to the emergency announce link(if not answered in 15 seconds and the option is activated). Speak into the loudspeaker for help.Loudspeaker with Telephone HandsetTo make a normal call (or urgent call if the station is programmed for Level 2 access), lift the handset off the hookswitch and replace it. You will hear a tone over the loudspeaker when the call is answered. If you want to have aprivate conversation, lift the handset. The conversation will automatically switch from loudspeaker to handset.To make an emergency call, lift the handset off the hook switch and flash the switch at least four times. Replacethe handset on the hook switch. You will hear a tone over the loudspeaker when the call is answered or when thecall is transferred to the emergency announce link (if not answered in 15 seconds and the option is enabled). Speakinto the loudspeaker for help.Notes: If your station has been programmed as a Level 3 station, a single press of the call switch (or single flashof hook switch) will initiate an emergency call. You will hear a tone over the loudspeaker when the call isanswered or when the call is transferred to the emergency announce link within 15 seconds (if this optionis enabled). Speak into the loudspeaker for help.In some installations, a station may have two (2) call switches or a handset and call switch (such as adedicated emergency-call switch). Your training instructor will be able to instruct you as to the use ofswitches in these configurations.8
Operation of Enhanced Staff StationsTo make a normal call to a loudspeaker, lift the handset and dial the three-digit number of the desired station.Precede this number with the key if you want to call a station telephone instead of the loudspeaker. You will heara preannounce tone when you are connected to the loudspeaker and a privacy beep every 16 seconds that youdon't speak. If you call a telephone, you will hear the ringing tone.To make an emergency call, lift the handset and flash the hook switch at least four times, then replace the handset(or press the dedicated emergency-call switch, if so equipped). You will hear a tone over the loudspeaker when thecall is answered or when the call is transferred to the emergency announce link if not answered in 15 seconds (andthis option is enabled). Speak into the loudspeaker for help.To make an Emergency 911 Outside Line Call to Outside Emergency Facilities,lift the handset and dial 911. If the station has a display, 911 will then be displayedon the station and the station will be directly connected to outside EmergencyFacilities, plus a display notification of the call will be sent to the Administratorʼsstation along with the station number that dialed the call.911 12:05MON 2System Functions for Enhanced Staff StationsThe chart below lists system functions available to enhanced staff stations, access levels, and dial sequences.Function Level Dial SequenceAlarm Distribution 4, 5, 6 xxxx -Audio Program On/Off 4, 5, 6 (Toggles)Call Forward * : All Calls 4, 5, 6 plus Arch. No.When Busy 4, 5, 6 plus Arch. No.When No Answer 4, 5, 6 plus Arch. No.When Busy or No Answer 4, 5, 6 plus Arch. No.Cancel Call Forward 4, 5, 6Conference/Transfer Call 5, 6 Flash Hook, Dial No. when secondparty answers, Flash Hook toConference or Hang up to TransferDial Administrative Station 4, 5, 6 nnn (Dial Speaker)nnn (Dial Phone)Dial Staff Station 5, 6 nnn (Dial Speaker)nnn (Dial Phone)Emergency All-Call 4, 5, 6 xxxxEmergency 911 Outside Line 4, 5, 6Place Outside Line Call * * 4, 5, 6 (Wait for Dial Tone)Remote Answer 4, 5, 6 nnnSingle-Zone/All-Station Page 6 - /xxxx = 4-Digit System Password Backwardsnnn = 3-Digit Architectural Number* Call forward to other enhanced staff or administrative stations. No call forward to/from emergency announce station.* * Outside Line Calls can be restricted to local calls only. Must be programmed for outside line access.9
Operation of Administrative StationsTo call any station loudspeaker, lift the handset and dial the 3-digit architectural number of the desired station.Precede this number with the key if you want to call a station telephone instead of the loudspeaker. The numberyou are calling will appear on the top line of the display panel as you dial. You will hear a pre-announce tone whenyou are connected to the loudspeaker and a privacy beep every 16 seconds that you don't speak. If you call a telephone,you will hear the ringing tone. To switch the use of the asterisk so that the preceding number called with anasterisk connects to the loudspeaker and the number alone rings the station, dial .To restore the original functionality of the asterisk key, dial .Queue Operation for Incoming CallsEach administrative telephone is equipped with a display panel which normally shows the time, day of week,and current time signalling schedule:12:00MON 2TimeDay-of-Week, ScheduleIf a normal or urgent call from a staff station is placed, the architectural number of the calling station appearson the top line of the display and the phone rings for 45 seconds. If the call remains unanswered, the numberremains on the top line for an additional 60 seconds (during which time, the call can be auto-dialed) and is thenplaced in the queue according to priority and time Urgent/Normal, older calls first (see illustration below).If an emergency call from a staff or enhanced staff station is placed, the architectural number appears on thetop line of the display along with the word HELP. The phone will sound a special ring signal and will continue to ringuntil the call is answered. If the emergency announce option is activated, the call will be routed to the emergencyannounce loudspeaker after 15 seconds, however, the administrative phone will continue to ring until the call isanswered.Emergency CallUrgent CallNormal CallNormal Call (Arrow indicates additionalcalls in the queue)110E HELP 12:00120U MON 2100 2105 vAn emergency call will interrupt a non-emergency call in progress at the designated administrative telephone.10
911 Emergency Outside Line Calls911 Alert Operation<strong>Systems</strong> with One Administrative TelephoneIf 911 is dialed from a Staff Station, the architectural number of the calling station appears on the top line of theadministrative display along with the phrase ALERT 911. The Alert can be cleared by that administrative telephoneby dialing 957.110E ALERT 911957 - To ClearIf 911 is dialed from the administrator of a system that is programmed with a single adminstrative telephone,there will not be a 911 Alert generated on that administrative telphone. However, the administrative display willindicate that 911 was called.<strong>Systems</strong> with More Than One Administrative TelephoneA system is considered to have more than one administrative telephone if it is programmed with one level 9 stationand an additional one or more stations of levels 7, 8, or 9. This can also include wall displays.If 911 is dialed from a Staff Station (such as a classroom), then all the administrative telephones, including any walldisplays, will show the 911 Alert. The Alert can be cleared by any of the administrative telephones by dialing 957.If 911 is dialed by one of the administrative telephones in the system, all of the other administrative telephoneswill receive the 911 Alert.Any administrative telephone that has the 911 Alert displayed can dial 957 to clear the Alert. If the Alert has not beencleared, then the administrative station that originated the 911 call, upon hanging up, will receive the message to dial957 to clear the Alert.Note: An Emergency 911 Outside Line Call will interrupt an emergency or non-emergency call at the designatedadministrative station.If 911 is Placed During an All-Call, the administrative telephone that placed the All-Call will be alerted when theAll-Call is completed. The other administrative station will be alerted immediately. If the 911 Alert is cancelled priorto completeing the All-Call, the administrative station that placed the All-Call will not receive an Alert.11
Using Auto-Dial and Scroll to Return CallsYou can use the Auto-Dial function to call the station number appearing on the top line of the display panel.Lift the handset and press . The call-waiting queue shifts down one line and the word ADIAL appears onthe top line. A small arrow points to the number on the second line and the call is placed.Auto Dial 12:00120 U < MON 2100105ADIAL replaces station 120 U on the top line. An arrow points to the stationbeing Auto-Dialed.You can scroll the queue to place any station number on the top line of the display, and then use the auto-dialfunction to return the call.Lift the handset and press . The display appears as shown below. Press to scroll the queue. (Note: You willbe prompted to WAIT for the action of each key press to be completed.) When the desired number appears on thetop line of the display, press twice. The word ADIAL and the arrow will appear as above and the call is placed.Zone?120 U100 # Scr Q105 * Clr QPressPressto Scroll queueto Clear queue (see below)Clearing the Call-Waiting QueueTo clear all calls from the call-waiting queue, lift the handset and press . The display shown below will appear.Press to select the Clear Queue function. The display will then prompt you to press to proceed or any otherkey to abort. If you proceed, the display will confirm the function and the queue (at that phone only) will be cleared.Clear Queue?* -YesHang up to ExitPressQueue 12:00Erased MON 2Single-Zone and All-Call PagingTo make a single-zone or all-call page, lift the handset and press . The display shown below will appear. Pressthe number keypad corresponding to the zone you want to page (1 through 8). To make an all-call page, press(the local speaker will be muted). Speak into the handset to make the page. Hang up the handset to end the page.Zone ? 12:00120U MON 2100105Enter number of the zone you want to page orHang up the handset to exit this function.for All-Call.12
Using the Main Menu SystemSystem functions can be accessed using the dial sequences shown in Keypad Access to System Functions onpage 20. Administrative telephones also have a "Main Menu" display system to assist the user in initiating systemfunctions. To view the menu, lift the handset and press . The menu appears showing the first three selections.To scroll the menu to see the other selections, press the keys.- Main Menu -# - Alarms2 - Audio Program3 - Media4 - External5 - Setup6 - Manual Tone7 - Call Forward8 - Outside Line9 - Media ControlThe Main Menu appears when you press .To scroll the menu, press the .To select a function, press the corresponding number key. The display will then prompt the user to enter additionalinformation, confirm the initiation of the function, or provide a new menu to permit theselection of choices available for that function.Note: Diagrams include menuselections not immediatelydisplayed (those beneath theAlarmsdashed line). Press the scrollThe Alarms menu lets you make an emergency all-call or initiate one of four alarm buttons on the MCDS4 Phonetones. Hanging up the phone stops the page/alarm. Press key to scroll the to view these selections.menu. Press to escape and return to the main menu.- Alarms -1 - All Call2 - Alarm 13 - Alarm 24 - Alarm 35 - Alarm 40 - EscapeThe Alarms menu lets you make an Emergency All-Call or sound one of four alarms.Presskey to scroll the menu.13
Audio ProgramThe Audio Program menu controls the selection and distribution of program material. If a program source is connected,the administrative telephone's speaker will be connected regardless of whether or not the program has been distributed.This allows monitoring of program source prior to distribution.- Select Program -1 - Program 12 - Program 23 - Program 34 - Cancel0 - EscapeCurrentProgramCancelled# - ExitPress if program is active andyou want to add speakers or zones.- Audio Program -1 - Select2 - Distribute3 - Cancel4 - Review5 - Query Status0 - EscapeNote: Diagrams include menuselections not immediatelydisplayed (those beneath thedashed line). Press the scrollbuttons on the MCDS4 Phoneto view these selections.Press to escape.Review ProgramNo speakersActive# - ExitQuery ProgramArch#Status_ _ _ _- Enter # - Exit*Press if program is active and youwant to cancel speakers or zones.*- Distribute -1 - Speaker2 - Zones3 - All Speakers0 - EscapeSelect SpeakerEnter Arch #_ _ _ _- Enter # - ExitPress orto addspeakers orzones. Enter3-digit roomnumber orzones. Pressto EnterPress orto cancelspeakers orzones. Enter3-digit roomnumber orzones. Pressto Enter*- Cancel -1 - Speaker2 - Zones3 - All Speakers0 - EscapeCancel SpeakerEnter Arch#_ _ _ _- Enter # - ExitSelect Zones_ _ _ _ _ _ _ _Cancel Zones_ _ _ _ _ _ _ _*- Enter # - ExitAllSpeakersACTIVE# - ExitPress toactivate allspeakers.The displayconfirms theaction. Pressto ExitPress tocancel allspeakers.The displayconfirms theaction. Pressto Exit*- Enter # - ExitAllSpeakersCANCELLED# - Exit14
Media AssignThe Media Assign menu controls the assignment of remotely located video equipment to a station. The menu isused with the telemedia control option. The operator enters the architectural number of the media station numberand the assigned architectural room number is returned (the cursor is positioned under room).To enter a station assignment, with the cursor positioned under room, enter a valid station architectural number thenpress to change the function of the key to "Enter", and press .Enter the media architectural station number and the architectural room number assigned is returned.To exit this menu, press to change the function of the key to "Exit", and then press .To review the media to room assignments, press to change the function of the key to "Review". Pressingwill then scroll through the current assignments (the cursor is positioned under room).To delete any information displayed, press to change the function of the key to "Delete". Pressing willthen delete the currently displayed information.External- Media -1 - Assign2 - TV On/Off3 - TV Schedule0 - EscapeMedia-to-Room_ _ _ _* -Review # -FunctThe "External" menu lets you review, select, or cancel external relay driver control circuits.Note: Diagrams include menuselections not immediatelydisplayed (those beneath thedashed line). Press the scrollbuttons on the MCDS4 Phoneto view these selections.Press to escape.- External -1 - Review2 - Select3 - Cancel4 - Program5 - Twice-a-Day6 - External Tone7 - Once-an-Hour0 - EscapeThe External menu lets you review, select,or cancel Relay Driver Control circuits (P5 pins 9-6).Note: Diagrams include menuselections not immediatelydisplayed (those beneath thedashed line). Press the scrollbuttons on the MCDS4 Phoneto view these selections.Press to escape.To Review the status of the external relay drivers, press . A display will appear showing the current statusof the four (4) external relays.To Select an external relay driver, press . Select the desired relay driver and press the appropriate key.The display will confirm the action. Press to escape.To Cancel an external relay driver, press . Select the desired relay driver and press the appropriate key.To cancel all relay drivers, press . The display will confirm the action. Press to escape.To Program a relay driver, press . Enter relay number, on time, and off time. To exit this menu, pressto change the function of the key to "Exit", and then press .To set Twice-a-Day closure, press . You can set hour and number of seconds of closure (press ),and days of week (press ). Press to exit.To set External Tone, press . Enter external tone number. Press to exit.To set Once-an-Hour closure, press . Enter minutes and duration. Press to exit.15
SetupThe Setup menu is protected by a password and is available only from administrative stations assigned to Level 9.The Setup menu permits setting the following parameters:• Day/Time• Time Signaling Events• Time Zones• Page ZonesThe Setup menu also provides access to the Initialization/Diagnostic menu displays. These menus are protected bypassword and permit setting the following:System Parameters– Bell Duration– Queue Time out– Day Start Time– Night Start Time– Emergency Link– Password– Architectural Dialing On/Off– Pre-announce Tone On/Off– Privacy Beep On/OffStation Parameters– Station Access Level– Station Architectural Number– "Day" Administrator– "Night" Administrator– Outside Line Access/DISA PasswordSoftware Revision LevelArchitectural/Station Number Cross ReferenceSelect 3, 4, 5, or 6 Digit Dialing911 Dial PrefixDiagnostic Tests– System Tests– Card TestsFactory Reset16
Manual ToneSelecting Manual Tone (No. 6 from Main Menu) displays the Initiate Tone menu and lets you initiate any of 8 tonesignals over all system loudspeakers assigned to any of the 8 time zones. If no speakers have been assigned to anytime zones, no tone will be heard.- Initiate Tone -1 - Tone 12 - Tone 23 - Tone 34 - Tone 45 - Tone 56 - Tone 67 - Tone 78 - Tone 89 - Program 20 - EscapeThe Initiate Tone menu lets you initiate any of 8 tone signals.Press key to scroll the menu. Press to escape to the Main menu.Press the keypad corresponding to the tone number you want to initiate. The display will confirm the action.Press to stop the tone and exit the display (or hang up).Call ForwardThe Call Forward menu lets you forward calls to another administrative telephone. When call forwarding is activateda CF will appear on the lower right corner of the display. Upon entering the menu, an arrow will appear next to theactive selection. No arrow appears if no selection is active.- Call Forward -1 - All2 - Busy3 - No Answer4 - Busy/No Ans.5 - Cancel0 - EscapePress the keypad corresponding to the type of call forwarding desired.Press to Cancel.Press key to scroll the menus.Press to escape to the Main menu.To forward all calls to another number, press . Enter the architectural number of the station you want to receivethe call. Press to enter. Press to exit the menu.To forward calls when your line is busy, press . Enter the architectural number of the station you want to receivethe call. Press to enter. Press to exit the menu.To forward calls when there is no answer (15 seconds), press . Enter the architectural number of the station youwant to receive the call. Press to enter. Press to exit the menu.To forward calls when the line is busy or when there is no answer, press . Enter the architectural number of thestation you want to receive the call. Press to enter. Press to exit the menu.To cancel call forwarding, press . The display will prompt you to press to cancel or to exit.If you press , the display will confirm the action. Press to exit.Note: The emergency link station cannot call forward to stations. No station can call forward toan emergency link station.17
Outside LineThe outside line menu will prompt you to wait until you hear dial tone before entering the number. The display willecho the number as you dial.If you have a restricted line, you will be unable to dial more than 10 digits. For the first 30 seconds, the call cannotbe transferred nor conferenced. Two outside lines may be joined in a conference call with any station programmedfor outside line use. If the station phone hangs up, the outside lines are dropped.- Outside Line -Wait ForDial ToneThen Dial #The outside line menu prompts you to wait for dial tone before dialing the number.Media ControlConnection to a media station is via 1 of 2 ways. Assignment is made either through the menu or by the stationcalling the media station architectural number directly. If a connection is made via the menu, only a logical connectionis made. The assigned phone must dial or the media station architectural number to connect physicallyto the media station. A tone will be heard periodically as long as the assigned station is physically connected.The station remains logically connected to the media controller even if the phone is hung up. No other station canconnect to a media station that is logically connected to any other station. Once a station is logically connected,dialing or the media station architectural number reconnects to the media station. No commands will beaccepted by the media controller from the phone until a physical connection is established. The assigned stationcan logically disconnect from the media station by dialing (if the confirmation tone is not heard through thehandset) and then dialing . Alternately, the logical connection can be cancelled by dialing the menuon the administrative phone, and pressing the delete key while the assignment is displayed. The Media Controlmenu operates the following media functions:- Media Control -1 - Play2 - Pause3 - Stop4 - Rewind5 - Fast Forword6 - Channel Up7 - TV/VCR8 - Display9 - Channel Down0 - Power# - 2nd Function* 0 - DisconnectNote: Diagrams include menuselections not immediatelydisplayed (those beneath thedashed line). Press the scrollbuttons on the MCDS4 Phoneto view these selections.Many more can be added but not displayed.Do not leave the phone physically connected to the media station for long periods of time since this can preventcalls from being placed by other phones.Note: If a station is already connected to one media station, a busy signal will be heard if an attempt is made to callanother media station. If a media station is reserved, the station dialing the media station will hear a busy signal.18
Emergency 911 Outside Line CallTo access outside 911 Emergency Facilities, dial 911 directly from <strong>Multicom</strong> <strong>2000</strong>. 911 can be dialed from any<strong>Multicom</strong> telephone that has dialing capabilities and is programmed for Level 4 or higher. Outside line restrictionsdo not apply when dialing 911.To access 911 facilities you must have an outside telephone line connected to the <strong>Multicom</strong> <strong>2000</strong> MCTCA port orto the PBX connected to the <strong>Multicom</strong>.If connecting to an outside line using a PBX, you may be required to use dialing prefixes. Up to 15 dial prefixes,including pauses, can be programmed into <strong>Multicom</strong> to access a PBX directly.Dialing 911 from <strong>Multicom</strong> will access the PBX through the MCTCA port, it will then dial the pre-programmedprefixes to access an outside line and automatically dial the 911 digits.- Dial Prefix -, , _ _ _ _ _ _ _ _ _ _ _ __- Space PAUSE = ,The PBX programming sequence for the <strong>Multicom</strong> <strong>2000</strong> 911 dialing prefixes are:Dial 9 5 (password) 6 (password) 6Note: A 2 second delay between digits can be added by pressing the key. The is displayedas a comma " , " in place of a digit. Press to add a space or to erase a previously entered digit.Note: If there are no dial prefixes entered, then 911 will be dialed directly through the <strong>Multicom</strong> telephone card.Select 3, 4, 5, or 6 Digit DialingYou can select the number of dial digits the system will use. Select from 3 digit to 6 digit dial. If a system hasstations programmed and the number of dial digits are changed form a higher number to a lower number of digits,the most significant digits will be cut off. If there are at least two stations remaining that will have the stationnumber, an error will be displayed and the change will not occur. You must then clear all programmed stationsfirst or renumber all the stations that would become duplicate station numbers.- Initialization -5 - Sel Digit Dial6 - 911 Dial Prefx8 - Diagnostics- SEL DIGIT DIAL -3 - 3 Digit Dialing4 - 4 Digit Dialing5 - 5 Digit Dialing6 - 6 Digit DialingFactory ResetThis command will clear all programmed parameters and will reset the <strong>Multicom</strong> <strong>2000</strong> back to the factory defaultsettings. This is non-reversible and you will be given a warning prior to executing the reset command.- Initialization -6 - 911 Dial Prefx8 - Diagnostics9 - Factory Reset*** WARNING **** FACTORY RESET *ALL SETTINGSARE YOU SURE?WILL BE ERASEDYes = 1* - Proceed # - Exit No = Other Keys19
Summary of Main Menu System9 # Alarms Menu9 # 1 All-Call9 # 2 Alarm #19 # 3 Alarm #29 # 4 Alarm #39 # 5 Alarm #49 # 0 Escape to Main Menu9 1 Emergency Menu9 1 1 Emergency 911 Outside Line9 2 Audio Program Menu9 2 1 Select Program Menu9 2 1 1 Select Program #19 2 1 2 Select Program #29 2 1 3 Select Program #39 2 1 4 Cancel Current Program9 2 1 0 Escape to Audio Program Menu9 2 2 Distribute Menu9 2 2 1 Select Speaker9 2 2 2 Select Zones9 2 2 3 Select All Speakers9 2 2 0 Escape to Audio Program Menu9 2 3 Cancel Menu9 2 3 1 Cancel Speaker9 2 3 2 Cancel Zones9 2 3 3 Cancel All Speakers9 2 3 0 Escape to Audio Program Menu9 2 4 Review Program9 2 5 Query Program Status9 2 0 Escape To Main Menu9 3 Media Assign Menu9 3 1 Assign9 3 2 Television On/Off9 3 3 Television Schedule9 3 0 Escape To Main Menu9 4 External Menu9 4 1 Review Menu9 4 2 Select Menu9 4 2 1 Select External #19 4 2 2 Select External #29 4 2 3 Select External #39 4 2 4 Select External #49 4 2 0 Escape to External Menu9 4 3 Cancel Menu9 4 3 1 Cancel External #19 4 3 2 Cancel External #29 4 3 3 Cancel External #39 4 3 4 Cancel External #49 4 3*Cancel All External9 4 3 0 Escape to External Menu9 5 Setup Menu - Password Requiredto Proceed. See Installation &Setup <strong>Instructions</strong> for Menu Options9 6 Manual Tone Menu9 6 1 Initiate Tone #19 6 2 Initiate Tone #29 6 3 Initiate Tone #39 6 4 Initiate Tone #49 6 5 Initiate Tone #59 6 6 Initiate Tone #69 6 7 Initiate Tone #79 6 8 Initiate Tone #89 6 9 Program 2 (External Audio Source)9 6 0 Escape to Main Menu9 7 Call Forward Menu9 7 1 Call Forward All Calls9 7 2 Call Forward When Busy9 7 3 Call Forward When No Answer9 7 4 Call Forward When Busy orNo Answer9 7 5 Cancel Call Forward9 7 0 Escape to Main Menu9 8 Outside Line9 9 Media Control9 9 1 Play9 9 2 Pause9 9 3 Stop9 9 4 Rewind9 9 5 Fast Forward9 9 6 Channel Up9 9 7 TV/VCR9 9 8 Display9 9 9 Channel Down9 9 0 Power9 9 # 2nd Function9 9* 0 Disconnect21
Notes
Notes
50 Spring Street, Ramsey, NJ 07446, U.S.A.Tel. 201-934-8500 • Fax: 201-934-9832www.bogen.com