Users Guide - the Virginia Modeling, Analysis and Simulation Center
Users Guide - the Virginia Modeling, Analysis and Simulation Center
Users Guide - the Virginia Modeling, Analysis and Simulation Center

Create successful ePaper yourself
Turn your PDF publications into a flip-book with our unique Google optimized e-Paper software.
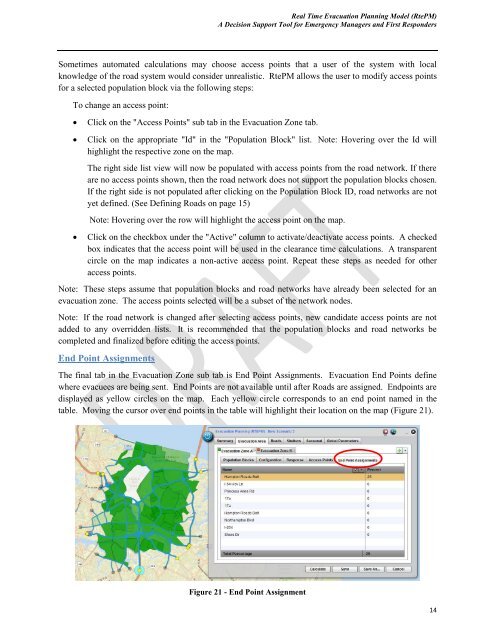
Real Time Evacuation Planning Model (RtePM)A Decision Support Tool for Emergency Managers <strong>and</strong> First RespondersSometimes automated calculations may choose access points that a user of <strong>the</strong> system with localknowledge of <strong>the</strong> road system would consider unrealistic. RtePM allows <strong>the</strong> user to modify access pointsfor a selected population block via <strong>the</strong> following steps:To change an access point:Click on <strong>the</strong> "Access Points" sub tab in <strong>the</strong> Evacuation Zone tab.Click on <strong>the</strong> appropriate "Id" in <strong>the</strong> "Population Block" list. Note: Hovering over <strong>the</strong> Id willhighlight <strong>the</strong> respective zone on <strong>the</strong> map.The right side list view will now be populated with access points from <strong>the</strong> road network. If <strong>the</strong>reare no access points shown, <strong>the</strong>n <strong>the</strong> road network does not support <strong>the</strong> population blocks chosen.If <strong>the</strong> right side is not populated after clicking on <strong>the</strong> Population Block ID, road networks are notyet defined. (See Defining Roads on page 15)Note: Hovering over <strong>the</strong> row will highlight <strong>the</strong> access point on <strong>the</strong> map.Click on <strong>the</strong> checkbox under <strong>the</strong> "Active" column to activate/deactivate access points. A checkedbox indicates that <strong>the</strong> access point will be used in <strong>the</strong> clearance time calculations. A transparentcircle on <strong>the</strong> map indicates a non-active access point. Repeat <strong>the</strong>se steps as needed for o<strong>the</strong>raccess points.Note: These steps assume that population blocks <strong>and</strong> road networks have already been selected for anevacuation zone. The access points selected will be a subset of <strong>the</strong> network nodes.Note: If <strong>the</strong> road network is changed after selecting access points, new c<strong>and</strong>idate access points are notadded to any overridden lists. It is recommended that <strong>the</strong> population blocks <strong>and</strong> road networks becompleted <strong>and</strong> finalized before editing <strong>the</strong> access points.End Point AssignmentsThe final tab in <strong>the</strong> Evacuation Zone sub tab is End Point Assignments. Evacuation End Points definewhere evacuees are being sent. End Points are not available until after Roads are assigned. Endpoints aredisplayed as yellow circles on <strong>the</strong> map. Each yellow circle corresponds to an end point named in <strong>the</strong>table. Moving <strong>the</strong> cursor over end points in <strong>the</strong> table will highlight <strong>the</strong>ir location on <strong>the</strong> map (Figure 21).Figure 21 - End Point Assignment14