Users Guide - the Virginia Modeling, Analysis and Simulation Center
Users Guide - the Virginia Modeling, Analysis and Simulation Center
Users Guide - the Virginia Modeling, Analysis and Simulation Center

Create successful ePaper yourself
Turn your PDF publications into a flip-book with our unique Google optimized e-Paper software.
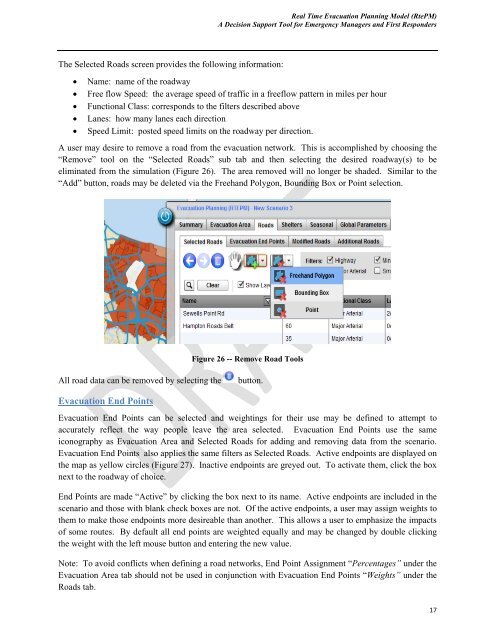
Real Time Evacuation Planning Model (RtePM)A Decision Support Tool for Emergency Managers <strong>and</strong> First RespondersThe Selected Roads screen provides <strong>the</strong> following information:Name: name of <strong>the</strong> roadwayFree flow Speed: <strong>the</strong> average speed of traffic in a freeflow pattern in miles per hourFunctional Class: corresponds to <strong>the</strong> filters described aboveLanes: how many lanes each directionSpeed Limit: posted speed limits on <strong>the</strong> roadway per direction.A user may desire to remove a road from <strong>the</strong> evacuation network. This is accomplished by choosing <strong>the</strong>“Remove” tool on <strong>the</strong> “Selected Roads” sub tab <strong>and</strong> <strong>the</strong>n selecting <strong>the</strong> desired roadway(s) to beeliminated from <strong>the</strong> simulation (Figure 26). The area removed will no longer be shaded. Similar to <strong>the</strong>“Add” button, roads may be deleted via <strong>the</strong> Freeh<strong>and</strong> Polygon, Bounding Box or Point selection.Figure 26 -- Remove Road ToolsAll road data can be removed by selecting <strong>the</strong>button.Evacuation End PointsEvacuation End Points can be selected <strong>and</strong> weightings for <strong>the</strong>ir use may be defined to attempt toaccurately reflect <strong>the</strong> way people leave <strong>the</strong> area selected. Evacuation End Points use <strong>the</strong> sameiconography as Evacuation Area <strong>and</strong> Selected Roads for adding <strong>and</strong> removing data from <strong>the</strong> scenario.Evacuation End Points also applies <strong>the</strong> same filters as Selected Roads. Active endpoints are displayed on<strong>the</strong> map as yellow circles (Figure 27). Inactive endpoints are greyed out. To activate <strong>the</strong>m, click <strong>the</strong> boxnext to <strong>the</strong> roadway of choice.End Points are made “Active” by clicking <strong>the</strong> box next to its name. Active endpoints are included in <strong>the</strong>scenario <strong>and</strong> those with blank check boxes are not. Of <strong>the</strong> active endpoints, a user may assign weights to<strong>the</strong>m to make those endpoints more desireable than ano<strong>the</strong>r. This allows a user to emphasize <strong>the</strong> impactsof some routes. By default all end points are weighted equally <strong>and</strong> may be changed by double clicking<strong>the</strong> weight with <strong>the</strong> left mouse button <strong>and</strong> entering <strong>the</strong> new value.Note: To avoid conflicts when defining a road networks, End Point Assignment “Percentages” under <strong>the</strong>Evacuation Area tab should not be used in conjunction with Evacuation End Points “Weights” under <strong>the</strong>Roads tab.17