DermaFloat LAL User Manual - Joerns
DermaFloat LAL User Manual - Joerns
DermaFloat LAL User Manual - Joerns
- No tags were found...
You also want an ePaper? Increase the reach of your titles
YUMPU automatically turns print PDFs into web optimized ePapers that Google loves.
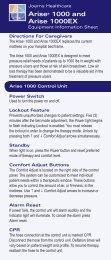
<strong>Joerns</strong> ® Support Surfaces<strong>DermaFloat</strong> ® <strong>LAL</strong>OperationWarning: For important precautions, see page two.Caution: The resident’s head should be positionedin the center of the top section of the mattress. Whenusing the mattress system always ensure that theresident is positioned properly within the confines ofthe bed. Do not let any extremities protrude over theside or between the bed rails when the mattress isbeing used.8Power SwitchThe Power switch is used to turn the power on and off.StandbyThe unit starts up in Standby. Press the Power buttonto inflate the mattress. When the Standby light ison, it may also indicate that there has been a powerinterruption and the therapy control unit is ready to beturned back on. Press the Power button and reset thepreferred mode of therapy and comfort level.Modes of OperationAutofirmAutofirm mode provides maximum air inflationdesigned to assist both residents and caregiversduring resident transfer and treatment. The unit willautomatically return to the mode it was in prior toAutofirm (either Therapy or Pulsate) in approximately12 minutes.Therapy Modes: Therapy and Pulsate• Therapy: The unit starts in the Therapy mode, whichis the standard low air loss therapy.• Pulsate: Pulsate alternates between a decreaseand increase of the pressure in all cells every 30seconds.Comfort AdjustThe Comfort Adjust function is located in the centerof the control panel. The <strong>DermaFloat</strong> ® <strong>LAL</strong> can becustomized to meet individual resident needs withina therapeutic window. See “Setup” section for moreinformation. This function will not work in Autofirmmode.LockoutThis feature is to prevent any unauthorized changes tothe resident settings. To unlock and make adjustmentsto the settings press both up and down comfort arrowsat the same time to disengage the Lockout function.The Lockout function will return in approximately fiveminutes.Note: The unit is designed to lock out all theadjustment controls after the resident has beenpositioned correctly. In approximately five minutesafter the last button push, the power on light begins toflash indicating Lockout is enabled.Additional FeaturesWarning: A possible fire hazard exists. This product issuitable for use with oxygen administering equipmentof the nasal, mask, or half bed-length, tent-type only.To prevent personal injury or equipment damage,ensure that the oxygen tent does not extend below themattress.CPRThe hose connection at the control unit is markedCPR. Disconnect the hose from the control unit.Deflation times will vary based on resident weight andprofile. To resume therapy, reattach the hose to thecontrol unit.TransportTo transport the resident in bed, turn the control unitoff. Unplug the power cord from the outlet. Do notdisconnect the hose connection at the control unit.The lower support cell will prevent the resident frombottoming out for up to 12 hours.Power FailureFigure 2After a power failure the unit will start up in Standbymode. Reset the preferred mode and comfort level asdescribed in the “Operation” section. In the event of apower failure, the lower support cells should remaininflated for up to 12 hours. In case of an extendedpower failure, transfer the resident to a hospitalmattress or other surface.


