DermaFloat LAL User Manual - Joerns
DermaFloat LAL User Manual - Joerns
DermaFloat LAL User Manual - Joerns
- No tags were found...

You also want an ePaper? Increase the reach of your titles
YUMPU automatically turns print PDFs into web optimized ePapers that Google loves.
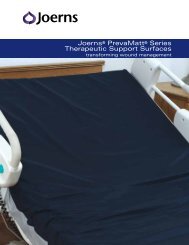
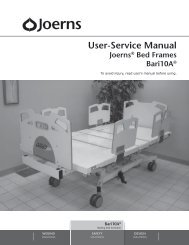
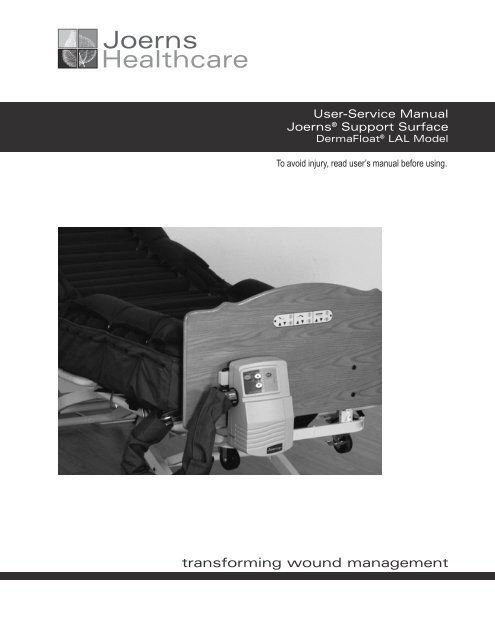
<strong>Joerns</strong>Healthcare<strong>User</strong>-Service <strong>Manual</strong><strong>Joerns</strong> ® Support Surface<strong>DermaFloat</strong> ® <strong>LAL</strong> ModelTo avoid injury, read user’s manual before using.transforming wound management
<strong>Joerns</strong> ® Support Surfaces<strong>DermaFloat</strong> ® <strong>LAL</strong>Important PrecautionsImportant Notice: The equipment must be installedand operated in the manner for which it was intended.Facility staff/user is responsible for reading andunderstanding the product user manual and contacting<strong>Joerns</strong> Healthcare if anything in this manual is unclear.<strong>Joerns</strong> will not be held responsible for any injuriesresulting from failure to comply with the instructionsand precautions in this manual.Warning: <strong>Joerns</strong> specialty support surfaces aredesigned as mattress replacement systems. Therisk of entrapment may occur when the equipment isplaced on bed frames that leave gaps of even a fewinches between the mattress and the head panel, footpanel, and bed or side rails. The equipment is NOT tobe used when such gaps are present.Facility staff/user is responsible for ensuring that allmattresses properly fit the bed frames. <strong>Joerns</strong> is notresponsible for the placement of its equipment on bedframes that leave gaps between the mattress andthe head panel, foot panel or bed or side rails whichpresent a risk of harm to residents.Warning: An optimal bed system assessment shouldbe conducted on each patient by a qualified clinicianor medical provider to ensure maximum safety ofthe patient. The assessment should be conductedwithin the context of, and in compliance with, thestate and federal guidelines related to the use ofrestraints and bed system entrapment guidance,including the Clinical Guidance for the Assessmentand Implementation of Side Rails published by theHospital Bed Safety Workgroup of the U.S. Foodand Drug Administration. Further information can beobtained at the following web address: http://www.fda.gov/MedicalDevices/ProductsandMedicalProcedures/GeneralHospitalDevicesandSupplies/HospitalBeds/default.htm.When using the mattress system, always ensure thatthe resident is positioned properly within the confinesof the bed. Do not let any extremities protrude overthe side or between the bed rails when the mattress isbeing used.Danger Explosion Hazard: Do not use in thepresence of flammable anesthetics. Do not use inthe presence of smoking materials or open flame.Air flowing through the air mattress will supportcombustion.Danger: To reduce the risk of shock, adhere to thefollowing instructions. Failure to do so could result inpersonal injury or equipment damage.• Immediately after using the <strong>DermaFloat</strong> ® <strong>LAL</strong>,unplug it from its power source.• Do not place or store the product where it can fall orbe pulled into a tub or sink.• Do not place or drop the product into water or otherliquid.• Do not remove the back of the control unit. Referservicing to <strong>Joerns</strong> Healthcare.Warning: To reduce the risk of burns, shock, fire, orpersonal injury, adhere to the following instructions.Failure to do so could result in personal injury orequipment damage.1. Use this product only for its intended purpose asdescribed in this manual. Only use attachmentsand/or accessories that are recommended by themanufacturer.2. If this product has a damaged power cord or plug,is not working properly, has been dropped ordamaged, or has been dropped into water, do notoperate it. For examination and repair, return theproduct to <strong>Joerns</strong>.3. Keep the control unit and power cord away fromheated surfaces, e.g. space heaters.4. Never block the air openings of the product. Donot place the control unit on a surface, such as abed or couch, where the air opening and/or filtercompartment, located on the back of the controlunit, may be blocked. Keep the air openings freeof lint and hair.5. Never drop or insert any object into any opening orhose.6. Do not spill food or liquids onto the control unit. Ifa spillage does occur, turn off the unit, disconnectit from its power supply and allow at least 24 hoursfor drying.7. Do not use the product outdoors, or whereaerosol-spray products are used.8. Plug this product only into a properly groundedoutlet. Refer to “Grounding Instructions”.9. Ensure nothing is placed on the power cord andensure it is not located where it can be stepped onor tripped over.10. Do not attempt to service the control unit. Pleasecall <strong>Joerns</strong> Healthcare for any service requests.11. The therapy pad (top cover) of this product is notair permeable and may present a suffocation risk.It is the responsibility of the caregiver to ensurethat the resident can use this product safely.2
<strong>Joerns</strong> ® Support Surfaces<strong>DermaFloat</strong> ® <strong>LAL</strong>Save These Instructions for FutureReferenceBed System Entrapment InformationIn April 1999, the U.S. Food and Drug Administration(FDA) in partnership with representatives from thehospital and post-acute bed industry, including<strong>Joerns</strong> Healthcare, national healthcare organizations,resident advocacy groups, and other federal agenciesformed the Hospital Bed Safety Workgroup (HBSW).The workgroup’s goal is to improve the safety ofbed frames for patients and residents in all healthcare settings who are most vulnerable to the risk ofentrapment. The efforts of the FDA and the HBSWculminated in the FDA’s release of recommendedguidelines intended to reduce the risk of entrapment,including dimensional limits for critical gaps andspaces between bed system components and clinicalguidance for assessment and implementation of bedside rails in various health care settings.For More InformationTo learn more about compliance options with<strong>Joerns</strong> products, visit our website at www.joerns.com, or contact our Customer Care representativesat 800.826.0270 and ask for free informationalpublications.To learn more about entrapment zones, assessmentmethods, and guidelines concerning entrapment,contact <strong>Joerns</strong> Healthcare at 800.826.0270 orconsult the FDA website: http://www.fda.gov/MedicalDevices/ProductsandMedicalProcedures/GeneralHospitalDevicesandSupplies/HospitalBeds/default.htm.Entrapment zones involve the relationship ofbed components often directly assembled by thehealthcare facility rather than the manufacturer.Therefore, compliance is the responsibility of thefacility.As the leading manufacturer of long-term care bedsand a frontrunner in addressing this critical issue,<strong>Joerns</strong> Healthcare can offer you the expertise,assistance and products to bring your facility intocompliance.<strong>Joerns</strong> ® Compliance SolutionsMatching the right bed components in order to meetregulatory guidelines can be complex.That’s why <strong>Joerns</strong> offers a wide array of complianceoptions. We assist customers in selecting compliantaccessories recommended for their specific bedmodel.Creating a Safer Care EnvironmentWhile the guidelines apply to all healthcare settings(hospitals, nursing homes and home care), long-termcare facilities have particular exposure since seriousentrapment events typically involve frail, elderly ordementia residents.3
<strong>Joerns</strong> ® Support Surfaces<strong>DermaFloat</strong> ® <strong>LAL</strong>Table of ContentsImportant Precautions............................................................................................................................................... 2Introduction................................................................................................................................................................ 5Moisture ControlShear and Friction ReductionIndications for use..................................................................................................................................................... 5Spinal Cord InjuryPressure RedistributionPain ManagementFeatures...................................................................................................................................................................... 6Therapy Control Unit FeaturesTherapy Mattress System FeaturesTherapy PadsGrounding Instructions............................................................................................................................................. 6Setup........................................................................................................................................................................... 7Operation.................................................................................................................................................................... 8Modes of OperationAdditional Features.................................................................................................................................................... 8CPRTransportPower FailureCairRailsOptional AccessoriesTroubleshooting......................................................................................................................................................... 9Therapy Surface Not InflatingUnable to Change Therapy Mode or Adjust Comfort ControlNursing Procedures................................................................................................................................................... 9Recommended LinenChanging the Therapy PadResident Positioning and ComfortIncontinenceSafety Information...................................................................................................................................................... 10Resident MigrationTractionSkin CareBed HeightCleaning...................................................................................................................................................................... 10Control UnitGeneral CleaningDisinfectingTherapy PadSteam CleaningFilter CleaningMaintenance............................................................................................................................................................... 11Storage and Care....................................................................................................................................................... 11Control UnitSupport SurfaceSystem Specifications............................................................................................................................................... 12WeightDimensionsElectrical SpecificationsEnvironmental ConditionsAgency ApprovalsCall for Assistance..................................................................................................................................................... 12Warranty...................................................................................................................................................................... 144
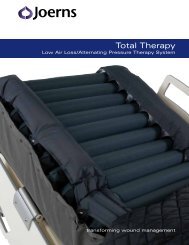
<strong>Joerns</strong> ® Support Surfaces<strong>DermaFloat</strong> ® <strong>LAL</strong>IntroductionThe <strong>DermaFloat</strong> ® <strong>LAL</strong>, provided by <strong>Joerns</strong> Healthcareis a unique therapy system that provides pressureredistribution by combining low air loss with pulsation.Low air loss therapy has been demonstrated to reducethe risk of pressure ulcers as well as being a valuableaid in the treatment of pressure ulcers. The pulsationfeature may provide additional resident comfort andenhance the lymphatic system. The <strong>DermaFloat</strong> <strong>LAL</strong>is designed as a mattress replacement system forresidents weighing up to 500 lbs.Warning: The risk of entrapment can arise whenequipment is placed on bed frames that leave gaps ofeven a few inches between the mattress and the headpanel, foot panel, and bed or side rails. The equipmentis NOT to be used when such gaps are present. See“Important Precautions” section of this manual.The <strong>DermaFloat</strong> <strong>LAL</strong> mattress replacement systemis suitable for both the treatment of existing pressureulcers Stage I through Stage IV as well as forthose who have been assessed at risk from thecomplications of immobility. The <strong>DermaFloat</strong> <strong>LAL</strong>is quiet, comfortable and simple enough for singlecaregiver installation, featuring rapid inflation in justfive minutes or less. The user-friendly controls allowfor easy adjustment of resident comfort.Additionally, low friction and low shear materials,together with average interface pressures well belowcapillary closure levels, means that the <strong>DermaFloat</strong><strong>LAL</strong> meets the comfort and clinical requirements ofyour residents up to 500 lbs.We have ensured that the <strong>DermaFloat</strong> <strong>LAL</strong> addressesthe four key areas in the treatment of compromisedskin: pressure redistribution, moisture control, andreduction in both friction and shearing forces.Moisture ControlResidents are at risk for skin maceration if excessmoisture is permitted to accumulate beneath theresident. This may be due to perspiration, incontinenceor wound drainage.On the <strong>DermaFloat</strong> <strong>LAL</strong>, moisture is controlled viathe specially treated breathable, fluid-proof, urethanecoated nylon therapy pad. The moisture vaporpermeable fabric of the therapy pad allows a sufficientamount of air to circulate beneath the pad and wicksaway excess moisture.Shear and Friction ReductionShearing occurs when the skin is stationary in relationto the support surface, while the underlying tissuesand vessels are stretched and damaged. When aresident’s skin rubs against another surface, the resultis friction. The top surface of the <strong>DermaFloat</strong> <strong>LAL</strong>therapy pad is constructed from a very smooth nylonfabric with low friction and low shear properties toprotect the resident’s skin from these damaging forces.Indications for UseNote: The selection of a pressure-redistributingsurface needs to be based on each individualresident’s clinical condition, diagnosis and/orco-morbidities. The choice and use of a supportsurface is one factor in a holistic program of woundcare and treatment.Spinal Cord InjuryThe <strong>DermaFloat</strong> <strong>LAL</strong> is not recommended for use byresidents with unstable spinal fractures. Advice shouldbe obtained from the appropriate physician beforeusing the <strong>DermaFloat</strong> <strong>LAL</strong> system for these residents.Pressure RedistributionPressure UlcersNeurologyBurnsPain ManagementAIDSOncologyRehabilitationDermatologyAmputationsArthritisThe <strong>DermaFloat</strong> <strong>LAL</strong> provides distribution of weightover a wide surface area, which redistributes pressureagainst bony prominences and provides a soft, gentletherapy surface to lie on. For residents experiencingsevere pain and discomfort due to pressure and/orpositioning limitations, consider the <strong>DermaFloat</strong> <strong>LAL</strong>as an adjunct to pain management interventions.Note: Pressure redistribution and pain managementare conditions and diagnoses for which the<strong>DermaFloat</strong> <strong>LAL</strong> may be indicated. Occasionally,there are orthopedic and neurological residents thatrequire body positioning to be maintained in specificalignment. The use of the <strong>DermaFloat</strong> <strong>LAL</strong> for theseresidents should be considered on an individual basisand discussed with the attending physician.5
6<strong>Joerns</strong> ® Support Surfaces<strong>DermaFloat</strong> ® <strong>LAL</strong>FeaturesThe <strong>DermaFloat</strong> ® <strong>LAL</strong> is comprised of two components:• Therapy control unit• Therapy mattress systemTherapy Control Unit Features• True low air loss with greater than 100 liters ofairflow per minute.• Three modes of operation – Autofirm, Therapy andPulsate.• Pulsate mode oscillates the air throughout themattress every 30 seconds providing increasedresident comfort.• Autofirm mode provides maximum air inflationdesigned to assist both residents and caregiversduring resident transfer and treatment.• Compact lightweight control unit is quiet, robust andpowerful, with a reusable air filter.• Crisp, easy to read graphics for intuitive set up andtherapy control.• Automatic panel lock out to avoid unwanted oraccidental adjustments.• Eight therapeutic comfort control settings tomaximize resident compliance and promote healing.• Closed loop pressure sensor control systemeliminates concerns of changes in mattress interfacepressure due to ambient temperature and pressurechanges.• Integrated swing out hanging brackets for fixing tomost bed types.• Quick disconnect hose feature allows for rapidattach and CPR deflate at the control unit.Therapy Mattress System Features• Twenty individual therapy cells help to evenlydistribute the resident’s weight and maximizepressure redistribution. Modular cell design mattressfor ease of cleaning, re-assembly and cost effectiveservice.• Lower two-inch safety cell remains inflated withoutany power up to 12 hours.• Eight-inch deep therapy cells are constructed ofhighly durable, polyurethane coated nylon to provideadequate support and prevent bottoming out formost residents within weight limit.• Integrated low-pressure heel section provides lowerinterface pressures for high-risk residents.• Durable base tub is constructed from 100% heavyweight 1680 Denier nylon with 1.5 oz. urethanecoating and incorporates bed attachment loops forstability.• Maximum weight capacity of 500 lbs.• Anti-kink, easy clean air supply hose set.• Quick CPR deflation.• Integrated CairRails risk management side airbolsters— two inch side bolsters that inflate on bothsides of the resident along the mattress edge toprovide additional support and to provide a gentlereminder to the resident that they are near the edgeof the mattress. Constructed with lower ingress/egress area.Therapy PadsMany healthcare facilities are facing the challengeof infection control. <strong>Joerns</strong>’ quilted therapy pads aretreated with an antimicrobial to protect the therapy paditself from the growth of mold, mildew andodor-causing bacteria.Key features and benefits:• Treated with a highly effective bacteriostat agent toinhibit the growth of bacteria and fungi.• Constructed from a very smooth nylon fabric withlow friction and low shear properties to protect theresident’s skin from damaging friction/shearingforces.• Breathable, moisture vapor permeable fabric allowsair to circulate beneath the pad and wicks awayexcess moisture. This keeps your resident dry andhelps to prevent skin maceration.• Two-way stretch therapy pad is designed for optimalcomfort, moisture vapor transfer, stain resistanceand ease of laundering.Grounding InstructionsWarning: Use a properly grounded, three-prong, 120VAC outlet for this product. Failure to use a groundedoutlet could result in personal injury or damage toequipment or house wiring, including risk of fire. Aqualified electrician should be contacted to correct thewiring and ensure a properly grounded outlet.Before installing this product, have the electricalsystem checked to make sure the electrical circuitsand the electrical service are properly grounded.Having a three-prong outlet does not necessarilymean it is grounded. Sometimes two-prong outlets arereplaced with a three-prong type even though there isno ground wire.There is always a chance of a loose connection orpoor installation of a ground wire that causes the lossof proper ground at the outlet. Inadequate groundingat electrical outlets can occur even if there is aground wire. Wires can become loose over time at theconnection to the outlet.
<strong>Joerns</strong> ® Support Surfaces<strong>DermaFloat</strong> ® <strong>LAL</strong>Note: To install new wires on a circuit requires aqualified electrician.How to Determine if Your Outlet hasthe Proper GroundingMost hardware stores sellcircuit testers (Figure 1) thatcan be used to test an outlet forproper grounding. The testerplugs into an outlet and byobserving the indicator lightsyou can determine if the outletis properly grounded. For ahigher level of assurance, anelectrician should be requestedto thoroughly test the electricalsystem with more reliableequipment.If repair or replacement ofthe cord or plug is necessary,please contact <strong>Joerns</strong>Healthcare for assistance.SetupFigure 1Warning: For important precautions, see page two.Caution: Do not place the control unit on the floor.Position the power cord to keep personnel fromtripping over it.• Remove the existing mattress from the bed.• Unroll the mattress with the hose connection at thefoot end of the bed and the therapy cells facing up.Secure the ten (10) straps on the mattress securelyto the movable part of the bed frame.• If the therapy pad is not already on the mattress,place it on the mattress. Attach the elastic strapsto the mattress buckles around each corner of themattress. Attach the six (6) additional straps to themovable part of the bed frame.• Hang the control unit on the foot of the bed facingaway from the bed. Attach the hose connectormarked CPR to the control unit.• Plug in the control unit and the yellow Standby lightwill illuminate. Press the Power button. The controlunit will start and the green light will illuminate.Keep the control unit ON while the resident is on themattress.• Fully inflate the mattress by selecting Autofirm.When the mattress is fully inflated, select theTherapy mode, and place the resident on themattress.• Select the appropriate Comfort Adjust level toprevent bottoming out (i.e., providing greater thanone inch of air between the resident’s sacral area/buttocks and the lower safety mattress) as outlinedbelow:1. Begin by placing the head of the bed in theappropriate position based on the resident’sclinical condition.2. Select the highest or most firm Comfort Adjustsetting.3. Hand Check: Place a hand with three (3) fingers(if head of bed at 30° or higher) or four (4)fingers (if head of bed lower than 30°) stackedvertically beneath the cells of the mattress andabove the safety mattress directly betweenthe lowest point of the resident’s sacral area/buttocks. The smallest finger should be restingon the safety mattress.4. Sequentially reduce the Comfort Adjust settingto the firmness level where the height of thethree (3) or four (4) fingers can slide withminimal resistance between the resident’s sacralarea/buttocks and the lower safety mattress.This is the proper Comfort Adjust setting for theresident to assure proper inflation of the air cellsand prevent bottoming out of the mattress.5. Document the resident’s Comfort Adjust settingfor future reference, and re-evaluate withthe Hand Check as the resident’s conditionwarrants.• The CairRails risk management side air bolsterscan be inflated or deflated as required. Locatethe turn valve on the hose assembly between themattress and the control unit. Next, inflate/deflate theCairRails by moving the turn valve to the up (inflate)or down (deflate) position.Note: When inflating or deflating CairRails it isrecommended that the support surface be in Autofirmmode.7
<strong>Joerns</strong> ® Support Surfaces<strong>DermaFloat</strong> ® <strong>LAL</strong>OperationWarning: For important precautions, see page two.Caution: The resident’s head should be positionedin the center of the top section of the mattress. Whenusing the mattress system always ensure that theresident is positioned properly within the confines ofthe bed. Do not let any extremities protrude over theside or between the bed rails when the mattress isbeing used.8Power SwitchThe Power switch is used to turn the power on and off.StandbyThe unit starts up in Standby. Press the Power buttonto inflate the mattress. When the Standby light ison, it may also indicate that there has been a powerinterruption and the therapy control unit is ready to beturned back on. Press the Power button and reset thepreferred mode of therapy and comfort level.Modes of OperationAutofirmAutofirm mode provides maximum air inflationdesigned to assist both residents and caregiversduring resident transfer and treatment. The unit willautomatically return to the mode it was in prior toAutofirm (either Therapy or Pulsate) in approximately12 minutes.Therapy Modes: Therapy and Pulsate• Therapy: The unit starts in the Therapy mode, whichis the standard low air loss therapy.• Pulsate: Pulsate alternates between a decreaseand increase of the pressure in all cells every 30seconds.Comfort AdjustThe Comfort Adjust function is located in the centerof the control panel. The <strong>DermaFloat</strong> ® <strong>LAL</strong> can becustomized to meet individual resident needs withina therapeutic window. See “Setup” section for moreinformation. This function will not work in Autofirmmode.LockoutThis feature is to prevent any unauthorized changes tothe resident settings. To unlock and make adjustmentsto the settings press both up and down comfort arrowsat the same time to disengage the Lockout function.The Lockout function will return in approximately fiveminutes.Note: The unit is designed to lock out all theadjustment controls after the resident has beenpositioned correctly. In approximately five minutesafter the last button push, the power on light begins toflash indicating Lockout is enabled.Additional FeaturesWarning: A possible fire hazard exists. This product issuitable for use with oxygen administering equipmentof the nasal, mask, or half bed-length, tent-type only.To prevent personal injury or equipment damage,ensure that the oxygen tent does not extend below themattress.CPRThe hose connection at the control unit is markedCPR. Disconnect the hose from the control unit.Deflation times will vary based on resident weight andprofile. To resume therapy, reattach the hose to thecontrol unit.TransportTo transport the resident in bed, turn the control unitoff. Unplug the power cord from the outlet. Do notdisconnect the hose connection at the control unit.The lower support cell will prevent the resident frombottoming out for up to 12 hours.Power FailureFigure 2After a power failure the unit will start up in Standbymode. Reset the preferred mode and comfort level asdescribed in the “Operation” section. In the event of apower failure, the lower support cells should remaininflated for up to 12 hours. In case of an extendedpower failure, transfer the resident to a hospitalmattress or other surface.
<strong>Joerns</strong> ® Support Surfaces<strong>DermaFloat</strong> ® <strong>LAL</strong>CairRailsIntegrated CairRails risk management air bolsters offera bilateral side bolster solution designed to addresshealthcare’s growing concerns of liability in relationto resident falls and entrapment. CairRails are beingrecognized by some of the nation’s leading healthcaresystems for improving their resident safety and riskmanagement programs.CairRails are recommended for residents requiringadditional support during resident care and transfer.CairRails can help reduce costs while ensuring optimalclinical outcomes and increasing resident safety.Features and Benefits• A bilateral side air bolster solution which canenhance your facilities entrapment/risk managementprogram.• Easy to engage Ready Valve for instant inflation anddeflation.• Transfer friendly-deflate for ease of assisted transferor when bolsters are not required.• Unique contoured design allows ease of ingress/egress, while providing additional protection, comfortand supports resident compliance.• Designed to fit on most key <strong>Joerns</strong> therapeuticsupport surfaces.• Promotes maximum independence by allowingcaregiver to decide when added protection isrequired.Inflation/Deflation• Set the control unit to Autofirm mode or the highestcomfort control setting to achieve quick inflation.• Locate the Ready Valve by unsnapping the flap onthe hose set.• Turn the Ready Valve to inflate or deflate as desired.• Return the control unit to the desired settings andsnap the open flap closed.Note: CairRails are meant to provide a documentableand functional intervention for the risk managementissues of falls and entrapment but in no way guaranteethe prevention of falls or entrapment occurrences.When using the mattress system, always ensure thatthe resident is positioned properly within the confinesof the bed. Do not let any extremities protrude overthe side or between the bed rails when the mattress isbeing used.Optional Accessories• Additional therapy pads available for purchase• Bariatric size available.TroubleshootingTherapy Surface is Not Inflating• Ensure the hose connection from the therapymattress system (mattress) to the control unit issecurely connected.• Ensure that the control unit is plugged into an ACoutlet.• Ensure that the power is not on Standby. If onStandby, press the Power button.• Ensure that all air cells are connected to the internalmattress manifold.Unable to Change Therapy Mode orAdjust Comfort ControlMake sure the Lockout function is disabled. Todisable, press the up and down Comfort Adjust arrowssimultaneously.Nursing ProceduresRecommended Linen:Special linens are not necessary for the <strong>DermaFloat</strong> ®<strong>LAL</strong>. There is no need for a bottom sheet as thetherapy pad should be covering the therapy cells atall times. The resident should never be lying directlyon the therapy cells. Based upon the resident specificneeds, the following linens may be utilized:• Draw or slide sheet to aid in positioning and tofurther minimize friction and shearing.• Incontinence barrier pad for residents incontinentof urine and/or stool, and residents with heavilydraining wounds.• Add top sheet, blanket and/or bedspread as neededfor resident comfort.• Keep the amount of padding between the residentand bed to a minimum for optimum performance.Changing the Therapy Pad• Place the therapy pad over the therapy cells, fittingthe corner of the cushions into the corner of thetherapy pad (similar to a fitted sheet).• Zip the therapy pad along each side of the mattresstub.Resident Positioning and ComfortGeneral RepositioningResidents should be turned and repositioned perindividual turning schedule or per facility policy. It maybe helpful to activate the Autofirm mode to achievea firm surface for repositioning purposes. The unitwill automatically return to the mode it was in prior9
<strong>Joerns</strong> ® Support Surfaces<strong>DermaFloat</strong> ® <strong>LAL</strong>to Autofirm in approximately 12 minutes or you canmanually return to therapy mode once resident hasbeen repositioned.Unless counter indicated, it is desirable to keep theback section of the bed in the flat position to provideoptimal pressure redistribution and minimize the risk ofshearing injuries.Elevating Resident into Sitting PositionThe special properties of the <strong>DermaFloat</strong> ® <strong>LAL</strong> therapypad reduce the opportunity for shear and friction thatmay occur when raising the back section of other bedsystems. As with any surface, sliding can be expected;therefore, residents should be repositioned afterelevation. The knee gatch or knee section of the bedmay be elevated first, to help prevent the resident fromsliding when the back section is elevated.IncontinenceMoisture against the skin surface leads to maceration,or softening of the tissues. To prevent maceration, werecommend you use an incontinence barrier pad toabsorb the excess moisture.In the event of incontinence or excess drainage on thetherapy pad, you should wipe off the excess fluid fromthe bed surface.Safety InformationResident MigrationSpecialty bed products are designed to reduce/redistribute pressure and the shearing/friction forceson the resident’s skin. The risk of gradual movementand/or sinking into hazardous positions of entrapmentand/or inadvertent bed exit may be increased due tothe nature of these products.TractionWith any traction or unstable fractures, maintainphysician-directed angle of articulation and guardagainst risks of resident migration or inadvertentdeflation of resident surface.Skin CareMonitor skin conditions regularly, particularly in areaswhere incontinence and drainage occur or collect,and consider adjunct or alternative therapies for highacuity residents. Early intervention may be essential topreventing serious skin breakdown.Bed HeightTo minimize the risks of falls or injury the residentsurface should always be in the lowest practicalposition when the resident is unattended. Make sureareas under and around the frame are clear of objects,persons and parts of body before adjusting height.CleaningWarning: Unplug the control unit from its powersource. Failure to do so could result in personal injuryor equipment damage.Warning: Do not expose the unit to excessivemoisture that would allow for liquid pooling. Personalinjury or equipment damage could occur.Caution: Do not use harsh cleansers/detergents, suchas scouring pads and heavy-duty grease removers, orsolvents, such as acetone. Equipment damage couldoccur.Control UnitWipe off dust. If necessary, clean the housing exteriorwith a disinfectant solution or a mild detergent and adamp cloth. Then wipe dry.General CleaningIf there is no visible soilage with possible body fluids,we recommend that you clean the mattress systemwith a mild detergent and warm water. If disinfectionis desired, you may use a combination cleanser/disinfectant as explained in “Disinfecting” area.• Resident care equipment that does not come incontact with mucous membranes or non-contact skinrequires low-level disinfection. Wiping surfaces witha properly prepared detergent or disinfectant carriesout low level disinfecting.• Processing of dirty resident care equipment shouldtake place in a designated area away from clean orsterile supplies and food preparation areas.• Detergent/disinfectants should not be mixed withother germicides or detergents. Using the properdilution ensures the most effective killing power ofthe disinfectant.• Wash hands often and well, including after removalof gloves.• Resident care equipment that is used in isolationareas should be disinfected in accordance with allinternal policies and procedures regarding suchequipment.10
<strong>Joerns</strong> ® Support Surfaces<strong>DermaFloat</strong> ® <strong>LAL</strong>DisinfectingWhen there is visible soilage and between residents,we recommend that you disinfect the unit and mattresswith a tuberculocidal disinfectant. Disinfectant shouldbe registered with the Environmental ProtectionAgency (EPA).• Use rubber gloves and eye protection.• Prepare detergent/disinfectant (registered by EPAas hospital disinfectant) solution according toinstructions on label for correct use-dilution.• With support surface deflated, thoroughly wipe downentire mattress, as air cells will lie flat. Be sure toreach all areas underneath and in-between air cells.Allow to air dry.• If dust or other soiling has accumulated alongair hoses, remove using swabs moistened withdetergent/disinfectant as necessary. Allow allcomponents to air dry. Wrap mattress in plastic andreturn to storage area.• Thoroughly wipe down outside of control unit andallow to air dry. Cover with plastic and return tostorage area.• Remove gloves and dispose; wash hands.Therapy PadThe therapy pad can be wiped down with a disinfectantsolution or a mild detergent with a damp cloth. Ifheavily soiled, the therapy pad can be laundered in awasher and dryer with warm water (no more than 120ºFahrenheit). A non-bleach detergent should be usedsparingly. Wipe dry or allow to air dry.Steam CleaningMaintenanceWarning: Only facility-authorized personnel trainedby <strong>Joerns</strong> Healthcare should perform preventativemaintenance. Preventative maintenance performed byunauthorized personnel could result in personal injuryor equipment damage.Any maintenance done without <strong>Joerns</strong>’s authorizationwill invalidate any warranties on this product.Storage and CareWhen the product is not in use, store the power cordproperly. Failure to do so could result in personalinjury.Note: Clean the <strong>DermaFloat</strong> ® <strong>LAL</strong> as described in theprevious section prior to storage.Control UnitThe power cord may be wrapped around the unit forconvenience. Wrap the unit in a plastic bag for dustresistance then store the unit in an area appropriatefor an electronic medical device.Support SurfaceGently roll up the support surface, expelling anyresidual air, for temporary storage. The mattressshould be wrapped in plastic and/or a clean bag forstorage.Do not use any steam cleaning device on the unit.Excessive moisture can damage mechanisms in thisunit.Filter CleaningCheck the air filter on the rear of the unit regularly forbuildup of dust/dirt. If buildup is visible, turn off thecontrol unit and disconnect the power cord from thewall outlet. Remove the filter by grasping the filter andpulling outward. Replace with the second suppliedfilter. Ensure the replaced filter covers the entire filterregion.Hand-wash the removed filter in warm soapy waterand allow to air dry. When dry, store the filter in a safeplace for the next filter maintenance.11
<strong>Joerns</strong> ® Support Surfaces<strong>DermaFloat</strong> ® <strong>LAL</strong>System SpecificationsWeightControl unit:................................ 10 lbs (4.5 Kg)Mattress:.................................... 22 lbs (10 Kg)Maximum weight capacity*:....... 500 lbs (227 Kg)DimensionsControl unit:7.5" (19 cm) W x 12.25" (31 cm) H x 5.5" (14 cm) DMattress:36" (89 cm) W x 80" (203 cm) L x 10" (25 cm) D42" (106 cm) W x 80" (203 cm) L x 10" (25 cm) DElectrical SpecificationsUSA120V AC, 60 Hz, 0.6AEnvironmental ConditionsOperating ConditionsAmbient Temperature: +10°C to +40oCRelative Humidity: 30% to 75% Non-CondensingStorage and Shipping ConditionsAmbient Temperature: 10ºC to +40ºCRelative Humidity: 10% to 100%Control Unit Agency ApprovalsUL Classified Medical Equipment UL 60601-1Can/CSA C22.2 No. 601.1Call for AssistanceIf you have any questions or require service on a<strong>Joerns</strong> product, please call <strong>Joerns</strong> Healthcare at800.826.0270.12*Mattress weight capacity only; total weight must not exceedbed frame manufacturers’ specified load capacity.
<strong>Joerns</strong> ® Support Surfaces<strong>DermaFloat</strong> ® <strong>LAL</strong>Notes:13