spiderchip - Xbox-Scene.com
spiderchip - Xbox-Scene.com
spiderchip - Xbox-Scene.com
- No tags were found...

You also want an ePaper? Increase the reach of your titles
YUMPU automatically turns print PDFs into web optimized ePapers that Google loves.
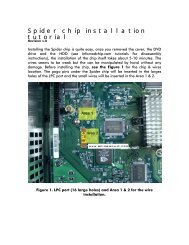
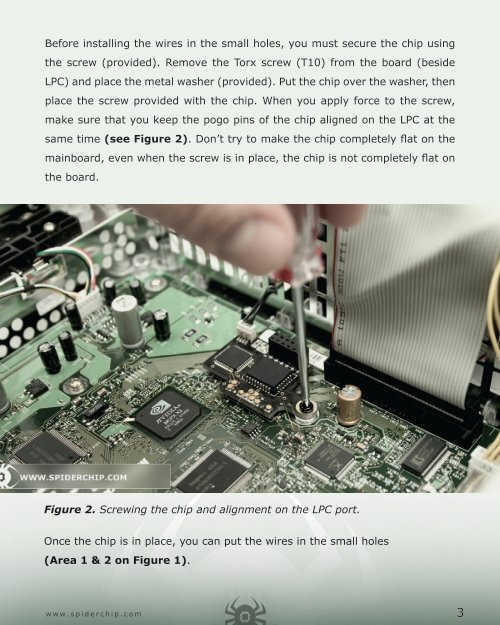
Before installing the wires in the small holes, you must secure the chip usingthe screw (provided). Remove the Torx screw (T10) from the board (besideLPC) and place the metal washer (provided). Put the chip over the washer, thenplace the screw provided with the chip. When you apply force to the screw,make sure that you keep the pogo pins of the chip aligned on the LPC at thesame time (see Figure 2). Don’t try to make the chip <strong>com</strong>pletely flat on themainboard, even when the screw is in place, the chip is not <strong>com</strong>pletely flat onthe board.Figure 2. Screwing the chip and alignment on the LPC port.Once the chip is in place, you can put the wires in the small holes(Area 1 & 2 on Figure 1).w w w . s p i d e r c h i p . c o m 3